
Loading ...
Loading ...
Loading ...
49-1000712 Rev. 0 21
Installation Instructions
INSTALLATION INSTRUCTIONS
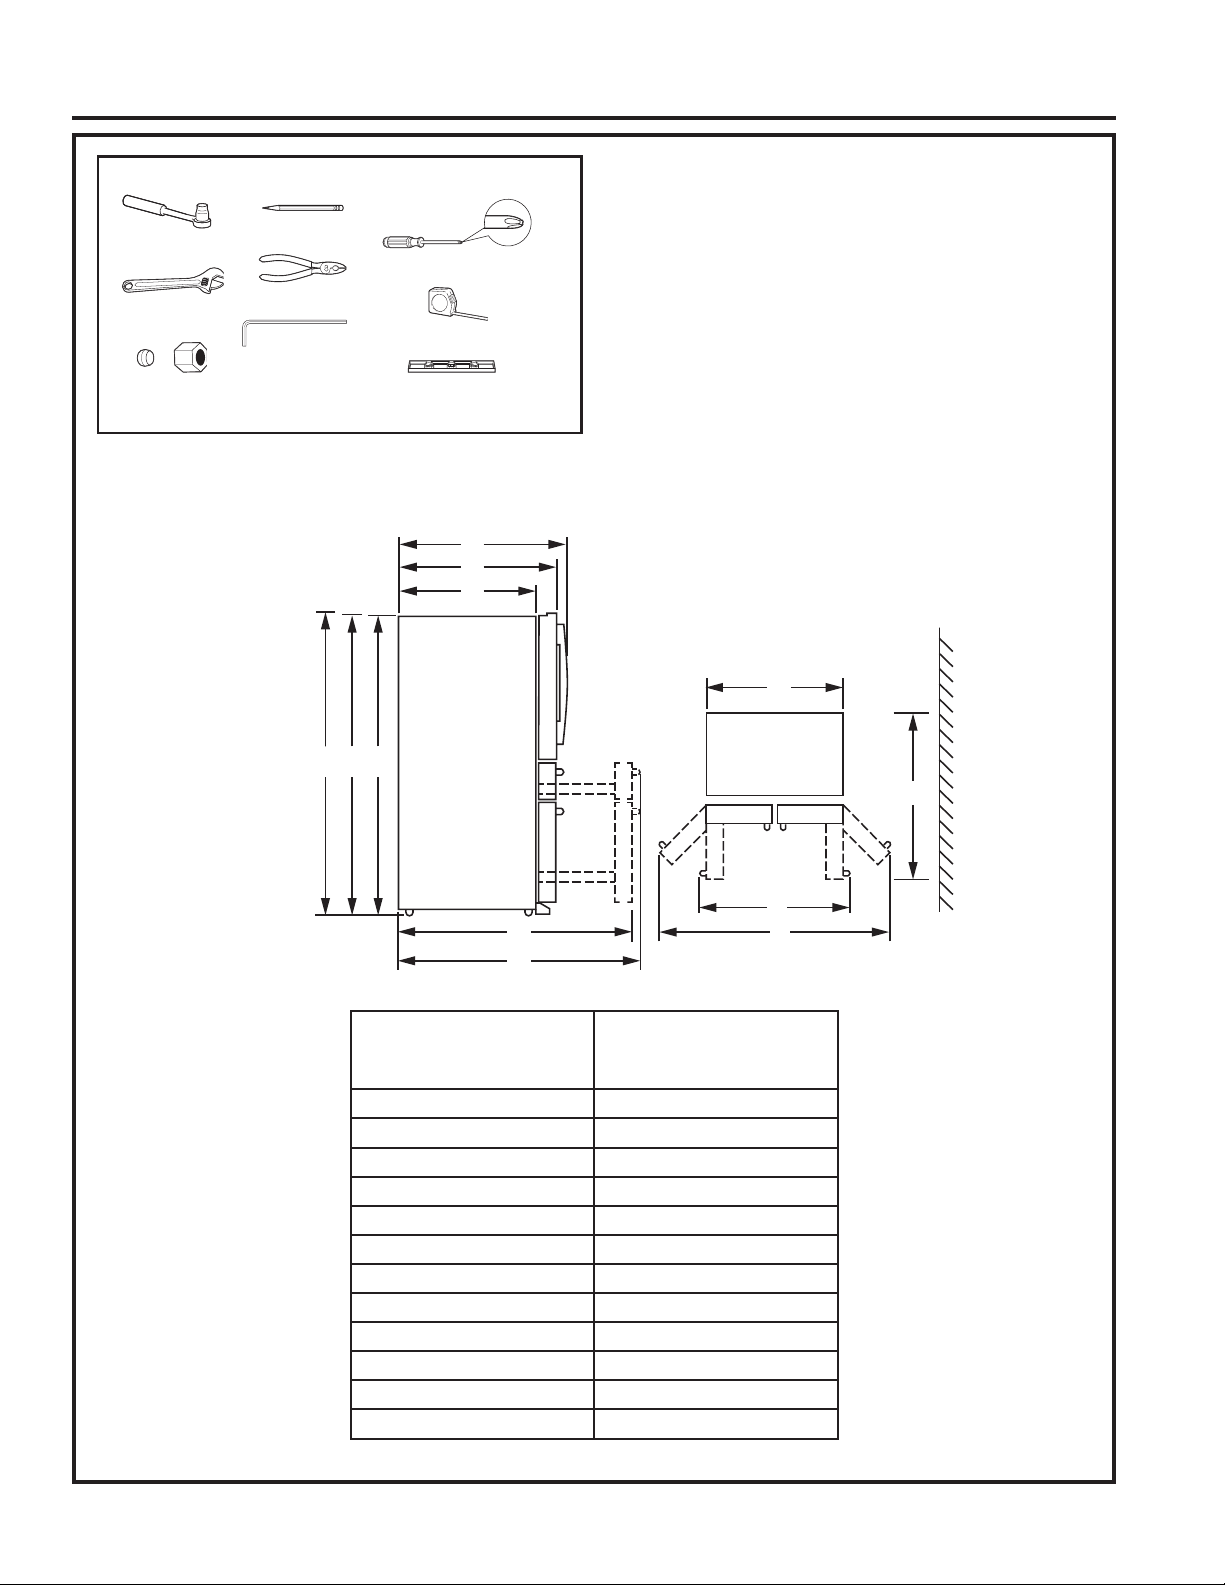
• Using the chart below to determine if passageways
can accommodate the width of the refrigerator.
• Use a padded hand truck or moving straps to move
this refrigerator. Place the hand truck to the side of
the refrigerator.
• We strongly recommend the refrigerator be moved
by two people.
• Leave tape, film, and other packaging on the
refrigerator until in it’s final location.
• Refer to sections 2 through 5 for handle, door,
and drawer removal if needed. Otherwise, skip to
section 6.
• Consider recycling options for your appliance
packaging material.
NOTE: It is recommended that the floor be protected with
a plastic covering throughout the installation process.
NOTE: Not recommended for installation on carpeted
flooring.
TOOLS YOU MAY NEED
Level
Adjustable Wrench
1/4” Outer Diameter
Compression Nut
and Ferrule (sleeve)
Phillips-Head Screwdriver
5/16” or 8mm
Socket Wrench
1/8” (included), 3/16”, and
1/4” Allen Wrenches
Pencil
Tape Measure
Pliers
X
D
H
E
F
Y
CBA
I
J
G
CLEARANCES
Allow the following
clearances for
ease of installation,
proper air circulation
and plumbing and
electrical connections.
Sides 1/8” (3 mm)
Top 1” (25 mm)
Back 2” (50 mm)
Full Depth
unit dimensions
Full Depth
Glass door
unit dimensions
A = 70” (1775mm) A = 70” (1775mm)
B = 69-13/16” (1773mm) B = 69-13/16” (1772mm)
C = 68-5/8” (1743mm) C = 68-5/8” (1743mm)
D = 29-1/2” (749 mm) D = 29-1/2” (749 mm)
E = 34-1/4” (870m) E = 34.0” (864mm)
F = 36-1/2” (927mm) F = 34.0” (864mm)
G = 48-3/8” (1229mm) G = 48-3/8” (1229mm)
H = 35-5/8” (905mm) H = 35-5/8” (905mm)
I = 44-3/8” (1127mm) I = 39-1/2” (1003mm)
J = 60-3/8” (1534mm) J = 59-1/4” (1505mm)
X = 53-17/32” (1360mm) X = 53-9/32” (1353mm)
Y = 55-3/4” (1416mm) Y = 53-9/32” (1353mm)
Loading ...
Loading ...
Loading ...