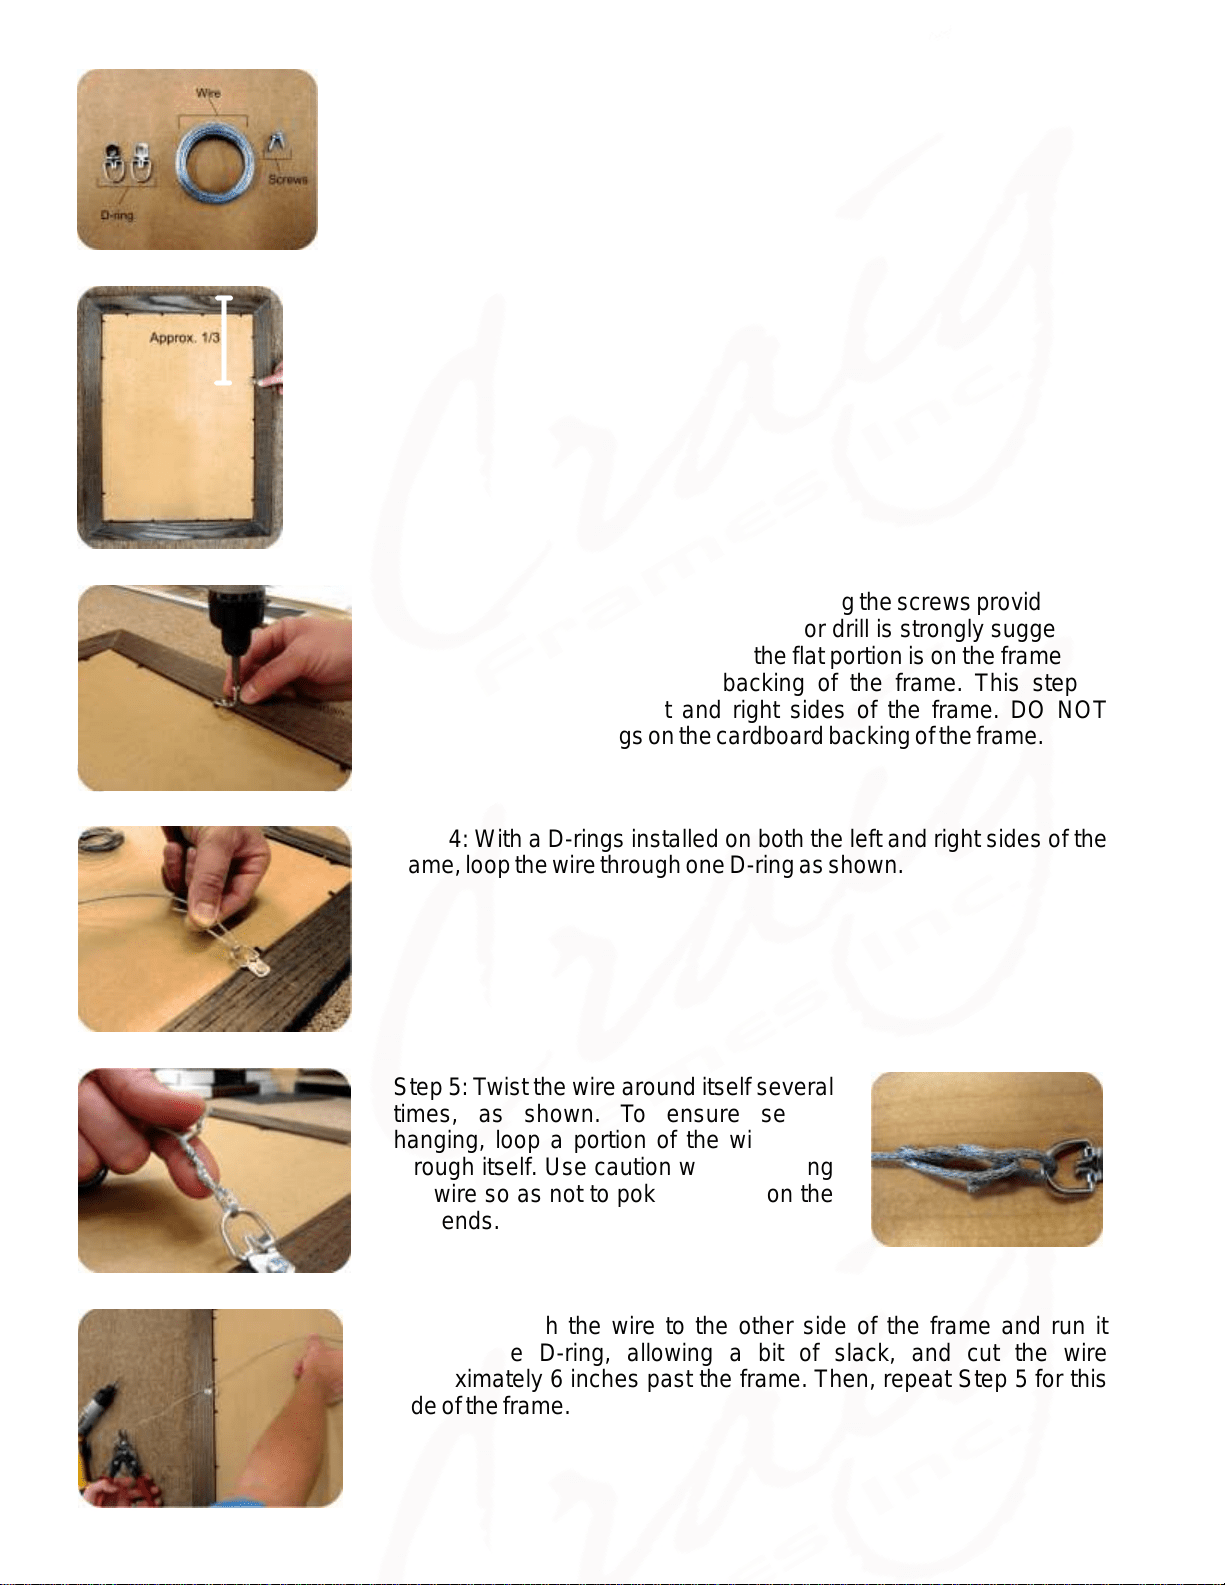
Step 1: The packet containing your hanging hardware can be found
attached to the back of your purchased frame. In the event that it
separates from the frame during delivery, just check the bottom of the
shipping box. Unpack D-rings, Wire, and Screws from the packet. (The
additional hook and nail will be installed on the wall when you are ready to
hang your frame.)
Step 2: Determine whether your frame will be hung horizontally or
vertically. On the back of frame measure down approximately 1/3 the
distance from the top of the frame on both the left and right sides. This is
where your D-rings will be installed during Step 3.
Step 3: The D-rings should be installed using the screws provided. An
electric / battery powered screw driver or drill is strongly suggested.
The D-rings should be installed so the flat portion is on the frame and
the ring is hanging over the backing of the frame. This step is
repeated for both the left and right sides of the frame. DO NOT
attempt to install D-rings on the cardboard backing of the frame.
Step 4: With a D-rings installed on both the left and right sides of the
frame, loop the wire through one D-ring as shown.
Step 5: Twist the wire around itself several
times, as shown. To ensure secure
hanging, loop a portion of the wire back
through itself. Use caution when handling
the wire so as not to poke yourself on the
wire ends.
Step 6: Stretch the wire to the other side of the frame and run it
through the D-ring, allowing a bit of slack, and cut the wire
approximately 6 inches past the frame. Then, repeat Step 5 for this
side of the frame.
How to Install Your Hanging Hardware Kit
That’s it! Please contact us if you have any questions.