Loading ...
Loading ...
Loading ...
5
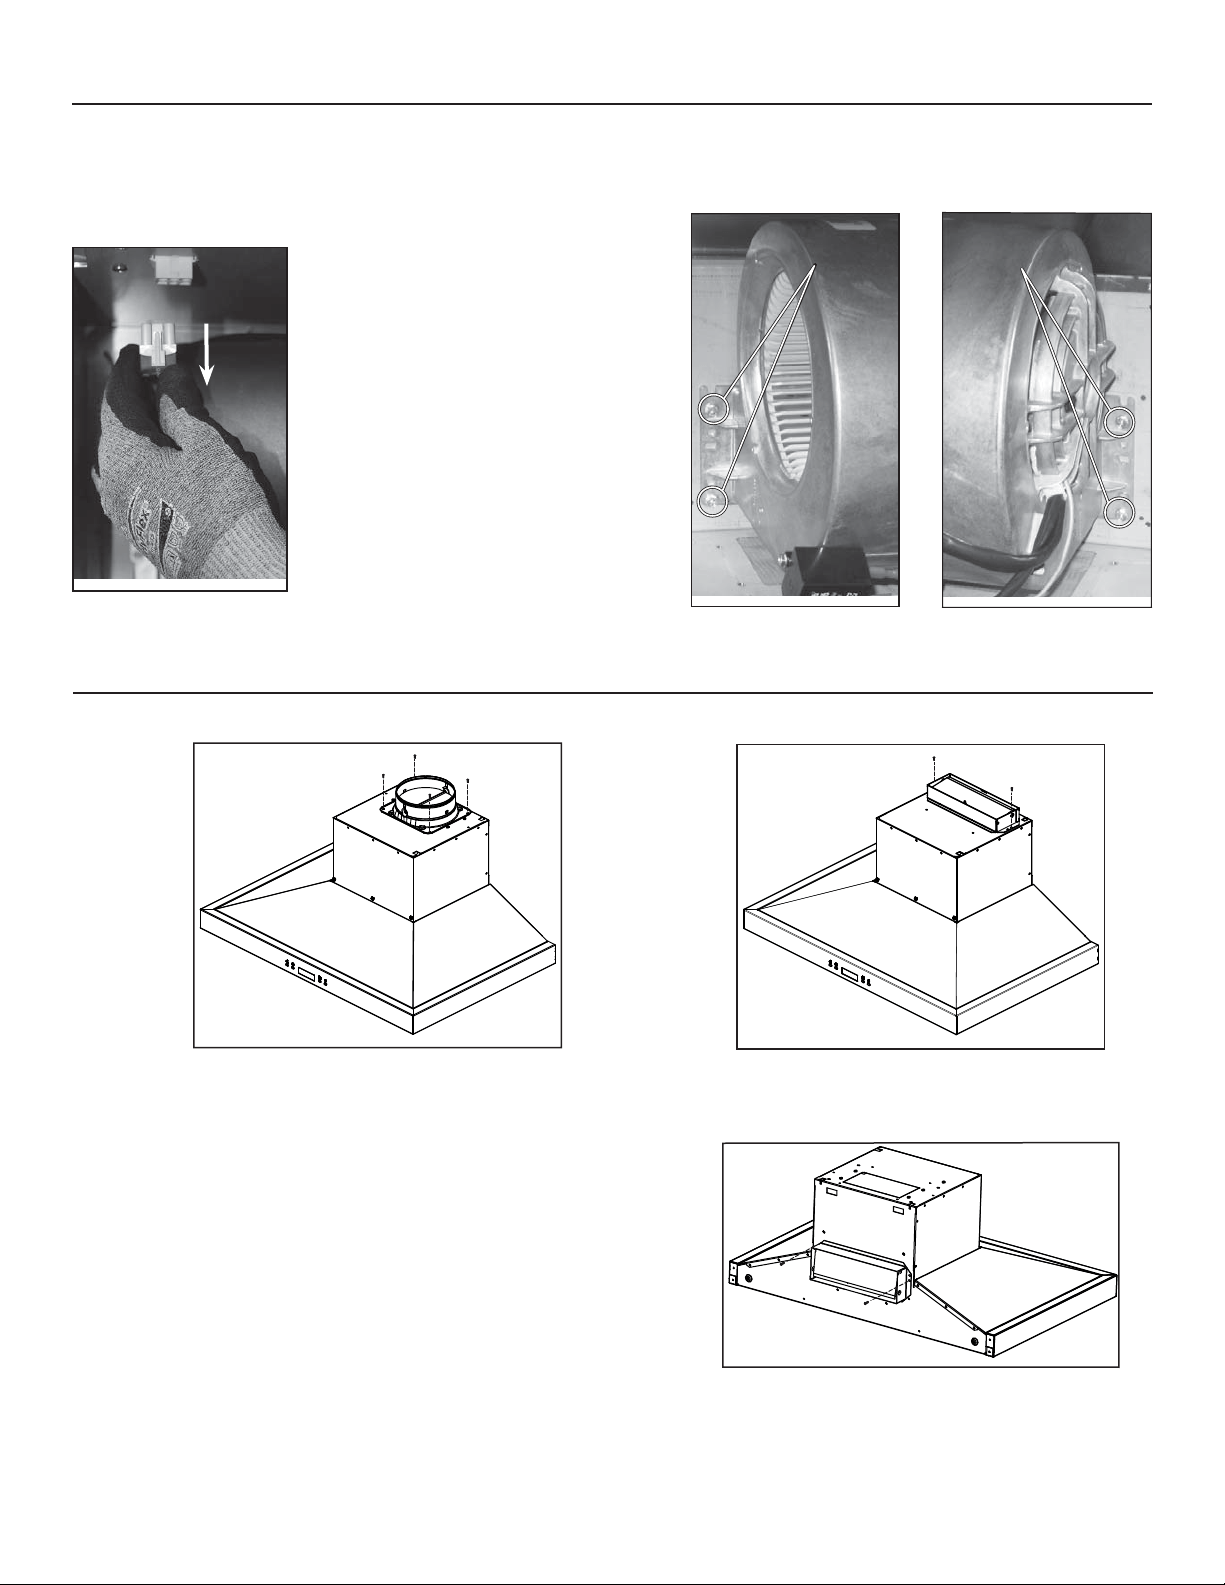
5. BLOWER REMOVAL (HORIZONTAL DISCHARGE ONLY)
The WC53I Series range hoods are factory shipped with the blower mounted for a vertical discharge configuration. For a horizontal discharge
configuration, disassemble the blower from the inner top of the hood (see procedure below). It will be assembled to the inner back of the hood
once the hood is mounted on the wall.
1) Unplug the blower.
HD0817
2) Using a 5/16” socket, or a
Robertson or a Phillips no. 2
screwdriver, remove the 4 blower
mounting screws (2 on each side)
from the inner top of the hood. Set
the blower and screws aside.
HD0386
RIGHT SIDE MOUNTING
SCREW LOCATIONS
HD0385
LEFT SIDE MOUNTING
SCREW LOCATIONS
Secure the adapter/damper to the back of the hood using 2 no. 8 x 3/8” screws
(included). Seal the adapter/damper to the hood using metal foil duct tape.
NOTE: The wall ducting must be properly prepared to receive the adapter. Before
performing the installation, make sure the adapter fits easily in the duct.
HJ0129
6. INSTALL ADAPTER/DAMPER
Mount the 6” round adapter/damper (included in bag) using 4 no. 8 x 3/8” screws (included) or the 3¼” x 10” adapter/damper to the hood
using 2 no. 8 x 3/8” screws (included). Seal the adapter/damper to the hood using metal foil duct tape.
HJ0145
HJ0146
VERTICAL DISCHARGE 6” ROUND
VERTICAL DISCHARGE 3¼” X 10”
H
ORIZONTAL DISCHARGE 3¼” X 10” ONLY
Loading ...
Loading ...
Loading ...