Loading ...
Loading ...
Loading ...

8
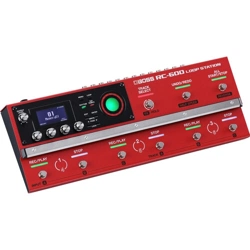
Getting Ready
(1) MEMORY NUMBER
(2) TRACK STATUS
Loop track status is shown with an icon
Icon Explanation
Recording, playing back, overdubbing
Stopped (phrase exists)
No phrase
Current track
(3) LOOP TRACKS
Displays the track status + progress during playback
(4) LOOP STATUS
Indicates the status of the tracks
(5) LOOP LEVEL
Volume of each track is shown by the level meters
(6) INPUT FX
Indicates the input FX status
A B C D
O
On
(7) TRACK FX
Indicates the track FX status
* You can change which play screen is
shown on startup.
& “Parameter Guide” (PDF)
Switching Between Play Screens
The screen that appears after you turn on the power is called the “play screen”.
Icon Explanation
Tempo
Phantom power for MIC 1, 2 connectors is on (o when not displayed)
Knob lock function is on (o when not displayed)
Memory name
[1] [2] [3] [4]
Parameters to set using the [1]–[4] knobs
Memory number
Press the PAGE [K] or [J] button while the play screen is shown to switch between variations of the play screen.
Adjusting the Input/Output Level
Press the [ENTER] button while the play screen is shown to display the MIXER screen, where you can check the input/output levels for each
jack and connector.
Use the PAGE [K] [J] buttons to switch between pages, and turn the [1]–[4] knobs to adjust the respective input/output levels.
[J]
[K]
[J]
[K]
Mute: On ScalePeak indicator
Switches the page
5 Adjust the levels so that the peak indicator on the level meter matches the scale shown in the illustration.
5 For the inputs, push the [1]–[4] knobs to mute the sound.
5 Use the MASTER OUT to adjust the levels of the MAIN OUTPUT, SUB OUTPUT 1 and SUB OUTPUT 2. The [OUTPUT LEVEL] knob is
congured to adjust the levels as well by factory default.
The jacks and connectors shown in the MIXER screen may change, depending on the stereo link settings.
Stereo link Explanation
ON The MIC 1, 2 and L/R channels are shown as a single connector.
OFF The MIC 1, 2 and L/R channels are shown separately.
* For details on stereo link, refer to the “Parameter Guide” (PDF).
Loading ...
Loading ...
Loading ...