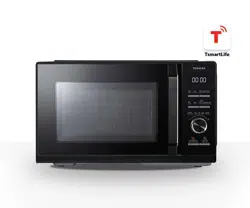
說明書
多功能健康氣炸焗爐
請在操作前仔細閱讀本說明書。
MW3-SAC24SE(BK)

目錄
IoT智能控制
產品無線網絡連接 ......................................................................................... CN-01
如何將您的設備連接到 TSmartLife
.................................................................. CN-02
產品安全
避免接觸過量微波能量的預防措施....... ............................................................. CN-04
重要安全說明
................................................................................................CN-06
減少接地安裝人士受傷的風險......... ................................................................ CN-11
器皿 ............................................................................................................. CN-14
可用於微波爐的物料 ...................................................................................... CN-15
................................................................................... CN-17
產品設置
安裝爐具........................................................................................................ CN-18
使用說明
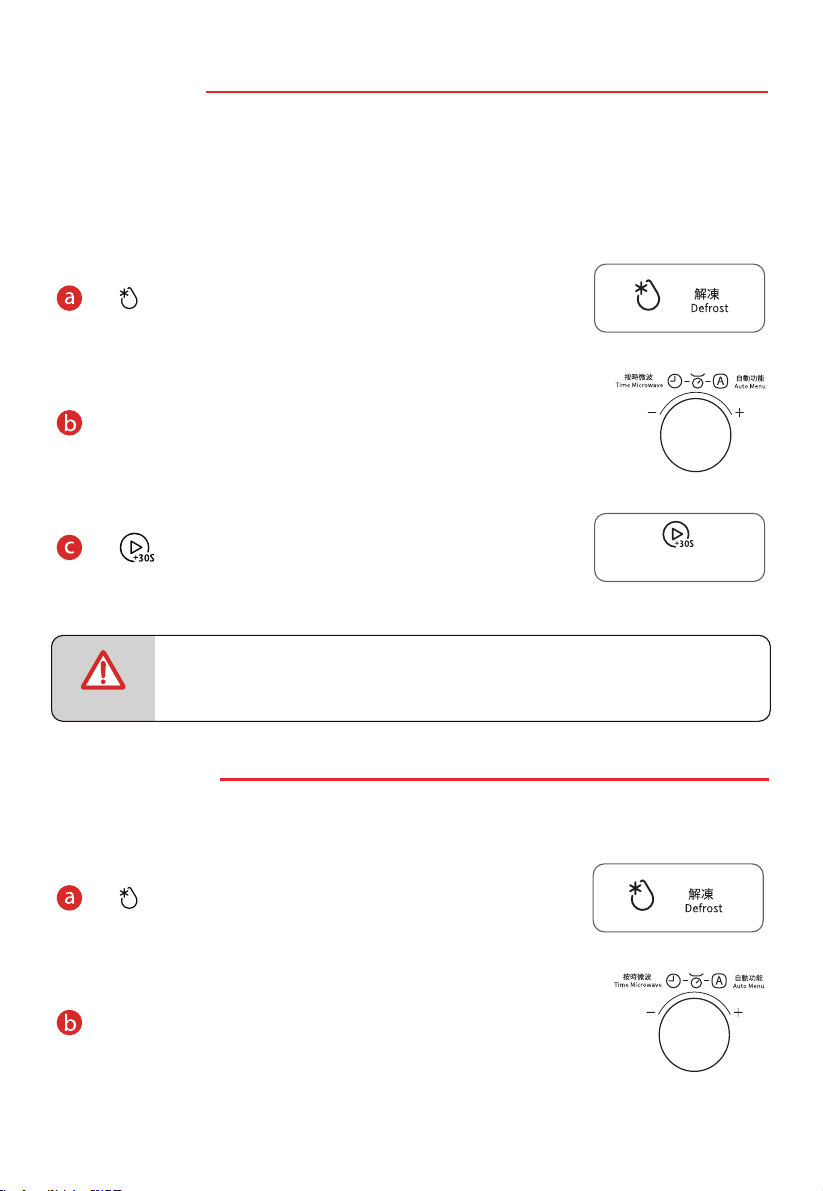
首次使用前.................................................................................................... CN-21
操作
............................................................................................................. CN-22
1. 功率等級
................................................................................................... CN-23
2. 時鐘設定 ................................................................................................... CN-23
3. 廚房計時器
................................................................................................ CN-24
4. 微波烹飪 ................................................................................................... CN-25
不可用於微波爐的物料
注意
在使用本產品之前,請閱讀、理解並遵守這些安
全說明。請務必妥善保存本說明書,以備日後使用。
5. 燒烤或混合 ................................................................................................ CN-27
6. 預熱熱風
...................................................................................................CN-28
7. 無預熱熱風
................................................................................................ CN-29
8. 自動選單
................................................................................................... CN-32
9. 按重量解凍
................................................................................................CN-35
10. 按時間解凍 .............................................................................................. CN-35
11. 多級烹飪
................................................................................................. CN-38
12. 快速烹飪
................................................................................................. CN-39
13. 查詢功能
................................................................................................. CN-39
14. 鎖定功能
.................................................................................................CN-40
清潔和保養
清潔 ............................................................................................................. CN-42
故障排除
.......................................................................................................CN-44
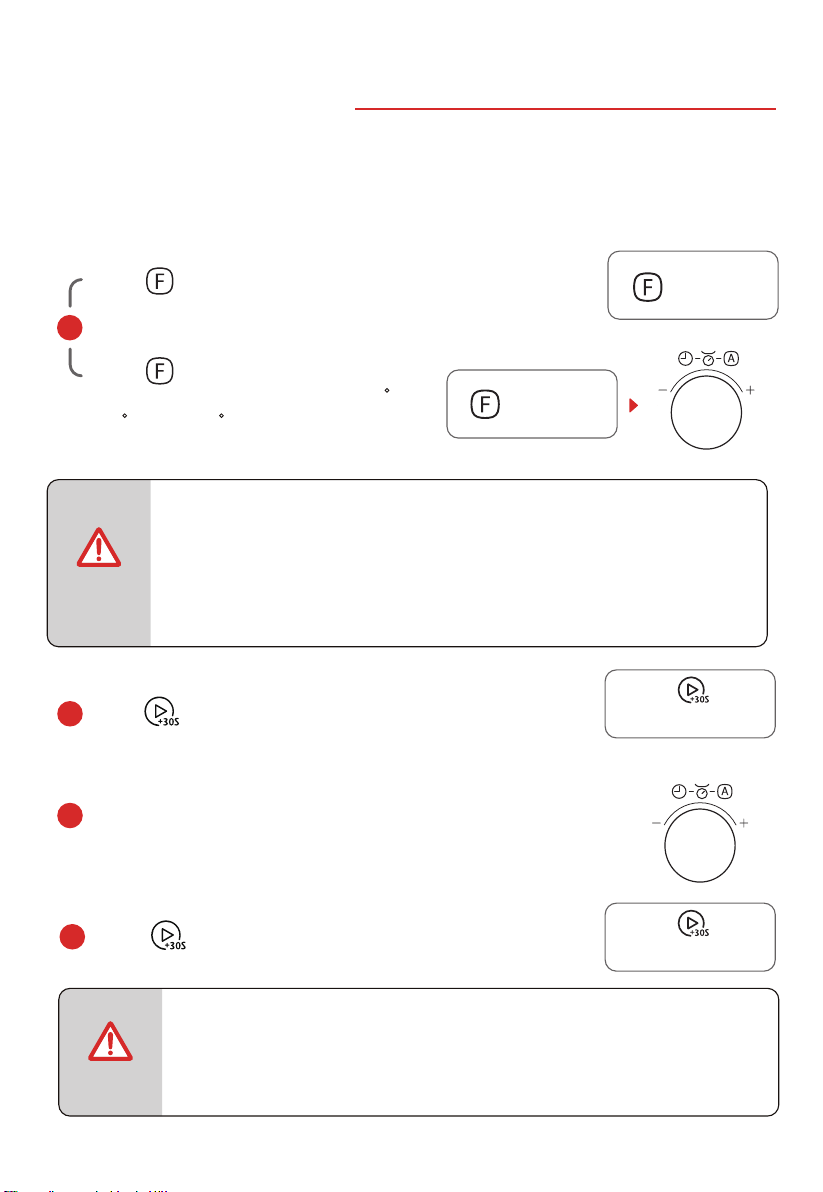
CN-01
IoT智能控制
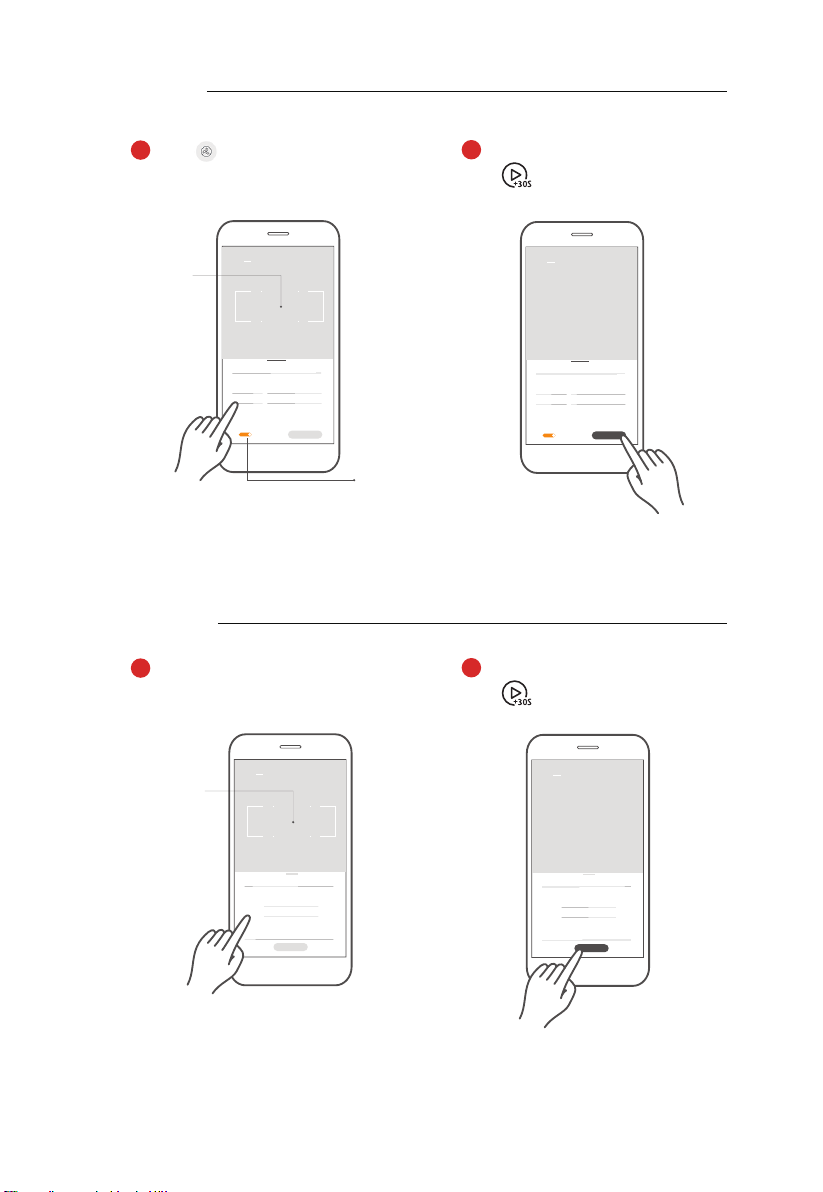
產品無線網絡連接
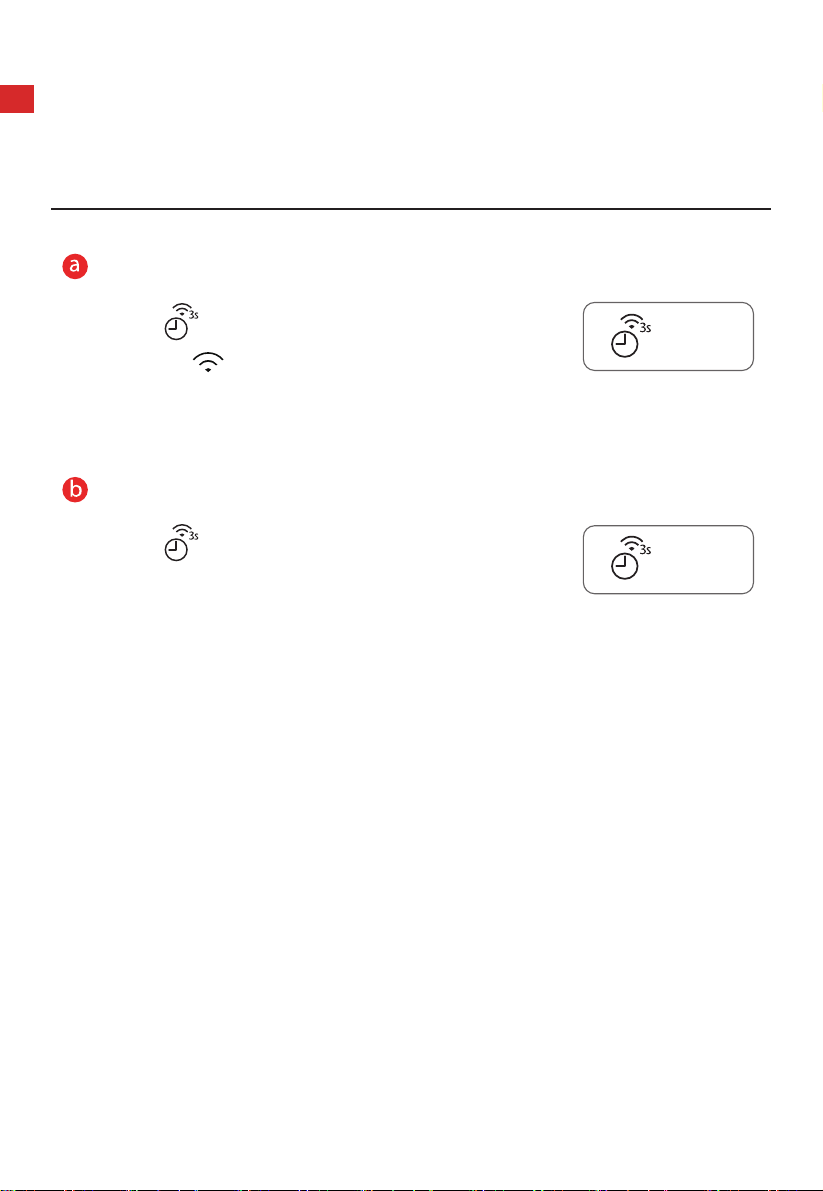
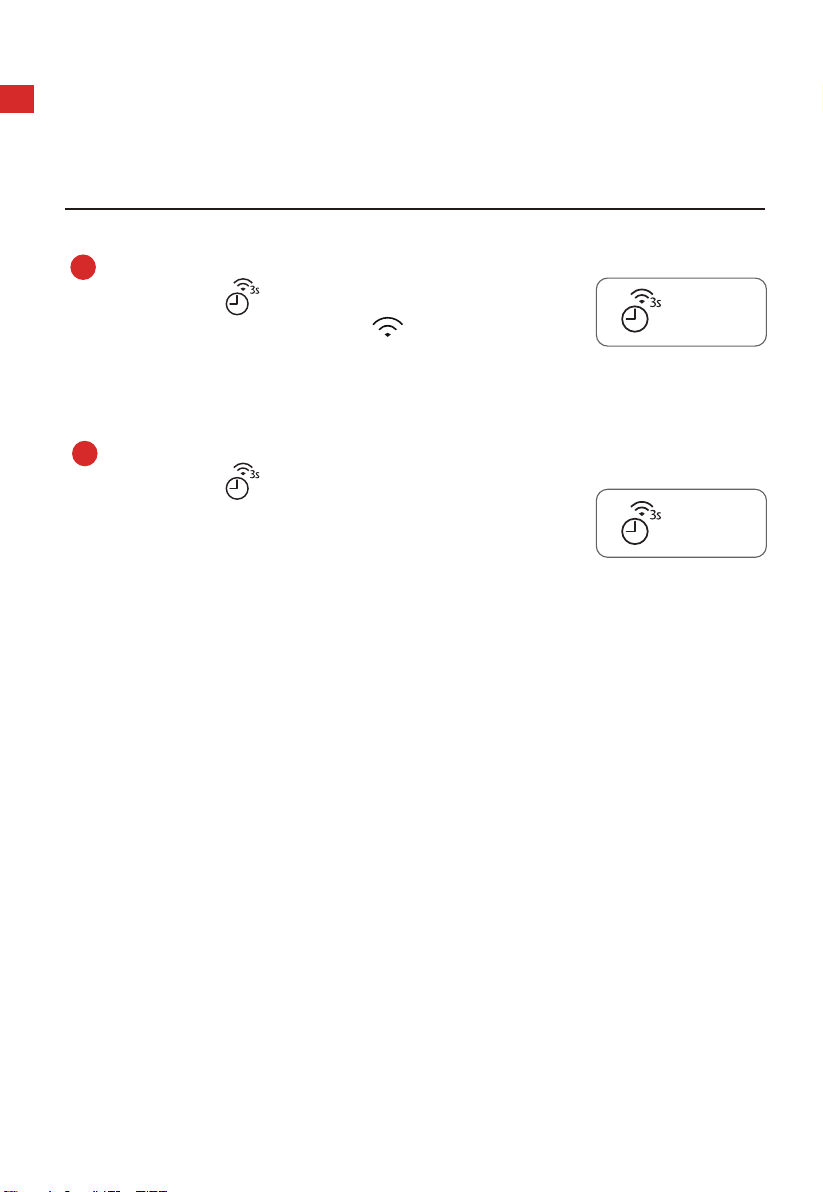
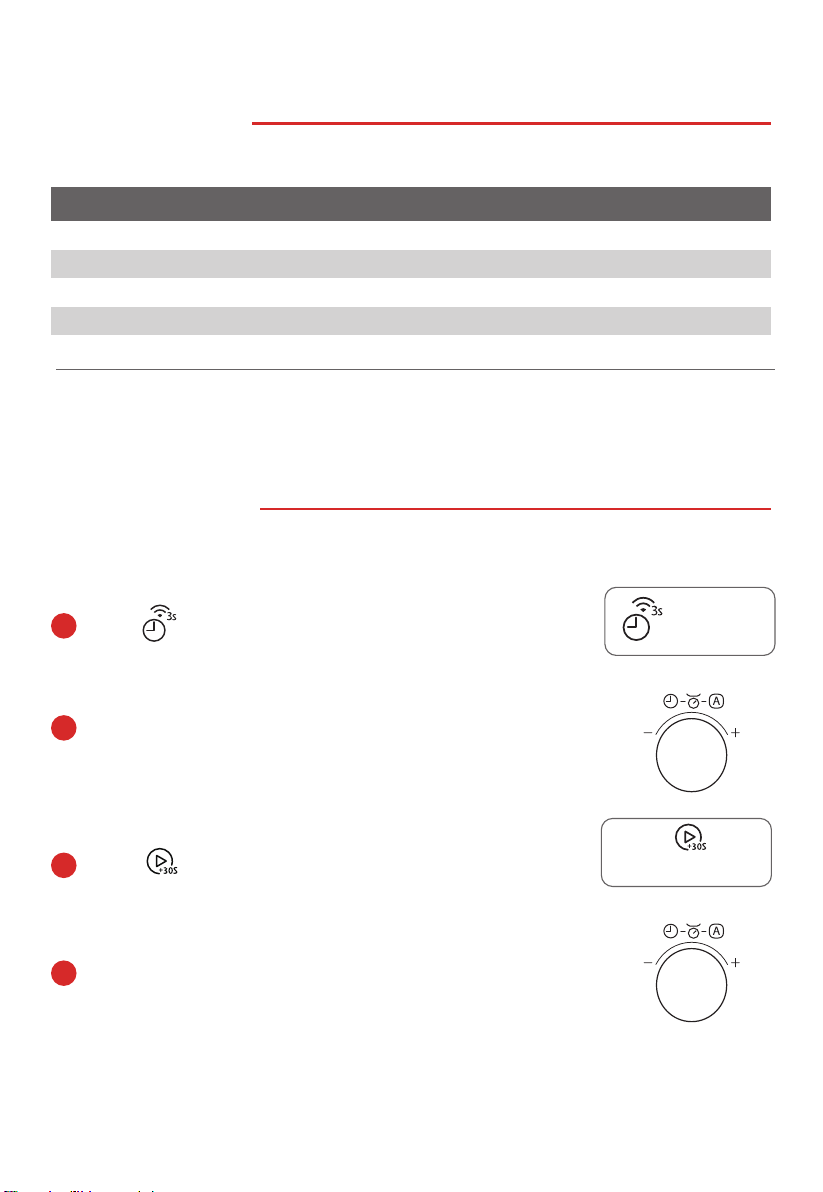
連接網絡
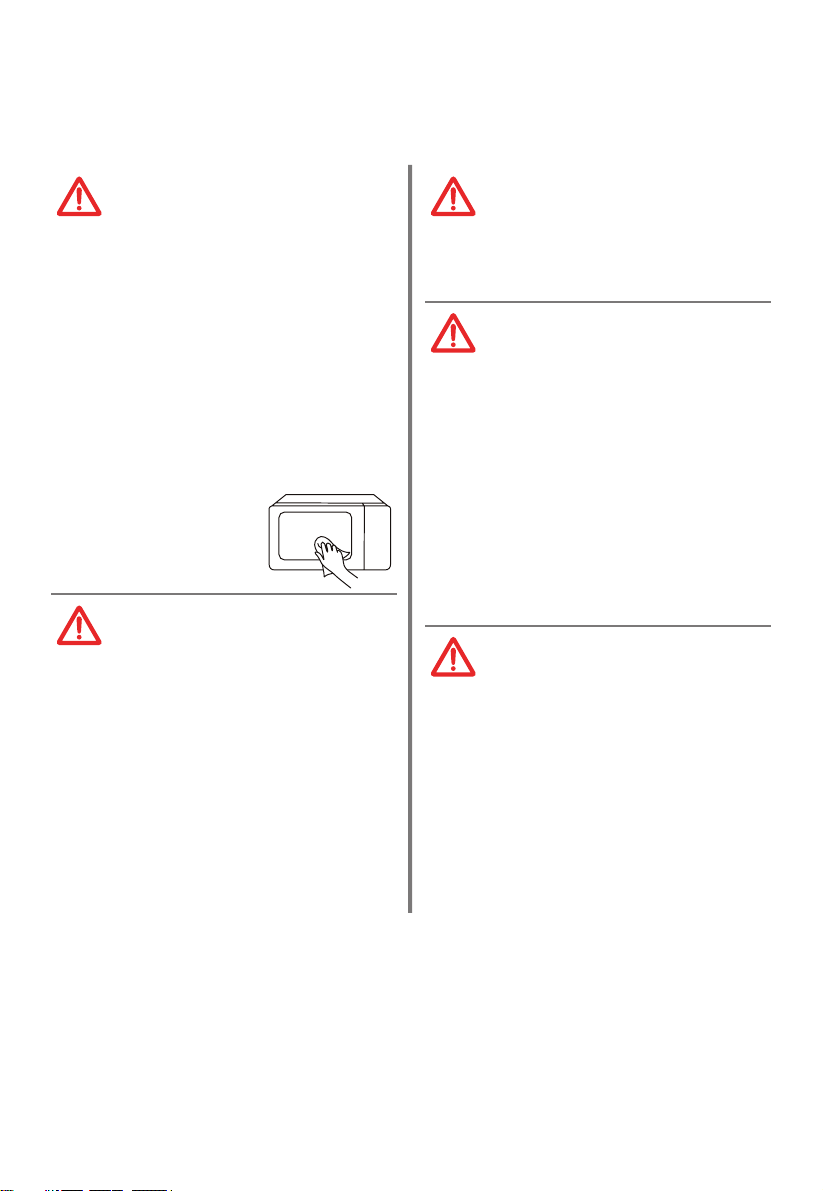
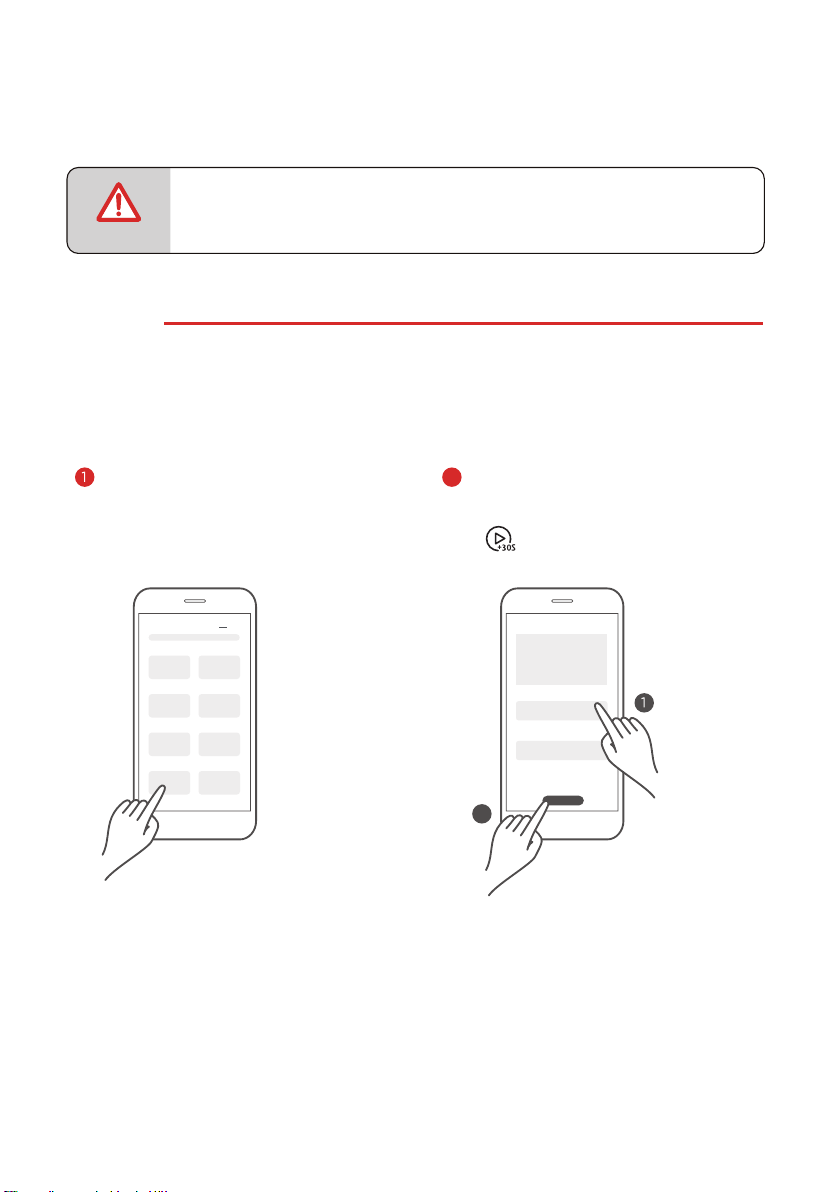
長按「
」3 秒鐘,直到聽見提示音"嗶",顯示屏上顯
示「AP」,「
」閃爍。如果出現故障,將顯示「N0」,
30 秒後,氣炸焗爐將返回待機模式。
斷開網絡連接
長按「
」8 秒,蜂鳴一聲後,「--」閃爍數
秒。如果已成功移除連結,屏幕將顯示「8888」。
3 秒後,氣炸焗爐返回待機模式。如果出現故障,
將顯示「FFFF」,3 秒後,氣炸焗爐將返回待機模
式。
計時器/時鐘/連接
Timer/Clock/Connect
計時器/時鐘/連接
Timer/Clock/Connect
CN-02
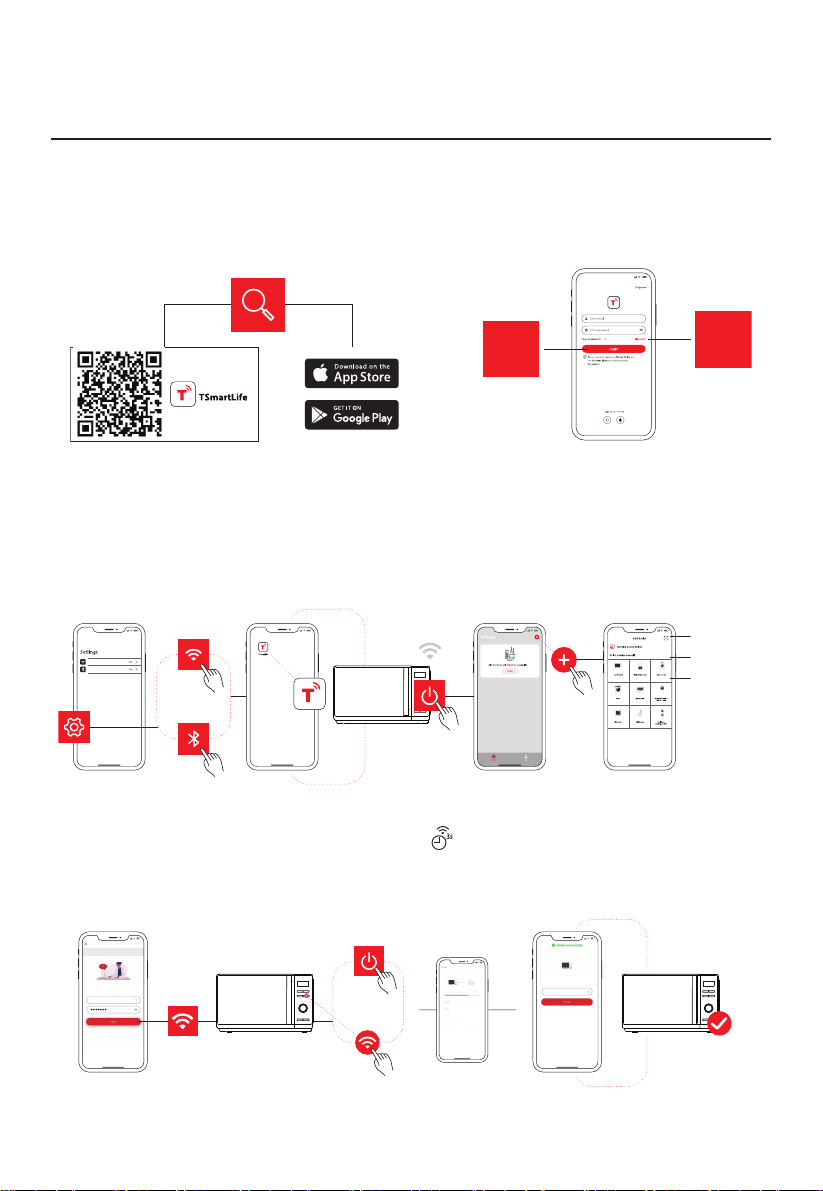
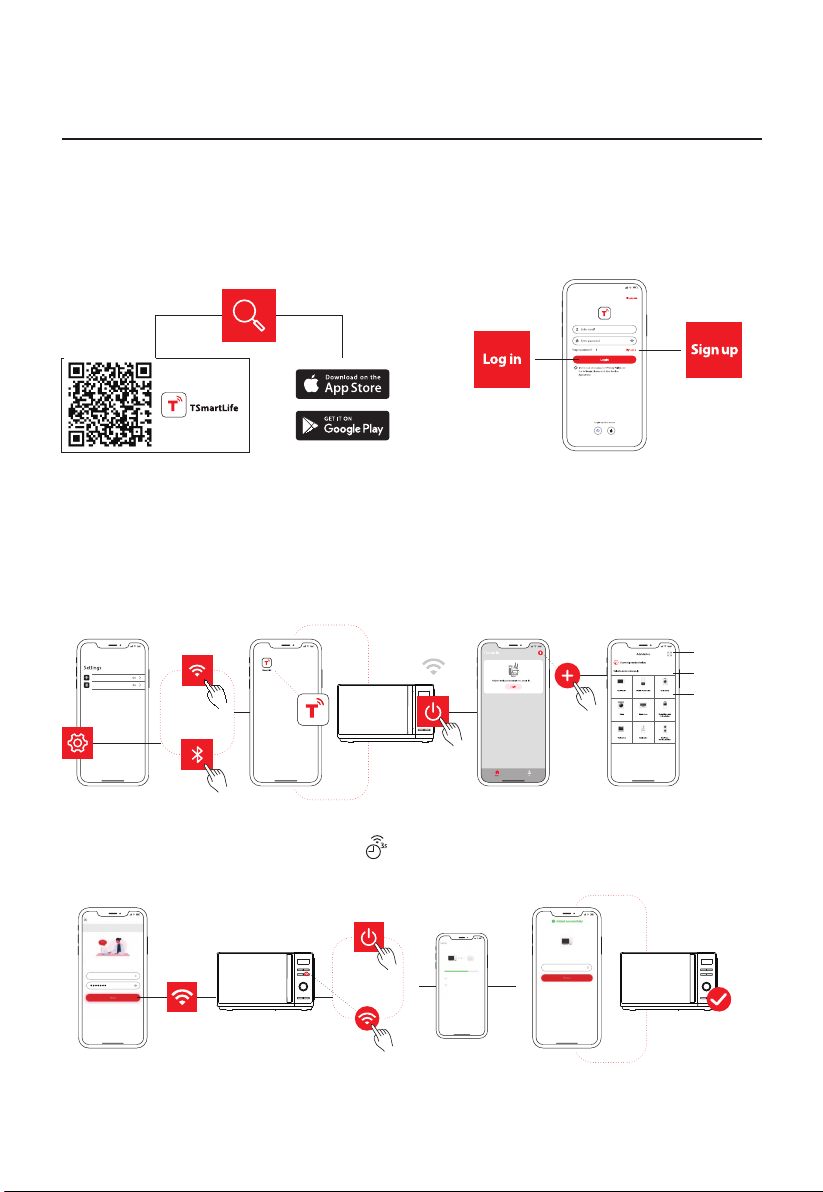
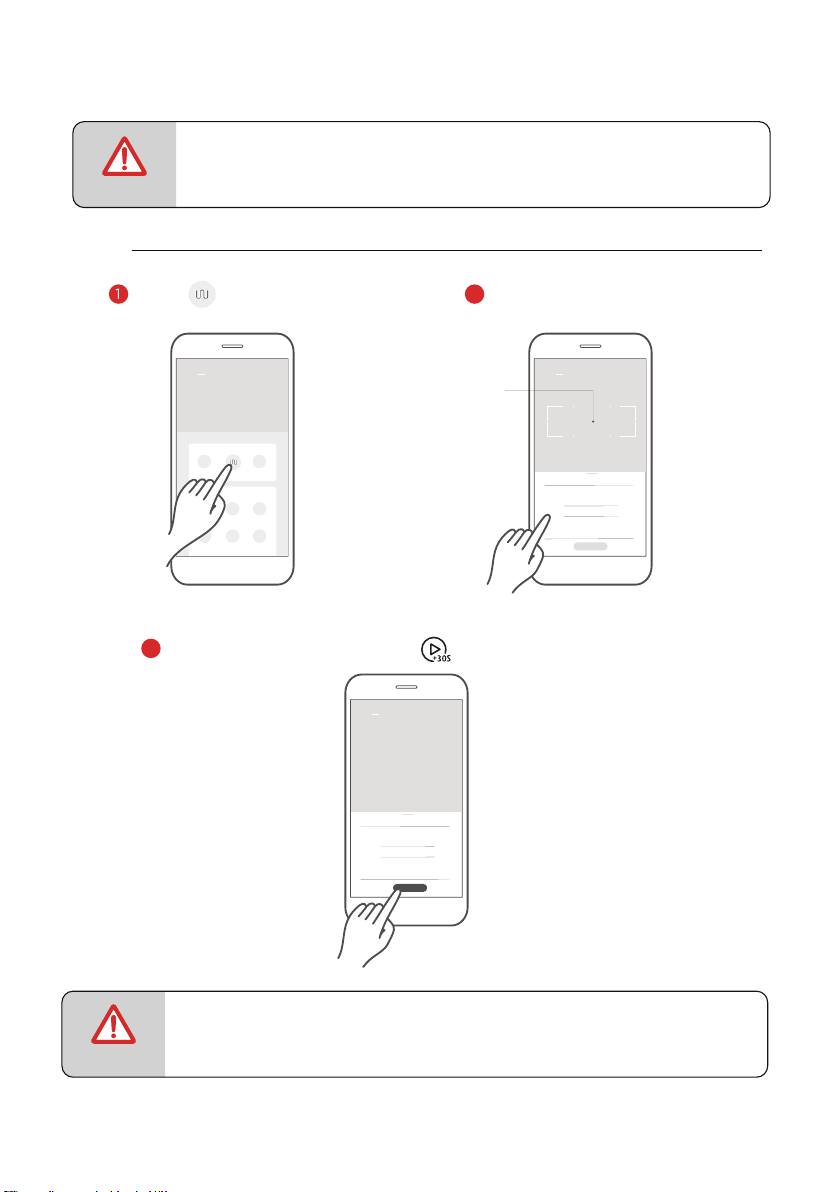
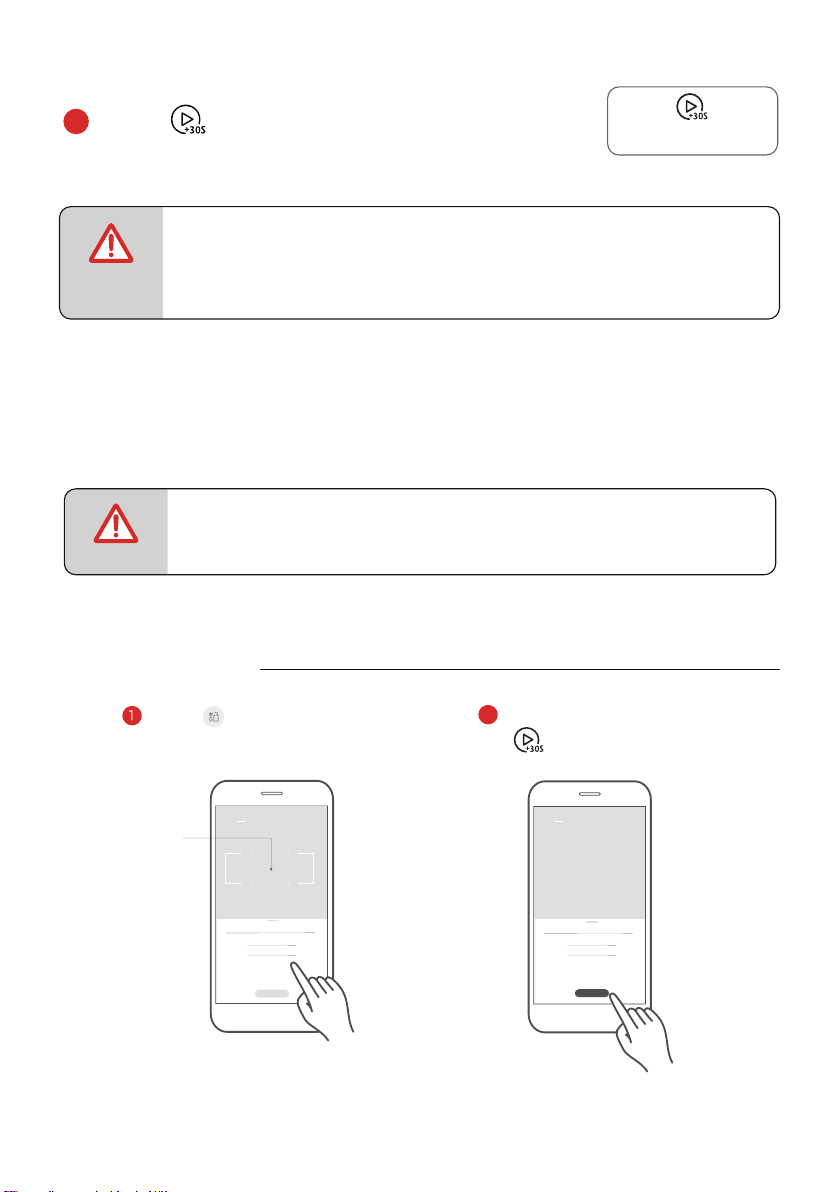
如何將您的設備連接到 TSmartLife
1
下載 TSmartLife 應用程序
掃描二維碼或在應用商店中找到我們。
登入
註冊
3
將您的設備連接到 TSmartLife
第1步:
第2步:
打開TSmartLife 應用程序。
為所選設備連接電源。
第3步:
使用以下方法之一加入您
的設備:
WLAN
Bluetooth
掃描產品二維碼
尋找設備
手動選擇
第4步:
確保設備和 App 處於同一
無線網絡下。
第5步:
按下面板上的 " " 按鈕,
保持 3 秒。根據説明進行
設定,它將自動連接。
第6步:
重新命名您的設備並嘗試
遠距離控制。
Toshiba
Please select wireless network
for device to connect
Connected device and send wireless
network information
Device is networking
Bind device to Toshiba TSmartLife
Toshiba
Hi,l’m your device!
How would you call me:
已連接
2
註冊或登入
請登入現有帳戶或註冊新帳戶
連接無線網絡,開 藍牙。
啟

CN-03
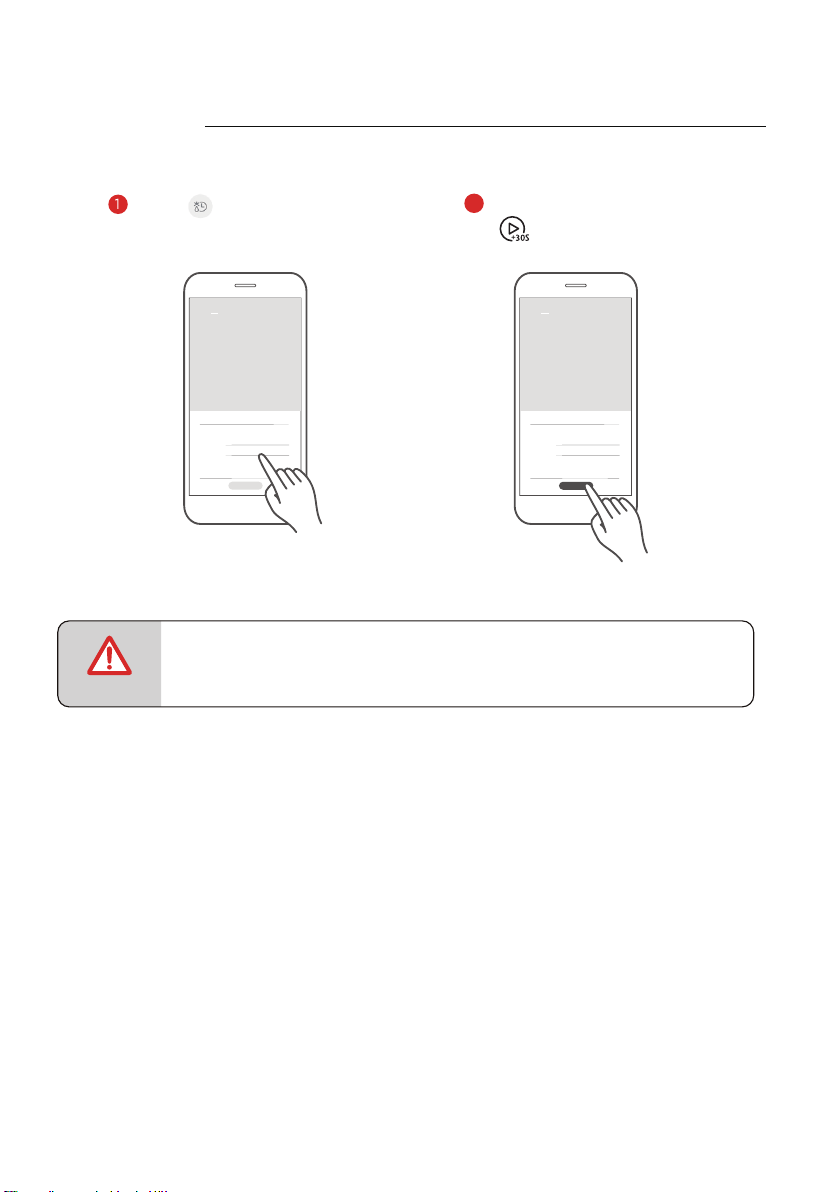
如何將您的設備連接到 TSmartLife
温馨提示
確保您的設備已連接電源。
連接時,請保持手機靠近您的設備。
將手機連接到家中無線網絡。
啓用無線網絡路由器上的 2.4GHz 頻率。目前 5GHz Wi-Fi 網絡不可用。
設備無法連接需要認證的無線網絡,即酒店、餐廳等公共區域的無線網絡。
建議使用僅包含字母和數字的無線網絡名稱。如果您的無線網絡名称包含特殊
字符,请在路由器中修改。連接您的設備到網絡時,請禁用 WLAN
+(
Android)
或 WLAN 助手(iOS)。
如需將設備重新連接無線網絡,請在 App 主界面點擊“+”,根據 App 提示,
按類別和型號重新加入設備。
CN-04
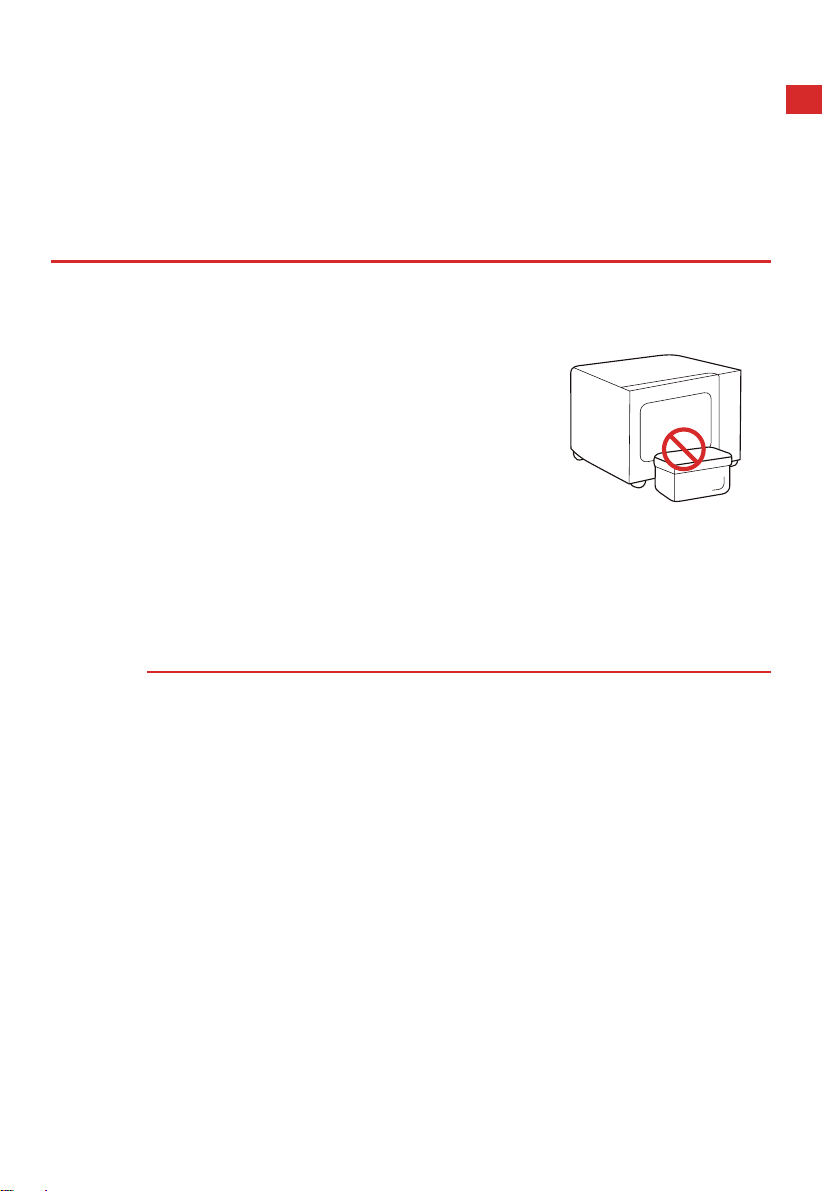
產品安全
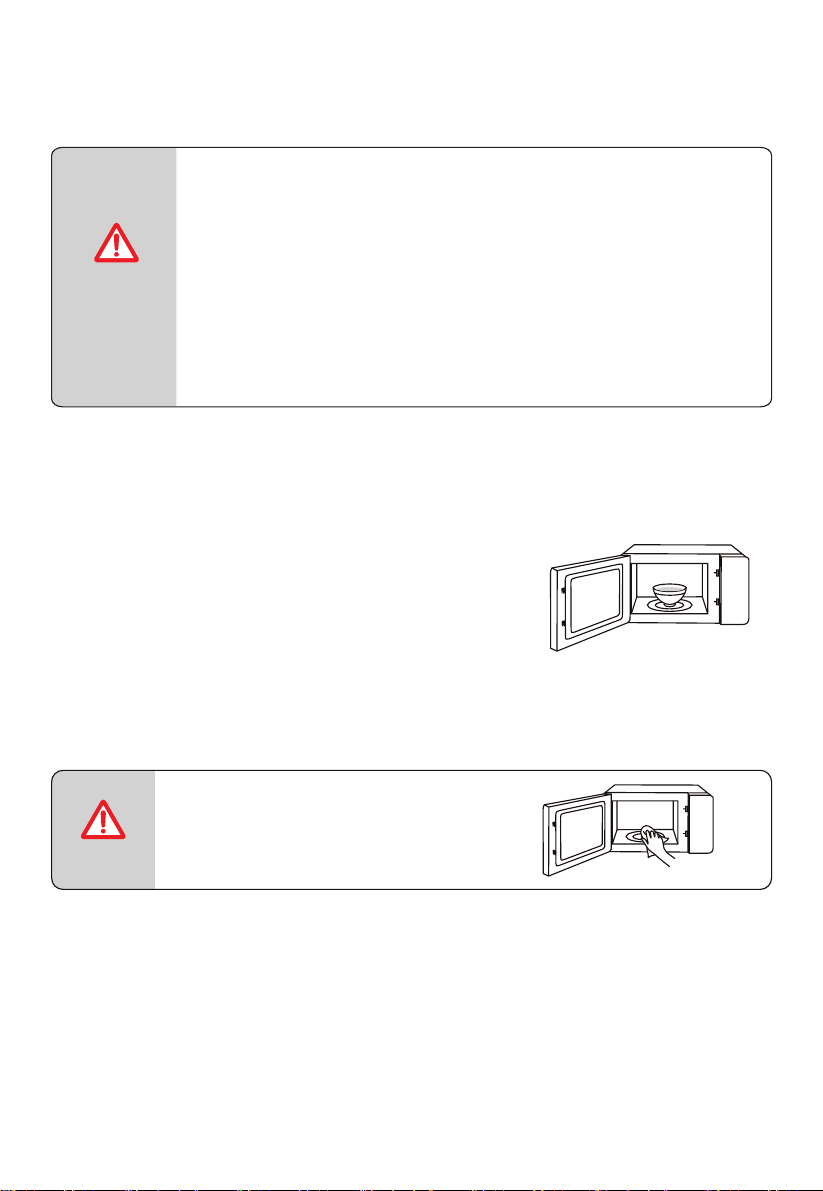
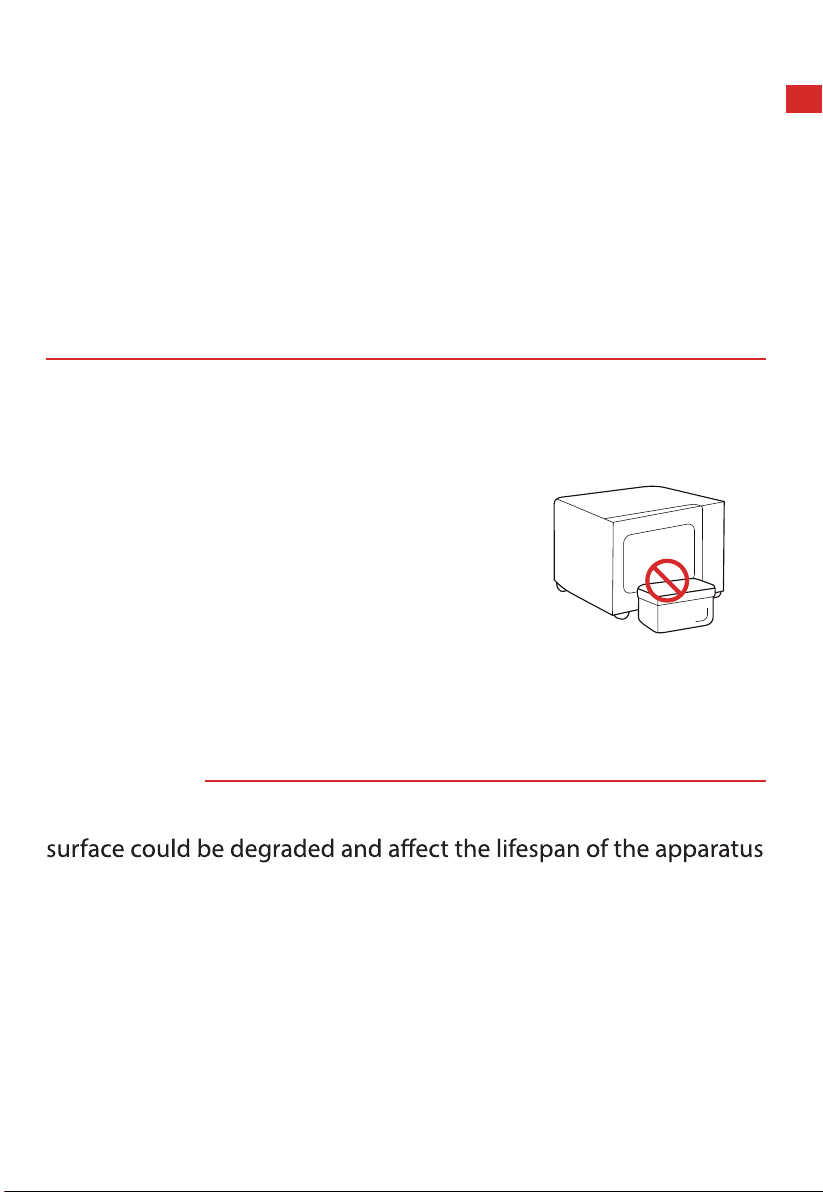
避免接觸過量微波能量的預防措施
(a). 請勿在爐門打開的情況下操作該氣炸焗爐,因為這會導致有
害的微波能量釋出 。請勿破壞或更改安全
連鎖。
(b). 請勿在氣炸焗爐正面和爐門之間放置任何
物品,或讓灰塵或清潔劑殘留物積聚在
密封面上。
(c). 警告:如果氣炸焗爐的爐門或爐門密封條有損,須待合資格
人士
修好後,方可使用氣炸焗爐。
補充說明
如果本電器未能保持良好的清潔狀態,其表面可能會退化,影
響設備的使用壽命,
並導致危險情況。

CN-05
規格
型號
額定電壓
額定輸入(微波)
額定輸出(微波)
額定輸入( )
額定輸入(熱風對流)
MW3-SAC24SE(BK)
220-230 V~ 50 Hz
1350-1450 W
850-900 W
900-1000 W
1500-1680 W
燒烤
CN-06
重要安全說明
警告
為減少使用本電器時發生火災、觸電、人身傷害
或接觸過量微波能的風險,請遵循以下基本預防
措施:
閱讀並遵循以下內容:
「避免接觸過量微波能
的預防措施」。
在缺乏負責其安全的人
士監督或指導之下,身
體感到不適、精神狀態
不佳或缺乏相關經驗與
知識的人士(包括兒
童),均不適宜使用本
產品。
請看管好兒童,切勿讓
兒童把玩本電器。
如電源線出現損壞,必
須由製造商、其服務代
理或相關合資格專業人
士進行更換,以免發生危
險。
警告:為避免發生觸電,
在更換燈泡前,請確保
本電器已關閉。
CN-07
重要安全說明
警告:除合格人員外,
任何人進行維修操作(例
如拆除防止微波暴露的
蓋子)時都是危險的。
警告:切勿將液體和其
他食物放在密封容器中
進行加熱,否則可能會
引發爆炸。
加熱塑膠或紙質容器中
的食物時,請注意氣炸
焗爐,因為可能會著
火。
只能使用適用於微波爐
的器皿。
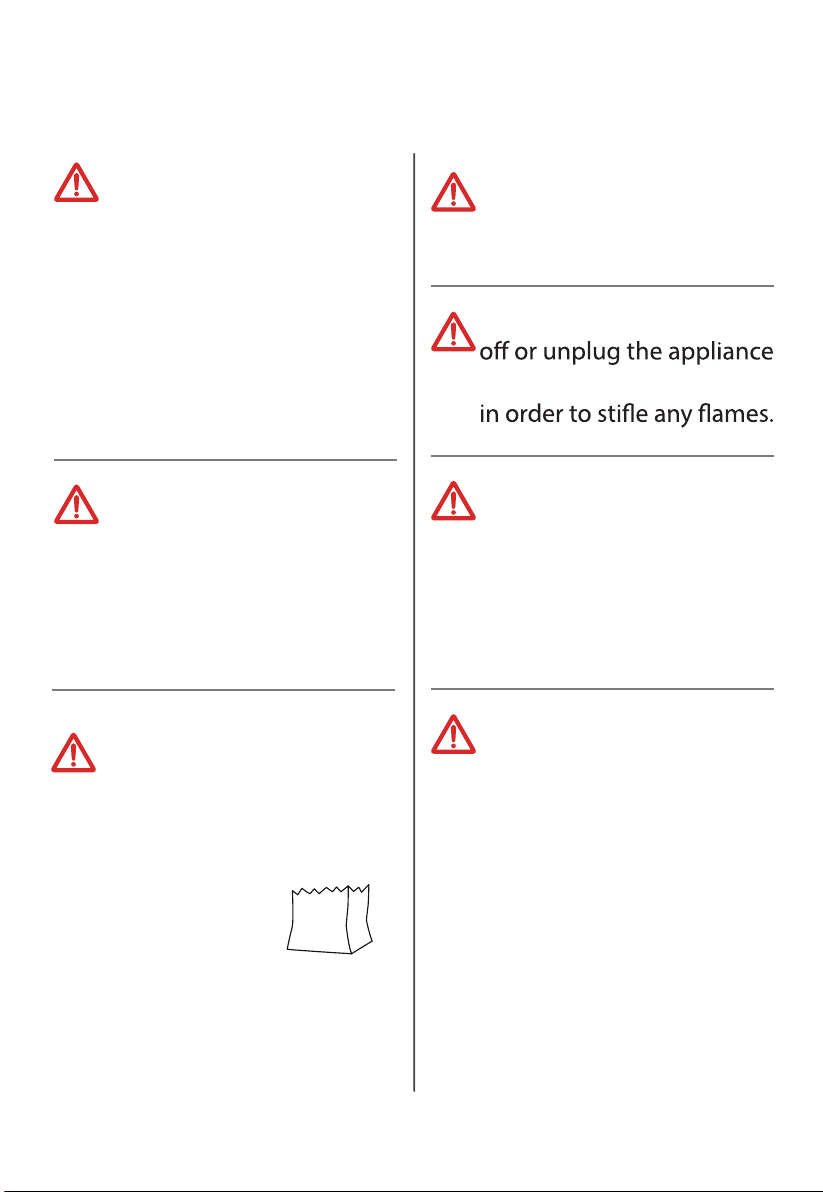
如果冒煙,請關閉本電
器或拔下插頭,並使門
閉合,以達到滅火目的。
微波加熱飲料會導致延
遲沸騰,因此在拿取容
器時必須小心。
在飲用前,應攪拌或搖
動奶瓶和嬰兒食物罐的
內容物,並檢查溫度,
以免燙傷。
CN-08
重要安全說明
應定期清潔
氣炸焗爐,
並清除食物沉積物。請
保持微波引導區清潔。
當微波引導區或腔體有
食物飛濺的殘留物時,
用柔軟濕布將其清理乾
淨。如果不清理食物殘
留物,可能會導致微波
腔體內產生無害火花、
煙霧,或者腔體變色。
僅使用本氣炸焗爐推薦
的溫度探頭。(適用於
配有溫度感應探針設
備。)
必須在裝飾門打開的情
況下操作微波爐。(適
用於帶有飾門的爐
具。)
本電器可用於家用和下
列類似用途:
1. 店舖、辦公室和其他
工作環境中的員工廚
房區域;
2. 酒店、汽車旅館和其
他居住環境;
3. 農舍;
4. 民宿類型環境。
微波爐用於加熱食物和
飲料。如果用於烘乾食
物或衣服,以及加熱保
暖墊、拖鞋、海綿、濕
布等,可能會導致受傷、
著火或火災等風險。
CN-09
重要安全說明
本設備僅供獨立使用。
設備的背面應靠牆
放置。
設備運行期間表面溫度
可能較高。
警告:當本電器以組合
模式運行時,由於會
產生高溫,故兒童只能
在成人監督下使用氣炸
焗爐。
切勿將帶殼的雞蛋和全
熟雞蛋放在微波爐中加
熱,因為在微波加熱結
束後,可能爆炸。
為避免過熱,禁止將本
設備
安裝在裝飾門後。
(該要求不適用於帶裝
飾門的設備。)
除非已在機櫃中開展測
試,否則不得將微波爐
放置在機櫃中。
微波烹飪時,不得使用
金屬容器盛載食物和
飲料。
不得使用蒸汽清潔器清
潔本設備。

CN-10
重要安全說明
請勿透過外部計時器或
第三方的遙控系統操作
本電器。
未能保持
氣炸焗爐清潔
可能導致表面退化,從
而可能影響本電器的壽
命,並造成危險。
仔細閱讀並妥善保存以備日後使用
CN-11
減少接地安裝人士受傷的風險
本電器必須接地。如發生電氣短路時,接地通過為電流提供逃
逸線來降低觸電風險。
本電器帶有接地插頭的接地線。插頭必須插入正確安裝並接地
的插座中。
警告——接地使用不當會導致觸電風險。如果不完全理解接地
說明,或者如果對本電器是否正確接地存在疑問,請諮詢合格
的電工或維修人員。
如果需要使用延長線,只能使用三芯延長線。
觸電危險:
觸摸某些內部部件會造成嚴重的人身傷害或死亡。
請勿拆卸本電器。
危險
CN-12
減少接地安裝人士受傷的風險
警告
觸電危險:
接地不當會導致觸電。在本電器正確安裝和接地之
前,請勿將插頭插入插座。
1. 低
的風險。
2. 如果使用長線或延長線:
(1). 線組或延長線的標記電氣額定值應至少與本
電器的電氣額定值相等。
(2). 延長線必須是接地型三芯線。
(3). 長線的佈置應確保其不會懸垂在台面或桌面
上,以免被兒童拉扯或無意中絆倒他人。
提供短電源線,以減 被長電源線纏住或絆倒提供短電源線,以減 被長電源線纏住或絆倒

CN-13
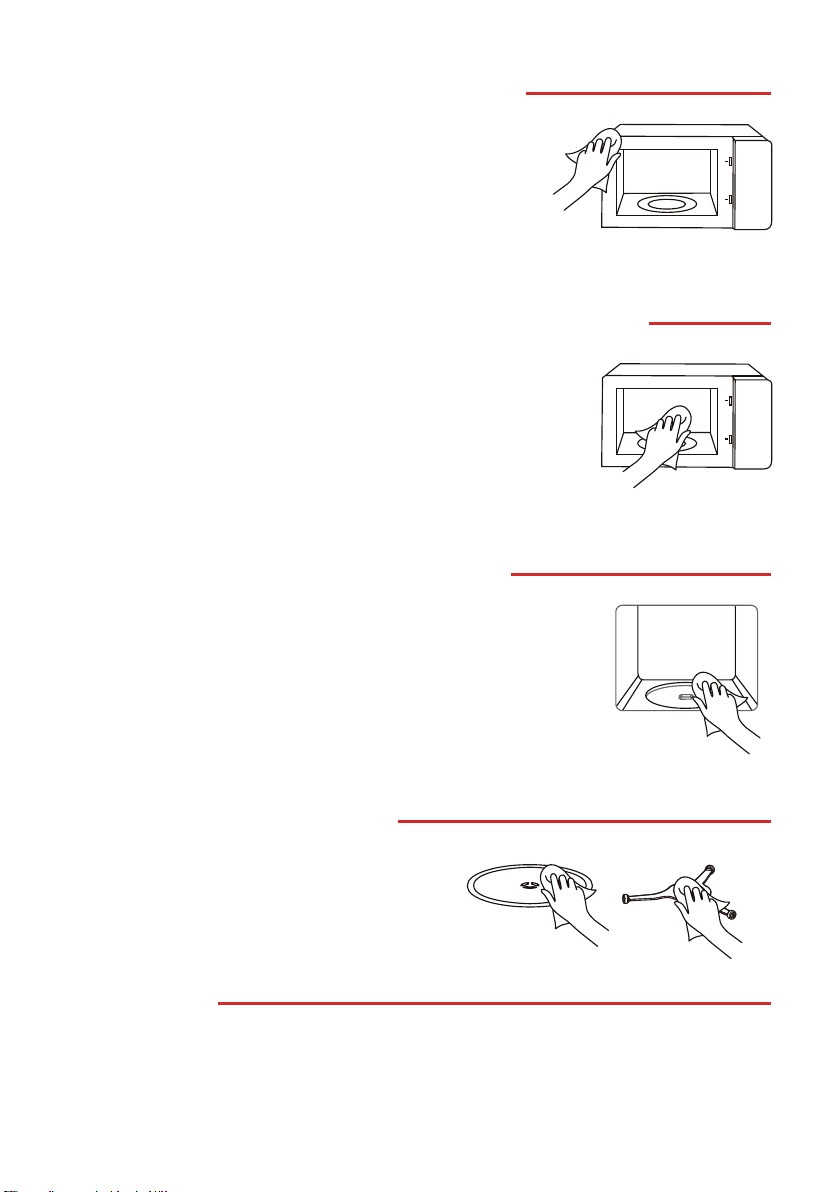
清潔
確保斷開本電器的電源。
1. 使用後,用微濕的布清潔氣炸焗爐腔體。
2. 按常規方法用肥皂水清洗配件。
3. 門框、密封條和相鄰部件髒污時,必須用濕布仔細清潔。
4. 切勿使用粗糙的擦洗劑或鋒利的金屬刮刀來清潔氣炸焗爐門
玻璃,因為它們會刮傷表面,從而可能導致玻璃破碎。
5. 清潔提示——為了方便清潔熟食可能接觸到的爐腔壁:將半
個檸檬放入碗中,加入 300 ml(1/2 品脫)水,並在 100%
微波功率下加熱 10 分鐘。用柔軟的乾布將氣炸焗爐擦拭乾
淨。
CN-14
器皿
小心
人身傷害危險:
除合格人員外,任何人進行維修操作(例如拆除防
止微波暴露的蓋子)時都是危險的。參見
「可用
於
微波爐的材料」或「不可用於微波爐的材料」。
在氣炸焗爐中使用某些非金屬器具可能也是不安全
的。如有疑問,您可以按照以下程序對相關器皿進
行測試。
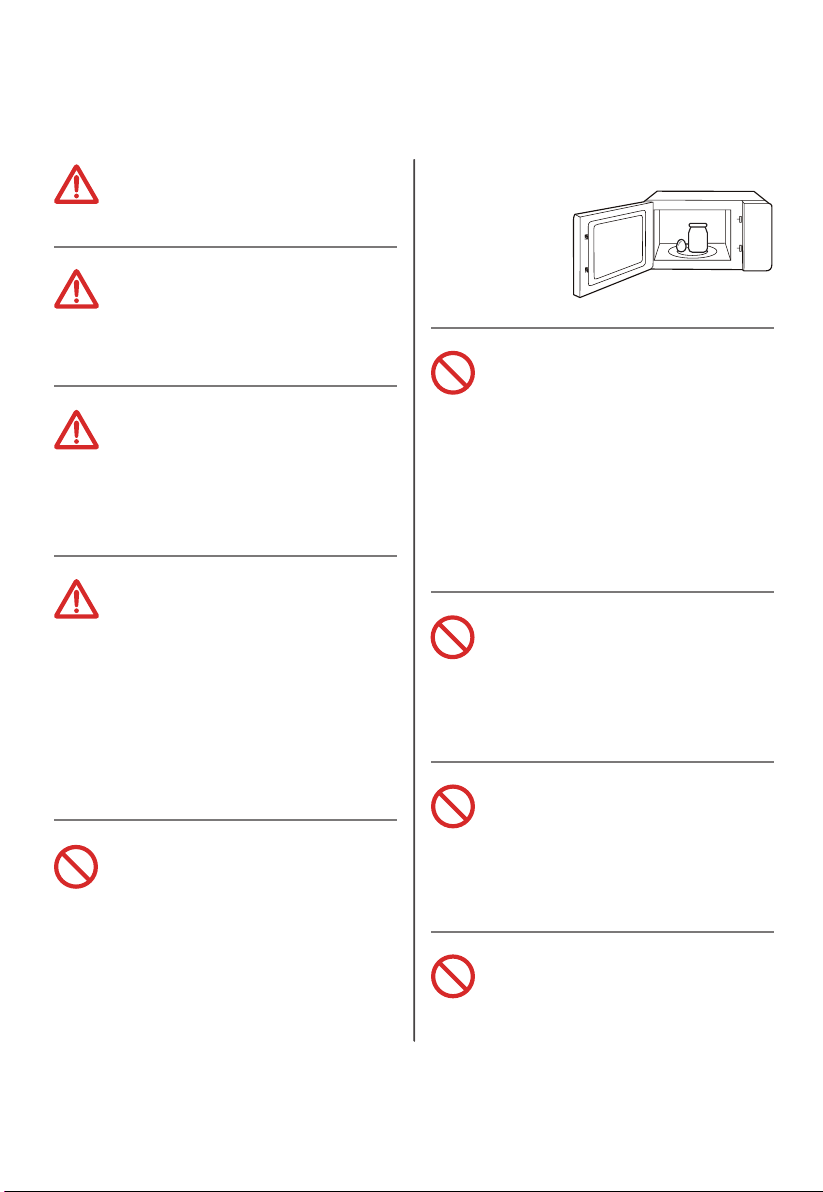
器皿測試:
1. 向一個微波安全容器中加入 1 杯冷水
(250 ml),將該容器和待測試器皿
一起放入氣炸焗爐。
2. 在最大功率下烹飪 1 分鐘。
3. 仔細感受該器皿。如果該空器皿是溫熱
的,請勿將其用於微波烹飪。
4. 烹飪時間不得超過 1 分鐘。
注意
保持烤箱內膽和波導罩清潔。
CN-15
器皿
備註
烤盤
遵循製造商的說明。
烤盤的底部必須至少高於轉盤 3/16 英寸(5 mm)。
使用不當可能導致轉盤破裂。
餐具
僅限微波安全材料。遵循製造商的說明。切勿使用有
裂紋或缺口的盤子。
玻璃罐
務必取下蓋子。只能將食物加熱至剛剛變溫熱的程度。
大多數玻璃罐不耐熱,可能會破裂。
玻璃器皿
僅限氣炸焗爐耐熱玻璃器皿。確保沒有金屬飾件。切
勿使用有裂紋或缺口的盤子。
氣炸焗爐烹飪袋
遵循製造商的說明。切勿使用金屬紮帶封口。
留出縫隙使蒸汽逸出。
紙盤和紙杯
僅用於短時間烹飪 / 加熱。烹飪時,請勿讓氣炸焗爐無
人看管。
紙巾
用來覆蓋食物,以重新加熱和吸收脂肪。僅在監督下
用於短時間烹飪。
羊皮紙
用作蓋子防止飛濺,或用作包裝防止蒸汽冒出。
可用於微波爐的物料
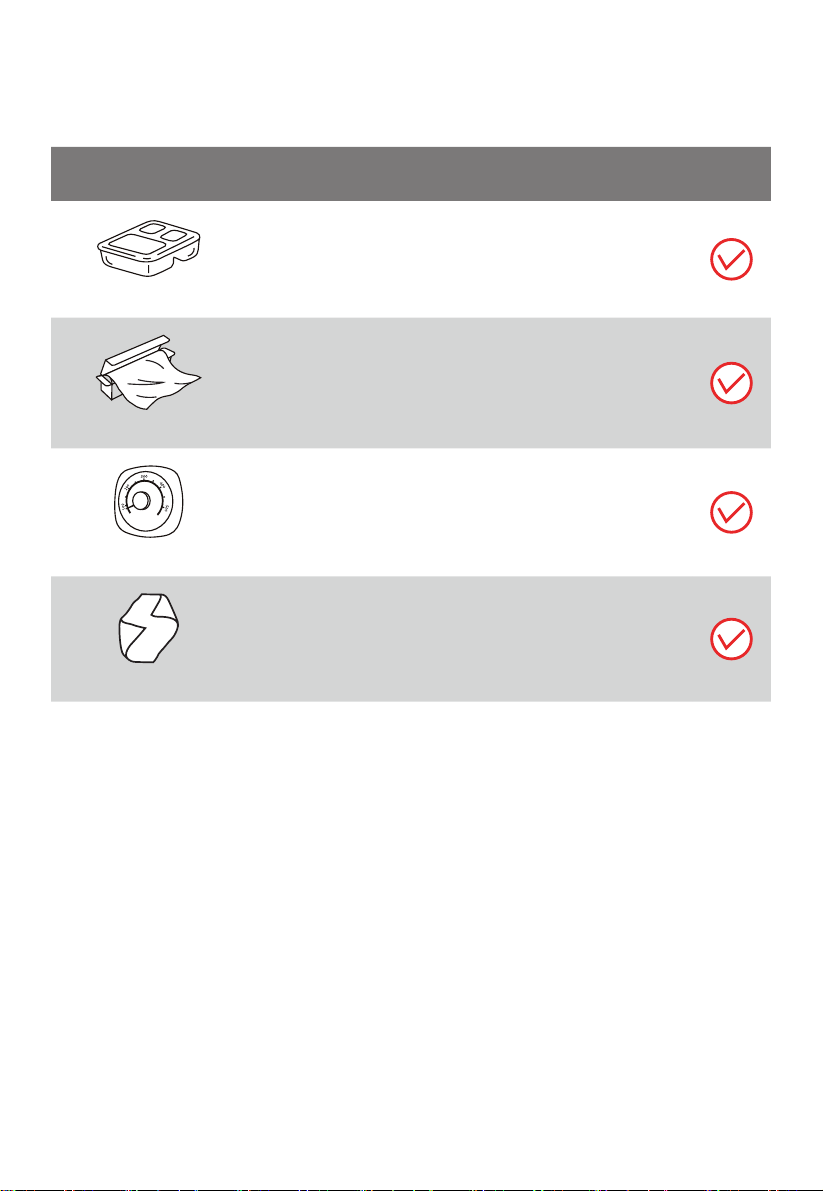
CN-16
可用於微波爐的物料
器皿
備註
塑料
僅限微波安全材料。遵循製造商的說明。應貼上「微
波安全」的標籤。一些塑料容器會隨著內置食物變熱
而軟化。應按照包裝上的說明,對「可煮袋」和密封
塑料袋進行開口、穿孔或通風處理。
保鮮膜
僅限微波安全材料。烹飪時用來覆蓋食物以保持水分。
切勿將保鮮膜接觸食物。
溫度計
僅限微波安全材料(肉類和糖果溫度計)。
蠟紙
用作蓋子防止飛濺並保持水分。
CN-17
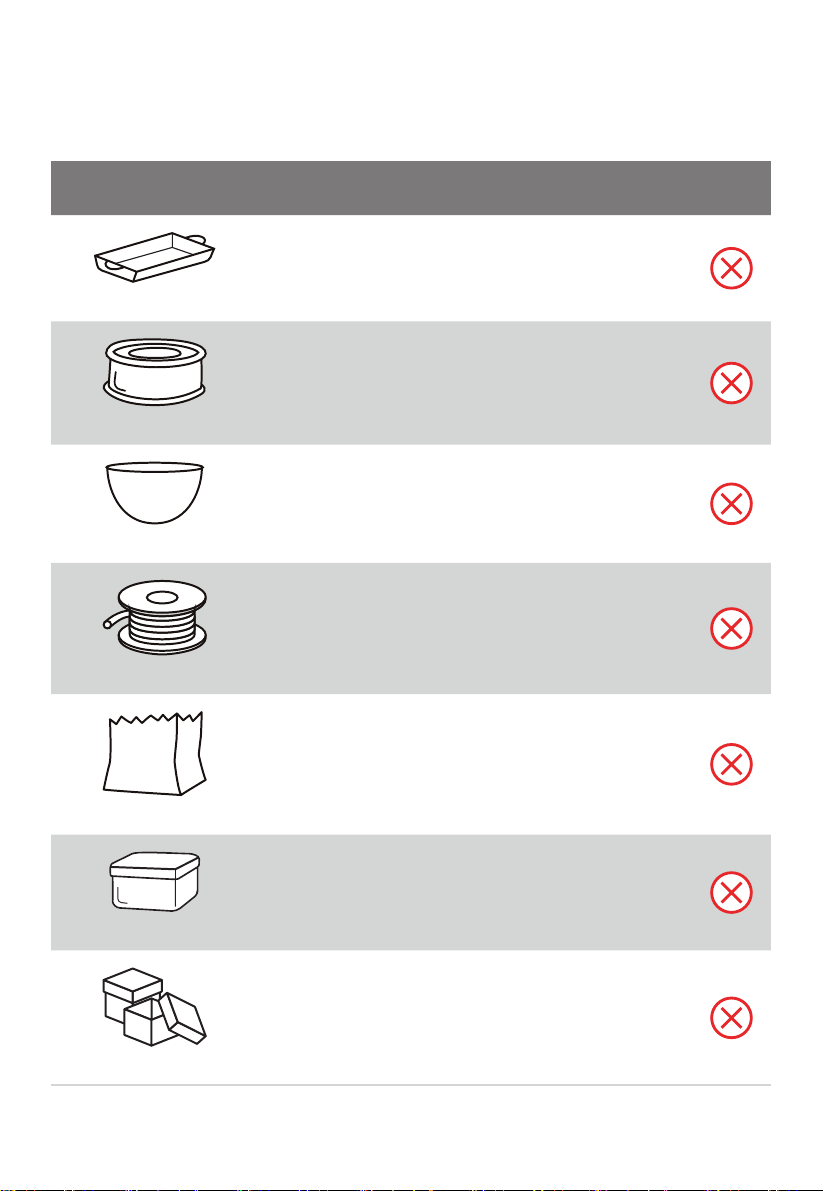
不可用於微波爐的物料
器皿
備註
鋁托盤
可能導致電弧放電。將食物轉移到可以微波安全使
用的盤子中。
帶金屬手柄的食物紙箱
可能導致電弧放電。將食物轉移到可以微波安全使
用的盤子中。
金屬或金屬裝飾器皿
金屬會妨礙食物受微波能作用。
金屬飾件可能導致電弧放電。
金屬紮帶
可能導致電弧放電,並可能導致氣炸焗爐起火。
紙袋
可能會導致氣炸焗爐起火。
塑料泡沫
塑料泡沫在遇到高溫時可能會熔化或污染內部液體。
木製品
木製品在微波爐中使用時會變乾,並可能開裂。
CN-18
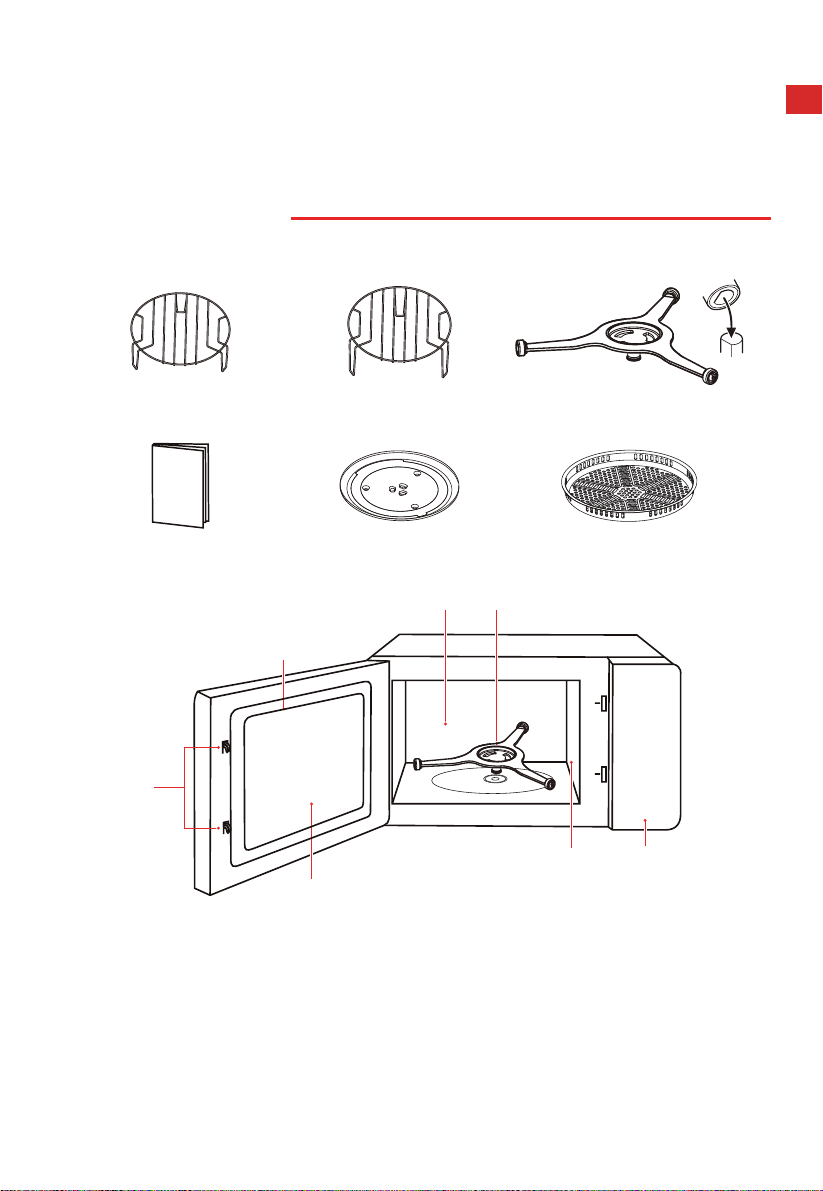
產品設置
氣炸焗爐安裝
(若產品實物與手冊中的圖片有差異,請以實物為準。)
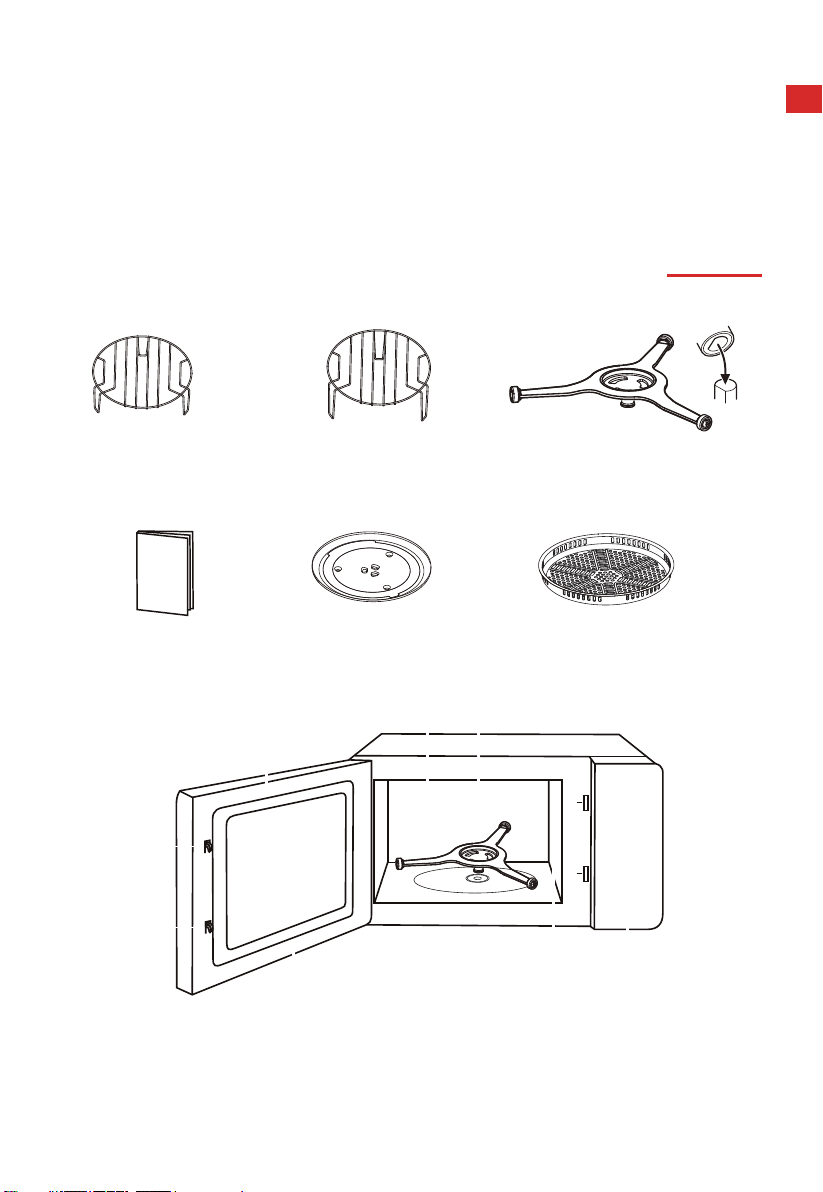
微波爐零件和配件名稱
從紙箱和氣炸焗爐腔體中取出氣炸焗爐和所有材料。
烤架(不能用於微波功能,
必須放置在玻璃托盤上)
烤架(不能用於微波功能,
必須放置在玻璃托盤上)
轉盤環組件
說明書 玻璃托盤
烤盤(不可用於微波功能,
可放置在烤架上)
D
E
C
A
BF
G
A)控制面板
B)轉盤環組件
C)觀察窗
D)門組件
E)安全聯鎖系統
F)氣炸焗爐腔體
G)波導罩
CN-19
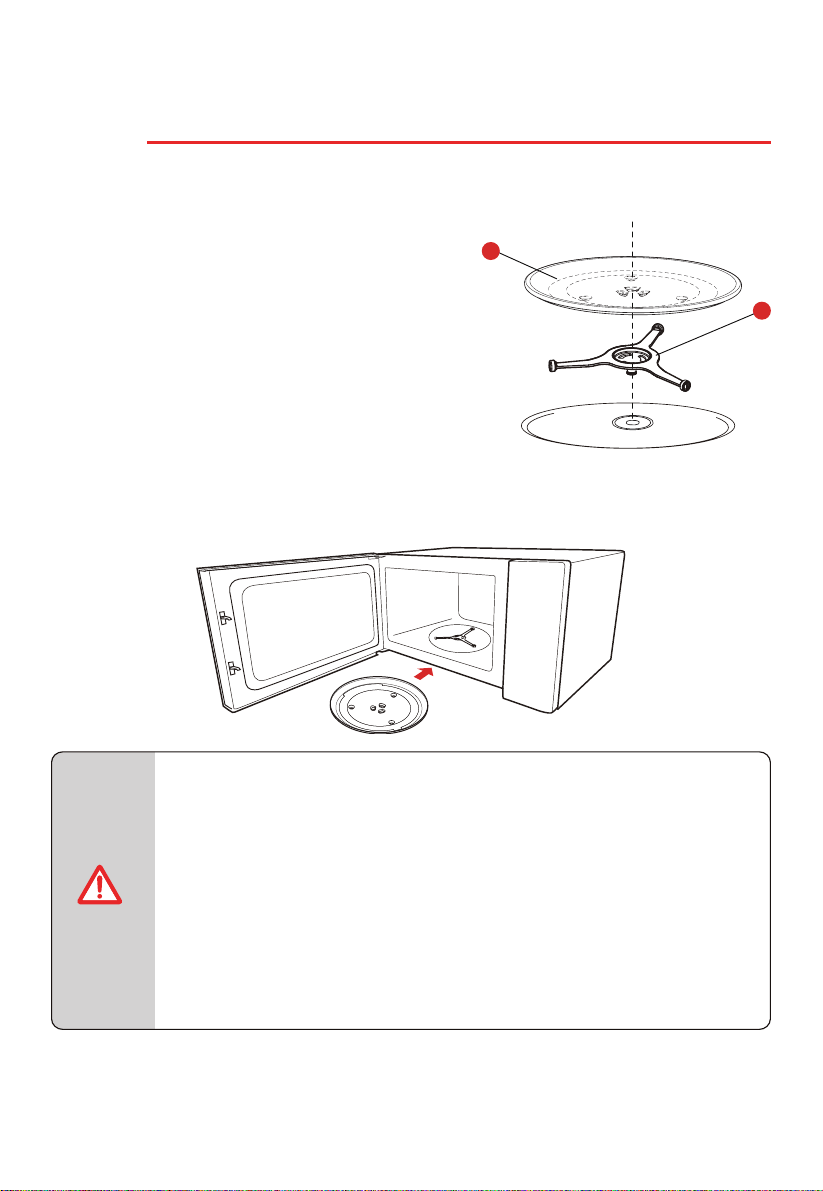
氣炸焗爐安裝
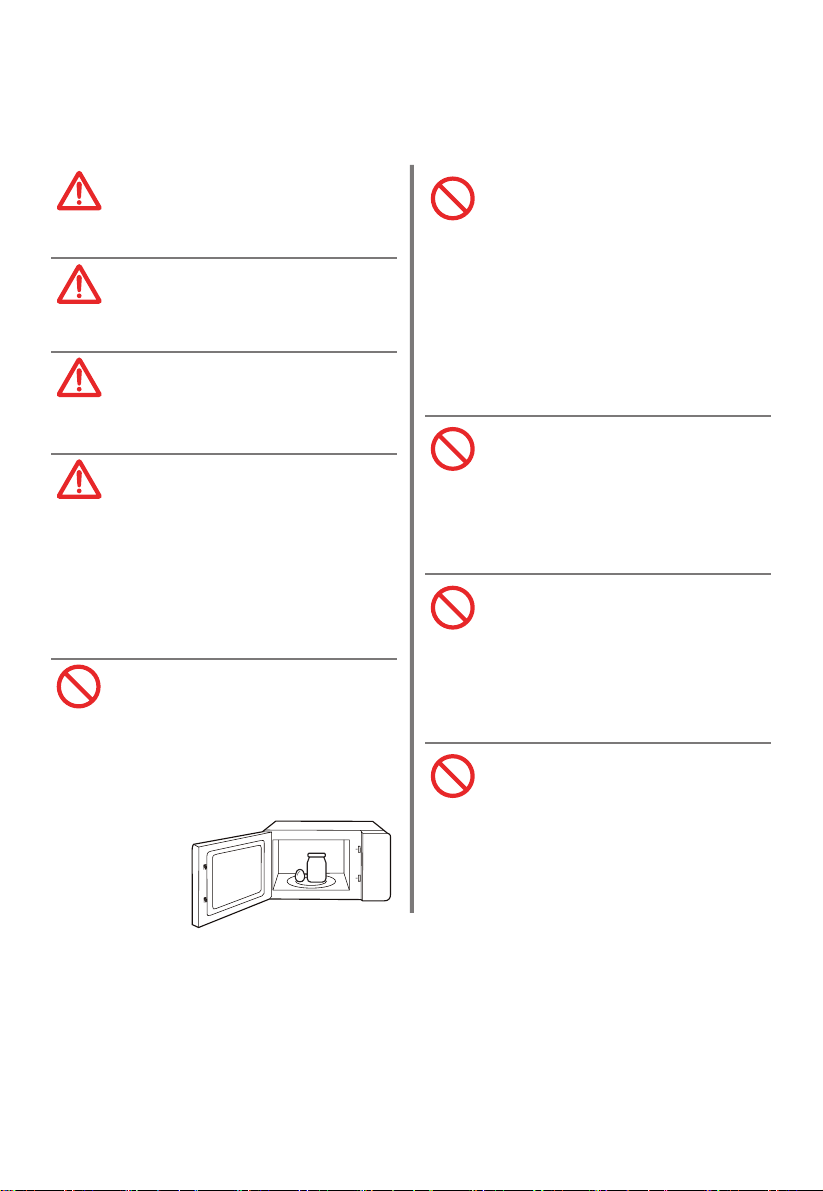
安裝轉盤
清潔烹飪腔,並將轉盤放置到位。
首次安裝時,確保轉盤軸上的所有包裝和運輸用膠帶已清理乾淨。
首次使用本電器製備食物前,需要將轉盤放置
在正確位置。必須清潔烹飪腔和附件。可以參
考清潔部分。
按如下步驟操作,將轉盤放置就位:
1. 將轉盤環組件 ② 放入烹飪腔的凹槽中。
2. 將玻璃托盤 ① 放在轉盤環組件 ②上。
注意
● 切勿在沒有轉盤的情況下使用本電器。確保各部件囓合到位。轉
盤可順時針或逆時針轉動。
● 切勿倒置玻璃托盤。切勿限制玻璃托盤的轉動。
● 烹飪期間必須始終使用玻璃托盤和轉盤環組件。
● 烹飪時,所有食物和食物容器要始終放在玻璃托盤上。
● 切勿限制轉盤的轉動。
● 如果玻璃托盤或轉盤環組件出現裂紋或破裂,請聯繫您最近的授
權維修中心。
2
1
1)玻璃托盤
2)轉盤環組件
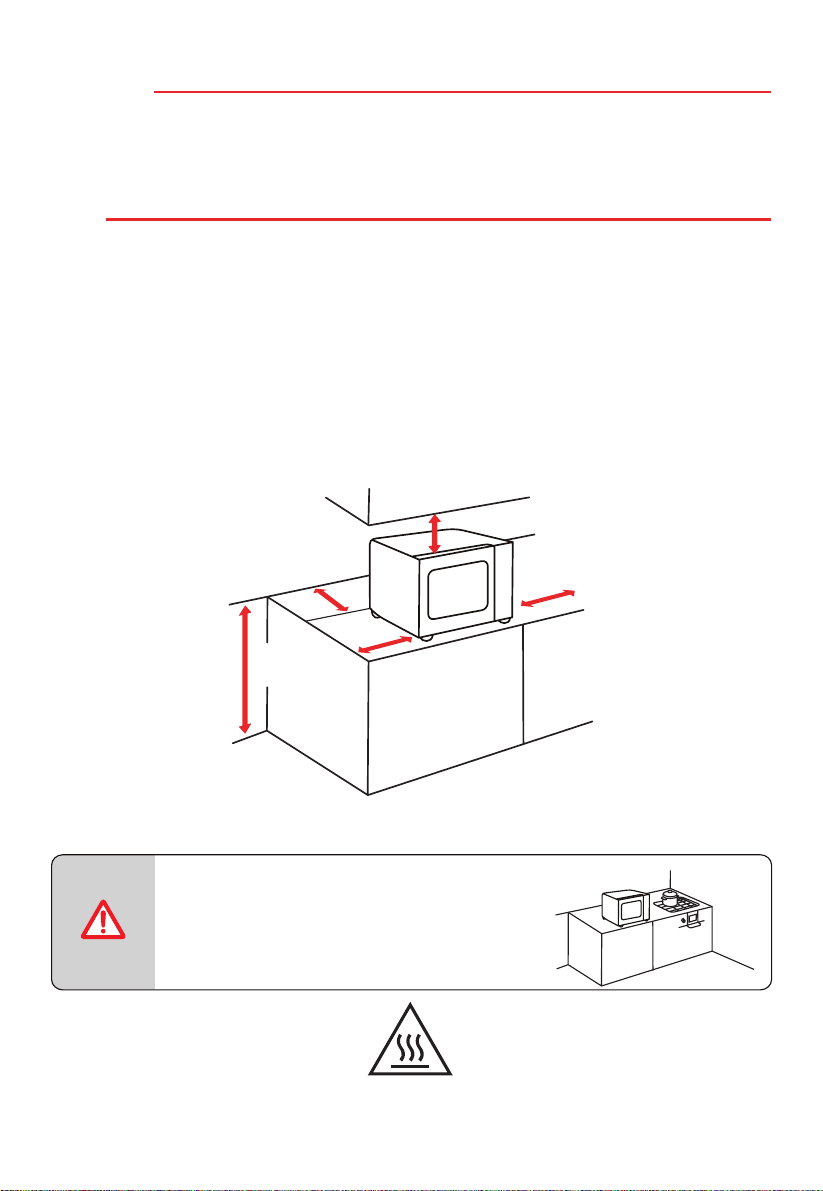
安裝台面
拆除所有包裝材料和配件。檢查氣炸焗爐是否存在凹陷或門破裂等損壞情況。如果氣炸焗爐損
壞,請勿安裝。
機櫃:去除微波爐機櫃表面的所有保護膜。請勿取下黏在氣炸焗爐腔體上保護磁控管的波導
蓋。
安裝
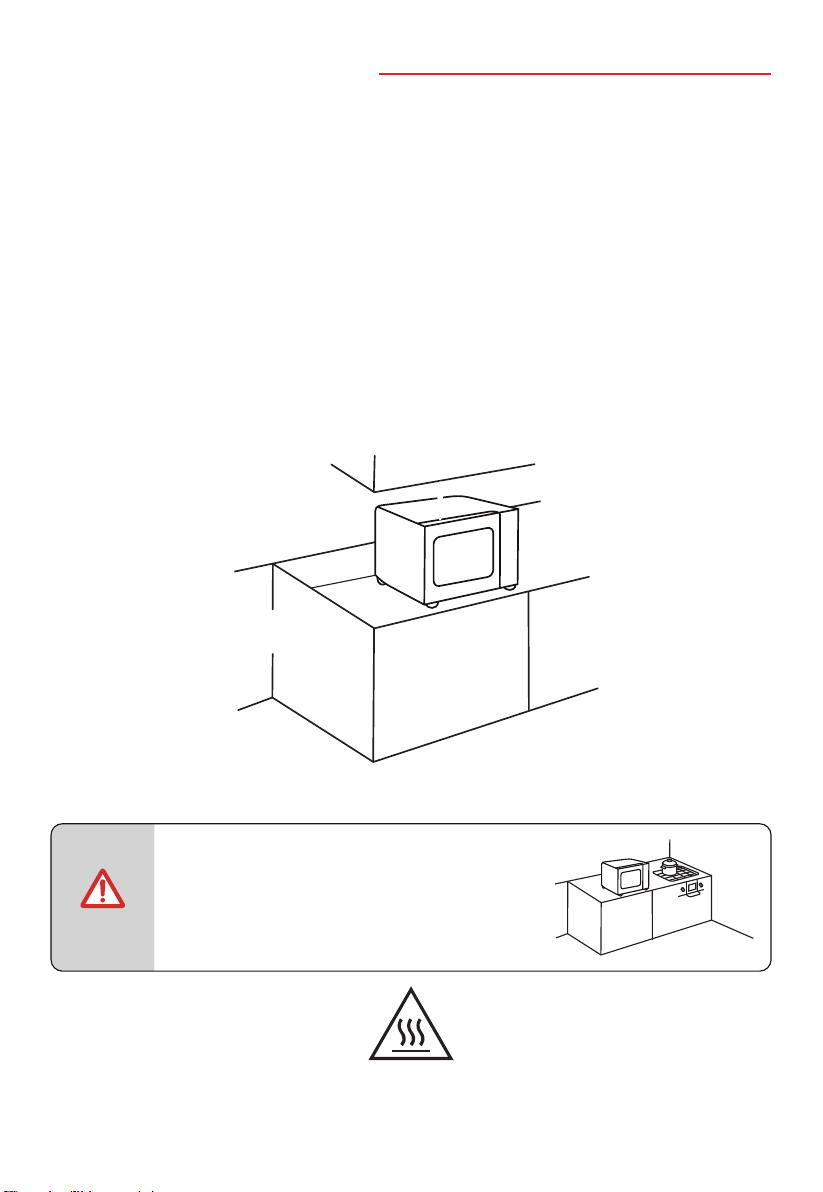
1. 選擇一個水平面,為進氣口和 / 或排氣口留出足夠的開放空間。
a. 最小安裝高度為 85 cm。
b. 設備的背面應靠牆放置。氣炸焗爐上方至少留出 30 cm 間隙。氣炸焗爐與臨近牆
面之間的距離不得少於 20 cm。
c. 請勿取下氣炸焗爐底部的支腳。
d. 堵塞進出氣口會損壞氣炸焗爐。
e. 將氣炸焗爐盡可能遠離收音機和電視。
微波爐運行時可能會干擾收音機或電視接收信號。
0 cm
20 cm
30 cm
20 cm
>
85
cm
2. 將微波爐插頭插入標準家用插座。請確保氣炸焗爐的電壓和頻率與標籤上的額定電壓和頻
率相同。
注意
● 切勿將氣炸焗爐安裝在爐灶或其他發熱電
器上方。
如果安裝在熱源附近或上方,氣炸焗爐易
損壞,此類情況不在保修範圍內。
氣炸焗爐運行時,
可接觸表面可能很燙
CN-20
CN-21
使用說明
首次使用前
首次使用氣炸焗爐時,可能會出現異味,屬於正常現象。
本節介紹了首次使用微波爐製備食物前需要完成的事項。使用前,請先閱讀「產品安全」一節。
使用新電器前,需要把轉盤放置在正確位置。
必須清潔烹飪腔和附件。
● 切勿在沒有轉盤的情況下使用本電器。
● 確保各部件囓合到位。轉盤可順時針或逆時針轉動。
注意
CN-22
操作
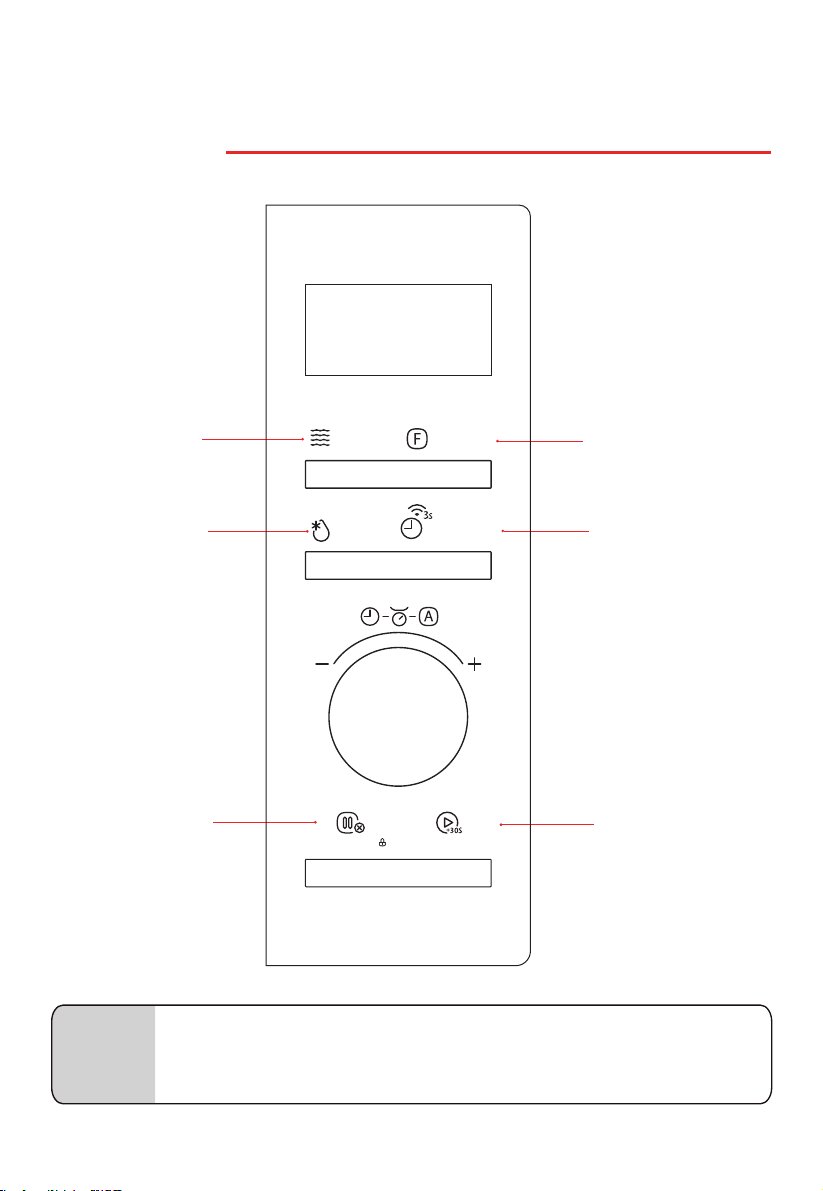
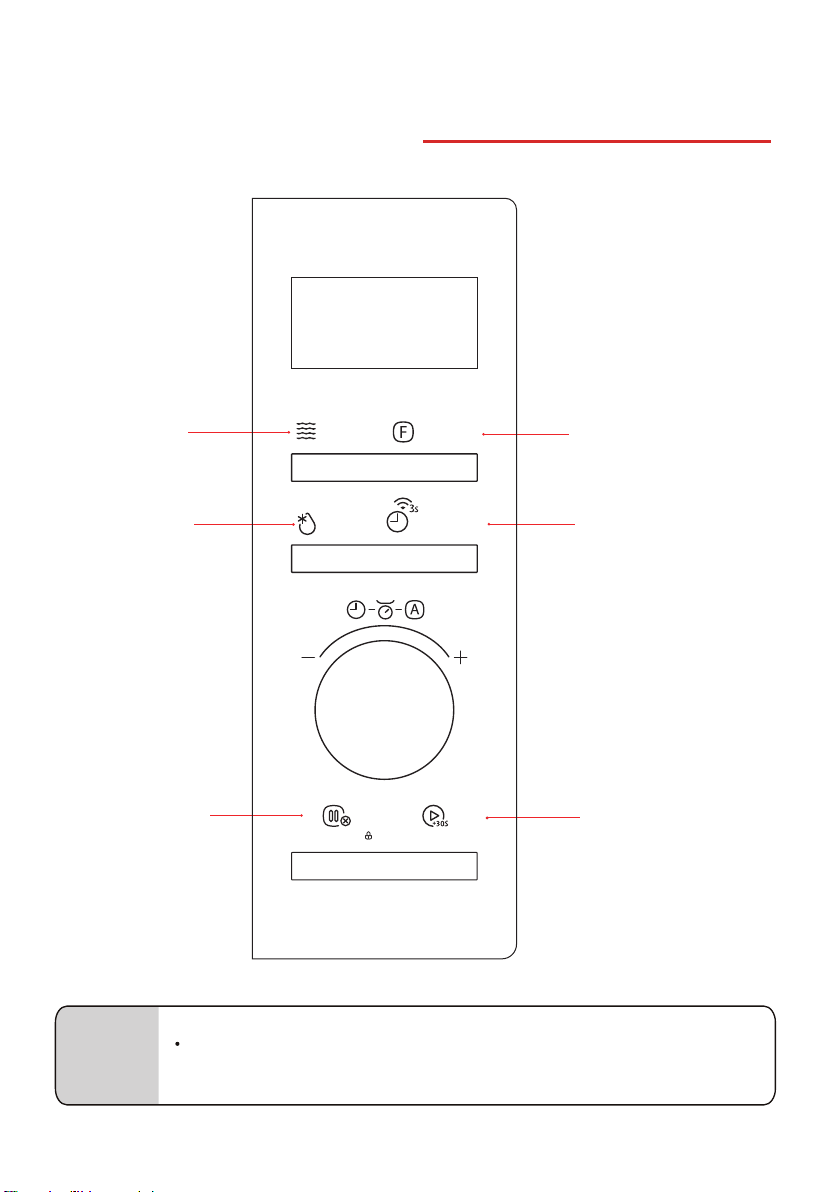
控制面板和功能
微波
重量 / 定時解凍
功能
開始 /+30 秒
廚房計時器 / 時鐘 /
無線網絡
(也可透過應用程式控制氣炸焗爐)
注意
● 應用程式控制:首先下載 TSmartLife,然後透過 TSmartLife 應用程式連接指
南將應用程式與氣炸焗爐連接。
微波
Microwave
解凍
Defrost
開始/+30秒
Start/+30Sec.
暫停/取消/童鎖
燒烤/熱風/混合
Grill/Conv./Combi
自動功能
Auto Menu
按時微波
Time Microwave
Stop/Cancel/Child Lock
暫停/取消/童鎖
計時器/時鐘/連接
Timer/Clock/Connect
CN-23
1. 功率等級
微波功率
+(火力)
電源 顯示
100% P100
80% P80
50% P50
30% P30
10% P10
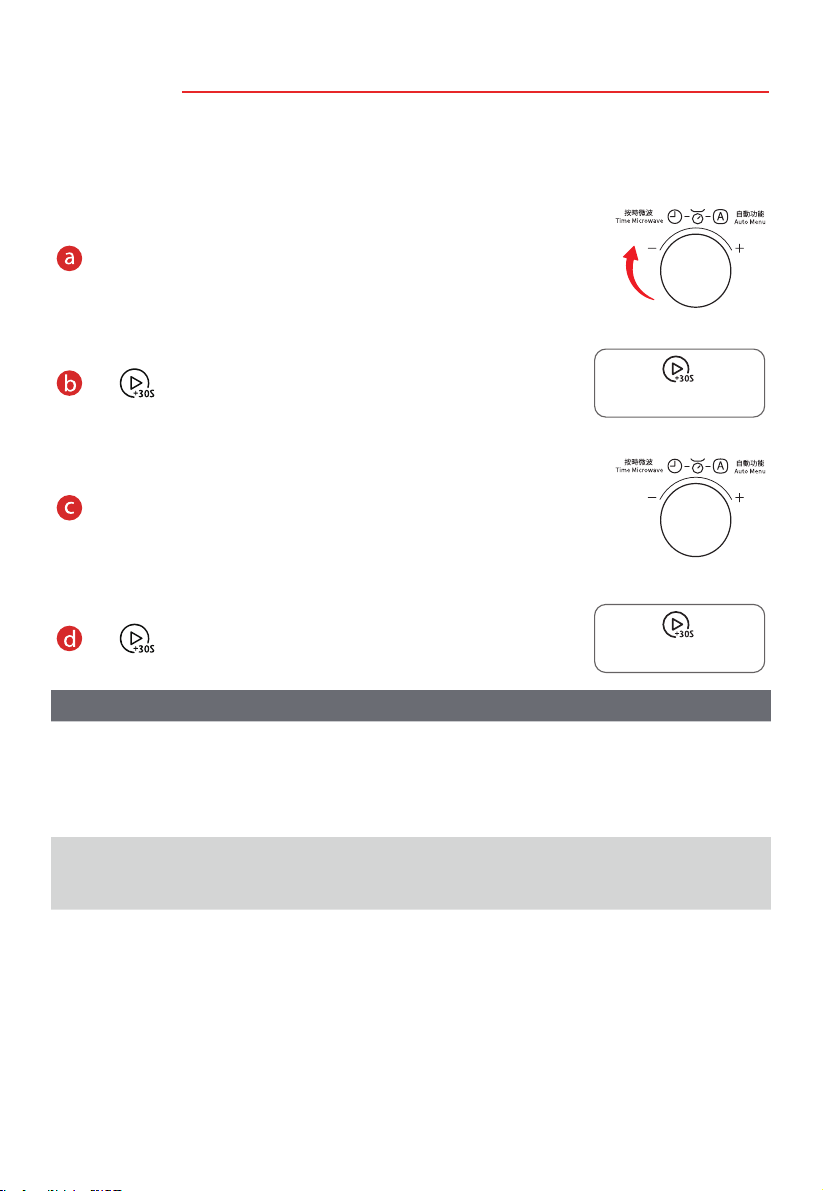
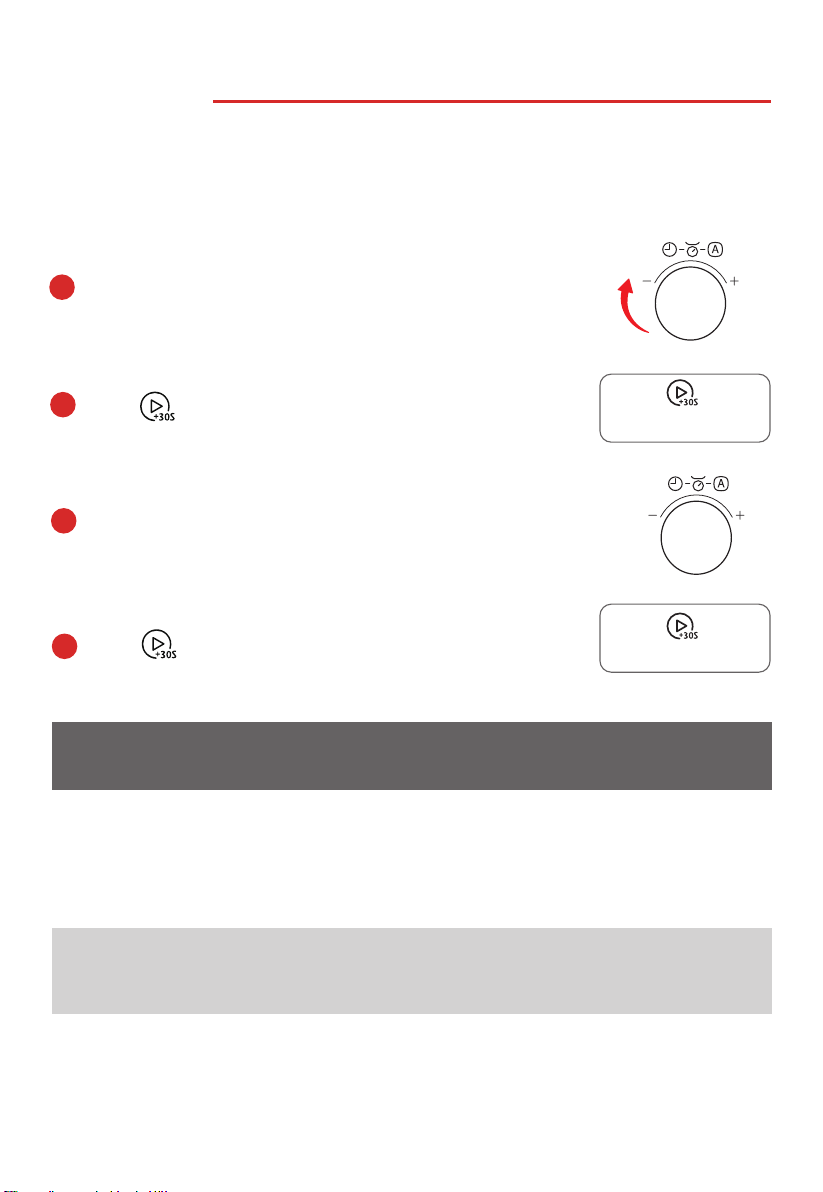
2. 時鐘設置
微波爐接入電源插座後,顯示「0:00」。
按 兩次
旋轉旋鈕設置小時數,設置範圍 0-23。
按 鍵確認。
旋轉旋鈕設置分鐘數,設置範圍 0-59。
按 鍵確認。
● 氣炸焗爐
● 設置時鐘時,若 5 分鐘內無任何操作或直接按 鍵,顯示屏將
自動返回上一次的時鐘設置。
注意
開始/+30秒
Start/+30Sec.
開始/+30秒
Start/+30Sec.
高
中高
中
中低
低
通電後,如果未設置時鐘,則氣炸焗爐無法啟動。
計時器/時鐘/連接
Timer/Clock/Connect
CN-24
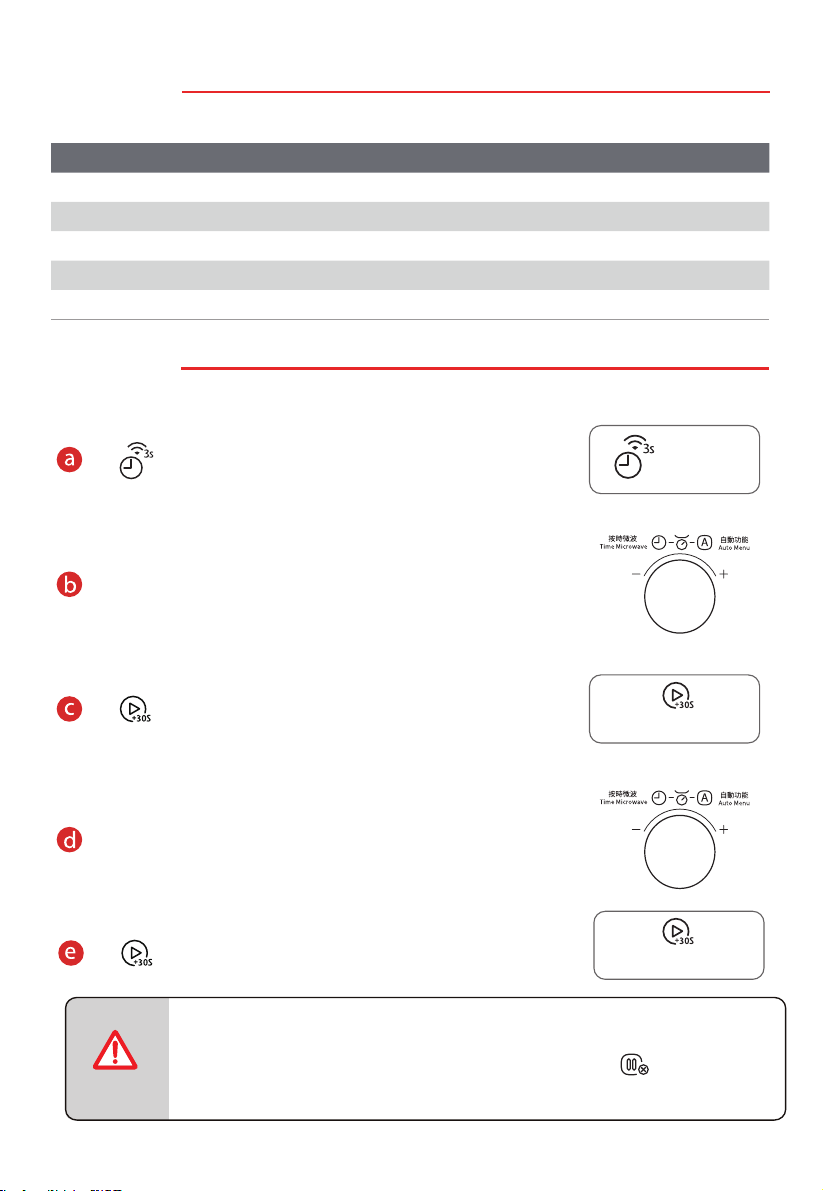
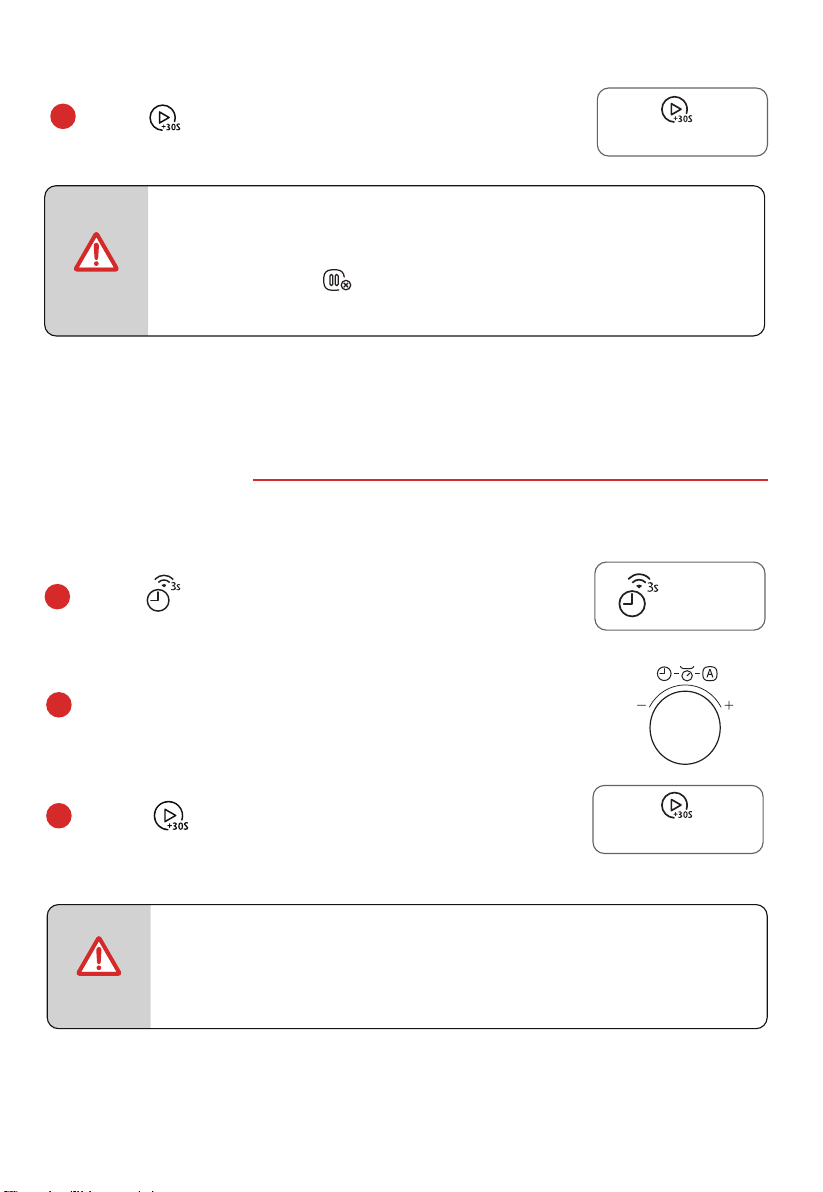
3. 廚房計時器
微波爐接入電源插座後,顯示「0:00」。
按 一次。
旋轉旋鈕設置烹飪時間,最大值為 95:00。
按 開始倒計時。
注意
● 廚房計時器設置與時鐘設置不同。計時器只用於計時。
● 廚房計時器計時期間, 。
不啟動任何負載
開始/+30秒
Start/+30Sec.
計時器/時鐘/連接
Timer/Clock/Connect
CN-25
4. 微波烹飪
使用微波功能時,請勿使用金屬配件。
微波功能有兩種使用方法。
按 數次,選擇功率等級。
或者
按
一次,然後旋轉旋鈕,設置
功率等級。
按一次: P100
按兩次: P80
按三次: P50
按四次: P30
按五次: P10
注意
按 鍵確認功率等級。
旋轉旋鈕設置烹飪時間,最大值為 95 分鐘。
按 鍵開始烹飪。
(
720W)
(900W)
( 450W)
(270W)
(90W)
開始/+30秒
Start/+30Sec.
開始/+30秒
Start/+30Sec.
微波
Microwave
微波
Microwave
CN-26
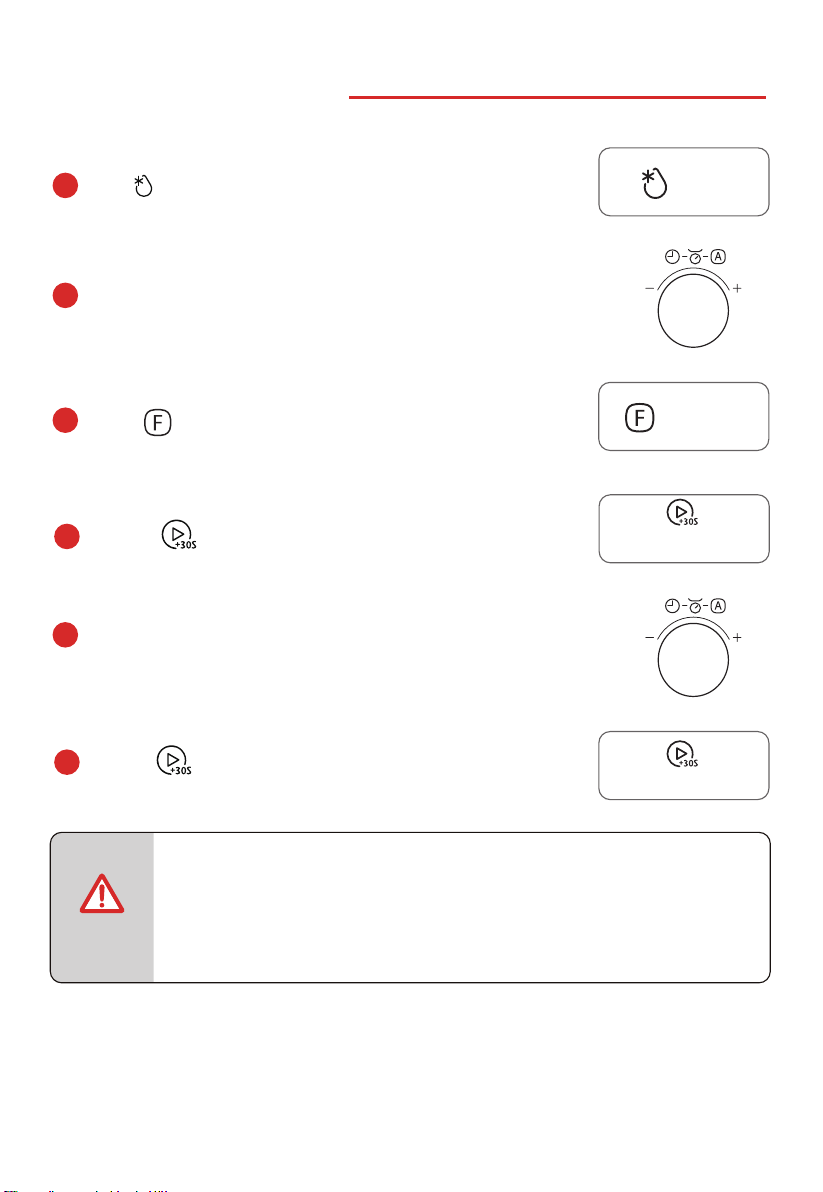
應用程式控制:
點擊 圖標,進入微波加
熱功能設置頁面。
上下滑動,調節微波功率。
點擊該區域,退出烹
飪參數選項卡,返回
設備功能頁面。
上下滑動,選擇小時數和分
鐘數,調節烹飪時間。
注意
● 上下滑動滾動條選擇參數時,速度請勿過快。當數字停止滾動時,
按下「Start(開始)」按鈕。
●
注意
為保安全,無法通過APP遙距啟動設備。
點按「Start」,在設備上點按
「 」啟動烹飪。
CN-27
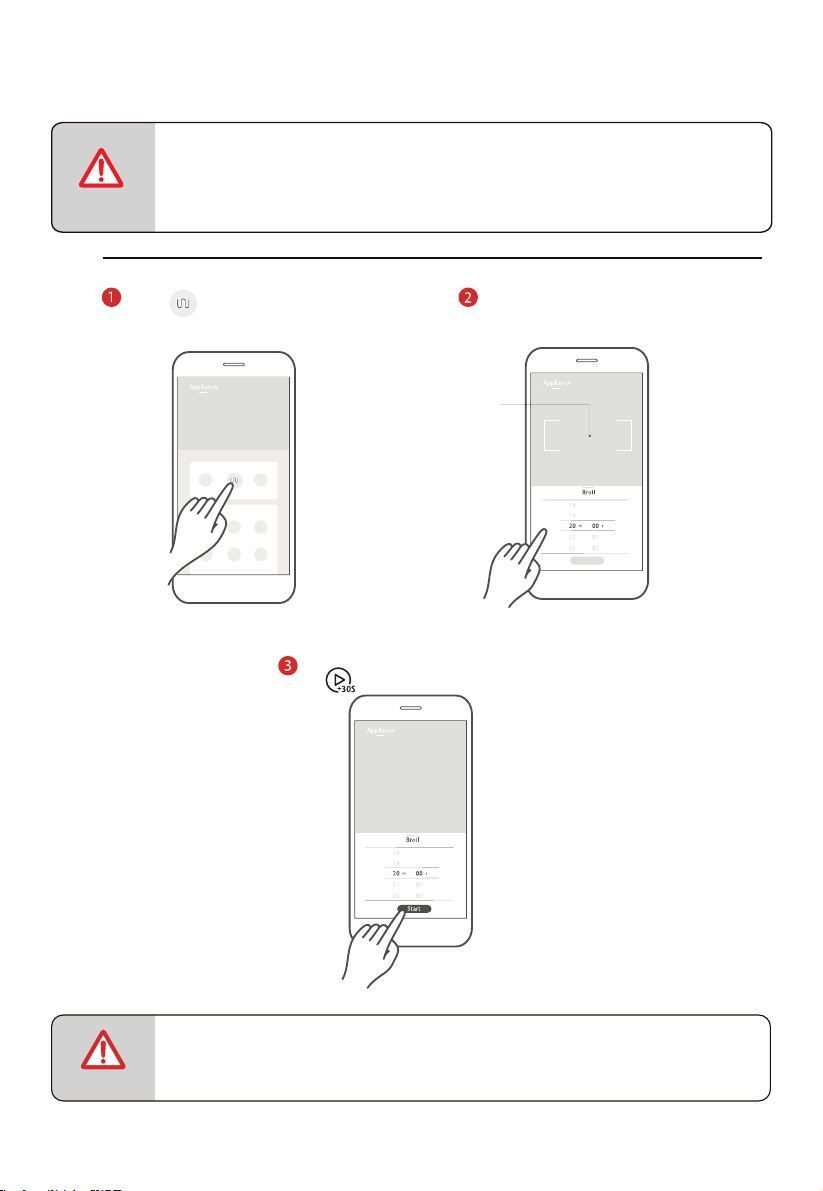
5. 燒烤或混合
除產品自帶的金屬附件外,請勿在混合功能下使用其他金屬附件。
燒烤 / 混合功能有兩種使用方式。
面板控制:
按 數次,選擇模式。
或者
按
一次,然後旋轉旋鈕選擇模式。
依次顯示「G-1、C-1……C-4、
110°C、120 °C……200°C」
(「G-1」為燒烤模式,「C-1~C-4」
為混合模式)。
按一次:G-1
按兩次:C-1
按三次:C-2
按四次:C-3
按五次:C-4
按六次以上:110°C 至 200°C
注意
按 鍵確認模式。
旋轉旋鈕設置烹飪時間,最大值為 95 分鐘。
按 鍵開始烹飪。
注意
● 烹飪時間過半時,蜂鳴器會發出聲音,提醒您給食物翻面。如果沒有操作,
氣炸焗爐將繼續工作。
開始/+30秒
Start/+30Sec.
開始/+30秒
Start/+30Sec.
CN-28
燒烤或混合模式
微波 燒烤 熱風
C-1
C-2
C-3
C-4
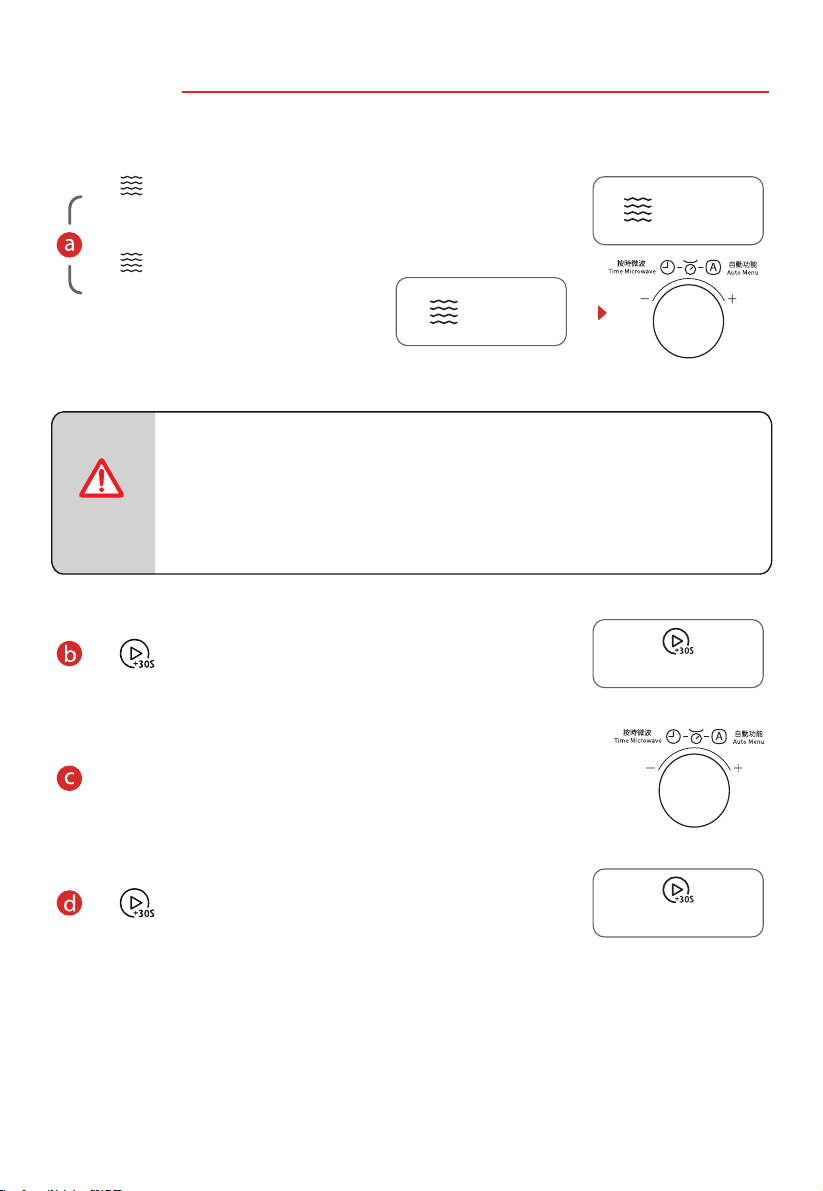
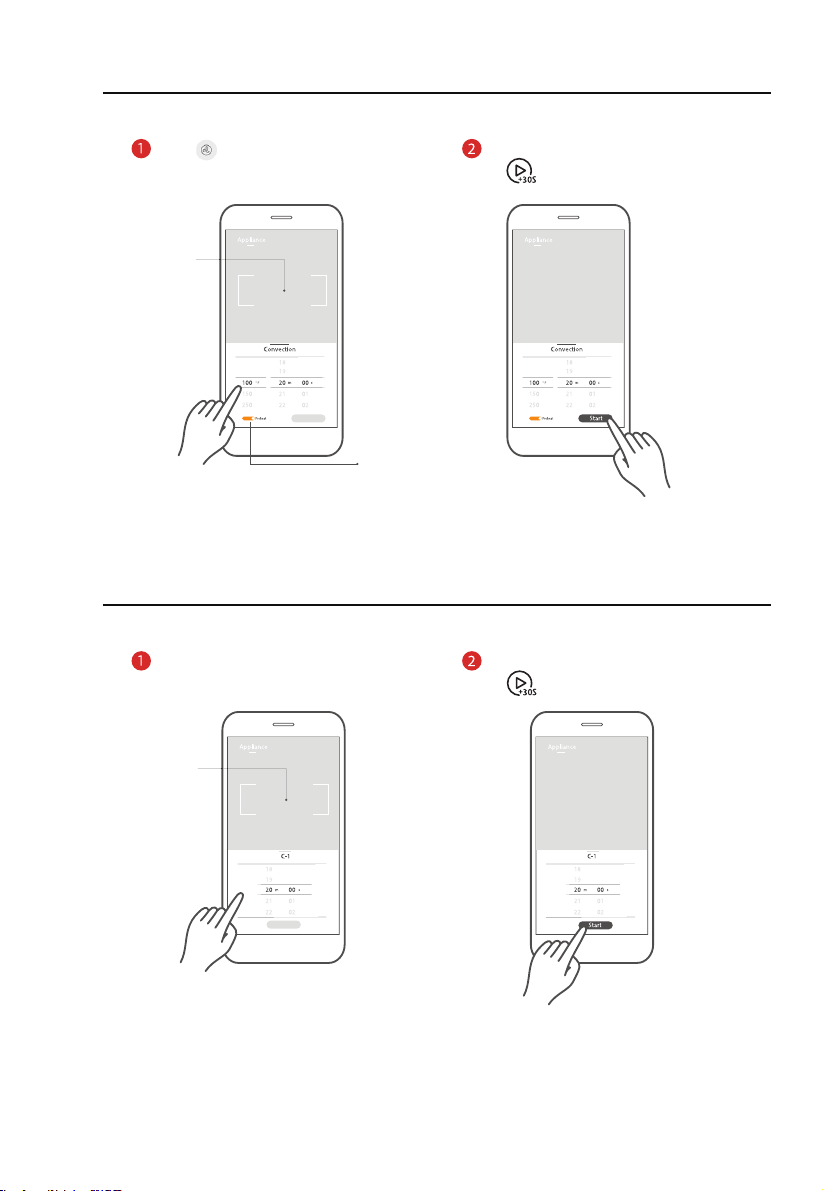
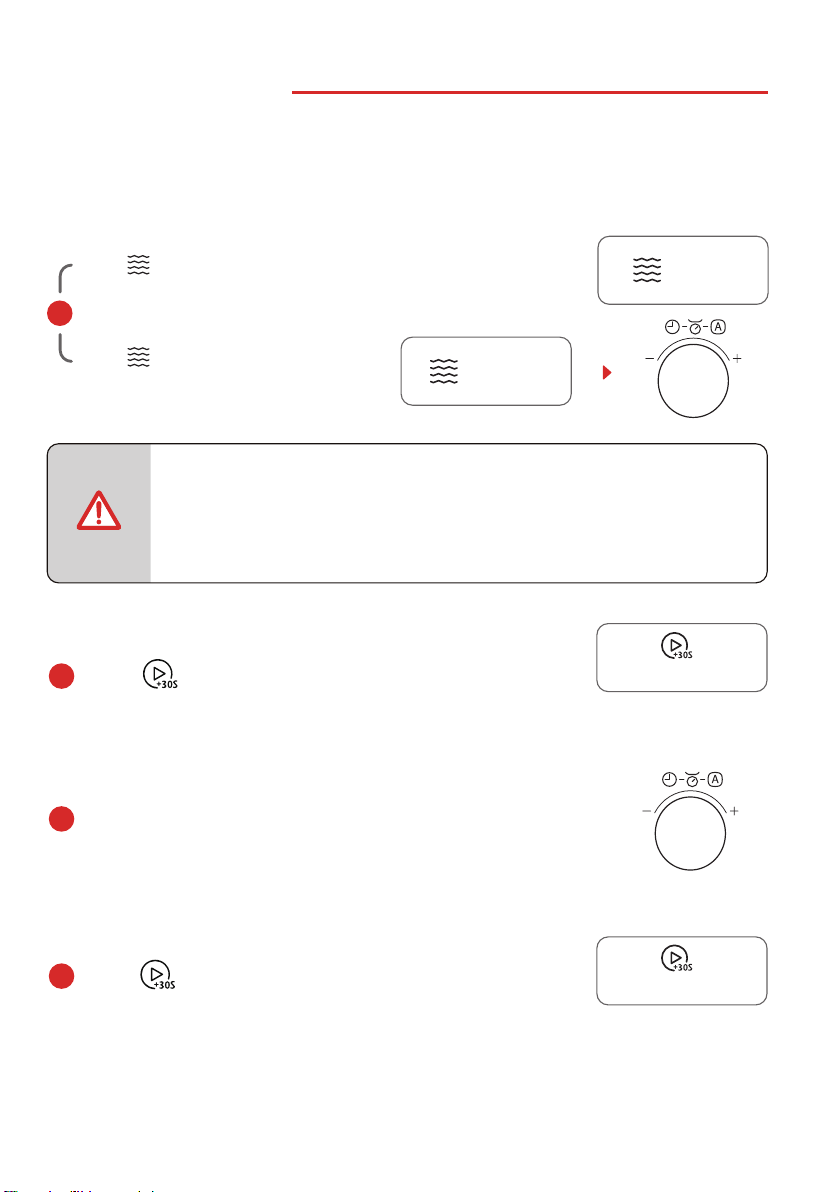
6. 預熱熱風
非微波功能,可以使用烤架、烤盤。
按 兩次開始預熱。
預熱完成後,溫度會閃爍,打開箱門,將食物放入氣炸焗
爐。
旋轉旋鈕設置烹飪時間,最大值為 95 分鐘。
按 鍵開始烹飪。
G-1
按 數次,選擇熱風。
或者
可選溫度範圍:110-200°C
按
一次,然後旋轉旋鈕選擇熱風。
開始/+30秒
Start/+30Sec.
開始/+30秒
Start/+30Sec.
CN-29
7. 無預熱熱風
非微波功能,可以使用烤架、烤盤。
按 數次,選擇熱風溫度。
或者
按 鍵確認溫度。
旋轉旋鈕設置烹飪時間,最大值為 95 分鐘。
按 鍵開始烹飪。
可選溫度範圍:110-200°C
按
一次,然後旋轉旋鈕選擇熱風。
開始/+30秒
Start/+30Sec.
開始/+30秒
Start/+30Sec.
CN-30
應用程式控制:
注意
烤架
點擊 圖標,進入燒烤功
能設置頁面。
上下滑動調節烹飪時間。
點擊該區域,退出烹飪
參數選項卡,返回設備
功能頁面。
注意
● 上下滑動滾動條選擇參數時,速度請勿過快。當數字停止滾動時,按下「Start(開
始)」按鈕。
●
為保安全,無法通過APP遙距啟動設備。
點按「Start」,在設備上點按
「 」啟動烹飪。
CN-31
熱風
點擊 圖標,進入熱風設置頁面,
上下滑動調整參數。
點擊該區域,退出烹飪
參數選項卡,返回設備
功能頁面。
如需預熱,請先打
開設備。
混合
點擊「C-1~C-4」進入模式設置
頁面,上下滑動調整參數。
點擊該區域,退出烹飪
參數選項卡,返回設備
功能頁面。
點按「Start」,在設備上點按
「 」啟動烹飪。
點按「Start」,在設備上點按
「 」啟動烹飪。
CN-32
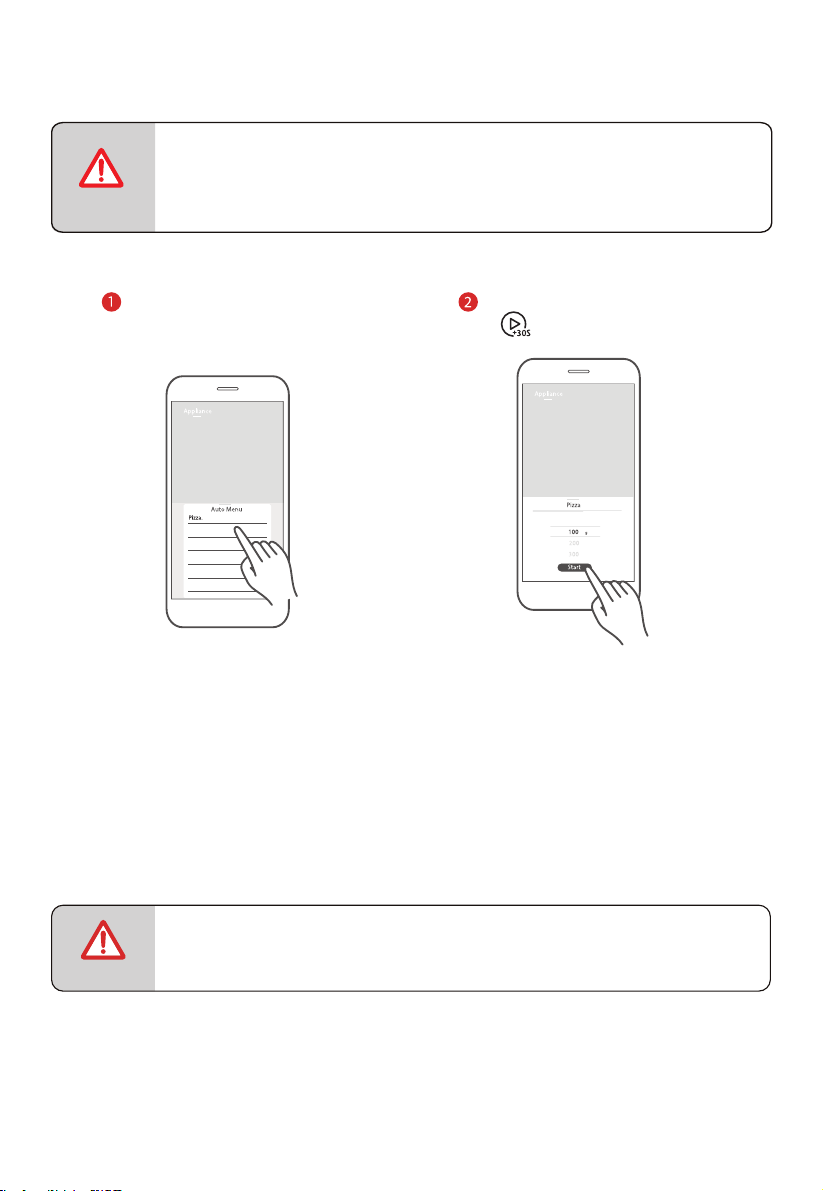
8. 自動選單
選單功能有兩種使用方法。
面板控制:
在待機模式下,向右旋轉旋鈕設置選單。
將依次顯示「A-1」至「A-10」。
按 鍵確認選單。
轉動旋鈕,設定食材重量。
按 鍵開始烹飪。
選單 重量 / 份數 顯示 功率等級 烹飪時間
A-1
自動加熱
150 克
250 克
350 克
450 克
600 克
150g
250g
350g
450g
600g
P100
(微波)
2’00”
3’00”
4’00”
5’00”
6’00”
A-2
薯仔
(生 -> 熟)
1
2
3
1
2
3
P100
(微波)
5’00”
8’30”
12’30”
開始/+30秒
Start/+30Sec.
開始/+30秒
Start/+30Sec.

CN-33
選單 重量 / 份數 顯示 功率等級 烹飪時間
A-3
肉類
(生 -> 熟)
150 克
300 克
450 克
600 克
150g
300g
450g
600g
P80
(微波)
3’00”
4’30”
6’00”
8’00”
A-4
蔬菜
(生 -> 熟)
150 克
350 克
500 克
150g
350g
500g
P100
(微波)
3’00”
5’00”
6’30”
A-5
魚肉
(生 -> 熟)
150 克
250 克
350 克
450 克
650 克
150g
250g
350g
450g
650g
P80
(微波)
3’00”
4’00”
5’30”
6’30”
8’30”
A-6
意大利粉
(生 -> 熟)
50 克(加 450 克冷水)
100 克(加 800 克冷水)
150 克(加 1200 克冷水)
50g
100g
150g
P80
(微波)
18’00”
20’00”
22’00”
A-7
煲湯
200 克
400 克
600 克
200g
400g
600g
P100
(微波)
2’00”
3’50”
5’30”
A-8
蛋糕
(生 -> 熟)
475 克
475g
熱風 150°C
(帶預熱)
55’00”
A-9
意大利薄餅
(冷凍 -> 熟食)
100 克
200 克
300 克
100g
200g
300g
P100(微)+
熱風 200°C
1’30”/4’30”
2’00”/6’00”
2’30”/7’30”
A10
雞肉
(生 -> 熟)
500 克
750 克
1000 克
1200 克
500g
750g
1000g
1200g
P100(微)+
熱風 200°C
5’00”/29’00”
7’00”/32’00”
9’00”/35’00”
11’00”/38’00”
CN-34
應用程式控制:
點擊所需選單圖標,進入選
單設置頁面,然後上下滑動
調整烹飪參數。
注意
● 上下滑動滾動條選擇參數時,速度請勿過快。當數字停止滾動時,
按下「Start(開始)」按鈕。
注意
●
為保安全,無法通過APP遙距啟動設備。
點按「Start」,在設備上點按
「 」啟動烹飪。
CN-35
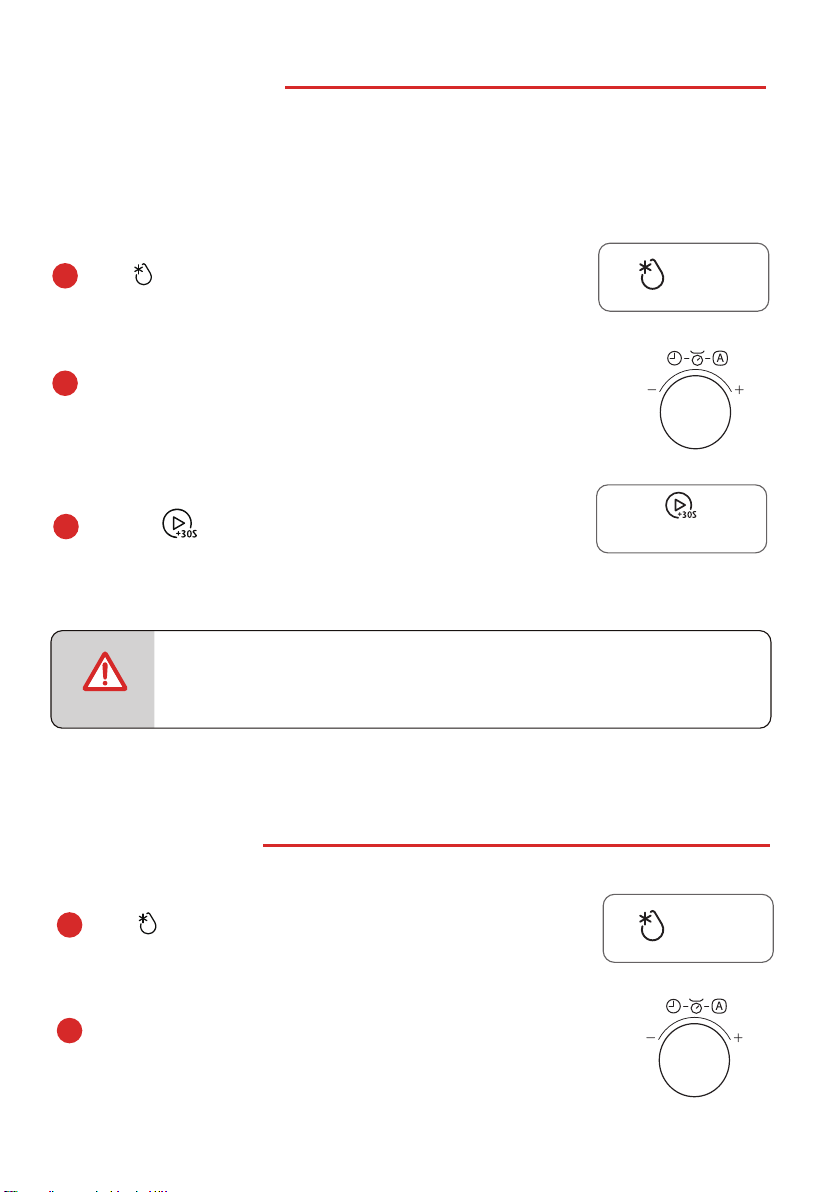
9. 按重量解凍
使用微波功能時,請勿使用金屬配件。
解凍功能有兩種使用方式。
面板控制:
按 一次,顯示「dEF1」。
旋轉旋鈕設置食材重量,應在「100 克 -2000 克」範圍內。
旋轉一次,重量增加 100 克。
按 鍵開始解凍。
注意
● 解凍期間,蜂鳴器會響兩次,提醒給食物翻面。
10. 按時間解凍
使用微波功能時,請勿使用金屬配件。
按 兩次,顯示「dEF2」。
旋轉旋鈕設置解凍時間,應在「0:05~95:00」範圍內。
開始/+30秒
Start/+30Sec.
CN-36
按 鍵開始解凍。
注意
● 時間過半時,蜂鳴器會發出聲音,提醒給食物翻面。
● 預設功率等級為 P30,不可更改。
應用程式控制:
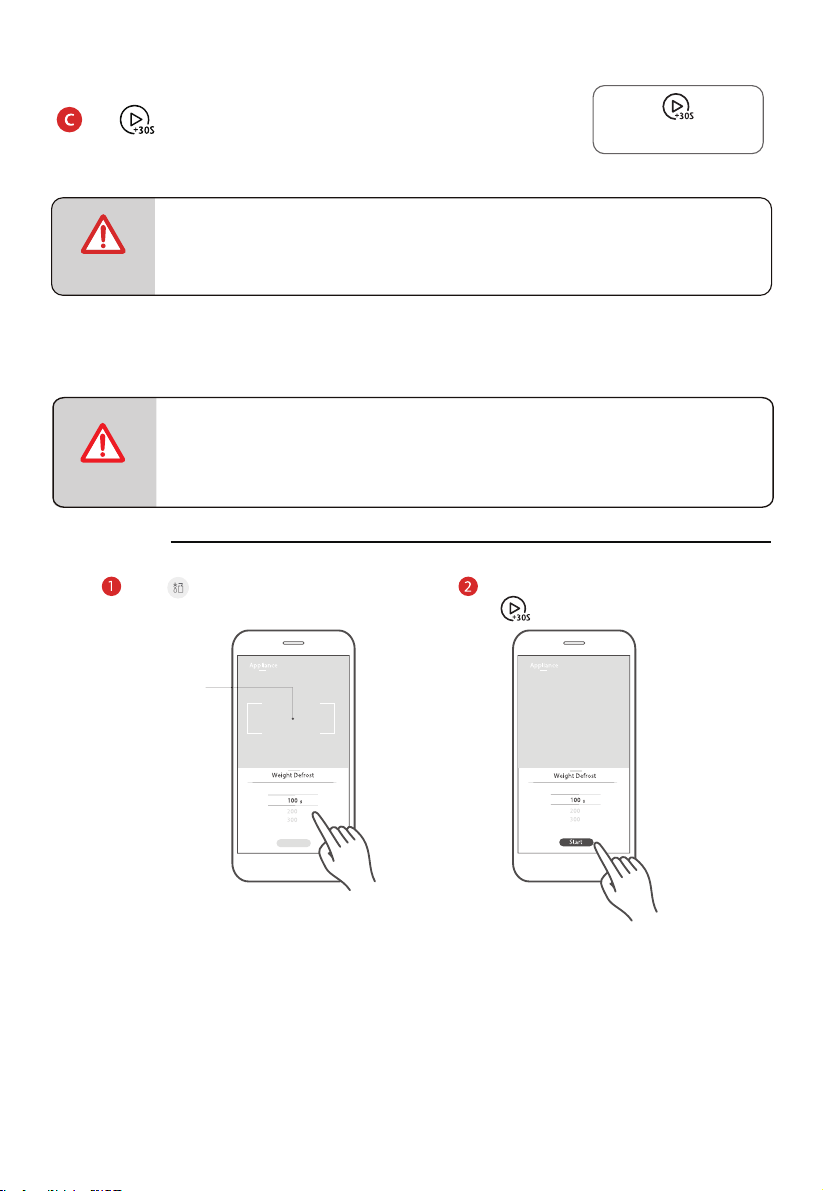
按重量解凍
點擊 圖標,進入按重量解凍功
能設置頁面,上下滑動調整重量。
點擊該區域,退出烹飪
參數選項卡,返回設備
功能頁面。
注意
開始/+30秒
Start/+30Sec.
●
為保安全,無法通過APP遙距啟動設備。
點按「Start」,在設備上點按
「 」啟動烹飪。
CN-37
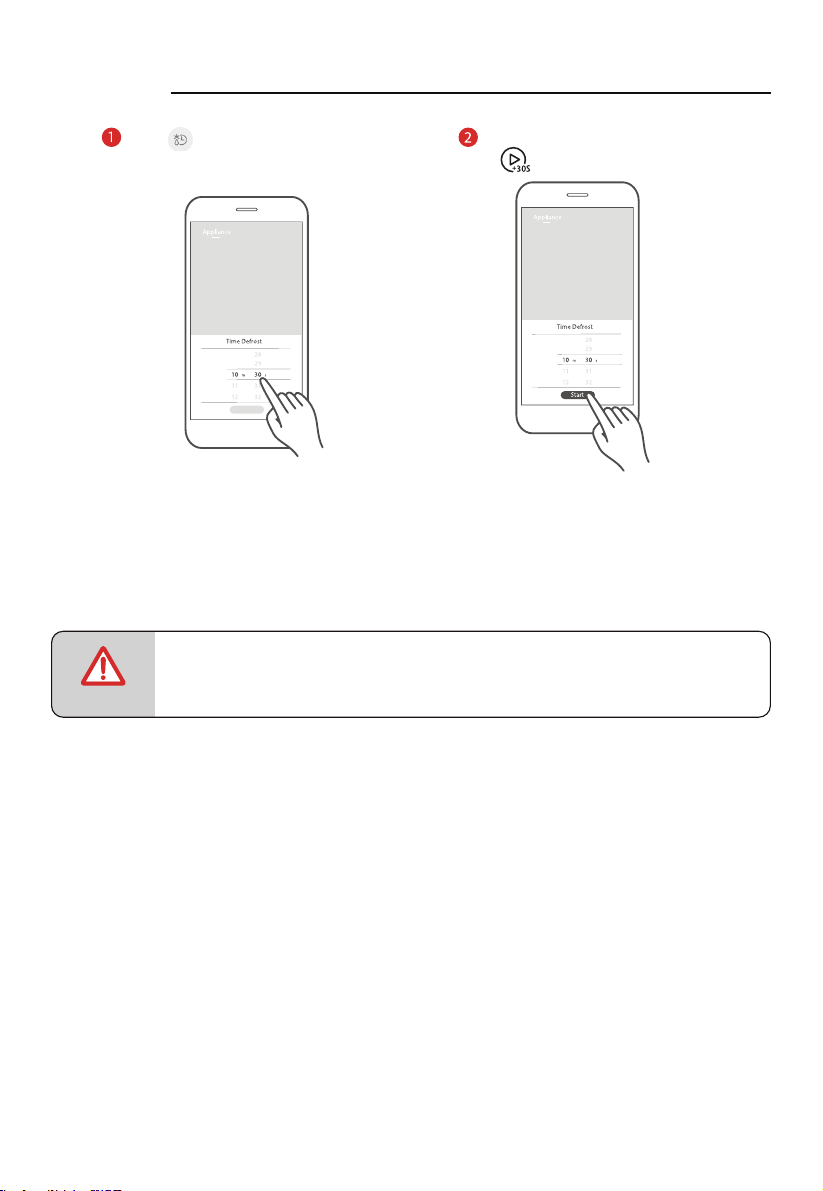
按時間解凍
點擊 圖標,進入 功
能設置頁面,上下滑動可調節時間。
注意
● 上下滑動滾動條選擇參數時,速度請勿過快。當數字停止滾動時,
按下「Start(開始)」按鈕。
按時間解凍
點按「Start」,在設備上點按
「 」啟動烹飪。
CN-38
11. 多級烹飪
使用微波功能時,請勿使用金屬配件。
按 兩次,顯示「dEF2」。
旋轉旋鈕設置解凍時間,最大值為 95:00。
按 鍵選擇烹飪模式。
按 鍵確認。
旋轉旋鈕設置烹飪時間,最大值為 95 分鐘。
按 鍵開始烹飪。
注意
● 多級烹飪可設置兩個烹飪階段。
● 如果已設置解凍功能,第一階段將自動解凍。
● 多級烹飪不能使用廚房計時器、自動選單、快速烹飪和預熱功能。
開始/+30秒
Start/+30Sec.
開始/+30秒
Start/+30Sec.

CN-39
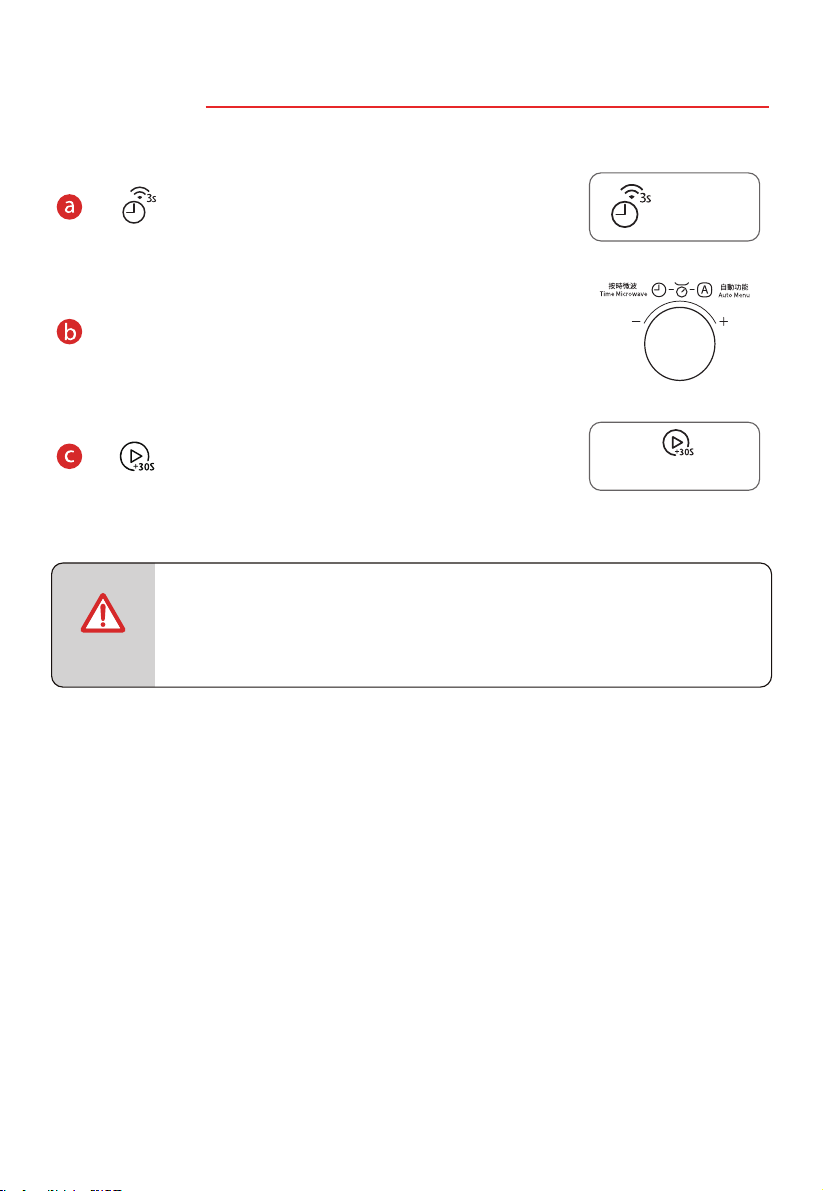
12. 快速烹飪
使用微波功能時,請勿使用金屬配件。
向左旋轉旋鈕一次,直接選擇 100% 功率烹飪模式,時間為
5 秒。
旋轉旋鈕設置烹飪時間,最大值為 95:00。
按 鍵開始烹飪。
短按 一次,直接以 100% 功率烹飪 30 秒
13. 查詢功能
鍵,顯示屏將顯示當前時間,持
氣炸焗爐烹調期間,按
下 續三秒。
開始/+30秒
Start/+30Sec.
開始/+30秒
Start/+30Sec.
計時器/時鐘/連接
Timer/Clock/Connect
CN-40
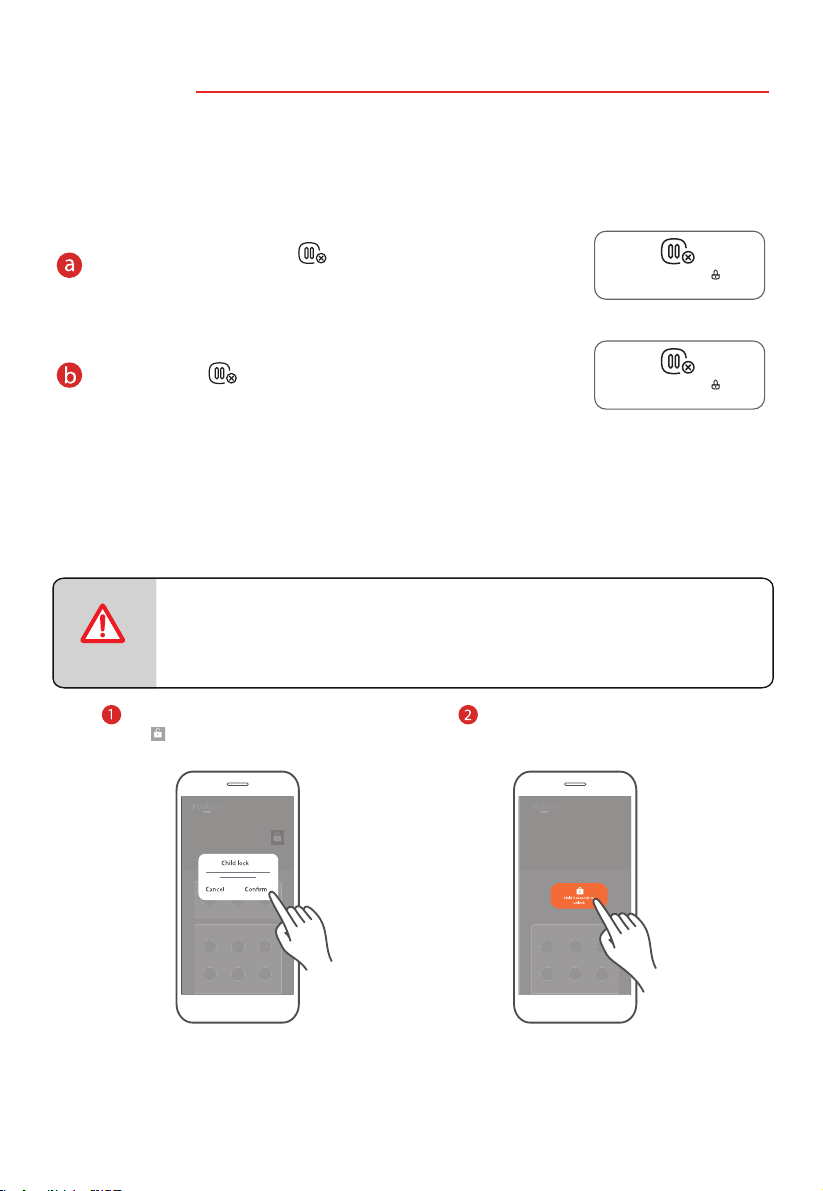
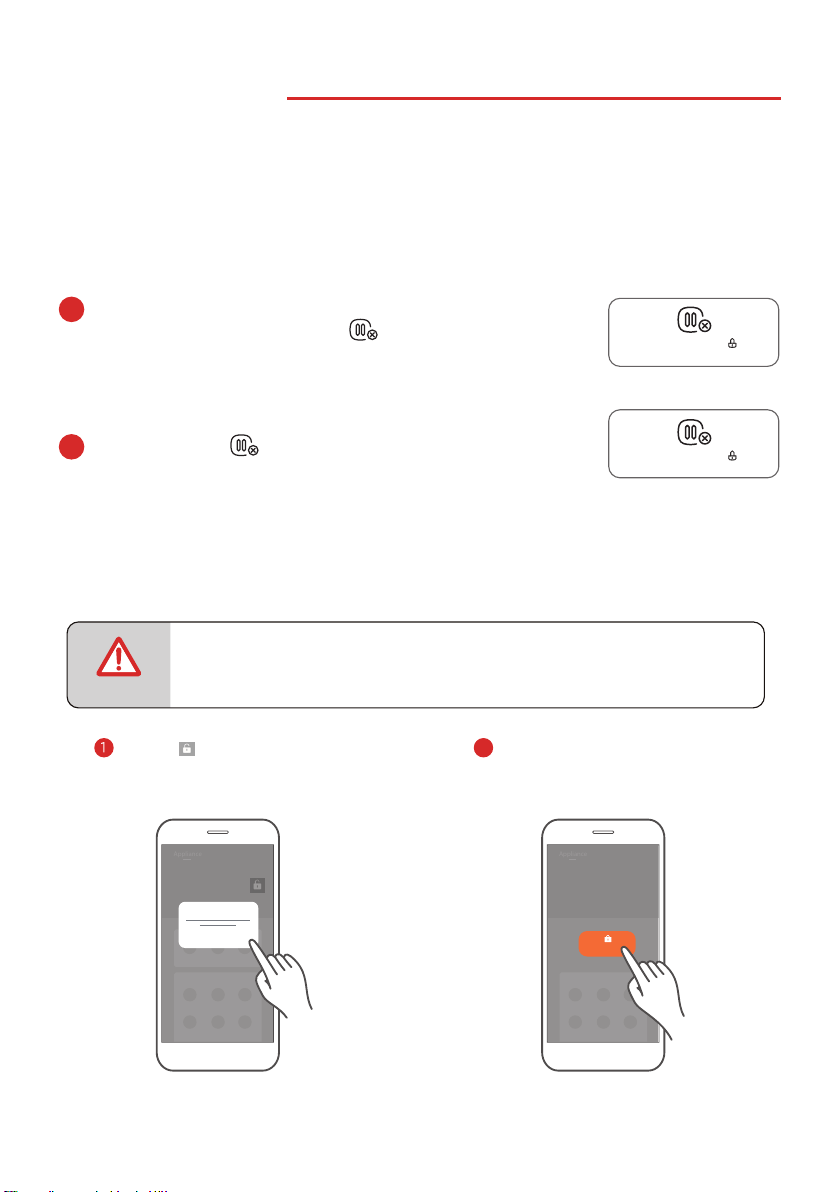
14. 鎖定功能
啟用該功能後,只能使用氣炸焗爐的微波功能,不可用於其他用
途。氣炸焗爐連接電源插座,並處於待機模式時,預設為解鎖狀
態。
兒童鎖功能有兩種使用方法。
如需啟用鎖定功能,長按 鍵 3 秒,顯示屏將顯示已鎖定圖
標,此時兒童或其他用戶不可使用氣炸焗爐。
要解鎖,請按 鍵 3 秒。
應用程式控制:
點擊「Appliance(電器)」界面
的 圖標,再按「Confirm(確認)」,
開啟兒童鎖功能。
按住鎖定鍵並保持 3 秒,解
除兒童鎖功能。
注意
暫停/取消/童鎖
Stop/Cancel/Child Lock
暫停/取消/童鎖
Stop/Cancel/Child Lock
●
為保安全,無法通過APP遙距啟動設備。
CN-41
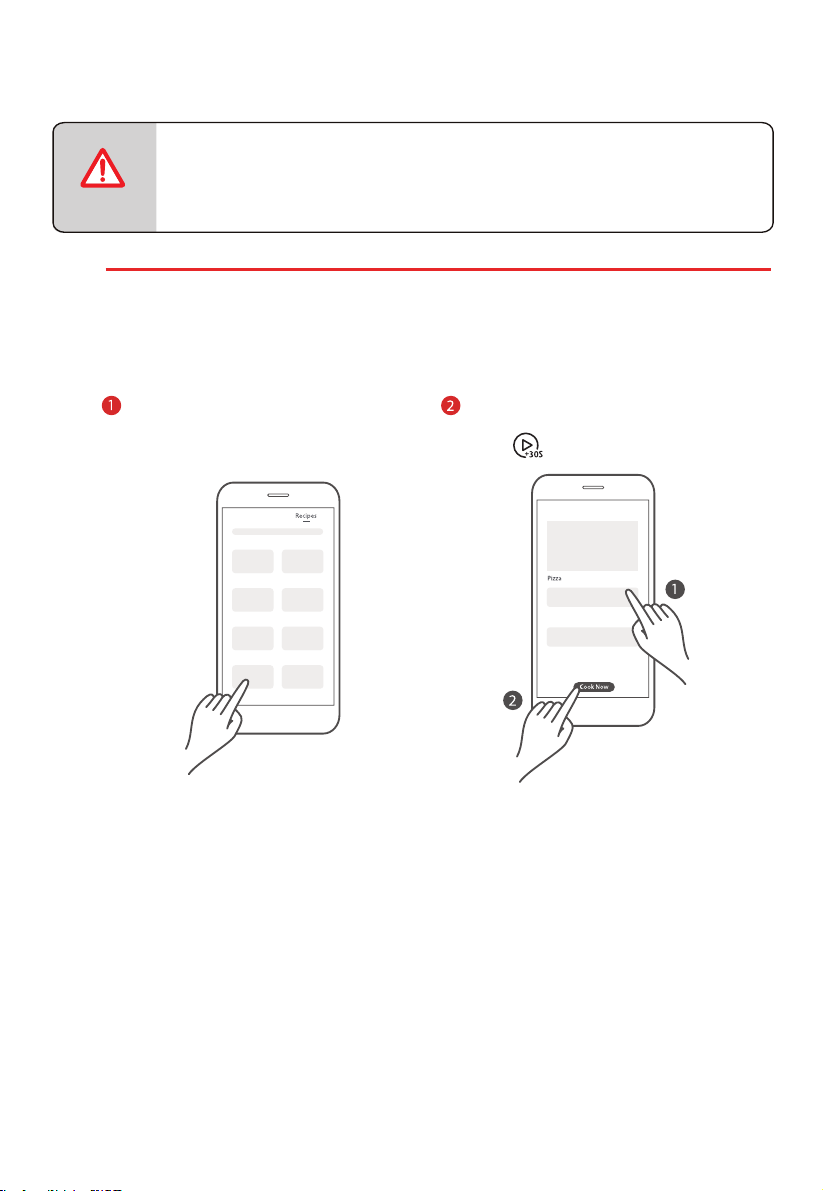
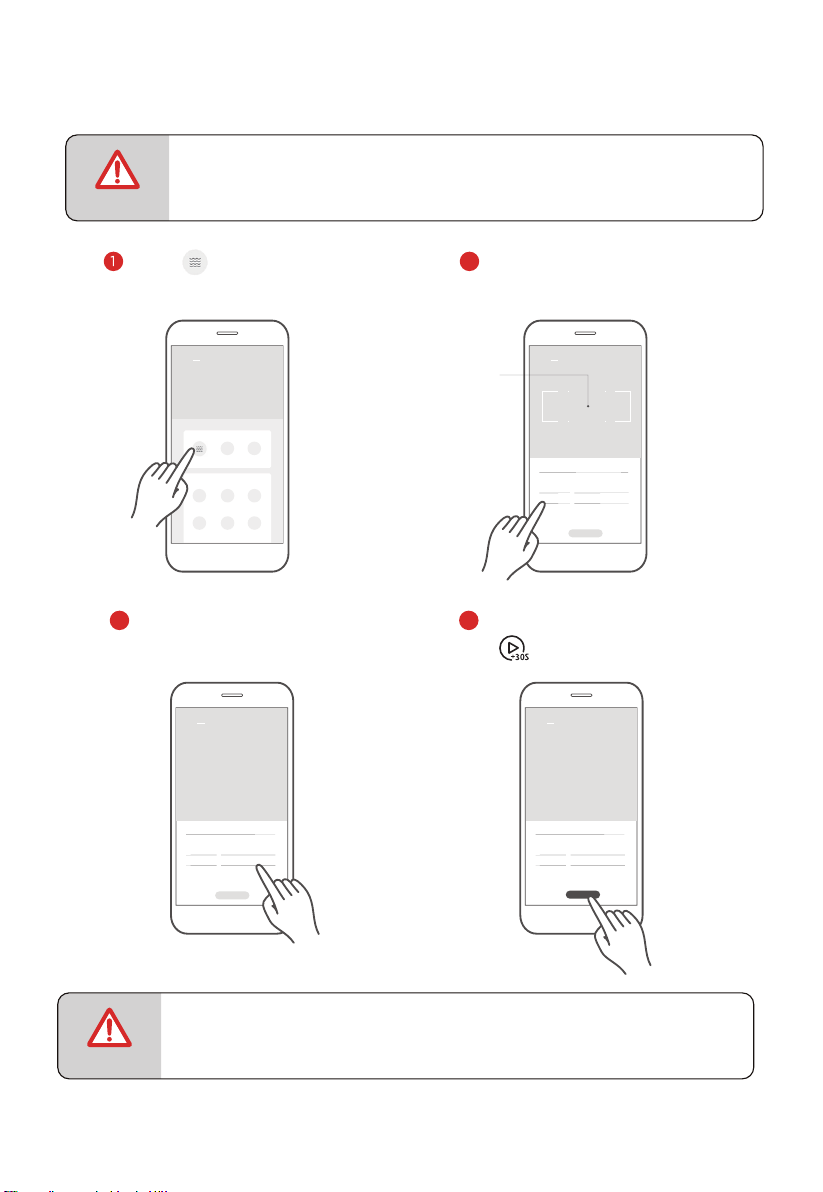
應用程式控制的其他功能:
食譜
食譜頁面顯示雲端食譜,烹飪參數均經專業廚師驗證。食譜頁面正在不斷更新,以提供更多
的烹飪選擇。
上下滑動查看所需的食材和詳細的烹
飪步驟。
注意
在美食交流圈入面點擊食譜圖
片,進入食譜詳情頁面。
●
為保安全,無法通過APP遙距啟動設備。
點按「一鍵烹飪」,在設備上
點按「 」啟動烹飪。
CN-42
清潔和維護
清潔
妥善保養和清潔可以保持電器外表美觀,同時有助於電器在良好狀態。請按照下述說明,
妥善安排微波爐維護。
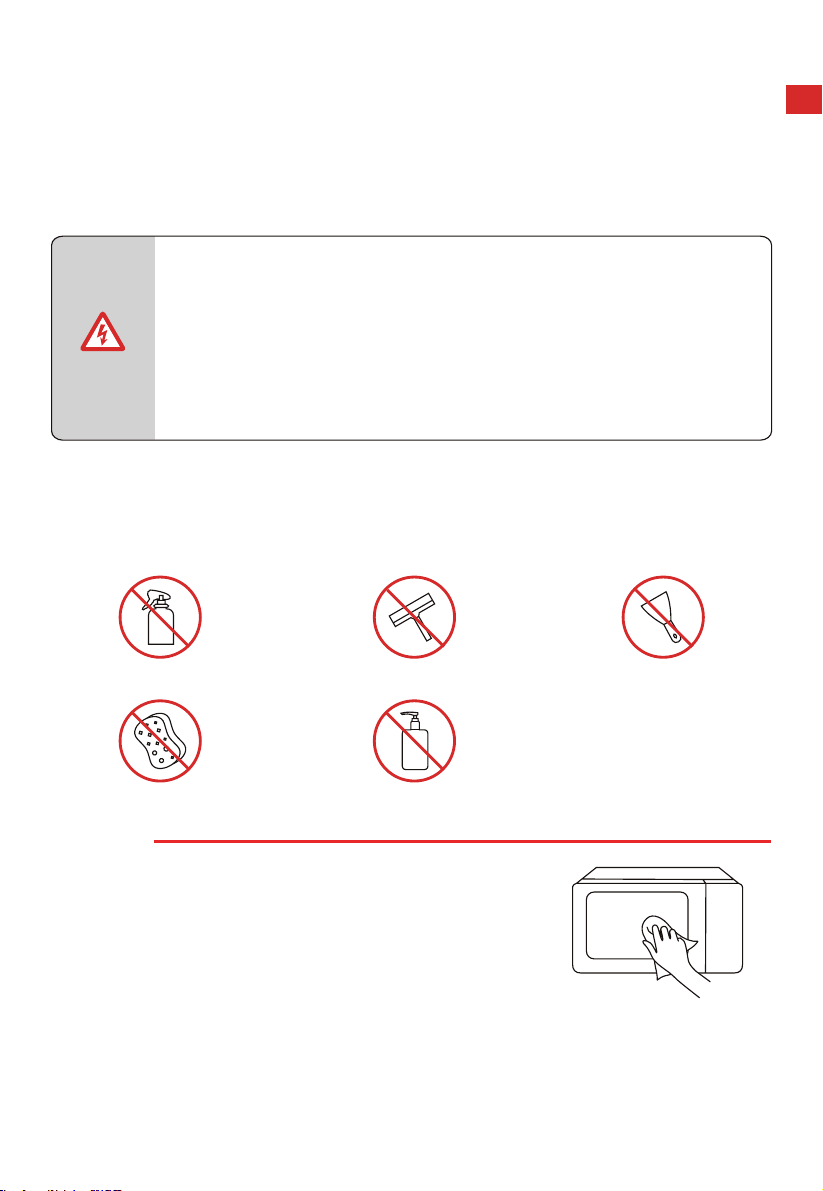
警告
● 門板玻璃刮傷可能會發展成裂縫。請勿使用玻璃刮刀、鋒利的或
研磨性的清潔工具或清潔劑。
● 如果清潔不當可能會損壞設備表面。會造成微波能量逸出。
定期清潔設備。如有任何食物殘渣,需立即清除。
● 請勿將設備浸入水中或用流水清洗。
清潔劑
清潔劑使用不當會造成電器各表面損壞,因此,使用清潔劑時請參考下表資訊。使用全新海
綿或布,使用前徹底清洗。
請勿使用:
粗糙或磨蝕性清潔劑 金屬或玻璃刮刀清潔門板 金屬或玻璃刮刀清潔門封
硬百潔布或海綿 酒精含量高的清潔劑
電器正面
熱肥皂水:
用抺布清洗,然後用軟布擦乾。請勿
使用金屬或玻璃刮刀進行清潔。
CN-43
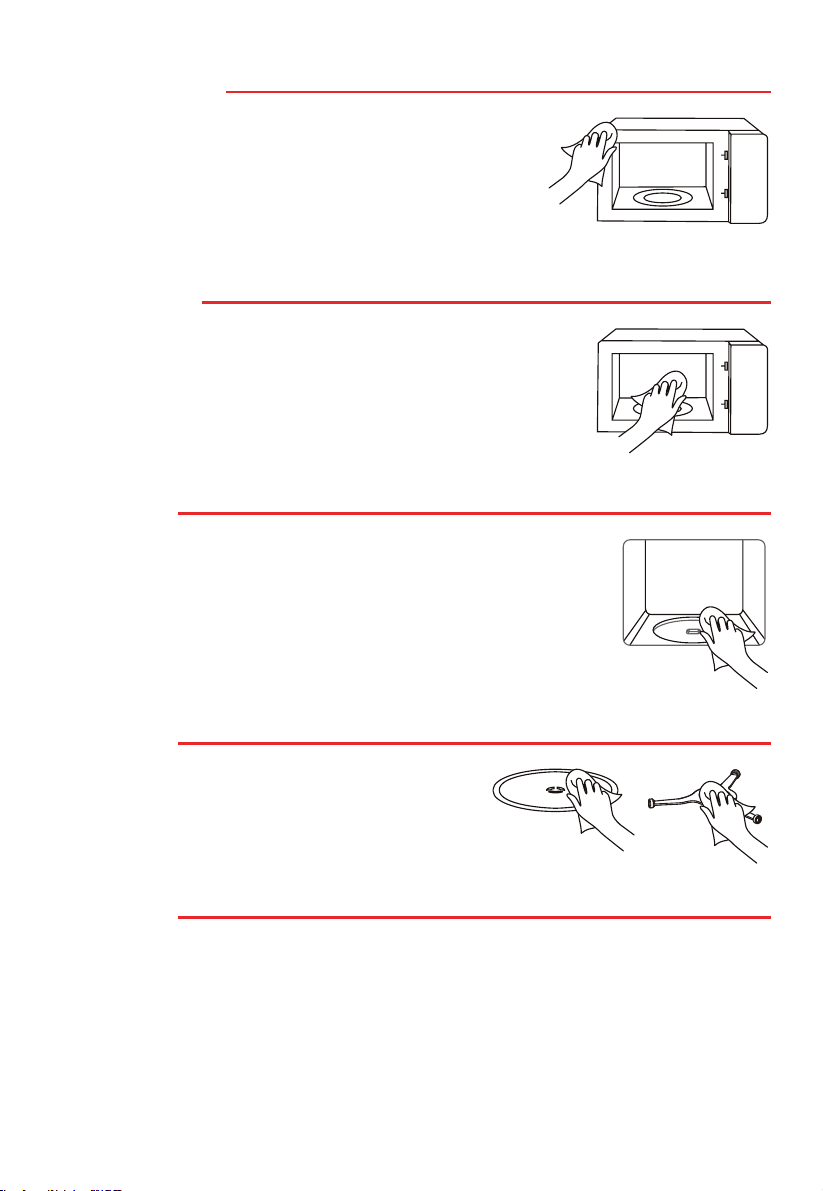
不鏽鋼電器正面
熱肥皂水:
用洗碗布清洗,然後用軟布擦乾。立即清除水垢、油脂、
澱粉和白蛋白的飛濺物和斑塊。這些斑塊或飛濺物下會產
生腐蝕。請勿使用玻璃清潔劑或金屬或玻璃刮刀進行清潔。
不鏽鋼烹飪腔
熱肥皂水或醋溶液:
用洗碗布清洗,然後用軟布擦乾。請勿使用烤箱噴霧或任何其
他刺激性烤箱清潔劑或研磨材料。百潔布、粗糙的海綿以及平
底鍋清潔劑也不適用。這些東西會損傷內腔表面。內腔表面需
要充分乾燥。
烹飪腔凹槽
濕布:
不得讓水通過轉盤驅動器流入設備。用布擦乾轉盤驅動器。
轉盤和輥環
熱肥皂水:
將轉盤放回其凹槽中時必須正確接合。
電器門面板
玻璃清潔劑:
用洗碗布清洗。請勿使用玻璃刮刀。

CN-44
故障排除
正常情況
微波爐干擾電視的訊號接收
微波爐運行時,可能會干擾收音機和電視的信號接收。
這與攪拌機、吸塵器、電風扇等小型設備造成的干擾類
似。
這是正常的情況。
昏暗的氣炸焗爐燈光
在低功率下運行氣炸焗爐微波功能時,其光線可能變
暗。這是正常的情況。
蒸汽積聚在氣炸焗爐門上,熱
氣從排氣口排出
烹調時,蒸汽可能從食物中冒出。大多數蒸汽會從排氣
口排出。但有些會積聚在氣炸焗爐門等低溫位置。這是
正常的情況。
禁止運行空氣炸焗爐。
危險
故障 可能原因 補救措施
(1) 電源線未插緊。
拔掉插頭。10 秒鐘後再次插入
插頭。
氣炸焗爐無法啟動 (2) 保險絲熔斷或斷路器工作。
更換保險絲或復位斷路器(由
我公司專業人員維修)
(3) 插座故障。 與其他電器測試插座。
氣炸焗爐不加熱。 (4) 門未關好。 關好門。
空氣炸焗爐意外啟動。

#
Details
Matter

INSTRUCTION MANUAL
MW3-SAC24SE(BK)
Please review this instruction manual before operating.
MULTI-FUNCTION OVEN WITH
HEALTHY AIR FRY

CONTENTS
IOT SMART CONTROL
Product wireless network connection ...................................................................... ................................... EN-01
How connect your devices to art .............................................................................................. EN-02
PRODUCT SAFETY
Precautions to avoid possible exposure to excessive microwave energy .................................
EN-04
Important safety instructions....................................................................................................................... EN-06
To reduce the risk of injury to persons grounding installation ...................................................... EN-11
Utensils ................................................................................................................................................................ EN-14
Materials you can use in microwave oven ............................................................................................. EN-15
PRODUCT SETTING
Setting up your oven ....................................................................................................................................... EN-18
INSTRUCTION FOR USE
Before using for the first time
....................................................................................................................... EN-21
Operation ............................................................................................................................................................. EN-22
1.
Power levels .................................................................................................................................................. EN-23
2. Clock setting .................................................................................................................................................. EN-23
3. Kitchen timer ................................................................................................................................................. EN-24
4. Microwave cook
.....
...............................................................................................................................
EN-25
Materials can not be used in microwave oven ..................................................................................... EN-17
TSm Life

5. Grill or combi nation
....................................................................................................................................
EN-27
6.
Convection with preheat
Convection without preheat
....................................................................................................................................
EN-28
7.
....................................................................................................................................
EN-29
8. Auto menu
..........................................................................................................................................
......... EN-32
.........................................................................................................................................
EN-35
.........................................................................................................................................
EN-35
....................................................................................................................................
EN-38
12 . Speedy cooking
..........................................................................................................................................
.EN-39
13. Inquiring function ..................................................................................................................................... EN-39
14. Lock function
..........................................................................................................................................
EN-40
CLEANING AND MAINTENANCE
Cleaning
..........................................................................................................................................
..... EN-42
Trouble shooting ............................................................................................................................................... EN-44
BEFORE OPERATING THIS PRODUCT, READ,
UNDERSTAND, AND FOLLOW THESE INSTRUCTIONS.
BE SURE TO SAVE THIS BOOKLIST FOR FUTURE
REFERENCE.
NOTE
9. Weight defrost
10. Time defrost
11. Multi-stage co oking
IOT SMART CONTROL
PRODUCT WIRELESS NETWORK CONNECTION
a
b
Press and hold " " for 3 seconds,
till a beep sounds, "AP" and flashing " " show
on display. If it fails,
will return to standby after 30 seconds.
Press and hold " " for 8 seconds,
till a beep sounds, "--" flashes for few seconds,
if the link has been removed successfully, the
screen will display "8888" and then return to standby
after 3 seconds.
oven will return to standby after 3 seconds.
Connect the network
Disconnect from the network
"N0" will display, and the oven
If it fails, "FFFF" will display, and the
EN-01
計時器/時鐘/連接
Timer/Clock/Connect
計時器/時鐘/連接
Timer/Clock/Connect
HOW CONNECT YOUR DEVICES TO TSmartLife
EN-02
1 Download The TSmartLife App
Scan QR code or find us on your App
store
2 Register and Log in
Log in for existing users or sign up
for new users.
Connect to wireless network
and enable Bluetooth.
STEP 1.
Open the TSmartLife App.
Power on selected device.
STEP 2.
Add your device using one
of the following methods:
STEP 3.
3 Connect your Devices to TSmartLife
Ensure device and App are
under same wireless network.
STEP 4.
STEP 5.
Rename your device and
try to remote control it.
STEP 6.
Press “ ” button for 3 seconds
on the panel.Following
instruction to set up, it will
connect automatically.
SELECT
MANUALLY
SEARCH
DEVICES
SCAN PRODUCT
QR CODE
WLAN
Bluetooth
connected
Toshiba
Please select wireless network
for device to connect
Connected device and send wireless
network information
Device is networking
Bind device to Toshiba TSmartLife
Toshiba
Hi,l’m your device!
How would you call me:

HOW CONNECT YOUR DEVICES TO TSmartLife
Make sure your devices are powered on.
Keep your mobile phone close to your device during connection.
Connect your mobile phone to the wireless network at home.
Enable the 2.4GHz frequency on your wireless network router. 5GHz Wi-Fi
network is not available at current stage.
The device is unable to connect to wireless network that requires authentication
and also appears in public areas such as hotels and restaurants.
It is recommended to use a wireless network name that only contains letters and
numbers. If your wireless network name contains special characters, modify it in
the router. Disable WLAN+ (Android) or WLAN Assistant (iOS) when connecting
your devices to the network.
To reconnect a device to the wireless network, click “+” on the App home screen
and add the device again by the category and model according to the App
prompts.
TIPS
EN-03
PRODUCT SAFETY
PRECAUTIONS TO AVOID POSSIBLE
EXPOSURE TO EXCESSIVE
MICROWAVE ENERGY
(a). Do not attempt to operate this oven with the door open since
this can result in harmful exposure to microwave energy. It is
important not to break or tamper with the safety interlocks.
(b). Do not place any object between the
oven front face and the door or allow
soil or cleaner residue to accumulate on
sealing surfaces.
(c). WARNING: If the door or door seals are damaged, the
oven must not be operated until it has been repaired by a
competent person.
ADDENDUM
If the apparatus is not maintained in a good state of cleanliness, its
and lead to a dangerous situation.
EN-04

SPECIFICATIONS
MODEL
RATED VOLTAGE
MW3-SAC24SE(BK)
220-230 V~ 50 Hz
1350-1450 W
850-900 W
900-1000 W
RATED INPUT (MICROWAVE)
RATED OUTPUT (MICROWAVE)
1500-1680 W
RATED INPUT (GRILL)
RATED INPUT (CONVECTION)
EN-05
If the supply cord is
damaged, it must
be replaced by the
manufacturer, its service
persons in order to avoid a
hazard.
WARNING: Ensure that the
before replacing the lamp
to avoid the possibility of
electric shock.
IMPORTANT SAFETY INSTRUCTIONS
WARNING
persons or exposure to excessive microwave oven
energy when using your appliance, follow basic
precautions, including the following:
Read and follow the
PRECAUTIONS
TO AVOID POSSIBLE
EXPOSURE TO EXCESSIVE
MICROWAVE ENERGY".
This appliance is not
intended for use by
persons (including
children) with reduced
physical, sensory or
mental capabilities,
or lack of experience
and knowledge, unless
they have been given
supervision or instruction
concerning use of the
appliance by a person
responsible for their safety.
Children should be
supervised to ensure that
they do not play with the
appliance.
EN-06
WARNING: It is hazardous
for anyone other than a
competent person to carry
out any service or repair
operation that involves the
removal of a cover which
gives protection against
exposure to microwave
energy.
WARNING: Liquids and
other foods must not be
heated in sealed containers
since they are liable to
explode.
When heating food in
plastic or paper containers,
keep an eye on the oven
due to the possibility of
ignition.
Only use utensils that
are suitable for use in
microwave ovens.
If smoke is emitted, switch
and keep the door closed
Microwave heating of
beverages can result in
delayed eruptive boiling,
therefore care must be
taken when handling the
container.
The contents of feeding
bottles and baby food jars
shall be stirred or shaken
and the temperature
IMPORTANT SAFETY INSTRUCTIONS
checked before
consumption, in order to
avoid burns.
EN-07
Only use the temperature
probe recommended
for this oven. (for ovens
provided with a facility to
use a temperature-sensing
probe.)
The microwave oven must
be operated with the
decorative door open. (for
ovens with a decorative
door.)
This appliance is intended
to be used in household
and similar applications
such as:
1.
working environments;
2. by clients in hotels,
motels and other
residential type
environments;
3. farm houses;
4. bed and breakfast type
environments.
The microwave oven is
intended for heating food
and beverages. Drying
of food or clothing and
heating of warming pads,
slippers, sponges, damp
cloth and similar may lead
to risk of injury, ignition or
IMPORTANT SAFETY INSTRUCTIONS
The oven should be
cleaned regularly and any
food deposits removed.
Please keep the waveguide
area clean. Use soft damp
cloth to clean it up when
there is food splash residue
on the waveguide area or
the cavity.Failure to clean
food residue may cause
innocuous sparking or some
smoke in the microwave
cavity,discoloration of the
cavity
may also occur.
EN-08
IMPORTANT SAFETY INSTRUCTIONS
The appliance is intended
to be used freestanding.
The rear surface of
appliances shall be placed
against a wall.
The temperature of
accessible surfaces may be
high when the appliance is
operating.
WARNING: When the
appliance is operated in
the combination mode,
children should only use
the oven under adult
supervision due to the
temperatures generated.
Eggs in their shell and
whole hard-boiled eggs
should not be heated in
microwave ovens since
they may explode, even
after microwave heating
has ended.
The appliance must not
be installed behind a
decorative door in order
to avoid overheating.
(This is not applicable for
appliances with decorative
door.)
The microwave oven shall
not be placed in a cabinet
unless it has been tested in
a cabinet.
Metallic containers for food
and beverages are not
allowed during microwave
cooking.
The appliance shall not
be cleaned with a steam
cleaner.
EN-09

IMPORTANT SAFETY INSTRUCTIONS
The appliances are not
intended to be operated by
means of an external timer
or separate remote-control
system.
READ CAREFULLY AND KEEP FOR
FUTURE REFERENCE
Failure to maintain the
oven in a clean condition
could lead to deterioration
of the surface that could
adversely affect the life of
the appliance and possibly
result in a hazardous
situation.
EN-10
TO REDUCE THE RISK OF INJURY TO
PERSONS GROUNDING INSTALLATION
This appliance must be grounded. In the event of an electrical
short circuit, grounding reduces the risk of electric shock by
providing an escape wire for the electric current.
This appliance is equipped with a cord having a grounding wire
with a grounding plug. The plug must be plugged into an outlet
that is properly installed and grounded.
WARNING - Improper use of the grounding can result in a risk of
grounding instructions are not completely understood or if doubt
exists as to whether the appliance is properly grounded.
If it is necessary to use an extension cord, use only a 3-wire
extension cord.
DANGER
Electric Shock Hazard:
Touching some of the internal components can
cause serious personal injury or death. Do not
disassemble this appliance.
EN-11
WARNING
Electric Shock Hazard:
Improper use of the grounding can result in electric
shock. Do not plug into an outlet until appliance is
properly installed and grounded.
1. A short power-supply cord is provided to reduce
the risks resulting from becoming entangled in or
tripping over a longer cord.
2. If a long cord or extension cord is used:
(1). The marked electrical rating of the cord set or
extension cord should be at least as great as
the electrical rating of the appliance.
(2). The extension cord must be a grounding-type
3-wire cord.
(3). The longer cord should be arranged so that it
will not drape over the counter top or tabletop
where it can be pulled on by children or
tripped over unintentionally.
TO REDUCE THE RISK OF INJURY TO
PERSONS GROUNDING INSTALLATION
EN-12

CLEANING
Be sure to unplug the appliance from the power supply.
1. Clean the cavity of the oven after using with a slightly damp
cloth.
2. Clean the accessories in the usual way in soapy water.
3. The door frame and seal and neighbouring parts must be
cleaned carefully with a damp cloth when they are dirty.
4. Do not use harsh abrasive cleaners or sharp metal scrapers to
clean the oven door glass since they can scratch the surface,
which may result in shattering of the glass.
5. Cleaning Tip---For easier cleaning of the cavity walls that the
food cooked can touch: Place half a lemon in a bowl, add 300ml
(1/2 pint) water and heat on 100% microwave power for 10
minutes. Wipe the oven clean using a soft, dry cloth.
EN-13
UTENSILS
CAUTION
Personal Injury Hazard:
It is hazardous for anyone other than a competent
person to carry out any service or repair operation
that involves the removal of a cover which gives
protection against exposure to microwave energy.
See the instructions on " Materials you can use in
microwave oven " or " Materials can not be used
in microwave oven "
There may be certain non-metallic utensils that are
not safe to use for microwaving. If in doubt, you can
test the utensil in question following the procedure
below.
Utensil
Test:
1. Fill a microwave-safe container with 1 cup
of cold water (250ml) along with the utensil
in question.
2. Cook on maximum power for 1 min.
3. Carefully feel the utensil. If the empty
utensil is warm, do not use it for microwave
cooking.
4. Do not exceed 1 min cooking time.
NOTE
KEEP THE CAVITY AND
WAVEGUIDE COVER CLEAN
EN-14
MATERIALS YOU CAN USE IN
MICROWAVE OVEN
UTENSILS REMARKS
Browning dish
Follow manufacturer’s instructions.
The bottom of browning dish must be at least 3/16 inch
(5mm) above the turntable. Incorrect usage may cause
the turntable to break.
Dinnerware
Microwave-safe only. Follow manufacturer’s
instructions. Do not use cracked or chipped dishes.
Glass jars
Always remove lid. Use only to heat food until just
warm. Most glass jars are not heat resistant and may
break.
Glassware
Heat-resistant oven glassware only. Make sure there is
no metallic trim. Do not use cracked or chipped dishes.
Oven cooking bags
Follow manufacturer’s instructions. Do not close with
metal tie.
Make slits to allow steam to escape.
Paper plates and cups
Use for short–term cooking/warming only. Do not leave
oven unattended while cooking.
Paper towels
Use to cover food for reheating and absorbing fat. Use
with supervision for a short-term cooking only.
Parchment paper
Use as a cover to prevent splattering or a wrap for
steaming.
EN-15
UTENSILS REMARKS
Plastic
Microwave-safe only. Follow the manufacturer’s
instructions. Should be labeled “Microwave Safe”. Some
plastic containers soften, as the food inside gets hot.
“Boiling bags” and tightly closed plastic bags should be
slit, pierced or vented as directed by package.
Plastic wrap
Microwave-safe only. Use to cover food during cooking
to retain moisture. Do not allow plastic wrap to touch
food.
Thermometers
Microwave-safe only (meat and candy thermometers).
Wax paper
Use as a cover to prevent splattering and retain
moisture.
MATERIALS YOU CAN USE IN
MICROWAVE OVEN
EN-16

MATERIALS CAN NOT BE USED IN
MICROWAVE OVEN
UTENSILS REMARKS
Aluminum tray
May cause arcing. Transfer food into microwave-safe
dish.
Food carton with metal
handle
May cause arcing. Transfer food into microwave-safe
dish.
Metal or metal trimmed
utensils
Metal shields the food from microwave energy.
Metal trim may cause arcing.
Metal twist ties
May cause arcing and could cause a fire in the oven.
Paper bags
May cause a fire in the oven.
Plastic foam
Plastic foam may melt or contaminate the liquid
inside when exposed to high temperature.
Wood
Wood will dry out when used in the microwave oven
and may split or crack.
EN-17
Grill Rack (Can not be used in
microwave function and must
Grill Rack (Can not be used in
microwave function and must
be placed on the glass tray ) be placed on the glass tray )
PRODUCT SETTING
Instruction Manual
Glass turntable
Turntable Ring Assembly
SETTING UP YOUR OVEN
NAMES OF MICROWAVE OVEN PARTS AND ACCESSORIES
Remove the oven and all materials from the carton and oven cavity.
(In case of any dierences between the appliance and the pictures in this manual, the
product shall prevail.)
Bake Tray (Can‘t be used in microwave
function and can be placed on the grill rack)
A. Control panel
B. Turntable Ring Assembly
C. Observation window
E. Safety interlock system
F. Oven cavity
D
E
C
A
D. Door assembly
BF
G
G. Waveguide cover
EN-18

TURNTABLE INSTALLATION
SETTING UP YOUR OVEN
• Never use the appliance without the turntable. Make sure that it is
properly engaged. The turntable can turn clockwise or anti-clockwise.
• Never place the glass tray upside down. The glass tray should never
be restricted.
• Both glass tray and turntable ring assembly must always be used
during cooking.
• All food and containers of food are always placed on the glass tray
for cooking.
• Never restrict the movement of the turntable.
• If glass tray or turntable ring assembly cracks or breaks, contact your
nearest authorized service center.
NOTE
Clean the cooking compartment and place the turntable.
For new installations, make sure all packaging and shipping tape has been removed from the
turntable shaft.
Before using the appliance to prepare food for the first time, you will need to put the turntable
in place correctly. You must clean the cooking compartment and accessories. You can also refer
How to put the turntable in place:
1. Place the turntable ring assembly into the
recess in the cooking compartment.
2. Place the glass tray
on the turntable ring
assemblies .
1) Glass Tray
2) Turntable Ring Assembly
2
1
them to the cleaning section.
EN-19
ce, the
oven could be damaged and the warranty
would be avoid.
The accessible surface may be
hot during operation
1. Select a level surface that provide enough open space for the intake and/or outlet vents.
a. The minimum installation height is 85cm.
b. The rear surface of appliance shall be placed against a wall. Leave a minimum clearance
of 30cm above the oven. A minimum clearance of 20cm is required between the oven
and any adjacent walls.
c. Do not remove the legs from the bottom of the oven.
d. Blocking the intake and/or outlet openings can damage the oven.
e. Place the oven as far away from radios and TV as possible.
Operation of microwave oven may cause interference to your radio or TV reception.
INSTALLATION
COUNTERTOP INSTALLATION
Remove all packing material and accessories. Examine the oven for any damage such as dents
or broken door. Do not install if oven is damaged.
Cabinet: Remove any protective film found on the microwave oven cabinet surface. Do not
remove the waveguide cover that is attached to the oven cavity to protect the magnetron.
2. Plug microwave oven into a standard household outlet. Be sure the voltage and the frequency
is the same as the voltage and the frenquency on the rating label.
NOTE
• Do not install oven over a range cooktop
or other heat-producing appliance.
If installed near or over a heat sour
0 cm
20 cm
30 cm
20 cm
>
85
cm
EN-20
INSTRUCTION FOR USE
BEFORE USING FOR THE FIRST TIME
This section tells you what you need to do before using your microwave to prepare food for the
first time. Read the section entitled "PRODUCT SAFETY " beforehand.
Before you can use your new appliance, you will need to put the turntable in place correctly.
You must also clean the cooking compartment and accessories.
• Never use the appliance without the turntable.
• Make sure that it is properly engaged.The turntable can turn clockwise
or anti-clockwise.
NOTE
It is normal that the oven may produce unpleasant odors when it is used for the first time.
EN-21
OPERATION
CONTROL PANEL AND FEATURES
(You can also control the oven by app control)
NOTE
App control: Download the TSmartLife rst, then connect the app with your oven by
the insert of TSmartLife APP connection guide.
Microwave
Weight/Time defrost
Stop/Cancel/Child Lock
Function
Kitchen timer/Clock/Wireless
Start/+30sec.
EN-22
微波
Microwave
解凍
Defrost
開始/+30秒
Start/+30Sec.
暫停/取消/童鎖
燒烤/熱風/混合
Grill/Conv./Combi
自動功能
Auto Menu
按時微波
Time Microwave
Stop/Cancel/Child Lock
計時器/時鐘/連接
Timer/Clock/Connect
1. POWER LEVELS
Microwave Power
P100
100%
P80
80%
P50
50%
P30
30%
P10
10%
LEVEL POWER DISPLAY
2. CLOCK SETTING
When the microwave oven is plugged into an outlet, "0:00" will display.
Press twice.
Press
to conrm.
a
c
b
Turn the knob to set the hour gures, it should de within 0-23.
d
Turn the knob to set the minute gures, it should de within 0-59.
High
M. High
Med.
M. Low
Low
自動功能
Auto Menu
按時微波
Time Microwave
自動功能
Auto Menu
按時微波
Time Microwave
EN-23
開始/+30秒
Start/+30Sec.
計時器/時鐘/連接
Timer/Clock/Connect
3. KITCHEN TIMER
• The Kitchen Timer setting is dierent from the Clock setting; it is simply
a timer.
• During the Kitchen Timer function, no cooking function can be set into
operation.
NOTE
• In the process of setting clock, if there is not any operation in 5
• When the oven is power on, if the clock is not be set, it will not work.
minutes or press directly,
display will automatically
return to
the previous clock setting.
NOTE
When the microwave oven is plugged into an outlet, "0:00" will display.
Press
to start counting down.
c
b
Turn the knob to set the time, the maximum value is 95:00.
Press once.
a
Press to conrm.
e
自動功能
Auto Menu
按時微波
Time Microwave
EN-24
開始/+30秒
Start/+30Sec.
開始/+30秒
Start/+30Sec.
計時器/時鐘/連接
Timer/Clock/Connect
a
or
4. MICROWAVE COOK
There are two ways to use the microwave function.
Press more times to choose the power level.
Press once, and then turn the knob
to set the power level.
Press to conrm the power level.
c
b
Turn the knob to set the cooking time, the maximum
Press
to start cooking.
d
Panel control:
Please do NOT use metal accessories under microwave function.
to set the power level.
Press once: P100 (900W)
Press twice: P80 (720W)
Press three times: P50 (450W)
Press four times: P30 (270W)
Press five times: P10 (90W)
自動功能
Auto Menu
按時微波
Time Microwave
自動功能
Auto Menu
按時微波
Time Microwave
NOTE
value is 95:00.
EN-25
開始/+30秒
Start/+30Sec.
開始/+30秒
Start/+30Sec.
微波
Microwave
微波
Microwave
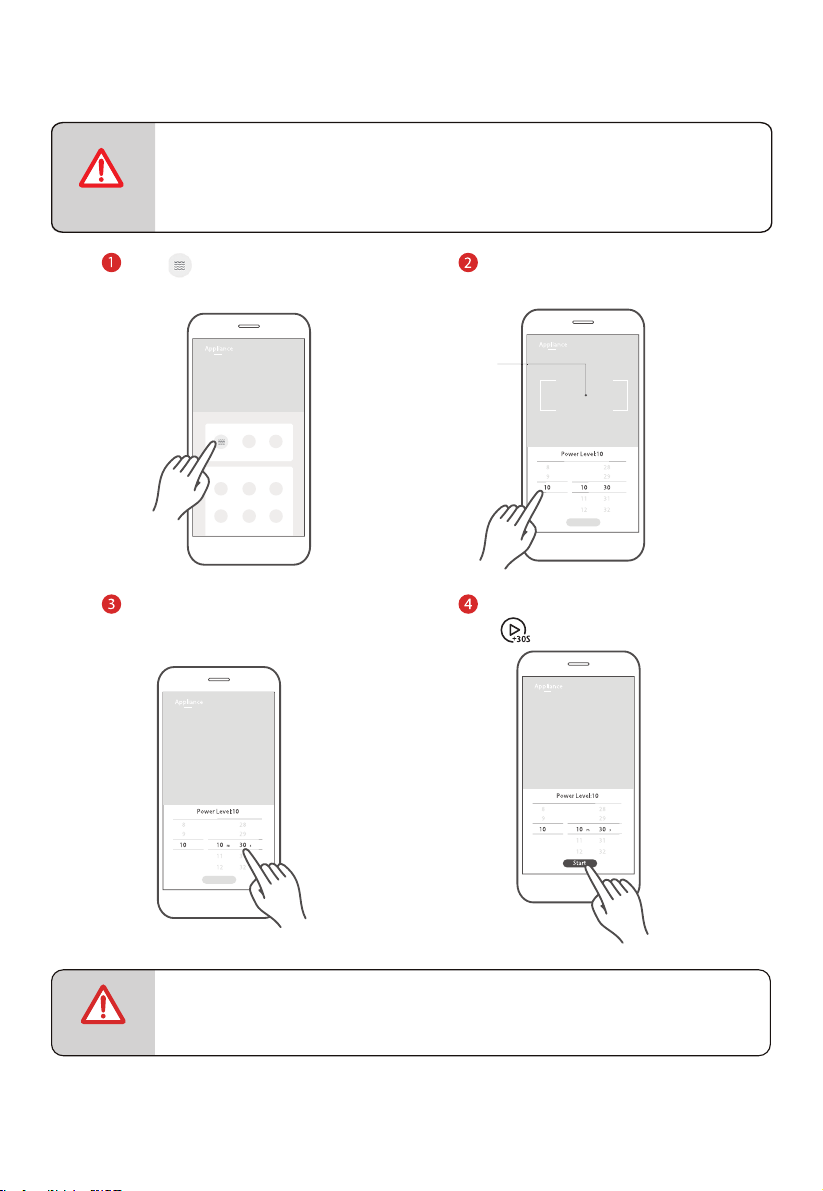
App Control:
• Do not swipe too fast when sliding the wheel up and down to select parameters.
Tap the
"Start" button when the numbers stop scrolling.
NOTE
NOTE
Power Level:10
10 10 30
11 31
12 32
9 29
8 28
Appliance
Appliance
Tap the icon to enter the
microwave heating function
setting page.
Swipe up and down to adjust
microwave power.
Power Level:10
10 10 30
11 31
12 32
9 29
8 28
Appliance
Swipe up and down the hour
and minute selection to adjust
cooking time.
sm
Power Level:10
10 10 30
11 31
12 32
9 29
8 28
Appliance
sm
Start
2
3 4
Tap this area to exit the
cooking parameter tab
and return to device
function page.
EN-26
• To ensure safety, the APP remote control function is not allowed.
Click
"Start" to conrm, then press
" " on the appliance to start cooking.
There are two ways to use the grill/combinate function.
5.
GRILL OR COMBINATION
a
or
Press more times to choose the mode.
Press once, and then turn the knob to
choose the mode. "G-1, C-1, ..., C-4, 110 C,
120 C, ……, 200 C” will display in order.
• When half of the time has nished, the buzzer will sound to remind you
to turn the food over during grill function. If no operation, the oven will
continue working.
NOTE
c
Turn the knob to set the cooking time, the maximum
Press
to conrm the mode .
b
Press
to start cooking.
d
Panel control:
(”G-1” is grill, ”C-1~C-4” are combination).
Press once: G-1
Press twice: C-1
Press three times: C-2
Press four times: C-3
Press five times: C-4
Press six times or more: 110°C-200°C
自動功能
Auto Menu
按時微波
Time Microwave
自動功能
Auto Menu
按時微波
Time Microwave
燒烤/熱風/混合
Grill/Conv./Combi
燒烤/熱風/混合
Grill/Conv./Combi
NOTE
value is 95:00.
EN-27
Please do NOT use metal accessories under combination function except for metal
accessories equipped with the product.
開始/+30秒
Start/+30Sec.
開始/+30秒
Start/+30Sec.
6. CONVECTION WITH PREHEAT
or
a
Press twice to start preheating.
When preheating is completed, the temperature will ash,
open the door and place food in the oven.
b
Press more times to choose the convection.
Press
to start cooking.
d
c
Turn the knob to set the cooking time, the maximum
Non-microwave function, grill rack, grill pan available .
自動功能
Auto Menu
按時微波
Time Microwave
自動功能
Auto Menu
按時微波
Time Microwave
燒烤/熱風/混合
Grill/Conv./Combi
燒烤/熱風/混合
Grill/Conv./Combi
value is 95:00.
EN-28
Combi. mode Microwave Convection
Grill
C-1
C-2
C-3
C-4
G-1
Press once, and then turn the knob
to choose the convection temperature.
Available temperature range is 110 C-
200 C.
開始/+30秒
Start/+30Sec.
開始/+30秒
Start/+30Sec.
7. CONVECTION WITHOUT PREHEAT
Press
to start cooking.
d
c
Turn the knob to set the cooking time, the maximum
Press
to conrm the temperature.
b
Non-microwave function, grill rack, grill pan available .
自動功能
Auto Menu
按時微波
Time Microwave
value is 95:00.
EN-29
or
a
Press more times to choose the convection temperature.
Press once, and then turn the knob
to choose the convection temperature.
自動功能
Auto Menu
按時微波
Time Microwave
燒烤/熱風/混合
Grill/Conv./Combi
燒烤/熱風/混合
Grill/Conv./Combi
Available temperature range is 110 C-
200 C.
開始/+30秒
Start/+30Sec.
開始/+30秒
Start/+30Sec.
• Do not swipe too fast when sliding the wheel up and down to select parameters.
Tap the
"Start" button when the numbers stop scrolling.
NOTE
3
App Control:
NOTE
Broil
20 00
21
19
18
01
22 02
Appliance
Appliance
Tap the icon to enter the
grill function setting page.
Swipe up and down to adjust
the cooking time.
2
Tap this area to exit the
cooking parameter tab
and return to device
function page.
sm
Broil
20 00
21
19
18
01
22 02
Appliance
sm
Start
GRILL
EN-30
• To ensure safety, the APP remote control function is not allowed.
Click
"Start" to conrm, then press
" " on the appliance to start cooking.
2
C-1
20 00
21
19
18
01
22 02
Appliance
sm
Start
CONVECTION
COMBINATION
C-1
20 00
21
19
18
01
22 02
Appliance
Tap “C-1~C-4” to enter the mode
setting page.Then swipe up and down
to adjust the parameter.
1
Tap this area to exit the
cooking parameter tab
and return to device
function page.
sm
2
Tap “ ” to enter the convection
setting page.Then swipe up and down
to adjust the parameter.
1
Convection
100
Preheat
150
250
° F
20 00
21
19
18
01
22 02
Appliance
If preheat is desired,
please open it rst.
Tap this area to exit the
cooking parameter tab
and return to device
function page.
sm
Convection
100
Preheat
150
250
° F
20 00
21
19
18
01
22 02
Appliance
sm
Start
EN-31
Click
"Start" to conrm, then press
" " on the appliance to start cooking.
Click
"Start" to conrm, then press
" " on the appliance to start cooking.
A-1
AUTO REHEAT
A-2
POTATO
150g
250g
350g
450g
600g
150g
250g
350g
450g
600g
1
2
3
1
2
3
MENU
WEIGHT/
PORTION
POWER
P100
P100
8. AUTO MENU
Press
to start cooking.
d
Press
to conrm the menu.
b
c
Turn the knob to set the weight of the food.
a
In standby mode, Turn the knob right to set the menu.
“A-1” to “A-10” will display in order.
There are two ways to use the menu function.
Panel control:
自動功能
Auto Menu
按時微波
Time Microwave
自動功能
Auto Menu
按時微波
Time Microwave
LEVEL
COOKING
TIME
EN-32
(Micro.)
(Micro.)
(raw -> cooked)
DISPLAY
2'00"
3'00"
4'00"
5'00"
6'00"
5’00“
8‘30”
12’30“
開始/+30秒
Start/+30Sec.
開始/+30秒
Start/+30Sec.

A-3
MEAT
A-4
VEGETABLE
150g
300g
450g
600g
150g
300g
450g
600g
150g
350g
500g
150g
350g
500g
P80
P100
150g
250g
350g
450g
650g
50g(with cold water 450g)
100g(with cold water 800g)
150g(with cold water 1200g)
50g
100g
150g
150g
250g
350g
450g
650g
MENU DISPLAY
WEIGHT/
PORTION
P80
P80
A-6
PASTA
200g
400g
600g
475g 475g
200g
400g
600g
P100
A-7
SOUP
100g
200g
300g
500g
750g
1000g
1200g
500g
750g
1000g
1200g
100g
200g
300g
A-9
PIZZA
A10
CHICKEN
A-8
CAKE
A-5
FISH
P100 (Micro.)+
CONVEC.150 C
(With preheat)
POWER
LEVEL
COOKING
TIME
CONVEC.200 C
CONVEC.200 C
EN-33
(Micro.)
(Micro.)
(Micro.)
(Micro.)
(Micro.)
P100 (Micro.)+
(raw -> cooked)
(raw -> cooked)
(raw -> cooked)
(raw -> cooked)
(raw -> cooked)
(raw -> cooked)
(frozen -> cooked)
3'00"
4'30"
6'00"
8'00"
3'00"
5'00"
6'30"
18’00”
20’00”
22‘00“
3'00"
4'00"
5'30"
6'30"
8'30"
2'00"
3'50"
5'30"
5’00"/29'00”
7’00"/32'00”
9’00"/35'00”
11’00"/38'00”
1'30"/4'30"
2'00"/6'00"
2’30"/7'30”
55'00"
App Control:
• Do not swipe too fast when sliding the wheel up and down to select parameters.
Tap the
"Start" button when the numbers stop scrolling.
NOTE
NOTE
Appliance
Tap the desired menu icon to enter
the menu setting page.Then swipe
up and down to adjust the cooking
value.
2
Auto Menu
Appliance
Pizza
100
g
200
300
Appliance
Start
Pizza.
EN-34
• To ensure safety, the APP remote control function is not allowed.
Click
"Start" to conrm, then press
" " on the appliance to start cooking.
9.
WEIGHT DEFROST
a
Press once, “dEF1” will display.
b
Turn the knob to set the weight of food, it should
be within “100g-2000g” .
c
• The buzzer will sound twice to remain you of turning over the food
during defrosting.
Press
to start defrosting.
NOTE
There are two ways to use the defrost function.
Panel control:
10.
TIME DEFROST
a
Press twice, “dEF2” will display.
b
Turn the knob to set the defrost time, it should
be within “0:05~95:00” .
Please do NOT use metal accessories under microwave function.
Please do NOT use metal accessories under microwave function.
自動功能
Auto Menu
按時微波
Time Microwave
自動功能
Auto Menu
按時微波
Time Microwave
解凍
Defrost
解凍
Defrost
Adding weight by 100g each time.
EN-35
開始/+30秒
Start/+30Sec.
App Control:
NOTE
Tap the icon to enter the weight
defrost function setting page.Then
Swipe up and down to adjust the
weight.
Weight Defrost
100
200
300
g
Appliance
2
Appliance
Start
Weight Defrost
Tap this area to exit the
cooking parameter tab
and return to device
function page.
100
200
300
g
• The buzzer will sound to remain you of turning over the food when
half of the time has passed.
• The default power level is P30, it can not be changed.
NOTE
Press
to start defrosting.
c
WEIGHT DEFROST
EN-36
開始/+30秒
Start/+30Sec.
• To ensure safety, the APP remote control function is not allowed.
Click
"Start" to conrm, then press
" " on the appliance to start cooking.
• Do not swipe too fast when sliding the wheel up and down to select parameters.
Tap the "Start" button when the numbers stop scrolling.
NOTE
Tap the icon to enter the time
defrost function setting page.Then
Swipe up and down to adjust the time.
2
TIME DEFROST
Time Defrost
Appliance
10 30
11 31
12 32
29
28
sm
Time Defrost
Appliance
10 30
11 31
12 32
29
28
sm
Start
EN-37
Click
"Start" to conrm, then press
" " on the appliance to start cooking.
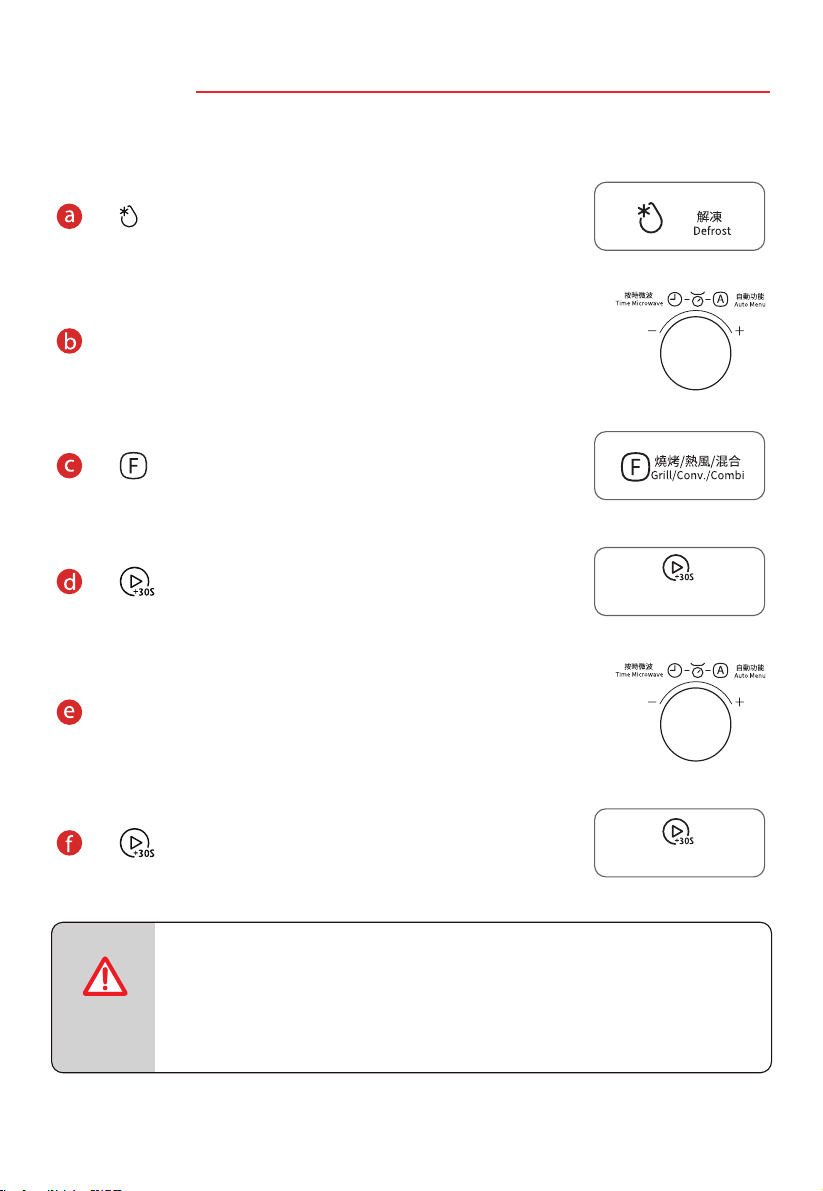
Press to choose the cooking mode .
11.
MULTI-SATGE COOKING
a
NOTE
Press to start cooking.
f
Press
to conrm.
d
Press twice, “dEF2”will display.
b
c
Turn the knob to set the defrost time, the maximum
e
Turn the knob to set the cooking time, the maximum
• Two cooking stages can be set in multi-stage cooking.
• If you set defrost function, it will work automatically in the rst stage.
• Kitchen Timer, Auto menu, Speedy cooking and Preheat cannot be set
as one of the multi-stage.
Please do NOT use metal accessories under microwave function.
自動功能
Auto Menu
按時微波
Time Microwave
燒烤/熱風/混合
Grill/Conv./Combi
解凍
Defrost
value is 95:00.
EN-38
自動功能
Auto Menu
按時微波
Time Microwave
value is 95:00.
開始/+30秒
Start/+30Sec.
開始/+30秒
Start/+30Sec.

Press to start cooking.
c
b
Turn the knob to set the time, the maximum value is 95:00.
Press once to cook with 100% power level with 30
seconds directly.
a
13. INQUIRING FUNCTION
When oven is cooking, pr
, the current time will
ess
appear for three seconds in the display.
a
自動功能
Auto Menu
按時微波
Time Microwave
12. SPEEDY COOKING
a
Turn the knob left once to choose the cooking mode
with 100% power level for 5 seconds directly.
Please do NOT use metal accessories under microwave function.
自動功能
Auto Menu
按時微波
Time Microwave
EN-39
開始/+30秒
Start/+30Sec.
開始/+30秒
Start/+30Sec.
計時器/時鐘/連接
Timer/Clock/Connect
14. LOCK FUNCTION
To unlock, press for 3 seconds.
b
To lock the microwave so that it cannot be operated by children
or other unintended users, press pad
pad
f
or 3 seconds, the
locked icon will display.
a
This function locks the microwave to avoid unintended use.
When the microwave is plugged into an outlet and is in standby mode, the default mode is
set as unlocked.
There are 2 ways to use the lock function:
App Control:
NOTE
Appliance
Tap the icon on the "Appliance"
page and then press "conrm" to
activate the child lock function.
Tap and hold the locked button
for 3 seconds to release the child
lock function.
2
Child lock
Cancel Conrm
Appliance
Hold 3 seconds to
unlock
EN-40
暫停/取消/童鎖
Stop/Cancel/Child Lock
暫停/取消/童鎖
Stop/Cancel/Child Lock
• To ensure safety, the APP remote control function is not allowed.
Other Function Of App Control:
NOTE
Recipes
The Recipes page displays cloud recipes, cooking parameters have been veried by
professional chefs. Recipe page is continuously being updated to provide more cooking
variety.
Tap the picture in "Recipes" to enter the
detail page.
RECIPES
Recipes
Recipes
Swipe up and down to view the required
ingredients and detailed cooking steps.
Pizza
Cook Now
2
2
EN-41
• To ensure safety, the APP remote control function is not allowed.
Tap
“Cook Now” to conrm, then press
“ ” on the appliance to start cooking.

CLEANING
With good care and cleaning, your appliance will retain its appearance and remain fully functioning
for a long time to come.Here are the instructions on how to properly care for the microwave oven.
WARNING
• Scratched glass in the appliance door may develop into a crack.
Do not use a glass scraper, sharp or abrasive cleaning aids or
detergents.
• The surface of the appliance may become damaged if it is not
cleaned properly. Microwave energy may escape.
Clean the appliance on a regular basis, and remove any food
remnants immediately.
• Do not immerse the appliance in water or clean under a jet of
water.
Cleaning agent
To ensure that the dierent surfaces are not damaged by using the wrong cleaning agent, see
the information in the table. Wash new sponge or cloth thoroughly before use.
Do not use:
APPLIANCE FRONT
Hot soapy water:
Clean using a dish cloth and then dry with a soft cloth.
Do not use metal or glass scrapers for cleaning.
CLEANING AND MAINTENANCE
Harsh or abrasive cleaning
agents
Metal or glass scrapers to
clean the door panels
Metal or glass scrapers to
clean the door seal
Hard scouring pads or
sponges
Cleaning agents with a
high alcohol content
EN-42
COOKING COMPARTMENT MADE OF STAINLESS STEEL
RECESS IN THE COOKING COMPARTMENT
TURNTABLE AND ROLLER RING
DOOR PANELS
APPLIANCE FRONT WITH STAINLESS STEEL
Glass cleaner:
Clean with a dish cloth. Do not use glass scrapers.
Hot soapy water:
When placing the turntable back into its recess,
it must engage properly.
Damp cloth:
Water must not be allowed to run into the appliance through the
turntable drive. Dry the turntable drive with a cloth.
Hot soapy water or vinegar solution:
Clean using a dish cloth and then dry with a soft cloth. Do not
use oven spray or any other aggressive oven cleaners or
abrasive materials. Scouring pads, rough sponges and pan
cleaners are also unsuitable. These items scratch the surface.
Allow the interior surfaces to dry completely.
Hot soapy water:
Clean using a dish cloth and then dry with a soft cloth.
Remove splashes and patches of limescale, grease, starch and
albumin immediately. Corrosion can form under these patches
or splashes. Do not use glass cleaners or metal or glass scrapers
for cleaning.
EN-43

Microwave oven interfering
TV reception
Radio and TV reception may be interfered when
microwave oven operating. It is similar to the
interference of small electrical appliances, like
mixer, vacuum cleaner, and electric fan.
It is normal.
In cooking, steam may come out of food. Most will
get out from vents. But some may accumulate on
cool place like oven door. It is normal.
Steam accumulating on
door, hot air out of vents
Oven started accidentally
with no food in.
It is forbidden to run the unit without any food inside.
It is very dangerou s.
Normal
Oven cannot
be started.
(1) Power cord is not
plugged in tightly.
Unplug. Then plug again after
10 seconds.
Replace fuse or reset circuit
breaker (repaired by
professional personnel of our
company)
Test outlet with other electrical
appliances.
Close door well.
(3) Trouble with outlet.
(4) Door is not closed
well.
(2) Fuse blowing or
circuit breaker
works.
Oven does not heat.
TROUBLE SHOOTING
Dim oven light
In low power microwave cooking, oven light may
become dim. It is normal.
Trouble Possible Cause Remedy
EN-44

#
Details
Matter
