Loading ...
Loading ...
Loading ...
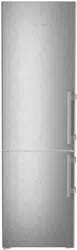
C5250 1855 mm
73.03 in
597 mm
23.5 in
611 mm
24.06 in
x
675 mm
26.57 in
x
719 mm
28.31 in
x
846 mm
33.31 in
882 mm
34.72 in
1178 mm
46.38 in
x
1186 mm
46.69 in
x
SC5781 2015 mm
79.33 in
597 mm
23.5 in
611 mm
24.06 in
x
675 mm
26.57 in
x
719 mm
28.31 in
x
846 mm
33.31 in
882 mm
34.72 in
1178 mm
46.38 in
x
1186 mm
46.69 in
x
SCB5790IM 2015 mm
79.33 in
597 mm
23.5 in
611 mm
24.06 in
x
675 mm
26.57 in
x
719 mm
28.31 in
x
846 mm
33.31 in
882 mm
34.72 in
1178 mm
46.38 in
x
1186 mm
46.69 in
x
SC7751 2015 mm
79.33 in
747 mm
29.41 in
610 mm
24.02 in
x
675 mm
26.57 in
x
719 mm
28.31 in
x
1059 mm
41.69 in
1096 mm
43.15 in
1314 mm
51.73 in
x
1322 mm
52.05 in
x
SCB7760IM 2015 mm
79.33 in
747 mm
29.41 in
610 mm
24.02 in
x
675 mm
26.57 in
x
719 mm
28.31 in
x
1059 mm
41.69 in
1096 mm
43.15 in
1314 mm
51.73 in
x
1322 mm
52.05 in
x
CB7790IM 2015 mm
79.33 in
747 mm
29.41 in
610 mm
24.02 in
x
675 mm
26.57 in
x
— 1059 mm
41.69 in
— 1314 mm
51.73 in
x
—
x
For appliances with supplied wall spacers, the dimen‐
sions must be increased by 15 mm (0.59 in)
(see 7 Mounting wall spacers) .
4 Ventilation requirements
NOTICE
Risk of damage due to overheating in the case of insuf‐
ficient ventilation!
In the case of insufficient ventilation, the compressor
can be damaged.
u
Make sure there is sufficient ventilation.
u
Observe the ventilation requirements.
If the appliance is integrated in a fitted kitchen, the
following ventilation requirements must be met:
-
The spacing fins on the back of the appliance are
used to ensure sufficient ventilation. These must not
lie in cavities or recesses in their final installation
position.
-
Basically, the larger the ventilation gap, the more
energy the appliance saves during operation.
5 Transporting the appliance
u
On initial setup: Transport the appliance in its pack‐
aging.
u
When transporting after initial setup (e.g. reloca‐
tion): Transport the appliance unloaded.
u
Transport the appliance upright.
u
Use two people when transporting the appliance.
6 Unpacking the appliance
If the appliance is damaged check with the supplier
immediately before connecting it.
u
Check the appliance and packaging for damage
during transport. If you suspect any damage, please
contact your supplier immediately.
u
Remove all materials that could prevent it from
being installed properly or prevent proper ventilation
from the back or the side panels of the appliance.
u
Remove all protective films from the appliance. Do
not use sharp or pointed objects for this.
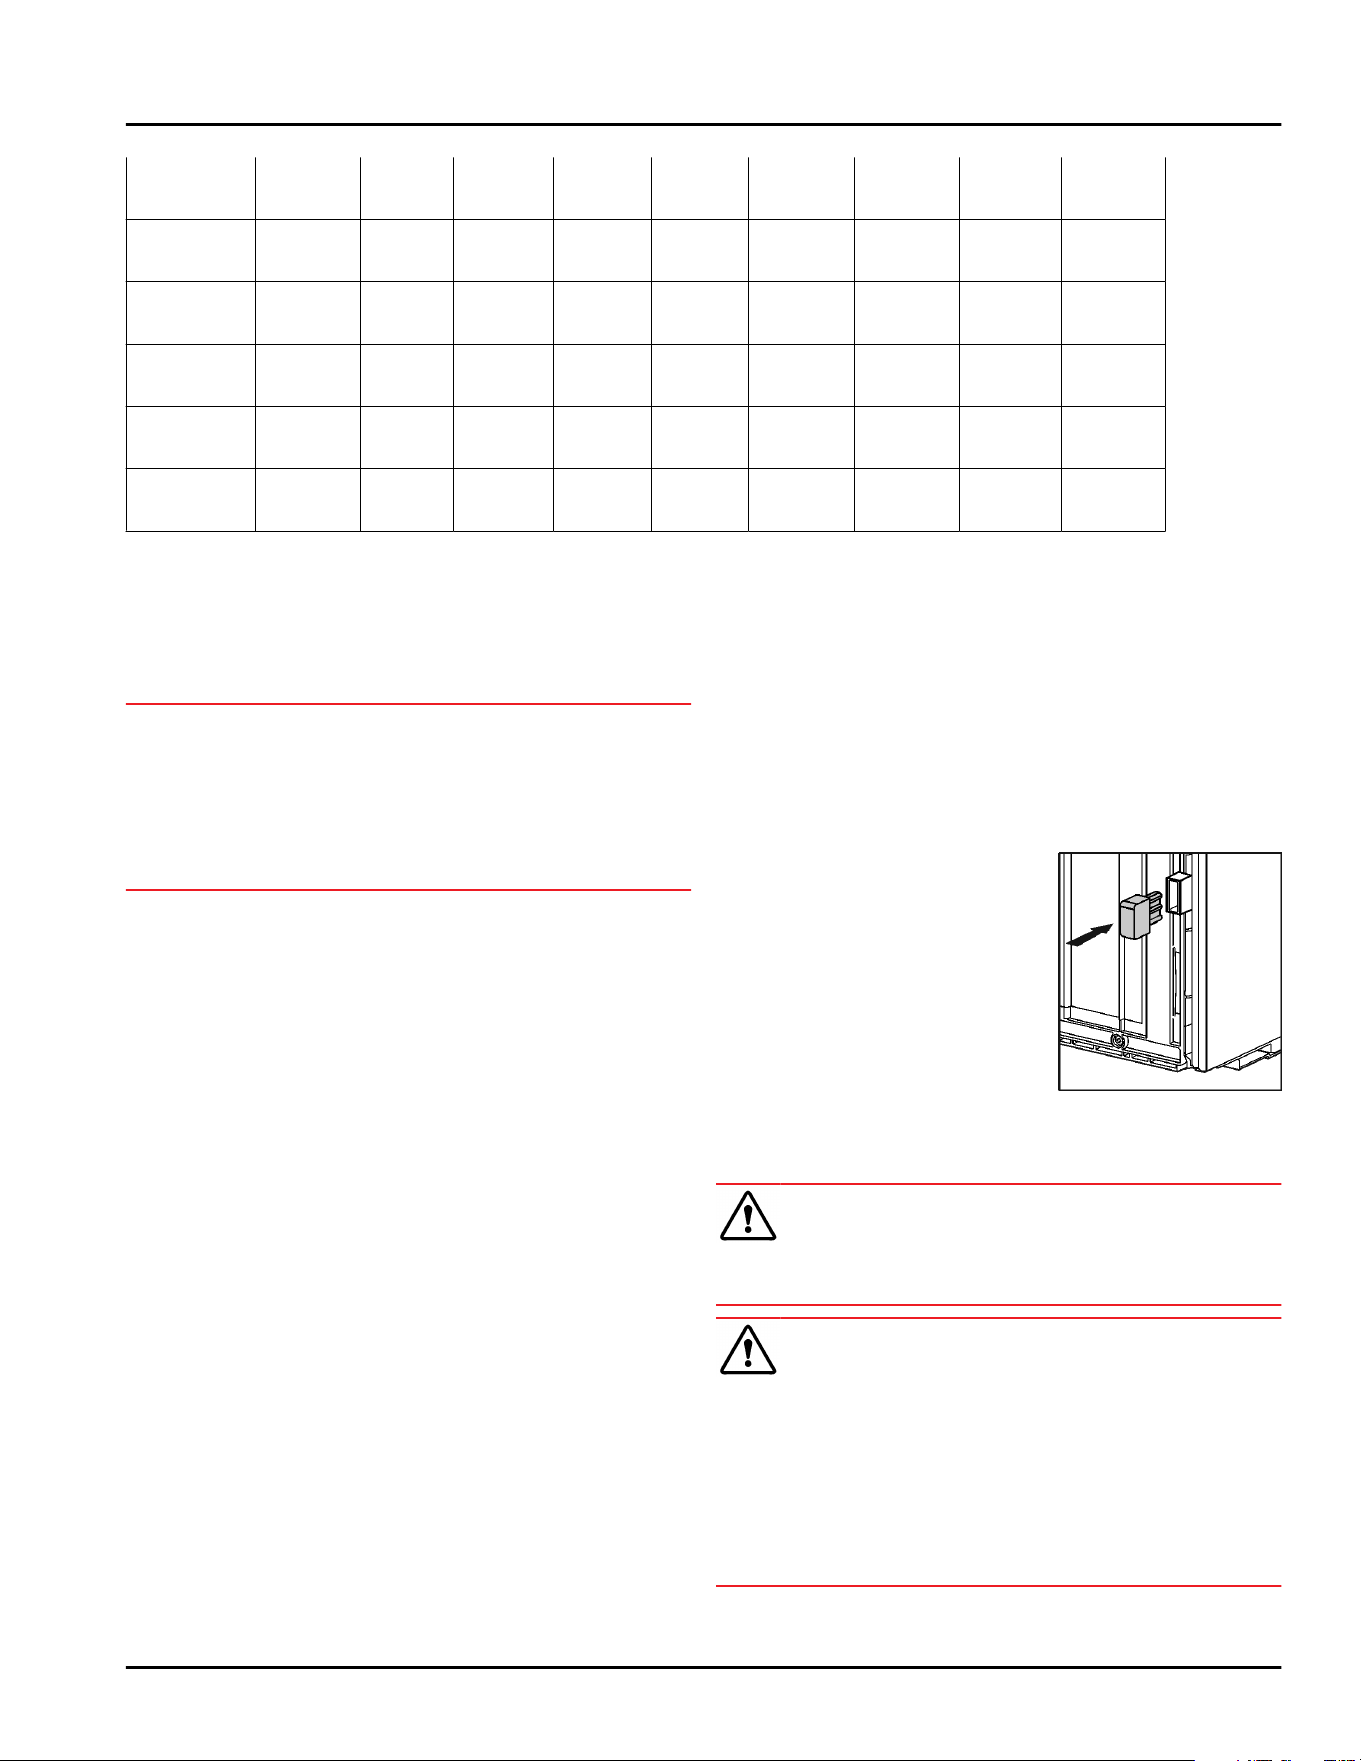
7 Mounting wall spacers
The spacers must be used in order to reach the
declared energy consumption levels as well as to avoid
the formation of condensate water at high levels of
ambient humidity. These will extend the depth of the
appliance by approx. 15 mm (0.59 in). The appliance is
fully functional if the spacers are not used, but it will
consume slightly more energy.
u
If wall spacers are supplied
with an appliance, these wall
spaces must be mounted on
the left and right of the back
of the appliance.
8 Setting up the device
CAUTION
Risk of personal injury!
u
Have two people move this appliance into place.
CAUTION
Risk of injury and damage!
The door can strike against the wall, which would
damage it. In the case of glass doors, the broken glass
may cause injury!
u
Protect the door from striking against the wall. Place
a door stopper, e.g. a felt stopper, on the wall.
u
A device that limits door opening to 90° can be
ordered from a qualified service provider.
Ventilation requirements
6 * Depending on model and options
Loading ...
Loading ...
Loading ...