Loading ...
Loading ...
Loading ...
ENGLISH
USING THE NINJA® FOODI® GRILL
GRILLCONTROL TECHNOLOGY
When using the Grill function, you will need
to select the grill grate temperature setting.
Below are recommended temperature levels for
common ingredients.
SPLATTER SHIELD
Located on the underside of the hood, the splatter
shield helps keep the heating element clean.
ALWAYS ensure the splatter shield is installed when
cooking. Failure to use the splatter shield will result
in oil buildup on the heating element, which can
cause smoking.
Removing the splatter shield
Remove the splatter shield for cleaning after
every use. Once the splatter shield has cooled
completely, remove it by pushing the upper left
tab toward the back of the hood. This will release
the splatter shield, allowing you to remove it.
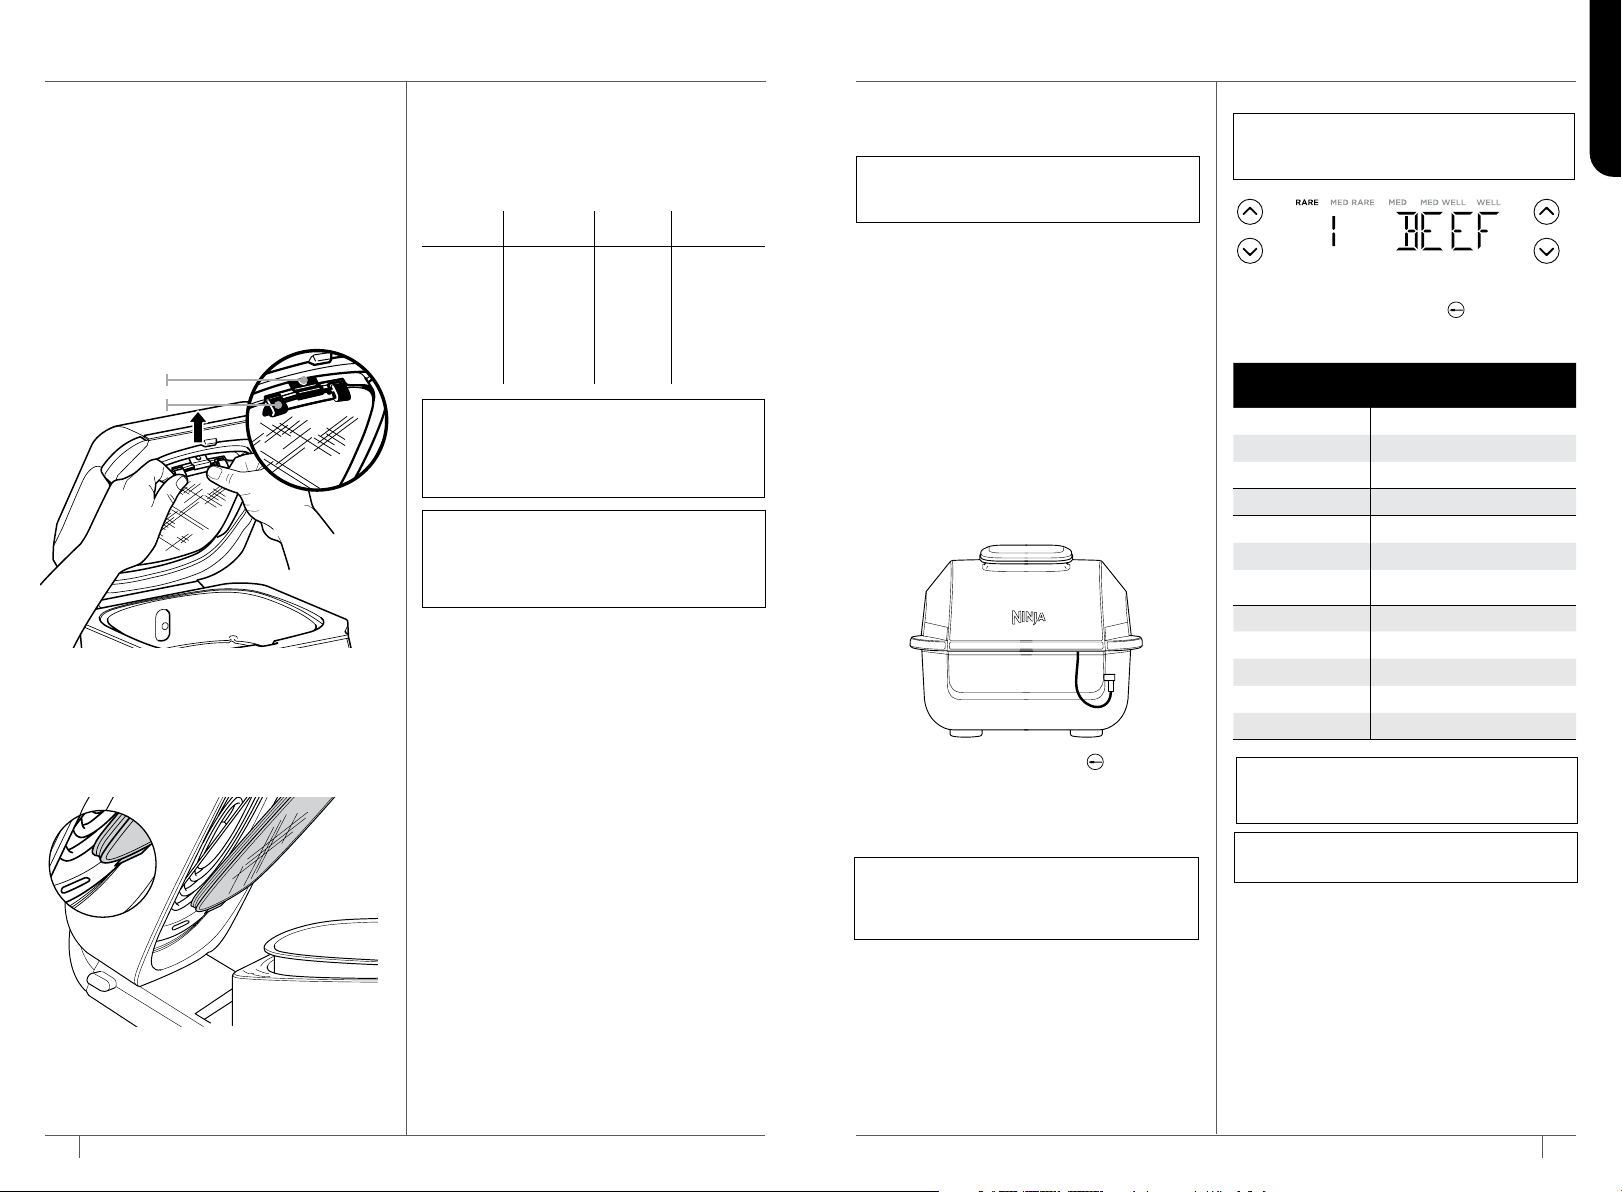
USING THE FOODI® SMART THERMOMETER
(not included in all models)
Before First Use
Make sure the thermometer jack is free of any
residue and the cord is free of knots before
plugging it into the jack.
1 Unwind the cord from the magnetic storage
compartment to remove the thermometer.
Note: The storage compartment is magnetic
and can be placed on either side of the unit.
2 Plug the thermometer into the jack of the right
side of the control panel. Push firmly on the
plug until it cannot go into the jack any further.
Place the storage compartment back onto the
side of the unit.
3 Once the thermometer is plugged into the
jack, it will enable and illuminate PRESET and
MANUAL. Select the desired cook function by
pressing FUNCTION and cook temperature.
4 Press the thermometer button to fully
illuminate PRESET and use the arrows to the
right of the display to select your desired food
type and the arrows to the left of the display
to set the internal doneness of your food (Rare
through Well).
NOTE: There is no need to set a cook time, as
the unit will automatically turn o the heating
element and alert you when your food has
finished cooking.
8 9
ninjakitchen.com ninjakitchen.com
NOTE: The unit may produce smoke when
cooking ingredients on a hotter setting than
what is recommended. For more cooking
charts, refer to your Inspiration Guide or visit
ninjakitchen.com.
NOTE: For less smoke, we recommend using
canola, coconut, avocado, grapeseed, or
vegetable oil instead of olive oil. Heating oil
past its smoke point can impart food with a
burnt, acrid flavor.
LO
(400°F)
MED
(450°F)
HI
(500°F)
MAX
(up to 510°F)
• Bacon
• Sausages
• When
using
thick BBQ
sauce
• Frozen
meats
• Marinated/
sauced
meats
• Steaks
• Chicken
• Burgers
• Hot dogs
• Meat
kebabs
• Veggies
• Fruit
• Pizzas
• Fresh/
frozen
seafood
• Veggie
Kebabs
Switching to Grill after using another function
If the unit is already warm from using a dierent
function, “ADD FOOD” may appear on the screen
immediately. We recommend allowing the grill
grate to heat up for at least 6 minutes before
placing ingredients on it.
Batch grilling
When grilling more than two consecutive batches
of food, it is recommended that you empty the
fat/oil from the removable cooking pot. It is also
HIGHLY recommended to clean the splatter shield
in between uses. This will help prevent grease
from burning and causing smoke.
If you would like to skip the Preheat process,
press the PREHEAT button.
FOOD TYPE: SET DONENESS TO:
Fish Medium (130°F)
Medium Well (140°F)
Well Done (150°F)
Chicken/Turkey Well Done (170°F)
Pork Medium (130°F)
Medium Well (150°F)
Well Done (160°F)
Beef/Lamb Rare (110°F)
Medium Rare (125°F)
Medium (130°F)
Medium Well (145°F)
Well Done (155°F)
To use the MANUAL function instead of PRESET,
press the thermometer button again to switch
to MANUAL. Use the recommended internal cook
temperatures below:
NOTE: Cooking dierent meats or the sames
ones to dierent doneness? Refer to the next
page for details on programming.
NOTE: Set doneness for BEEF/LAMB are lower
than normal recommendations as unit will
carry-over cook 5-10°F.
Front Tab
Lift Clip
IMPORTANT: DO NOT place hands near Foodi
Smart Thermometer cord when in use to
prevent burning or scalding
NOTE: Reference USDA guidelines for food-
safe temperature recommendations.
Installing the splatter shield
To install, insert the splatter shield so the grooves
on the splatter shield ring match those of the fixed
heat shield ring notch on the right. Then gently
push the splatter shield upward until it clicks into
the tab on the left side.
5 Place the accessory required (excluding the
thermometer) for your selected cook function
in the unit and close the hood. Press START/
STOP to begin preheating.
Loading ...
Loading ...
Loading ...