Loading ...
Loading ...
Loading ...
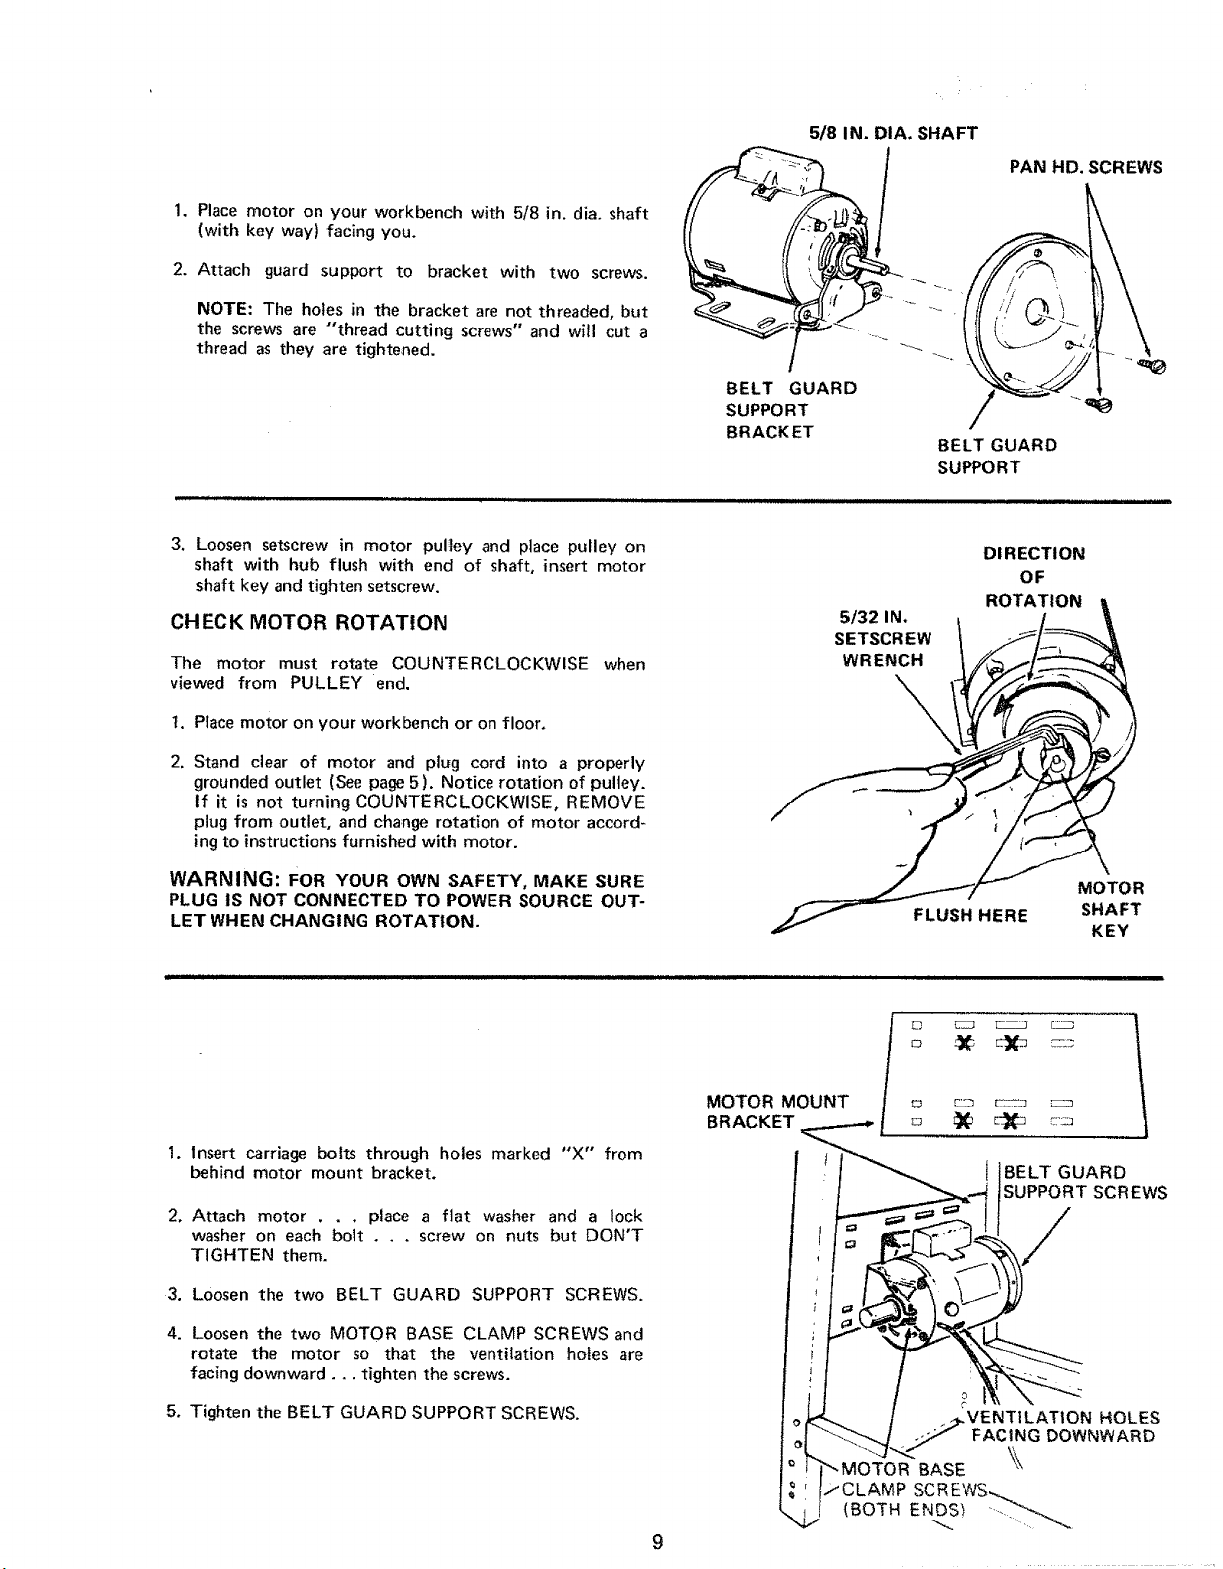
1. Place motor on your workbench with 5/8 in. dia. shaft
(with key way) facing you.
2. Attach guard support to bracket with two screws.
NOTE: The holes in the bracket are not threaded, but
the screws are "thread cutting screws" and will cut a
thread as they are tightened.
5/8 IN. DIA. SHAFT
BELT GUARD
SUPPORT
BRACK ET
BELT GUARD
SUPPORT
PAN HID. SCREWS
3, Loosen setscrew in motor pulley and place pulley on
shaft with hub flush with end of shaft, insert motor
shaft key and tighten setscrew.
CHECK MOTOR ROTATION
The motor must route COUNTERCLOCKWISE when
viewed from PULLEY end.
1. Place motor on your workbench or on floor,
2. Stand clear of motor and plug cord into a properly
grounded outlet (See page 5). Notice rotation of pulley.
If it is not turning COUNTERCLOCKWISE, REMOVE
plug from outlet, and change rotation of motor accord-
ing to instructions furnished with motor.
WARNING: FOR YOUR OWN SAFETY, MAKE SURE
PLUG IS NOT CONNECTED TO POWER SOURCE OUT-
LET WHEN CHANGING ROTATION.
5/32 IN,
SETSCREW
WRENCH
\,
DIRECTION
OF
ROTATION
FLUSH HERE
MOTOR
SHAFT
KEY
1. Insert carriage bolts through holes marked "X" from
behind motor mount bracket.
2, Attach motor . . , place a flat washer and a lock
washer on each bolt . . . screw on nuts but DON'T
TIGHTEN them.
3. Loosen the two BELT GUARD SUPPORT SCREWS.
4. Loosen the two MOTOR BASE CLAMP SCREWS and
rotate the motor so that the ventilation holes are
facing downward.., tighten the screws.
5. Tighten the BELT GUARD SUPPORT SCREWS.
9
MOTOR MOUNT
BRACKET
o
BELT GUARD
SCREWS
/
.VENTILATION HOLES
FACING DOWNWARD
BASE
JCLAMP SCREWS
(BOTH ENOS_ _
Loading ...
Loading ...
Loading ...