Loading ...
Loading ...
Loading ...
9www.warmlite.co
HANDLING
Before continuing any further with the
installation of this re please read the following:
• Two people should be sucient to lift the
re.
• When lifting always keep your back
straight. Bend your legs and not your
back.
• Avoid twisting at the waist. It is better to
reposition your feet.
• Avoid upper body / top heavy bending.
Always bend from the knees rather
than the waist. Do not lean forward or
sideways whilst handling the re.
• Always grip with the palm of your hand.
Do not use the tips of ngers for support.
• Always keep the product as close to the
body as possible to prevent unnecessary
and undue strain on the body.
• Use gloves to provide additional grip.
• Always use assistance if required.
UNPACKING THE PRODUCT
The unit is supplied in a single package
carton. Carefully unpack the product using the
following procedure:
• Ensure that the product is in the correct
position with the carton wording legible.
• Remove the straps and sleeve.
• Carefully lift the replace out of the box.
• Remove the protective packaging and
bag from the suite.
• Locate the xing pack and put aside.
• Carefully remove the protective lm
covering the re.
INSTALLATION
IMPORTANT: Do not connect the appliance
until it is properly xed to the wall and the
instructions have been read fully.
Ensure the minimum distances are
observed.
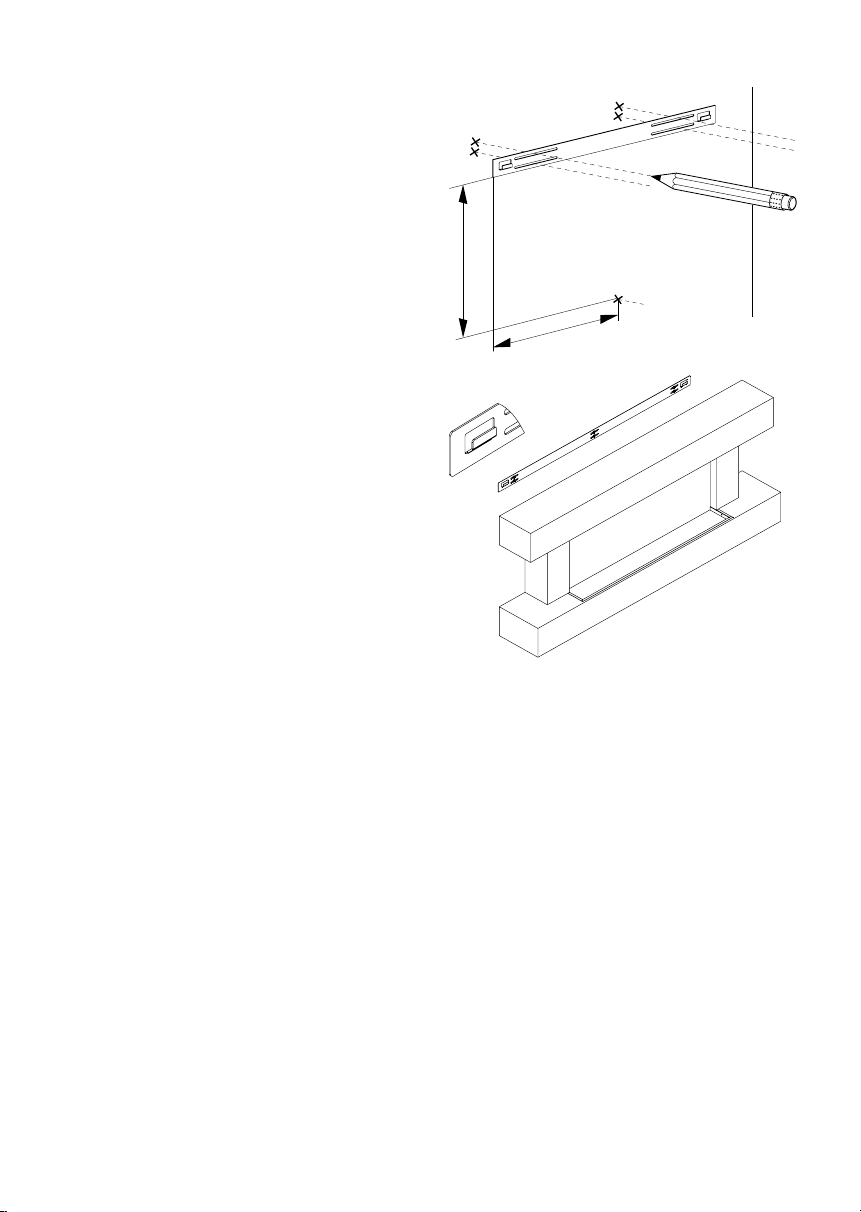
1. The re is designed to be permanently
xed to a wall at a minimum height
of 300mm. The wall bracket must be
tted horizontally and the cable routed
to the bottom right of the re. A height
of 600mm from the oor to the bottom
of the wall re is recommended for
optimum viewing of the fuel bed.
2. Use the bracket as a table template
and mark ve drill positions on the wall.
Ensure that these holes are all level.
3. Put the bracket aside and drill holes
with a depth of 35mm using a 2mm
pilot drill bit & 8mm drill bit.
4. Clean the holes from dust and debris
and insert one plug in each hole. Make
sure the edge of each hole is ush with
the surface.
5. Hold the bracket in position and x it in
place with screws.
475 mm
330.5 m
m
Loading ...
Loading ...
Loading ...