Loading ...
Loading ...
Loading ...
en Before using for the first time
10
6.1 Locking function
The locking function prevents the accessories from tilt-
ing when they are pulled out.
You can pull out the accessories approximately halfway
without them tipping. The accessories must be inserted
into the cooking compartment correctly for the tilt pro-
tection to work properly.
6.2 Sliding accessories into the cooking
compartment
Always slide the accessory into the cooking compart-
ment the right way round. This is the only way to en-
sure that accessories can be pulled out approximately
halfway without tipping.
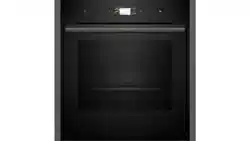
1.
Turn the accessories so that the notch
is at the
rear and is facing downwards.
2.
Insert the accessory between the two guide rods for
a shelf position.
Wire rack Insert the wire rack with the open
side facing the appliance door.
Tray
E.g. univer-
sal pan or
baking tray
Slide the tray in with the sloping
edge towards the appliance door.
3.
Push the accessory all the way in, making sure that
it does not touch the appliance door.
Note:Take any accessories that you will not be using
out of the cooking compartment while the appliance is
in operation.
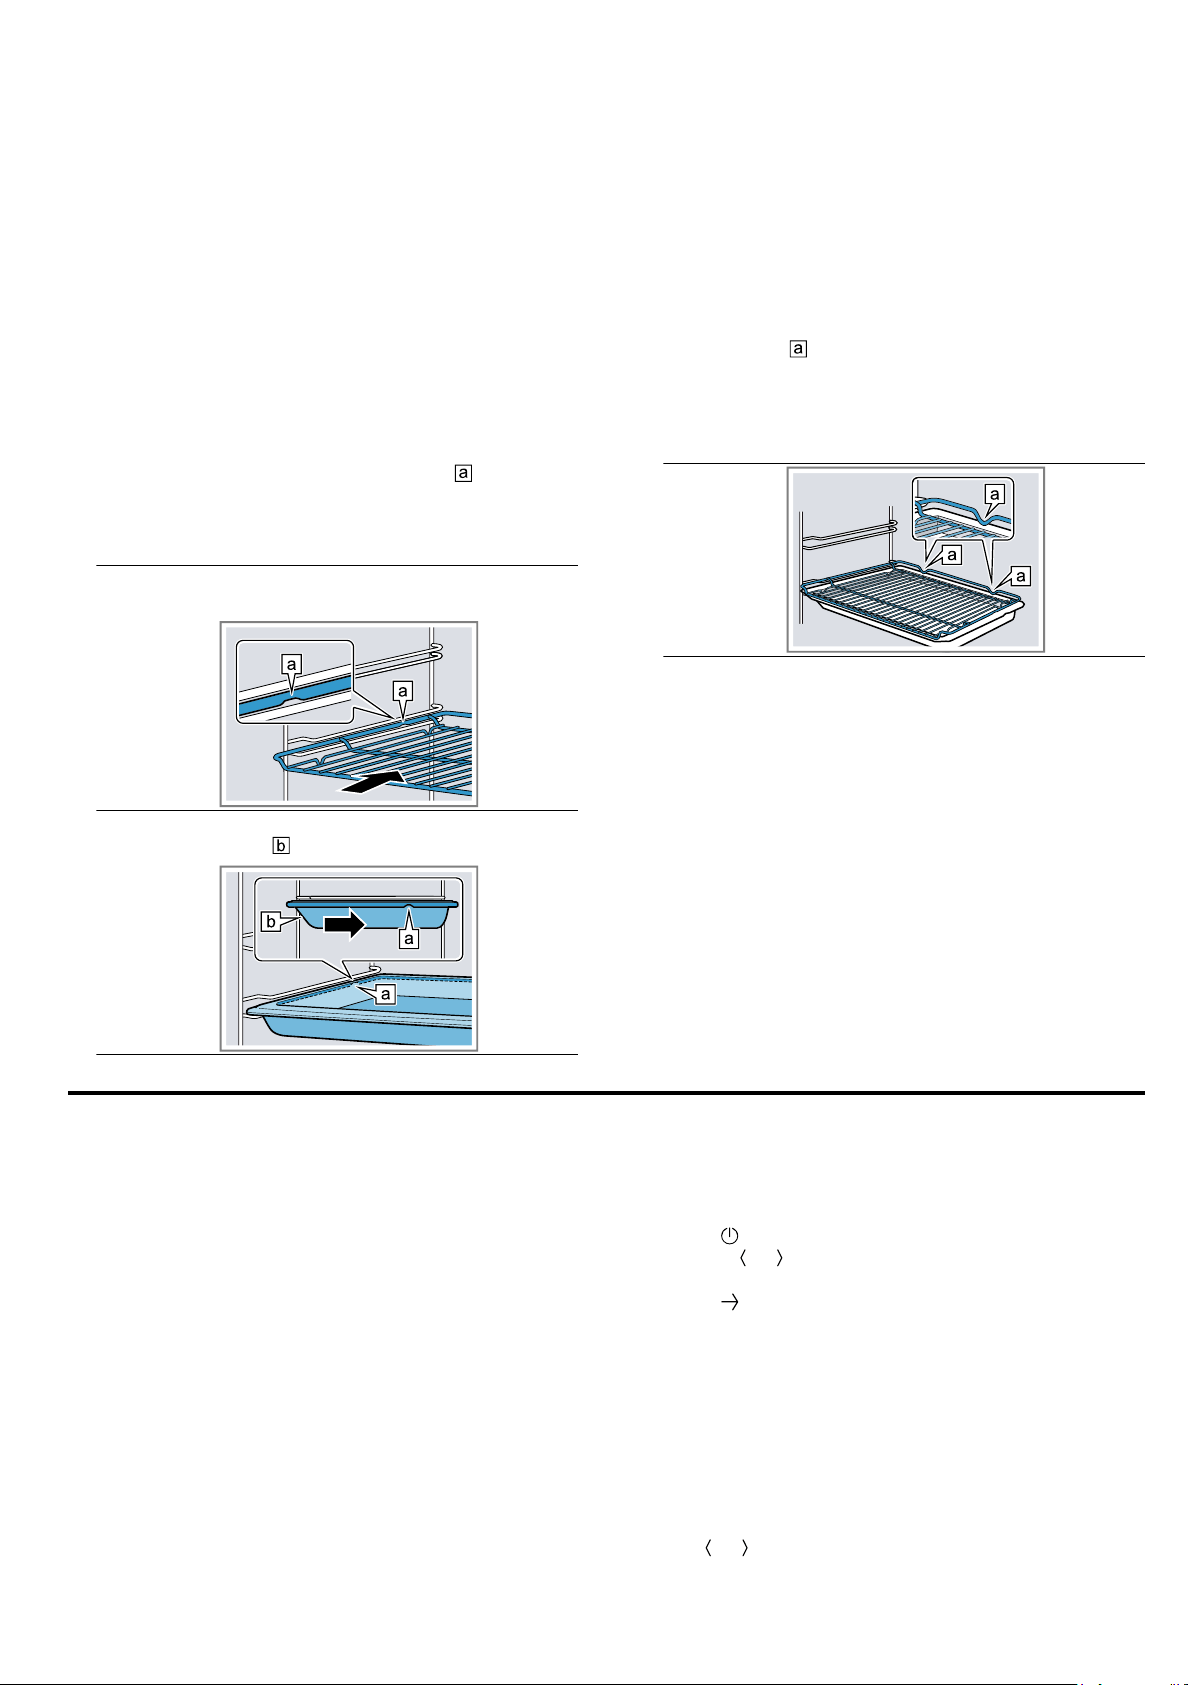
Combining accessories
You can combine the wire rack with the universal pan
to catch any liquid that drips down.
1.
Place the wire rack on the universal pan so that
both spacers
are on the rear edge of the univer-
sal pan.
2.
Insert the universal pan between the two guide rods
for a shelf position. In so doing, the wire rack is on
top of the upper guide rod.
Wire rack
on univer-
sal pan
6.3 Other accessories
You can purchase other accessories from our after-
sales service, specialist retailers or online.
You will find a comprehensive range of products for
your appliance in our brochures and online:
www.neff-international.com
Accessories vary from one appliance to another. When
purchasing accessories, always quote the exact
product number (E no.) of your appliance.
You can find out which accessories are available for
your appliance in our online shop or from our after-
sales service.
7 Before using for the first time
Configure the settings for initial start-up. Clean the ap-
pliance and accessories.
7.1 Initial use
After connecting the appliance to the power supply,
you must configure the settings for its initial start-up. It
may take a few minutes for the settings to appear on
the display.
Notes
¡ You can adjust the settings at any time in the basic
settings.
→"Basic settings", Page16
¡ You can also use HomeConnect to configure the
settings. When your appliance is connected, follow
the instructions in the app.
→"HomeConnect ", Page17
Setting the language
Requirement:The appliance is connected to the power
supply.
1.
Press
to switch the appliance on.
2.
Use the or button to select the language.
3.
Press the required language.
4.
Press to confirm the language.
Setting up HomeConnect
Note:You can skip HomeConnect set-up by pressing
"Later". Next, set the clock.
1.
Press "Connect" to set up HomeConnect.
→"HomeConnect ", Page17
2.
Make all other settings for initial start-up in the
HomeConnect app.
Setting the time
1.
Use or to select the hours.
Loading ...
Loading ...
Loading ...