Loading ...
Loading ...
Loading ...
18
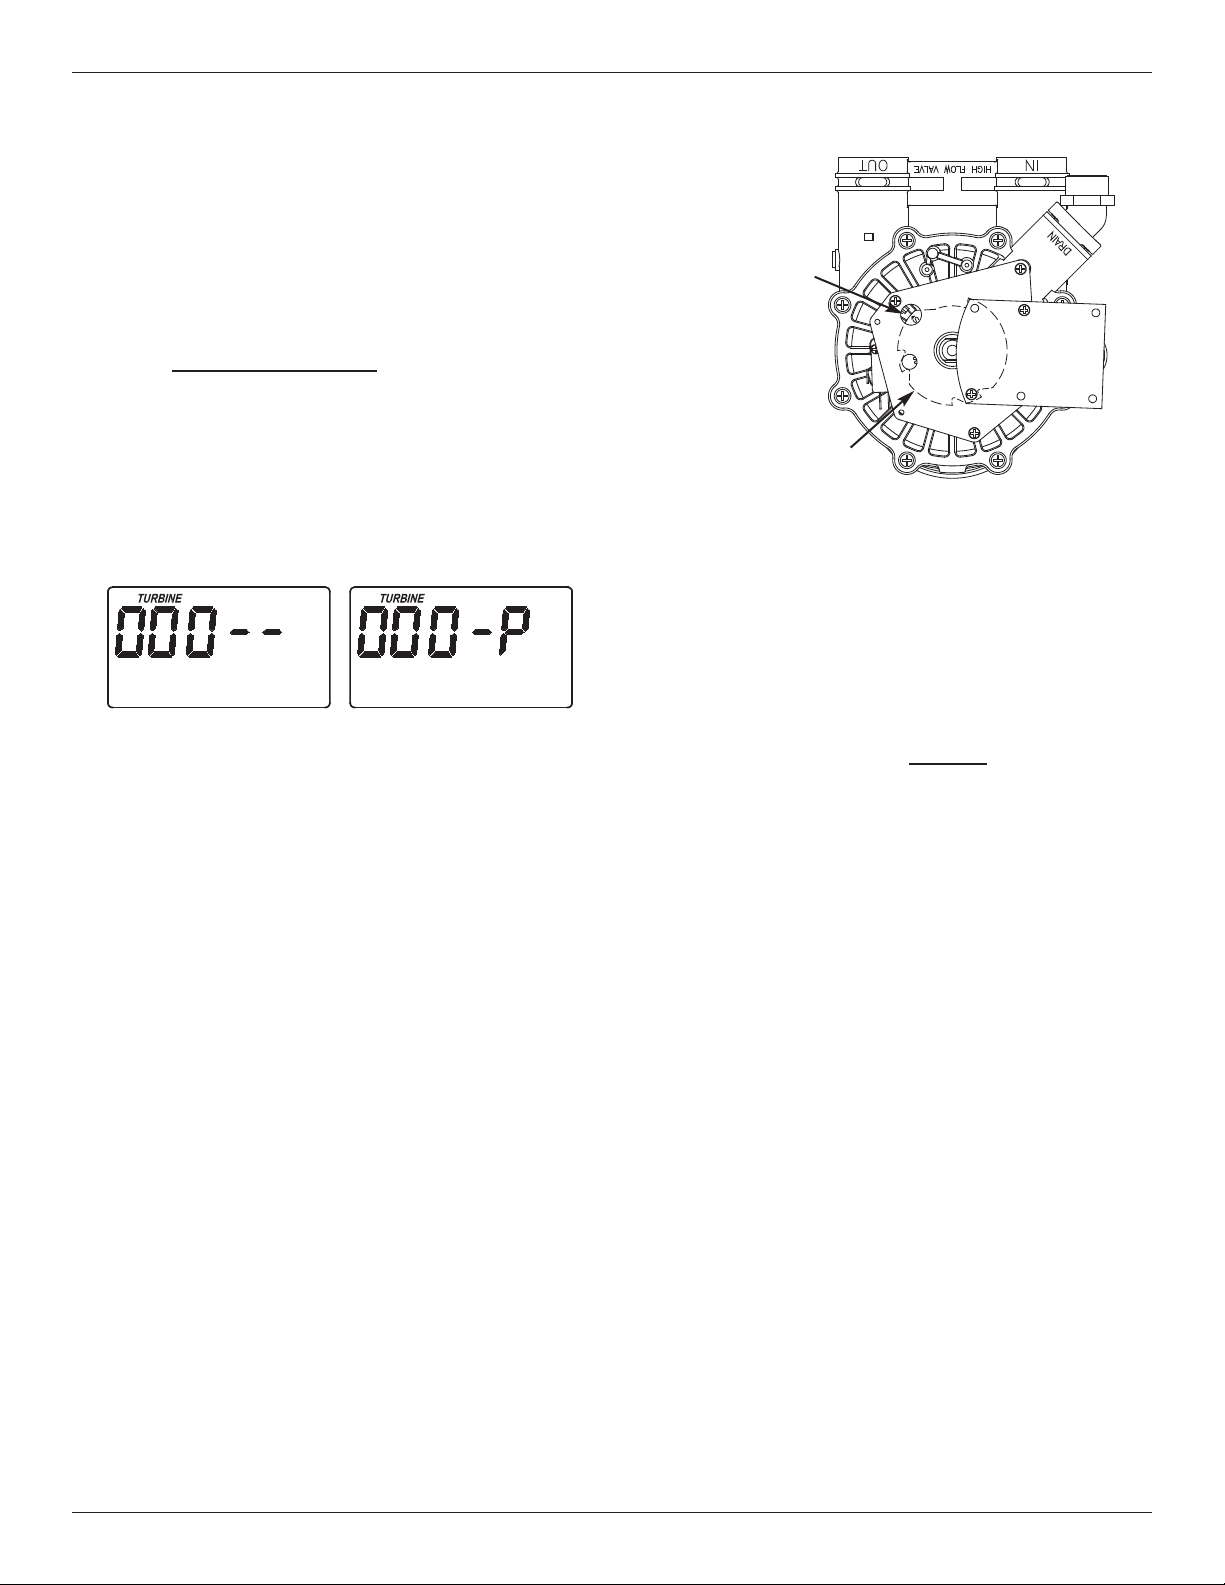
Position markers
(valve in service)
CAM
MOTOR
FIG. 34
Troubleshooting
MANUALLY INITIATED ELECTRONIC
DIAGNOSTICS
U
se the following procedures to advance the filter
through the recharge cycles to check operation.
Remove the top cover faceplate assembly by unlock-
ing the tabs and lifting, to observe cam and switch
operation during valve rotation (See Figure 34).
1. Press and hold for 3 seconds
the SELECT button,
until one of the screens shown in Figure 33 is dis-
played. If the valve is in service, fill, solution draw /
brining, backwash or fast rinse position (observe
markings on the valve cam), the display should
show “000 - -”, meaning the position switch is
open. When the valve is moving, the display
should show “000 - P”, meaning that the position
switch is closed.
2. Only for filter systems modified by adding a
turbine and turbine cable:
If a turbine has been installed in your filter’s valve
outlet port, the first 3 digits of the display in Figure
33 should count upward whenever water is flowing
through the system.
3. Use the TOUCH/HOLD button to manually advance
the valve into each position and check correct switch
operation.
4. While in this diagnostic screen, the following infor-
mation is available and may be beneficial for vari-
ous reasons. This information is retained by the
computer from the first time electrical power is
applied to the electronic controller.
a. Press the r UP button to display the number of
days this electronic control has had electrical
power applied.
b. Press the s DOWN button to display the num-
ber of recharges initiated by this electronic con-
trol since the model code number was entered.
5. Press the SELECT button and hold in for 3 sec-
onds until the model code shows in the display.
This code identifies the filter model. If the wrong
number shows (see table on page 4), the filter will
operate on incorrect configuration data.
6. To change the code number - Press the r UP or
s DOWN button until the correct code shows.
7. To return to the present time display, press the
SELECT button. If the model code was
changed, make all timer settings.
NOTE: If the electronic control is left in a diagnostic
display (or a flashing display when setting
times or hardness), present time automatically
returns if a button is not pressed within 4 min-
utes.
FIG. 33
Loading ...
Loading ...
Loading ...