Loading ...
Loading ...
Loading ...
10
English
4. When the power supply is turned on, the drain pump
should operate. Drainage can be checked at the
transparent part of the drain socket.
(The drain pump will automatically stop after 10
minutes.)
After checking the drainage of water, refer to Fig.20
and attach the sealing material (14) to perform the
thermal insulation of the drain socket.
• Do not connect the drain piping directly to the
sewage that gives off ammonia odor.
The ammonia in the sewage may go through the
drain piping and corrode the heat exchanger of
the indoor unit.
• Do not apply external force to the oat switch or it
could cause malfunction.
5. Turn off the power supply after checking drainage,
and remove the power supply wiring.
6. Attach the control box cover as before.
• Do not touch the electronic parts other than the
terminal block (X2M).
(3) Sweating may occur and result in water leakage.
Therefore, make sure to insulate the indoor drain pip-
ing and socket locations.
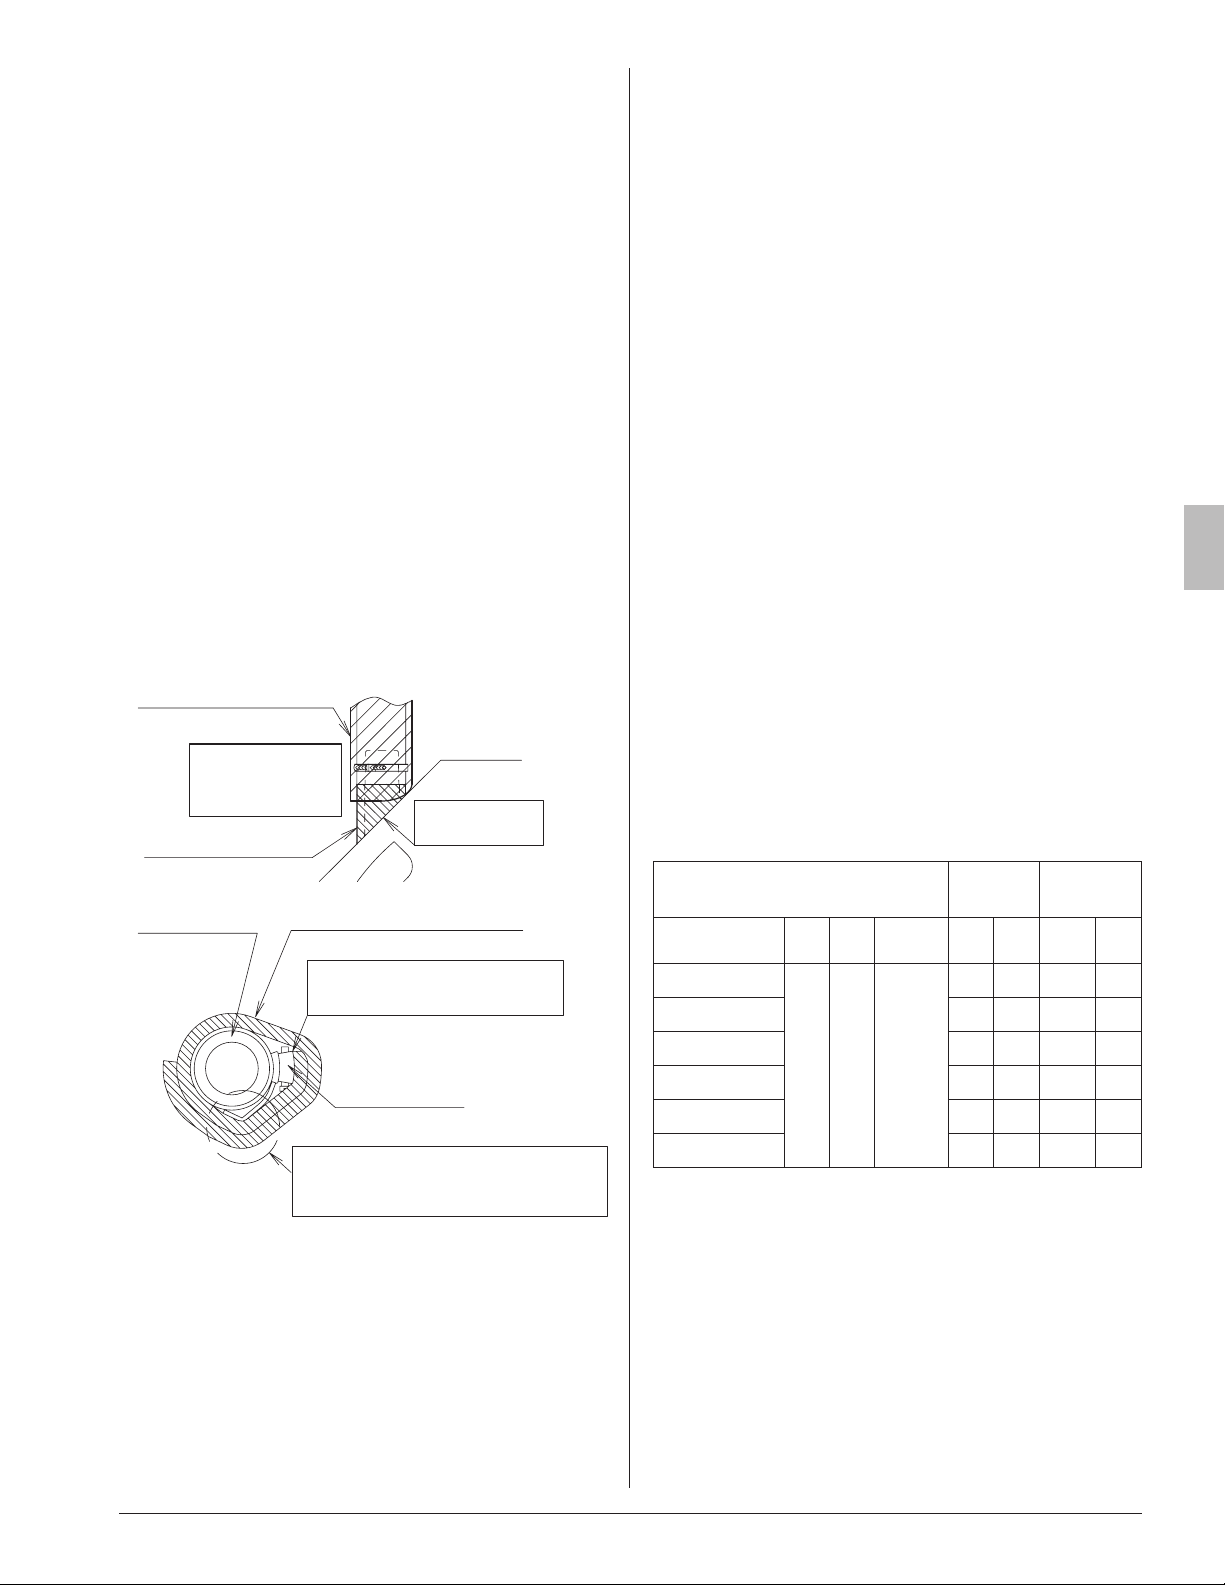
After drainage is checked, put the attached sealing
material (14) referring to Fig.20, and insulate the drain
hose (1) and the metal clamp (2) with the attached seal-
ing material (Large) (10) referring to Fig. 22.
Start wrapping from where the
metal clamp (2) is tightened.
Wrap the sealing material (Large) (10)
so that the metal clamp (2) end side
may be doubled.
Metal clamp (2)
(accessory)
Drain hose (1)
(accessory)
Sealing material (Large) (10)
(accessory)
Sealing material (14)
(accessory)
Sealing material - Large
(10) (accessory)
Be sure to lay the
sealing material
(10) on (14).
Do not have
the clearance.
Fig. 22
8. ELECTRIC WIRING WORK
8-1 GENERAL INSTRUCTIONS
• Make sure that all electric wiring work is carried out by
qualied personnel according to the applicable legislation
and this installation manual, using a separate dedicated
circuit.
Insufcient capacity of the power supply circuit or improper
electrical construction may lead to electric shocks or a re.
• Make sure to install a ground fault circuit interrupter.
Failure to do so may cause electrical shocks and a re.
• Do not turn on the power supply (branch switch, branch
overcurrent circuit breaker) until all the works are nished.
• Make sure to ground the air conditioner.
Grounding resistance should be according to applicable
legislation.
• Do not connect the ground wiring to gas or water pipings,
lightning conductor or telephone ground wiring.
• Gas piping .................Ignition or explosion may occur if
the gas leaks.
• Water piping ..............Hard vinyl tubes are not effective
ground.
• Lightning conductor or telephone ground wiring ..............
Electric potential may rise abnormally if struck by a light-
ning bolt.
• For electric wiring work, refer to also the WIRING DIA-
GRAM attached to the control box cover.
• Carry out wiring between the outdoor units, indoor units
and the remote controllers according to the wiring diagram.
• Carry out installation and wiring of the remote controller
according to the installation manual attached to the remote
controller.
• Do not touch the Printed Circuit Board assembly. It may
cause malfunction.
8-2 ELECTRICAL CHARACTERISTICS
Units
Power
supply
Fan motor
Model Hz Volts
Voltage
range
MCA MOP KW FLA
FCQ18TAVJU
60
208/
230
Max. 253
Min. 198
0.6 15 0.048 0.5
FCQ24TAVJU 0.7 15 0.048 0.5
FCQ30TAVJU 1.3 15 0.106 1.0
FCQ36TAVJU 1.5 15 0.106 1.2
FCQ42TAVJU 1.8 15 0.106 1.4
FCQ48TAVJU 1.8 15 0.106 1.4
MCA: Minimum Circuit Ampacity (A)
MOP:Maximum Overcurrent Protective Device (A)
KW: Fan Motor Rated Output (kW)
FLA: Full Load Ampere (A)
01_EN_3P161684-9U.indd 10 8/8/2018 15:26:55
Loading ...
Loading ...
Loading ...