
Loading ...
Loading ...
Loading ...
WARNING: To avoid injury, do not connect this scroll saw to a power source until it is completely assembled and
adjusted and you have read and understood the operator’s manual.
(ITEMS NOT SUPPLIED)
Star-head screwdriver
UNPACKING YOUR SCROLL SAW
YOU WILL NEED
• Unpack all parts and lay them on a at, stable surface.
• Remove all packing materials and shipping devices if applicable.
• Make sure the delivery contents are complete and free of any damage. If you nd that parts are missing or show damage
do not use the product but contact your dealer. Using an incomplete or damaged product represents a hazard to people
and property.
• Ensure that you have all the accessories and tools needed for assembly and operation. This also includes suitable
personal protective equipment.
WARNING: The use of attachments or accessories not listed in this manual might be hazardous and could cause
serious personal injury.
WARNING: Do not attempt to modify this tool or create accessories not recommended for use with this tool. Any
such alteration or modication is misuse, and could result in a hazardous condition leading to possible serious personal
injury.
WARNING: Do not connect to the power supply until assembly is complete. Failure to comply could result in
accidental starting and possible serious personal injury.
Page 11
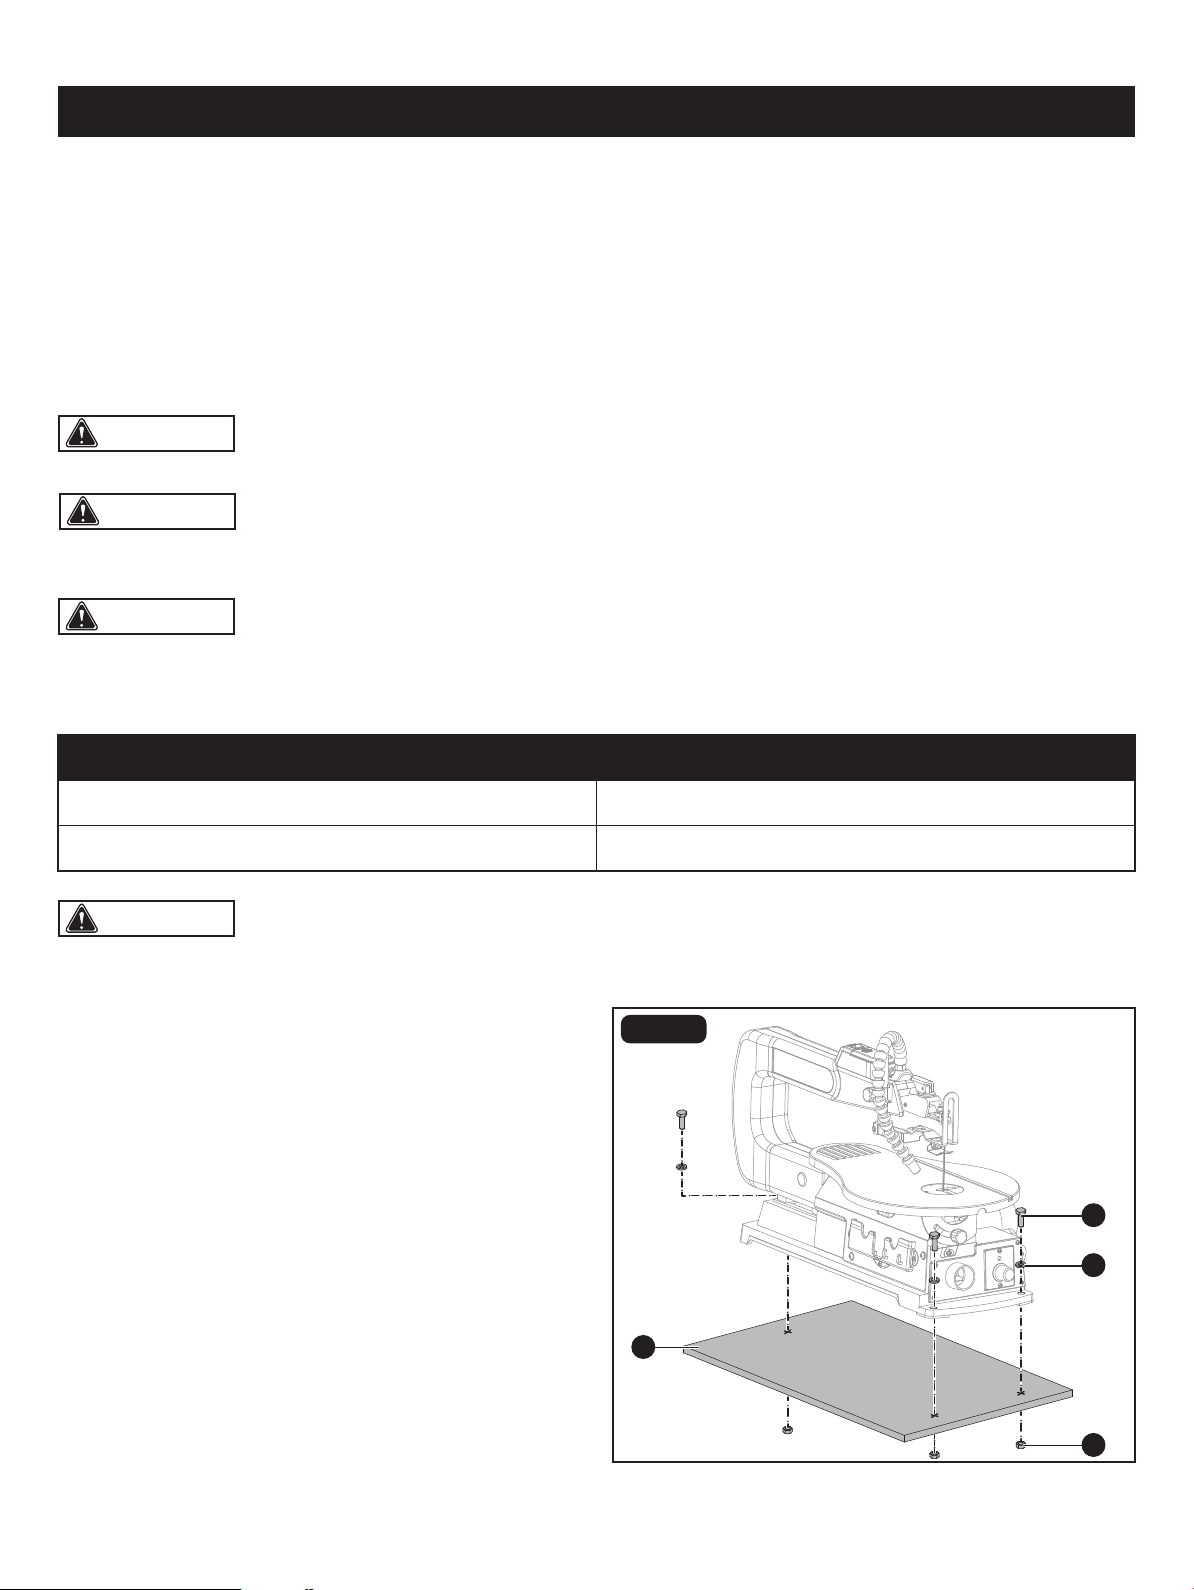
ASSEMBLY
FIG. 2
MOUNTING SCROLL SAW TO
WORKBENCH (Fig. 2)
If the scroll saw is to be used in a permanent application,
we recommend that you secure it in a permanent location
such as a workbench. Three bolt holes have been provided
in the saw’s base for this purpose. When mounting the saw
to a workbench, holes should be drilled through the supporting
surface of the workbench.
A
C
B
D
10mm Open-end wrench or Adjustment wrench
2.5mm Hex key
Combination square
• Each hole in the base of the saw should be bolted securely
using hex bolts (A), locking washers (B) and hex nuts (C)
(not included). Bolts should be of sufcient length to
accommodate the saw base, washers, nuts and the
thickness of the workbench (D).
Loading ...
Loading ...
Loading ...