Loading ...
Loading ...
Loading ...
12
4. Place the coee pot (C8) under the spouts (g. 18). Press "OK";
5. The appliance proceeds with delivery and the image of the
selected beverage appears on the display (B5), together
with a progress bar which gradually lls as the operation
proceeds and a description of each individual phase (grind-
ing, brewing coee).
Please note:
"Cancel "or Stop": press to stop preparation completely and go
back to the homepage.
6. When delivery has ended, press "Save" to save the new
settings, or "Cancel" to retain the previous parameters.
7. Press "OK" to go back to the homepage (B).
The appliance is ready to be used again.
Please note:
If you save the new settings, they are memorised ONLY in the
selected prole.
SAFETY WARNING:
After making a pot of coee, leave the ap-
pliance to cool for 5 minutes before making
another beverage. Risk of overheating!
8.1 Cleaning the coee pot
After each use, you should clean the coee pot with hot water
and mild washing up liquid. Rinse thoroughly with hot water to
eliminate all detergent residues.
9. OVER ICE (ECAM61X.7Y only)
To make the beverage, proceed as follows:
1. On the homepage (B), press the image corresponding to
over ice:
2. Select the parameters to be customised according to your
tastes by pressing "Next" after each selection:
Aroma
Quantity
3.
4. Place the ice cubes in the
glass (suggested quanti-
ty: 6 cubes);
5. Place the glass under the
coee spouts (A14) (g.
19) and press "OK". The
appliance starts making
the coee and the image
of the selected beverage
appears on the display,
together with a progress
bar which gradually lls
19
as the operation proceeds and a description of each indi-
vidual phase (grinding, brewing coee);
Please note:
• "Cancel "or Stop": press to stop preparation completely and
go back to the homepage.
• As soon as delivery has ended, to increase the quantity of
coee, just press "Extra". When the required quantity is
reached, press "Stop".
6. When delivery has ended, press "Save" to save the new
settings, or "Cancel" to retain the previous parameters.
Please note:
If you save the new settings, they are memorised ONLY in the
selected prole.
7. Press "OK" to go back to the homepage (B).
The appliance is ready to be used again.
10. MAKING MILKBASED BEVERAGES
U
Please note:
To avoid milk with poor froth or large bubbles, always clean the
milk container (D) as described in sections “10.5 Cleaning the
milk container after use” and “16.10 Cleaning the milk container
(D)”.
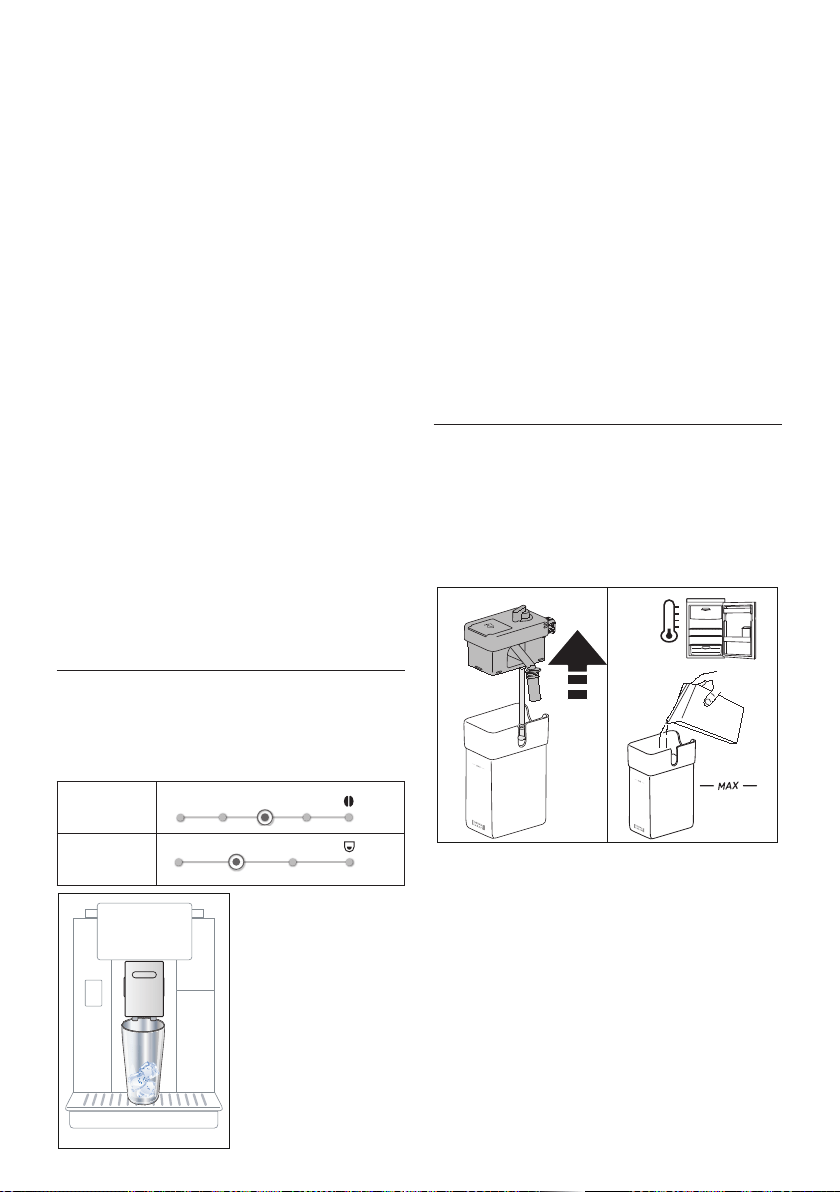
10.1 Filling and attaching the milk container
1. Lift the lid (D1) (g.20);
20 21
MILK
5°C
2. Fill the milk container (D10) with a sucient quantity of
milk, not exceeding the MAX level marked on the container
(g. 21). Each mark on the container corresponds to about
100 ml of milk;
3. Make sure the milk intake tube (D9) is correctly inserted on
the bottom of the milk container lid (g. 22);
Loading ...
Loading ...
Loading ...