
Loading ...
Loading ...
Loading ...
11INSTALLATION
ENGLISH
• Before drilling into a wall, make sure that there
are no vents, gas or water pipes, or electrical
cables behind the wall.
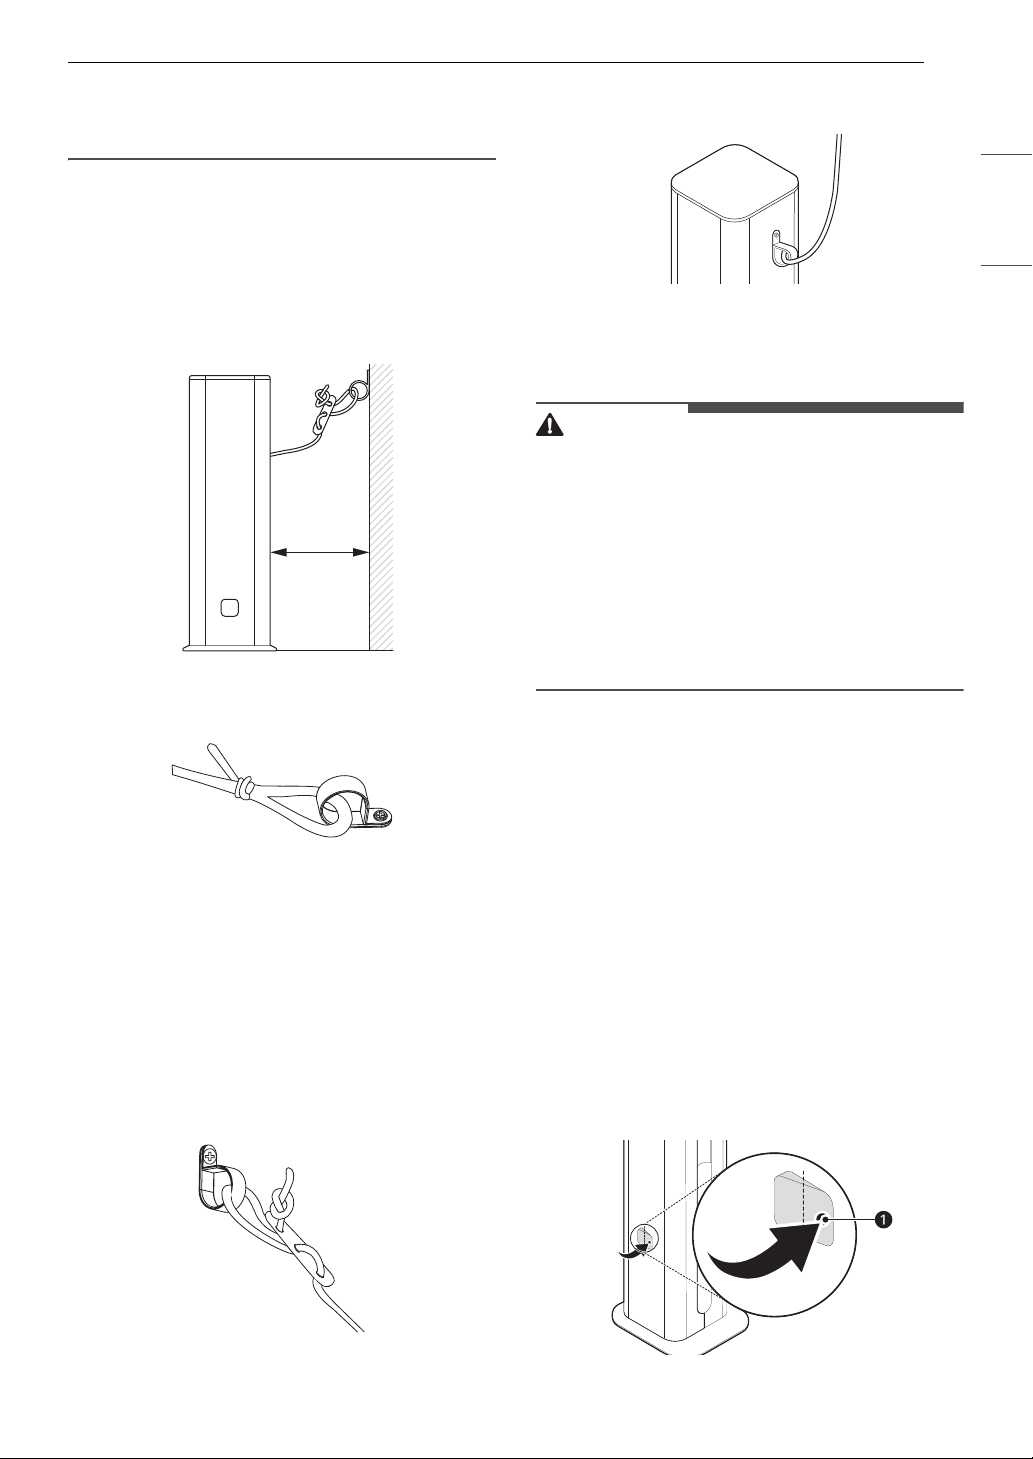
1 Before moving the product to its final
position, mark the location on the wall where
you will attach the anti-tip cord. If you are not
drilling into a wall stud, you will need to use
the wall mounting anchor.
• Install the wall mounting anchor and the
mounting band directly behind the product.
2 Attach one of the mounting bands to the loop
at one end of the cord.
3 If drilling into drywall, use a 4 mm bit to drill a
hole 1 3/4" (44.5 mm) deep at the marked
location and insert the wall mounting anchor
first. Then screw the mounting band into the
anchor with the wall mounting screw. When
screwing into a wall stud or concrete, use the
wall mounting screw without the anchor.
4 Thread the other end of the cord through the
slide as shown to form a loop. Attach the
second mounting band to this loop.
5 Use the product mounting screw to attach the
mounting band to the back of the product.
6 Place the product in its final location and use
the slider to adjust the length of the cord until
there is about 1 inch of play in the cord.
CAUTION
• Do not tighten the wall mounting screw
excessively. Doing so may cause the wall
mounting to come loose and the product to fall,
resulting in personal injury or product damage.
• For best results, attach the mounting band to a
wall stud or a solid wall. If the screw pulls out of
the wall and the product falls, personal injury or
product damage may result.
• If the distance between the wall and the product
is too great, the product may fall.
Storing the Accessories
Storing the Tools
Use the product to store the inlet and components
provided with the vacuum cleaner.
The components may differ depending on the
vacuum cleaner model.
Using the Nozzle Hooks
1 Open the nozzle hook a on both sides of the
product.
• To open the nozzle hooks, press on the right
side. Be careful not to pinch fingers when
opening.
2"(5 cm)
Loading ...
Loading ...
Loading ...