USER MANUAL
SINGLE SERVE FROZEN, ICED AND HOT COFFEEMAKER
P.N. 202160 www.mrcoffee.com
INTRODUCTION
1.
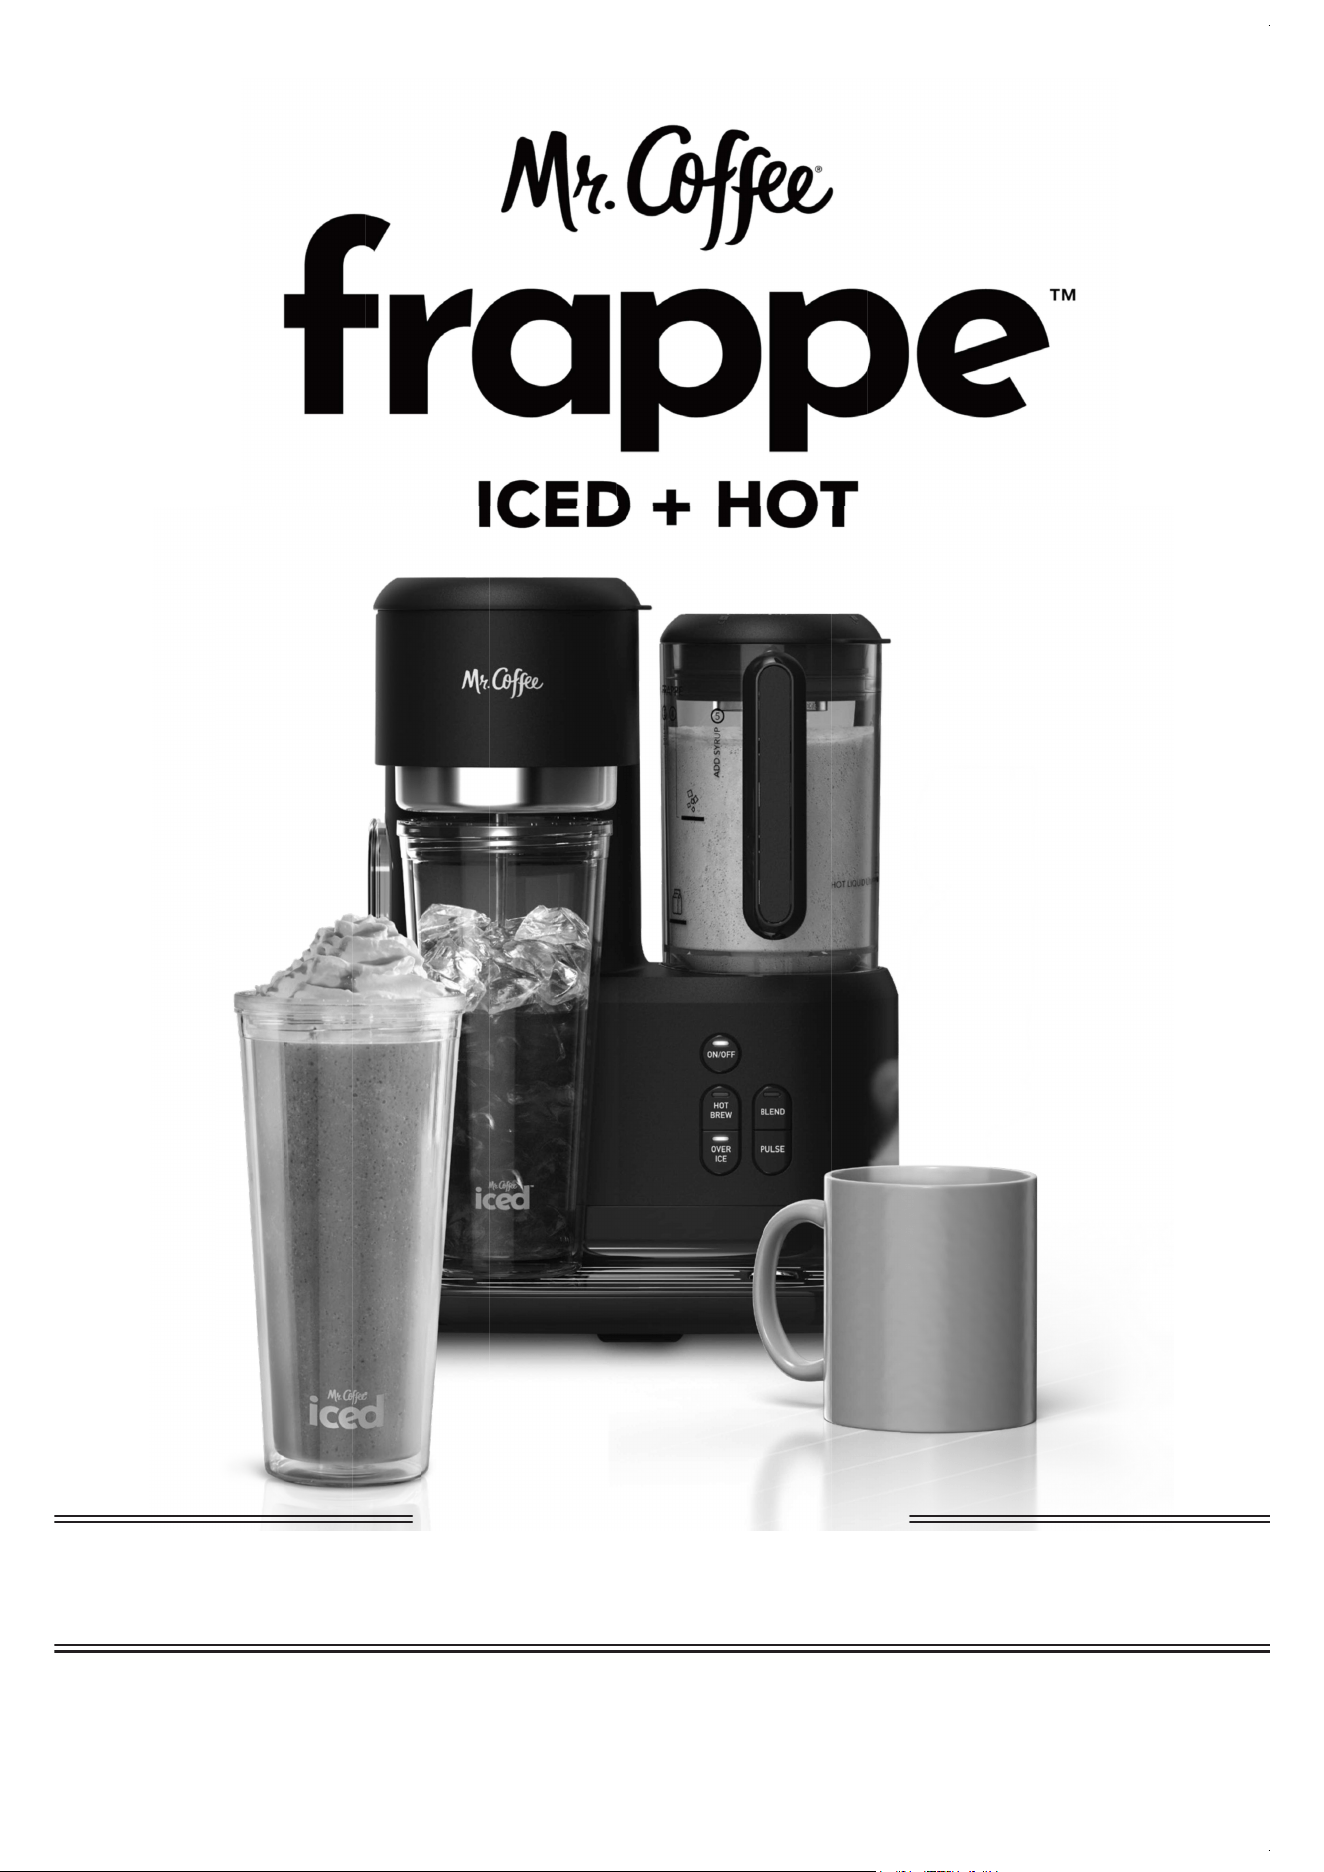
Hey! Welcome to the Mr. Coffee Product Family and congratulations
on the purchase of your new Mr. Coffee Frappe™ Coffeemaker.
Your coffeemaker brings the coffeehouse home with the ability to
make frozen, iced and hot coffee all in one machine. Easily create
frozen coffee with the step-by-step guide and integrated measuring
system on the blender. Then press Blend and a perfectly frosty
frappe is ready in no time. To create refreshing iced coffee, use the
tumbler to measure water and ice, and the scoop to measure coffee
grounds. The perfect ratio of hot, concentrated coffee is brewed
overtheice,leavingyouwithflavorfulicedcoffeethat'snever
watered down. Your coffeemaker can also make single servings of
pod-free hot coffee, giving you better taste and reducing waste. As
always, Mr. Coffee creates the great tasting coffee and you make it
special–addinyourfavoriteflavoringsandmix-instocustomize
exactlyhowyoulikeit!
Our number one goal is to give you great-tasting coffee every time.
If you have any questions about your new Mr. Coffee Frappe™+
Coffeemaker, please contact us at 1-800-MRCOFFEE
(1-800-672-6333) or visit us at www.mrcoffee.com.

2.
When using electrical appliances, basic safety precautions should always
befollowedtoreducetheriskoffire,electricshock,and/orinjuryto
persons including the following:
1. Read all instructions.
2. Do not touch hot surfaces. Use handles or knobs.
3. To protect against electric shock, do not place or immerse cord, plugs,
or appliance in water or other liquid.
4. This appliance is not intended for use by children or by persons with
reducedphysical,sensory,ormentalcapabilities,orlackofexperience
and knowledge. Close supervision is necessary when any appliance is
used near children. Children should be supervised to ensure that they
do not play with the appliance. Keep the appliance and its cord out of
reach of children.
5. Turn the appliance OFF, then unplug from the outlet when not in use,
before assembling or disassembling parts and before cleaning. To
unplug, grasp the plug and pull from the outlet. Never pull from the
power cord.
6. Do not operate any appliance with a damaged cord or plug or after
the appliance malfunctions, or has been damaged in any manner.
ReturnappliancetoanAuthorizedServiceCenterforexamination,
repairoradjustment.Donotattempttoreplaceorsplicea
damaged cord.
7. Theuseofattachments,includingcanningjars,isnotrecommended
bythemanufacturerandmaycauseariskofinjurytopersons.
8. Do not use outdoors.
9. Do not let cord hang over edge of table or counter, or touch
hot surfaces.
10. Do not place on or near a hot gas or electric burner, or in a
heated oven.
11. Alwaysattachplugtoappliancefirst,thenplugcordintothewall
outlet (for appliances with detachable cords). To disconnect, turn any
control to the off position, then remove plug from wall outlet.
12. Do not use appliance for other than intended use.
13. All lids should be closed during use.
14. Scalding may occur if the lid is removed or brew basket door is
opened during or immediately after the brewing cycles. Contents may
be hot. Allow to cool before opening the lid.
IMPORTANT SAFEGUARDS

15. Avoid contacting moving parts.
16. Flashing light indicates ready to operate (models with stand-by
mode). Avoid any contact with blades or moveable parts.
17. For appliances with markings on plug blade: This appliance has
important markings on the plug blade. The attachment plug or entire
cordset (if plug is molded onto cord) is not suitable for replacement.
If damaged, the appliance shall be replaced.
18. Keep hands and utensils out of container while blending to reduce
theriskofsevereinjurytopersonsordamagetotheblender.A
scraper may be used but must be used only when the blender is not
running.
19. Blades are sharp. Handle carefully, especially when emptying the
container and during cleaning.
20. Always hold container while operating the appliance. If the container
should turn when the motor is turned ON, switch appliance OFF
immediately and tighten the container in the threaded bottom.
21. Always operate blender with cover in place. Always wait until all
moving parts have stopped before removing any lid or cover.
22. Do not blend hot liquids.
23.Alwaysuseapplianceonadry,stable,levelsurface.Neverfill
beyondtheMAXfillline.
For appliances with service panels:
24. WARNING:Toreducetheriskoffireorelectricshock,donot
remove this cover. no user–serviceable parts inside. repair should be
done by authorized service personnel only.
3.
SAVE THESE INSTRUCTIONS
HOUSEHOLD USE ONLY
IMPORTANT SAFEGUARDS CONT.
4.
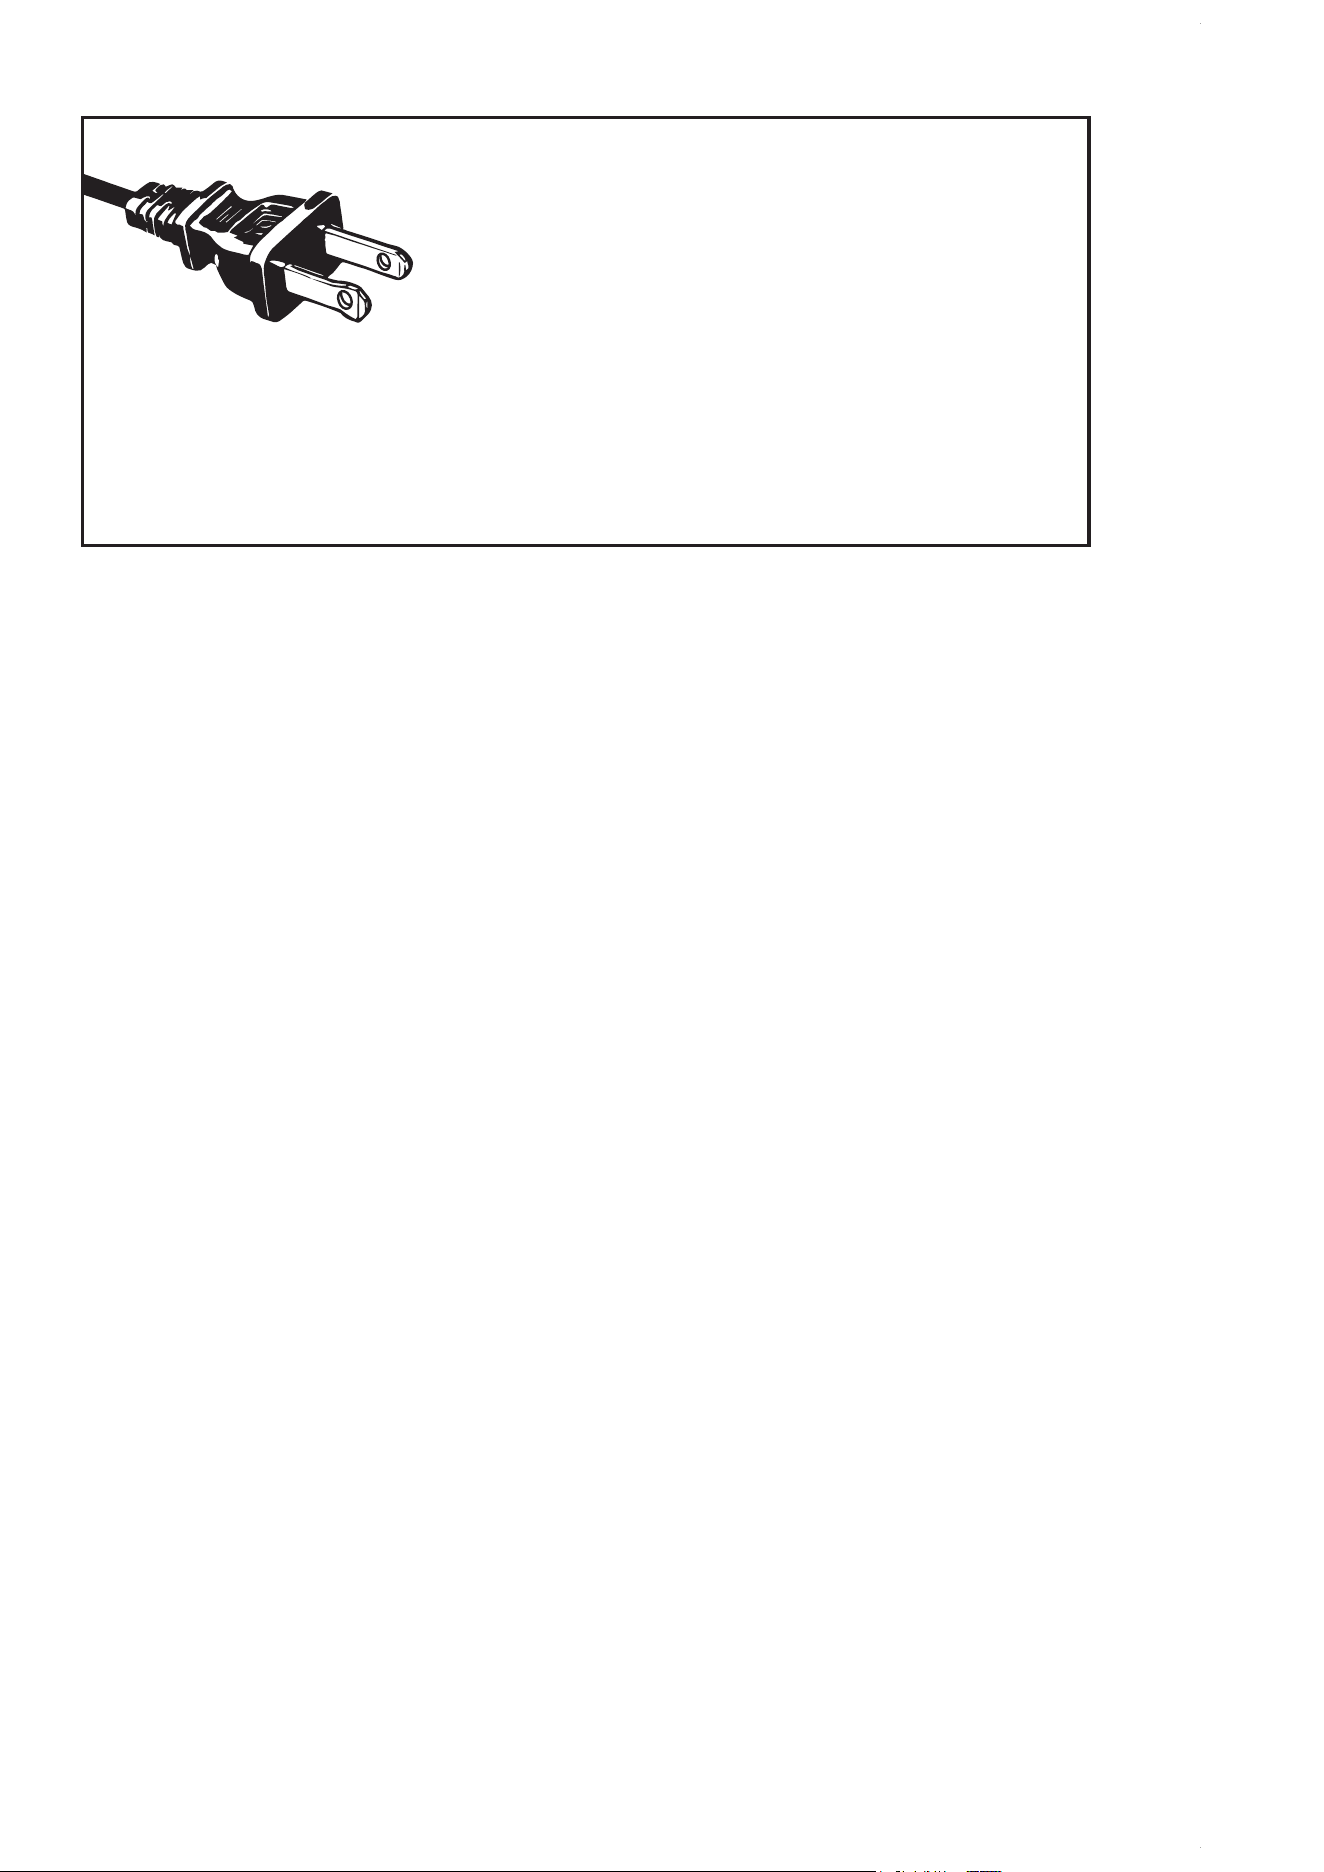
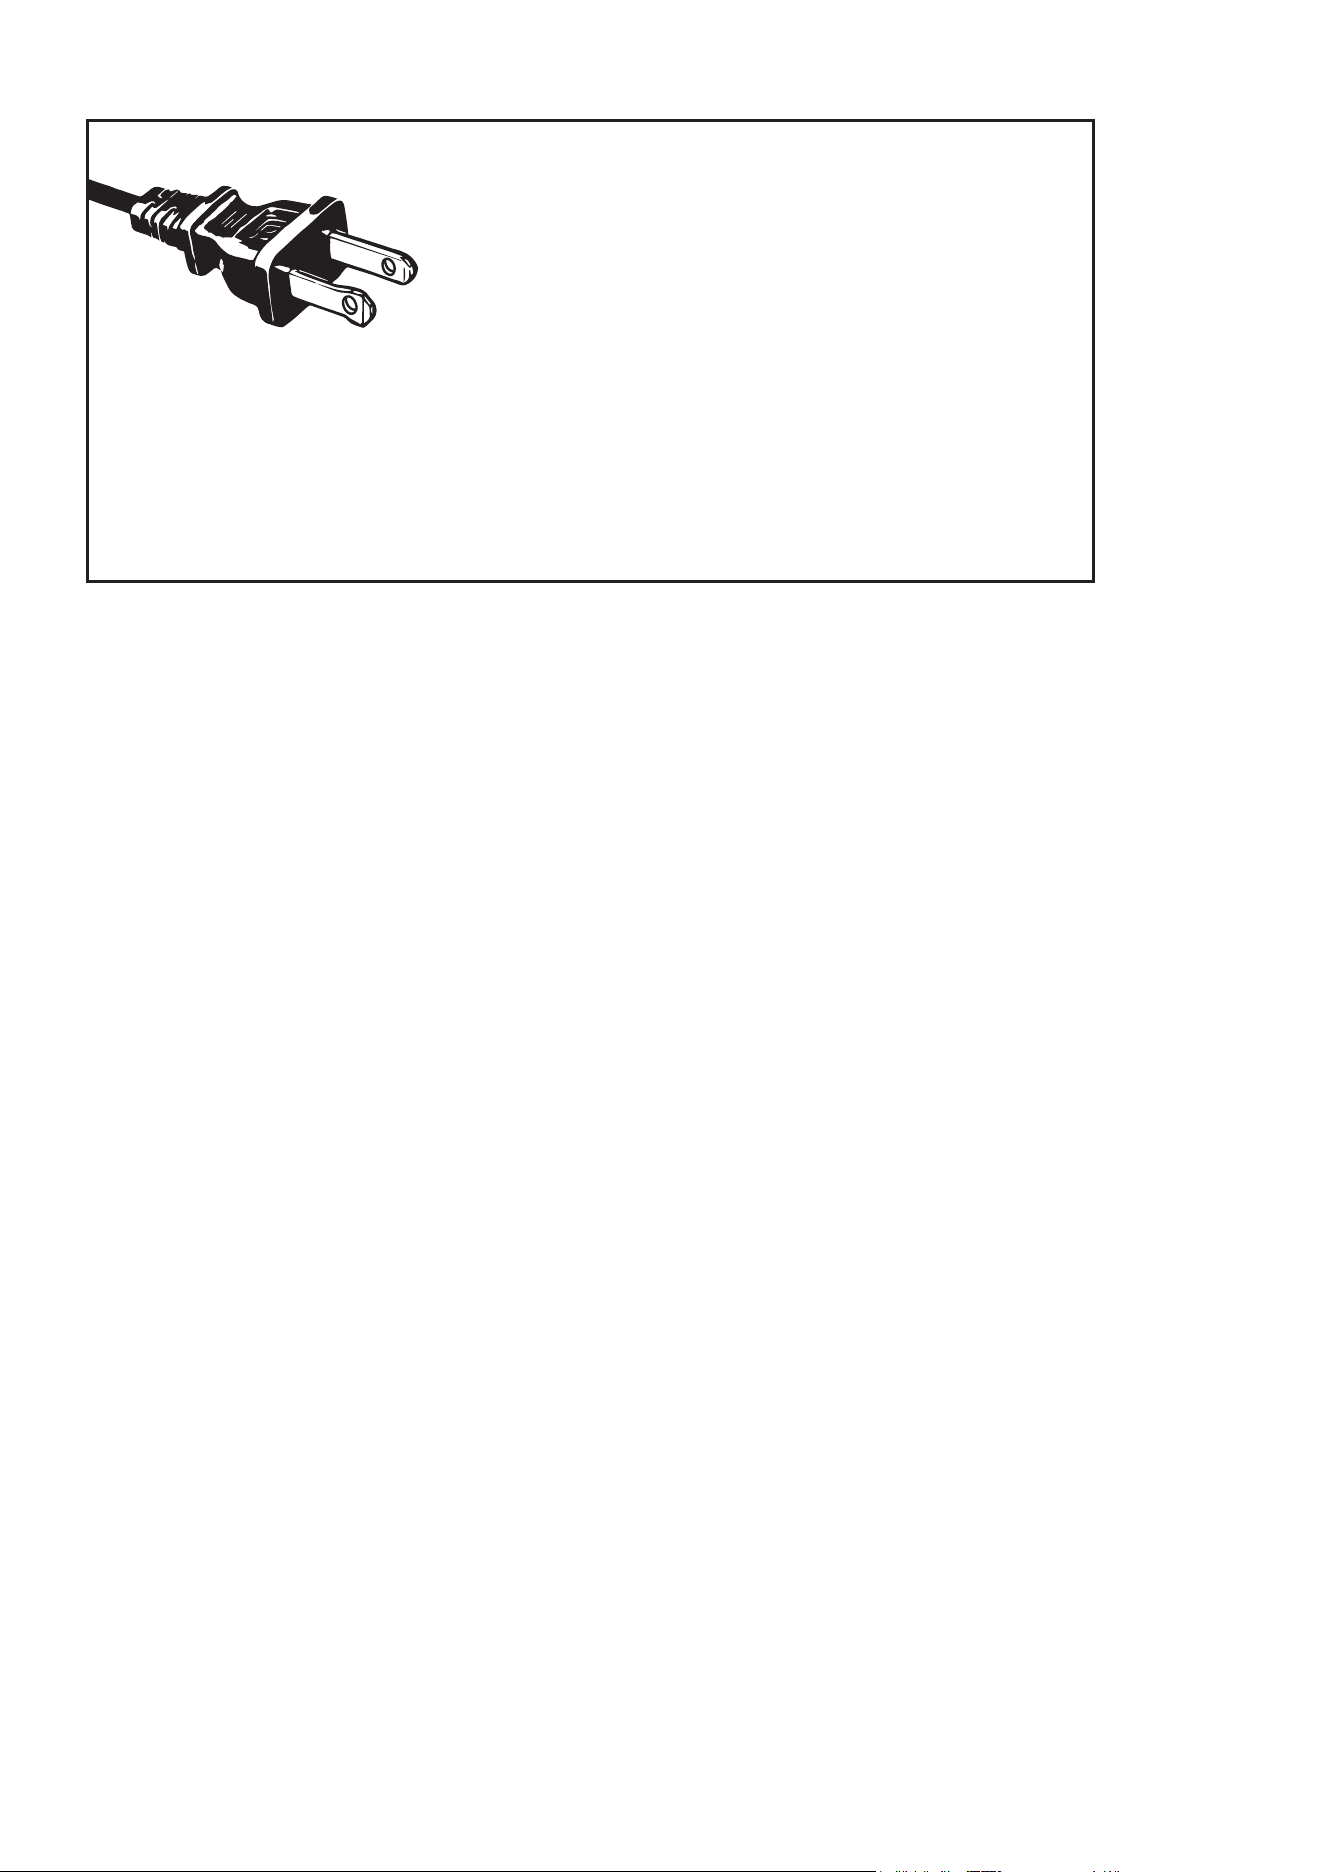
Polarized plug
This appliance has a polarized plug, (one
blade is wider than the other). As a safety
feature to reduce the risk of electrical shock,
thisplugisintendedtofitinapolarized
outletonlyoneway.Iftheplugdoesnotfitfullyintheoutlet,reverse
theplug.Ifitstilldoesnotfit,contactaqualifiedelectrician.Donot
attempt to defeat this safety feature or modify the plug in any way. If
theplugfitslooselyintotheACoutletoriftheACoutletfeelswarm
do not use that outlet.
a. The marked electrical rating of the detachable power-supply cord
orextensioncordshouldbeatleastasgreatastheelectricalrating
of the appliance;
b.Iftheapplianceisofthegroundedtype,theextensioncordshould
be a grounding type 3-wire cord; and
c. The longer cord should be arranged so that it will not drape over
the counter top or table top where it can be pulled on by children
or tripped over unintentionally.
A short power-supply cord (or detachable power-supply cord) may be
provided to reduce risks resulting from becoming entangled in or tripping
overalongercord.Longerdetachablepower-supplycordsorextension
cordsareavailableandmaybeusedifcareisexercisedintheiruse.Ifa
longdetachablepower-supplycordorextensioncordisused:
Do not pull, twist or otherwise abuse the power cord.
PRODUCT NOTICES
1.Placetheapplianceonahard,flat,levelsurfacetoavoidinterruptionof
airflowunderneaththecoffeemaker.
2. Glass decanters only: Discard the decanter immediately if it is ever
boiled dry.
3. Glass decanters only: Protect the decanter from sharp blows, scratches
or rough handling.
4. Do not operate the appliance with an empty water tank.
5. Keep the area above the appliance clear during use, as hot steam will
escape the appliance.
POWER CORD INSTRUCTIONS
7
5.
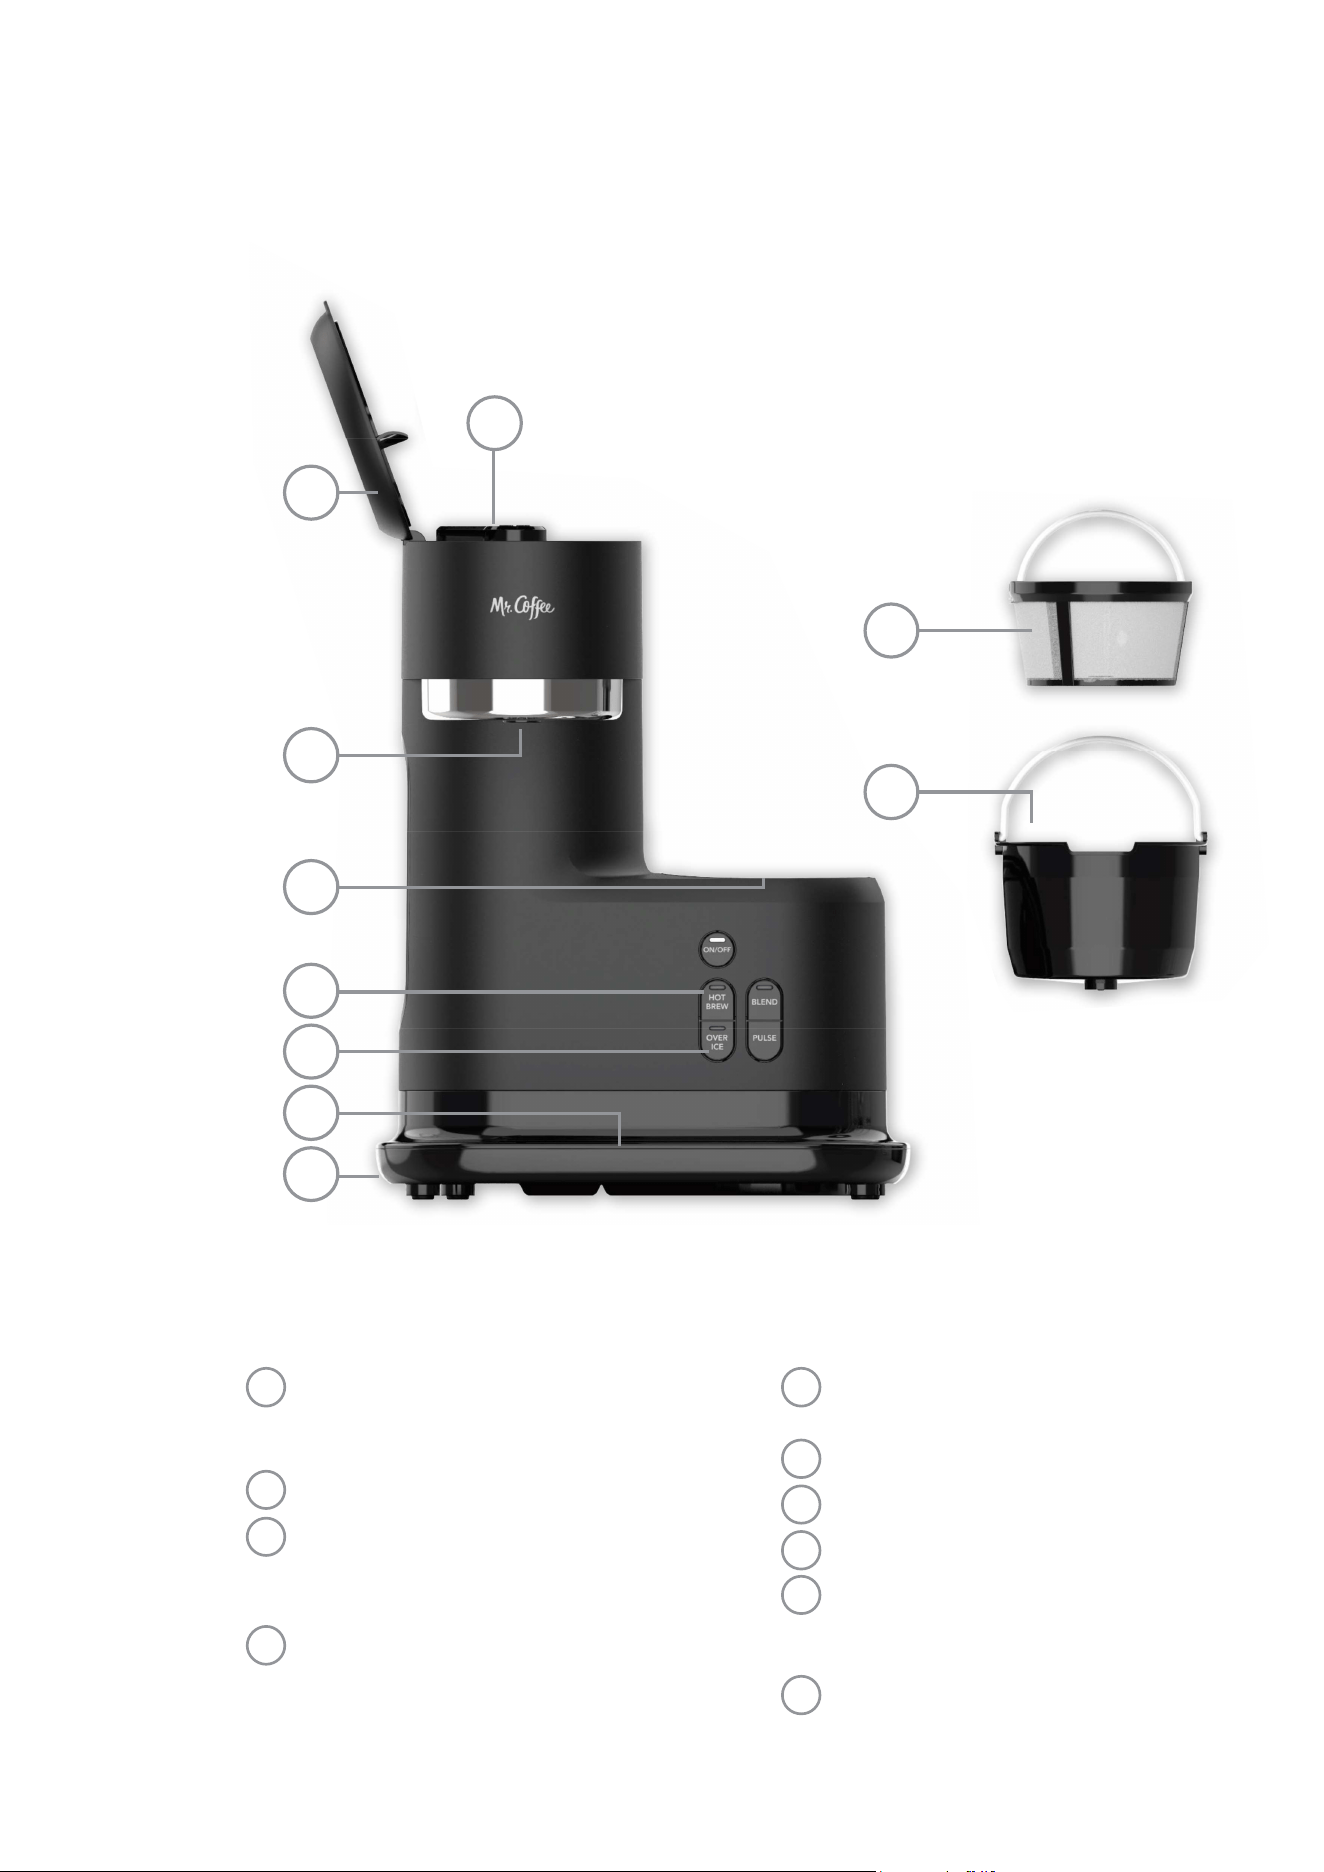
GET TO KNOW YOUR SINGLE SERVE
COFFEEMAKER & BLENDER
Dip tray - helps keep countertop tidy
and free from mess. Clean after a few
uses to prevent any overflow
Dip tray cover - hand wash only
Over ice button
- press to brew
refreshing single servings of iced
coffee
Hot brew button - press to brew
flavorful single servings of hot coffee
Blender mount - with locking system
to ensure blender is secure
Brew spout
Lid
Showerhead
Reusablecoffeefilter - is
dishwashable (ultra durable gold tone
filter available in select units)
Brew basket - insert filter filled
with grounds here
1
2
4
3
5
6
7
8
9
10
8
9
10
5
4
3
2
1
6
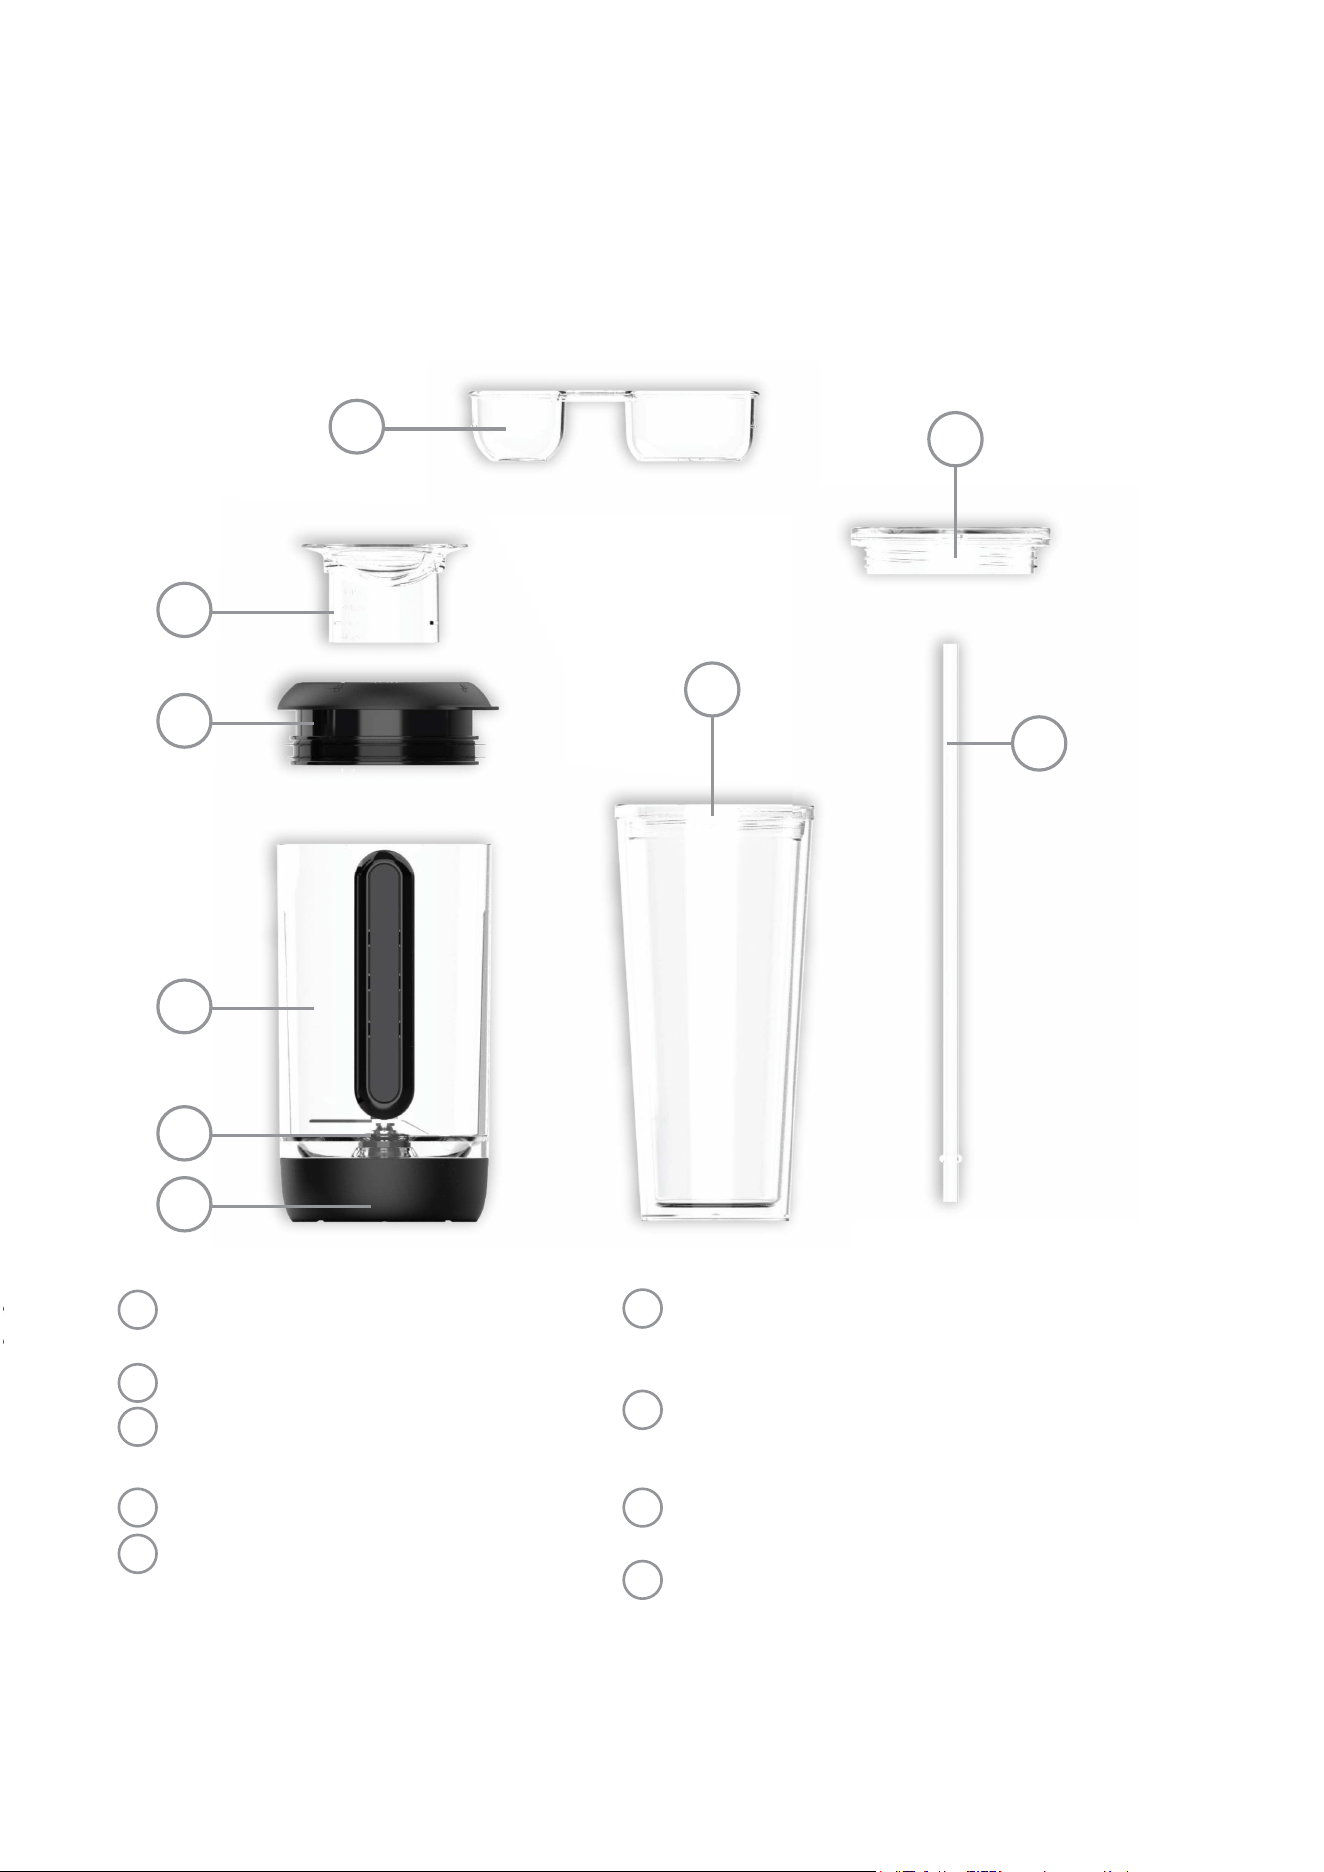
6.
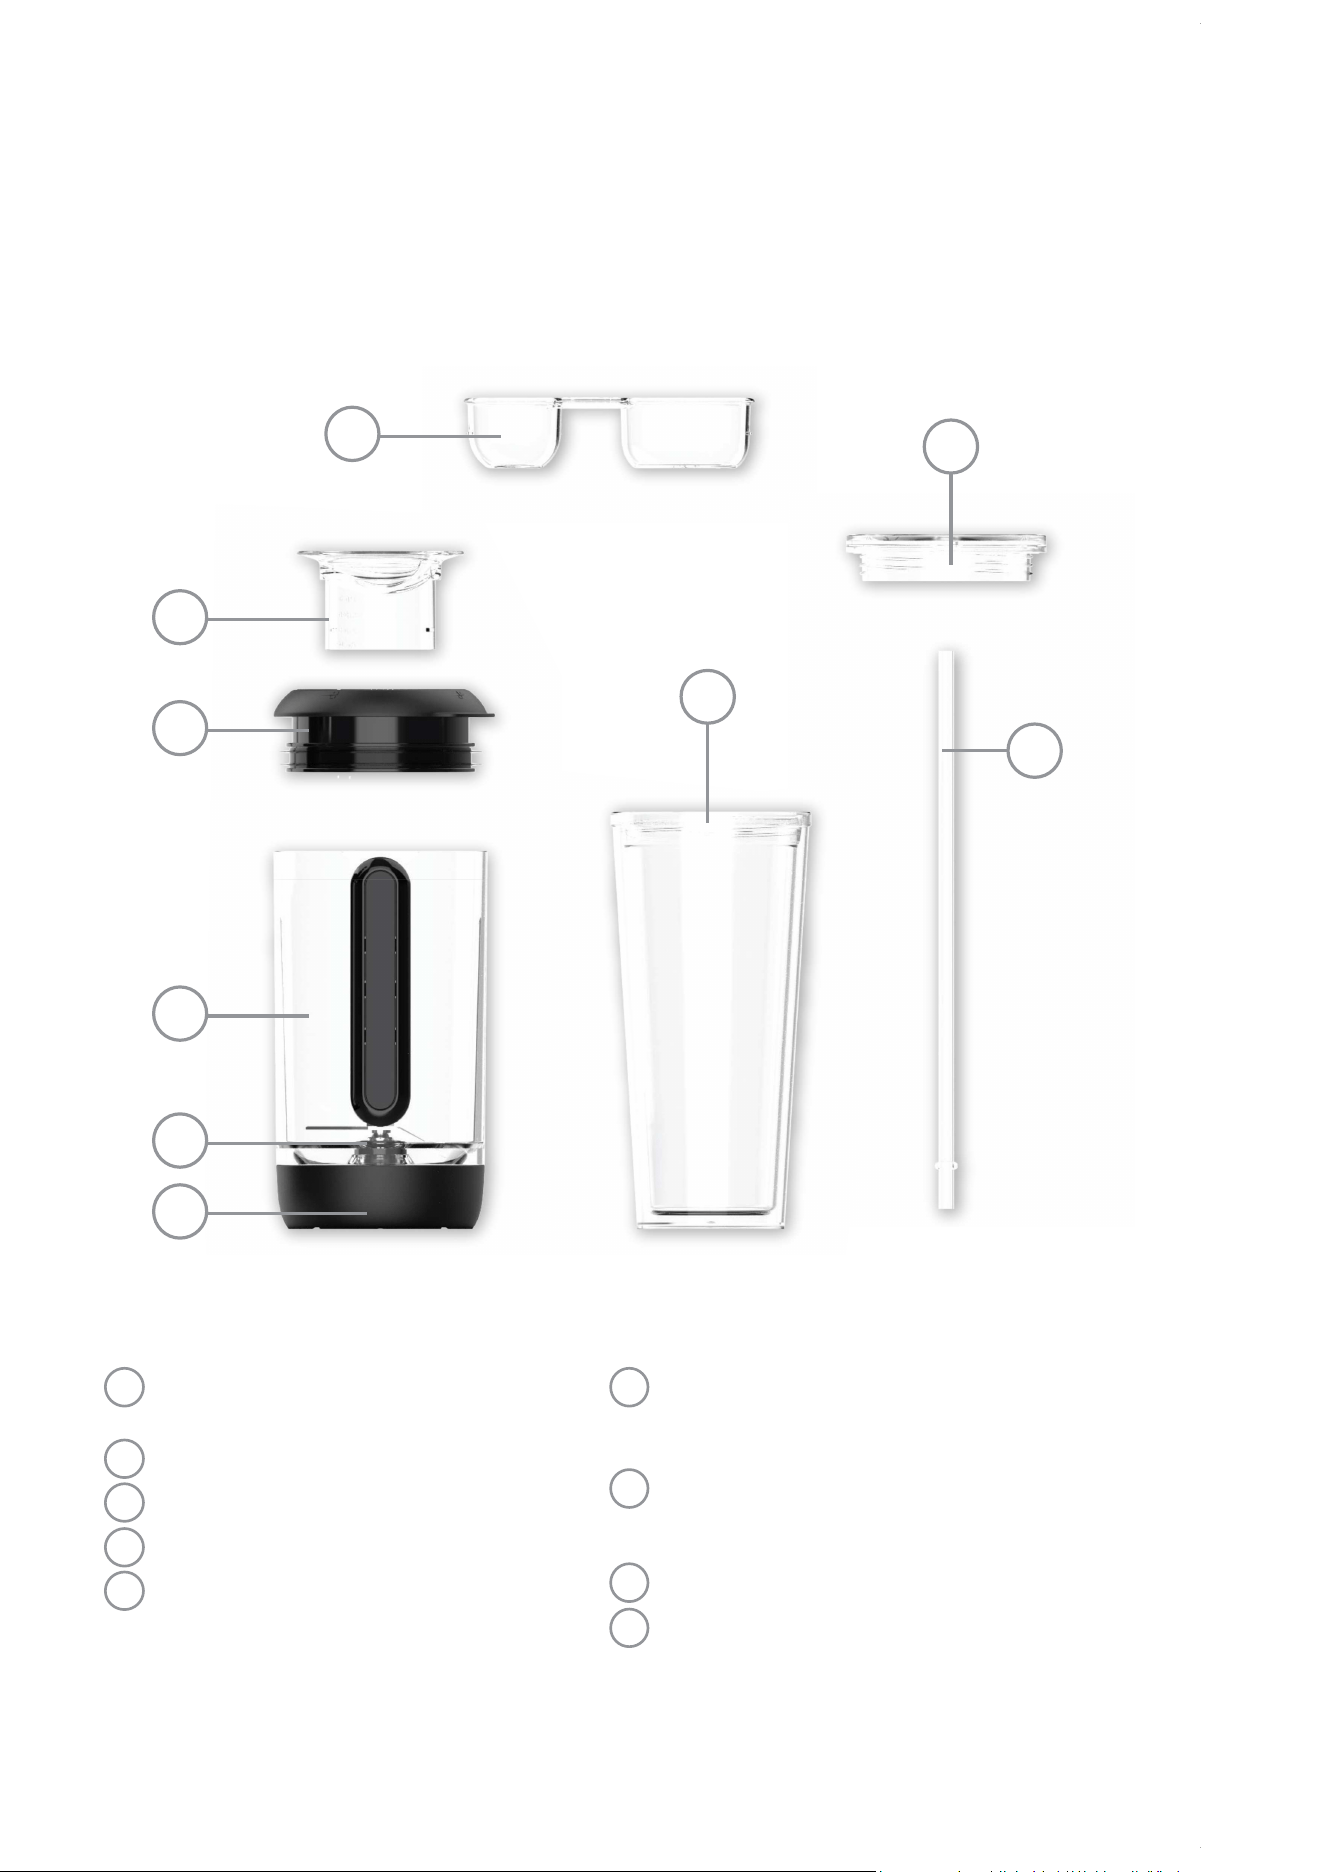
GET TO KNOW YOUR SINGLE SERVE
COFFEEMAKER & BLENDER
Blender base – attaches to
blender mount
Blender blades
Blender jar – is dishwaher safe
Blender lid
Blender measuring cap - with 1 oz,
2 oz, 3 oz and ¼ cup measurements
for creating delicious frappes
Coffee ground scoop - dual
sided for measuring iced or hot
coffee grounds
Tumbler - is 22 oz. double-wall
insulated and BPA-free, handwash
only
Tumbler lid - handwash only
Tumbler straw- handwash only
11
12
14
15
13
16
17
18
19
11
12
13
14
15
16
18
19
17

7.
CLEAN COFFEEMAKER BEFORE
FIRST USE
DISHWASHER SAFE PARTS OF YOUR
COFFEEMAKER
Just follow these simple steps:
1.Washtheblenderjar,blenderlid,blendermeasuringcap,
tumbler,tumblerlid,straw,coffeefilter,coffeescoopandbrew
basketinamixtureofmilddetergentandwater.Rinseeach
thoroughly.
2. Fill tumbler with water to the water line and pour into reservoir.
Replacebrewbasketinpositionandnylonfilter(orpaper5-cup
basketstylepaperfilter)intobrewbasket.
3. Position tumbler under brew spout, plug in unit and press HOT
BREW. Note: the unit is on when the LED is lit.
4. When brewing is complete, discard water from tumbler and rinse
tumbler thoroughly with clean water.
5. You Mr. Coffee Frappe™ Coffeemaker is now ready for use!
1.Blenderjar
2.Reusablecoffeefilter
3. Brew basket
CAUTION: THE ELECTRICAL BASE, POWER CORD AND PLUG ARE
NOTDISHWASHERSAFEANDSHOULDNEVERBEIMMERSEDIN
WATER OR OTHER LIQUIDS.
To thoroughly clean your coffeemaker, you can put the following parts
into the top-rack of the dishwasher

1. Plug the coffeemaker in. Press power button. It will blink slowly in standby
for brew or blend.
2.Filltheblenderjartothe“WATER”markingwithclean,filteredwater.
3. Lift the lid of the unit and pour the water into the reservoir.
4. Placethereusablecoffeefilter(orstandard5-cupbasket-stylepaper
filter)intothebrewbasket.
5. Using the ICED side of the coffee scoop , pour 2 scoop of grounds into
thereusablecoffeefilter.Closethelid.
6.Filltheblenderjarwithmilktothemilkline(about2ozofmilk).
7.Filltheblenderjarwithicecubestothe“ICE”marking.
8. Placetheblenderjarfulloficeandmix-insunderthebrewspout.
Pressthe“OVERICE”button–ensuretheLEDisilluminated.
9. Wait 3-4 minutes for brewing to complete. Once dripping slows and stops,
grabblenderjarfromunderneaththespout.Note:afewsparse
coffee drips may come from the drip spout post brew – the drip tray will
catch these and keep your countertop mess free.
10. Pourdesiredsyrups,flavoringsormix-insintotheblender.Sweettips:
• Syrup or sugar of some kind greatly impacts the frosty consistency of the
frappe. We recommend following one of our favorite recipes in the
recipe book!
• Use the blender cap as a measuring device to measure 1 tbsp, 2 tbsps., 3
tbsps., or ¼ cup.
8.
LET’S MAKE FROZEN COFFEE!
11.Placetheblenderlidontheblenderjar.Placetheblenderjaronthe
blender mount. Twist handle to the left to lock into place.
12.Pressthe“BLEND”button.Theblenderwillautomaticallyblendyour
frappe to the perfect consistency.
13. When blending is complete, remove lid and pour your frappe into the
reusable tumbler or separate drinking vessel.
14. Insertthestrawinlid,placeontumblerandenjoy!
13
9
7
1
13
13
5
14
14
13
19 18
7
6
9
10
16
13
13
13
5
3
17

9.
LET’S MAKE ICED COFFEE!
1. Plug the coffeemaker in. Press power button. It will blink slowly in standby
for brew or blend.
2.Fillthetumblertothe“WATER”markingwithclean,filteredwater.
3. Lift the lid of the unit and pour the water into the reservoir.
4. Placethereusablecoffeefilter(orstandard5-cupbasket-stylepaper
filter)intothebrewbasket.
5. Using the ICED side of the coffee scoop , pour 1 scoop of grounds into
thereusablecoffeefilter.Closethelid.Note:ifyouwantaboldercupof
iced coffee, you can use 1 ½ - 2 scoops of grounds.
6.Fillthetumblerwithlargeicecubestothe“ICE”marking.
7. Placetumblerfulloficeunderdripspoutandpressthe“OVERICE”
button – ensure the LED is illuminated.
8. Wait 3-4 minutes for brewing to complete. Once dripping slows and stops,
grab tumbler from underneath the spout. Note: a few sparse coffee
drips may come from the drip spout post brew – the drip tray will catch
these and keep your countertop mess free.
9.Addinyourfavoritecoffeemix-insforcoffeejusthowyoulikeit.
10.Insertthestrawinlid,placeontumblerandenjoy!
17
17
19 18 17
7
6
9
10
9
5
5
1
16
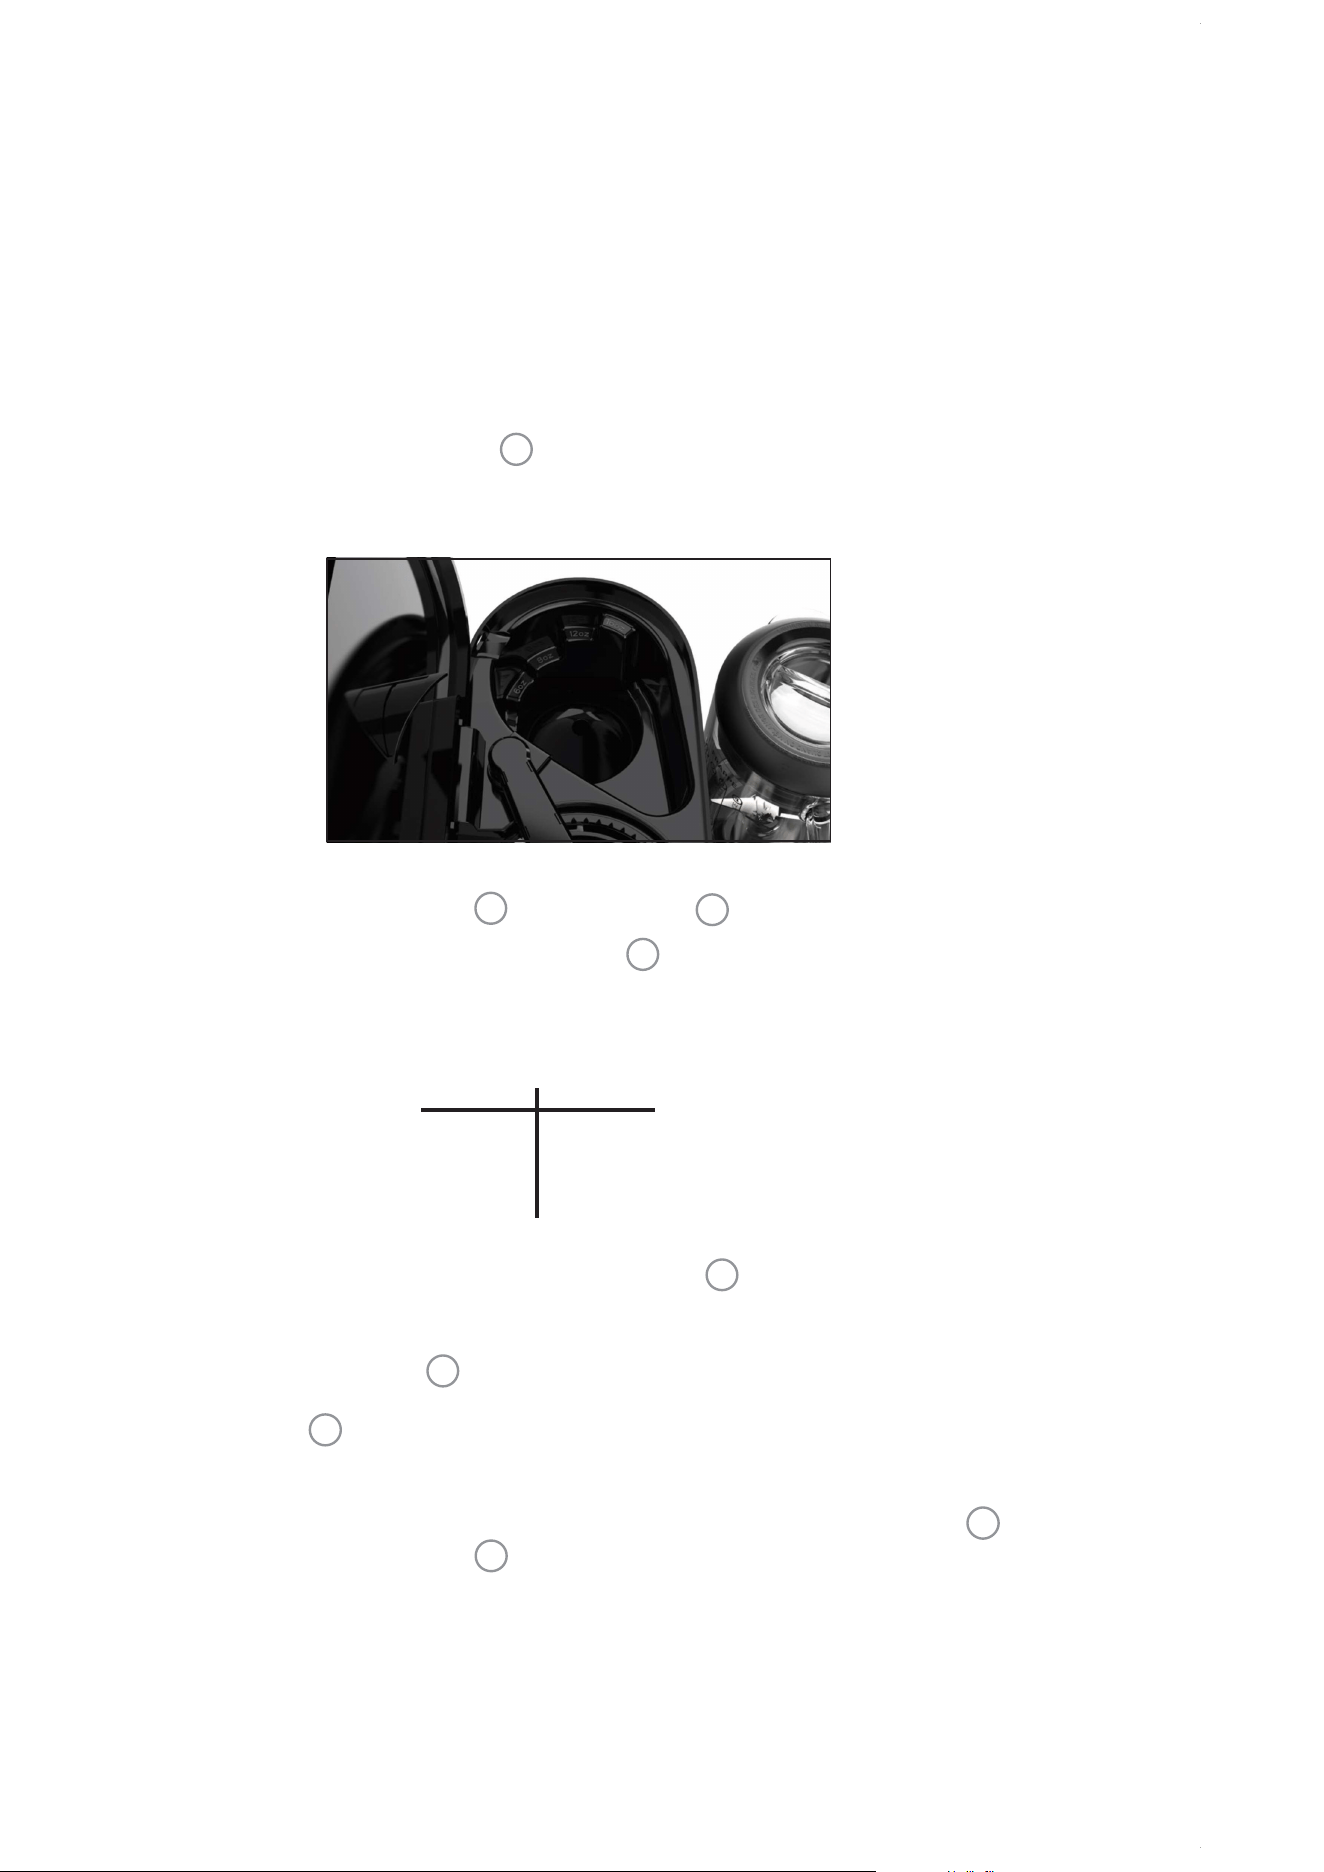
NOTE: Immediately after brewing, the heater thermostat needs to cool down
tobereadyforthenextbrew.Buttonindicatorlightmayflashwhenpressing
“HOTBREW”or“OVERICE;”waitafewmoresecondsforheatertocooloff
before pressing again.
1. Plug the coffeemaker in. Press power button. It will blink slowly in standby
for brew or blend.
2.Grabdesiredcoffeecupormugandfillwithasmuchwaterasyouwould
like coffee.
Tip: Taller coffee mugs work best to avoid any splashing during brewing.
3. Pour water into the reservoir . Observe how much water your poured on
thewaterladder.Note:donotpourabove16oz.maxfilllineaswater
reservoirwilloverflow.
4. Placereusablecoffeefilterinbrewbasket .
5. Using the HOT side of the coffee scoop , measure coffee grounds that
correspond to amount of water poured.
6.Pourcoffeegroundsintoreusablecoffeefilter.
Tip:ensuregroundstonotspillintowaterreservoirwhenfillingcoffee
filter.Removingcoffeefiltertofillwithgroundscanhelppreventaccidental
spills into the reservoir .
7. Close the lid .Note:ifyoupreferbolderhotcoffee,youcanuseanextra
½ - 1 scoops of coffee grounds.
8. Place the mug that was used to measure water under the drip spout .
Press“HOTBREW”button.
9. Addinyourfavoritecoffeemix-insforcoffeejusthowyoulikeit.Enjoy!
10.
6
9
9
10
16
7
5
4
6
LET’S MAKE HOT COFFEE!
HOT BREW
Water
8 oz
12 oz
16 oz
1
1 ½
2
Scoop

11. 12.
FAQ
Why does the ICED coffee still brew HOT?
The Mr. Coffee Frappe™+ Coffeemaker brews the perfect ratio of hot,
concentratedcoffeeovericetocreateflavorfulfrozenandicedcoffee!This
processmaximizesflavorextractionandleavesyouwitharefreshingcupoficed
coffee every time. Our precise measurements of water, coffee grounds and ice
ensurethatyouricedcoffeeisalwaysflavorfulandneverwatereddown.
My frappe didn’t blend properly, what’s wrong?
Sorry about this! There could be a few causes for this:
1.Theremightbetoomuchice.Onlyaddicetothelineontheblenderjar.
When using smaller sized ice cubes, you may need to use slightly less ice.
2.Theremightnotbeenoughliquid.Ensurethatwaterisfilledtothewaterline
before pouring into the reservoir or try adding more milk to improve
consistency.
3. There might not be any sugar to help consistency while blending. We have
foundthatsyruporsugarofsomeformgreatlyhelpsblendingtextureand
consistency. Try one of our favorite recipes in the included recipe book!
The “BLEND” button didn’t blend my frappe all the way, what should I do?
Ifyoudesireadditionalblending,simplypressthe“PULSE”buttonafewtimesand
the blender will pulse as you hold down the button.
My iced or hot coffee isn’t strong enough for my taste – what now?
Noproblem–everyone’stastesaredifferent!Tryaddinganextra½-1scoopof
coffeegroundstothereusablefilterforaboldercupofcoffee.
Is the tumbler dishwasher safe?
No, the tumbler, lid and straw should be hand-washed only.
Why is there no ice left in my cup after brewing iced coffee?
Try using bigger ice cubes when making your iced coffee – these will melt slower
andgiveyouiceinyourdrinkforlonger!Alsobesureyouhavefilledyourtumbler
allthewaytothe“ICE”marking.
Why are there coffee grounds in my coffee?
Youmayhaveover-filledyourreusablecoffeefilterwithcoffeegrounds,andthey
could have spilled over the top. Although this is uncommon, try using a little less
groundsnexttimeandthatshouldsolvethisproblem!
Can I use a different tumbler or cup for making iced coffee?
Sure thing! Just ensure you keep the same ratio of water-ground-ice to create the
best tasting iced coffee!

11. 12.
REPAIRS
If your coffeemaker requires service, do not return it to the store where
you purchased it. All repairs and replacements must be made by
Sunbeam or by an authorized MR. COFFEE® Service Center. If you live in
the U.S. or Canada, please call us at the following toll-free telephone
numberstofindthelocationofthenearestauthorizedservicecenter:
U.S. 1-800-MR COFFEE (1-800-672-6333). You may also visit our
website at www.mrcoffee.com for a list of service centers. To assist us in
serving you, please have the coffeemaker model number and date of
purchase available when you call. The model number is on the bottom of
the coffeemaker. We welcome your questions, comments or
suggestions. In all your communications, please include your complete
name, address and telephone number and a description of the problem.
Visitourwebsiteatwww.mrcoffee.comanddiscoverthesecretto
brewingtheperfectcupofcoffee.Youwillalsofindarichblendof
gourmet recipes, entertaining tips and the latest information onMR.
COFFEE® products.
WARRANTY INFORMATION
1-YEAR LIMITED WARRANTY
Sunbeam Products, Inc warrants that for a period of one year from the
date of purchase, this product will be free from defects in material and
workmanship. Sunbeam, at its option, will repair or replace this product
or any component of the product found to be defective during the
warranty period. Replacement will be made with a new or
remanufactured product or component. If the product is no longer
available, replacement may be made with a similar product of equal or
greatervalue.ThisisyourexclusivewarrantyfromSunbeam.This
warranty is valid for the original retail purchaser from the date of initial
retail purchase and is not transferable. Keep the original sales receipt.
Proof of purchase is required to obtain warranty performance. Sunbeam
dealers, service centers, or retail stores selling Sunbeam products do not
have the right to alter, modify or any way change the terms and
conditions of this warranty. This warranty does not cover normal wear of
parts or damage resulting from any of the following: negligent use or
misuse of the product, use on improper voltage or current, use contrary
to the operating instructions, disassembly, repair or alteration by anyone
other than Sunbeam or an authorized Sunbeam service center. Further,
thewarrantydoesnotcover:ActsofGod,suchasfire,flood,hurricanes
and tornadoes.

13.
What are the Limits on Sunbeam’s Liability?
Sunbeam shall not be liable for any incidental or consequential damages
causedbythebreachofanyexpress,impliedorstatutorywarrantyor
condition.Excepttotheextentprohibitedbyapplicablelaw,anyimplied
warrantyorconditionofmerchantabilityorfitnessforaparticularpurposeis
limited in duration to the duration of the above warranty. Sunbeam disclaims all
otherwarranties,orconditionsorrepresentations,express,implied,statutory
or otherwise. Sunbeam shall not be liable for any damages of any kind
resulting from the purchase, use or misuse of, or inability to use the product
including incidental, special, consequential or similar damages or loss of
profits,orfordamagesarisingfromanytort,includingnegligenceorgross
negligence, or fault committed by Sunbeam, its agents or employees or for any
breach of contract, fundamental or otherwise, or for any claim brought against
purchaserbyanyotherparty.Somestatesorjurisdictionsdonotallowthe
exclusionorlimitationofincidentalorconsequentialdamagesorlimitationson
howlonganimpliedwarrantylasts,sotheabovelimitationsorexclusionsmay
notapplytoyou.Thiswarrantygivesyouspecificlegalrights,andyoumayalso
haveotherrightsthatvaryfromstatetostateorjurisdictiontojurisdiction.
How to Obtain Warranty Service
If you have any question regarding this warranty or would like to obtain
warranty service, please call 1-800-672-6333 and a convenient service center
address will be provided to you.

14.
USER MAINTENANCE
This appliance has no user serviceable parts. Any servicing beyond that
described in the Cleaning Section should be performed by an Authorized
Service Representative only. See warranty available online.
SERVICE MAINTENANCE AND WARRANTY
Service Maintenance and Warranty can be found online at
www.mrcoffee.com or call us toll-free at the Consumer Service Department,
1-800-MR COFFEE (1-800-672-6333).

© 2020 Sunbeam Products, Inc. All rights reserved. Distributed by Sunbeam Products, Inc.
Boca Raton, Florida 33431. Made in China. SPR-150221-037P
MANUAL DEL USUARIO
CAFETERA INDIVIDUAL PARA CAFÉ CALIENTE, FRÍO Y HELADO
P.N. 202160 www.mrcoffee.com
FRÍO + CALIENTE

INTRODUCCIÓN
1.
¡Hola! Le damos la bienvenida a la familia de productos de Mr.
Coffee. Felicidades por la compra de su nueva cafetera Mr. Coffee
Frappe™. Su cafetera le trae el sabor de la cafetería a su hogar con
la posibilidad de preparar café helado, frío y caliente en una sola
máquina. Prepare café helado fácilmente con la guía paso a paso y
el sistema de medición integrado sobre la licuadora. Luego
presione“Blend”(licuar)yensegundostendrálistounfrappé
absolutamente helado. Para preparar un refrescante café frío,
puede utilizar las marcas en el vaso para medir el agua y el hielo, y
una cucharada para medir los granos de café. La proporción
perfecta de café concentrado caliente se prepara sobre el hielo y le
otorga un café frío sabroso sin diluir. Su cafetera también puede
preparar medidas individuales de café caliente sin granos. Así se
obtienemejorsaborysereducenlosdesechos.¡Comosiempre,Mr.
Coffeecreaelmejorsaboryustedlohaceespecialagregandosus
esenciaseingredientesfavoritosparapersonalizarloexactamente
como le gusta!
Nuestroobjetivoprincipalesofrecerlesiempreelcafémás
delicioso. Si tiene alguna pregunta sobre su nueva cafetera Mr.
Coffee Frappe™+, comuníquese con nosotros al 1-800-MRCOFFEE
(1-800-672-6333) o visítenos en www.mrcoffee.com.

2.
Cuando se utilizan aparatos eléctricos, siempre se deben seguir las
precauciones básicas de seguridad para disminuir el riesgo de incendio,
descarga eléctrica o lesiones personales, incluidas las siguientes:
1. Lea todas las instrucciones.
2. Notoquelassuperficiescalientes.Utilicelasasasomanijas.
3. Paraprotegersecontralasdescargaseléctricas,nocoloquenisumerja
el cable, los enchufes ni el aparato en agua u otro líquido.
4. Los niños o las personas con disminución de sus capacidades físicas,
sensorialesomentalesosinexperiencianiconocimientosnodeben
utilizar este aparato. Se requiere una estricta supervisión cuando el
aparato se utiliza cerca de los niños. Se debe supervisar a los niños
paraasegurarsedequenojueguenconelaparato.Mantengael
aparato y el cable de alimentación fuera del alcance de los niños.
5. Apague el aparato, luego desenchúfelo del tomacorriente cuando no
esté en uso, antes de ensamblar o desarmar partes y antes de limpiarlo.
Para desenchufarlo, tome el enchufe y retire del tomacorriente. Nunca
tire del cable de alimentación.
6. No haga funcionar ningún aparato con un cable o enchufe dañado o
después de alguna falla en el funcionamiento o daño de cualquier tipo.
Devuelva el aparato a un centro de servicio autorizado para que lo
examinen,reparenoajusten.Nointentereemplazaroempalmarun
cable dañado.
7. El fabricante no recomienda el uso de accesorios, incluyendo frascos
para conservas, ya que pueden causar un riesgo de lesiones personales.
8. No lo utilice al aire libre.
9. Nodejequeelcablecuelguedelbordedelamesaoencimera,nique
toquesuperficiescalientes.
10. No lo coloque sobre un quemador eléctrico o a gas que esté caliente,
ni cerca del quemador, o en un horno caliente.
11. Siempre conecte primero el enchufe al aparato, luego enchufe el
cable al tomacorriente de la pared (para aparatos con cables
desmontables). Para desconectar, apague todos los controles
poniéndolosen“OFF”(apagado)yluegoretireelenchufedel
tomacorriente de la pared.
12. No utilice el aparato para otro uso que no sea el previsto.
13. Todas las tapas deben estar cerradas durante el uso.
14. Se pueden sufrir quemaduras si se retira la tapa o si se abre la tapa de
la cesta de preparación durante el ciclo de preparación o
inmediatamentedespués.Elcontenidopuedeestarcaliente.Deje
enfriar antes de abrir la tapa.
MEDIDAS DE SEGURIDAD IMPORTANTES

15. Evite tocar piezas en movimiento.
16. La luz parpadeante indica que la máquina está lista para operar
(modelosconmodo“enespera”).Evitetocarcuchillasopiezasen
movimiento.
17. Para aparatos con marcas en la patilla del enchufe: Este aparato
tiene importantes marcas en la patilla del enchufe. No se puede
reemplazar ni el enchufe ni el cable completo (si el enchufe está
unido al cable). Si se dañan, deberá cambiar el aparato.
18. Mantenga las manos y cualquier utensilio fuera del contenedor
mientras esté funcionando la licuadora para evitar riesgos de
lesiones graves en las personas y daños en la licuadora. Puede usar
una espátula, pero solo cuando la licuadora no esté en
funcionamiento.
19.Lascuchillassonafiladas.Manipúlelasconcuidado,especialmente
al vaciar el contenedor y durante la limpieza.
20. Sostenga siempre el contenedor mientras el aparato está en
funcionamiento. Si el contenedor gira mientras el motor está
encendido,apagueelaparatoinmediatamenteyajústeloenlarosca
de la base.
21. Siempre haga funcionar la licuadora con la tapa colocada. Siempre
espere hasta que las piezas en movimiento se hayan detenido antes
de retirar cualquier tapa o cubierta.
22. No licúe líquidos calientes.
23. Utilicesiempreelaparatosobreunasuperficieseca,establey
nivelada. Nunca llene el depósito de agua por encima del nivel
máximodellenado(MAX).
Para aparatos con paneles de servicio:
24. ADVERTENCIA: Para reducir el riesgo de incendio o descarga
eléctrica, no quite esta cubierta. Este aparato no contiene piezas que
el usuario pueda reparar. Únicamente el personal de servicio
autorizado puede realizar la reparación.
3.
CONSERVE ESTAS INSTRUCCIONES
SOLO PARA USO EN EL HOGAR
MEDIDAS DE SEGURIDAD IMPORTANTES
(CONTINUACIÓN)
4.
Enchufe polarizado
Este aparato tiene un enchufe polarizado (una
cuchilla es más ancha que la otra). Como una
característica de seguridad para reducir el
riesgo de descarga eléctrica, este enchufe está
diseñadoparaencajarenuntomacorriente
polarizadodeunasolamanera.Sielenchufenoencajacompletamente
eneltomacorriente,inviertaelenchufe.Sisiguesinencajar,
comuníqueseconunelectricistacalificado.Nointenteanularesta
característicadeseguridadnimodificarelenchufedeningunaforma.
SielenchufeencajaholgadamenteeneltomacorrientedeCAosieste
está caliente, no lo utilice.
a. La potencia eléctrica nominal marcada en el cable de alimentación
desmontableodelcabledeextensióndebeseralmenostanalta
como la potencia eléctrica del aparato.
b.Sielaparatoesdeltipoconconexiónatierra,elcabledeextensión
debeseruncablede3hilosconconexiónatierra
c. El cable más largo debe estar dispuesto de modo que no cuelgue
de la encimera o la mesa donde los niños puedan tirar de él o
tropezarse accidentalmente.
Se puede proporcionar un cable de alimentación corto (o cable de
alimentación desmontable) para reducir los riesgos ocasionados por el
enredo o tropiezo con un cable más largo. Hay cables de alimentación
desmontablesmáslargosocablesdeextensiónquesepuedenutilizarcon
precaución. Si se utiliza un cable de alimentación desmontable largo o un
cabledeextensión,sedebetenerencuentalosiguiente:
No tire, tuerza ni dañe el cable de alimentación.
AVISOS SOBRE EL PRODUCTO
1.Coloqueelaparatosobreunasuperficiedura,planayniveladapara
evitarlainterrupcióndelflujodeairedebajodelacafetera.
2. Solo para decantadores de vidrio: Deseche el decantador de inmediato
si el contenido se evapora por completo.
3.Soloparadecantadoresdevidrio:Protejaeldecantadordegolpes
fuertes, rayones o manipulación brusca.
4. No ponga en funcionamiento el aparato con el tanque de agua vacío.
5. El vapor caliente saldrá por la parte superior del aparato; manténgala
despejadacuandoestéenuso.
INSTRUCCIONES SOBRE EL CABLE
DE ALIMENTACIÓN

CONOZCA SU CAFETERA
LICUADORA INDIVIDUAL
7
5.
Bandeja de goteo ayuda a mantener
la encimera ordenada y sin ensuciar.
Limpiar después de algunos usos
para evitar desbordes
Tapa de la bandeja de goteo Lavar a
mano únicamente
Botón “OVER ICE” (con hielo)
presione para preparar refrescantes
porciones individuales de café helado
Botón “HOT BREW” (preparar
caliente) presione para preparar
sabrosas porciones individuales de
café caliente
Soporte para licuadora
con sistema de
bloqueo para garantizar la seguridad de
la licuadora
Boquilla
Tapa
Cabezal de salida de agua
Filtro de café reutilizable es lavable en
lavavajillas (filtro dorado ultraduradero
disponible en unidades selectas)
Cesta de preparación inserte el filtro
lleno de café molido aquí
1
2
4
3
5
6
7
8
9
10
8
9
10
5
4
3
2
1
6
CONOZCA SU CAFETERA
LICUADORA INDIVIDUAL
6.
con sistema de
bloqueo para garantizar la seguridad de
Base de la licuadora sefijaal
soporte de la licuadora
Cuchillas de la licuadora
Jarra de la licuadora apto para
lavavajillas
Tapa de licuadora
Taza medidora de la licuadora
Cuchara para el café molido de
doble cara, para medir el café
molido. Caliente o frío
Vaso de 22 oz. con doble pared de
aislamiento y sin BPA. Lavar a mano
únicamente
Tapa del vaso Lavar a mano
únicamente
Sorbete del vaso Lavar a mano
únicamente
11
12
14
15
13
16
17
18
19
11
12
13
14
15
16
18
19
17
con medidas de 1 oz, 2 oz, 3 oz y ¼
de taza para crear deliciosos frapés

7.
LIMPIE LA CAFETERA
ANTES DE USAR
PIEZAS DE SU CAFETERA
APTAS PARA EL LAVAVAJILLAS
Solo siga estos pasos sencillos:
1.Lavelajarra,latapaylatazamedidoradelalicuadora,elvaso,la
tapadelvaso,elsorbete,elfiltrodecafé,lacucharamedidorade
café y la cesta de preparación en una mezcla de detergente
suaveyagua.Enjuaguebiencadaunadelaspiezas.
2. Llene el vaso con agua hasta la línea de agua y vierta en el
depósito.Vuelvaacolocarlacestadepreparaciónensulugary
coloqueelfiltrodenailon(ounfiltrodepapeltipocestapara5
tazas) en la cesta de preparación.
3.Coloqueelvasodebajodelpicodepreparación,enchufela
unidadypresioneelbotón“HOTBREW”(prepararcaliente).
Nota: La unidad está encendida cuando el LED está encendido.
4. Cuando se complete la preparación, deseche el agua del vaso y
enjuaguebienconagualimpia.
5. ¡Su cafetera Mr. Coffee Frappe™ ya está lista para usar!
1. Jarra de la licuadora
2. Filtro de café reutilizable
3. Cesta de preparación
PRECAUCIÓN: LA BASE ELÉCTRICA, EL CABLE DE ALIMENTACIÓN Y
ELENCHUFENOSONAPTOSPARALAVAVAJILLASYNOSEDEBEN
SUMERGIR EN AGUA NI EN OTROS LÍQUIDOS.
Para limpiar bien su cafetera, puede colocar las siguientes piezas en la
rejillasuperiordellavavajillas.

1. Enchufe la cafetera. Presione el botón de encendido. La luz parpadeará
lentamenteenmodo“standby”(enespera)paraprepararolicuar.
2.Llenelajarradelalicuadorahastalamarca“WATER”(agua)conagua
filtradaylimpia.
3. Levante la tapa de la unidad y vierta el agua en el depósito.
4. Coloqueelfiltroparacaféreutilizable(ounfiltrodepapelestándartipo
cesta para 5 tazas) en la cesta de preparación.
5.Conelladopara“ICED”(frío)delacucharamedidora,vierta2
cucharadasdecafémolidoenelfiltroparacaféreutilizable.Cierrela
tapa.
6.Llenelajarradelalicuadoraconcubosdehielohastalamarca“ICE”
(hielo).
7.Llenelajarradelalicuadoraconcubosdehielohastalamarca“ICE”
(hielo).
8. Coloquelajarradelalicuadorallenadehieloeingredientesdebajode
laboquilla.Presioneelbotónde“OVERICE”(conhielo)yasegúrese
de que la luz LED esté encendida.
9. Espere de 3 a 4 minutos hasta que la preparación se complete. Una vez
queelgoteodisminuyeysedetiene,tomelajarradelalicuadora
desdeabajodelaboquilla.Nota:Puedensaliralgunasgotasdecafé
del pico de goteo después de la preparación. Estas gotas quedarán en la
bandejadegoteoylaencimerasemantendrálimpia.
10. Viertalosjarabes,esenciasoingredientesquedeseeenlalicuadora.
Consejosdulces:
•Eljarabeoelazúcardecualquiertipoafectamucholaconsistencia
congelada del frappé. ¡Le recomendamos seguir una de nuestras recetas
favoritas en nuestro recetario!
• Utilice la tapa de la licuadora para medir 1 cucharada, 2 cucharadas, 3
cucharadas o ¼ de taza.
11.Coloquelatapadelalicuadoraenlajarradelalicuadora.Coloque
lajarradelalicuadoraenelsoportedelalicuadora.Gireelmangohaciala
izquierda para trabarlo en su lugar.
12.Presioneelbotón“BLEND”(preparar).Lalicuadoraautomáticamente
licuará su frappé hasta lograr la consistencia perfecta.
13. Cuando termine de licuar, retire la tapa y vierta su frappé en el vaso
reutilizable u otro recipiente para beber.
14. Introduzca el sorbete en la tapa , coloque la tapa en el vaso y
¡disfrute!
8.
¡PREPAREMOS CAFÉ HELADO!
13
9
7
1
13
13
5
14 13
19 18
7
6
9
10
16
13
13
13
5
3
17
14

9.
¡PREPAREMOS CAFÉ FRÍO!
1. Enchufe la cafetera. Presione el botón de encendido. La luz parpadeará
lentamenteenmodo“standby”(enespera)paraprepararolicuar.
2.Lleneelvasohastalamarca“WATER”(agua)conaguafiltradaylimpia.
3. LLevante la tapa de la unidad y vierta el agua en el depósito. .
4. Coloqueelfiltroparacaféreutilizable(ounfiltrodepapelestándartipo
cesta para 5 tazas) en la cesta de preparación.
5.Conelladopara“ICED”(frío)delacucharamedidora,vierta1
cucharadadecafémolidoenelfiltroparacaféreutilizable.Cierrela
tapa. Nota: Si desea una taza de café frío más intenso, puede utilizar de 1½
a 2 cucharadas de granos de café.
6.Lleneelvasoconcubosdehielograndeshastalamarca“ICE”(hielo).
7. Coloqueelvasollenodehielodebajodelpicodegoteoypresioneel
botón“OVERICE”(conhielo)yasegúresedequelaluzLEDesté
encendida.
8. Espere de 3 a 4 minutos hasta que la preparación se complete. Una vez
queelgoteodisminuyeysedetiene,tomeelvasodesdeabajodela
boquilla . Nota: Pueden salir algunas gotas de café del pico de goteo
despuésdelapreparación.Estasgotasquedaránenlabandejadegoteo
y la encimera se mantendrá limpia.
9. Agregue sus ingredientes favoritos para obtener un café a su gusto.
10. Introduzca el sorbete en la tapa , coloque la tapa en el vaso y
¡disfrute!
17
17
19 18
17
7
6
9
10
9
5
5
1
16
NOTA: Inmediatamente después de la preparación, el termostato del
calentador debe enfriarse para estar listo para la siguiente preparación. La
luz indicadora del botón puede parpadear al presionar "HOT BREW" o
"OVER ICE"; espere unos segundos más para que el calentador se enfríe
antes de presionar nuevamente.

1. Enchufe la cafetera. Presione el botón de encendido. La luz parpadeará
lentamenteenmodo“standby”(enespera)paraprepararolicuar.
2. Tome la taza o tazón de café que desee y llene con la cantidad de agua
que quiera en su café. Recomendación: Los tazones de café más altos son
mejoresparaevitarcualquiersalpicaduradurantelapreparación.
3. Viertaelaguaeneldepósitodeagua.Observeenelmedidorqué
cantidad de agua vertió. Nota: No vierta más de las 16 onzas que indica la
líneamáximadellenadosinoeldepósitodeaguasedesbordará.
4. Coloqueelfiltrodecaféreutilizableenlacestadepreparación.
5.Conelladopara“HOT”(caliente)delacucharamedidora,midala
cantidad de café que corresponde a la cantidad de agua que vertió en el
depósito.
6.Coloquegranosdecaféenelfiltrodecaféreutilizable.
Recomendación: Asegúrese de que los granos no caigan en el depósito de
aguacuandolleneelfiltrodecafé.Quiteelfiltrodecaféalllenarlopara
evitar que caigan granos accidentalmente en el depósito de agua .
7.Cierrelatapa.Nota:Siprefiereunatazadecafécalientemásintenso,
puede utilizar de ½ a 1 cucharada adicional de granos de café.
8. Coloqueeltazónqueusóparamediraguadebajodelpicodegoteo.
Presioneelbotón“HOTBREW”(prepararcaliente).
9. Addinyourfavoritecoffeemix-insforcoffeejusthowyoulikeit.Enjoy!
10.
6
9
9
10
16
7
5
4
6
¡PREPAREMOS CAFÉ CALIENTE!
PREPARACIÓN CALIENTE
Agua
8 onzas
12 onzas
16 onzas
1
1 ½
2
Cuchara

PREGUNTAS FRECUENTES
¿Por qué la preparación de café FRÍO sale CALIENTE?
La cafetera Mr. Coffee Frappe™+ prepara la proporción perfecta de café caliente
concentrado sobre hielo para crear un sabroso café frío y helado. Este proceso
maximizalaextraccióndesaboryleotorgasiempreunarefrescantetazadecafé
frío. Nuestras medidas precisas de agua, granos de café y hielo le aseguran que su
café frío esté siempre sabroso y nunca diluido.
Mi frappé no se preparó correctamente. ¿Qué paso?
¡Lo sentimos! Puede haber distintas causas para es:
1.Puedehaberdemasiadohielo.Soloagreguehielohastalamarcaenlajarra
de la licuadora. Cuando use cubos de hielo más pequeños, puede necesitar
un poco menos de hielo.
2.Puedenohabersuficientelíquido.Asegúresedequeelagualleguehastala
línea de llenado antes de verterla en el depósito o pruebe agregando más
lecheparamejorarlaconsistencia.
3. Puede no haber azúcar para ayudar a armar la consistencia mientras se licúa.
Eljarabeoazúcardecualquiertipoayudaengranmedidaalatexturay
consistencia del licuado. ¡Pruebe alguna de nuestras recetas favoritas en
nuestro recetario!
El botón “BLEND” (licuar) no licuó mi frappé completamente. ¿Qué debo
hacer?
Sideseaunlicuadoadicional,simplementepresioneelbotón“PULSE”(pulsar)
algunas veces y la licuadora funcionará mientras oprima el botón.
Micaféfríoocalientenoeslosuficientementeintensoparamigusto.
¿Y ahora?
No hay problema. ¡Todos tenemos gustos diferentes! Pruebe agregando de ½ a 1
cucharadaadicionaldegranosdecaféalfiltroreutilizableparaobtenerunataza
de café más intenso.
¿El vaso es apto para lavavajillas?
No, el vaso, la tapa y el sorbete pueden lavarse únicamente a mano.
¿Por qué no queda ningún cubo de hielo en mi taza cuando termino de
preparar el café frío?
Intente usar cubos de hielo más grandes cuando prepara café helado. Estos se
derretirán más despacio y podrá disfrutar del hielo en su bebida por más tiempo.
Asegúresetambiéndequesuvasoestéllenohastalamarca“ICE”(hielo).
¿Por qué mi café contiene granos?
Talvez,llenódemasiadoelfiltrodecaféreutilizablecongranosypudieron
haberse derramado sobre la parte superior. Si bien esto no es común, intente
utilizarunacantidadmenordegranosdecafélapróximavezyestoresolverásu
problema.
¿Puedo usar un vaso o una taza diferente para preparar café frío?
¡Por supuesto! Solo debe asegurarse de mantener la misma proporción de agua,
granos de café y hielo para crear el café frío más delicioso!
11.

REPARACIONES
Si su cafetera se encuentra averiada, no la devuelva a la tienda donde la
compró. Todas las reparaciones y reemplazos deben ser realizados por
Sunbeam o por un Centro de Servicio MR. COFFEE® autorizado. Si usted
vive en los Estados Unidos o en Canadá, comuníquese sin cargo a los
siguientes números de teléfono para averiguar la ubicación del Centro
deServicioAutorizadomáspróximo:EstadosUnidos:1-800-MR
COFFEE (1-800-672-6333). También puede visitar nuestro sitio web,
www.mrcoffee.com, donde podrá obtener una lista de nuestros Centros
deServicio.Paraquepodamosatenderlomejor,cuandollametengaa
mano el número de modelo de la cafetera y la fecha de compra. El
número de modelo se encuentra en la parte inferior de la cafetera. Sus
preguntas, comentarios o sugerencias serán bienvenidos. Le solicitamos
que en todas sus comunicaciones con nosotros incluya su nombre
completo, dirección y número de teléfono, así como una descripción del
problema.Visitenuestrositiowebwww.mrcoffee.comydescubrael
secreto de preparar una taza de café perfecta. También encontrará una
exquisitaselecciónderecetasdecocina,consejospararecibirinvitados
y la última información sobre los productos MR. COFFEE®.
INFORMACIÓN SOBRE LA GARANTÍA
GARANTÍA LIMITADA POR UN AÑO
Sunbeam Products, Inc. garantiza que, por un período de un año a partir
de la fecha de compra, este producto no tendrá defectos de materiales
ni de mano de obra. Sunbeam, a su elección, reparará o reemplazará
este producto o cualquier componente del mismo que tenga defectos
durante el período de garantía. El reemplazo se realizará por un
producto o componente nuevo o reparado. Si el producto ya no
estuviera disponible, se lo reemplazará por un producto similar de valor
igualosuperior.ÉstaessugarantíaexclusivadeSunbeam.Lagarantía
es válida para el comprador minorista original a partir de la fecha de la
compra inicial y no es transferible. Conserve el recibo de compra
original.
Para solicitar servicio en garantía se requiere presentar un recibo de
compra. Los agentes y Centros de Servicio de Sunbeam o las tiendas
minoristas que venden productos Sunbeam no tienen derecho a alterar,
modificarnicambiardeningúnotromodolostérminosylascondiciones
de esta garantía. Esta garantía no cubre el desgaste normal de las piezas
ni los daños que se produzcan como resultado de: uso negligente o mal
uso del producto, uso de tensión o corriente inapropiada, uso contrario
a las instrucciones operativas, desarmado, reparación o alteración por
un tercero que no sea Sunbeam o un Centro de Servicio Sunbeam
autorizado. Asimismo, la garantía no cubre: actos de fuerza mayor tales
como incendios, inundaciones, huracanes y tornados.
12.

13.
¿Cuál es el límite de responsabilidad de Sunbeam?
¿Cuál es el límite de responsabilidad de Sunbeam? Sunbeam no será
responsable de daños incidentales o emergentes causados por el
incumplimientodealgunagarantíaocondiciónexpresa,implícitaolegal.
Exceptoenlamedidaenqueloprohíbalaleyaplicable,cualquiergarantíao
condiciónimplícitadecomerciabilidadoaptitudparaunfindeterminadose
limita, en cuanto a su duración, a la duración de la garantía antes mencionada.
Sunbeamquedaexentadetodaotragarantía,condiciónomanifestación,
expresa,implícita,legalodecualquierotranaturaleza.Sunbeamnoserá
responsable de ningún tipo de daño emergente de la compra, uso o mal uso
del producto, o imposibilidad de usar el producto, incluidos los daños
incidentales, especiales, emergentes o similares, o la pérdida de ganancias, ni
de los daños emergentes de un hecho ilícito civil, incluidos negligencia, culpa
grave o culpa por parte de Sunbeam, sus representantes o empleados, ni de
ningún incumplimiento contractual, sea de una obligación esencial o de otra
naturaleza, ni de ningún reclamo iniciado contra el comprador por un tercero.
Algunosestadosojurisdiccionesnopermitenlaexclusiónolimitacióndelos
daños incidentales o emergentes ni las limitaciones a la duración de las
garantíasimplícitas,demodoqueesposiblequelaexclusiónolaslimitaciones
antes mencionadas no se apliquen en su caso. Mediante esta garantía, se le
otorganderechoslegalesespecíficosyesposiblequetengaotrosderechos
quevaríendeunestadoounajurisdicciónaotros.
Cómo solicitar servicio en garantía
Si tiene alguna pregunta sobre esta garantía o desea obtener el servicio en
garantía, llame al 1-800-672-6333 y podrá obtener la dirección del Centro de
Servicio que le resulte más conveniente.

14.
MANTENIMIENTO DEL USUARIO
Este aparato no contiene partes que el usuario pueda reparar. Cualquier
servicio de mantenimiento que no sea lo descrito en la sección Limpieza
deberá ser realizado únicamente por un representante autorizado del servicio
de mantenimiento. Consulte la garantía disponible en línea.
SERVICIO DE MANTENIMIENTO Y GARANTÍA
El servicio de mantenimiento y garantía se puede consultar en línea en
www.mrcoffee.com. También puede llamarnos sin cargo al Departamento
de Atención al Consumidor al 1-800-MR COFFEE (1-800-672-6333).

FRÍO + CALIENTE
© 2020 Sunbeam Products, Inc. Todos los derechos reservados. Distribuido por Sunbeam
Products, Inc .Boca Ratón, Florida 33431. Fabricado en China. SPR-150221-037P
