INSTRUCTIONS FOR USE
ELECTRIC RANGE

Contents
3Important safety information .................................................................................................
3Tip-Over hazard ........................................................................................................................
3Anti-Tip Bracket ........................................................................................................................
10Appliance description .............................................................................................................
11Rating plate - information about the appliance ...................................................................
12Cooktop ...................................................................................................................................
12Cooking zones ..........................................................................................................................
12Glass ceramic cooking surface .................................................................................................
13Operating the cooktop ..............................................................................................................
15Oven .........................................................................................................................................
15Control unit ...............................................................................................................................
16Using the appliance ..................................................................................................................
16Keypad use ...............................................................................................................................
16Settings .....................................................................................................................................
20Oven functions ..........................................................................................................................
21Baking .......................................................................................................................................
21Baking tips ................................................................................................................................
22Baking modes ...........................................................................................................................
25Extra functions ..........................................................................................................................
28Child Lock .................................................................................................................................
28Light ..........................................................................................................................................
28Switching off .............................................................................................................................
29Food table .................................................................................................................................
30Cleaning and maintenance ....................................................................................................
30Daily exterior cleaning ...............................................................................................................
30Cleaning control panel ..............................................................................................................
30Cleaning glass cooktop ............................................................................................................
31Light bulb ..................................................................................................................................
31Storage drawer .........................................................................................................................
32Removing and inserting the oven door .....................................................................................
33Potential issues/troubleshoot ................................................................................................
33Troubleshooting table ...............................................................................................................
35Baking problems and tips .........................................................................................................
36Disposal ...................................................................................................................................
EN 2
Important safety information
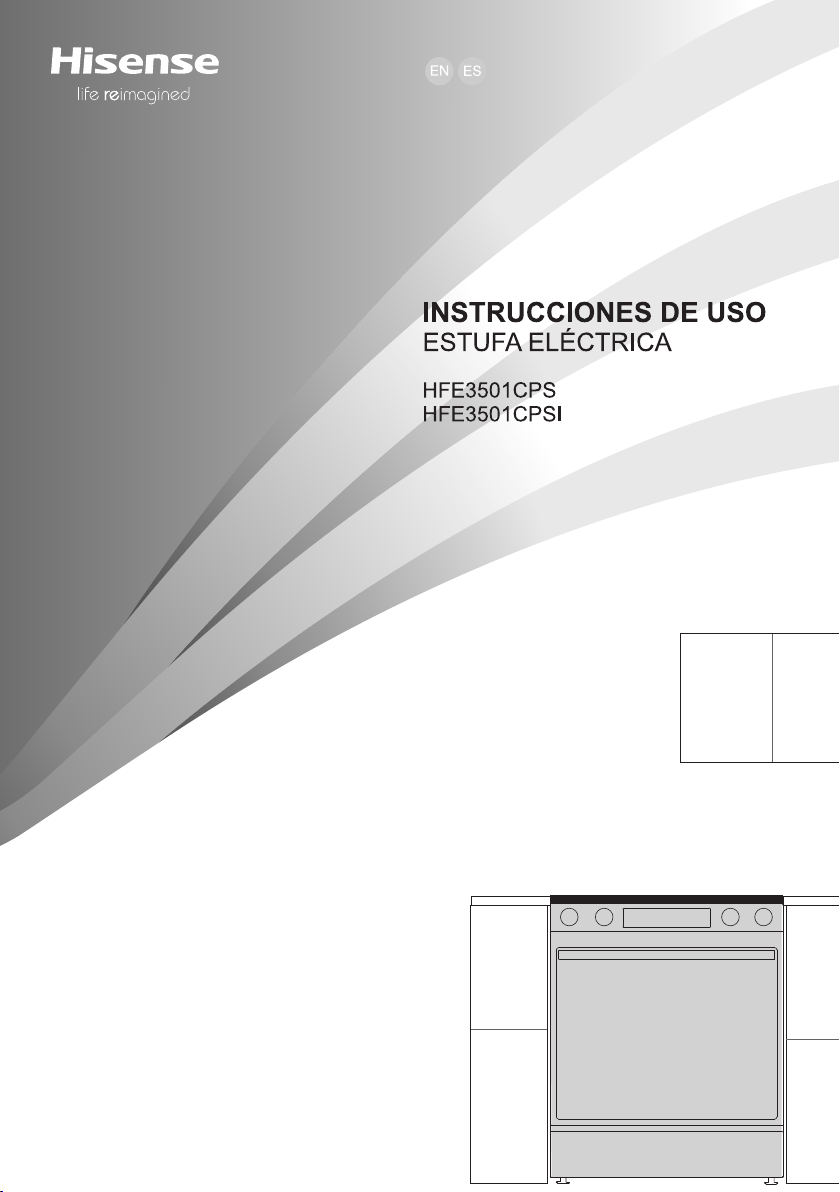
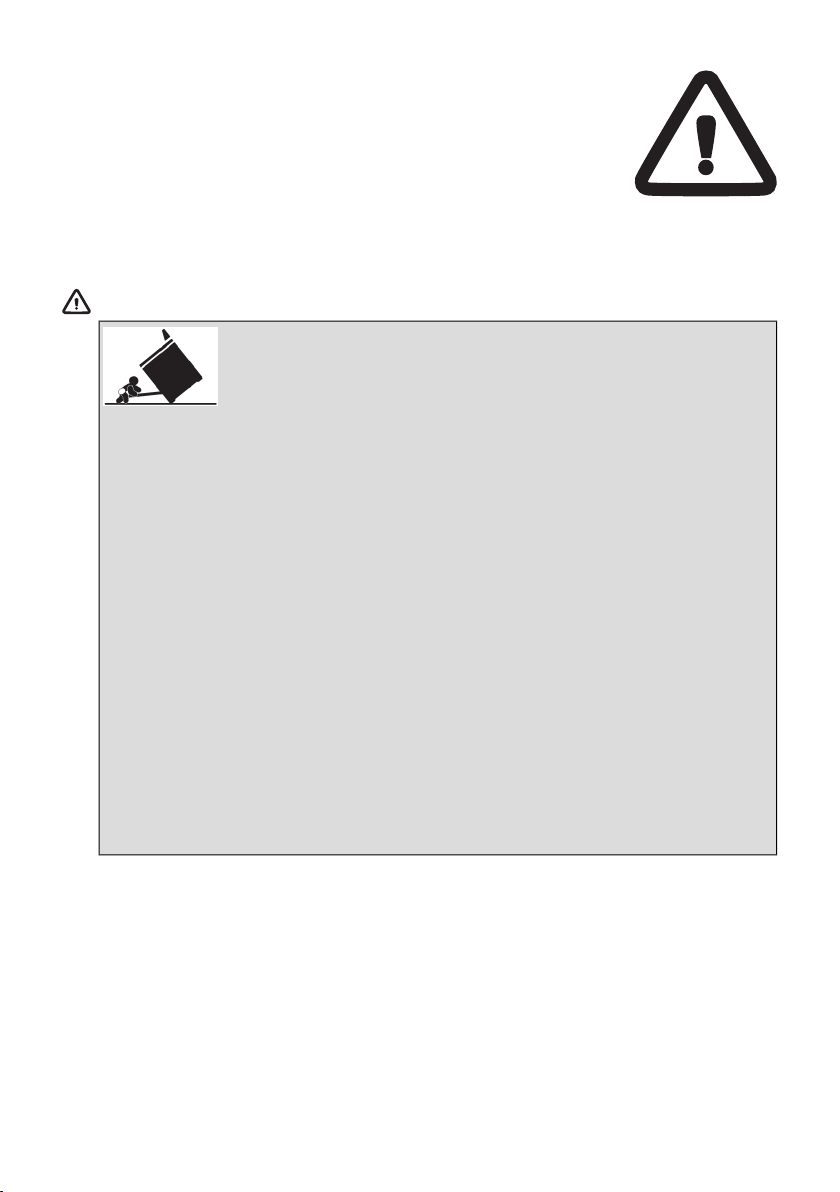
Tip-Over hazard
WARNING!
A. A child or adult can tip the range and
be killed.
B. Verify the anti-tip device has been
properly installed and engaged (See
installation instruction for details).
C. Ensure the anti-tip device is
re-engaged when the range is moved
(See installation instruction for details).
D. Do not operate the range without
the anti-tip device in place and
engaged.
Anti-Tip Bracket
WARNING!
•
To reduce the risk of tipping the
range, the range must be secured
by a properly installed anti-tip
bracket.
•
See installation instructions shipped
with the bracket for complete details
before attempting to install.
EN 3

GENERAL SAFETY INSTRUCTIONS:
WARNING!
NEVER use this appliance as a space heater to heat or
warm the room.
Keep these safety precautions, so they are available for review
by your local inspector.
Make sure your appliance is properly installed and grounded
by a qualified technician.
Never use the appliance for heating a room.
Do not leave children unsupervised. Children should never be
left alone or unsupervised in the appliance's area. Never allow
children to sit or stand on any part of the appliance.
Wear suitable clothing. When using the appliance, do not wear
loose clothing or clothing with hanging parts.
Do not attempt to repair or replace any part of the appliance,
unless this is specifically recommended in the manual. A trained
service technician shall carry out all other servicing or repairs.
Do not use water to extinguish a grease fire. Smother the fire
or flame, or use a dry chemical or foam-type extinguisher.
Use only dry potholders. Moist or damp potholders on hot
surfaces may result in burns from steam. Do not let the
potholders touch hot heating elements. Do not use a towel or
other bulky cloth in place of a potholder.
EN 4

During use of the appliance some condensation could appear
on the control panel. This will not affect functioning of the
appliance.
STORING ITEMS IN OR ON THE APPLIANCE:
Do not store items of interest to children in cabinets above the
cooking range or on the back guard of the cooking range.
Children climbing onto the range to reach items could be
seriously injured.
Do not store any flammable materials or substances in the oven
or near the cooking zones or burners of the appliance.
BOTTOM STORAGE DRAWER SAFETY INSTRUCTIONS:
Do not leave paper products, plastics, canned food, or
combustible materials in the drawer. They may ignite.
Use care when opening the bottom storage drawer.
EN 5

COOKTOP SAFETY INSTRUCTIONS:
Use the proper pan size. This appliance is equipped with one
or more surface units of different sizes. Select cookware with
flat bottoms large enough to cover the burner. The use of
undersized cookware will expose a portion of the heating
element to direct contact and may result in the ignition of
clothing. Proper relationship of cookware to burner will also
improve efficiency.
Never leave the cooking zones unattended at medium or high
heat settings. Foods, especially oily foods, may ignite resulting
in a fire that could spread to surrounding cabinets.
Only certain glass, glass/ceramic, ceramic, earthenware, or
other glazed cookware or utensils are suitable for use on the
cooktop without breaking due to the sudden temperature
change.
Cookware handles should be turned inward and not extend
over adjacent cooking zones. To reduce the risk of burns,
ignition of flammable materials, and spillage due to unintentional
contact with the cookware, the cookware handles should be
positioned so that they are turned inward and that they do not
extend over adjacent cooking zones.
EN 6

OVEN SAFETY INSTRUCTIONS:
Be careful when opening the oven door. Let the hot air or steam
escape before removing or replacing food.
Do not heat unopened food containers. Build-up of pressure
may cause the container to burst, which may result in injury.
Never place cooking utensils, pizza or baking stones, or any
type of foil or liner on the oven floor. These items can trap heat
or melt, resulting in damage to the product and risk of shock,
smoke, or fire.
Do not leave items on the cooktop near the oven vent. Items
may overheat, resulting in a risk of fire or burns.
Always place oven racks in the desired location while the oven
is cool. If you have to move a rack while the oven is hot, do not
let the potholder come into contact with any hot heating element
in the oven.
Never broil with the door open.
Ensure that aluminum foil and meat probes are prevented from
contacting the heating elements (including sheathed type
surface elements).
SELF-CLEANING OVEN SAFETY INSTRUCTIONS:
CAUTION: DO NOT LEAVE FOOD OR COOKING UTENSILS,
ETC., IN THE OVEN DURING THE SELF-CLEANING MODE.
Do not clean the door gasket. The door gasket is essential for
a good seal. Care should be taken not to rub, damage, or move
the gasket.
EN 7

Do not touch oven door surfaces during self-clean operation.
Keep children away from the oven during self-cleaning. Failure
to follow these instructions may cause burns.
Before operating the self-clean cycle, remove pans, shiny metal
oven racks and other utensils from the oven.
Before operating the self-clean cycle, wipe grease and food
soils from the oven. An excessive amount of grease may ignite
causing a fire hazard and smoke damage.
Do not use oven cleaners. No commercial oven cleaner or oven
liner protective coating of any kind should be used in or around
any part of the oven.
Only clean the parts specified in the manual.
IMPORTANT: The health of some birds is extremely sensitive
to the fumes given off during the self-cleaning cycle of any
range. Move birds to another well-ventilated room.
Be careful when handling hot grease container and disposing
hot grease.
GLASS/CERAMIC COOKING BURNERS SAFETY
INSTRUCTIONS:
Do not cook on a broken cooktop. If the cooktop breaks,
cleaning solutions and spillovers may penetrate the broken
cooktop, which in turn results in a risk of electric shock. Contact
a qualified technician immediately.
EN 8

Be careful when cleaning the cooktop. If you use a wet sponge
or cloth to wipe spills on a hot cooking area, be careful to avoid
steam burn. Some cleaners can produce noxious fumes if
applied to a hot surface.
DURING AND AFTER USE DO NOT TOUCH THE COOKING
ZONES OR AREAS NEAR THEM – Cooking zones may be hot
even when they are dark in color. Areas near cooking zones
may become hot enough to cause burns. During and after use,
do not touch, or let clothing or other flammable materials come
into contact with the cooking zones or areas near them, until
they have had sufficient time to cool.
EN 9
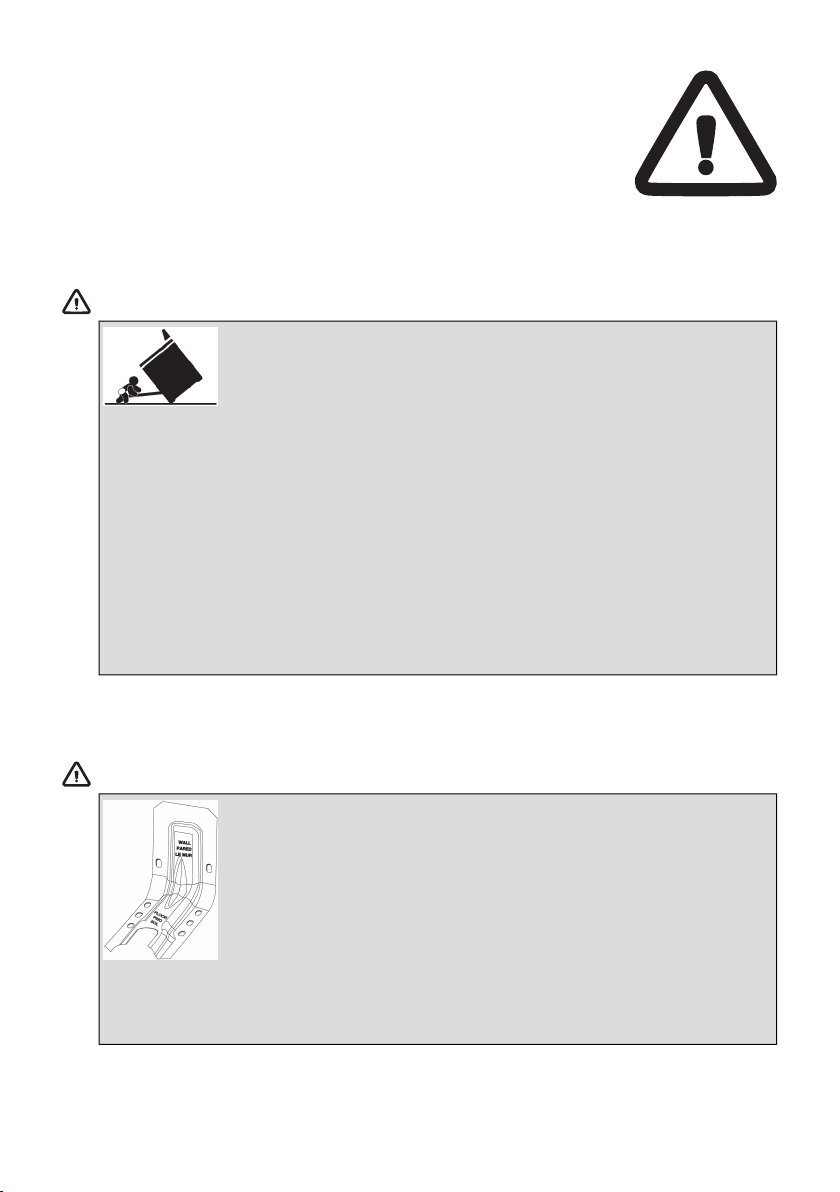
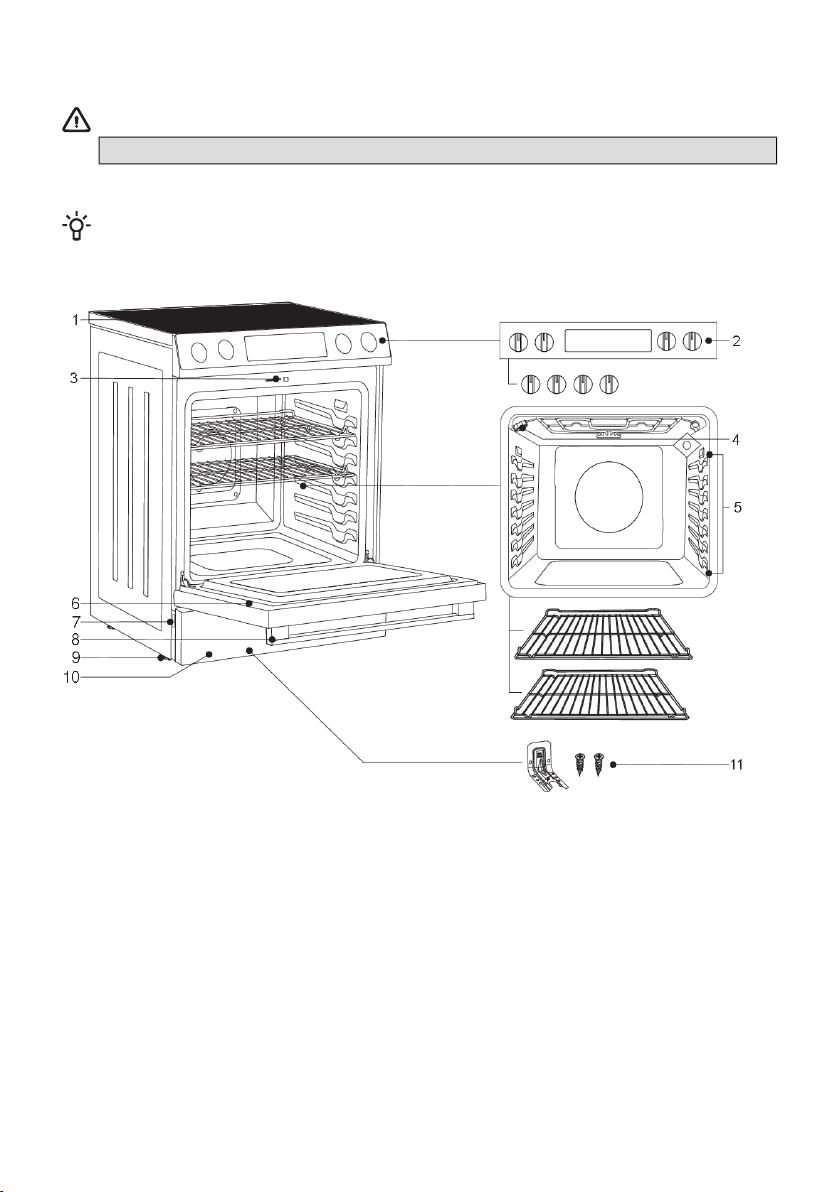
Appliance description
WARNING!
Before use, read the safety instruction first!
INFORMATION!
Throughout this manual, features and appearance may vary from your model.
7. Rating plate1. Cooktop
8. Door handle2. Control unit
9. Foot3. Door lock with switch
10. Drawer4. Light
11. Anti-Tip Bracket5. Guides - 7 cooking levels
6. Oven door
EN 10
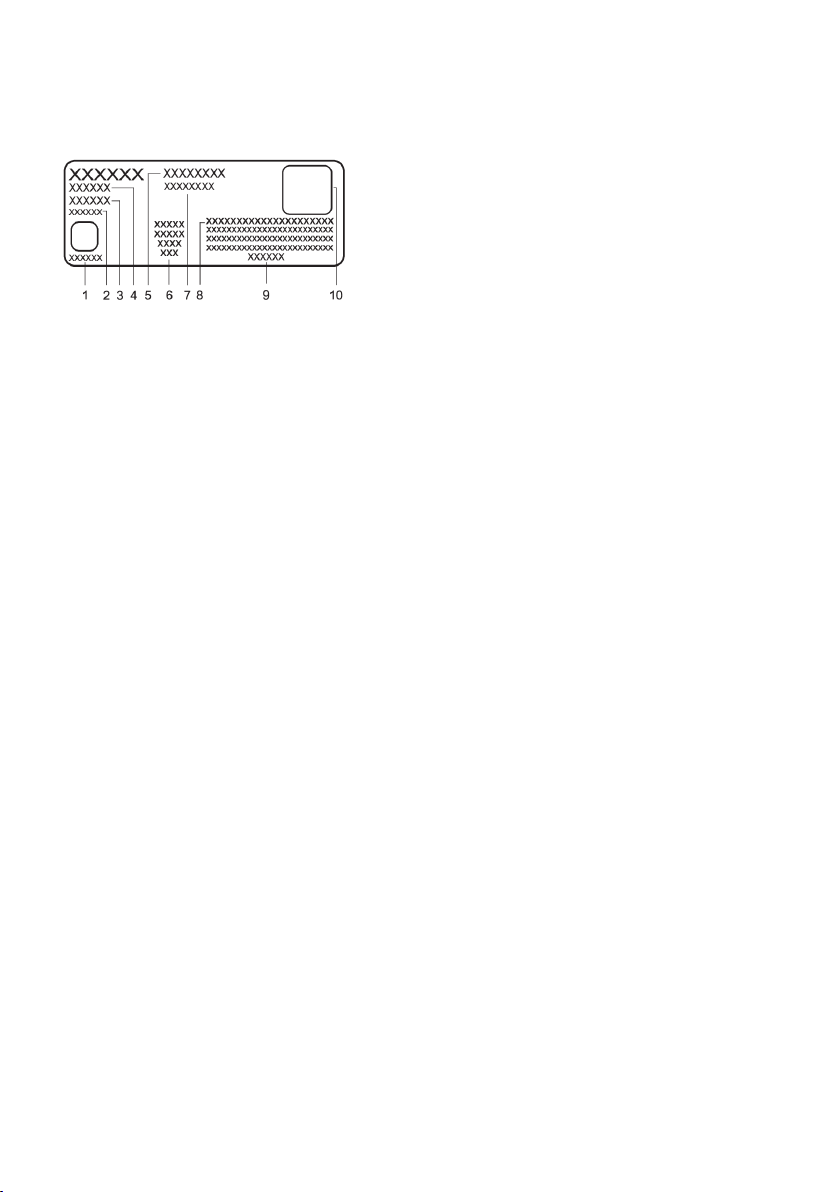
Rating plate - information about the appliance
The rating plate indicating the basic information about the appliance is located at the edge of the
drawer.
1 UL symbol
2 Serial number
3 Code
4 Model
5 Brand
6 Safety standard
7 Technical data
8 AUID number
9 Manufacturer address
10 QR Code
EN 11
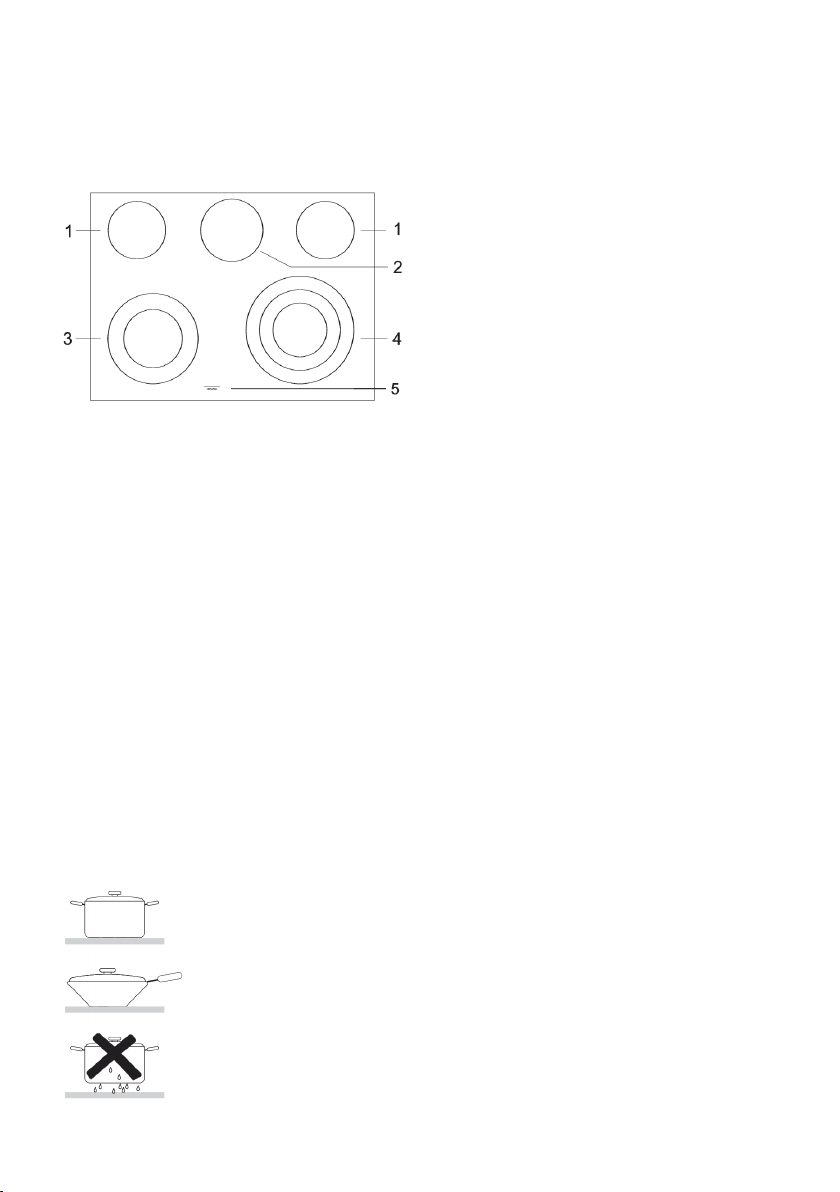
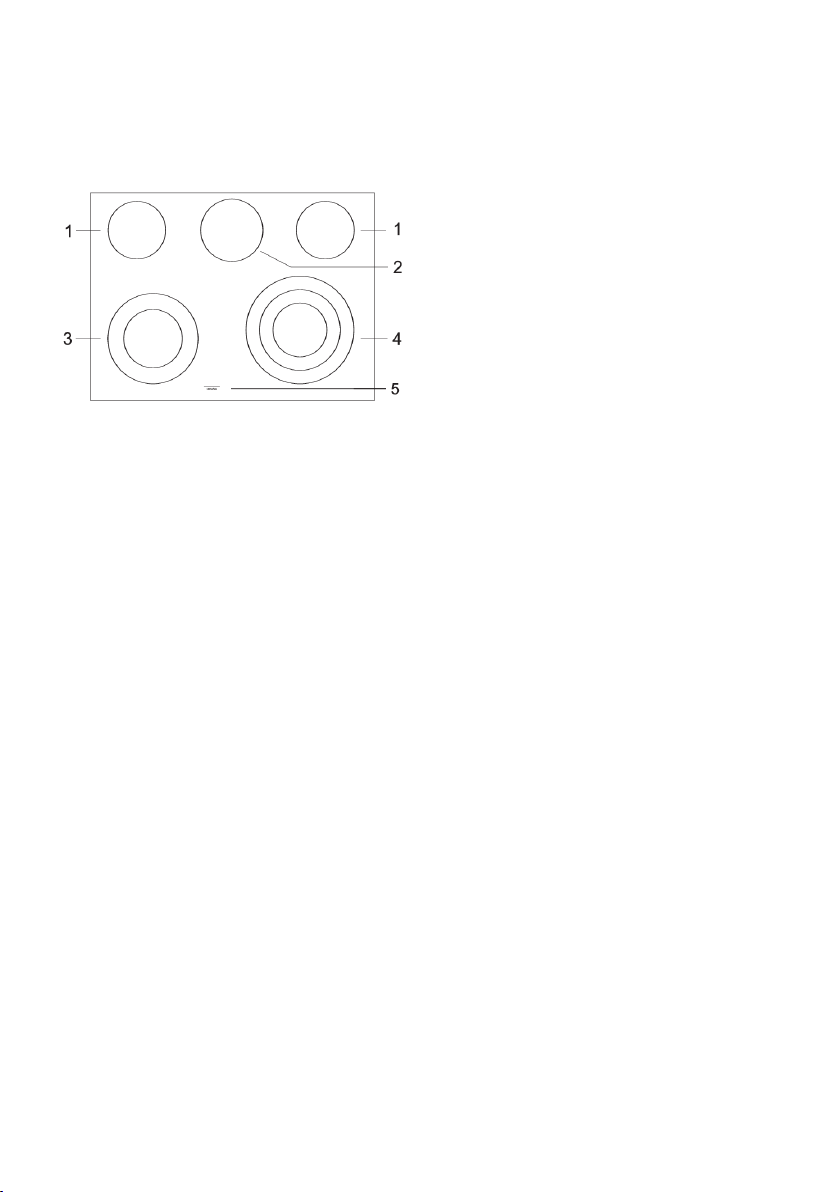
Cooktop
Cooking zones
(depending on the model)
4. Triple-ring cooking zone:1. Cooking zone ø 6'' - 1200 W
2. Cooking zone ø 7'' - 100 W (Warm Zone)
• ø 6'' - 1050 W
3. Double-ring cooking zone:
• ø 8'' - 1950 W
ø 12'' - 3000 W• ø 6'' - 1400 W
• ø 9'' - 3300 W
5. Double-ring cooking zone:
• ø 8'' - 1900 W
• ø 12'' - 3000 W
6. Cooking zone indicator
Glass ceramic cooking surface
• Cooktop surface is made of smooth glass; heaters are placed under the cooking zones.
• Cooking zone temperature rises gradually and evenly. When the temperature is rises, the cooking
zone will glow red.
• The cooking zone will switch on and off to maintain the selected setting. The cooking zone will
retain enough heat to deliver even heat during operation.
• For more efficient cooking, switch off the cooking zone 5 minutes before the end of the cooking
process. The appliance will finish cooking using the remaining heat.
Safety tips for cooking
• Use quality cookware with a flat and stable bottom.
• Only use a flat-bottomed wok.
• Do not place wet cookware in the cooking zone.
• Make sure the pots and pans are placed in the middle of the cooking
zone.
• Pan bottom diameter should be equal to the cooking zone diameter.
• When using special cookware, observe the cookware manufacturer's
instructions.
EN 12
Preventing scratches and stains
• Do not use abrasive cleaners or sponges that could scratch the cooktop.
• Do not use chlorine-based bleach, ammonia, or other cleaners not expressly recommended for
cleaning the glass- ceramic surface.
• Do not use glass cookware as it could scratch the cooktop surface.
• Do not place a wok ring on the cooktop, as it could damage or scratch the cooktop.
• Make sure the cooktop and the pan bottom are always clean.
• Do not slide metal cookware across the cooktop.
• Do not use dirty cloths to clean your cooktop. They will leave behind a layer of dirt that could
cause permanent stains on the cooktop.
Preventing other damage
• Do not place plastic objects, sugar or food with high sugar content onto the cooking zone. If this
happens, immediately clean the cooktop.
• Do not cook food directly on the cooktop.
• Always use suitable cookware.
Operating the cooktop
WARNING!
DANGER OF FIRE: Never leave the area in which the cooktop is used unsupervised.
Always supervise the cooking process. Do not store any items on the cooktop surface.
Failure to observe these instructions could lead to fire, severe injuries, or death.
INFORMATION!
Before using the cooktop, clean the glass-ceramic surface using a damp cloth and some mild
cleaner safe for the cooktop surface. During initial use, a characteristic "New appliance smell"
may appear; it will gradually disappear.
Do not use aggressive cleaners, such as abrasive cleaners that could cause scratches, abrasive
dishwashing sponges, or stain removers.
Use only cleaners safe for cooktop surfaces.
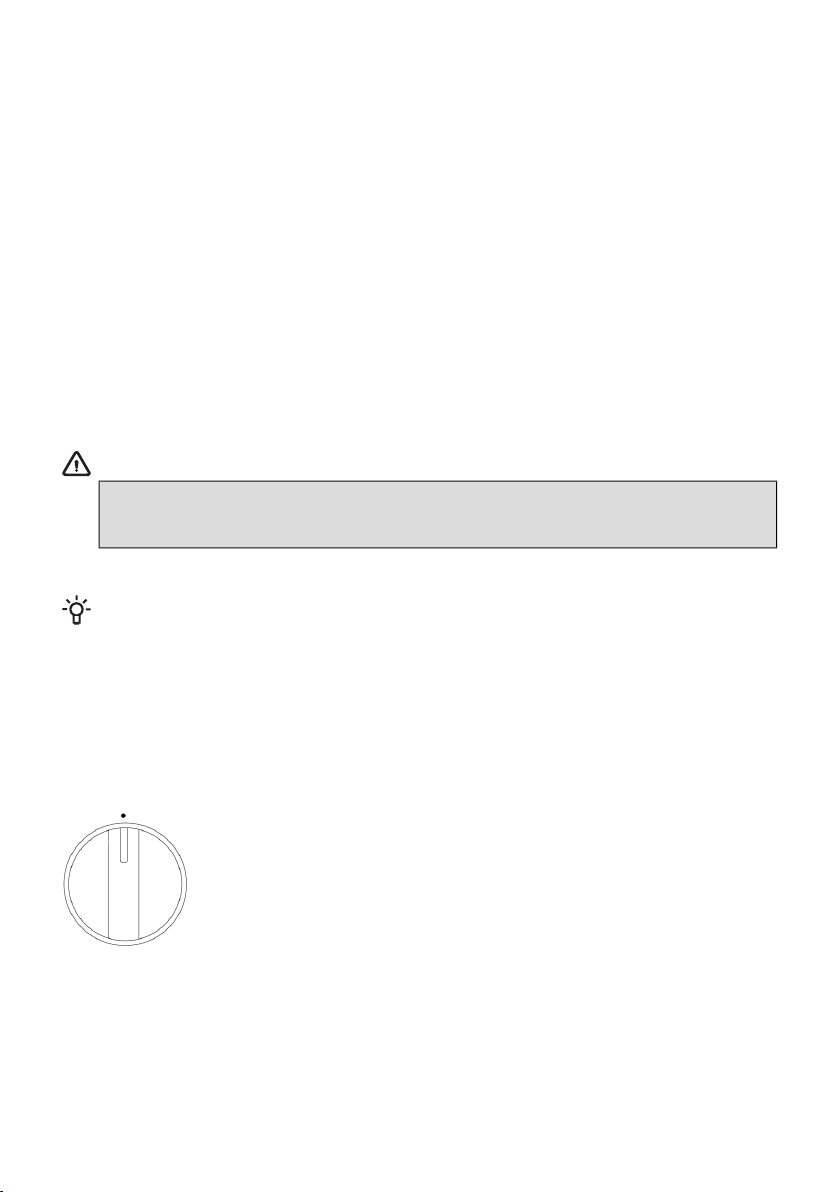
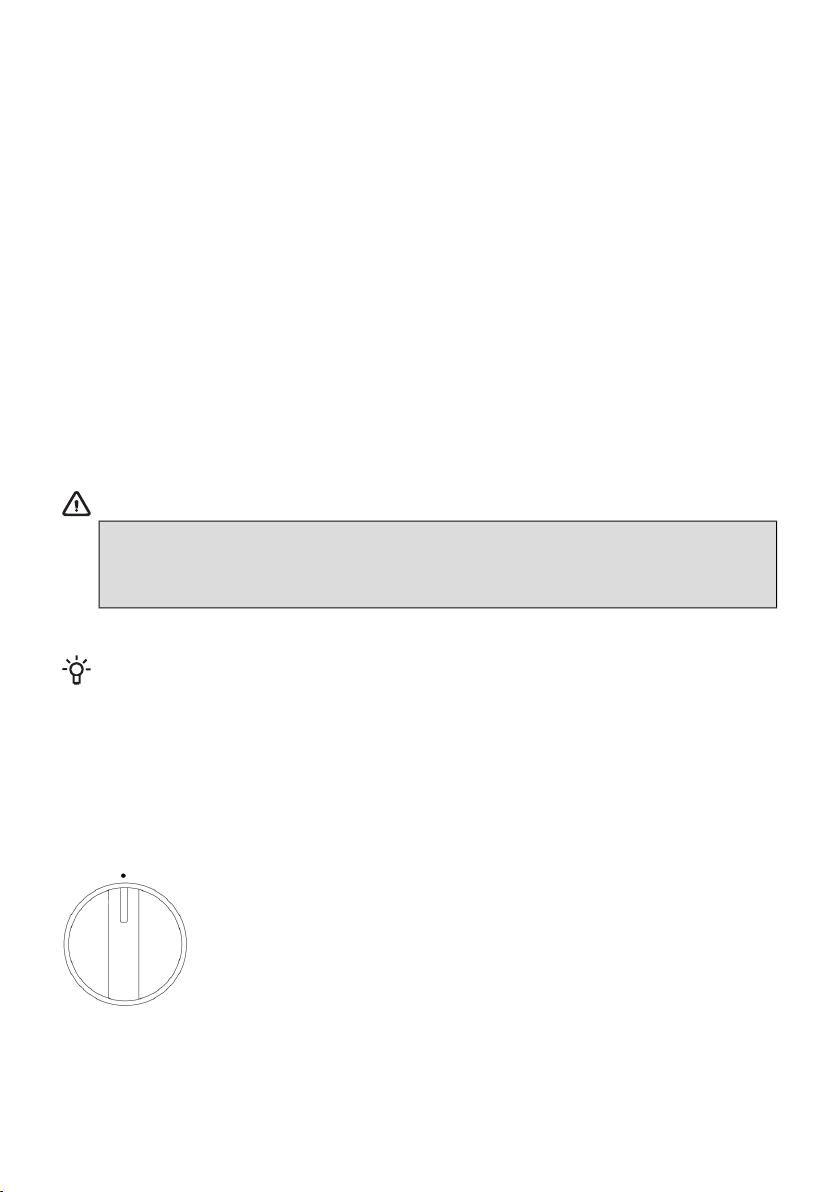
Switching on the cooking zone
Switch on the cooking zones using the knobs on the control panel. A
surface ON indicator light will glow when any surface unit is on. The
symbols indicate the respective cooking zones that the knobs control.
Push the knob inwards and rotate it in any direction to the setting you
want.
Warm Zone function can be operated using control unit.
Dual and Triple Surface units (on some models)
An additional heater ring can be activated for some cooking zones (depending on the model). Push
the knob inwards and rotate it in any direction to the desired position.
EN 13
Hot surface indicator
When on, the indicator light warns that the cooking zone is hot (danger of burns). The hot surface
indicator will remain lit when the cooking zone is switched off until the cooktop cools down to
approximately 150 °F.
WARNING!
Do not touch the cooktop until the cooking zones have fully cooled down.
The surface could still be hot and touching the glass surface before it is sufficiently cool
may result in burns.
After the hot surface indicator light is turned off, immediately clean any spills of food
residue from the cooktop as it will be harder to clean them later on.
If there is a storage cupboard directly above the cooktop, make sure the items stored
there are rarely used and that they can be safely stored in the area exposed to heat. High
temperature can be dangerous to items, such as volatile liquid, cleaners or sprays.
Warm Zone
WARNING!
FOOD POISONING HAZARD: if the food has not been sufficiently cooked the Warm Zone
function can contribute to development of harmful bacteria in the food.
Activate the Warm Zone function by pressing the Warm Zone key. Signs MID and CONFIRM will
start flashing on the display unit. The intensity of the Warm Zone can be adjusted by pressing Warm
Zone. Press once to increase the intensity; HIGH will flash on the display unit. Press twice to decrease
the intensity; LOW will flash on the display unit. Then, Activate the function by pressing key.
• Placing uncooked or cold food in the Warm Zone could result in foodborne illness.
• For best results, all food should be covered with a lid or aluminium foli.
• When removing food from the Warm Zone, cookware and plates will be hot; use potholders or
oven mitts.
• Always start with hot food.
EN 14

Oven
Control unit
6 Cancel/Child Lock1 Stop
7 Start/Confirm2 Baking modes
8 Cleaning- Proof
- Steam Clean- Pizza
- Self Clean- Broil
9 Warm Zone- Bake
10 Defrost/Warm- Convection Bake
Time Settings- Convection Roast
A Decrease time- Frozen Bake
B Increase time- AirFry
Temperature Settings- Dehydrate
a Decrease temperature3 Fast Preheat/Crisp Mode
b Increase temperature4 Cooking Time/Settings Mode
5 Keypad
Touch the keys with a larger area of your fingertip for a better key response. Each time you press a
key, this will be acknowledged by a short acoustic signal.
INFORMATION!
Appliance functions depend on the model.
EN 15
Using the appliance
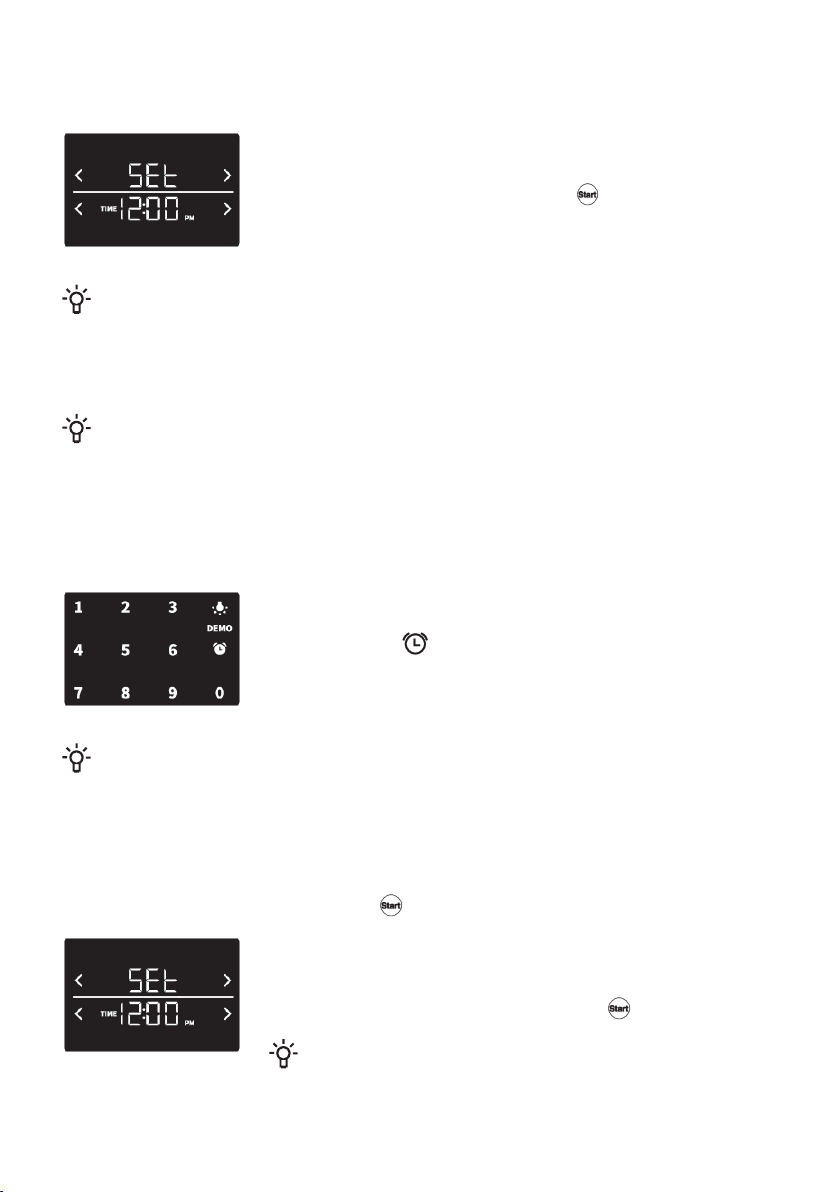
Switching on for the first time
After connecting your appliance to the power for the first time, or after
an extended power outage, 12:00 will flash on display.
To activate the appliance, briefly press the key.
NOTE!
After powering on the appliance "DOOR LOCK" will be illuminated on the user interface for the
first few seconds. This is the normal initialization process of the door lock. After the "DOOR
LOCK" sign disappears, the appliance is ready to use. Please do not open the door when the
"DOOR LOCK" sign is illuminated.
INFORMATION!
If you do not press any key within 30 seconds and no program is activated, the oven will
automatically switch to standby mode. A clock will appear on the display unit. The appliance can
also be switched to standby mode if a cooking system has been selected, but the oven is not
active.
Keypad use
Keypad can be used to set temperature or time. For setting the
temperature simply write the value desired. To set the time first press
Cooking Time or and for the next 10 seconds keypad will be used
for time setting.
INFORMATION!
Please note that temperature will be rounded to the values of 5.
Settings
Choose settings by pressing the Cooking Time/Settings Mode key and holding it for 3 seconds.
Use the temperature settings keys to scroll through the menu. Use the time settings keys to change
value. Confirm any changes by pressing the key.
Setting the clock
World Time is always shown on the lower display. The first 2 digits are
hours and the third and fourth digits are minutes. Use the Keypad keys
to set the time. Confirm your selection with the key.
INFORMATION!
AM/PM is automatically changed when time exceeds 12:00.
EN 16
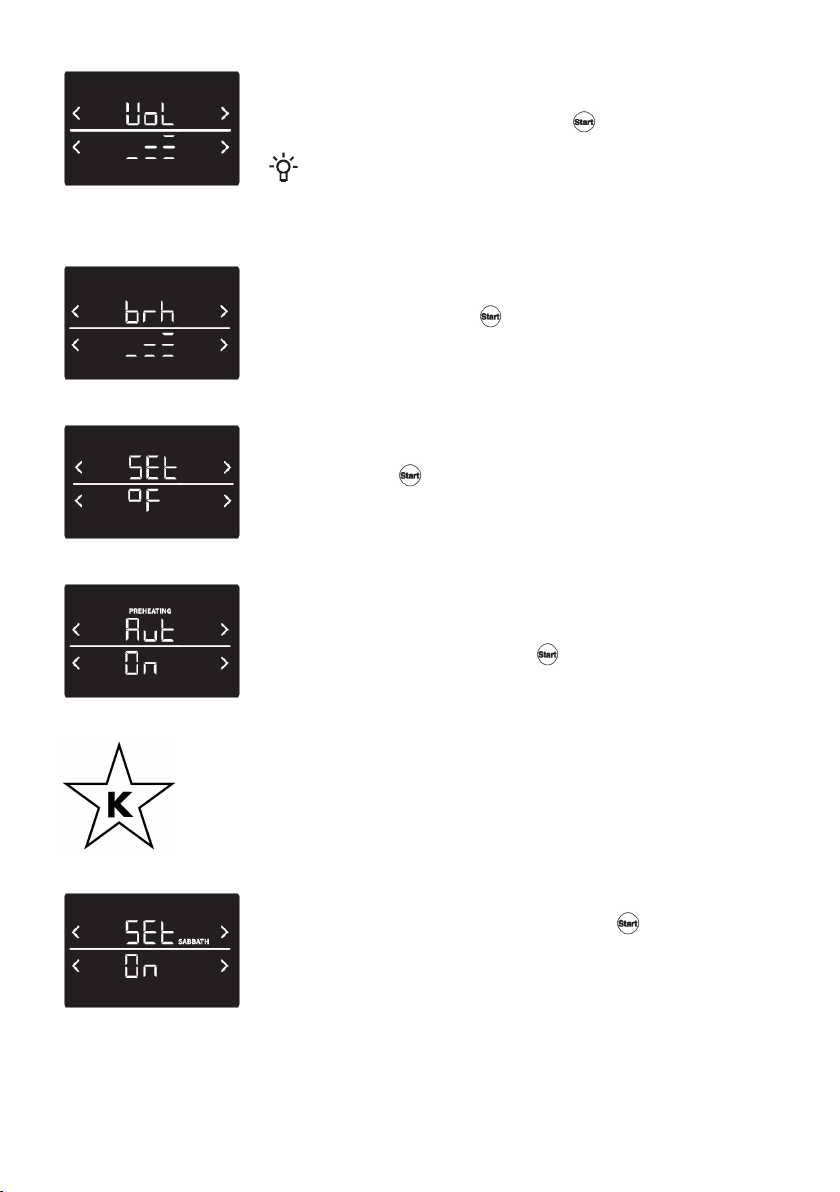
Setting the volume
You can choose between three control unit volume levels, and silent
operation. Confirm your selection with the key.
INFORMATION!
When the silent operation is selected, oFF will appear at the bottom
of the display unit.
Control unit brightness
You can choose between three display brightness intensity levels. Confirm
the selection by pressing the key.
Temperature unit
Select either degree Fahrenheit (°F) or degrees Celsius (°C). Confirm your
selection with the .
Auto Fast Preheat
You can set whether Fast Preheat is automatically activated on the
selected function or not, by setting Auto Fast Preheat to either ON or
OFF. Confirm your selection with the key.
Sabbath Mode
Allows keeping the food warm in the oven without having to switch the
oven on or off.
The Sabbath mode function complies with standards set forth by
Star K.
Sabbath Mode function can be activated in the settings menu. When
activated, ON will start flashing. Then, touch the key and the
SABBATH sign will start flashing as well.
EN 17
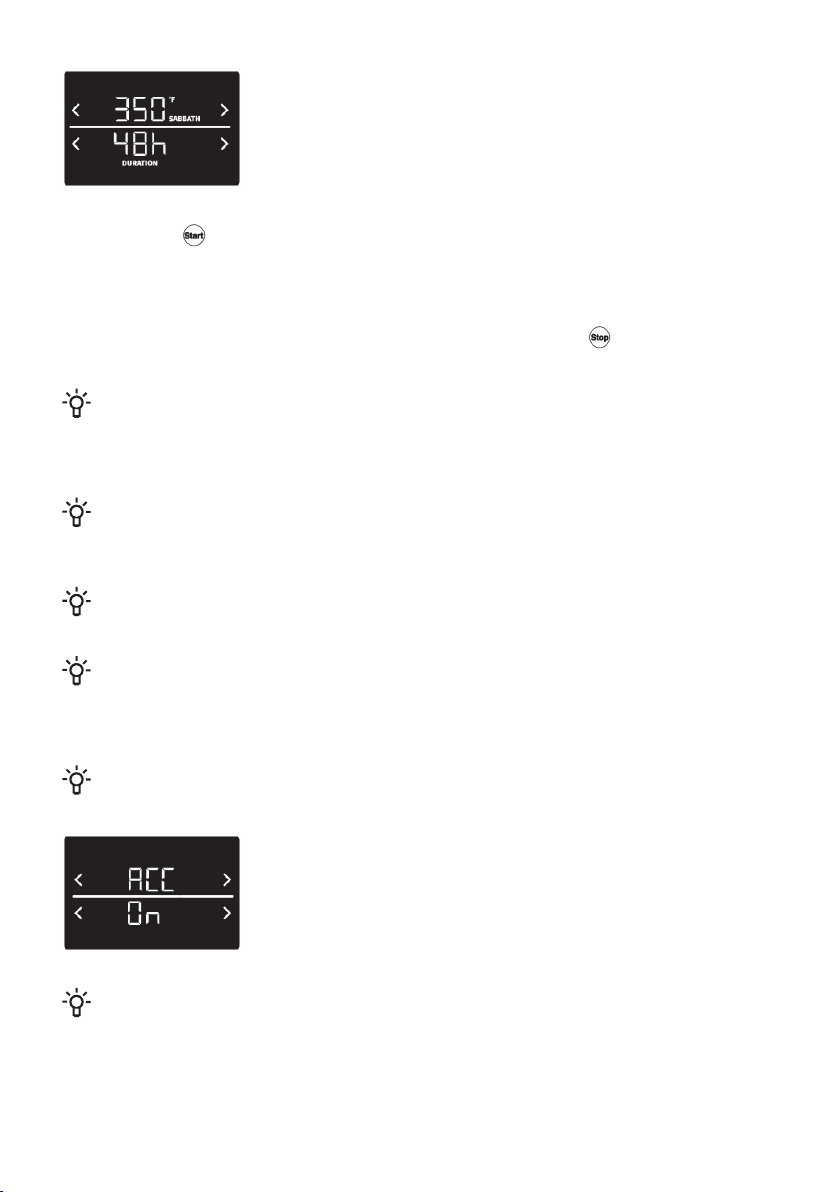
Baking during Sabbath Mode. Set the baking temperature and time.
The default temperature of 350 °F is displayed at the top of the display
unit. You may adjust the temperature in the range from 175 °F to the
maximum possible setting of 425 °F. The default time of 48 hours is
indicated at the bottom of the display unit. You can set it in the range
from 1 hour to 74 hours.
Briefly press the key to start the Sabbath Mode function. The oven starts heating up after 30
seconds.
The Sabbath Mode function is active for 74 hours, after that the function is automatically switched
off.
The Sabbath Mode function can be deactivated at any time by pressing the key. When the Sabbath
Mode is active, the temperature or time cannot be changed.
INFORMATION!
In the case that during active Sabbath Mode any error is triggered, all the heaters are turned off,
and an error message is displayed on the user interface, but there is no audible tone to indicate
this.
INFORMATION!
Suppose the power failure occurs while in Sabbath Mode ; the appliance will return to Sabbath
Mode without heating. The 74h countdown, will start again from 74h.
INFORMATION!
During active Sabbath Mode, the Child Lock and Warm function function are disabled.
INFORMATION!
When the Sabbath Mode is active, the oven light is off, and it does not switch on when the oven
door is opened.
All sounds are deactivated as well.
INFORMATION!
Only the Bake function is enabled in the Sabbath Mode.
Automatic Convection Conversion
When Automatic Convection Conversion is turned ON, the function will
automatically convert the regular baking temperatures to convection
bake cooking temperatures. This feature may be turned on or off.
NOTE!
Note that this option does not convert convection bake cooking times; it only converts
temperatures.
EN 18
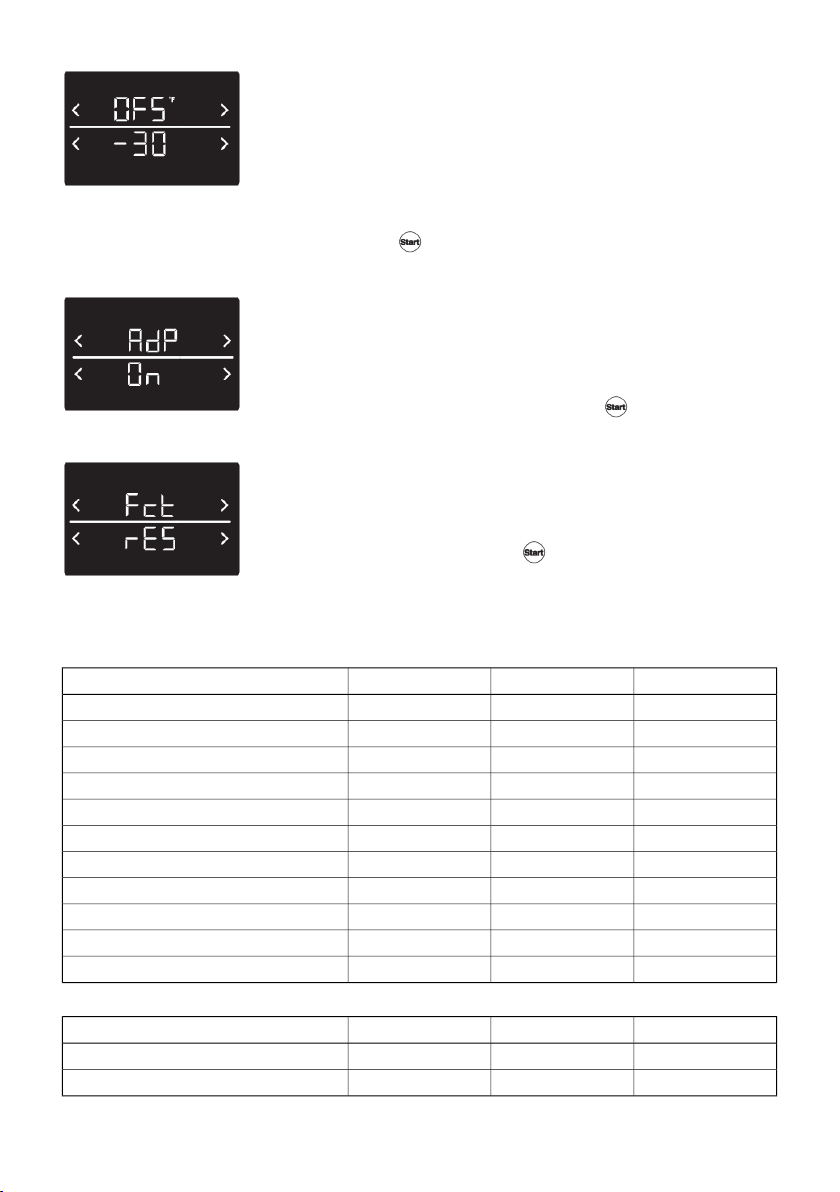
Temperature offset
The temperature in the oven has been calibrated at the factory. When
first using the oven, be sure to follow recipe times and temperatures. If
you think the oven is too hot or too cool, you can adjust the temperature
in the oven. Before correcting, test a recipe by using a temperature setting
that is higher or lower than the recommended temperature. The baking
results should help you decide how much adjustment is needed. The
oven temperature can be changed from -30°F to +30°F. Confirm your
selection with the key.
Adapt Sense
The Adapt Sense (AdP) function will propose the most frequently used
temperature setting when the following systems (Bake, Frozen Bake,
Warm, Convection Bake, Convection Roast, AirFry, Pizza, Dehydrate)
are activated. The factory setting for this function is OFF; you can activate
it is ON and confirms your choice by pressing .
Factory settings
This function allows resetting the appliance to factory settings. Fct will
appear on display. Press the time increase or decrease key to choose
between rES (for factory defaults) or oFF (for keeping the current settings).
Confirm your selection by pressing .
Minimum and maximum settings
All of the programs listed in the table below have minimum and maximum temperature or time settings.
DefaultMaxMinProgram
350 °F550 °F175 °FBake
325 °F480 °F265 °FFrozen Bake
HIHILOBroil
150 °F210 °F140 °FWarm
325 °F550 °F175 °FConvection Bake
325 °F550 °F175 °FConvection Roast
425 °F500 °F300 °FAirFry
100 °F100 °F100 °FProof
425 °F550 °F300 °FPizza
100 °F100 °F100 °FDefrost
150 °F175 °F100 °FDehydrate
Default (h:min)Max (h:min)Min (h:min)Program
3:005:002:00Self Clean
0:300:300:30Steam Clean
EN 19
Oven functions
Oven functions include Baking modes: Proof, Pizza, Broil, Bake, Convection Bake, Convection Roast,
Frozen Bake, AirFry, Dehydrate and some Extra modes: Fast Preheat, Crisp Mode, Self Clean, Steam
Clean, Defrost and Warm. All oven functions are activated in two steps:
1. First, press the key for the selected mode. The indicator around it will light up and the indicator
around .
2.
Then, activate the selected mode by pressing the key. The indicator around the selected mode
and the indicator around will be lit.
Default temperature will be displayed at the top of the display unit.
You can set the temperature using or key or keypad.
INFORMATION!
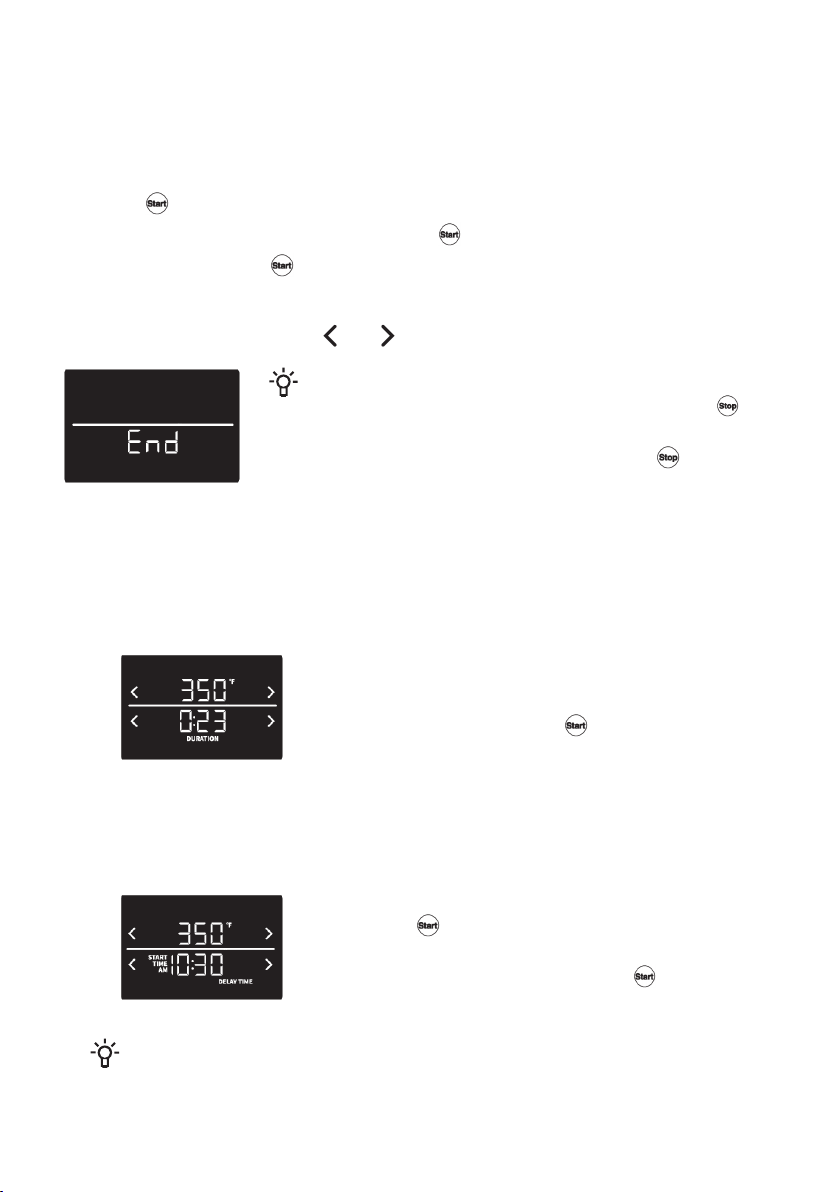
All oven functions can be stopped by briefly pressing the key.
End will display on the screen. The appliance will automatically go
to a standby state after 5 minutes or if you press again.
Cooking Time
You can set Cooking Time by pressing the Cooking Time key, before you activate the function or
while the function is active.
Cooking Time includes duration and delay. You can set it in the next ways.
1. Duration – set the duration for the selected oven function.
• Position the oven rack(s) and place the food in the oven.
• Select desired baking function.
• Press the Cooking Time key.
•
Set desired duration and touch key to confirm the setting.
• When the set duration expires, the oven function is switched
off.
2. Delay Time – use this option when you wish to activate a function after a certain period of time.
• Position the oven rack(s) and place the food in the oven.
• Select desired baking function.
• Press the Cooking Time twice.
• Set desired delay (start time).
•
Touch the to confirm the setting.
• The oven will begin to bake with selected delay.
•
Delay can be deactivated by pressing the and the oven will
immediately start baking.
INFORMATION!
Duration and delay can be used at the same time. The function will start with a set delay and
when the delay expires. Function will start and the duration will be shown.
EN 20

INFORMATION!
If you want to cancel duration and delay, press Cooking Time and when DURATION or
DELAY TIME signs is blinking; press the Cancel key.
Timer
Set the time by pressing the key. After you set the time press again and the timer will be
confirmed. If you do not confirm the timer it will be automatically confirmed after 10 seconds. When
the time expires, an alarm will sound.
NOTE!
The timer does not start or stop cooking functions. You can use the timer with any of the other
oven functions.
If you want to cancel the timer, press the key so that the TIMER sign starts to blink and
then press the Cancel key.
Baking
• Remove all unnecessary equipment from the oven during baking.
• If at all possible, do not open the oven during baking.
• Do not place baking dishes, sheets, or trays directly onto the bottom of the oven cavity.
• Always place the baking dishes in the center of the wire rack.
• When cooking larger cuts of meat or pastry with higher water content, a lot of steam will be
generated inside the oven, which in turn may condense on the oven door. This is a normal
phenomen on that will not affect the appliance's operation. After the cooking process, wipe the
door and the door glass dry.
• Place the deep baking tray one level lower to function as a drip tray when using the wire rack.
• When making cakes or pastry, use light-colored baking dishes or molds (biscuits, cupcakes).
• Use dark-colored baking dishes for pies and tarts.
Baking tips
Preheating
When you start, the appliance will be in preheating phase until the set temperature is reached. Some
of the functions have automatically set Fast Preheat. This functioning can be changed in settings.
If you are preheating the oven with the fast preheat function, do not place the food into the oven until
the oven is fully heated. When the appliance reaches set temperature, an audible signal is played,
PREHEATING sign will turn OFF and on the upper display only set temperature will be shown.
You can see the temperature rise on the user interface. Rapid preheating is recommended for delicate
cuts of meat (sirloin), as well as for yeast-leavened and sponge dough.
INFORMATION!
Heating an empty oven consumes a lot of energy. Therefore, we recommend cooking several
dishes in succession, or making several dishes simultaneously.
INFORMATION!
Some baking functions use low temperatures and preheating is not necessary. In this case
PREHEATING will not be shown on display.
EN 21
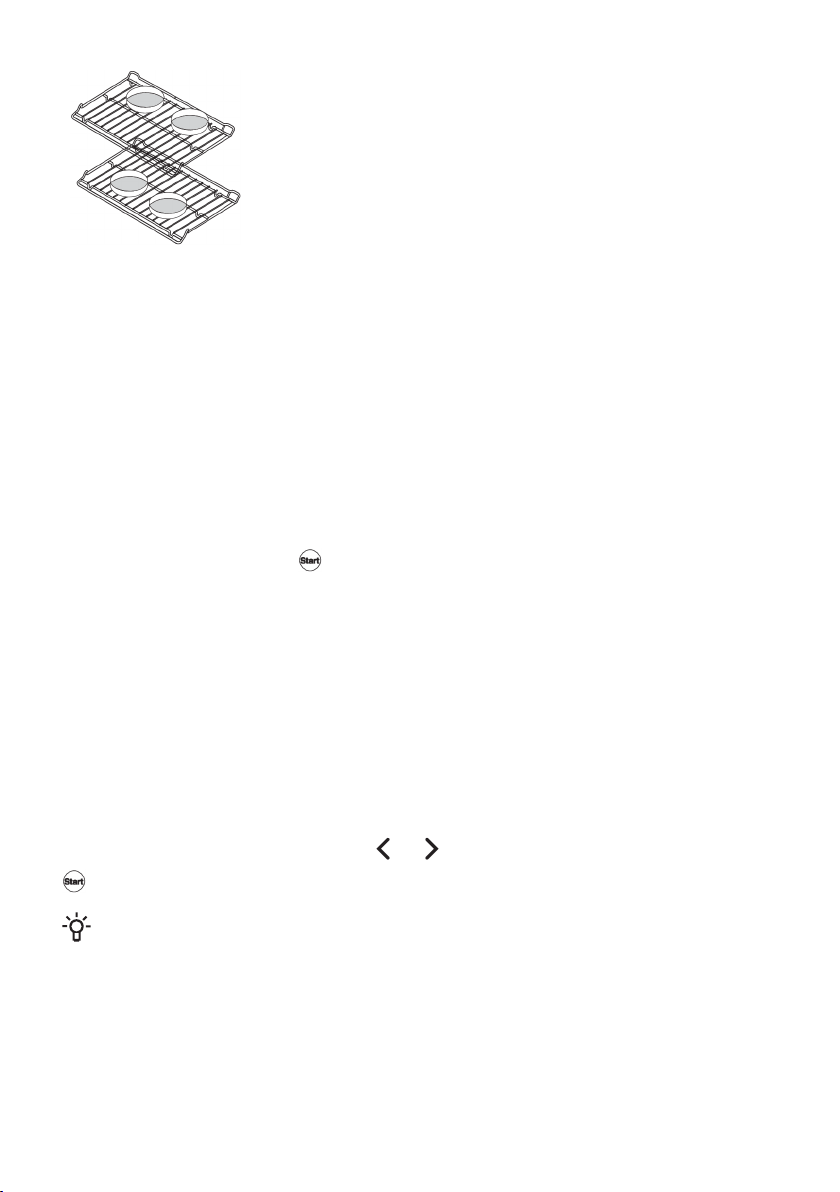
Multi-level baking
• Use the Convection Bake system for baking on multiple levels
simultaneously.
• Recommended baking levels: 3 and 5
• Arrange smaller baking dishes as indicated in the figure. This way,
you will allow adequate room for air circulation around the food,
which in turn allows correct baking.
Baking modes
Bake
This mode is intended for baking food on a single rack. The oven should be preheated when baking
pastry, biscuits, and cakes.
Frozen Bake
This method allows baking frozen food on a single rack in a shorter period of time without pre-heating.
Optimum for pre-baked frozen products (frozen meals, bakery products, croissants, French fries,
chicken nuggets).
Follow the recipe or package directions for frozen products preparation (time, and temperature). Use
the Frozen Bake system for baking.
Press Frozen Bake to activate the function. Set the temperature, baking time and preheating if required.
Confirm the settings by pressing .
Broil
This mode is intended for baking flat food (toasted bread, open sandwiches, burgers, grill sausages,
steaks, fish, etc.) or for Au gratin.
The top heater uniformly heats the entire surface, baking the food evenly regardless of where it is
under the heater. Recommended baking levels: 6 and 7 You can choose Broil HI and Broil LO.
Broil HI
Use it to grill large amounts of flat-shaped food like toast, open sandwiches, grill sausages, fish,
skewers, etc., cook au gratin and brown the crust.
Broil LO
Use it to prepare flat food, when you want the food to be crunchy.
To activate the function, press Broil. Press or select the intensity and activate it by pressing
.
INFORMATION!
Recommended temperature is preset.
Regular use:
• Always keep the oven door closed when using the broil function.
Use the wire rack and drip tray or suitable special-purpose equipment.
• Use upper rack levels.
• When the food is close to the upper heating element, spattering grease can cause smoke and
possible ignition of the fat. Therefore, closely monitor the food while you are using the broil function.
EN 22

Convection Bake
Use it to prepare meat, pastry and vegetables on a single or multiple racks simultaneously.
This system combines heaters with a fan, which makes it faster than conventional systems.
Recommended baking levels:
• for single-level baking of flat food (pastry) 4
• for single-level baking of larger cuts (meat): 2 or 3 for multi-level baking: 3 and 5
Convection Roast
The mode is intended for roasting poultry and whole cuts of meat on a single rack under a broiler.
This is a combined system. Hot air is circulated evenly around the food, and the heaters uniformly
radiate heat and contribute to a crunchy crust and juicy core. This system combines heaters with a
fan, which makes it faster than conventional systems.
Recommended baking levels:
• roasting large cuts of meat: 3 or 4
• roasting a single cut of meat: 2 or 3
Equipment used:
• wire rack
• drip pan
AirFry
This cooking method results in a crunchy crust without added fat. This is a healthy version of fast-food
frying, with fewer calories in the cooked food. Suitable for smaller cuts of meat, fish, vegetables, and
frozen products ready for frying (French fries, chicken nuggets).
This is a combined system. The hot air circulates evenly around the food. The heat from the top heater
contributes to a crunchy crust.
Recommended baking levels: 4
Equipment used:
• for better browning of the bottom, we recommend using darker baking dishes
INFORMATION!
For the best result, distribute the food evenly across the entire area of the baking dish or sheet,
and do not cover it.
Proof
This program ensures an optimum proofing process. The controlled temperature will speed up the
proofing process relative to proofing at room temperature.
INFORMATION!
For best results, cover the dough while using the Proof mode.
For optimum proofing, always start the program when the appliance has completely cooled
down.
Do not open the appliance door during the proofing process for better results.
Do not use the Proof mode warm or keep the food hot. Proofing temperature in the oven is not
hot enough to hold foods at safe temperatures.
EN 23

Dehydrate
The Dehydrate mode is intended for drying food so that moisture can evaporate. You can use this
mode for manually dehydrating food at a temperature between 100 and 175 °F. You can dehydrate
fruit, vegetables and herbs.
Pizza
This system is optimal for the fastest, pizza baking on a single rack.
Recommended baking levels: 1 or 2.
Equipment used:
• For better browning of the bottom, we recommend using darker baking sheets.
EN 24
Extra functions
Self Clean
WARNING!
Before you start the Self Clean mode, remove all items you may store in your oven as it
will discolor if left inside during the process.
The Self Clean function cleans the oven using high temperature.
Fat residues and other impurities are incinerated during the cleaning process and reduced to ashes.
There are three cleaning intensity levels available, with varying duration of the process:
Program durationCleaning purposeCleaning intensity
2 hoursFor minor impuritiesFast cleaning
3 hoursFor noticeable impuritiesMedium-intensity cleaning
5 hoursFor stubborn and persistent (older) impuritiesIntensive cleaning
INFORMATION!
The more stubborn the soil, the higher the level that should be selected.
Preparing for the Self Clean function:
• Make sure any noticeable oil is wiped up prior to using this function.
• Remove all soil left on glass and food residue from the oven cavity.
• Always start the program when the appliance has cooled down.
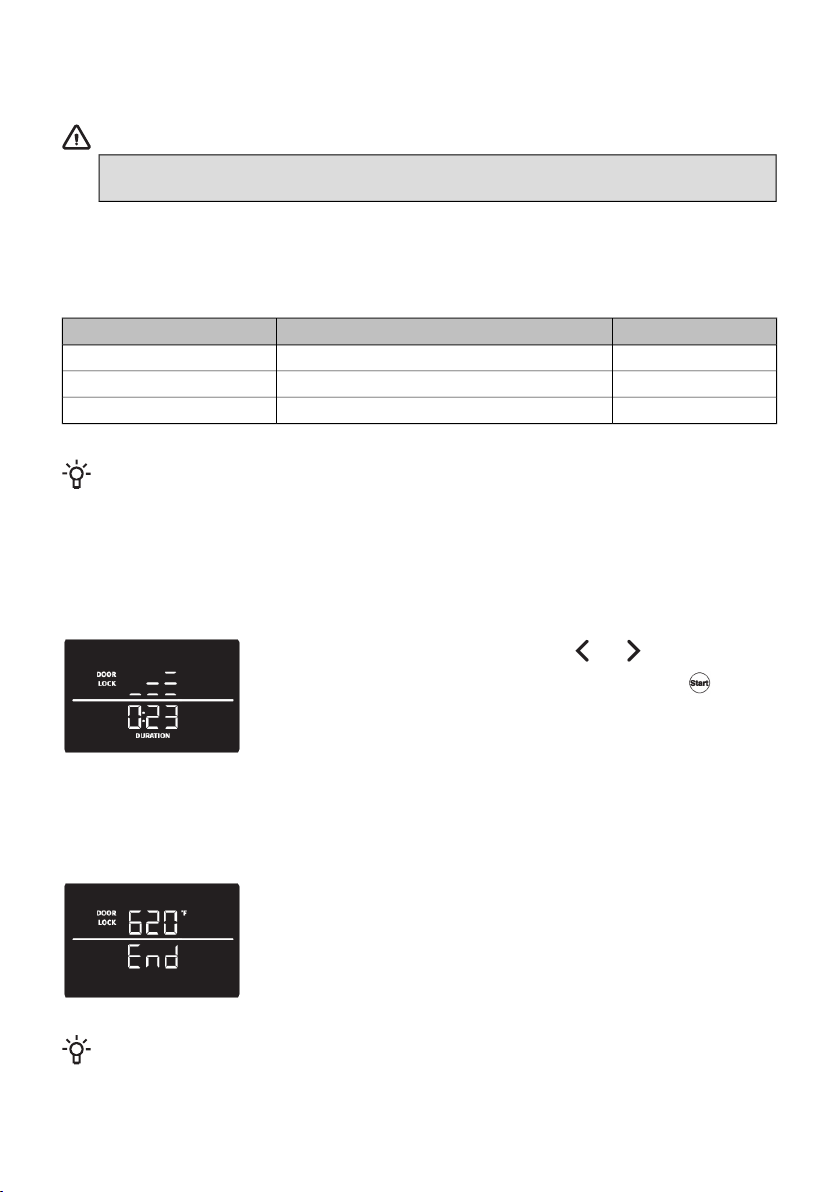
Briefly press the Self Clean key and touch or to set the desired
cleaning intensity. Confirm the settings by pressing on the symbol.
Lock and program duration will appear on display (the door will be
locked). The default cleaning duration is 3 hours.
Unpleasant odors and smoke can be released and irritant fumes and gases during a program operation.
Therefore, we recommend that you ensure thorough ventilation of the kitchen during the program
process. We advise against staying in the room for a long period of time. Do not let children and pets
near the appliance while using this mode.
When the temperature drops to bellow 400 °F, the appliances will unlock
and go to a stand-by state.
Once the oven cavity has fully cooled down, wipe it with soap and a soft
cloth to remove any residue (e.g. ashes).
INFORMATION!
We recommend using this function once per month.
EN 25
WARNING!
• Do not use cooktop during the Self Clean mode.
• If you try to use the cooktop while the Self Clean mode is in use "Hob" will appear
on upper display and will be toggled with Self Clean intensity sign. If cooktop is not
turned off within one minute, Error 14 is displayed and Self Clean function will stop.
• Remove any cookware from the cooktop area.
• During the cleaning program, the appliance becomes very hot on the outside. Do not
touch the oven door and never hang any combustible objects, such as kitchen cloths
or towels, on the door handle.
• The oven door is locked. Do not try to open it!
• Small animals or pets can be particularly sensitive to any fumes. We recommend
removing them from the kitchen while this function is active, and ventilating the
kitchen thoroughly after the cleaning process.
• As a result of the Self Clean cleaning, the oven cavity and the oven accessories may
discolor and lose their sheen. This does not affect the functionality of the oven or
the accessories/equipment.
• Before cleaning the oven with Self Clean function, remove the oven racks and other
accessories.
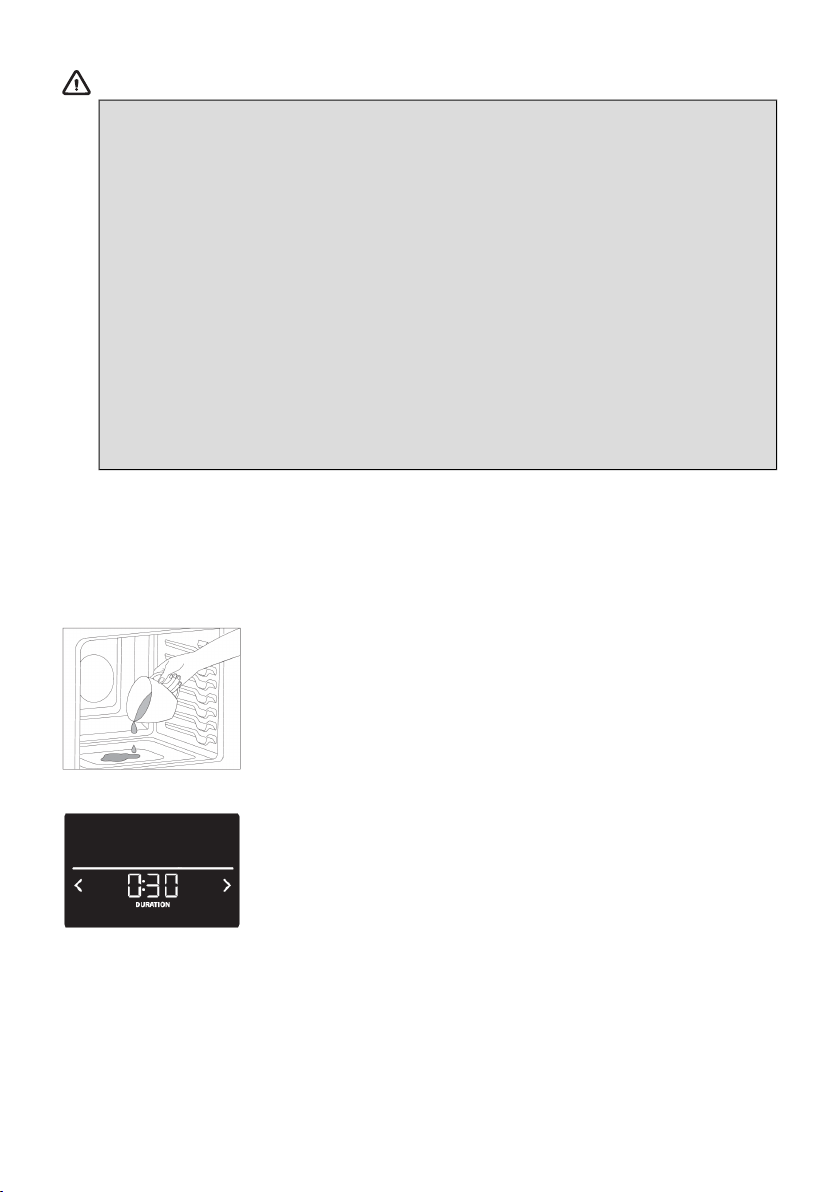
Steam Clean
The Steam Clean function allows easier removal of soils in the oven using steam.
This function is most effective when used regularly.
Before running the Steam Clean program, remove all large chunks of dirt and food residue from the
oven cavity.
Pour a maximum of 1/2 cup of water onto the bottom of the oven.
Activate the Steam Clean function by pressing the Self Clean key twice.
The program takes 30 minutes.
Wipe the appliance dry with a cloth.
Fast Preheat
Use the Fast Preheat function if you wish to heat the oven to the desired temperature as quickly as
possible. The default setting is ON.
EN 26

Press the Fast Preheat key to change the setting before activating the selected cooking function.
You can enable Fast Preheat only for Bake, Convection Bake, Convection Roast, AirFry and Pizza
functions.
The Fast Preheat function uses a convection fan to reach the temperature as quickly as possible, even
if a function that does not use convection is selected.
Crisp Mode
This mode is used when you need a crisp exterior, such as breaded food, bread or french fries.
You can enable Crisp mode for Bake, Broil, Convection Bake, Convection Roast, AirFry, Frozen Bake
and Pizza functions.
The Crisp mode can be activated and deactivated with a long press on
Crisp Mode. In the crisping process, it's possible to start, when the set
temperature of the oven is reached. The maximum duration of Crisp
mode operation is 5 minutes.
INFORMATION!
Crisp mode is automatically canceled after 5 minutes. If a set
temperature is above 480°F, the Crisp mode cannot be activated.
Defrost
The Defrost mode is used for automatic controlled defrosting (or thawing)
of frozen food (cakes, pastry, bread and rolls, and deep-frozen fruit). The
temperature is preset, and it cannot be adjusted. Halfway through the
defrost time, the pieces should be turned over, stirred and separated if
they were frozen together.
INFORMATION!
Defrosting time is longer than when defrosting with microwaves.
Warm
This mode allows you to keep cooked food warm. The temperature for
this program can be set from 140 °F to 210 °F, and the Cooking Time
can be set from 0 minutes to 3 hours. Recommended Cooking Time is
30 minutes.
To activate the mode, press the Warm key. Set the temperature and
reheating time and confirm the setting by pressing on the symbol.
• Cover any food with higher water content with a lid of aluminum foil. If you prefer a crunchy crust,
leave the food uncovered.
• Do not use the function for reheating cold food.
WARNING!
FOOD POISONING HAZARD: if the food has not been sufficiently thermally processed,
the Warm function can contribute to development of harmful bacteria in the food.
EN 27

Child Lock
Use the Child Lock function to prevent children from turning on the oven or changing the settings,
either inadvertently or when unsupervised. The function locks the control unit (prevents unwanted
control or changes to the settings).
To activate the Child Lock function, press the Child Lock key and hold it for 3 seconds. The display
unit is locked. The keys will be unresponsive when the Child Lock function is active (a beep will be
heard upon touch, indicating that the module cannot be controlled).
To deactivate the Child Lock function, press the Child Lock key and hold it for 3 seconds. The display
unit is unlocked.
NOTE!
The cooktop can still be used normally when the Child Lock function is active.
In case of the need for emergency shutdown of the heaters, the user can still use the key
even if the Child Lock is activated.
Light
Activate/deactivate the light by briefly pressing the Light key.
Switching off
Oven functions can be deactivated at any time by pressing the key.
EN 28
Food table
Additional suggestionsCooking
level
Recommended
baking mode
Type of food
Pork and beef
Use barbecue tongs to turn the
meat after 2/3 of cooking time.
5 or 6Broil LOHamburgers
Use barbecue tongs to turn the
meat after 2/3 of cooking time.
5 or 6Broil LOSteaks & chops
Use barbecue tongs to turn the
meat after 2/3 of the cooking
time.
5 or 6Broil HIBeef steaks
Broil skin side down first.4 or 5Broil LOChicken parts (breasts, wings,
legs, thighs)
We recommend using a broiling
pan.
2 or 3Bake
Convection Bake
Roasts
Convection Roast
Polultry
We recommend using a broiling
pan.
2 or 3Convection Roast
Bake
Whole poultry
We recommend using a broiling
pan
4Convection Roast
AirFry
Chicken parts (breasts, wings,
legs)
Bake
Fish
The larger the fish, the lower the
level and the longer the cooking
time.
5 or 6Broil HIWhole fish
5 or 6Broil LOFish fillet
Baked Goods
3 or 4BakePastry (cookies, biscuits,), cakes
2 or 3BakeAngel food cakes, pies
3 and 5Convection BakePastry (cookies, biscuits, muffins),
cakes - multiple levels
Various
3 or 4Frozen BakeFrozen conventional products
(potatoes, pizza, lasagna, chicken
nuggets, fish fingers, etc.)
Bake
1 or 2PizzaFresh pizza
Bake
If possible, use an air fry baking
tray.
4AirFry
Bake
Potato products
3BakeCasseroles
7Broil HIToast bread, opened sandwiches
EN 29
Cleaning and maintenance
We recommend cleaning the appliance after each use. This will prevent the food that is stuck to the
cooktop from heating up and damaging the glass surface.
Daily exterior cleaning
• Clean the appliance using a damp cloth and a mild detergent, such as dish soap.
• Wipe the appliance dry with a paper towel or a cloth for best results.
• For heaviliy polluted stainless steel surfaces use a stainless steel cleaner. Clean according to the
cleaner instructions. If possible, wipe along direction of the grain.
Cleaning control panel
• To avoid damage to the cooktop controls, do not use steel wool, abrasive cleaners or oven cleaner.
• If you remove knobs during the cleaning of the control panel, be careful not to move the knob
gasket from its assembled place.
• If you move the gasket, you can install it back in the right place by yourself.
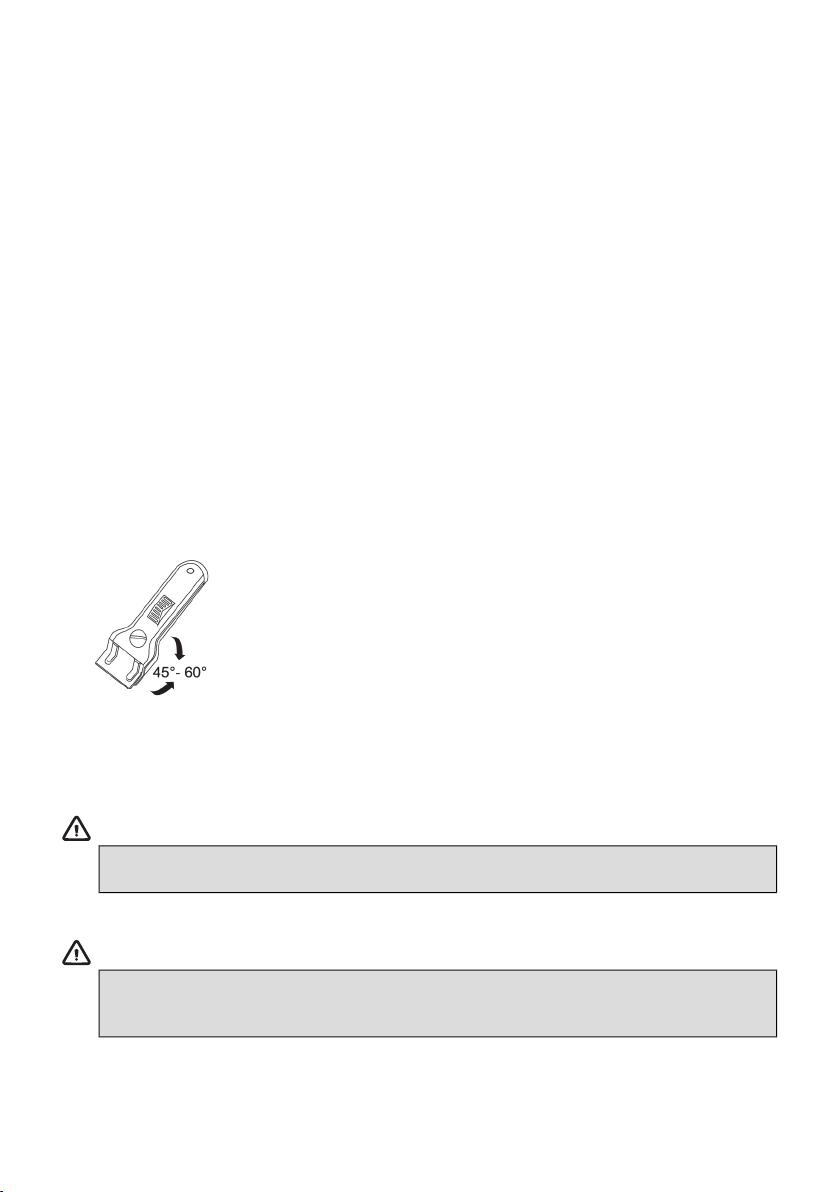
Cleaning glass cooktop
• Immediately remove any food remains, burnt grease, sugar or stubborn stains from the cooktop
using a scraper, even if the cooktop is still hot! Spills of sugar or food with high sugar content can
permanently damage the glass-ceramic surface.
• Hold the scraper (not included) at the correct angle (45° to 60°)
relative to the cooktop. Gently slide the scraper across the glass
surface to remove the dirt. Make sure the plastic handle of the scraper
(in some models) does not come into contact with a hot cooking
zone. Do not press the scraper perpendicularly against the surface.
Be careful not to scratch the cooktop surface with the corners of the
scraper blade. This could result in permanent scratches on the
surface.
• After you have removed the stubborn stains from the glass, use the daily cleaning steps to clean
the burner.
WARNING!
Do not use abrasive cleaning agents because they can cause scratches. Do not use
steelwool, scourers or any type of sharp objects to clean the appliance.
WARNING!
The cooktop could still be very hot from the cooking process. Do not touch the appliance
surface directly. Immediately after the end of the cooking process, you can use protective
gloves or mittens to prevent burns.
EN 30

INFORMATION!
If you notice a crack in the glass top (small), switch the cooktop off immediately, unplug the
range, turn off the (automatic) fuse switch(es) in the fuse switch in the fuse box or, in the event
of a permanent connection, set the switch in the power supply lead to zero. Contact the service
department.
Light bulb
The bulb is consumable, therefore not covered by a warranty. Before replacing the bulb, remove all
accessories from the oven.
Unscrew and remove the cover in
counter-clockwise direction and pull out the
bulb.
INFORMATION!
Take care not to damage the enamel
coating.
Use protection to avoid burning yourself.
For lightbulb replacement, contact our
customer service.
WARNING!
Before replacing the bulb disconnect the cooking range from the power mains.
Only replace the bulb when oven is cool.
Storage drawer
1 Open the drawer.
2 Simultaneously push the two spacers, one on either side, back in the
direction of the arrow.
3 Completely remove the drawer.
WARNING!
Do not store combustible, explosive, volatile items or items
sensitive to high temperature (such as paper, dish cloths,
plastic bags, cleaners or detergents and spray cans) in the
oven's storage drawer, as they can ignite during operation
the oven and cause a fire.
EN 31
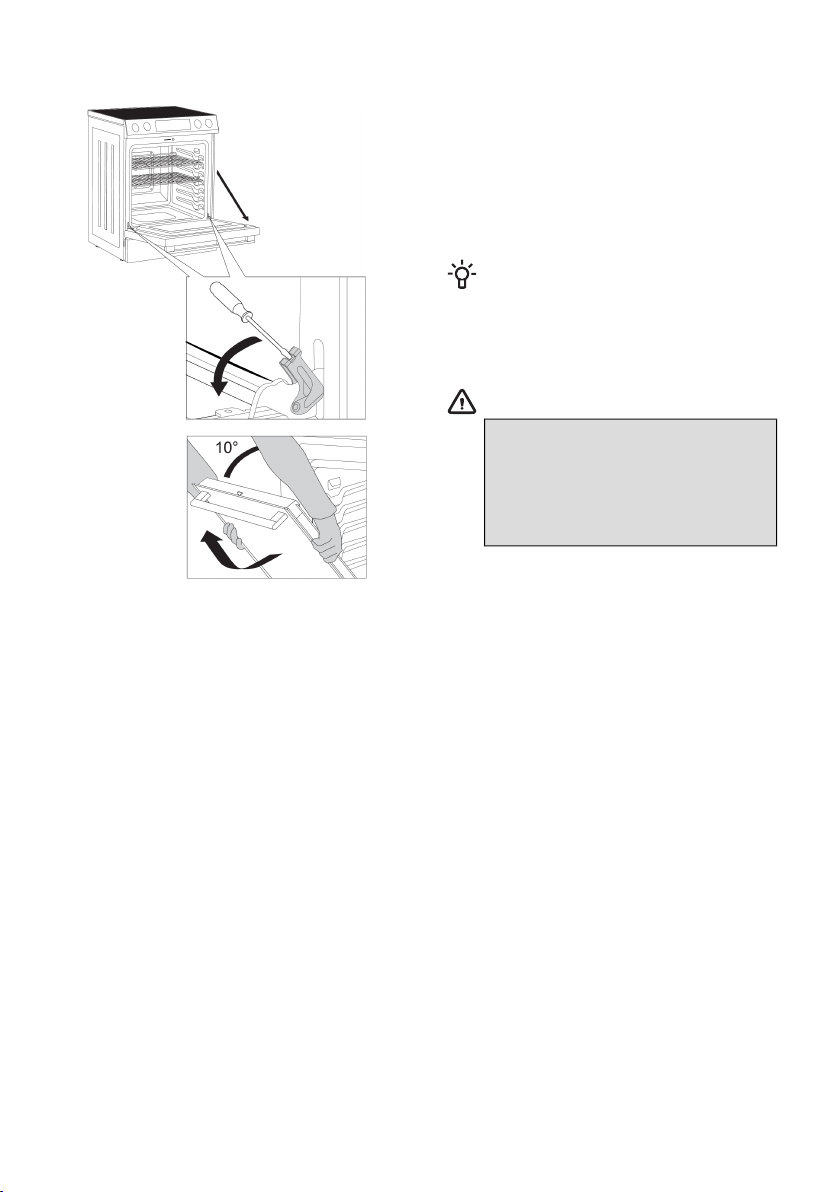
Removing and inserting the oven door
1 First, fully open the door (as far as it will go).
2 Rotate with a screwdriver the two retainers
until the end position.
3 Slowly close the door to a 10-degree angle
(relative to the position of the fully closed door);
then pull the door.
INFORMATION!
To replace the door, follow the reverse
order. If the door does not open or close
properly, make sure the notches on the
hinges are aligned with the hinge beds.
WARNING!
When replacing the door, always
make sure the hinge retainersare
correctly placed in the hinge beds to
prevent sudden closing of the main
hinge, which is connected to a strong
main spring. There is a risk of injury.
EN 32

Potential issues/troubleshoot
Only a service center authorized by the manufacturer during the warranty period may carry out
any repairs.
Before making any repairs, make sure the appliance is disconnected from the power mains by removing
the fuse or disconnecting the power plug from the wall outlet.
Any unauthorized repairs of the appliance may result in electric shock and short circuit hazard; therefore,
do not perform them. Leave such work to an authorized service technician.
In case of minor problems with appliance operation, check this manual to see if you can fix the problem
yourself.
Suppose the appliance is not operating properly or at all due to inappropriate operation or handling.
In that case, a visit from a service technician shall not be free of charge, even during the warranty
period.
Save the instructions for future reference and pass them on to any subsequent owners or users of the
appliance.
Troubleshooting table
SolutionPossible causeDescriptionError name
Check if the power cord connection is
correct.
Temperature
sensor on the
appliance might
be malfunctioning.
Oven
temperature
sensor failure
Err 001
Colors of the power cord wires should
match colors of the wires on the
appliance.
Disconnect the cooking range from the
power mains for a few minutes (undo
the fuse or switch off the main switch);
then, reconnect the cooking range to
the power mains. If the problem
persists, contact service.
Disconnect the cooking range from the
power mains for a few minutes (undo
the fuse or switch off the main switch);
then, reconnect the cooking range to
the power mains. If the problem
persists, contact service.
Problem on
appliance’s
electronics.
Communication
failure between
user interface
and power board
Err 003
Clean user interface with dry cloth.
Disconnect the cooking range from the
power mains for a few minutes (undo
the fuse or switch off the main switch);
then, reconnect the cooking range to
the power mains. If the problem
persists, contact service.
Failure on touch
sensor.
Touch sensor
failure on user
interface
Err 004
EN 33

Table continued from last page
SolutionPossible causeDescriptionError name
Check ambient temperature in the
room. Cool down the appliances.
Disconnect the cooking range from the
power mains for a few minutes (undo
the fuse or switch off the main switch);
then, reconnect the cooking range to
the power main. If the problem
persists, contact service.
Ambient
temperature is too
high, NTC sensor
is malfunctioning.
Overheating of
user interface
Err 005
Check position of pots. Pots position
might influence temperature on the
user interface.
Stop Self Clean function, wait until the
door is unlocked and start it again. If
the problem persists, contact service.
Door lock on the
appliance is
malfunctioning.
Self Clean door
lock failure
Err 006
Check correct voltage in house
installation. Disconnect the cooking
range from the power mains for a few
minutes (undo the fuse or switch off
the main switch); then, reconnect the
cooking range to the power mains. If
the problem persists, contact service.
Failure of power
supply.
Failure of power
board relay
supply
Err 007
Check ambient temperature in the
room. Cool down the appliances.
Disconnect the cooking range from the
power mains for a few minutes (undo
the fuse or switch off the main switch);
then, reconnect the cooking range to
the power mains. If the problem
persists, contact service.
Ambient
temperature is too
high, NTC sensor
is malfunctioning.
Overheating of
power board
Err 008
Turn off any active cooktop heater and
start Self Clean function again.
Cooktop was
activated while
the Self Clean
function was
active.
Cooktop
activation during
active Self Clean
function
Err 014
Disconnect the cooking range from the
power mains for a few minutes (undo
the fuse or switch off the main switch);
then, reconnect the cooking range to
the power mains. If the problem
persists, contact service.
Failure on
electronics.
Zero cross failure
on power board
Err 015
EN 34
Baking problems and tips
TipProblem
When is the sponge cake done?
• The crust turns a golden brown.
• The sponge is elastic to touch.
• Pierce the cake at the top with a wooden
toothpick or skewer. When you pull the
toothpick out, there should be no crumbs or
traces of dough on it.
The cake collapsed
• Observe the mixing time.
• Use less liquid.
• Increase temperature and extend baking
time.
The cake is unevenly browned
• When baking on multiple levels
simultaneously, pastry may not be done all
at the same time.
• Remove the baking tray with the pastry that
is done sooner.
The sponge cake has risen in the middle, but not
along the sides
• Only grease the bottom of the baking dish;
do not grease the sides.
Small pastry clumped or stuck together during
baking
• Not enough space between pastries (allow
at least 2 cm).
The pastry is dried out
• Increase temperature and reduce the baking
time.
The bottom is underbaked
• Place the food one rack level lower.
The top side is underbaked
• Place the pastry one rack level higher.
When baking on multiple levels simultaneously,
the cake is not evenly browned
• When baking on multiple levels
simultaneously, pastry may not be done all
at the same time.
• Remove the baking tray with the pastry that
is done sooner.
Cake is stuck to the baking dish or tin
• When the cake cools down, carefully
separate it from the mold by loosening the
edges with a knife.
• Next time, grease the tin more generously,
or sprinkle it with breadcrumbs.
EN 35

Disposal
Our product packaging is made of environmentally friendly materials that
can be recycled, disposed of, or destroyed without any environmental
hazard. To this end, packaging materials are labelled appropriately.
The product's symbol or packaging indicates that the product should
not be treated as normal household waste. Take the product to an
authorized collection centre for waste electric and electronic equipment
processing.
Correct disposal of the product will help prevent any negative effects on
the environment and health of people, which could occur in case of
incorrect product removal. For detailed information on the removal and
processing of the product, please contact the relevant municipal body
in charge of waste management, your waste disposal service, or the
store where you bought the product.
We reserve the right to any changes and errors in the instructions for use.
EN 36

Tabla de contenidos
38Información importante de seguridad ..................................................................................
38Riesgo de vuelco ......................................................................................................................
39Soporte antivuelco ....................................................................................................................
46Descripción del aparato .........................................................................................................
47Placa de características: información del aparato ..............................................................
48Cocción ....................................................................................................................................
48Zonas de cocción .....................................................................................................................
48Superficie de cocción de vitrocerámica ...................................................................................
50Cómo utilizar la placa de cocción .............................................................................................
52Horno .......................................................................................................................................
52Control unit ...............................................................................................................................
53Cómo usar el aparato ...............................................................................................................
53Uso del teclado numérico .........................................................................................................
53Ajustes ......................................................................................................................................
58Funciones del horno .................................................................................................................
59Horneado ..................................................................................................................................
59Consejos de horneado ..............................................................................................................
60Modos de horneado .................................................................................................................
63Funciones adicionales ..............................................................................................................
66Child Lock .................................................................................................................................
66Ilumincación ..............................................................................................................................
66Apagado ...................................................................................................................................
67Tabla de alimentos ....................................................................................................................
69Limpieza y mantenimiento .....................................................................................................
69Limpieza exterior diaria .............................................................................................................
69Limpieza del panel de control ...................................................................................................
69Limpieza de la placa de vidrio ..................................................................................................
70Focos ........................................................................................................................................
70Cajón de almacenamiento ........................................................................................................
71Extraer e insertar la puerta del horno .......................................................................................
72Posibles problemas y soluciones ..........................................................................................
72Tabla de resolución de problemas ...........................................................................................
74Problemas y consejos para hornear .........................................................................................
75Eiminación de desechos ........................................................................................................
ES 37
Información importante de seguridad
Riesgo de vuelco
ADVERTENCIA!
A. Tanto un niño como un adulto
podrían volcar la estufa con riesgo de
muerte.
B. Verifique que el dispositivo
antivuelco esté correctamente
instalado y acoplado (consulte las
instrucciones de instalación para más
detalles).
C. Asegúrese de volver a acoplar el
dispositivo antivuelco cuando mueva
la estufa de lugar (consulte las
instrucciones de instalación para más
detalles).
D. No ponga la estufa en
funcionamiento si el dispositivo
antivuelco no está instalado y
acoplado.
ES 38

Soporte antivuelco
ADVERTENCIA!
•
Para reducir el riesgo de vuelcos,
debe asegurar la estufa con un
soporte antivuelco correctamente
instalado.
•
Consulte las instrucciones de
instalación proporcionadas para
tener toda la información necesaria
antes de comenzar la instalación.
ES 39

INSTRUCCIONES GENERALES DE SEGURIDAD:
ADVERTENCIA!
NUNCA use este aparato como calefactor para calentar
una habitación.
Guarde estas instrucciones para la consulta de su inspector
local.
Asegúrese de que el electrodoméstico sea correctamente
instalado y conectado a tierra por un técnico calificado.
Nunca utilice este aparato para calentar el ambiente en
habitaciones.
Antes de conectar la estufa al suministro de luz y gas, retire
todo el material de embalaje y los manuales que se encuentran
dentro del horno.
Use una vestimenta apropiada. No vista ropa holgada o prendas
con partes colgantes cuando use este aparato.
No repare ni reemplace ninguna pieza del aparato a menos
que esto se recomiende específicamente en el manual. El resto
de losservicios o reparaciones deben ser realizados por un
técnico de servicio capacitado.
No use agua para extinguir fuego de grasa. Sofoque la llama
o use un extinguidor de polvo seco o espuma.
ES 40

Utilice únicamente agarraollas secos. Los agarraollas mojados
o húmedos sobre una superficie caliente pueden provocar
quemaduras por vapor. No permita que los agarraollas entren
en contacto con elementos calefactores que estén calientes.
No utilice toallas ni ningún otro tipo de paño grueso en lugar
agarraollas.
Durante el uso del aparato podría aparecer condensación en
el panel de control. Esto no afecta el funcionamiento del
aparato.
ALMACENAMIENTO DE ARTÍCULOS DENTRO O ENCIMA
DEL APARATO:
No guarde artículos que sean de interés para los niños en la
protección trasera de la estufa ni en gabinetes que se
encuentren encima de la misma. Si un niño se sube a la estufa
para alcanzar un objeto, podría sufrir lesiones graves.
No almacene materiales o sustancias inflamables dentro del
horno, cerca de las zonas de cocción ni de los quemadores
del aparato.
INSTRUCCIONES DE SEGURIDAD DEL CAJÓN INFERIOR
DE ALMACENAMIENTO:
No deje en el cajón productos de papel, de plástico, alimentos
enlatados ni materiales combustibles. Podrían encenderse.
Tenga cuidado al abrir la gaveta inferior de almacenamiento.
ES 41

INSTRUCCIONES DE SEGURIDAD DE LA PLACA DE
COCCIÓN:
Use ollas y sartenes del tamaño adecuado. Este aparato está
equipado con una o más unidades de diferentes tamaños.
Seleccione ollas y sartenes de base plana y lo suficientemente
grandes como para cubrir la superficie de cocción. Usar ollas
y sartenes de menor tamaño hará que una parte del elemento
calefactor quede expuesta al contacto directo y puede provocar
la ignición de prendas de vestir. Una relación adecuada entre
el tamaño de las ollas o sartenes y del quemador también
mejorará la eficiencia.
Nunca deje las zonas de cocción desatendidas cuando estén
a una temperatura media o alta. Los alimentos, especialmente
los que son muy aceitosos, pueden encenderse y provocar un
incendio que podría propagarse a los gabinetes circundantes.
No todos los utensilios de vidrio, vitrocerámica, cerámica, loza
u otros recipientes de cocina vidriados son adecuados para
usar en la placa de cocción sin romperse por el cambio
repentino de temperatura.
Debe colocar las agarraderas y mangos de ollas y sartenes
hacia adentro y no permitir que se extiendan sobre las zonas
de cocción adyacentes. Para reducir el riesgo de quemaduras,
ignición de materiales inflamables y derrames debido al
contacto no intencional con ollas y sartenes, debe colocar los
mangos y agarraderas de los mismos hacia adentro y no
permitir que se extiendan sobre las zonas de cocción
adyacentes.
ES 42

INSTRUCCIONES DE SEGURIDAD DEL HORNO:
Tenga cuidado al abrir la puerta del horno. Antes de retirar o
de volver a colocar los alimentos, permita que salga el aire
caliente o el vapor.
No caliente envases de alimentos sin abrir. El recipiente podría
explotar por una acumulación de presión y provocar lesiones.
Nunca coloque utensilios, pizzas o piedras para hornear, ni
ningún tipo de papel de aluminio o revestimiento en el piso del
horno. Estos artículos pueden acumular calor o derretirse, lo
que podría dañar el aparato y generar riesgo de descargas
eléctricas, humo o incendio.
No deje artículos sobre la placa de cocción cerca de la
ventilación del horno. Estos podrían sobrecalentarse y provocar
un riesgo de incendio o quemaduras.
Ubique las rejillas del horno donde desee únicamente cuando
el horno esté frío. Si tiene que mover una rejilla mientras el
horno está caliente, evite que el agarraollas entre en contacto
con algún elemento caliente del horno.
Nunca ase alimentos con la puerta del horno abierta.
Procure evitar que el papel de aluminio y las sondas para carne
entren en contacto con los elementos calefactores (incluyendo
elementos superficiales con revestimiento).
INSTRUCCIONES DE SEGURIDAD DEL HORNO
AUTOLIMPIANTE:
ES 43

PRECAUCIÓN: NO DEJE ALIMENTOS, UTENSILIOS NI OTROS
OBJETOS DENTRO EL HORNO DURANTE EL MODO DE
AUTOLIMPIEZA
No limpie la junta de la puerta. La junta de la puerta es un
elemento esencial para un buen cierre. Tenga cuidado de no
frotar, dañar o mover la junta.
No toque las superficies de las puertas del horno durante la
operación self-clean. Mantenga a los niños alejados del horno
durante self-clean (autolimpieza). El incumplimiento de estas
instrucciones puede ocasionar quemaduras.
Antes de iniciar el ciclo de autolimpieza (Self-clean), retire del
horno recipientes, bandejas, estantes metálicos y otros
utensilios.
Antes de iniciar el ciclo de autolimpieza (self-clean), limpie la
grasa y los restos de alimentos que pueda haber adentro del
horno. Una cantidad excesiva de grasa podría encenderse
causando un peligro de incendio y daños por humo.
No utilice limpiadores de hornos. No utilice limpiadores
comerciales ni ningún tipo de capa protectora dentro o
alrededor de ninguna de las partes del horno.
Solo debe limpiar las piezas que se especifican en el manual.
IMPORTANTE: La salud de algunas aves es extremadamente
sensible a los humos que se desprenden durante el ciclo de
autolimpieza de la estufa. Si tiene aves, trasládelas a otra
habitación que esté bien ventilada.
Tenga cuidado al manipular el recipiente de grasa caliente y
desechar la grasa caliente.
ES 44

INSTRUCCIONES DE SEGURIDAD PARA LOS
QUEMADORES DE COCINAS DE VITROCERÁMICA:
No cocine sobre una placa de cocción que esté rota o
agrietada. Si la superficie está rota, los productos de limpieza
y los líquidos que se derramen pueden penetrar en la placa de
cocción, generando un riesgo de descarga eléctrica. En tal
caso, póngase en contacto con un técnico calificado de
inmediato.
Tenga cuidado al limpiar la placa de cocción. Si usa una
esponja o paño húmedo para limpiar un derrame en una
superficie de cocción que está caliente, tenga cuidado de no
quemarse con el vapor. Algunos limpiadores pueden producir
vapores nocivos cuando se aplican sobre una superficie
caliente.
NO TOQUE LAS ZONAS DE COCCIÓN NI LAS ÁREAS
CERCANAS A ESTAS – Las zonas de cocción pueden estar
calientes incluso cuando parezcan estar apagadas. Las áreas
cercanas a las superficies de cocción pueden calentarse lo
suficiente como para causar quemaduras. Durante y después
del uso, no toque ni permita que la ropa u otros materiales
inflamables entren en contacto con las zonas de cocción ni las
áreas cercanas hasta que hayan tenido suficiente tiempo para
enfriarse.
ES 45
Descripción del aparato
ADVERTENCIA!
¡Lea las instrucciones de seguridad antes de usar!
¡INFORMACIÓN!
Las características y la apariencia del producto mostradas en este manual podrían ser diferentes
a las de su modelo.
7. Placa de características1. Cocción
8. Tirador2. Unidad de control
9. Pie3. Cerradura de puerta con interruptor
10. Cajón4. Ilumincación
11. Riesgo de vuelco5. Guías - 7 niveles de cocción
6. Puerta del horno
ES 46

Placa de características: información del aparato
La placa de especificaciones que indica la información básica del aparato se encuentra en el borde
de la gaveta.
1 Marca UL
2 Número de serie
3 Código
4 Modelo
5 Marca
6 Norma de seguridad
7 Especificaciones técnicas
8 Número AUID
9 Dirección del fabricante
10 Código QR
ES 47
Cocción
Zonas de cocción
(dependen de cada modelo)
4. Zona de cocción de tres anillos:1. Zona de cocción ø 6'' - 1200 W
2. Zona de cocción ø 7'' - 100 W (Warm Zone)
• ø 6'' - 1050 W
3. Cocción de doble fuego:
• ø 8'' - 1950 W
ø 12'' - 3000 W• ø 6'' - 1400 W
• ø 9'' - 3300 W
5. Cocción de doble fuego:
• ø 8'' - 1900 W
• ø 12'' - 3000 W
6. Indicador de zona de cocción
Superficie de cocción de vitrocerámica
• La superficie de la placa de cocción está hecha de vidrio satinado; los calentadores se encuentran
debajo de las zonas de cocción.
• La temperatura de la zona de cocción aumenta de manera gradual y uniforme. Cuando la
temperatura suba, la zona de cocción se iluminará en rojo.
• La zona de cocción se encenderá y apagará según sea necesario para mantener la configuración
seleccionada. La zona de cocción retendrá suficiente calor para proporcionar una temperatura
constante durante el funcionamiento.
• Para ahorrar energía, apague la zona de cocción 5 minutos antes de que finalice el proceso. El
aparato terminará el proceso de cocción utilizando el calor acumulado.
ES 48

Consejos de seguridad para cocinar
• Utilice ollas, sartenes y otros recipientes de buena calidad, con una
base plana y estable.
• Utilice únicamente woks de base plana.
• No coloque ollas, sartenes ni otros recipientes húmedos sobre la
zona de cocción.
• Asegúrese de colocar las ollas y sartenes en el centro de la zona de
cocción.
• El diámetro del fondo de la olla debe ser igual al diámetro de la zona
de cocción.
• Si utiliza recipientes de cocción especiales, siga las instrucciones
del fabricante.
ES 49
Prevención de arañazos y manchas
• No utilice limpiadores ni esponjas abrasivas que puedan rayar la superficie de cocción.
• No utilice productos con cloro, amoníaco u otros limpiadores que no estén expresamente
recomendados para limpiar superficies de vitrocerámica.
• No utilice recipientes de cocción de vidrio, ya que podrían rayar la superficie de la placa de cocción.
• No coloque un aro para wok sobre la superficie de cocción, ya que podría dañar o rayar la
superficie.
• Asegúrese de que tanto la superficie de cocción como el fondo del recipiente estén siempre
limpios.
• No deslice recipientes de cocción metálicos sobre la superficie de cocción.
• No use paños sucios para limpiar la placa de cocción. Dejarán una capa de suciedad que podría
causar manchas permanentes en la superficie del aparato.
Prevención de otras averías
• No coloque objetos de plástico, azúcar o alimentos con alto contenido de azúcar sobre la zona
de cocción. Si sucede esto, limpie inmediatamente la superficie.
• No cocine alimentos directamente sobre la superficie de cocción.
• Utilice siempre recipientes de cocción adecuados.
Cómo utilizar la placa de cocción
ADVERTENCIA!
PELIGRO DE INCENDIO: Nunca deje sin supervisión el área donde se utiliza la placa de
cocción. Supervise los procesos de cocción en todo momento. No almacene artículos
sobre la superficie de la placa de cocción. El incumplimiento de estas instrucciones
podría provocar incendios, lesiones graves o la muerte.
¡INFORMACIÓN!
Antes de usarla, limpie la superficie de vitrocerámica con un paño húmedo y un limpiador suave
adecuado para placas de cocción. Durante los primeros usos, es normal que aparezca el
característico «olor a nuevo», que desaparecerá gradualmente.
No utilice productos agresivos, como limpiadores abrasivos que puedan causar rayones, esponjas
abrasivas o quitamanchas.
Use únicamente limpiadores adecuados para placas de cocción.
Encender la zona de cocción
Encienda las zonas de cocción con las perillas del panel de control.
Cuando una unidad de la superficie esté encendida, verá una luz
indicadora con la palabra «ON» (encendido). Los símbolos indican las
zonas de cocción que controla cada perilla. Empuje la perilla hacia
adentro y gírela en cualquier dirección hasta el nivel que desee.
La función Warm Zone se puede operar con la unidad de control.
Unidades de superficie doble y triple (en algunos modelos)
En algunas de las zonas de cocción se puede activar un anillo calentador adicional (según el modelo).
Empuje la perilla hacia adentro y gírela en cualquier dirección hasta la posición deseada.
ES 50
Indicador de superficie caliente
Cuando está encendido, el indicador le advierte que la zona de cocción está caliente (peligro de
quemaduras). Cuando apague una zona de cocción, el indicador permanecerá encendido hasta que
la superficie llegue aproximadamente a los 150 °F (65 °C).
ADVERTENCIA!
No toque la superficie hasta que las zonas de cocción se hayan enfriado por completo.
La superficie podría seguir estando caliente; tocarla antes de que se enfríe lo suficiente
puede provocar quemaduras.
Después de que se apague la luz indicadora de superficie caliente, limpie inmediatamente
cualquier derrame de residuos de alimentos en la placa de cocción, ya que será más
difícil limpiarlos más tarde.
Si hay un gabinete de almacenamiento directamente encima de la placa de cocción,
asegúrese de que los elementos almacenados allí sean de uso poco frecuente y que
puedan almacenarse de manera segura en un lugar expuesto al calor. Las altas
temperaturas pueden ser peligrosas para algunos elementos como líquidos, limpiadores
o aerosoles inflamables.
Warm Zone
ADVERTENCIA!
PELIGRO DE INTOXICACIÓN ALIMENTARIA: Si los alimentos no han sido suficientemente
procesados térmicamente, la función Warm Zone podría contribuir al desarrollo de
bacterias dañinas en ellos.
Active la función Warm Zone presionando la tecla Warm Zone. Las señales MID y CONFIRM
comenzarán a parpadear en la unidad de visualización. La intensidad de Warm Zone se puede ajustar
presionando Warm Zone. Presione una vez para aumentar la intensidad; HIGH parpadeará en la
unidad de visualización. Presione dos veces para disminuir la intensidad; LOW parpadeará en la
unidad de visualización. Luego, active la función presionando la tecla .
• Colocar alimentos crudos o fríos en el área Warm Zone puede provocar alguna enfermedad
transmitida por alimentos.
• Para obtener los mejores resultados, cubra todos los alimentos con papel de aluminio o una tapa.
• Cuando retire alimentos del área Warm Zone, los recipientes o platos estarán calientes; use
agarraollas o manoplas para horno.
• Comience siempre con comida caliente.
ES 51
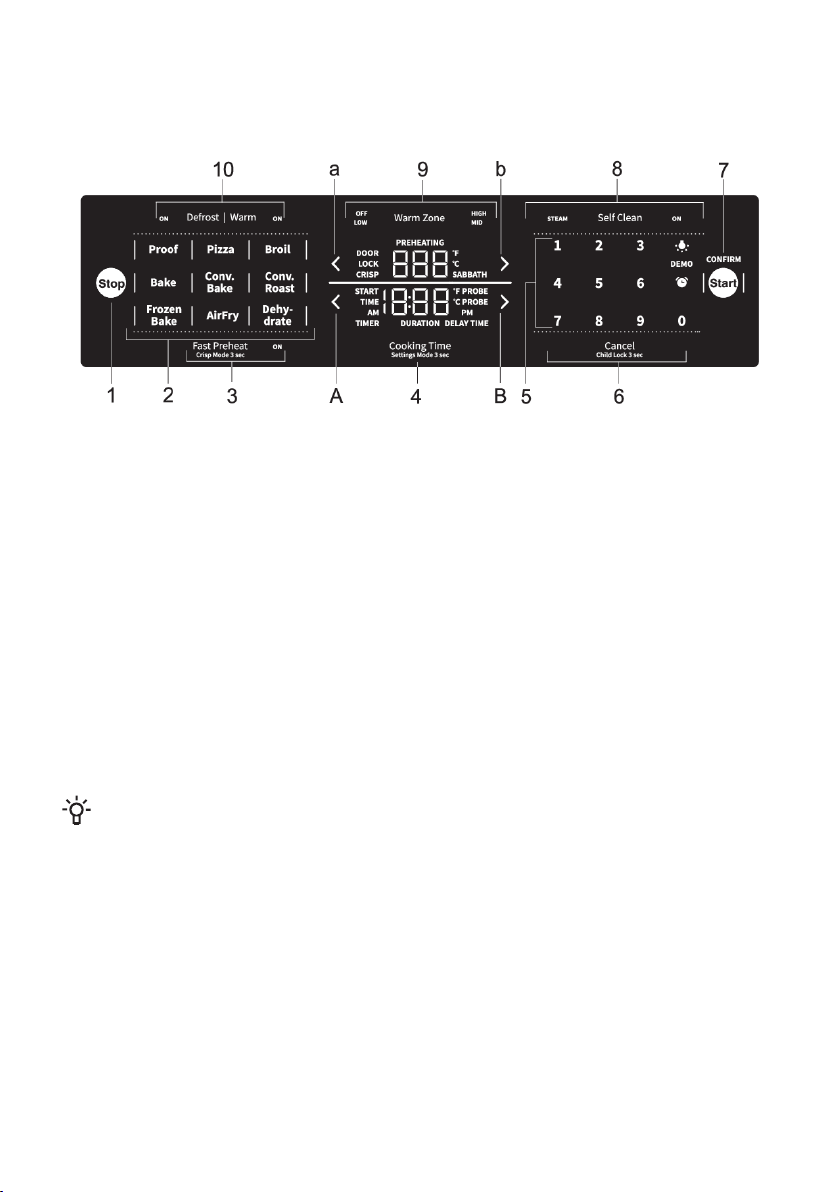
Horno
Control unit
6 Cancelar/Bloqueo para niños1 Detener
7 Iniciar/Confirmar2 Modos de horneado
8 Limpieza- Proof
- Steam Clean- Pizza
- Self Clean- Broil
9 Warm Zone- Bake
12 Defrost/Warm- Convection Bake
Configuración de tiempo- Convection Roast
A Disminuir el tiempo- Frozen Bake
B Aumentar el tiempo- AirFry
Ajustes de temperatura- Dehydrate
a Disminuir la temperatura3 Fast Preheat/Crisp Mode
b Aumentar la temperatura4 Tiempo de cocción/modo de configuración
5 Teclado
Para una mejor respuesta de las teclas, tóquelas con toda la superficie de la yema del dedo. Cada
vez que presione una tecla, escuchará una breve señal acústica.
¡INFORMACIÓN!
Las funciones del aparato dependen de cada modelo.
ES 52
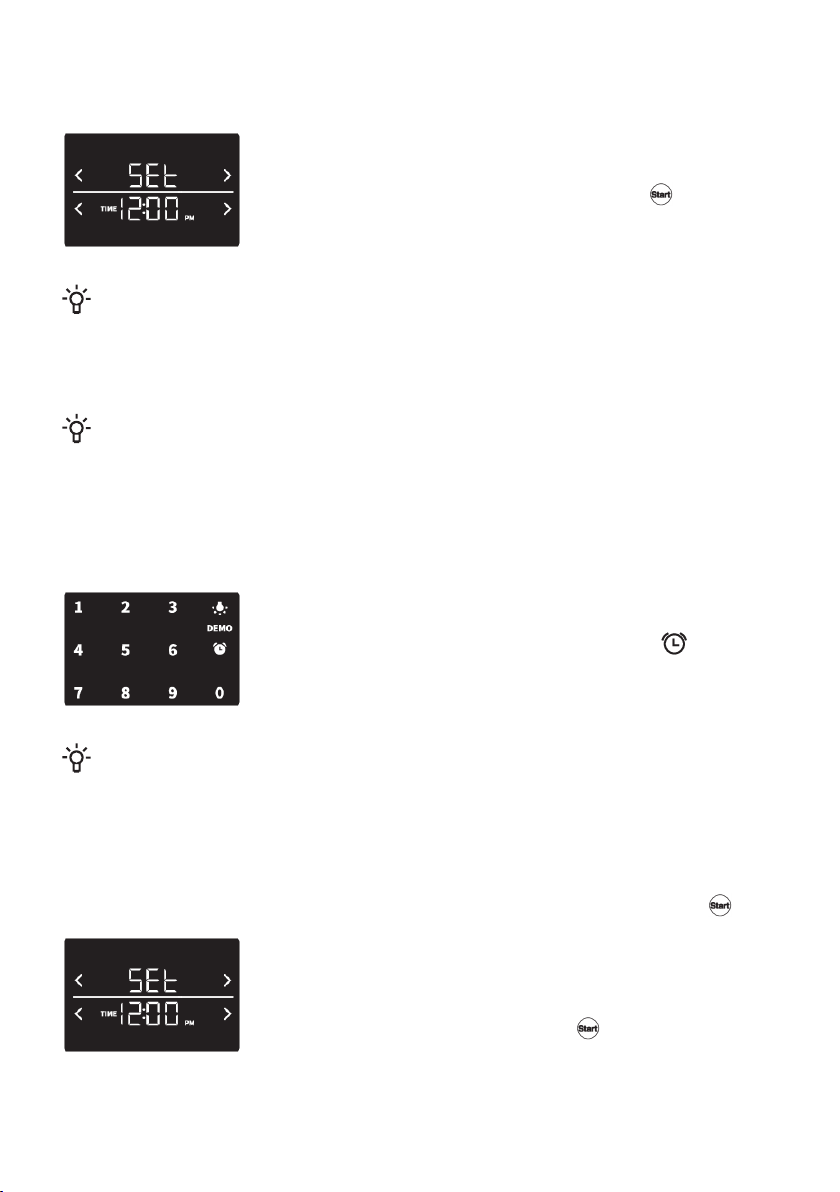
Cómo usar el aparato
Encender por primera vez
Al conectar su aparato a la corriente por primera vez, o después de un
corte de energía prolongado, verá 12:00 parpadeando en la pantalla.
Para activar el aparato, presione brevemente la tecla .
NOTA!
Al encender el aparato, "DOOR LOCK" (bloqueo de puerta) se iluminará en la interfaz de usuario
durante unos segundos. Este es el proceso normal de inicio del bloqueo de la puerta. Cuando
"DOOR LOCK" desaparezca de la pantalla, el aparato estará listo para usar. Por favor, no abra
la puerta mientras "DOOR LOCK" esté iluminado.
¡INFORMACIÓN!
Si no pulsa ninguna tecla en 30 segundos y no se activa ningún programa, el horno pasará
automáticamente al modo de espera. El reloj aparecerá en la unidad de visualización. El aparato
también puede cambiar al modo de espera cuando se haya seleccionado un sistema de cocción
pero el horno no esté activo.
Uso del teclado numérico
El teclado se puede utilizar para ajustar la temperatura o el tiempo. Para
ajustar la temperatura simplemente introduzca el valor deseado. Para
establecer la hora, presione primero Cooking Time o y durante
los próximos 10 segundos se utilizará el teclado para ajustar el tiempo.
¡INFORMACIÓN!
Tenga en cuenta que la temperatura se redondeará en valores de 5.
Ajustes
Seleccione la configuración presionando la tecla Cooking Time/Settings Mode durante 3 segundos.
Utilice las teclas de configuración de temperatura para desplazarse por el menú. Utilice las teclas de
configuración de tiempo para cambiar el valor. Confirme los cambios presionando la tecla .
Configuración del reloj
La hora mundial siempre estará visible en la pantalla inferior. Los primeros
2 dígitos corresponden a las horas, y los dígitos tercero y cuarto
corresponden a los minutos. Use el teclado numérico para establecer
la hora. Confirme su selección con la tecla .
ES 53
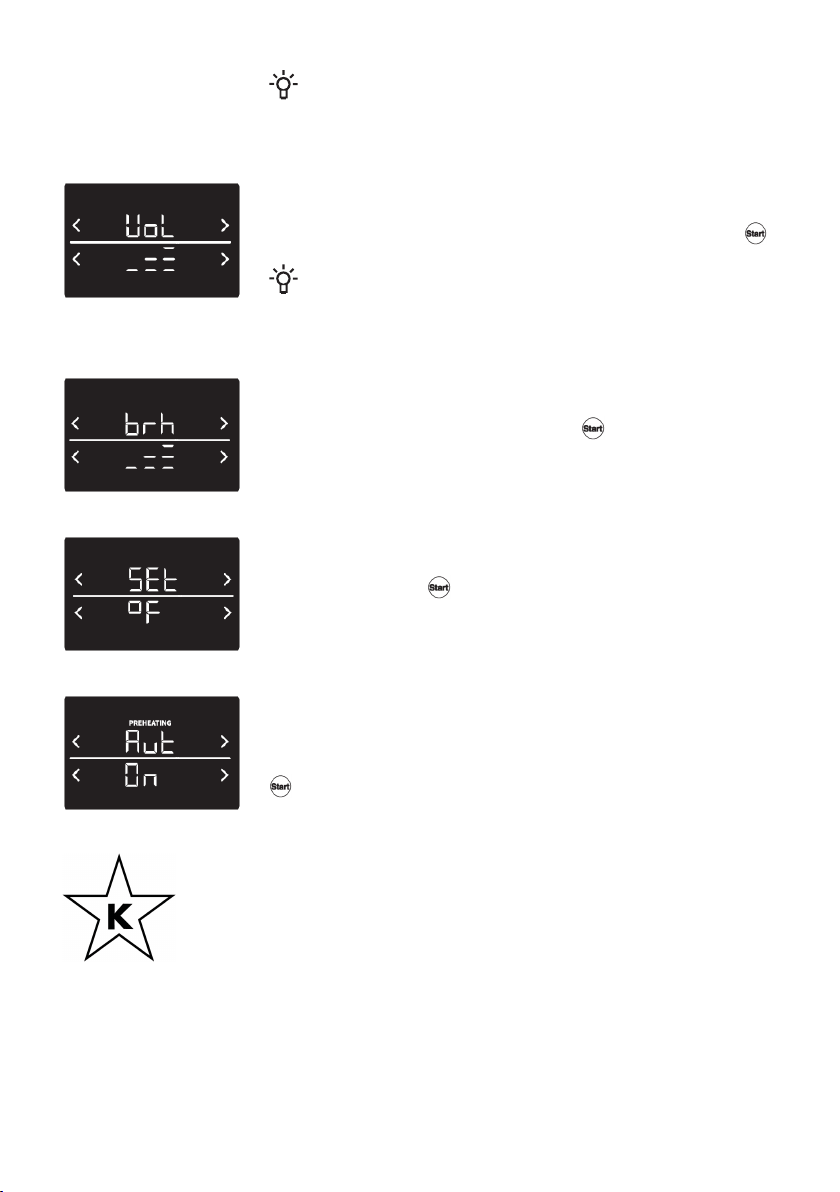
¡INFORMACIÓN!
AM/PM se cambia automáticamente cuando la hora supera las
12:00.
Establecer el volumen
Puede elegir uno de los tres niveles de volumen para la unidad de control
o el funcionamiento silencioso. Confirme su selección con la tecla .
¡INFORMACIÓN!
Cuando seleccione el funcionamiento silencioso, oFF aparecerá
en la parte inferior de la unidad de visualización.
Brillo de la unidad de control
Puede elegir entre tres niveles de intensidad para el brillo de la pantalla.
Confirme su selección presionando la tecla .
Unidad de temperatura
Seleccione grados Fahrenheit (°F) o grados Celsius (°C). Confirme su
selección con la tecla .
Auto Fast Preheat
Puede definir si el calentamiento rápido Fast Preheat debe o no debe
activarse automáticamente en la función seleccionada, configurando
Auto Fast Preheat en ON o en OFF. Confirme su selección con la tecla
.
La función Sabbath Mode
permite mantener la comida caliente en el horno sin tener que encenderlo
o apagarlo
La función Sabbath Mode cumple con las normas establecidas por
Star K.
ES 54
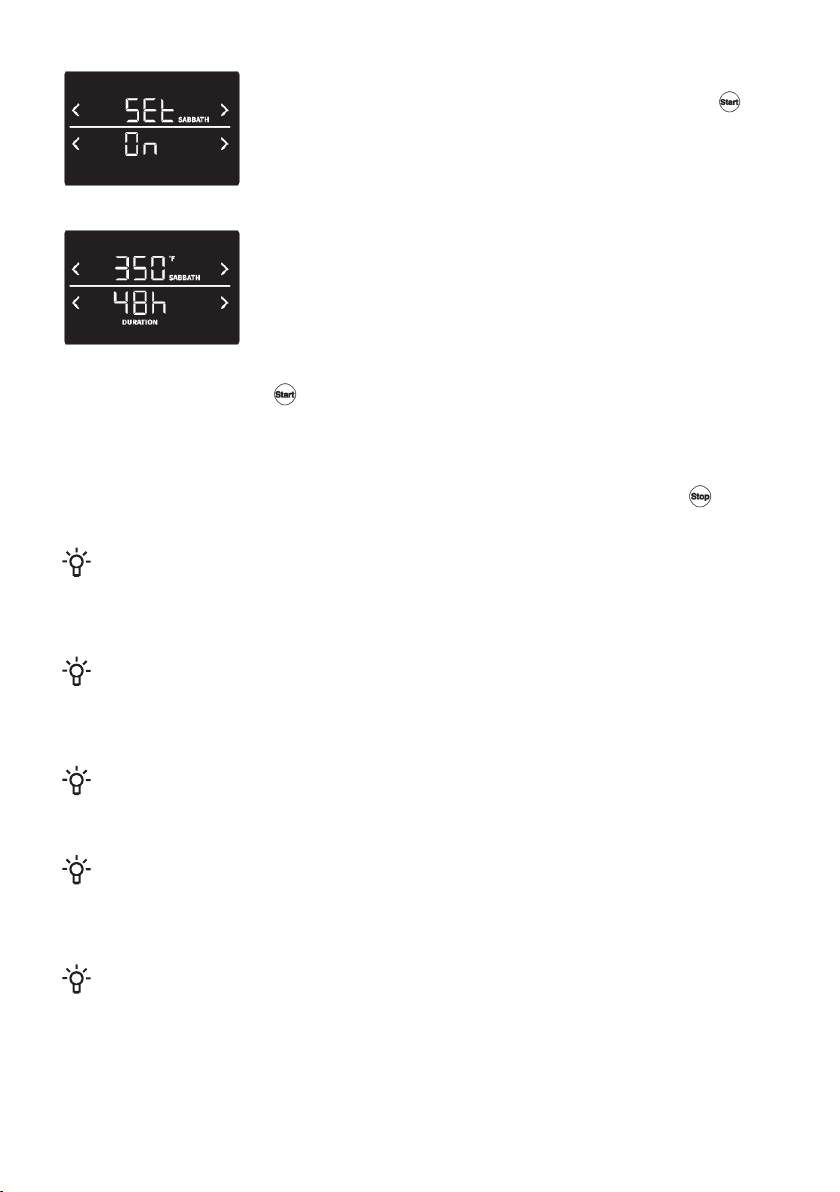
Sabbath Mode puede activarse en el menú de configuración. Cuando
está activo, ON comenzará a parpadear. Luego, toque la tecla y la
palabra SABBATH también comenzará a parpadear.
Hornear durante el modo Sabbath Mode. Configure la temperatura y la
duración del horneado. En la parte superior de la pantalla, verá la
temperatura predeterminada de 350 °F (177 °C). Puede ajustar la
temperatura entre 175 °F (79 °C) y el máximo de 425 °F (218 °C). En la
parte inferior de la pantalla verá el tiempo predeterminado de 48 horas.
Puede configurarlo en un rango de entre 1 y 74 horas.
Presione brevemente la tecla para iniciar la función Sabbath Mode. Después de 30 segundos, el
horno comenzará a calentarse.
La función Sabbath Mode estará activa durante 74 horas; transcurrido ese tiempo, se apagará
automáticamente.
Puede desactivar la función Sabbath Mode en cualquier momento presionando la tecla . Cuando
Sabbath Mode esté activo, no podrá cambiar la temperatura ni el tiempo.
¡INFORMACIÓN!
Si durante la actividad de la función Sabbath Mode se activa un error, todos los calentadores
se apagarán y aparecerá un mensaje de error en la interfaz de usuario (pero no se emitirá una
señal sonora).
¡INFORMACIÓN!
Supongamos que se produce un corte de energía mientras Sabbath Mode está activo; el aparato
volverá a Sabbath Mode sin calentar. La cuenta regresiva de 74 h, comenzará de nuevo desde
las 74 h.
¡INFORMACIÓN!
Mientras la función Sabbath Mode está activa, las funciones Child Lock y Warm function estarán
deshabilitadas.
¡INFORMACIÓN!
Cuando la función Sabbath Mode está activa, la luz del horno estará apagada y no se encenderá
al abrir la puerta.
También estarán desactivados todos los sonidos.
¡INFORMACIÓN!
Únicamente la función Bake estará habilitada junto con Sabbath Mode.
ES 55
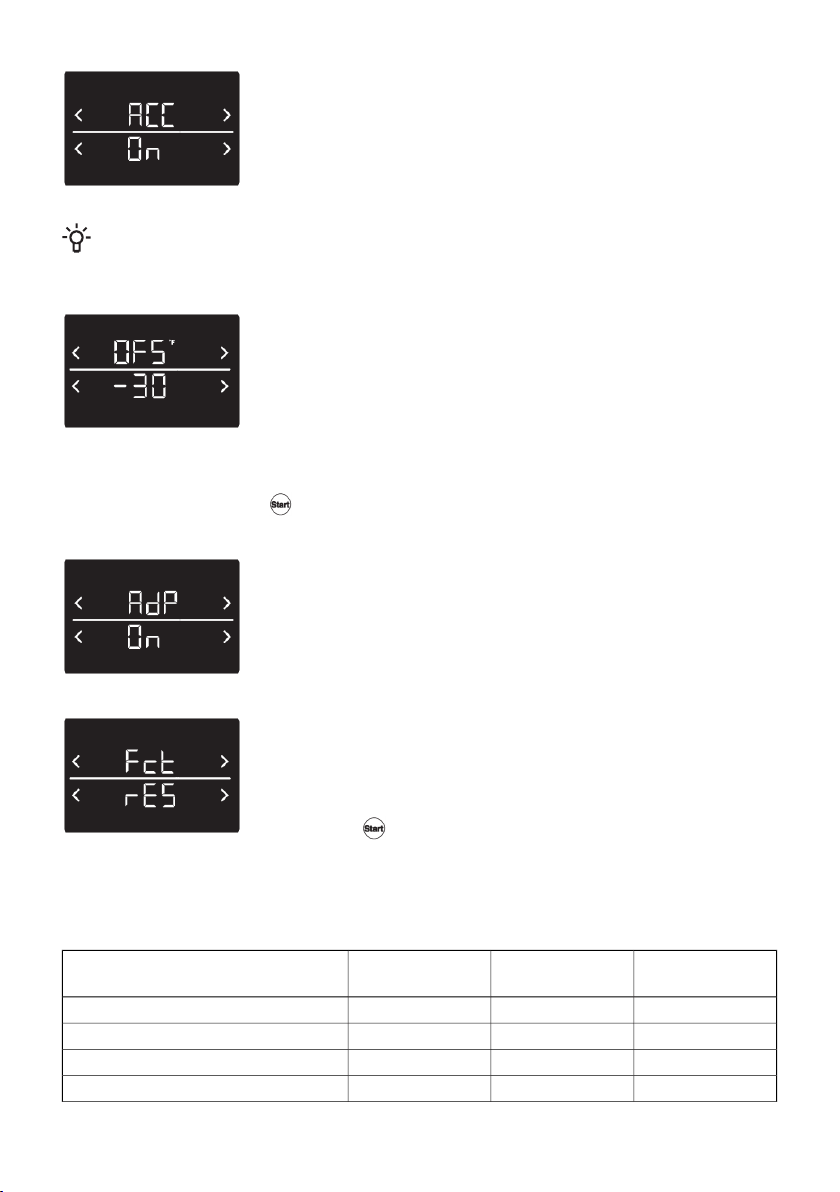
Automatic Convection Conversion
Cuando la función Automatic Convection Conversion está en ON,
convertirá automáticamente las temperaturas de horneado regulares a
temperaturas de horneado por convección. Esta característica se puede
activar o desactivar.
NOTA!
Tenga en cuenta que esta opción no convierte los tiempos de cocción del horneado por
convección, solo convierte las temperaturas.
Temperature offset
La temperatura del horno ha sido calibrada en fábrica. Cuando use el
horno por primera vez, asegúrese de seguir los tiempos y temperaturas
indicados en la receta. Si cree que el horno está demasiado caliente o
demasiado frío, puede corregir la temperatura. Antes de hacerlo, pruebe
la receta usando una temperatura más alta o más baja que la
recomendada. Los resultados del horneado deberían ayudarle a decidir
cuánto necesita ajustar. Puede modificar la temperatura del horno desde
-30 °F (17 °C) hasta +30 °F (17 °C). Confirme su selección con la tecla
.
Adapt Sense
La función Adapt Sense (AdP) propondrá el ajuste de temperatura más
utilizado cuando se activen los siguientes sistemas (Bake, Frozen Bake,
Warm, Convection Bake, Convection Roast, AirFry, Pizza, Dehydrate).
El ajuste de fábrica para esta función es OFF; puede activarlo
presionando ON y confirmar su elección presionando .
Configuración de fábrica
Esta función permite restablecer el aparato a su configuración de fábrica.
Fct aparecerá en la pantalla. Pulse la tecla de aumento o disminución
de tiempo para elegir entre rES (para volver a los valores de fábrica) u
oFF (para mantener las configuraciones actuales). Confirme su selección
presionando .
Ajustes mínimos y máximos
Todos los programas de la siguiente tabla tienen ajustes mínimos y máximos de temperatura o de
tiempo.
Predeterminado
(F)
Máx. (F)Mín. (F)Programa
350° F (177 °C)550 ° F (288 °C)175 °F (79 °C)Bake
325 °F (163 °C)480 °F (249 °C)265°F (130 °C)Frozen Bake
HI (alto)HI (alto)LO (bajo)Broil
150 °F (66 °C)210 ° F (99 °C)140 °F (60 °C)Warm
ES 56
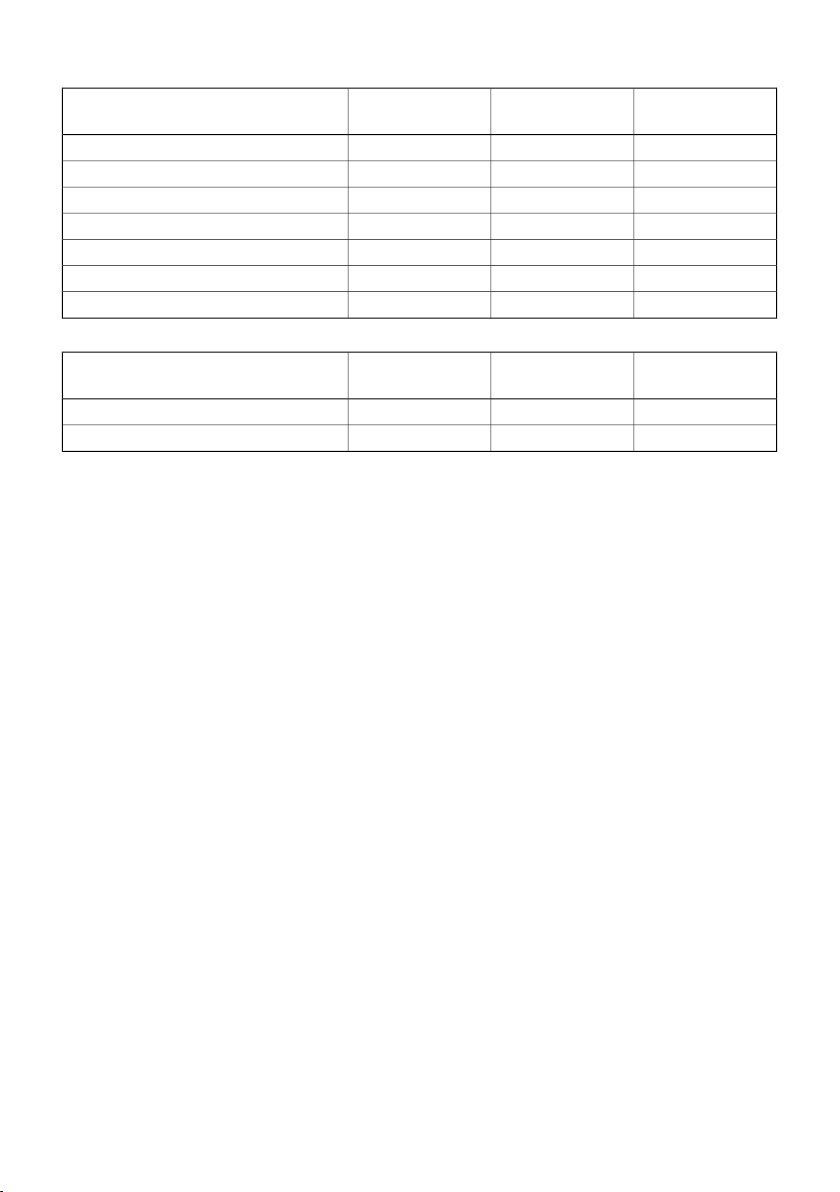
Tabla continuada de la última página
Predeterminado
(F)
Máx. (F)Mín. (F)Programa
325 °F (163 °C)550 ° F (288 °C)175 °F (79 °C)Convection Bake
325 °F (163 °C)550 ° F (288 °C)175 °F (79 °C)Convection Roast
425 °F (218 °C)500 °F (260 °C)300 °F (149 °C)AirFry
100° F (38 °C)100° F (38 °C)100° F (38 °C)Proof
425 °F (218 °C)550 ° F (288 °C)300 °F (149 °C)Pizza
100° F (38 °C)100° F (38 °C)100° F (38 °C)Defrost
150 °F (66 °C)175 °F (79 °C)100° F (38 °C)Dehydrate
Predeterminado
(h:min)
Máx. (h:min)Mín. (h:min)Programa
3:005:002:00Self Clean
0:300:300:30Steam Clean
ES 57
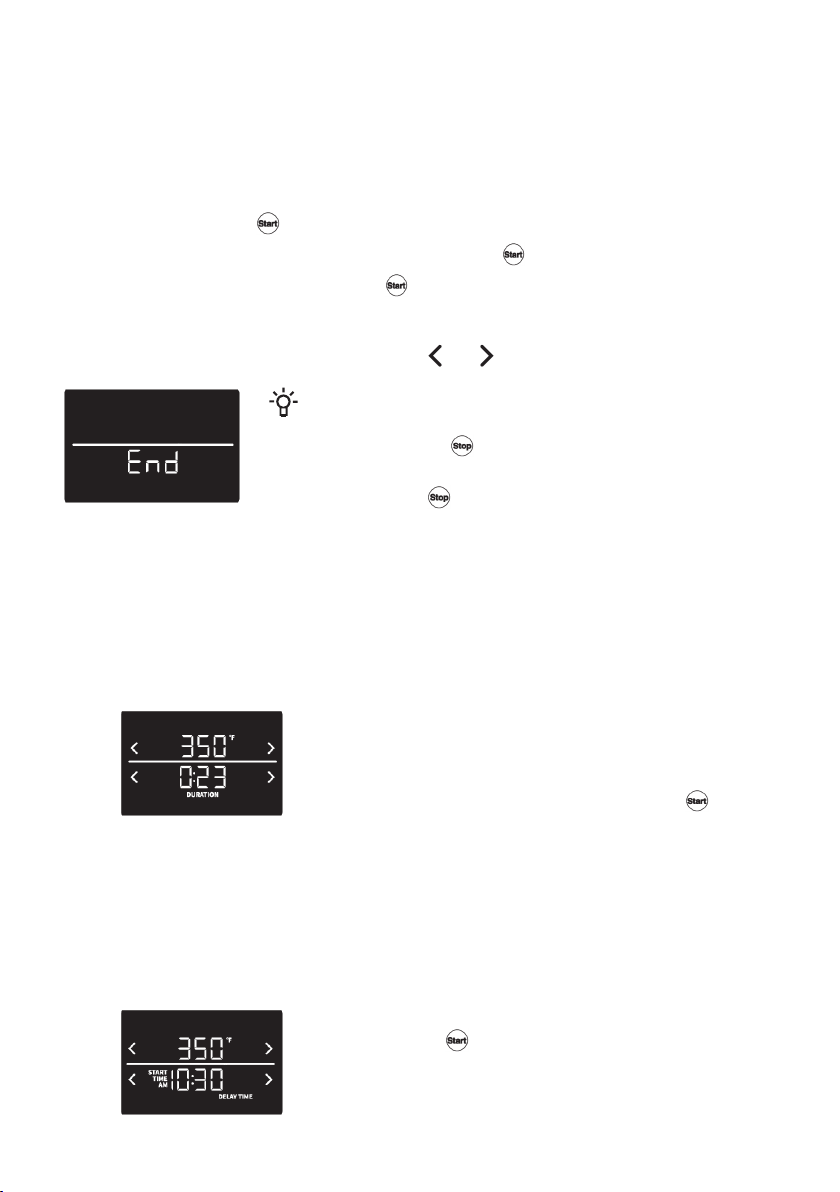
Funciones del horno
Las funciones del horno incluyen Modos de horneado: Proof, Pizza, Broil, Bake, Convection Bake,
Convection Roast, Frozen Bake, AirFry, Dehydrate y algunos modos adicionales:Fast Preheat, Crisp
Mode, Self Clean, Steam Clean, Defrost y Warm. Todas las funciones del horno se activan en dos
pasos:
1. Primero, presione la tecla del modo seleccionado. El indicador a su alrededor se encenderá y el
indicador alrededor de comenzará a parpadear.
2.
Luego, active el modo seleccionado presionando la tecla . El indicador alrededor del modo
seleccionado y el indicador alrededor de se encenderán.
La temperatura predeterminada se mostrará en la parte superior de la unidad de visualización.
Puede ajustar la temperatura utilizando las teclas o o el teclado numérico.
¡INFORMACIÓN!
Puede detener todas las funciones del horno presionando
brevemente la tecla . End aparecerá en la pantalla. El aparato
entrará automáticamente en estado de espera tras 5 minutos o si
presiona la tecla otra vez.
Tiempo de cocción
Puede establecer el Cooking Time presionando la tecla Cooking Time antes de activar la función o
mientras la función está activa.
Cooking Time incluye duración y tiempo de espera, y se puede configurar como se muestra a
continuación.
1. Duración – configurar la duración de la función del horno seleccionada.
• Coloque la(s) rejilla(s) del horno en su lugar e introduzca los
alimentos en el horno.
• Seleccione la función de horneado que desee.
• Pulse la tecla Cooking Time.
•
Establezca la duración deseada y toque la tecla para
confirmar la configuración.
• Cuando finalice el tiempo establecido, la función del horno se
apagará.
2. Delay Time (tiempo de espera) – use esta opción cuando desee activar una función después
de un cierto período de tiempo.
• Coloque la(s) rejilla(s) del horno en su lugar e introduzca los alimentos en el horno.
• Seleccione la función de horneado que desee.
• Pulse la tecla Cooking Time dos veces.
• Establezca el tiempo de espera deseado (hora de inicio).
•
Toque la tecla para confirmar la configuración.
• El horno comenzará a hornear después del tiempo de espera
seleccionado.
ES 58

•
Puede desactivar el tiempo de espera presionando la tecla
y el horno comenzará a hornear inmediatamente.
¡INFORMACIÓN!
Puede utilizar duración y tiempo de espera al mismo tiempo. La función comenzará con el
tiempo de espera establecido y cuando finalice se mostrará la duración.
¡INFORMACIÓN!
Si desea cancelar la duración y el tiempo de espera, presione Cooking Time y cuando los
indicadores DURATION o DELAY TIME parpadeen, presione la tecla Cancel .
Temporizador
Configure el tiempo presionando la tecla . Después de configurar la tiempo, presione la
tecla de nuevo y el temporizador quedará confirmado. Si no confirma el temporizador, se
confirmará automáticamente tras 10 segundos. Cuando finalice el tiempo, sonará una alarma.
NOTA!
El temporizador no inicia ni detiene las funciones de cocción. Puede usar el temporizador con
cualquiera de las otras funciones del horno.
Si desea cancelar el temporizador, presione la tecla hasta que el indicador TIMER comience
a parpadear y luego presione la tecla Cancel.
Horneado
• Retire todos los artículos innecesarios del aparato durante el horneado.
• En lo posible, no abra el horno durante el proceso.
• No coloque fuentes, placas o bandejas directamente sobre el fondo del interior del horno.
• Coloque siempre las bandejas o charolas para hornear en el centro de la rejilla.
• Cuando cocine cortes grandes de carne o pasteles con un contenido de líquido considerable, se
generará una gran cantidad de vapor dentro del horno que puede condensarse en la puerta. Este
es un fenómeno normal que no afectará el funcionamiento del aparato. Al finalizar el proceso de
cocción, seque la puerta y el vidrio.
• Cuando use la rejilla, coloque una bandeja o charola para hornear profunda un nivel más abajo
para que cumpla la función de bandeja de goteo.
• Cuando haga bizcochos o pastelería (galletas, cupcakes), use bandejas/charolas o moldes para
hornear de colores claros.
• Use utensilios para hornear de colores oscuros para los pasteles y tartas.
Consejos de horneado
Precalentamiento
Cuando encienda el aparato, estará en la fase de precalentamiento hasta alcanzar la temperatura
establecida. Algunas de las funciones tienen el precalentamiento rápido (Fast Preheat) establecido
automáticamente. Puede cambiar esto en la configuración.
Si está utilizando la función de precalentamiento rápido, no introduzca los alimentos en el horno hasta
que se haya alcanzado la temperatura establecida. Cuando el aparato alcance la temperatura
establecida, escuchará una señal sonora, el indicador PREHEATINGse apagará y en la pantalla
superior solo verá la temperatura establecida.
ES 59
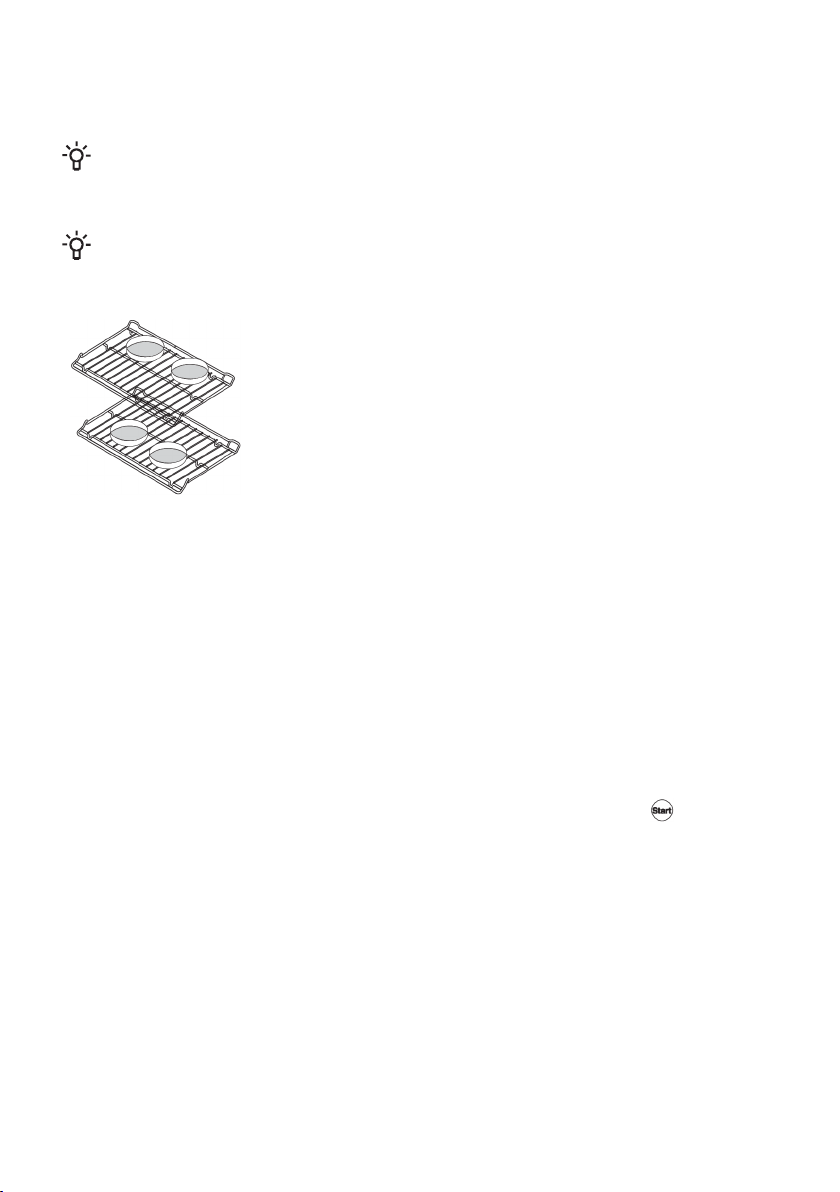
Puede ver cómo aumenta la temperatura en la interfaz de usuario. Se recomienda utilizar el
precalentamiento rápido para cortes de carne delicados (solomillo) y para masas esponjosas o con
levadura.
¡INFORMACIÓN!
Calentar un horno vacío consume mucha energía. Por lo tanto, si es posible, le recomendamos
cocinar varios platos en secuencia o simultáneamente.
¡INFORMACIÓN!
Algunas funciones de horneado utilizan temperaturas más bajas, por lo que no es necesario
precalentar el horno. En este caso, PREHEATINGno aparecerá en la pantalla.
Horneado en varios niveles
• Utiilizar elhorneado por convección sistema para hornear en múltiples
niveles simultáneamente.
• Niveles de cocción recomendados: 3 y 5
• Disponga platos para hornear más pequeños como se indica en la
figura. De esta manera, dejará suficiente espacio para que circule
aire alrededor de los alimentos, lo que permitirá una cocción correcta.
Modos de horneado
Bake
Este modo está diseñado para hornear alimentos en una sola rejilla. Cuando hornee pastelería,
galletas y bizcochos, se debe precalentar el horno.
Frozen Bake
Este método permite hornear alimentos congelados en una sola rejilla más rápidamente y sin
precalentamiento. Es ideal para productos congelados precocidos (comidas congeladas, productos
de panadería, cruasanes, papas fritas, nuggets de pollo).
Siga las instrucciones de la receta o el paquete para la preparación de productos congelados (tiempo
y temperatura). Use la función Frozen Bake.
Presione Frozen Bake para activar la función. Ajuste la temperatura y el tiempo de horneado, y
establezca precalentamiento si fuera necesario. Confirme los ajustes presionando .
Broil
Este modo está diseñado para la cocción de alimentos planos (pan tostado, sándwiches abiertos,
hamburguesas, salchichas a la parrilla, filetes, pescado, etc.) o para gratinar.
El calentador superior calentará toda la superficie, horneando los alimentos de manera uniforme sin
importar el lugar en que se encuentren abajo del calentador. Niveles de horneado recomendados: 6
y 7. Puede elegir entre Broil HI y Broil LO.
Broil HI (alto)
Úselo para asar grandes cantidades de alimentos aplanados como tostadas, sándwiches abiertos,
salchichas de parrilla, pescado, brochetas, etc., así como para gratinar y dorar la corteza.
Broil LO (bajo)
Úselo para preparar alimentos planos y desee que queden crujientes.
ES 60

Para activar la función, presione Broil. Presione o seleccione la intensidad y actívela
presionando .
¡INFORMACIÓN!
La temperatura recomendada está preestablecida.
Uso habitual:
• Mantenga siempre la puerta del horno cerrada cuando use la función broil.
Utilice la rejilla y la bandeja de goteo o un equipo adecuado.
• Utilice las rejillas superiores.
• Cuando los alimentos están cerca del calentador superior, las salpicaduras pueden provocar
humo y la grasa podría encenderse. Por lo tanto, vigile atentamente los alimentos mientras utiliza
esta función.
Convection Bake
Úselo para cocinar carnes, pasteles y verduras en una o varias rejillas simultáneamente.
Este sistema combina los calentadores con un ventilador, lo que lo hace más rápido que los sistemas
convencionales.
Niveles de horneado recomendados:
• para horneado en un solo nivel de alimentos aplanados (pastelería) 4
• para horneado en un solo nivel de cortes grandes (carne): 2 o 3 para horneado en varios niveles:
3 y 5
Convection Roast
Este modo está diseñado para asar aves y cortes enteros de carne en una sola rejilla debajo de un
asador.
Este es un sistema combinado. El aire caliente circula constantemente alrededor de los alimentos, y
los calentadores irradian calor de forma uniforme para obtener alimentos de corteza crujiente y centro
jugoso. Este sistema combina los calentadores con un ventilador, lo que lo hace más rápido que la
cocción convencional.
Niveles de horneado recomendados:
• asar cortes grandes de carne: 3 o 4
• asar un solo corte de carne: 2 o 3
Accesorios utilizados:
• rejilla
• bandeja de goteo
AirFry
Este método de cocción da como resultado una corteza crujiente sin necesidad de agregar grasa o
aceite. Es una versión saludable de la fritura de comida rápida, que permite cocinar alimentos con
menos calorías. Adecuado para cortes pequeños de carne, pescado, verduras y productos congelados
listos para freír (papas fritas, nuggets de pollo).
Este es un sistema combinado. El aire caliente circula de forma uniforme alrededor de los alimentos.
El calor emitido por el calentador superior permite obtener una corteza crujiente.
Niveles de horneado recomendados: 4
Accesorios utilizados:
ES 61

• para obtener una base más dorada, recomendamos usar fuentes de horno más oscuras
¡INFORMACIÓN!
Para obtener los mejores resultados, distribuya los alimentos de manera uniforme en toda el
área de la charola o bandeja, y no los cubra.
Proof
Este programa garantiza un proceso óptimo de fermentación y levado. La temperatura controlada
acelera este proceso en comparación con la fermentación a temperatura ambiente.
¡INFORMACIÓN!
Para obtener los mejores resultados, cubra la masa mientras usa el modo Proof.
Para una fermentación óptima, inicie siempre el programa después de que el aparato se haya
enfriado por completo.
Para obtener mejores resultados, no abra la puerta del aparato durante el proceso.
No use el modo de fermentación Proof para calentar o mantener la comida caliente. La
temperatura de fermentación no es lo suficientemente elevada para mantener los alimentos a
temperaturas seguras.
Dehydrate
La función Dehydrate está diseñado para deshidratar alimentos evaporando su contenido de humedad.
Puede usar este modo para deshidratar alimentos manualmente a una temperatura entre 100 y 175
°F (38 y 79 ºC). Puede deshidratar frutas, verduras y hierbas.
Pizza
Este sistema es ideal para hornear pizza fresca más rápido en una sola rejilla.
Niveles de cocción recomendados: 1 o 2.
Accesorios utilizados:
• Para una base más dorada, recomendamos usar placas de horno más oscuras.
ES 62
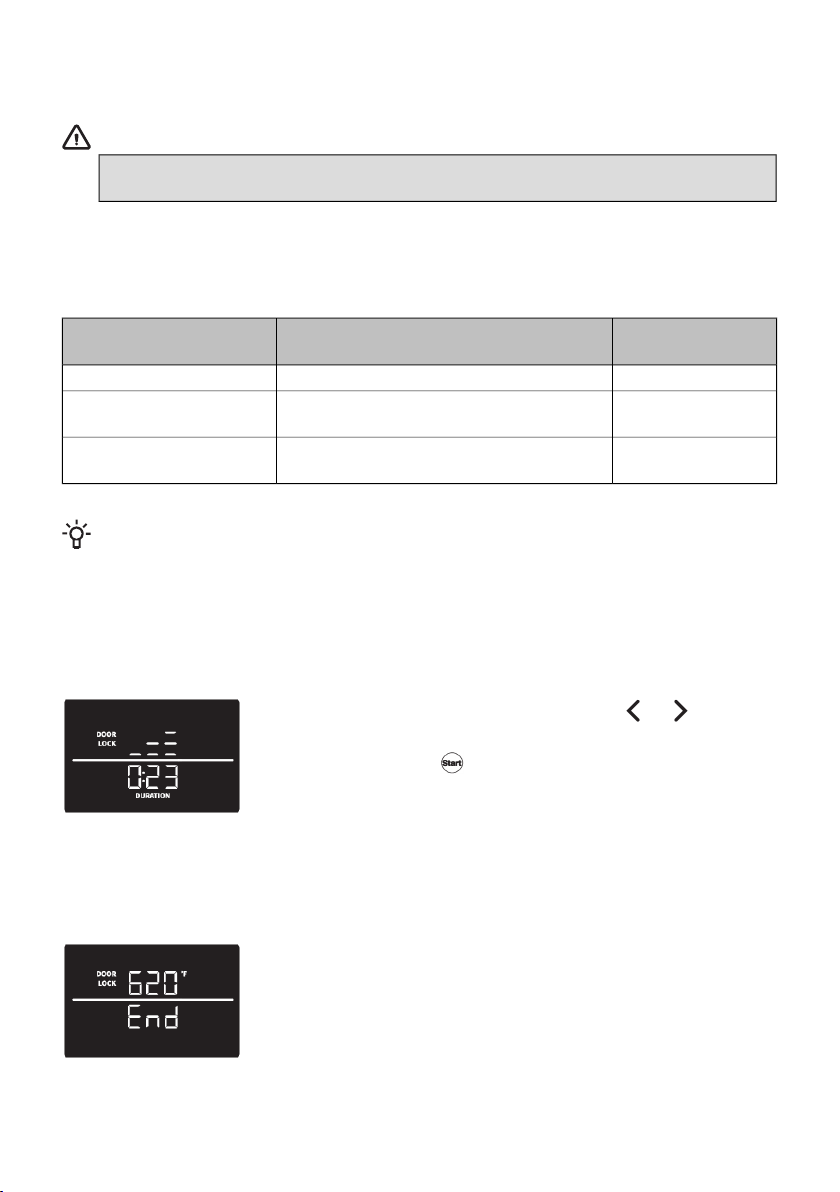
Funciones adicionales
Self Clean
ADVERTENCIA!
Antes de iniciar el modo Self Clean, retire todos los utensilios que tenga guardados en
el horno, ya que se decolorarán si permanecen adentro durante el proceso.
La función Self Clean sirve para limpiar el horno usando altas temperaturas.
Durante el proceso de limpieza, los residuos de grasa y otras impurezas se incineran y se reducen a
cenizas. Hay tres niveles de intensidad de limpieza disponibles, con diferentes duraciones:
Duración del
programa
Propósito de la limpiezaIntensidad de la limpieza
2 horasPara impurezas menoresLimpieza rápida
3 horasPara impurezas visiblesLimpieza de intensidad
media
5 horasPara impurezas rebeldes y persistentes (más
antiguas)
Limpieza intensiva
¡INFORMACIÓN!
Cuanto más rebelde sea la suciedad, mayor será el nivel que debe seleccionar.
Preparación para la función Self Clean:
• Limpie todo el aceite visible antes de utilizar esta función.
• Retire todos los residuos que queden en el vidrio y los restos de alimentos de la cavidad del horno.
• Inicie el programa después de que el aparato se haya enfriado.
Presione brevemente la tecla Self Clean y toque o para
establecer la intensidad de limpieza que desee. Confirme la configuración
presionando el símbolo . «Lock» y la duración del programa
aparecerán en la pantalla (la puerta estará bloqueada). La duración
predeterminada para la limpieza es de 3 horas.
Durante la ejecución del programa, podrían liberarse olores desagradables, humo, gases y vapores
irritantes. Por lo tanto, le recomendamos que mantenga la cocina completamente ventilada durante
el proceso. No permanezca en el área durante un tiempo prolongado. No permita que los niños y las
mascotas se acerquen al aparato mientras este modo esté en uso.
Cuando la temperatura descienda por debajo de los 400 °F, los aparatos
se desbloquearán y pasarán al modo de espera.
Una vez que el interior del horno se haya enfriado por completo, límpielo
con agua jabonosa y un paño suave para eliminar cualquier residuo (por
ejemplo, cenizas).
ES 63
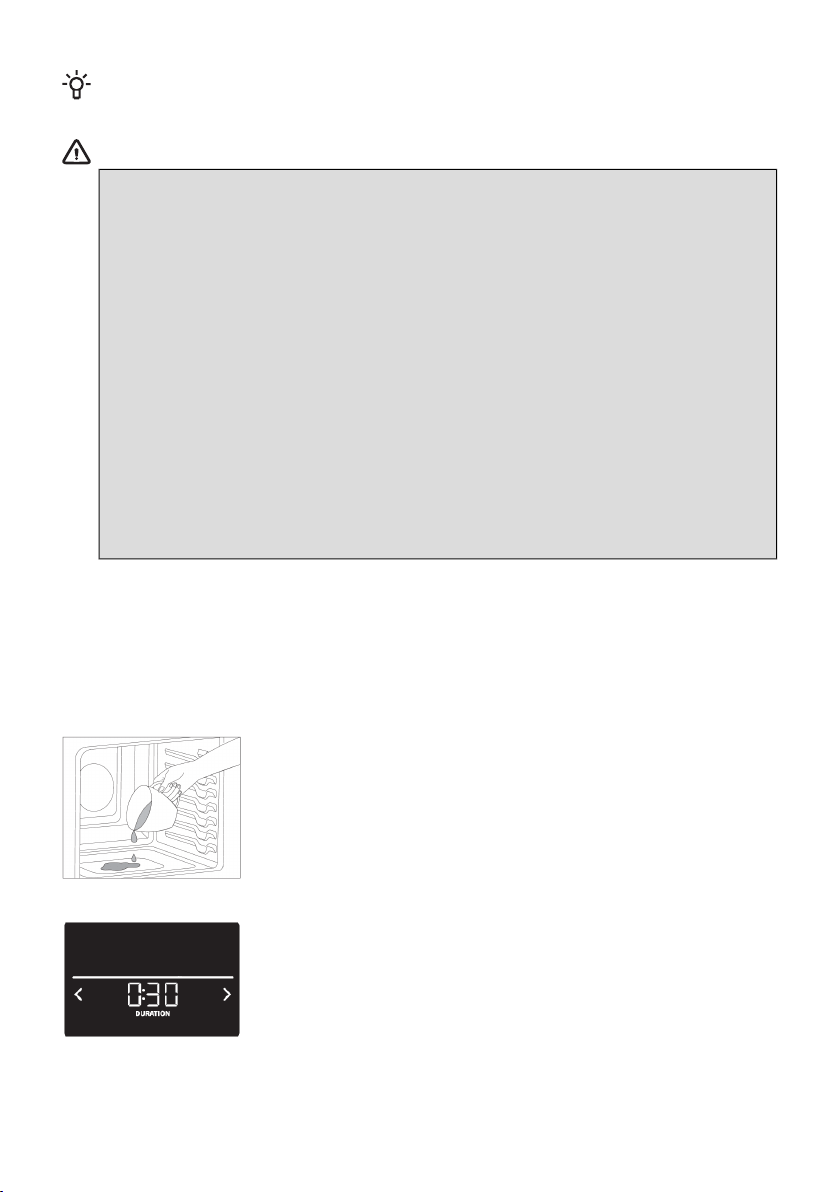
¡INFORMACIÓN!
Recomendamos usar esta función una vez al mes.
ADVERTENCIA!
• No utilice la placa de cocción mientras el modo Self Clean está en funcionamiento.
• Si intenta usar la placa de cocción mientras el modo Self Clean está en uso, la palabra
«Hob» aparecerá en la pantalla superior y se alternará con el letrero de la intensidad
de Self Clean. Si la placa de cocción no se apaga en un minuto, se muestra el Error
14 y la función Self Clean se detendrá.
• Retire de la superficie de cocción todas las ollas, sartenes y otros utensilios.
• Durante el programa de limpieza, el exterior del aparato se calienta mucho. No toque
la puerta del horno y nunca cuelgue objetos combustibles, como paños de cocina
o toallas, de la manija de la puerta.
• La puerta del horno está bloqueada. ¡No intente abrirla!
• Los animales o mascotas pequeñas pueden ser especialmente sensibles a los
vapores. Recomendamos sacarlos de la cocina mientras esta función esté activa y
ventilar bien el ambiente después del proceso de limpieza.
• Como resultado de la limpieza con Self Clean, el interior del horno y los accesorios
podrían decolorarse y perder su brillo. Esto no afecta la funcionalidad del horno o
los accesorios.
• Antes de limpiar el horno con el modo Self Clean retire las rejillas y otros accesorios
que se encuentren dentro del horno.
Steam Clean
La función Steam Clean permite eliminar más fácilmente la suciedad del horno usando vapor.
Esta función es más efectiva cuando se usa regularmente, preferiblemente después de cada sesión
de horneado.
Antes de ejecutar el programa Steam Clean elimine las manchas y los restos de alimentos más grandes
de la cavidad del horno.
Vierta un máximo de 1/2 taza de agua en la base del interior del horno.
Active la función Steam Clean presionando la tecla Self Clean dos
veces. El programa dura 30 minutos.
Limpie el horno con un paño húmedo.
ES 64
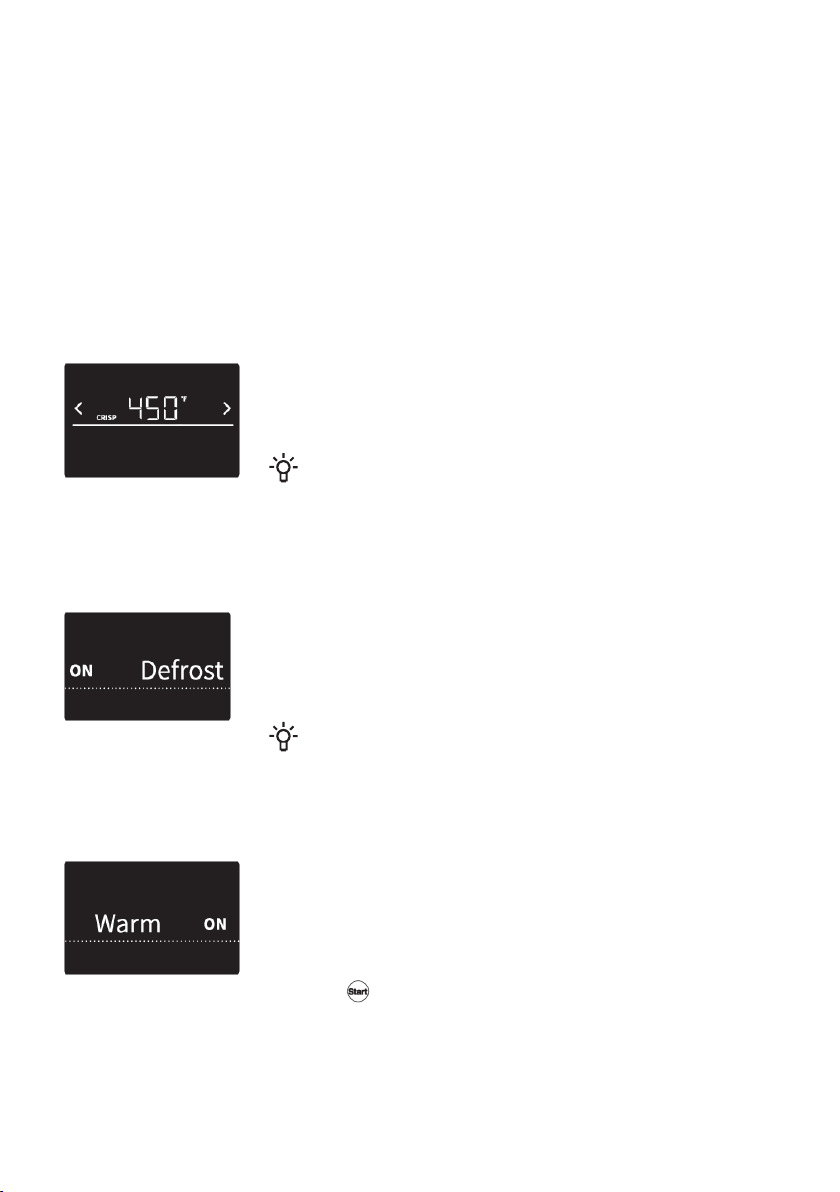
Fast Preheat
Utilice las teclas del Fast Preheat (calentamiento rápido) cuando desee calentar el horno lo más rápido
posible. La configuración por defecto es ON.
Pulse la tecla Fast Preheat para cambiar la configuración antes de activar la función de cocción
seleccionada. Puede habilitar Fast Preheat Fast Preheat o para las funciones Bake, Convection Bake,
Convection Roast, AirFry y Pizza..
La función Fast Preheat utiliza un ventilador de convección para alcanzar la temperatura lo más rápido
posible, incluso cuando se seleccione una función que no utiliza convección.
Crisp Mode
Este modo es adecuado cuando necesita obtener un exterior crujiente, como en el caso de alimentos
empanados, pan o papas fritas.
Puede habilitar el modo Crisp para la funciones: Bake, Broil, Convection Bake, Convection Roast
AirFry,Frozen Bake y Pizza.
Crisp se puede activar y desactivar pulsando prolongadamente la tecla
Crisp Mode. Puede iniciar el proceso de tostado (crisp) cuando el horno
alcance la temperatura establecida. La duración máxima del modo Crisp
es de 5 minutos
¡INFORMACIÓN!
Crisp se cancela automáticamente después de 5 minutos. Si la
temperatura establecida es superior a 480 °F, el modo Crisp no se
podrá activar.
Defrost
La función Defrost mode se utiliza para descongelar controlada y
automáticamente los alimentos congelados (tortas, pasteles, pan y bollos,
y frutas ultracongeladas). La temperatura está preestablecida y no se
puede modificar. Cuando llegue a la mitad del proceso de
descongelación, dé la vuelta, mueva o separe los alimentos.
¡INFORMACIÓN!
El tiempo de descongelación es más largo que cuando se realiza
con microondas.
Warm
Este modo le permite mantener caliente la comidas ya cocinada. La
temperatura para este programa se puede ajustar entre 140 °F (60 °C)
y 210 °F (99 °C), y puede establecer Cooking Time entre 0 minutos a 3
horas. Recomendamos utilizar un Cooking Time de 30 minutos.
Para activar este modo, presione la tecla Warm . Ajuste la temperatura
y el tiempo de recalentamiento, y confirme la configuración presionando
el símbolo .
• Cubra los alimentos con mayor contenido de líquido usando una tapa de papel de aluminio. Si
prefiere obtener una corteza crujiente, deje los alimentos destapados.
• No utilice esta función para recalentar alimentos fríos.
ES 65
ADVERTENCIA!
PELIGRO DE INTOXICACIÓN ALIMENTARIA: Si los alimentos no han sido suficientemente
procesados térmicamente, la función Warm podría contribuir al desarrollo de bacterias
dañinas en ellos.
Child Lock
Use la función Child Lock para evitar que los niños enciendan el horno o cambien la configuración,
ya sea sin querer o por estar sin supervisión. Esta función bloquea la unidad de control (evita que se
controle el aparato o se realicen cambios en la configuración).
Para activar la función Child Lock presione la tecla Child Lock durante 3 segundos. La unidad de
visualización quedará bloqueada. Cuando la función Child Lock esté activa, las teclas no responderán
(si toca una tecla, escuchará un pitido indicando que el módulo no se puede controlar).
Para desactivar la función Child Lock presione la tecla Child Lock durante 3 segundos. La pantalla
está desbloqueada.
NOTA!
Puede usar la placa de cocción normalmente mientras la función Child Lock está activada. En
caso de que necesite apagar los calentadores en una emergencia, puede usar la tecla incluso
si Child Lock está activado.
Ilumincación
Active o desactive la luz pulsando brevemente la tecla «Light».
Apagado
Las funciones del horno se pueden desactivar en cualquier momento pulsando la tecla .
ES 66
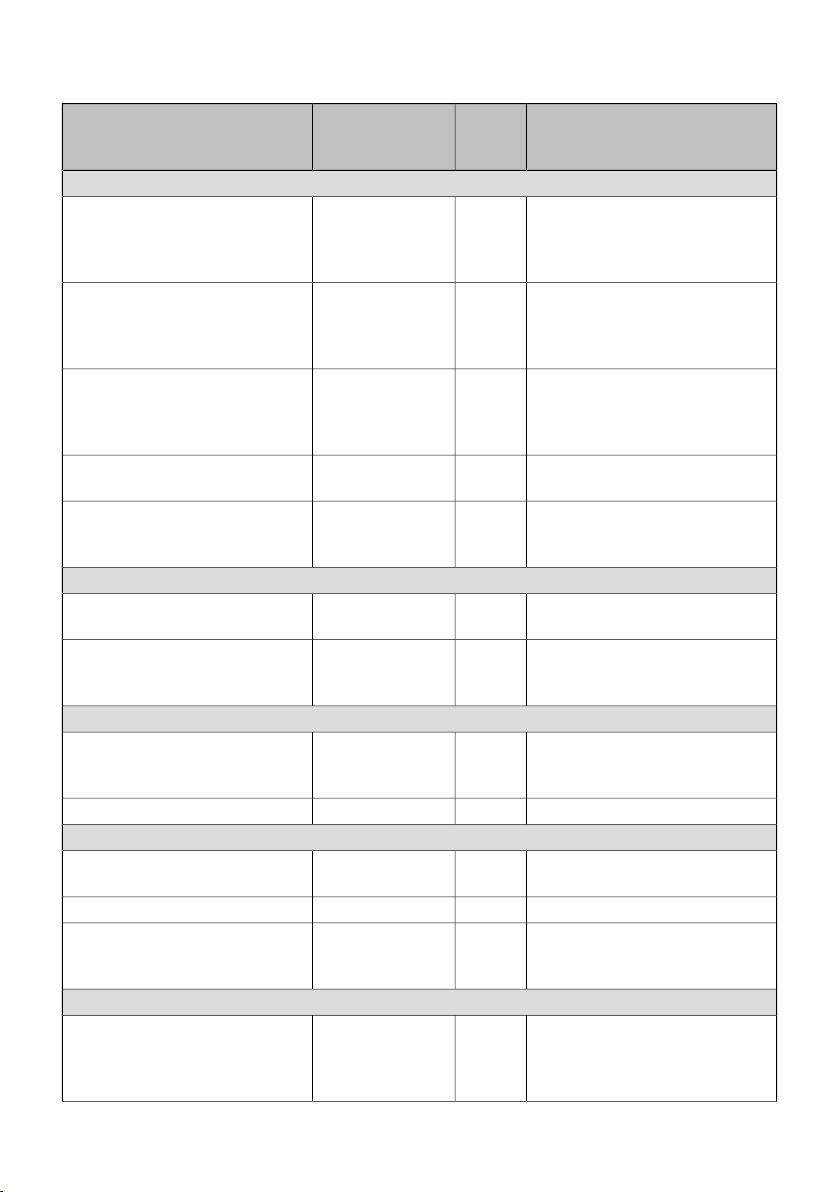
Tabla de alimentos
Sugerencias adicionalesNivel
de
cocción
Modo de
horneado
recomendado
Tipo de alimento
Cerdo y ternera
Use pinzas para barbacoa para
dar vuelta la carne después de
transcurridas dos terceras partes
del tiempo de cocción.
5 o 6BroilLO (bajo)Hamburguesas
Use pinzas para barbacoa para
dar vuelta la carne después de
transcurridas dos terceras partes
del tiempo de cocción.
5 o 6BroilLO (bajo)Bistecs y chuletas
Dé vuelta a la carne usando
pinzas para barbacoa después
de transcurridos 2/3 del tiempo
de cocción.
5 o 6BroilHI (alto)Filetes de ternera
Ase primero con la piel hacia
abajo.
4 o 5BroilLO (bajo)Piezas de pollo (pechugas, alas,
patas, muslos)
Le recomendamos usar una
bandeja para asar.
2 o 3Bake
Convection Bake
Asados
Convection Roast
Aves de corral
Le recomendamos usar una
bandeja para asar.
2 o 3Convection Roast
Bake
Aves enteras
Le recomendamos usar un
bandeja para asar
4Convection Roast
AirFry
Piezas de pollo (pechugas, alas,
patas)
Bake
Pescado
Cuanto más grande sea el
pescado, menor debe ser el nivel
y mayor el tiempo de cocción.
5 o 6BroilHI (alto)Pescado entero
5 o 6BroilLO (bajo)Filete de pescado
Productos horneados
3 o 4BakePastelería (galletas, bollos),
bizcochos
2 o 3BakePasteles de ángel, tartas
3 y 5Convection BakePastelería (galletas, biscuits,
muffins), bizcochos - varios
niveles
Varios
3 o 4Frozen BakeProductos congelados
convencionales (papas, pizza,
lasaña, nuggets de pollo, palitos
de pescado, etc.)
Bake
ES 67

Tabla continuada de la última página
Sugerencias adicionalesNivel
de
cocción
Modo de
horneado
recomendado
Tipo de alimento
1 o 2PizzaPizza fresca
Bake
Si es posible, use una bandeja
para freír con aire.
4AirFry
Bake
Productos a base de papas
3BakeGuisos
7BroilHI (alto)Pan tostado, sándwiches abiertos
ES 68
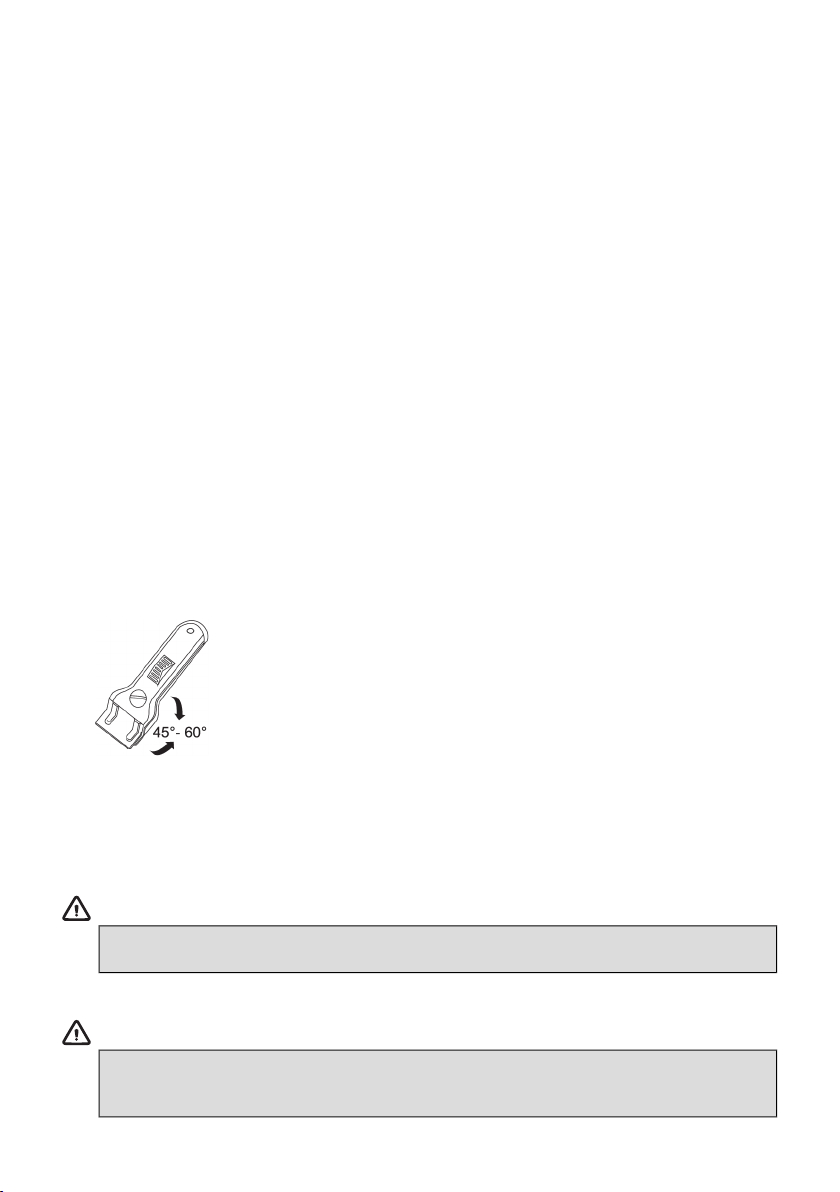
Limpieza y mantenimiento
Recomendamos limpiar el aparato después de cada uso. Esto evitará que la comida pegada a la placa
se caliente y dañe la superficie de vidrio.
Limpieza exterior diaria
• Limpie el aparato con un paño húmedo y un detergente suave, como jabón para platos.
• Seque el aparato con una toalla de papel o un paño para obtener los mejores resultados.
• Para superficies de acero inoxidable muy contaminadas, utilice un limpiador específico para acero
inoxidable. Limpie de acuerdo con las instrucciones indicadas en el producto de limpieza. Si es
posible, limpie en la dirección del grano del acero inoxidable.
Limpieza del panel de control
• Para no dañar los controles de la placa de cocción, evite utilizar lana de acero, limpiadores
abrasivos o limpiadores para horno.
• Si retira las perillas durante la limpieza del panel de control, procure no mover la junta de la perilla
del lugar en el que está ensamblada.
• Si mueve la junta, puede volver a colocarla en su lugar sin necesidad de asistencia.
Limpieza de la placa de vidrio
• ¡Elimine inmediatamente los restos de comida, grasa quemada, azúcar o manchas difíciles de la
placa usando una espátula, incluso si la placa aún está caliente! Los derrames de azúcar o
alimentos con alto contenido de azúcar pueden dañar permanentemente la superficie de
vitrocerámica.
• Sostenga el raspador (no incluido) en un ángulo correcto (entre 45°
y 60°) en relación con la superficie de cocción. Deslice suavemente
el raspador por la superficie del vidrio para eliminar la suciedad.
Asegúrese de que el mango de plástico del raspador (en algunos
modelos) no entre en contacto con una zona de cocción que esté
caliente. No presione el raspador perpendicularmente contra la
superficie. Procure no rayar la superficie de la placa de cocción con
las esquinas de la cuchilla del raspador. Esto podría provocar rayones
permanentes en la superficie.
• Una vez que haya eliminado las manchas difíciles del vidrio, siga los pasos para la limpieza diaria
de los quemadores.
ADVERTENCIA!
No utilice productos de limpieza abrasivos, ya que pueden arañar la superficie. No utilice
lana de acero, estropajos ni otros objetos afilados para limpiar el aparato.
ADVERTENCIA!
La placa de cocción aún podría seguir estando muy caliente debido al proceso de cocción.
No toque la superficie del aparato. Si acaba de finalizar el proceso de cocción, use
guantes protectores o manoplas para evitar quemaduras.
ES 69
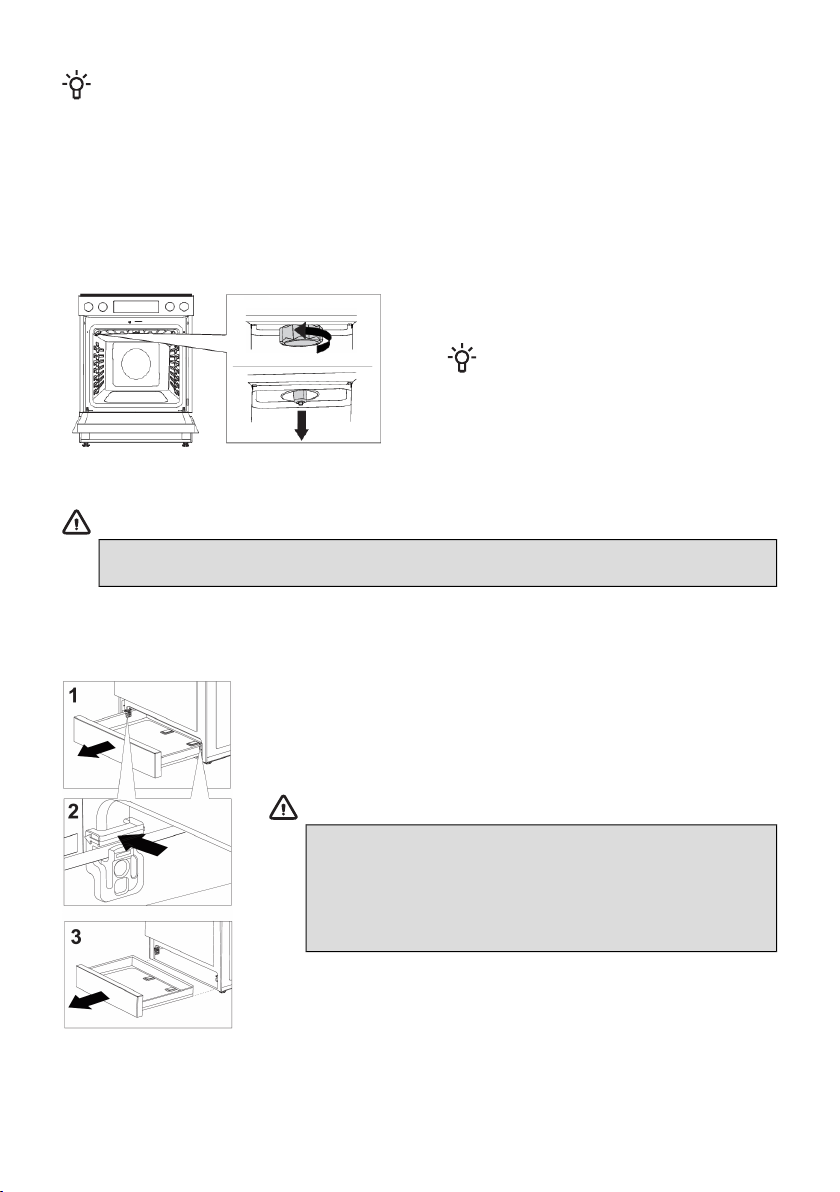
¡INFORMACIÓN!
Si observa una grieta en la parte superior del vidrio (por pequeña que sea), apague la placa
inmediatamente, desenchufe la estufa, apague el interruptor(es) del fusible(s) (automáticos) que
se encuentra en gabinete de fusibles o, en el caso de una conexión permanente, lleve a cero
interruptor de la fuente de alimentación. Póngase en contacto con el servicio técnico.
Focos
El foco (bombillo) es un consumible y, por lo tanto, no está cubierto por la garantía. Antes de
reemplazarlo, retire todos los accesorios del horno.
Desenrosque y retire la tapa en sentido
antihorario y extraiga lel foco.
¡INFORMACIÓN!
Tenga cuidado de no dañar el
recubrimiento esmaltado.
Use protección para evitar quemarse.
Para el reemplazo del foco, póngase en
contacto con nuestro servicio al cliente.
ADVERTENCIA!
Antes de reemplazar el foco, desconecte la estufa de la red eléctrica.
Reemplace el foco únicamente cuando el horno esté frío.
Cajón de almacenamiento
1 Abra el cajón.
2 Empuje simultáneamente los dos espaciadores de cada lado hacia
atrás en la dirección que indica la flecha.
3 Retire completamente el cajón.
ADVERTENCIA!
No guarde elementos combustibles, explosivos, volátiles o
sensibles a las altas temperaturas (como papel, paños de
cocina, bolsas de plástico, limpiadores, detergentes y latas
de aerosol) en el cajón de almacenamiento, ya que podrían
encenderse durante el funcionamiento del horno y provocar
un incendio.
ES 70
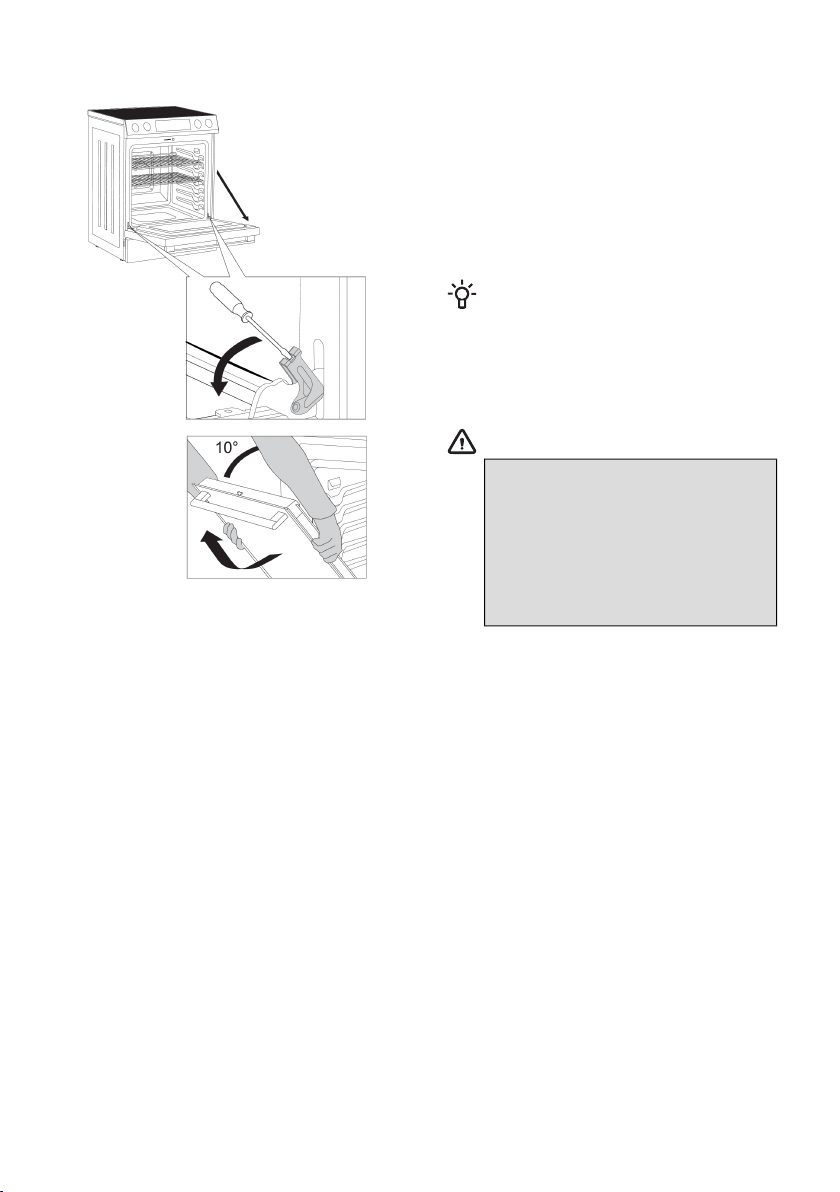
Extraer e insertar la puerta del horno
1 Primero, abra completamente la puerta del
horno.
2 Con un destornillador, gire los dos
retenedores hasta su posición final.
3 Cierre lentamente la puerta en un ángulo de
10 grados (en relación con su posición
completamente cerrada); luego tire de la puerta.
¡INFORMACIÓN!
Para volver a colocar la puerta, siga los
mismos pasos en orden inverso. Si la
puerta no abre o cierra correctamente,
asegúrese de que las muescas de las
bisagras estén alineadas con sus bases.
ADVERTENCIA!
Cuando vuelva a colocar la puerta,
asegúrese de que los retenedores de
las bisagras estén colocados
correctamente en sus bases para
evitar el cierre repentino de la bisagra
principal que está conectada a un
resorte muy fuerte. Existe riesgo de
lesiones.
ES 71

Posibles problemas y soluciones
Durante el período de garantía, las reparaciones solo pueden ser efectuadas por el servicio
autorizado por el fabricante.
Antes de realizar cualquier reparación, desconecte el cable de la toma de corriente para asegurarse
de que el aparato esté desconectado de la red eléctrica.
Cualquier reparación no autorizada del aparato puede dar lugar a descargas eléctricas y producir
riesgos de cortocircuito; no intente realizarlas. Deje esta tarea en manos de un técnico de servicio
autorizado.
En caso de problemas menores de funcionamiento, consulte este manual para ver si puede solucionar
el problema por su cuenta.
En el supuesto de que el aparato no funcione correctamente o no funcione en absoluto debido a una
manipulación o uso inapropiado, la visita de un técnico de servicio no será gratuita, incluso durante
el período de garantía.
Guarde estas instrucciones para futuras consultas y entrégueselas a un eventual propietario o usuario
posterior del aparato.
Tabla de resolución de problemas
SoluciónCausa posibleDescripciónNombre del error
Verifique si la conexión del cable de
alimentación es correcta.
El sensor de
temperatura del
aparato puede
estar funcionando
mal.
Falla del sensor
de temperatura
del horno
Error 001
Les couleurs des fils du cordon
d'alimentation doivent correspondre
aux couleurs des fils de l'appareil.
Desconecte la estufa de la red eléctrica
durante unos minutos (quite el fusible
o apague el interruptor principal);
luego, vuelva a conectarla. Si el
problema persiste, comuníquese con
el servicio.
Desconecte la estufa de la red eléctrica
durante unos minutos (quite el fusible
o apague el interruptor principal);
luego, vuelva a conectarla. Si el
problema persiste, comuníquese con
el servicio.
Problema en la
electrónica del
aparato.
Fallo de
comunicación
entre la interfaz
de usuario y la
placa de
alimentación
Error 003
Limpie la interfaz de usuario con un
paño seco. Desconecte la estufa de la
red eléctrica durante unos minutos
(quite el fusible o apague el interruptor
principal); luego, vuelva a conectarla.
Si el problema persiste, comuníquese
con el servicio.
Fallo en el sensor
táctil.
Fallo del sensor
táctil de la
interfaz de
usuario
Error 004
ES 72

Tabla continuada de la última página
SoluciónCausa posibleDescripciónNombre del error
Compruebe la temperatura de la
habitación. Enfríe el aparato.
Desconecte la estufa de la red eléctrica
durante unos minutos (desmonte el
fusible o apague el interruptor
principal); luego, vuelva a conectarla.
Si el problema persiste, comuníquese
con el servicio.
La temperatura
ambiente es
demasiado alta, el
sensor NTC no
funciona
correctamente.
Sobrecalentamiento
de la interfaz de
usuario
Error 005
Compruebe la posición de ollas y
sartenes. La posición de ollas y
sartenes puede influir en la
temperatura que se muestra en la
interfaz de usuario.
Detenga la función Self Clean, espere
hasta que la puerta se desbloquee y
vuelva a activarla. Si el problema
persiste, contacte al servicio técnico.
El bloqueo de la
puerta no
funciona
correctamente.
Self Clean falla
en el bloqueo de
la puerta
Error 006
Compruebe el voltaje correcto en la
instalación de su casa. Desconecte la
estufa de la red eléctrica durante unos
minutos (quite el fusible o apague el
interruptor principal); luego, vuelva a
conectarla. Si el problema persiste,
comuníquese con el servicio.
Fallo en el
suministro de
energía.
Fallo en el
suministro del
relé de la placa
de alimentación
Error 007
Compruebe la temperatura de la
habitación. Enfríe el aparato.
Desconecte la estufa de la red eléctrica
durante unos minutos (quite el fusible
o apague el interruptor principal);
luego, vuelva a conectarla. Si el
problema persiste, comuníquese con
el servicio.
La temperatura
ambiente es
demasiado alta, el
sensor NTC no
funciona
correctamente.
Sobrecalentamiento
de la placa de
alimentación
Error 008
Apague cualquier quemador que esté
activo e inicie la función Self Clean
nuevamente.
La placa de
cocción se activó
mientras la
función Self Clean
estaba encendida.
Activación de la
placa de cocción
mientras la
función Self
Clean estaba
encendida
Error 014
Desconecte la estufa de la red eléctrica
durante unos minutos (quite el fusible
o apague el interruptor principal);
luego, vuelva a conectarla. Si el
problema persiste, comuníquese con
el servicio.
Fallo en la
electrónica.
Fallo de cruce
por cero en la
placa de
alimentación
Error 015
ES 73
Problemas y consejos para hornear
ConsejoProblema
¿Cómo sé cuándo está hecho un bizcocho?
• Verá que la corteza se vuelve de color marrón
dorado.
• El bizcocho estará esponjoso al tacto.
• Perfore la parte superior del bizcocho con
un palillo de madera o una brocheta. Cuando
saque el palillo, no debe haber restos de
masa pegados en él.
El bizcocho se hundió
• Respete el tiempo de mezcla indicado.
• Use menos cantidad de líquido.
• Aumente la temperatura y prolongue el
tiempo de horneado.
El bizcocho se dora de manera dispareja
• Cuando hornee en varios niveles
simultáneamente, es posible que no se
cocinen todas las masas al mismo tiempo.
• Retire antes la bandeja que contiene la masa
que ya está hecha.
El bizcocho ha subido en el medio, pero no por
los lados
• Solo debe engrasar la base de la fuente para
hornear; no engrase los lados.
Una pequeña masa se ha aglomerado o pegado
durante la cocción
• No hay suficiente espacio entre los pasteles
(deje al menos 2 cm).
La masa se ha secado
• Aumente la temperatura y reduzca el tiempo
de horneado.
La base está poco cocida
• Coloque la comida en una rejilla un nivel más
abajo.
La parte superior está poco cocida
• Coloque la masa en una rejilla más alta.
Al hornear en varios niveles simultáneamente, el
pastel no se dora de manera uniforme
• Cuando hornee en varios niveles
simultáneamente, es posible que no se
cocinen todas las masas al mismo tiempo.
• Retire antes la bandeja que contiene la masa
que ya está hecha.
El bizcocho se ha pegado a la fuente
• Cuando el bizcocho se enfríe, sepárelo con
cuidado del molde aflojando los bordes con
un cuchillo.
• La próxima vez, engrase el molde más
generosamente o espolvoréelo con pan
rallado.
ES 74

Eiminación de desechos
El embalaje de nuestro producto está hecho de materiales ecológicos
que se pueden reciclar, deshechar o destruir sin perjudicar el medio
ambiente. Por eso, los materiales de embalaje están debidamente
etiquetados.
El símbolo que encontrará en el producto o en su embalaje indica que
este aparato no debe tratarse como un residuo doméstico normal. Lleve
el aparato a un centro de recogida autorizado para el procesamiento de
residuos eléctricos y electrónicos.
La eliminación correcta del producto ayudará a prevenir efectos negativos
sobre el medio ambiente y la salud de las personas, que podrían tener
lugar en caso de desecharlo de forma incorrecta. Para obtener
información detallada sobre la eliminación y el procesamiento del
producto, comuníquese con el organismo municipal responsable de la
gestión de residuos, con su servicio de eliminación de residuos o con
la tienda donde compró el aparato.
Nos reservamos el derecho de realizar cambios y de cometer errores en las instrucciones de uso.
ES 75
854936-a13
