Loading ...
Loading ...
Loading ...
22
Basic Sewing (3)
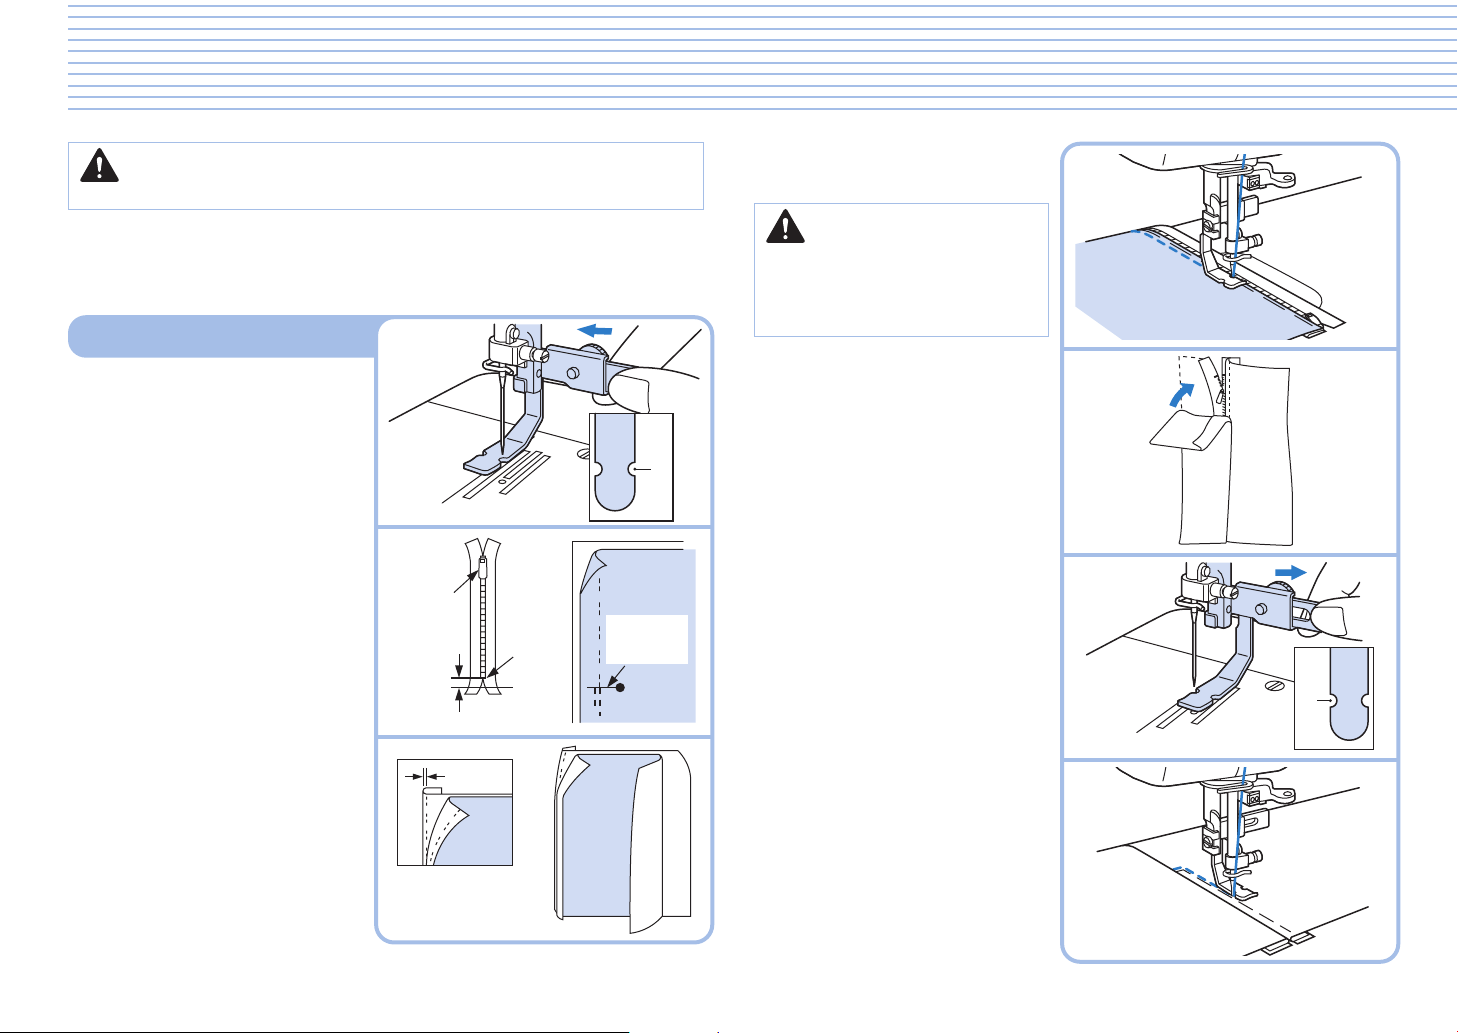
Zipper Foot
1 Attach zipper foot.
✽ See “Changing Presser Feet
(Zipper Foot)” on page 19.
2
Turn the handwheel towards you
to lower the needle and adjust the
position of the foot relative to the
needle using the adjustment screw
to slide the foot from left to right.
5 Secure the zipper with basting
and sew along the mark.
CAUTION
Make sure the needle does not
strike the metal part of the zipper
when sewing. The needle may
break and cause injury.
6 Line up the folded hem on the
opposite side with the stitches.
3
Line up zipper to the section of
fabric it will be attached to, and
mark the base of the opening
on the fabric. It should be set
approximately 0.5 cm (approx. 3/16
inch) below zipper stop. Sew from
below the base of the opening.
4 Divide the seam margin. Fold
the seam margin with the
overlap of the zipper position
facing down 0.2 cm (approx.
1/16 inch) on the outside of the
mark.
A
0.5 cm
Slide
Base of
Opening
Stop
0.2 cm
7 Change position of zipper foot.
8 Turn the handwheel to lower the
needle and position the presser
foot.
9
With the fabric right side up,
baste the zipper onto the fabric,
then sew the edge of the basting.
✽
Reinforce base of opening by
sewing over it twice.
✽
If the zipper slide gets in the
way, lower the needle all the way
through the fabric, raise the foot,
and move the slider out of the way.
B
CAUTION
Make sure the power to the machine is o before changing feet.
✽ When attaching zippers to stretch fabrics, use the pin feed method and
adjust foot pressure accordingly.
✽ The zipper foot can also be used as a guide when attaching piping to
fabric.
Loading ...
Loading ...
Loading ...