Loading ...
Loading ...
Loading ...
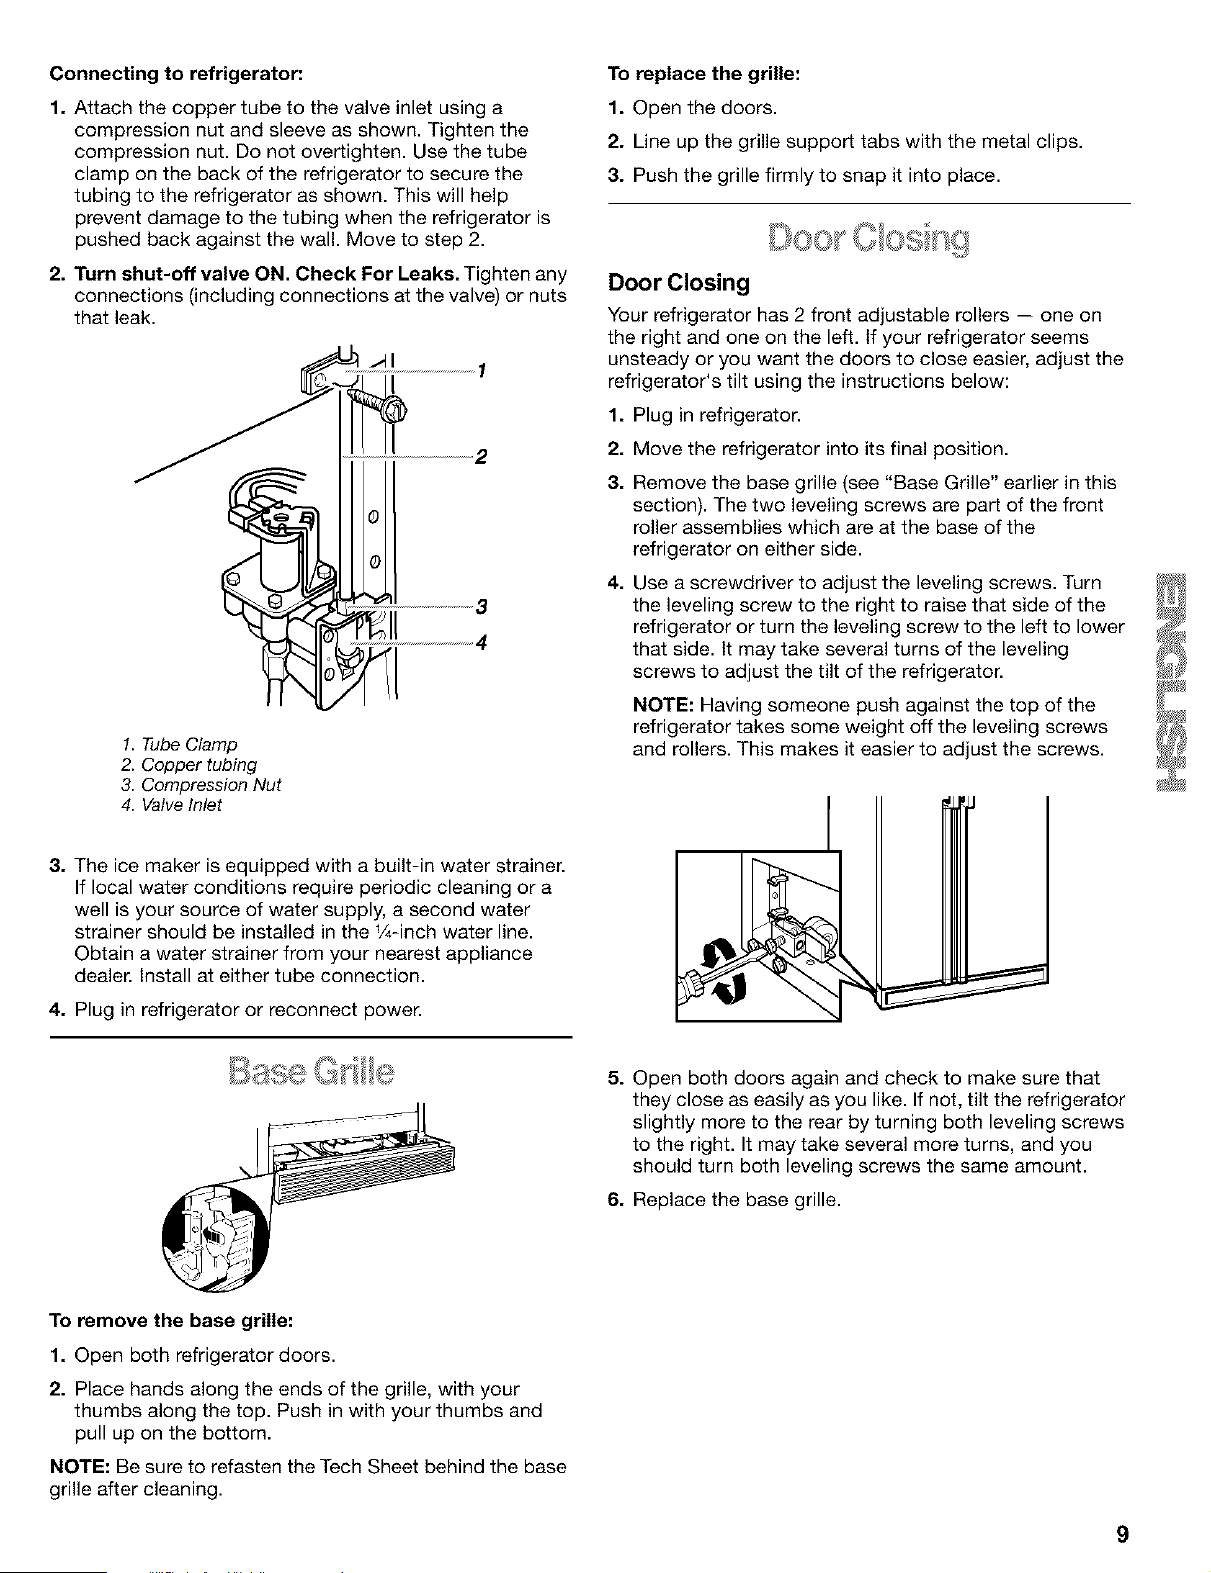
Connecting to refrigerator:
1. Attach the copper tube to the valve inlet using a
compression nut and sleeve as shown. Tighten the
compression nut. Do not overtighten. Use the tube
clamp on the back of the refrigerator to secure the
tubing to the refrigerator as shown. This will help
prevent damage to the tubing when the refrigerator is
pushed back against the wall. Move to step 2.
2. Turn shut-off valve ON. Check For Leaks. Tighten any
connections (including connections at the valve) or nuts
that leak.
1. Tube Clamp
2. Copper tubing
3. Compression Nut
4. Valve Inlet
3. The ice maker is equipped with a built-in water strainer.
If local water conditions require periodic cleaning or a
well is your source of water supply, a second water
strainer should be installed in the 1/4-inch water line.
Obtain a water strainer from your nearest appliance
dealer. Install at either tube connection.
4. Plug in refrigerator or reconnect power.
To replace the grille:
1. Open the doors.
2. Line up the grille support tabs with the metal clips.
3. Push the grille firmly to snap it into place.
Door Closing
Your refrigerator has 2 front adjustable rollers -- one on
the right and one on the left. tf your refrigerator seems
unsteady or you want the doors to close easier, adjust the
refrigerator's tilt using the instructions below:
1. Plug in refrigerator.
2. Move the refrigerator into its final position.
3. Remove the base grille (see "Base Grille" earlier in this
section). The two leveling screws are part of the front
roller assemblies which are at the base of the
refrigerator on either side.
4. Use a screwdriver to adjust the leveling screws. Turn
the leveling screw to the right to raise that side of the
refrigerator or turn the leveling screw to the left to lower
that side. It may take several turns of the leveling
screws to adjust the tilt of the refrigerator.
NOTE: Having someone push against the top of the
refrigerator takes some weight off the leveling screws
and rollers. This makes it easier to adjust the screws.
5. Open both doors again and check to make sure that
they close as easily as you like. If not, tilt the refrigerator
slightly more to the rear by turning both leveling screws
to the right. It may take several more turns, and you
should turn both leveling screws the same amount.
6. Replace the base grille.
To remove the base grille:
1. Open both refrigerator doors.
2. Place hands along the ends of the grille, with your
thumbs along the top. Push in with your thumbs and
pull up on the bottom.
NOTE: Be sure to refasten the Tech Sheet behind the base
grille after cleaning.
9
Loading ...
Loading ...
Loading ...