Loading ...
Loading ...
Loading ...
I
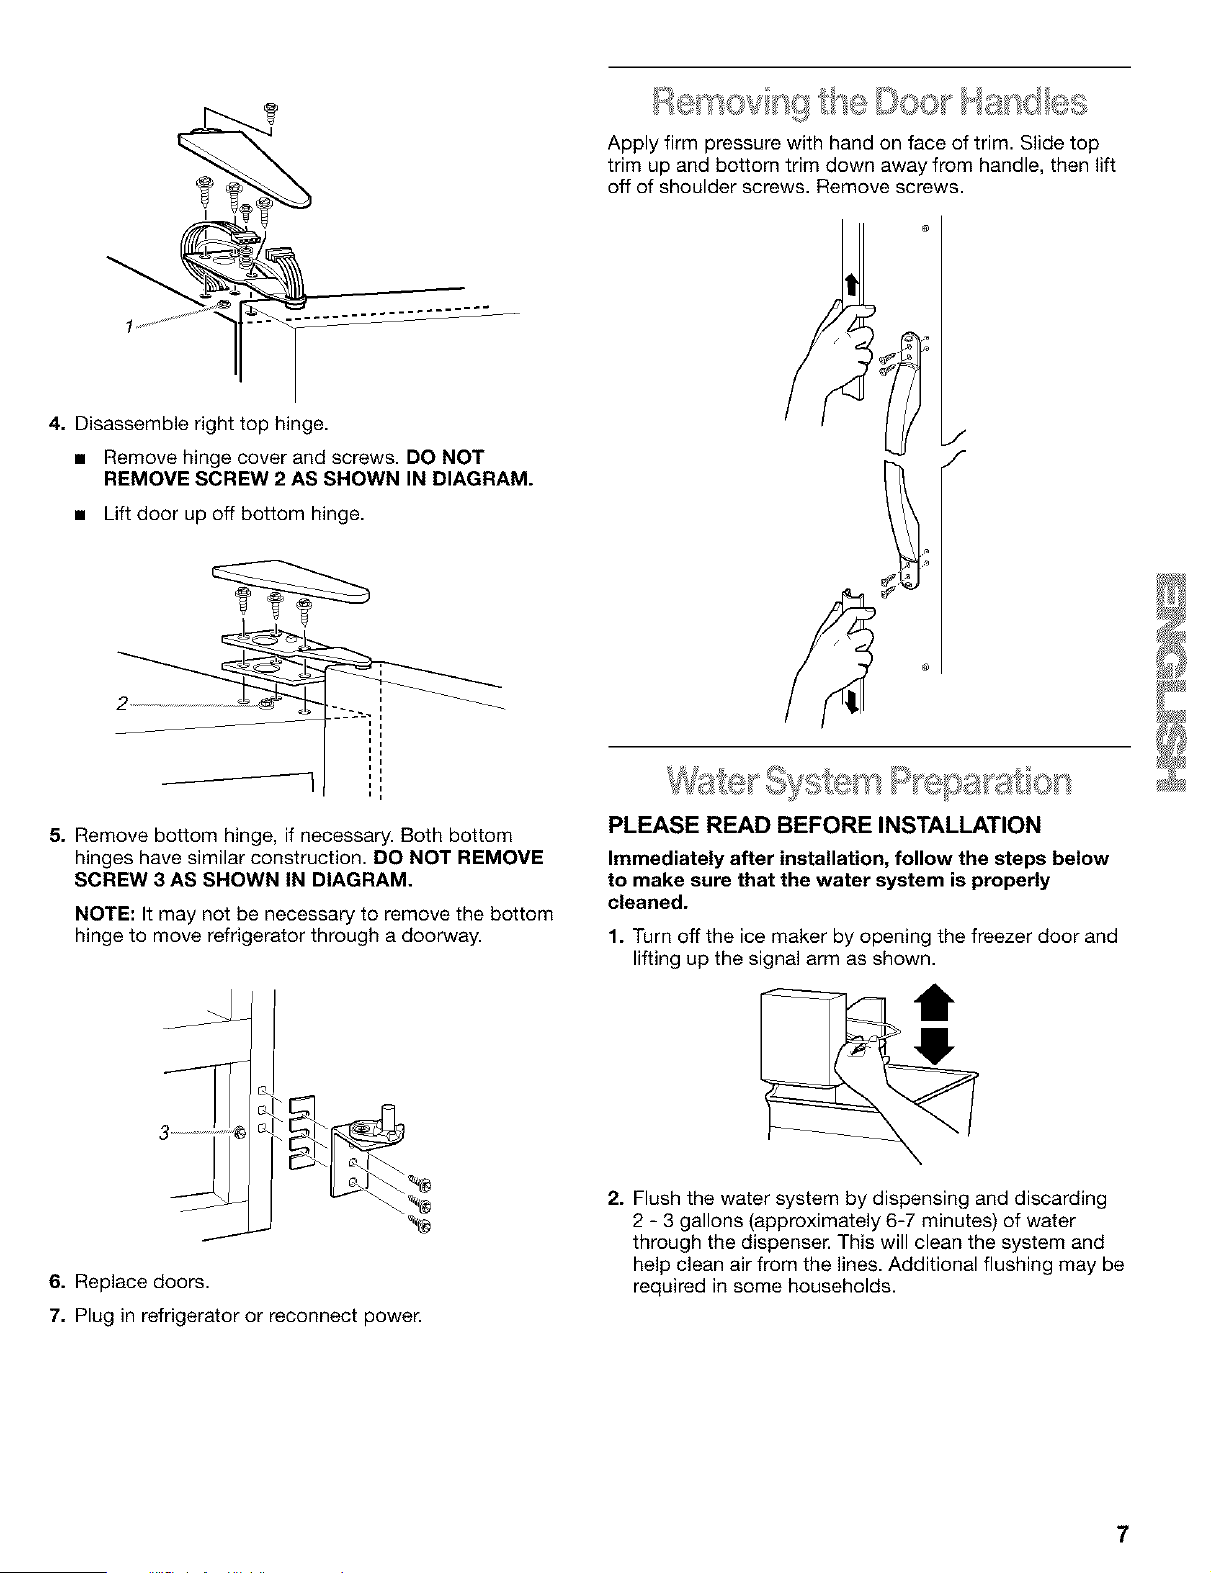
4. Disassemble right top hinge.
• Remove hinge cover and screws. DO NOT
REMOVE SCREW 2 AS SHOWN IN DIAGRAM.
• Lift door up off bottom hinge.
Apply firm pressure with hand on face of trim. Slide top
trim up and bottom trim down away from handle, then lift
off of shoulder screws. Remove screws.
j
f
i
i
I i
i
i
i
i
5. Remove bottom hinge, if necessary. Both bottom
hinges have similar construction. DO NOT REMOVE
SCREW 3 AS SHOWN IN DIAGRAM.
NOTE: It may not be necessary to remove the bottom
hinge to move refrigerator through a doorway.
J
6. Replace doors.
7. Plug in refrigerator or reconnect power.
PLEASE READ BEFORE INSTALLATION
Immediately after installation, follow the steps below
to make sure that the water system is properly
cleaned.
1. Turn off the ice maker by opening the freezer door and
lifting up the signal arm as shown.
2. Flush the water system by dispensing and discarding
2 - 3 gallons (approximately 6-7 minutes) of water
through the dispenser. This will clean the system and
help clean air from the lines. Additional flushing may be
required in some households.
7
Loading ...
Loading ...
Loading ...