QUICK START GUIDE
+ RECIPE BOOK
PRO OUTDOOR GRILL
WITH BUILT IN THERMOMETER
Please make sure to read the enclosed Ninja® Owner’s Guide prior to using your unit.
SCAN HERE for
quick tips and
how-to videos
YOUR GUIDE TO
MASTER GRILLING
LIKE A PRO
TABLE OF CONTENTS
What’s in the box ............................................................ 2
Get to know the control panel .................................. 3
Cleaning ............................................................................... 3
Woodfire Technology ................................................... 4
Ninja Woodfire™ Pellets .............................................. 6
Woodfire Flavor Scale.....................................................7
Smart Cook System ...................................................... 10
Master Grilling
Instructions ........................................................................14
Kickstarters .......................................................................16
Recipes .............................................................................. 20
BBQ Smoking
Instructions .......................................................................26
Kickstarters ......................................................................28
Recipes ............................................................................... 32
Beyond Grilling
Instructions for air crisping & more .......................36
Recipes ...............................................................................38
Sauces & Spice Rubs ....................................................42
Cooking Charts
Cook times & temps for your favorites ................ 44
Welcome to the Ninja Woodfire Pro Outdoor Grill.
From here, you’re just a few pages away from how-
to’s and recipes that’ll make for the ultimate outdoor
grilling and smoking experience, without the hassle.
Now open the hood and let’s get cooking.
BUILT-IN
THERMOMETER
SCAN HERE for
accessories
recipe videos,
tips & tricks
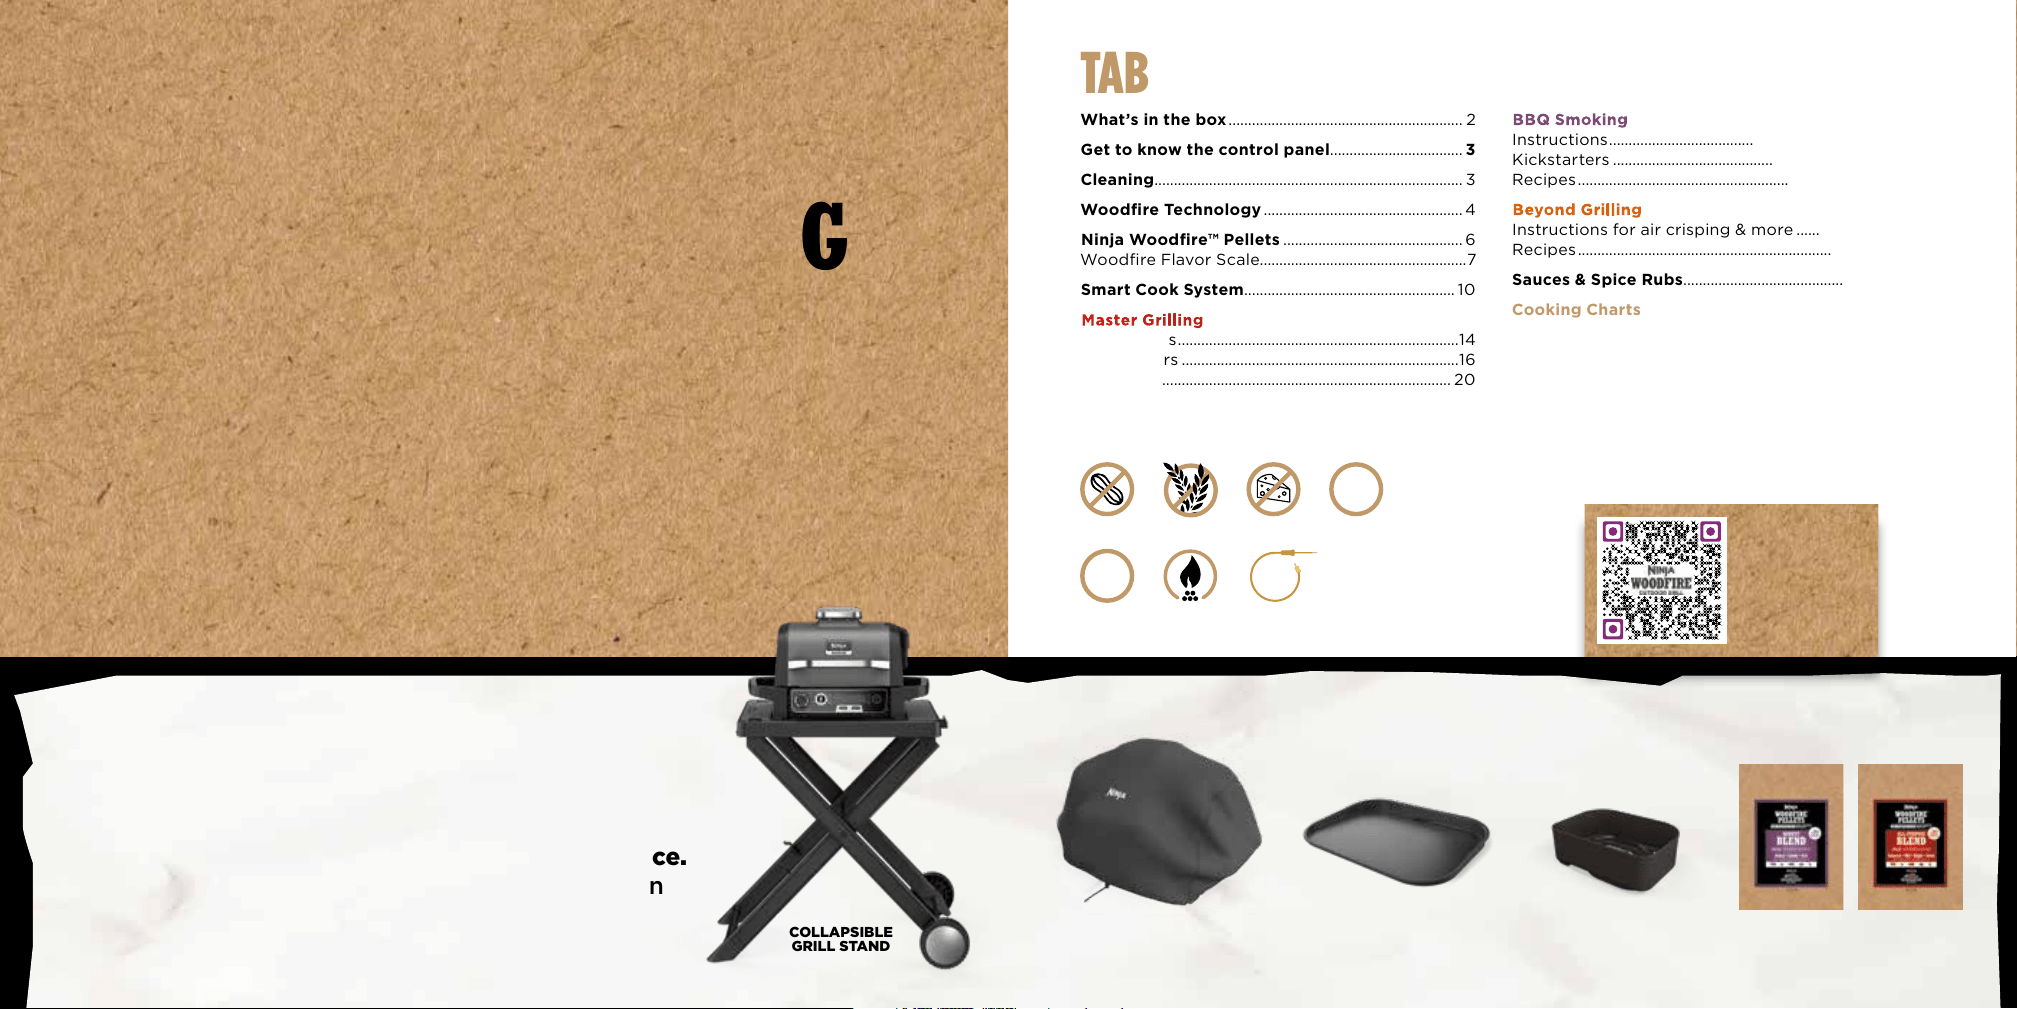
THE ULTIMATE SETUP
Getting the right stu makes all the dierence.
Gear up with accessories for your new grill on
NinjaKitchen.com/Accessories. FLAT TOP
GRIDDLE PLATE
COMBO
CRISPER
BASKET
PELLET
REFILLS
PREMIUM
GRILL COVER
COLLAPSIBLE
GRILL STAND
RECIPE KEY
DAIRY-FREEGLUTEN-FREE VEGAN
VG
VEGETARIAN
V
NUT-FREE
WOODFIRE
FLAVOR
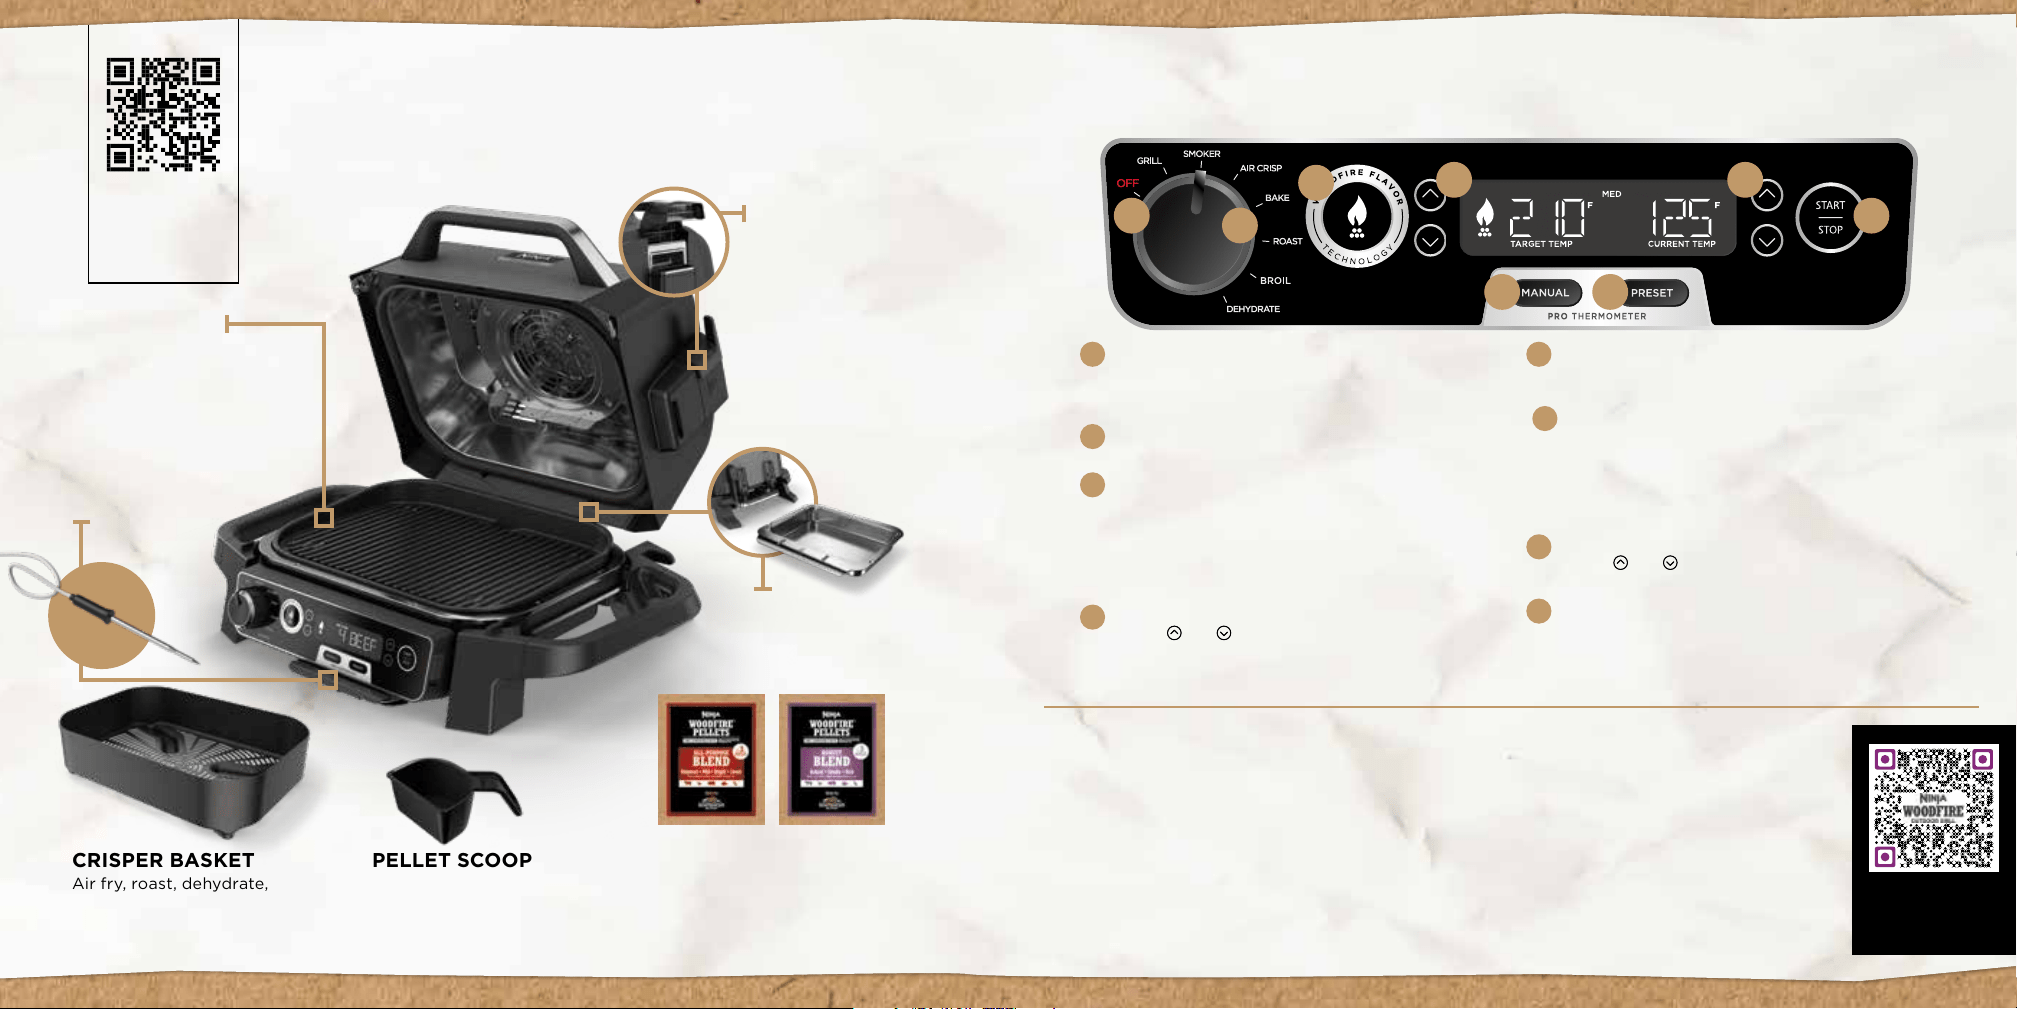
WHAT’S IN THE BOX
CRISPER BASKET
Air fry, roast, dehydrate,
and more. Fits up to 3lbs
of food.
GET TO KNOW THE CONTROL PANEL
NONSTICK
GRILL GRATE
Use with every cooking
function. fits up to 6
burgers, 30 hot dogs,
or 2 racks of ribs.
REMOVABLE
WOODFIRE
SMOKE BOX
Comes fully installed
in the unit. Always
insert it into place
before adding pellets.
GREASE TRAY
Always insert grease
tray before every
cooking session.
PELLET SCOOP
Designed to measure the
perfect amount of pellets
for one smoke session.
BACK OF BACK OF
UNITUNIT
SCAN HERE for
how-to videos
on setting up
your grill
THERMOMETER
Continuously monitors
the internal temperature
of food for the perfect
doneness.
NINJA WOODFIRE PELLETS
Each sample bag provides three smoke
sessions. Open the pouch, fill the pellet
scoop, and pour pellets into the smoke
box. Give both of our signature blends
a try with the included starter packs.
AB
CD
E F
G
H
A OFF
When unit is not in use, ensure dial is in OFF position.
Rotate dial clockwise to select cooking function.
NOTE: when display is illuminated, unit is on.
B
COOKING FUNCTIONS
Grill, Smoker, Air Crisp, Bake, Roast, Broil, Dehydrate.
C WOODFIRE FLAVOR TECHNOLOGY
Press after selecting your cooking function to add
woodfire flavor. Intended for use with the Grill, Air Crisp,
Bake, Roast, and Dehydrate functions. When pressed,
flame icon will illuminate on the display screen.
NOTE: Woodfire Flavor Technology cannot be used with
the Broil function.
D
TEMP
Use the and buttons to the left of the display
screen to adjust your temperature.
E
MANUAL
Switches the display screen so you can manually set
the target temperature for the thermometer.
F PRESET
Switches the display screen so you can select a
preset target temperature for the thermometer based
on food load and desired results. Use the arrows to
the right of the display to select protein type and
the arrows to the left of the display to select desired
doneness.
G
TIME
Use the and buttons to the right of the display
screen to adjust your time.
H START|STOP
Press to start or stop the current cook function, or
press and hold for 4 seconds to skip preheat.
Remove non-stick grill
grate and non-stick crisper
basket (if used) after each
use and hand-wash with
warm, soapy water.
STEP 1
Remove smoke box and
safely discard all cooled
contents after each use.
STEP 2
Carefully remove cooled
grease tray from back of
unit and safely discard
grease contents after each
use. Hand-wash grease
tray in warm, soapy water.
STEP 3
CLEANING INSTRUCTIONS
Allow unit and accessories to cool before moving
unit and removing any accessories.
SCAN HERE for
more cleaning
tips & tricks
PREHEAT FOR BETTER RESULTS
For best grilling results, let the grill fully preheat

The combination of our high-power convection fan,
Integrated Smoke Box, and Ninja Woodfire pellets work
together to create rich, fully developed woodfire flavor.
Powered by electricity, flavored by real
burning wood pellets. Add rich, fully developed
smokiness to any dish you make.
WOODFIRE
TECHNOLOGY
100% REAL WOODFIRE FLAVOR
EXPERIMENT WITH WOODFIRE FLAVORS
INTEGRATED
SMOKER BOX
The self-igniting smoke box
needs only 1/2 cup of pellets
to give your food authentic
woodfire flavor.
CONVECTION
FAN
Rapidly circulates air and
woodfire smoke around food
for fast, even cooking and
smoke absorption.
BURNS REAL
WOOD PELLETS
With the ideal size and
composition of premium
hardwoods, Ninja Woodfire
Pellets are engineered to be
used for flavor, not fuel.
4 Woodfire Technology
7
6 Woodfire Pellets
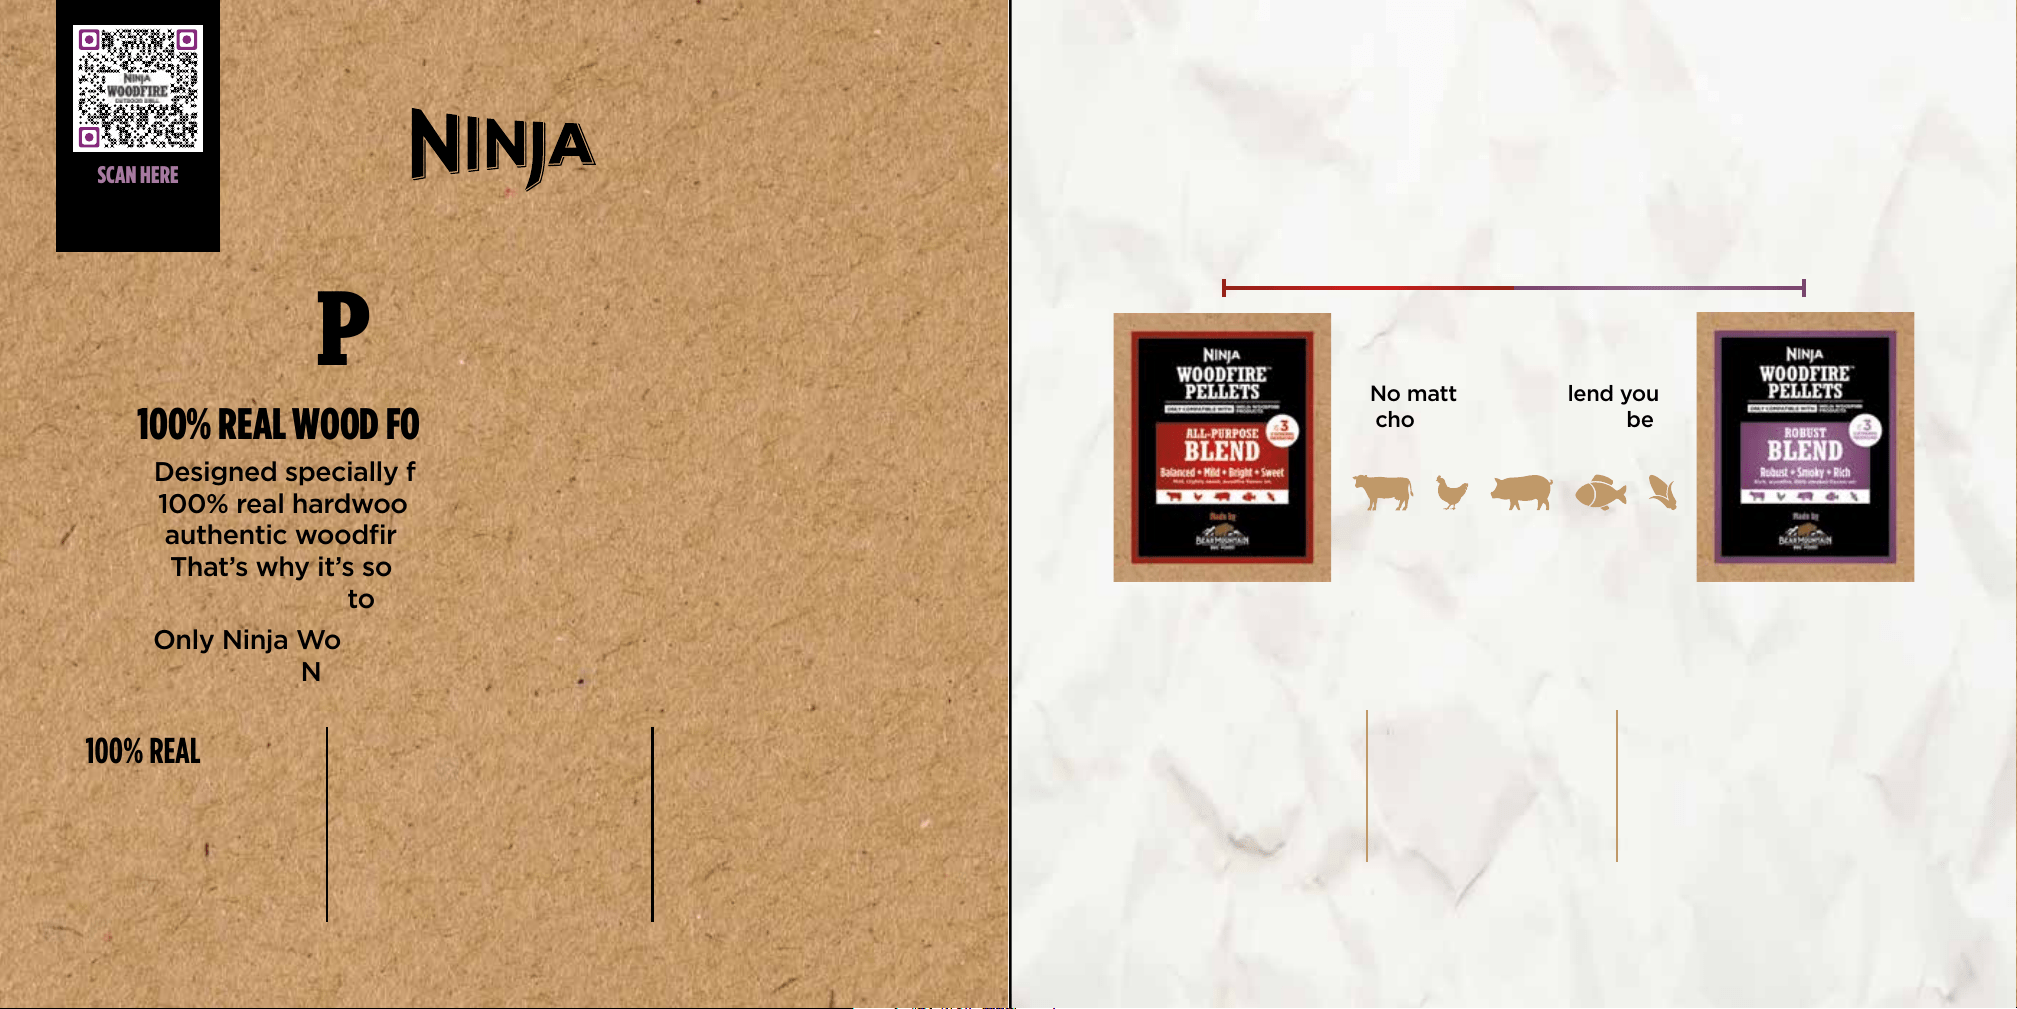
WOODFIRE™
PELLETS
100% REAL WOOD FOR 100% REAL WOODFIRE FLAVORS
Designed specially for Ninja Woodfire products, our
100% real hardwood pellets are only used to create
authentic woodfire flavor and are not used as fuel.
That’s why it’s so easy to add real woodfire flavor
to anything you make.
Only Ninja Woodfire Pellets are compatible with the
Ninja Woodfire Outdoor Grill.
100% REAL WOOD-
NO FILLERS.
Each pellet is a
combination of premium
hardwoods at the perfect
ratio for optimal flavor.
PREMIUM QUALITY
FOR BEST SMOKE
Our wood pellets are high
density and low moisture—
the perfect combo to create
professional-grade smoke.
CONSISTENT
FLAVOR
The size and shape of
our pellets provide better
air flow and consistent
smoky flavor.
SCAN HERE
to buy more
Ninja Woodfire™
Pellets
WOODFIRE FLAVOR SCALE
TIPS & TRICKS
Our Ninja Woodfire
Pellet Scoop comes
included so you get
the perfect amount
every time.
Don’t worry about
your pellet stash. You
only need 1 full scoop
of pellets for each
session to get that
smoky finish.
No need to refuel
while cooking, just
throw 1 full scoop of
pellets into the smoke
box and the grill does
the rest.
No matter which blend you
choose, our pellets can be
used with anything you make:
ALL-PURPOSE BLEND
FLAVOR: Balanced, mild, bright, sweet
COMPOSITION: Cherry, maple, oak
ROBUST BLEND
FLAVOR: Rich, classic BBQ
COMPOSITION: Hickory,
cherry, maple, oak
MILD ROBUST
Our recipes are designed to be used exclusively
with Ninja Woodfire Pellets.
Use ash in your garden
Wood ash is an excellent source of nutrients for plants. To use in your garden,
lightly scatter on the soil, or add it to your existing compost.
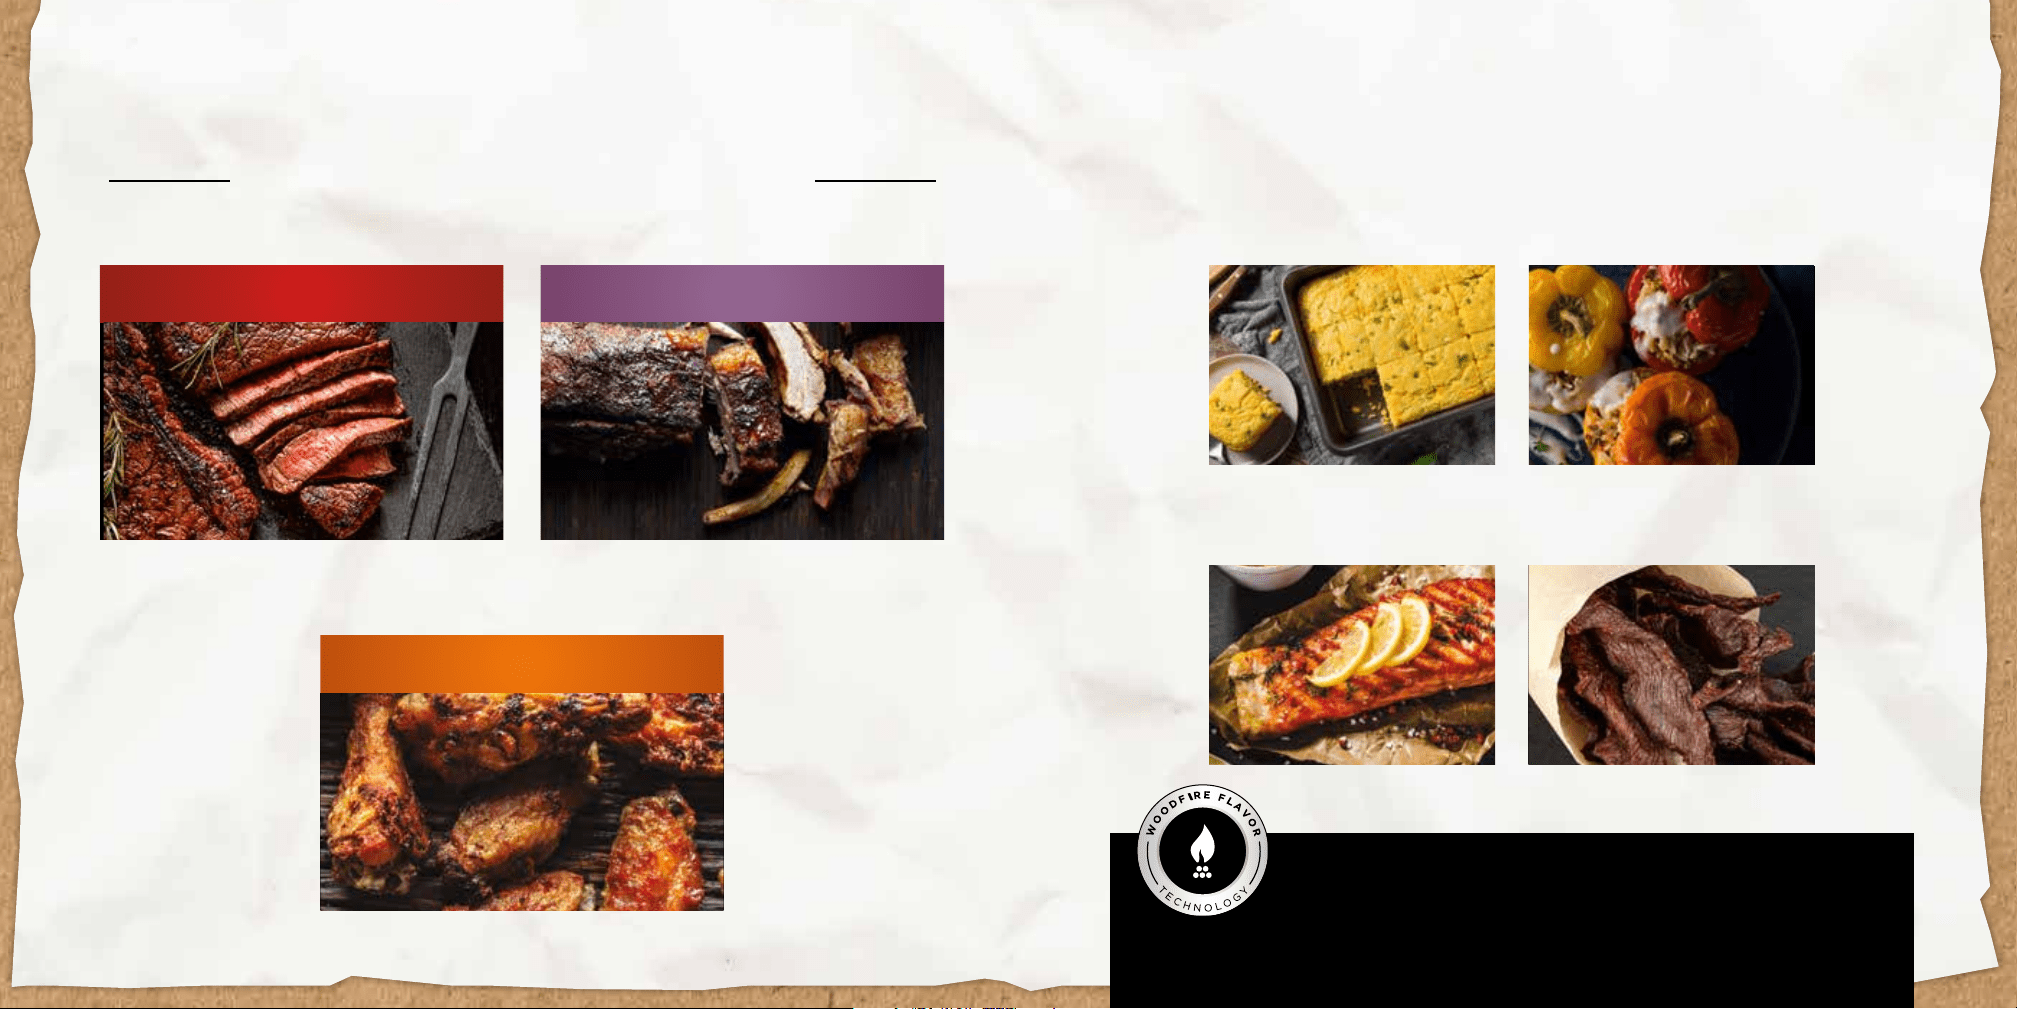
BEYOND GRILLING
From desserts to sides, there’s so much more to
try with Bake, Roast, Broil, and Dehydrate.
ROASTBAKE
Cornbread, biscuits, and
desserts
Roasted meats
and veggies
BROIL DEHYDRATE
Top-down heat
for a quick crisp
Dehydrated fruit
or jerky
GRILL, SMOKE, AND AIR FRY
WITH NATURAL WOODFIRE FLAVORS
OUTDOOR AIR FRYER
Guilt-free fried favorites, now outdoors
Pages 44–55
MASTER GRILL
High-heat searing and char-grilling for
steaks, burgers and more
Pages 14–29
FOOL PROOF BBQ SMOKER
Low & slow smoking for BBQ classics
like ribs and pulled pork
Pages 30–43
Just add pellets, select a cooking
function, and press the WOODFIRE
FLAVOR TECHNOLOGY button.
The grill will do the rest.
ADD SMOKE
TO ANYTHING
NO GUESSWORK. PERFECT DONENESS.
11 10 For complete thermometer instructions, see your Ninja® Owner’s Guide. Questions? ninjakitchen.com
BUILT-IN THERMOMETER Once you’ve selected your cooking function, cooking
temperature, protein type, and desired level of doneness, insert
the Built-In Thermometer into the thickest part of your protein
while the grill is preheating.
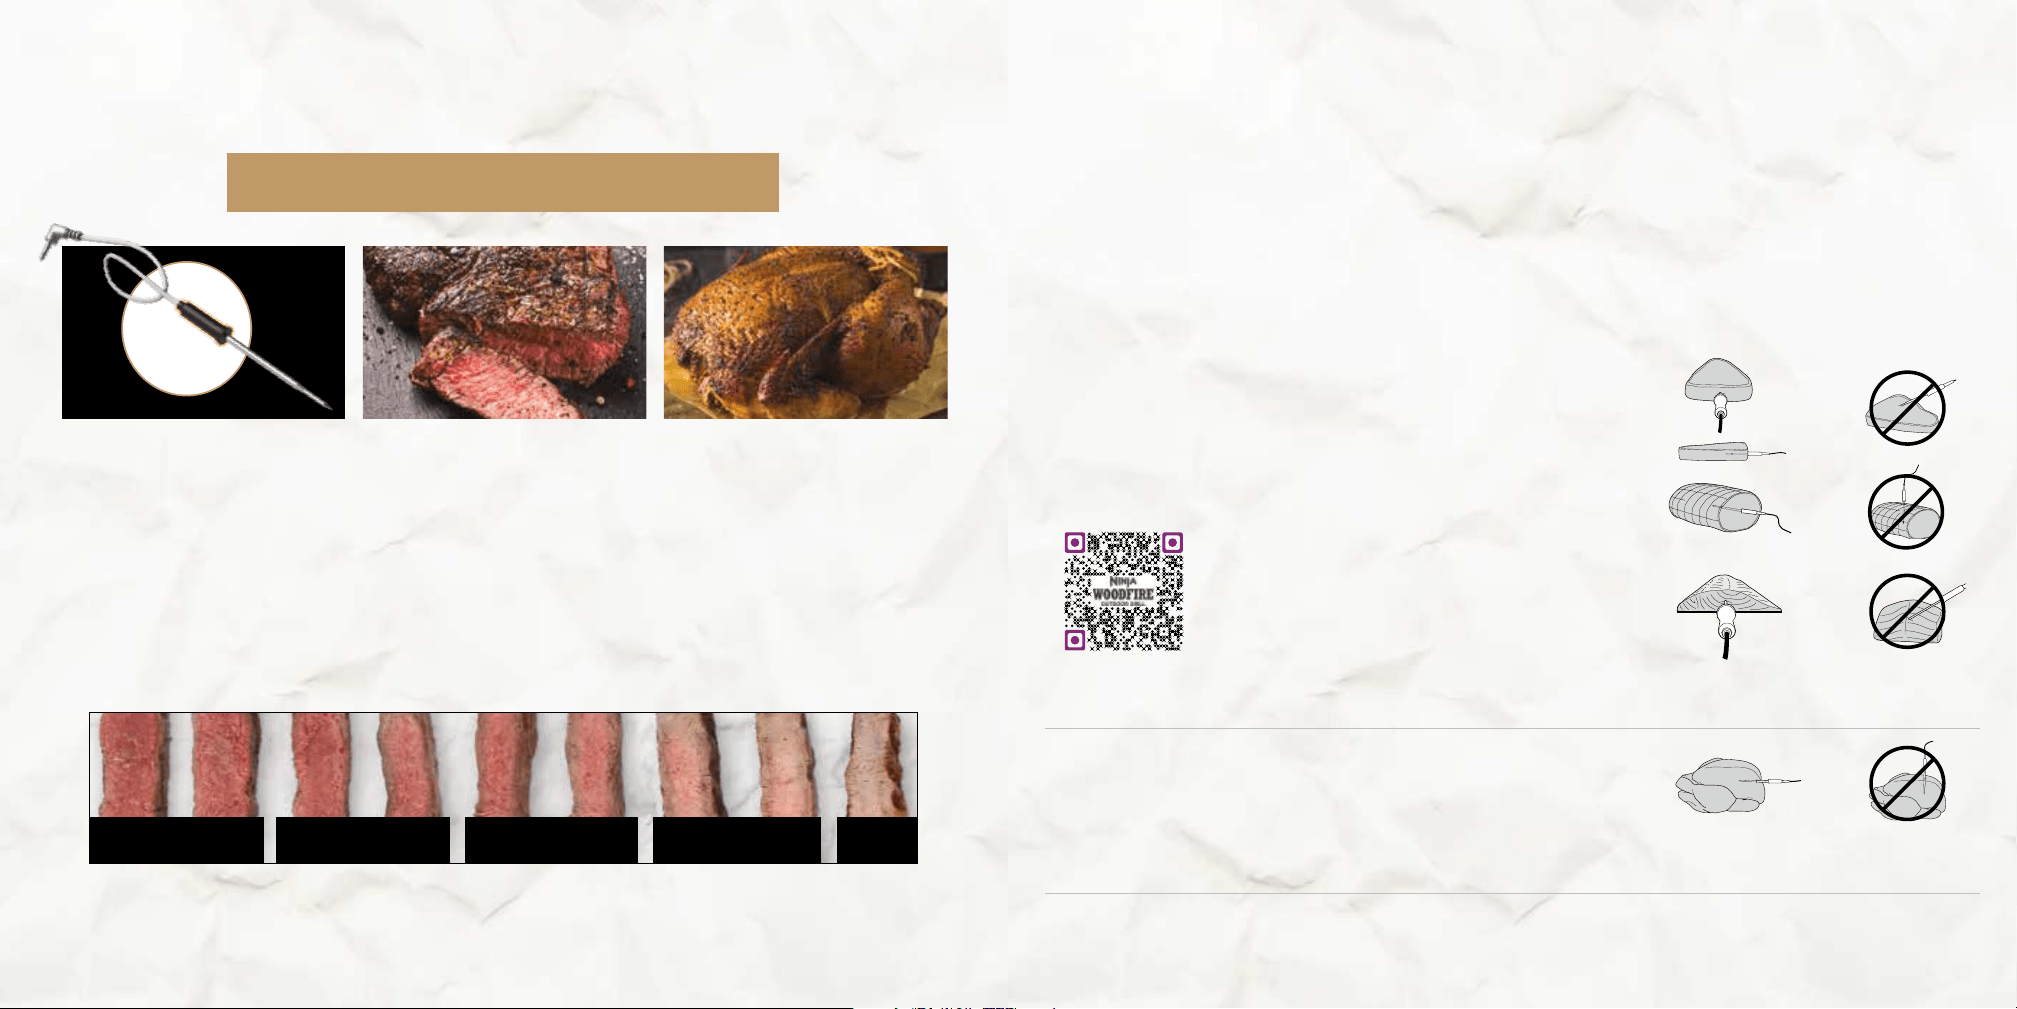
HOW TO PLACE THE THERMOMETER
FOOD TYPE PLACEMENT CORRECT INCORRECT
Steaks
Pork chops
Lamb chops
Chicken breasts
Burgers
Tenderloins
Fish fillets
• Insert thermometer horizontally into the
center of the thickest part of the meat.
• Make sure the tip of the thermometer is
inserted straight into the center of the meat,
not angled toward the bottom or top of it.
• Make sure the thermometer is close to
(but not touching) the bone and away
from any fat or gristle.
NOTE: The thickest part of the fillet may
not be the center. It is important that the
end of the thermometer hits the thickest
part so desired results are achieved.
• Insert thermometer horizontally into the
thickest part of the breast, parallel to, but
not touching, the bone.
• Make sure the tip reaches the center of the
thickest part of the breast and doesn’t go all
the way through the breast into the cavity.
Whole chicken
DO NOT use the thermometer with frozen protein or for cuts of meat thinner than 1 inch.
NINJA® BEEF DONENESS GUIDE
Everyone's idea of doneness diers. This guide shows you what
you can expect from each of our preset beef doneness settings.
RARE WELLMEDIUM WELL
MEDIUM
MEDIUM RARE
1 2 3 5 7
4 6 8 9
NOTE: Beef Doneness Guide is based on New York Strip Steak.
Using dierent cuts of steak and dierent sizes can alter the outcome.
PERFECT DONENESS
Built-in thermometer continuously
monitors temp. The grill
automatically shuts o when
food is perfectly done.
FOOLPROOF BBQ SMOKING
Get perfect BBQ results every time.
No need to constantly check your
food. The grill will let you know
when your food is ready.
NO GUESSWORK
Select food type and doneness, then
insert built-in thermometer.
SCAN HERE for helpful
videos on thermometer
interaction
• Remove the storage compartment
from the front of the unit,
below the control panel.
• Unwind cord and remove
thermometer.
• Plug thermometer into jack on the
right side of the control panel.
If adding woodfire flavor,
open provided bag of
Ninja Woodfire Pellets.
Using the pellet scoop, reach
scoop into bag to fill scoop to
the top, level o to avoid spilling.
While holding the smoke box
lid open, pour pellets into the
smoke box until filled to the top.
Then, close the smoke box lid.
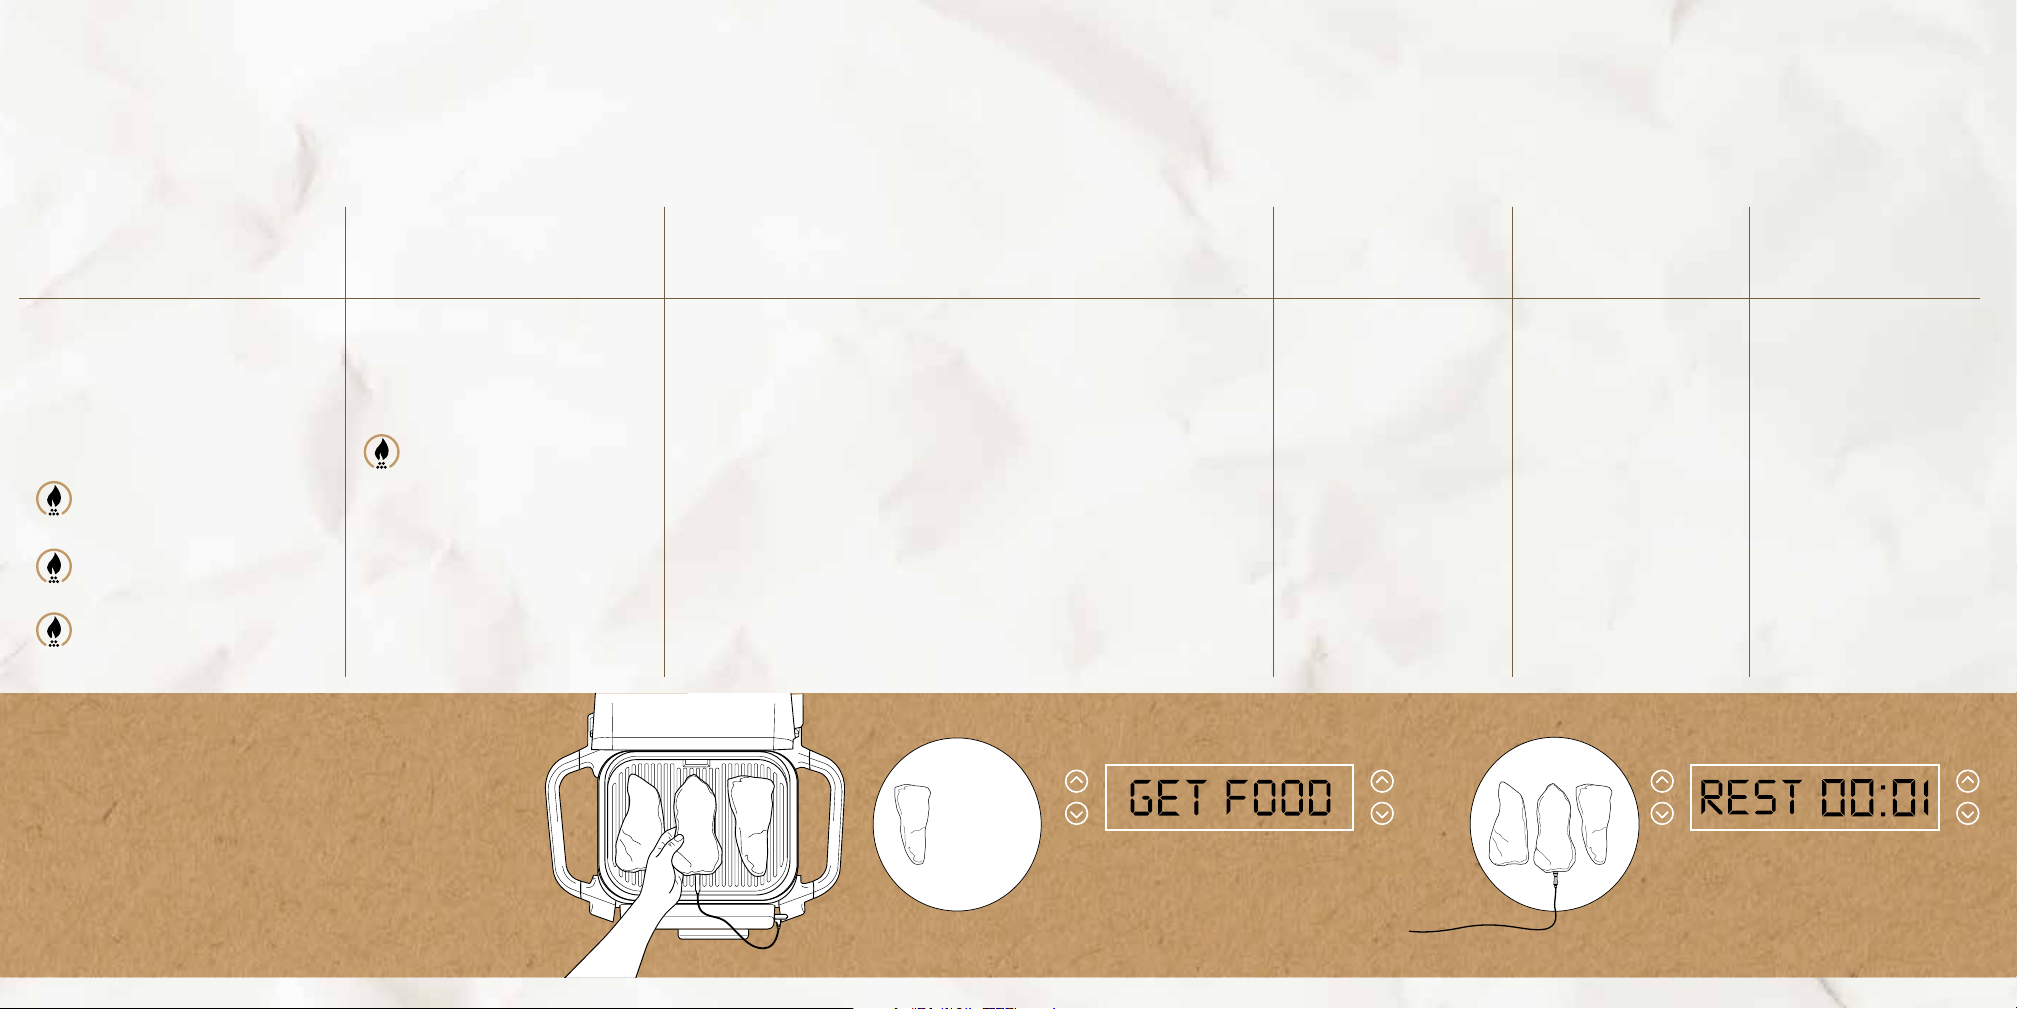
• Once unit has
preheated, “ADD
FOOD” will appear
on the screen.
• Add the food with
thermometer grip fully
inside the unit, and
close the hood over
cord to begin cooking
NOTE: DO NOT close hood on
thermometer grip, as this
will prop open the hood and
create inaccurate readings.
• Turn the unit on by rotating the
dial clockwise from the OFF
position to select GRILL,
SMOKER, AIR CRISP, BAKE,
ROAST, or BROIL.
If you added pellets, press
the WOODFIRE FLAVOR
TECHNOLOGY button.
• Use the left arrows to select
desired cook temperature.
(setting a time is not necessary
when using the thermometer).
• The progress bar at
the top of the display
will track doneness.
• Flashing doneness
indicates progression
to that doneness.
• When using Roast
and Grill, the unit will
beep and display FLIP.
Flipping is optional
but recommended.
STEP 1
SET UP STEP 5
ADD FOOD
STEP 2
SELECT COOK FUNCTION STEP 6
TRACK PROGRESS
• Press the PRESET button.
• Use the right arrows to
choose the desired protein.
• Use the left arrows to choose
the desired doneness.
NOTE: If selecting the MANUAL button,
use the internal cook temperatures
recommended in the Owner’s Guide.
• Unit will beep and show
“GET FOOD”, indicating
it’s time to carry-over
cook and rest food on
a plate for 3–5 minutes.
• Carry-over cooking
is when food retains
heat and continues
to cook after being
removed from the
source of heat.
STEP 3
PROGRAM THERMOMETER STEP 7
CARRY-OVER & REST
• Press the START/STOP
button to begin
preheating.
NOTE: While preheating is
strongly recommended, you
can skip it by pressing and
holding the START/STOP
button for 4 seconds.
• Wait until unit is fully
preheated before
adding food.
• Insert thermometer
in protein using the
“How to Place the
Thermometer” guide
on the previous page.
NOTE: There is no preheat
for the Smoker function.
Add your food before
pressing START.
STEP 4
PLACE THERMOMETER
The Built-In Thermometer continuously monitors doneness throughout the
cooking process, unlike a traditional instant-read thermometer.
COOKING WITH THE
BUILT-IN THERMOMETER
DID YOU KNOW?
Meat keeps cooking when you
remove it from the grill.
To prevent overcooking, unit will beep
right before food reaches desired doneness,
taking carry-over cooking into account.
REMOVING YOUR FOOD
Transfer meat to a plate using
silicone-tipped tongs with the
thermometer still inserted.
WARNING: Thermometer
and grip will be hot.
NOTE: Skipping carry-over cooking and cutting into food
right away may result in a rarer level of doneness.
CARRY-OVER COOKING & RESTING
Allow protein to carry-over cook
and rest for 3–5 minutes. “REST”
will appear and timer will count up.

MASTER
GRILLING
OUTDOOR GRILLING MADE EASY
Our grill makes it easier than ever to get the same
char as a propane gas grill. And thanks to Woodfire
Technology, you can create 100% real woodfire flavors
at the same time—and without the hassle.
MASTER GRILLING
• Place grill on a flat,
level surface.
• Open the hood and install
the grill grate by positioning
it flat on top of the heating
element so it sits into place.
• Install the grease tray
by sliding it into place at
the back of the grill.
• Once grill has preheated,
“ADD FOOD” will appear
on the screen.
• Open the hood to add
ingredients to the grill.
• Close the hood. The grill will
begin cooking and the timer
will begin to count down.
• When cook time is complete,
the grill will beep, and “END”
will appear on the display.
• Remove food from grill,
then enjoy!
STEP 1
SET UP
STEP 4
ADD FOOD & COOK STEP 5
REMOVE FOOD & SERVE
• Open provided bag of pellets.
• Using the pellet scoop, reach
scoop into bag to fill scoop
to the top. Level o to avoid
spilling.
NOTE: The scoop is designed
to measure pellets needed
for one smoke session.
• While holding the smoke
box lid open, pour pellets
into the smoke box until
filled to the top. Then,
close the smoke box lid.
STEP 2
ADD PELLETS STEP 3
PROGRAM & PREHEAT
• Turn the unit on by rotating
the dial clockwise from the
OFF position to select GRILL.
If you added
pellets, press the
WOODFIRE FLAVOR
TECHNOLOGY button.
• Use the and buttons to
the right of the display screen
to adjust the cook time.
• Use the and buttons to
the left of the display screen
to adjust the temperature.
• Press START to begin
preheating. If using WOODFIRE
FLAVOR TECHNOLOGY, the
pellets will go through and
ignition cycle (IGN), then the
grill will begin preheating (PRE).
For easier, faster clean
up, line the grease
tray with tinfoil.
TIP
DON'T WANT SMOKE?
Skip these steps
14 Master Grilling
SCAN HERE
for quick
tips and
how-to
videos
Smoking ignition times will
take an additional 5–7 minutes.
Keep ingredients cold before
putting them on the grill
For optimal smoke flavor,
minimize the time the lid is open
when adding or flipping food.
For back-to-back smoking
sessions, re-fill the smoke box
when half the pellets have burned.
DO NOT re-ignite pellets. DO NOT
re-fill more than 1 or 2 times.
GRILL-MASTER’S NOTES
Preheat times by temp:
HI
10–12 mins
MED
8–10 mins
LO
7–9 mins
PREHEAT FOR BETTER RESULTS
Let the Grill fully preheat before adding
food or this may lead to overcooking and
a longer preheat time. While preheating
is strongly recommended, you can skip
it by pressing and holding the START/STOP
button for 4 seconds.

16 17
Questions? ninjakitchen.comKickstarter Recipe
DIRECTIONS
Plug thermometer
into unit. To install
the grill grate,
position it flat on
top of the heating
element and gently
press down until it
sits into place.
While holding the
smoke box lid open,
use the pellet scoop
to pour pellets into
the smoke box until
filled to the top.
Then close the
smoke box lid.
Turn dial to GRILL.
Press WOODFIRE
FLAVOR. Set
temperature to
HI, then select
PRESET. To set the
thermometer, use
the right arrows to
select BEEF, and the
left arrows to select
desired doneness.
Select START/STOP
to begin preheating
(preheating will
take approx. 15–19
minutes).
When unit is
preheating, brush
each steak on all
sides with ½
tablespoon oil,
then season with
salt and pepper.
Insert thermometer
horizontally into the
center of the thickest
part of the largest
steak. Toss asparagus
with remaining oil,
then season with salt
and pepper.
When unit beeps
and the display reads
FLIP, open hood, and
use silicone-tipped
tongs to flip the
steaks. Close hood to
continue cooking.
When unit beeps to
signal the steaks are
almost done cooking,
open hood, transfer
steaks to a cutting
board, and let rest for
5 minutes.
While steaks are
resting, place
asparagus on grill
grate and close hood.
Turn dial to GRILL,
set temperature to
HI, and set time to
8 minutes. Select
START/STOP to
begin cooking.
When cooking and
resting are complete,
open hood and
remove asparagus
from grill. Slice
steaks and serve with
asparagus.
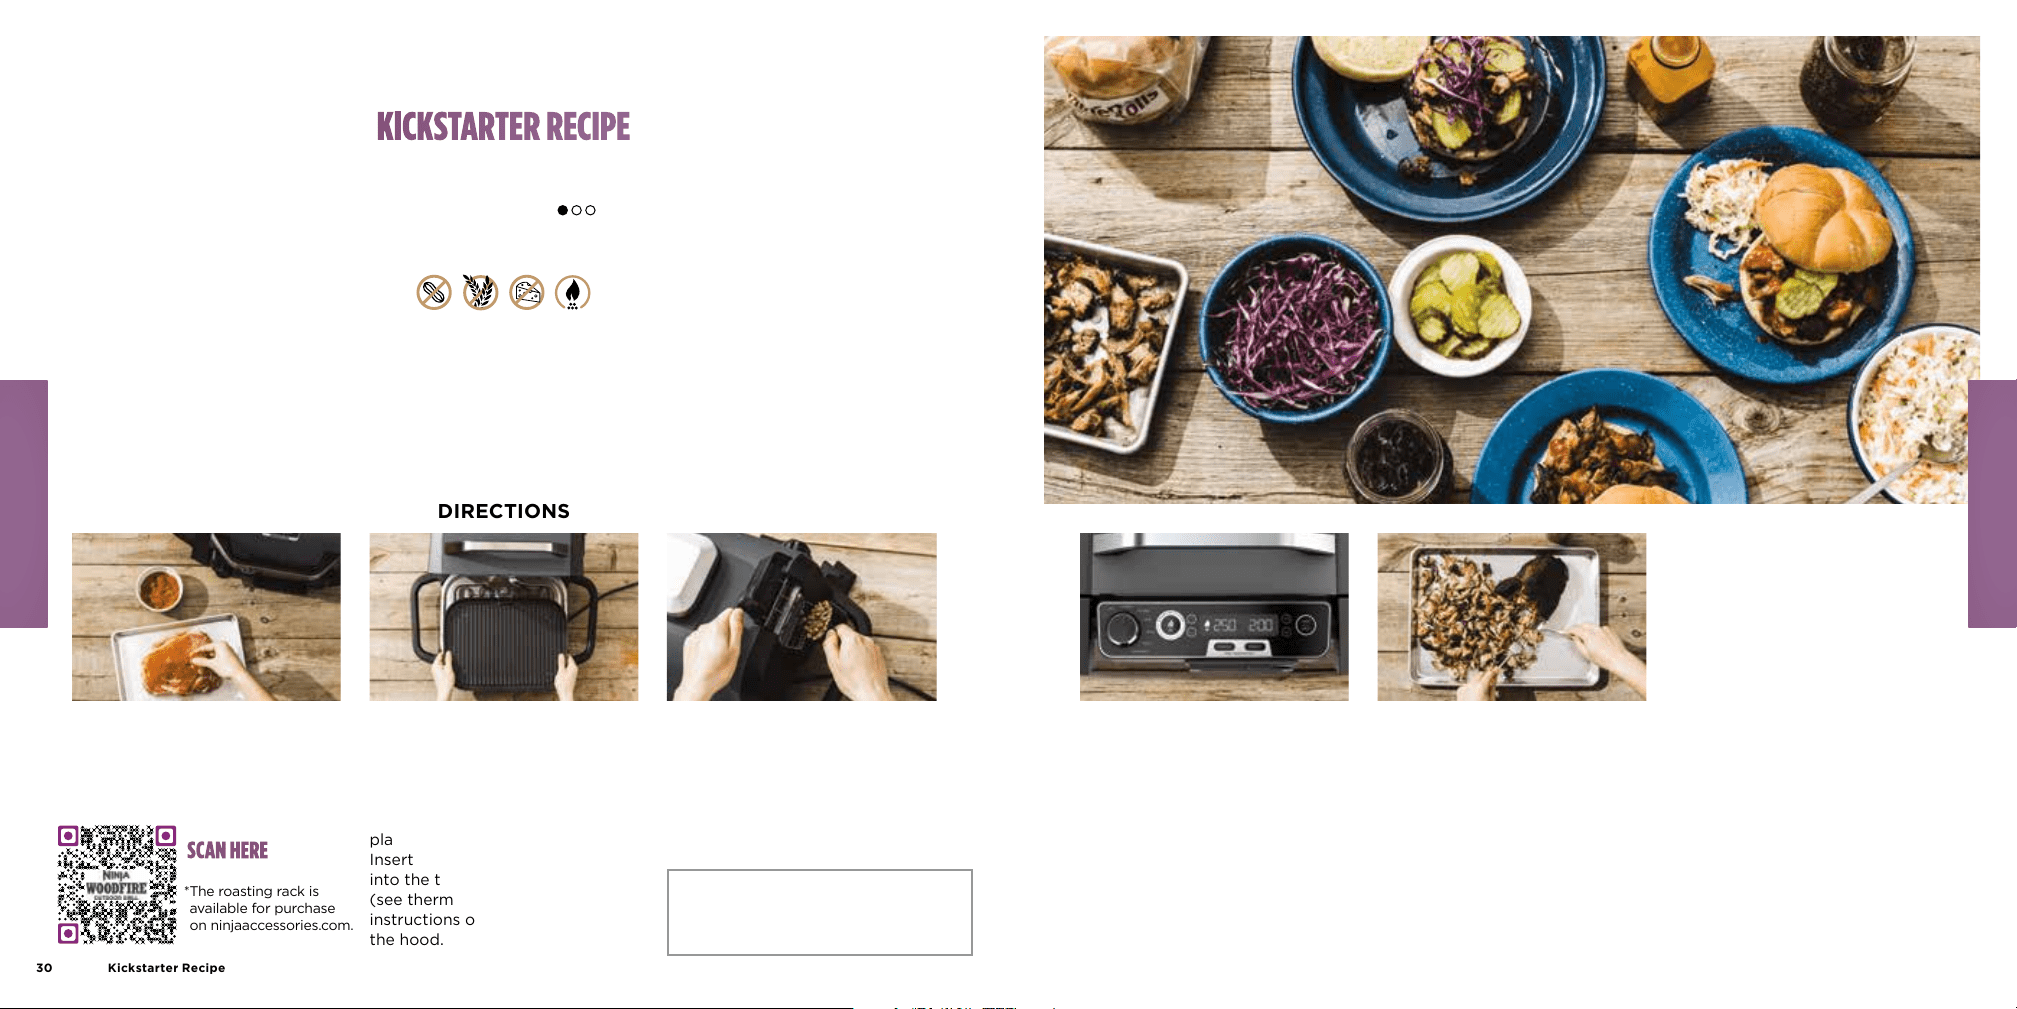
KICKSTARTER RECIPE
NY STRIP STEAK WITH
GRILLED ASPARAGUS
BEGINNER RECIPE
PREP: 5 MINUTES | PREHEAT: APPROX. 15–19 MINUTES | TOTAL COOK TIME: APPROX. 20 MINUTES | MAKES: 4 SERVINGS
When unit beeps
to signify it has
preheated and ADD
FOOD is displayed,
open hood and
place steaks on
grill grate, gently
pressing down
to maximize grill
marks. Close hood
over thermometer
cord to begin
cooking.
MASTER GRILLING
MASTER GRILLING
INGREDIENTS
4 uncooked New York strip steaks
(10–12 ounces each)
3 tablespoons canola oil, divided
2 bunches (2 pounds) asparagus, trimmed
Kosher salt, as desired
Ground black pepper, as desired
(see thermometer placement
instructions on page 9).
TIP
See thermometer placement
instructions on page 9.
SCAN HERE for
a step-by-step
video
* Choose pellets
based on flavor,
refer to page 7 for
more info on pellet
flavor profiles.
18 19
Questions? ninjakitchen.comKickstarter Recipe
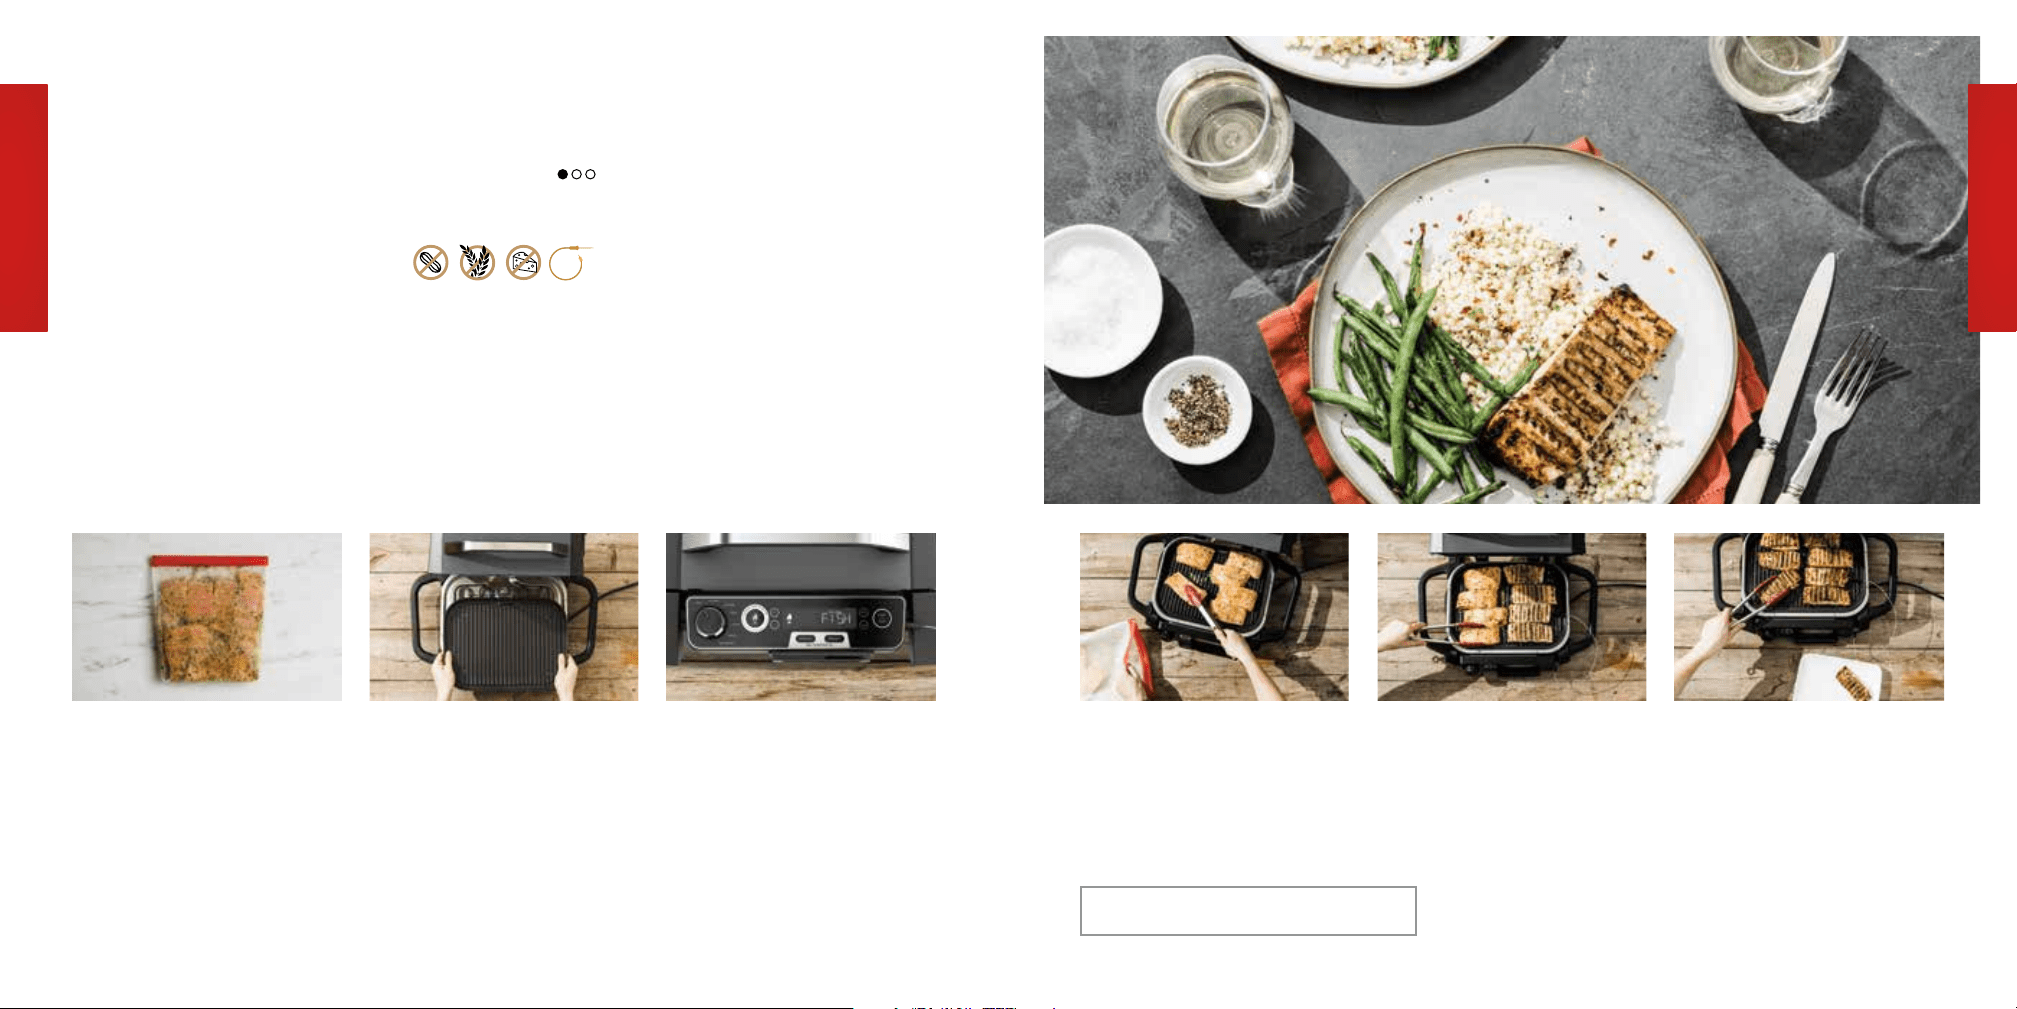
DIRECTIONS
In a small bowl, prepare marinade
by whisking together all ingredients
except the salmon. Then place the
marinade and salmon in a large
resealable plastic bag. Massage
the outside of the bag to work
the marinade over all parts of
the salmon, then place the bag in
the refrigerator for 30 minutes to
marinate.
Plug thermometer into unit. To
install the grill grate, position it
flat on top of the heating element
and gently press down until it sits
into place, then close the hood.
Turn dial to GRILL, set
temperature to HI, then select
PRESET. To set the thermometer,
use the right arrows to select
FISH, and the left arrows to
select desired doneness. Select
START/STOP to begin preheating
(preheating will take approx.
10–12 minutes). While unit is
preheating, insert thermometer
horizontally into the center of the
thickest part of the largest fillet.
When the unit beeps to signify
it is preheated and ADD FOOD
is displayed, open the hood and
spray the grill grate with cooking
spray. Add the salmon to the grill,
then close hood to cook.
When the unit displays FLIP, open
hood and flip the salmon. Close
hood to continue cooking.
When cooking is complete, open
hood, remove salmon from grill
and serve with your favorite side
dish.
KICKSTARTER RECIPE
LEMON HERB GRILLED SALMON
BEGINNER RECIPE
PREP: 10 MINUTES | MARINATE: 30 MINUTES | PREHEAT: APPROX. 10–12 MINUTES
TOTAL COOK TIME: 10 MINUTES | MAKES: 8 SERVINGS
INGREDIENTS
2 tablespoons minced garlic
2 tablespoons fresh rosemary, chopped
2 tablespoons fresh thyme, chopped
3 tablespoons fresh parsley, chopped
1 ½ tablespoons Dijon mustard
¾ cup olive oil
2 tablespoons honey
Zest and juice of 2 lemons
Kosher salt, as desired
Ground black pepper, as desired
8 salmon fillets (7–8 ounces each),
deboned, skin removed
Nonstick cooking spray
MASTER GRILLING
MASTER GRILLING
TIP
See thermometer placement
instructions on page 9.

DIRECTIONS
1 In a large bowl, toss the shrimp with oil and
Jamaican jerk seasoning until evenly coated.
2 To install the grill grate, position it flat on top of
the heating element and gently press down until
it sits into place, then close the hood. Turn the
dial to select GRILL, set temperature to HI, and
set time to 8 minutes. Select START/STOP to
begin preheating (preheating will take approx.
10–12 minutes).
3 To prepare the rum glaze, place all remaining
ingredients in a medium bowl and whisk until
combined.
4 When the unit beeps to signify it is preheated and
ADD FOOD is displayed, open the hood and add
the shrimp to the grill, ensuring they are spread
out to maximize grill marks. Leave the hood open
and cook untouched for about 3 to 4 minutes.
5 Use silicone-tipped tongs, flip the shrimp, then
drizzle with 5 to 7 tablespoons of rum glaze.
Continue to grill until fully cooked, about 3 to 4
minutes longer.
6 When cooking is complete, remove shrimp from
grill, drizzle with any remaining rum glaze and
garnish with cilantro and lime wedges. If desired,
serve over cooked rice.
INGREDIENTS
2 pounds jumbo shrimp, peeled, tails removed,
deveined
2 tablespoons canola oil
¼ cup prepared Jamaican jerk seasoning
(found on page 53)
¼ cup honey
¼ cup spiced rum
Zest and juice of 1 large orange
1 teaspoon lime juice
1 tablespoon ground ginger or minced fresh ginger
1 teaspoon kosher salt
Chopped cilantro, for garnish
Lime wedges, for garnish
Cooked brown rice, for serving, as desired
MASTER GRILLING
TIP Running out of cooking time? Use the arrows on the
right to add more time as necessary.
JAMAICAN JERK SHRIMP
WITH RUM GLAZE
PREP: 5 MINUTES | PREHEAT: APPROX. 10–12 MINUTES | TOTAL COOK TIME: 6–8 MINUTES | MAKES: 4–6 SERVINGS
INTERMEDIATE RECIPE
MASTER GRILLING
Master Grilling
20

GRILLED PANZANELLA SALAD
DIRECTIONS
1 To install the grill grate, position it flat on top of
the heating element and gently press down until
it sits into place, then close the hood. Turn dial
to GRILL, set temperature to HI, and set time to
15 minutes. Select START/STOP to begin cooking
(preheating will take approx. 10–12 minutes).
2 When the unit has beeped to signify it has
preheated and ADD FOOD is displayed, open the
hood, and place the oiled bread on the grill, close
hood, and cook for 1 to 2 minutes per side or until
bread is toasted and grill marks are prevalent. Then
open hood, remove bread from grill and set aside.
3 Open the hood, and add peaches and plums to
grill, cut-side down, then close hood. Grill peaches
and plums for 5 minutes or until grill marks are
prevalent and fruit is soft (no need to flip). Then
open hood, remove fruit from grill and set aside.
4 Place the onions on the right side of the grill. Then
place the tomatoes on the left side of the grill,
close hood and cook for about 5 minutes or until
blistered and lightly charred. Gently toss tomatoes
with silicone-tipped tongs once or twice during
cooking.
5 When cooking is complete, transfer the onions
and tomatoes to a medium bowl along with the
cucumber and mozzarella. Cut fruit into bite-sized
pieces and add to the bowl. Cut bread into 1-inch
pieces and add to bowl.
6 In a small bowl, prepare the dressing by whisking
together the vinegar, Dijon mustard, lemon juice,
salt, and pepper. While whisking, slowly drizzle in
the olive oil until dressing is emulsified.
7 Drizzle the dressing over the prepared salad and
toss to evenly combine. Garnish with torn basil
leaves and serve.
INGREDIENTS
3 peaches, pitted, cut into 8 pieces
2 red plums, pitted, cut into 6 pieces
1 medium red onion, peeled, cut in ½-inch-thick,
round slices
1 baguette, cut in 1/2-inch-thick slices, drizzled with
olive oil
12 ounces cherry tomatoes
1/2 English cucumber, cut in 1/2-inch pieces
8 ounces bocconcini mozzarella balls
3 tablespoons white balsamic or white wine vinegar
1 tablespoon Dijon mustard
1/4 cup lemon juice
Kosher salt, as desired
Ground black pepper, as desired
1/2 cup olive oil
Fresh torn basil leaves, as garnish
PREP: 5 MINUTES | PREHEAT: APPROX. 10–12 MINUTES | TOTAL COOK TIME: 15 MINUTES | MAKES: 4–6 SERVINGS
INTERMEDIATE RECIPE
Master Grilling
22
MASTER GRILLING
MASTER GRILLING
V

DIRECTIONS
1 In a small bowl, add the goat cheese, herbed
cheese, tomatoes, basil, Parmesan, garlic,
spinach, salt, and pepper and mix until fully
combined.
2 Lay each chicken breast flat and cut horizontally,
about / of the way into the chicken. Fill each
breast with 2 to 3 tablespoons of prepared
filling. Then evenly cover the outside of the
chicken with salt and pepper as desired.
3 To install the grill grate, position it flat on top of
the heating element and gently press down until
it sits into place, then close the hood.
4 While holding the smoke box lid open,
use the pellet scoop to pour pellets into the
smoke box until filled to the top. Then close
the smoke box lid.
5 Turn dial to GRILL. Press WOODFIRE FLAVOR.
Set the temperature to HI, and set time to 25
minutes. Select START/STOP to begin cooking
(preheating will take approx. 15–19 minutes).
6 When unit beeps to signify it is preheated and
ADD FOOD is displayed, open the hood, and
place the chicken to the grill. Close the hood to
begin cooking.
7 When cooking is complete, open hood and
remove chicken from grill and serve with your
favorite side.
INGREDIENTS
8 ounces mild goat cheese, room temperature
4 ounces garlic and herb soft cheese, room
temperature
¼ cup julienned sundried tomatoes in herbed oil
2 tablespoons fresh or dried basil
2 tablespoons grated Parmesan cheese
1 teaspoon granulated garlic
2 ounces fresh baby spinach, roughly chopped
Kosher salt, as desired
Ground black pepper, as desired
6 boneless, skinless chicken breasts
(8–9 ounces each)
DIRECTIONS
1 To install the grill grate, position it flat on top of
the heating element and gently press down until
it sits into place, then close the hood.
2 While holding the smoke box lid open,
use the pellet scoop to pour pellets into the
smoke box until filled to the top. Then close
the smoke box lid.
3 Turn dial to GRILL. Press WOODFIRE FLAVOR.
Set the temperature to HI, and set time to 10
minutes. Select START/STOP to begin preheating
(preheating will take approx. 15–19 minutes).
4 When unit beeps to signify it is preheated and
ADD FOOD is displayed, open hood and add
the onion, pineapple, tomatoes, bell pepper,
and jalapeño pepper to the grill plate. Close the
hood and grill for 5 minutes. Then open hood, flip
vegetables, and grill for another 5 minutes.
5 When cooking is complete, open hood, remove
vegetables from grill and let cool. Once cooled,
add half of the tomatoes and the garlic to a
blender and blend until smooth. Roughly chop
the remaining grilled vegetables, then mix with
the blended tomatoes in a serving bowl. Garnish
with cilantro and serve with chips.
INGREDIENTS
1 small red onion, peeled,
cut in 1-inch rings
6 ounces fresh pineapple,
cut in 1-inch chunks (6–8 chunks)
3 Roma tomatoes, cut in half
1 green bell pepper, cut in quarters,
stem and seeds removed
1 jalapeño pepper, cut in half,
stem and seeds removed
1 teaspoon ground cumin
1 teaspoon chili powder
Kosher salt, as desired
Ground black pepper, as desired
2 limes, cut in half
2 cloves garlic, peeled
/ cup fresh cilantro leaves,
plus more for garnish as desired
TIP For added flavor, grill the limes cut-side down and
swap the green bell pepper for a poblano pepper.
Master Grilling
24
MASTER GRILLING
TIP Running out of cooking time? Use the arrows on the
right to add more time as necessary.
PREP: 5 MINUTES | PREHEAT: APPROX. 15–19 MINUTES | TOTAL COOK TIME: 10 MINUTES | MAKES: 8+ SERVINGS
INTERMEDIATE RECIPE
GRILLED TOMATO-
PINEAPPLE SALSA
VG CHEESY STUFFED
CHICKEN BREASTS
PREP: 5–10 MINUTES | PREHEAT: APPROX. 15–19 MINUTES | TOTAL COOK TIME: 25 MINUTES | MAKES: 6 SERVINGS
INTERMEDIATE RECIPE
25
Questions? ninjakitchen.com
MASTER GRILLING

FOOL-PROOF
BBQ SMOKING
PITMASTER WITHOUT THE PITFALLSPITMASTER WITHOUT THE PITFALLS
Smoking doesn’t have to be complicated. No 12 hour waits,
no reloading fuel, no watching anything like a hawk.
Just an easy, fool-proof way to get deep, smoky flavors
into everything you make.
• Turn the grill on by rotating
the dial clockwise from
the OFF position to select
the SMOKER function.
• Use the and buttons to
the left of the display screen
to adjust the temperature.
• Use the and buttons to
the right of the display screen
to adjust the cook time.
• Press the button to the right
of the display labeled
START/STOP to begin cooking.
• Close the hood. The grill will
begin cooking and the timer
will begin to count down.
• When cook time is complete,
the grill will beep, and “END”
will appear on the display.
• Remove food from grill,
then enjoy!
STEP 4
PROGRAM & COOK STEP 5
REMOVE FOOD & SERVE
• Add ingredients to the grill
then close the hood.
STEP 2
ADD FOOD
• Open provided bag of pellets.
• Using the pellet scoop,
reach scoop into bag to fill
scoop to the top. Level o
to avoid spilling.
NOTE: The scoop is designed
to measure pellets needed
for one smoke session.
• While holding the smoke
box lid open, pour pellets
into the smoke box until
filled to the top. Then
close the smoke box lid.
STEP 3
ADD PELLETS
• Place grill on a flat,
level surface.
• Open the hood and install
the grill grate by positioning
it flat on top of the heating
element so it sits into place.
• Install the grease tray
by sliding it into place at
the back of the grill.
STEP 1
SET UP
For easier, faster clean
up, line the grease
tray with tinfoil.
TIP
26 BBQ Smoking
The colder the ingredients,
the smokier the results.
For optimal smoke flavor,
minimize the time the lid
is open when adding or
flipping food.
If you want to add more pellets,
pour in another full scoop of
pellets after the first batch
has completely burned. Press
and hold WOODFIRE FLAVOR
TECHNOLOGY for 3 seconds to
ignite the new full box of pellets.
PITMASTER’S NOTES
There is no preheat time
for the Smoker function
BBQ SMOKING

28 29
Questions? ninjakitchen.comKickstarter Recipe
DIRECTIONS
To install the grill grate,
position it flat on top of the
heating element and gently
press down until it sits into
place.
Liberally cover ribs on
all sides with desired
seasoning, salt, and
pepper.
Shingle ribs onto grill
grate or place in rib rack*,
then close the hood.
While holding the smoke
box lid open, use the
pellet scoop to pour
pellets into the smoke
box until filled to the top.
Then close the smoke
box lid.
Turn dial to select
SMOKER, set
temperature to 250°F,
and set time to 2
hours. Select START/
STOP to begin cooking
(preheating is not
needed).
After 1 hour, open
hood, and rotate ribs
so the bottom side is
now exposed on top.
Depending on the
thickness of the ribs,
begin to check for
doneness around
1 hour 30 minutes.
Cooking is done when
an instant-read food
thermometer reads
between 190°F to 203°F.
When cooking is
complete, open hood,
remove ribs from grill
and let rest for about
10 minutes. Then cut
as desired and serve
with sauce of choice
(reference page 52 for
sauce recommendations).
KICKSTARTER RECIPE
SMOKED BABY BACK RIBS
BEGINNER RECIPE
PREP: 5 MINUTES | TOTAL COOK TIME: 1–2 HOURS | MAKES: 4–6 SERVINGS
INGREDIENTS
2 racks baby back ribs, cut in half
1 cup spice seasoning
(ideas can be found on page 53)
Kosher salt, as desired
Ground black pepper, as desired
BBQ SMOKING
BBQ SMOKING
SCAN HERE for
a step-by-step
video
* The roasting rack is
available for purchase
on ninjaaccessories.com.
SCAN HERE to buy
grill accessories
** Choose pellets based
on flavor, refer to page
7 for more info on pellet
flavor profiles.
30 31
Questions? ninjakitchen.comKickstarter Recipe
DIRECTIONS
Liberally season pork on all sides
with desired seasoning, salt,
and pepper.
Plug thermometer into unit. To
install the grill grate, position it
flat on top of the heating element
and gently press down until it sits
into place. Place the roasting rack*
on the grill grate (if using) or
place the pork directly on the grill.
Insert thermometer horizontally
into the thickest part of the meat
(see thermometer placement
instructions on page 9). Close
the hood.
While holding the smoke box lid
open, use the pellet scoop to pour
pellets into the smoke box until
filled to the top. Then close the
smoke box lid.
Turn dial to SMOKER and set
temperature to 250°F. To set the
thermometer, select MANUAL and
set temperature to 203°F. Select
START/STOP to begin cooking
(preheating is not needed).
When cooking is complete, turn
unit off, leave hood closed, and
let pork rest for 45 minutes to 1
hour. Alternatively, remove food
from grill, wrap in plastic wrap
and let rest for at least 45 minutes
to 1 hour. Then shred the pork
and toss or serve with sauce of
choice (see page 52 for sauce
recommendations).
KICKSTARTER RECIPE
SMOKED PORK SHOULDER
BEGINNER RECIPE
PREP: 5 MINUTES | TOTAL COOK TIME: 4–6 HOURS | MAKES: 6–8 SERVINGS
INGREDIENTS
4 pounds pork shoulder,
trimmed, fat removed
½–1 cup spice seasoning
(ideas can be found on page 53)
Kosher salt, as desired
Ground black pepper, as desired
BBQ SMOKING
TIP For proteins with a thick fat cap, like
pork shoulder, trim o enough fat so
that 1/4-inch remains. Then place on
the grill fat side up.
* The roasting rack is
available for purchase
on ninjaaccessories.com.
SCAN HERE to buy
grill accessories
BBQ SMOKING
** Choose pellets based on flavor,
refer to page 7 for more info on
pellet flavor profiles.

SMOKED TACOS AL PASTOR
DIRECTIONS
1 Plug thermometer into unit. To install the grill
grate, position it flat on top of the heating
element and gently press down until it sits into
place.
2 Liberally season pork on all sides with Mexican
spice blend. Insert thermometer horizontally into
the center of the thickest part of the pork (see
thermometer placement instructions on page 9).
Place the pork and pineapple on the grill grate,
then close the hood.
3 While holding the smoke box lid open,
use the pellet scoop to pour pellets into the
smoke box until filled to the top. Then close
the smoke box lid.
4 Turn dial to SMOKER and set temperature to
250°F. To set the thermometer, select MANUAL
and set temperature to 203°F. Select START/
STOP to begin cooking (preheating is not
needed). Set an external timer to 15 minutes.
5 After 15 minutes, open hood, remove pineapple
and set aside. Close hood to continue cooking
pork. Let pineapple cool, then chop into small
pieces.
6 When cooking is complete, turn unit off, leave
hood closed, and let pork rest for 45 minutes to
1 hour. Alternatively, remove food from grill, wrap
in plastic wrap and let rest for at least 45 minutes
to 1 hour. Then shred the pork and toss in a large
bowl with pineapple juice.
7 To build the tacos, layer the tortillas with pork,
pineapple, onions, and cilantro. Top with fresh
lime juice.
INGREDIENTS
3–4 pounds boneless pork shoulder, trimmed, fat
removed
Mexican spice blend, as desired (found on page 53)
1 whole pineapple, peeled, core removed, cut in
1/2-inch rings
1 can (6 ounces) pineapple juice
1 large white onion, peeled, diced small
1/2 cup chopped cilantro
24 corn tortillas, warmed
Lime wedges, for garnish
PREP: 10 MINUTES | TOTAL COOK TIME: 4 HOURS | MAKES: 8–10 SERVINGS
INTERMEDIATE RECIPE
BBQ Smoking
32
BBQ SMOKING
TIP For proteins with a thick fat cap, like pork shoulder,
trim o enough fat so that 1/4-inch remains. Then
place on the grill fat side up.
BBQ SMOKING
BBQ SMOKED BEEF BRISKET
DIRECTIONS
1 Liberally season brisket on all sides with mustard,
desired seasoning, salt, and pepper.
2 Plug thermometer into unit. To install the grill
grate, position it flat on top of the heating
element and gently press down until it sits into
place. Place the brisket directly on grill, then close
the hood. Insert thermometer horizontally into
the thickest part of the meat (see thermometer
placement instructions on page 9).
3 While holding the smoke box lid open, use
the pellet scoop to pour pellets into the
smoke box until filled to the top. Then close
the smoke box lid.
4 Turn dial to SMOKER, set temperature to 250°F,
and set time to 6 hours. Select START/STOP
to begin cooking (preheating is not needed).
Depending on the size and shape of the beef
brisket, more time may be needed during the
cooking cycle. Use the arrows to the right to add
more time.
5 When cooking is complete, open hood, remove
brisket from grill, wrap in plastic wrap and let rest
for 1 hour. Then slice the brisket against the grain
and brush or serve with sauce of choice (see page
48 for sauce recommendations).
INGREDIENTS
5–9 pounds beef brisket, trimmed
3 tablespoons yellow mustard
1/2–1 cup spice seasoning of choice
(ideas can be found on page 49)
Kosher salt, as desired
Ground black pepper, as desired
PREP: 5 MINUTES | TOTAL COOK TIME: 5–8 HOURS | MAKES: 6–8 SERVINGS
INTERMEDIATE RECIPE
TIP For proteins with a thick fat cap, like brisket, trim o
enough fat so that 1/4-inch remains. Then place on the
grill fat side up.
33
Questions? ninjakitchen.com

SMOKED PIT BEEF SANDWICHES
WITH HORSERADISH SAUCE
DIRECTIONS
1 Liberally season beef on all sides with desired
seasoning.
2 Plug thermometer into unit. To install the grill
grate, position it flat on top of the heating element
and gently press down until it sits into place. Place
beef onto grill grate, then close the hood.
3 While holding the lid open, use the pellet scoop
to pour pellets into the smoke box until filled to
the top. Do not let pellets overflow the box. Close
smoke chamber lid.
4 Insert the thermometer into the thickest part
of the meat (see thermometer placement
instructions on page 9). Turn dial to SMOKER, set
temperature to 250°F, then select PRESET. To set
the thermometer, use the right arrows to select
BEEF, and the left arrows to select MED RARE 3.
Select START/STOP to begin cooking (preheating
is not needed).
5 In a small bowl, prepare the horseradish sauce by
adding the mayonnaise, sour cream, horseradish,
salt, and pepper, and whisking until fully
combined.
6 When cooking is complete, open hood, remove
beef from grill, lightly cover with aluminum foil
and let rest for 20 minutes.
7 Thinly slice beef against the grain and season with
salt and pepper as desired. Layer beef onto rolls,
top with horseradish sauce and other desired
toppings.
INGREDIENTS
3 pounds beef eye round, trimmed, fat removed
¼–½ cup spice seasoning
(ideas can be found on page 53)
¾ cup mayonnaise
¼ cup sour cream
2 tablespoons prepared horseradish
Kosher salt, as desired
Ground black pepper, as desired
6–8 sandwich rolls of choice
TOPPINGS (optional)
Sliced tomato
Sliced onion
Prepared BBQ sauce
PREP: 5 MINUTES | TOTAL COOK TIME: UP TO 2 HOURS | MAKES: 6–8 SERVINGS
INTERMEDIATE RECIPE
BBQ SMOKING
35
Questions? ninjakitchen.com
BBQ SMOKING

• Turn the unit on by rotating the
dial clockwise from the OFF
position to select AIR CRISP,
BAKE, ROAST, or DEHYDRATE.
If you completed
step two, press the
WOODFIRE FLAVOR
TECHNOLOGY button.
• Use the and buttons to
the left of the display screen
to adjust the temperature.
• Use the and buttons to
the right of the display screen
to adjust the cook time.
• Press START to begin
preheating. If using WOODFIRE
FLAVOR TECHNOLOGY, the
pellets will go through and
ignition cycle (IGN), then the grill
will begin preheating (PRE).
BEYOND
GRILLING
BRING THE KITCHEN OUTSIDEBRING THE KITCHEN OUTSIDE
Go from apps to dessert all in one place with 4 additional,
easy-to-use cooking functions. You can even add
100% real woodfire flavor for dishes likesmoky mac
n’ cheese or smoked beef jerky.
• Once unit has preheated,
“ADD FOOD” will appear
on the screen.
• Open the hood to add
ingredients to the unit.
• Close the hood. The unit will
begin cooking and the timer
will begin to count down.
• When cook time is complete,
the unit will beep, and “END”
will appear on the display.
• Remove food from unit,
then enjoy!
STEP 4
ADD FOOD & COOK STEP 5
REMOVE FOOD & SERVE
STEP 3
PROGRAM & PREHEAT
• Place grill on a flat,
level surface.
• Open the hood and install
the grill grate by positioning
it flat on top of the heating
element so it sits into place.
• Install the grease tray by
sliding it into place at the back
of the Grill.
• Place any additional
accessories required for
your recipe inside the grill.
STEP 1
SET UP
For easier, faster clean
up, line the grease
tray with tinfoil.
TIP
• Open provided bag of
Ninja Woodfire Pellets.
• Using the pellet scoop, reach
scoop into bag to fill scoop
to the top. Level o to avoid
spilling.
NOTE: The scoop is designed
to measure pellets needed
for one smoke session.
• While holding the smoke
box lid open, pour pellets
into the smoke box until
filled to the top. Then,
close the smoke box lid.
STEP 2
ADD PELLETS
DON'T WANT SMOKE?
Skip these steps
36 Beyond Grilling
Smoking ignition times will
take an additional 5–7 minutes.
Keep ingredients cold before
putting them on the grill.
For optimal smoke flavor,
minimize the time the lid
is open when adding or
flipping food.
CHEF’S NOTES
Preheat times by function:
Air Crisp, Roast, Bake
3 mins
Dehydrate
No preheat
PREHEAT FOR BETTER RESULTS
Let the Grill fully preheat before adding
food or this may lead to overcooking and
a longer preheat time. While preheating
is strongly recommended, you can skip
it by pressing and holding the START/STOP
button for 4 seconds.
BEYOND GRILLING
SCAN HERE
for quick
tips and
how-to
videos

Beyond Grilling
38
BEYOND GRILLING
BEYOND GRILLING
39
Questions? ninjakitchen.com
‘FRIED’ CHICKEN
DIRECTIONS
1 Plug thermometer into unit. To install the grill
grate, position it flat on top of the heating
element and gently press down until it sits into
place. Place Air Crisp Basket on grill grate, then
close the hood.
2 While holding the smoke box lid open, use the
pellet scoop to pour pellets into the smoke box
until filled to the top. Then close the smoke box lid.
3 Turn dial to AIR CRISP. Press WOODFIRE
FLAVOR. Set temperature to 360°F, then select
PRESET. To set the thermometer, use the right
arrows to select CHIX. Select START/STOP to
begin preheating (preheating will take approx.
8–10 minutes).
4 In a medium bowl, add all seasoning, buttermilk,
salt, and pepper and whisk to combine. In a
separate medium bowl, whisk together the
cornstarch, bread crumbs, salt, and pepper.
5 Dip chicken into buttermilk, then place into the
seasoned bread crumbs. Press each chicken into
the bread crumbs for optimal sticking. Liberally
spray each piece of coated chicken with the
cooking spray. Insert thermometer horizontally
into the center of the thickest part of the largest
chicken (see thermometer placement instructions
on page 9).
6 When unit beeps to signify it has preheated
and ADD FOOD is displayed, open hood and
place chicken pieces in basket. Close hood to
begin cooking. After 20 minutes, open hood and
with silicone-tipped tongs, flip the chicken. Close
hood to continue cooking.
7 When cooking is complete, open hood, remove
‘fried ‘chicken from basket and serve.
INGREDIENTS
2 teaspoons onion powder
2 teaspoons garlic powder
1 teaspoon paprika
1/2 teaspoon chili powder
1/4 teaspoon cayenne pepper
1 teaspoon dried thyme
1 teaspoon kosher salt
1/2 teaspoon ground black pepper
2 cups buttermilk
1/2 cup cornstarch
2 cups panko bread crumbs
6 bone-in skin-on chicken of choice
(2 legs, 2 thighs, 2 breasts)
Nonstick cooking spray
PREP: 10 MINUTES | PREHEAT: APPROX. 8–10 MINUTES | TOTAL COOK TIME: 40 MINUTES | MAKES: 6–8 SERVINGS
INTERMEDIATE RECIPE
CHICKEN WINGS
DIRECTIONS
1 To install the grill grate, position it flat on top of
the heating element and gently press down until
it sits into place. Place Air Crisp Basket on grill
grate, then close the hood.
2 While holding the smoke box lid open,
use the pellet scoop to pour pellets into the
smoke box until filled to the top. Then close
the smoke box lid.
3 Turn dial to AIR CRISP. Press WOODFIRE
FLAVOR. Set temperature to 390°F, and set
time to 30 minutes. Select START/STOP to begin
preheating (preheating will take approx.
8–10 minutes).
4 In a large bowl, toss chicken wings with Cajun
seasoning, salt, and pepper until evenly coated.
5 When unit beeps to signify it has preheated and
ADD FOOD is displayed, open hood and place
wings in basket. Close hood to begin cooking.
Several times during cooking, open hood and
use silicone-tipped tongs to flip the wings.
6 When cooking is complete, open hood, remove
wings from basket, and serve.
INGREDIENTS
4 pounds fresh chicken wings
Cajun seasoning, as desired (found on page 53)
Kosher salt, as desired
Ground black pepper, as desired
PREP: 10 MINUTES | PREHEAT: APPROX. 8–10 MINUTES | TOTAL COOK TIME: 30 MINUTES | MAKES: 4 SERVINGS
INTERMEDIATE RECIPE
TIP If using larger sized wings, more cook time may be
necessary. Use the arrows on the right to add more
time as needed.

BEEF JERKY
DIRECTIONS
1 In a small bowl, prepare the marinade by whisking
together all ingredients except the beef. Then
place the marinade and beef in a large resealable
plastic bag. Massage the outside of the bag to
work the marinade over all parts of the beef, then
place the bag in the refrigerator for 8 hours to
marinate.
2 To install the grill grate, position it flat on top of
the heating element and gently press down until
it sits into place.
3 Remove the beef from the marinade and discard
excess liquid. Place the beef in a flat single layer
in the Air Crisp Basket. Then place the basket on
the grill grate and close the hood.
4 While holding the smoke box lid open,
use the pellet scoop to pour pellets into the
smoke box until filled to the top. Then close
the smoke box lid.
5 Turn dial to DEHYDRATE. Press WOODFIRE
FLAVOR. Set the temperature to 165°F, and set
time to 6 hours. Select START/STOP to begin
cooking (preheating is not needed).
6 Begin to check the beef jerky after 4 hours. If a
crispier output is desired, continue to cook.
7 When cooking is complete, open hood and
remove basket with beef jerky. Beef jerky can be
stored in an air-tight container for up to 2 weeks.
INGREDIENTS
½ cup soy sauce
1 tablespoon Worcestershire sauce
3 tablespoons brown sugar
½ tablespoon onion powder
½ tablespoon garlic powder
1 teaspoon paprika
1/8–¼ teaspoon cayenne pepper
¼ teaspoon ground black pepper
½ teaspoon ground cinnamon
½ teaspoon kosher salt
1–1 / pounds (16–24 ounces) uncooked
beef eye of round, cut in /-inch slices
PREP: 5 MINUTES | MARINATE: 8 HOURS | TOTAL COOK TIME: 4–6 HOURS | MAKES: 6 SERVINGS
INTERMEDIATE RECIPE
PIMENTO MAC & CHEESE
DIRECTIONS
1 Place the processed cheese product into the
center of an 11”x7” glass baking dish, then
surround with the macaroni. Pour the heavy cream
and water over the macaroni then sprinkle over
the pimento peppers, ½ cup mozzarella cheese,
½ cup cheddar cheese, salt, and pepper. Cover
baking dish with aluminum foil.
2 To install the grill grate, position it flat on top of
the heating element and gently press down until
it sits into place, then close the hood. Turn dial to
ROAST, set temperature to 375°F, set time to 40
minutes. Select START/STOP to begin preheating
(preheating will take approx. 3 minutes).
3 When unit beeps to signify it is preheated and
ADD FOOD is displayed, open hood and place
baking dish on grill grate. Close hood to begin
cooking.
4 Transfer the mac and cheese to a large bowl. Add
the remaining cheddar cheese and stir until the
mixture is evenly combined. Place the mac and
cheese back into the baking dish and top with
remaining mozzarella and bread crumbs. Return
the baking dish to the grill grate and close hood to
continue cooking. Cook for 5 minutes or until the
mozzarella is melted and bread crumbs are golden
brown.
5 When cooking is complete, open hood and
carefully remove the baking dish. Serve mac &
cheese hot.
INGREDIENTS
10 ounces prepared processed cheese product
1 pound uncooked elbow macaroni
4 ounces chopped pimento peppers
2 cups heavy cream
1 ½ cups water
1 cup shredded mozzarella cheese, divided
1 cup shredded cheddar cheese, divided
Kosher salt, as desired
Fresh ground black pepper, as desired
¼ cup panko bread crumbs
PREP: 5 MINUTES | PREHEAT: APPROX. 3 MINUTES | TOTAL COOK TIME: 45 MINUTES | MAKES: 6–8 SERVINGS
INTERMEDIATE RECIPE
41
Questions? ninjakitchen.comBeyond Grilling
40
BEYOND GRILLING
BEYOND GRILLING
V

1 cup ketchup
1 cup dark brown sugar
1/3 cup apple cider vinegar
2 tablespoons yellow mustard
1 tablespoon Worcestershire
sauce
1 tablespoon honey
2 teaspoons chili powder
Kosher salt, as desired
Ground black pepper,
as desired
SWEET BBQ SAUCE
1 cup mayonnaise
1/2 cup sweet chili sauce
1/4 cup canola oil
1/4 cup ketchup
2 tablespoons lemon juice
1 tablespoon Worcestershire
sauce
1 tablespoon yellow mustard
2 teaspoons garlic powder
1 teaspoon onion powder
COMEBACK SAUCE
2 cups apple cider vinegar
2 tablespoons dark brown
sugar
1 tablespoon ketchup
1 tablespoon hot sauce
Kosher salt, as desired
Ground black pepper,
as desired
NORTH CAROLINA
VINEGAR SAUCE
1 cup yellow mustard
1/4 cup apple cider vinegar
1/4 cup honey
1 tablespoon Worcestershire
sauce
1 tablespoon soy sauce
1 tablespoon chili powder
1 teaspoon garlic powder
Kosher salt, as desired
Ground black pepper, as desired
CAROLINA GOLD SAUCE
SAUCES
YIELD: APPROX. 2 HEAPING CUP | MARINATING TIME: 2–12 HOURS
STORE: REFRIGERATE FOR UP TO 2 WEEKS
1/3 cup brown sugar
2 teaspoon cayenne pepper
(optional)
1 teaspoon kosher salt
1 tablespoon smoked paprika
¼ cup ground espresso or coffee
¼ cup cocoa powder
¼ cup brown sugar
¼ cup smoked paprika
3 tablespoons black pepper
2 tablespoon kosher salt
2 teaspoon garlic powder
2 teaspoon onion powder
BASIC BBQ SPICE RUB
CAFÉ MOCHA SPICE BLEND
1 teaspoon garlic powder
1 teaspoon onion powder
½ teaspoon white pepper
¼ teaspoon cayenne pepper
1 teaspoon kosher salt
1 teaspoon paprika
½ teaspoon thyme
1 teaspoon oregano
2 teaspoons ground cumin
1 teaspoon ground coriander
1 tablespoon kosher salt
2 teaspoons chili powder
2 teaspoons onion powder
2 teaspoons garlic powder
1 teaspoon dried oregano
½ teaspoon chipotle chili
powder (optional)
MEXICAN STYLE SPICE BLEND
CAJUN SPICE BLEND
1 tablespoon brown Sugar
2 teaspoon cayenne pepper
1 teaspoon kosher salt
1 teaspoon smoked paprika
1 teaspoon cumin
½ teaspoon chili powder
1 tablespoon garlic powder
1 tablespoon onion powder
1 tablespoon brown sugar
1 tablespoon dried parsley
2 teaspoons cayenne pepper
1 teaspoon ground cinnamon
1 teaspoon kosher salt
½ teaspoon black pepper
½ teaspoon ground allspice
½ teaspoon ground clove
½ teaspoon red pepper flakes
½ teaspoon chili powder
½ teaspoon paprika
½ teaspoon ground nutmeg
JAMAICAN JERK SPICE BLEND
SPICY CAROLINA
SPICE BLEND
SPICE RUBS
YIELD: APPROX. ½ - 1 CUP (DOUBLE THE INGREDIENTS FOR A LARGER OUTPUT) | SEASON: GENEROUSLY
STORE: UP TO 6 MONTHS IN AN AIRTIGHT CONTAINER AWAY FROM LIGHT AND HEAT
Place all ingredients in a bowl and whisk until evenly combined. Place all ingredients in a bowl and mix until evenly combined.
43
Questions? ninjakitchen.com
42
1 cup mayonnaise
1/4 cup apple cider vinegar
2 tablespoons dark brown sugar
1 tablespoon brown mustard
2 teaspoons prepared horseradish
1 teaspoon lemon juice
1 teaspoon hot sauce
Kosher salt, as desired
Ground black pepper, as desired
ALABAMA WHITE SAUCE

44 Cooking Charts 45
Questions? ninjakitchen.com
FOOD VOLUME (UP TO) PREP COOK TEMP COOK TIME INTERACTION
POULTRY
Chicken breast, boneless 6 breasts (7-9 oz each) Marinate or season as desired HI 13–15 mins Flip 2 or 3 times during cooking
Chicken breast, bone-in 4 breasts (12-24 oz each) Marinate or season as desired HI 20–25 mins Flip 2 or 3 times during cooking
Chicken, leq quarters 3 bone-in leg quarters Marinate or season as desired HI 15–20 mins Flip 2 or 3 times during cooking
Chicken sausages, prepared 2 packs (8 sausages) Marinate or season as desired HI 5–7 mins Flip 2 or 3 times during cooking
Chicken tenderloins 9 tenderloins Marinate or season as desired HI 6–8 mins Flip 2 or 3 times during cooking
Chicken thighs, boneless 2 lbs Marinate or season as desired HI 7–10 mins Flip 2 or 3 times during cooking
Chicken thighs, bone-in 8 thighs (4-7 oz each) Marinate or season as desired HI 12–16 mins Flip 2 or 3 times during cooking
Chicken wings 2 1/2 lbs Marinate or season as desired HI 10–15 mins Flip 2 or 3 times during cooking
Turkey burgers 6 patties Season with salt and pepper HI 8–11 mins Flip halfway through cooking
BEEF
Beef burgers 6 patties, 1-inch thick Season with salt and pepper HI 5–8 mins Flip halfway through cooking
Filet mignon 6 steaks (6-8 oz each), 1 1/4–1 1/2-inch thick Marinate or season as desired HI 15–20 mins Flip halfway through cooking
Flat iron or Flank steak 1 steak (18-24 oz each) 1 1/4-inch thick Marinate or season as desired HI 10–25 mins Flip halfway through cooking
Hot dogs 12 each N/A HI 5–8 mins Turn frequently through cooking
New York strip 4 steaks (10-12 oz each) 1 1/4–1 1/2-inch thick Marinate or season as desired HI 8–16 mins Flip halfway through cooking
Ribeye 3 steaks (14-16 oz each) 1 1/4-inch thick Marinate or season as desired HI 10–15 mins Flip halfway through cooking
Skirt steak 4 steaks (10-12 oz each) 3/4 - 1-inch thick Marinate or season as desired MED 7–13 mins Flip halfway through cooking
Steak tips 2 lbs Marinate or season as desired MED 8–13 mins Flip halfway through cooking
PORK
Baby back ribs 1 rack, divided in half Marinate or season as desired HI 1 hour+ Turn frequently through cooking
Bacon 6 strips, thick cut N/A LO 6–10 mins Turn frequently through cooking
Lamb rack 1 full rack (8 bones) N/A HI 15–20 mins Turn frequently through cooking
Pork chops, boneless 6-8 boneless chops (8 oz each) Marinate or season as desired HI 10–14 mins Flip halfway through cooking
Pork chops, bone-in 4 thick cut, bone-in (10-12 oz each) Marinate or season as desired HI 15–18 mins Flip halfway through cooking
Pork tenderloins 3 whole tenderloins (1-1 1/2 lbs each) Marinate or season as desired MED 18–22 mins Turn frequently through cooking
Sausages 10 each N/A LO 8–12 mins Turn frequently through cooking
TIP Want to add smoke? See page 9 for Woodfire
Flavor Technology interaction.
GRILL CHART (CLOSED-HOOD COOKING)

46 Cooking Charts 47
Questions? ninjakitchen.com
FOOD VOLUME (UP TO) PREP COOK TEMP COOK TIME INTERACTION
SEAFOOD
Flounder 3 fillets Coat lightly with canola oil, season as desired HI 4–6 mins Flip halfway through cooking
Halibut 6 fillets (5-6 oz each) Coat lightly with canola oil, season as desired HI 6–10 mins Flip halfway through cooking
Salmon 6 fillets (6 oz each) Coat lightly with canola oil, season as desired HI 7–11 mins Flip halfway through cooking
Scallops 18 each Coat lightly with canola oil, season as desired HI 4–6 mins Flip halfway through cooking
Shrimp (large or jumbo) 1 1/2 lbs Coat lightly with canola oil, season as desired HI 4–5 mins Flip halfway through cooking
Swordfish 2 steaks (11-12 oz each) Coat lightly with canola oil, season as desired HI 8–10 mins Flip halfway through cooking
Tuna 4 steaks (4-6 oz each) Coat lightly with canola oil, season as desired HI 6–10 mins Flip halfway through cooking
VEGGIES
Asparagus 2 bunches Trimmed, coat lightly with canola oil, season as desired HI 8–12 mins Toss frequently through cooking
Baby Bok Choy 1 1/2- lb Coat lightly with canola oil, season as desired HI 9–13 mins Toss frequently through cooking
Bell Peppers 4 Cut into quarters, coat lightly with canola oil,
season as desired HI 6–12 mins Toss frequently through cooking
Broccoli 2 heads Cut into 1-inch pieces, coat lightly with canola oil,
season as desired HI 10-16 mins Toss frequently through cooking
Brussel Sprouts 2 lbs Halved, trimmed, coat lightly with canola oil, season as desired HI 11–16 mins Toss frequently through cooking
Carrots 2 lbs Peel, cut into 1 or 2-inch pieces, coat lightly with canola oil,
season as desired HI 20–23 mins Toss frequently through cooking
Cauliflower 2 heads Cut into 1-inch pieces, coat lightly with canola oil,
season as desired HI 20–24 mins Toss frequently through cooking
Corn on the cob 4 cobs Coat lightly with canola oil, season as desired HI 10–15 mins Flip 2 or 3 times during cooking
Crimini mushrooms 2 lb Clean, coat lightly with canola oil, season as desired HI 6–9 mins Toss frequently through cooking
Eggplant 2 medium Sliced, coat lightly with canola oil, season as desired HI 7–10 mins Flip halfway through cooking
Green beans 24 oz Trimmed, coat lightly with canola oil, season as desired HI 12–20 mins Toss frequently through cooking
Onions, white or red (cut in half) 6 Peeled, cut in half, coat lightly with canola oil, season as desired HI 8–12 mins Flip halfway through cooking
Onions, white or red (sliced) 3 Peeled, sliced, coat lightly with canola oil, season as desired HI 6–10 mins Toss frequently through cooking
Portobello mushrooms 6 Cleaned, coat lightly with canola oil, season as desired HI 7–9 mins Flip halfway through cooking
Squash or zucchini 1 lb Cut in quarters lengthwise, coat lightly with canola oil,
season as desired HI 6–10 mins Flip halfway through cooking
Tomatoes 6 Cut in half, coat lightly with canola oil, season as desired HI 6–10 mins Flip halfway through cooking
TIP Want to add smoke? See page 9 for Woodfire
Flavor Technology interaction.
GRILL CHART (CLOSED-HOOD COOKING)

FOOD VOLUME (UP TO) PREP COOK TEMP COOK TIME INTERACTION
FRUIT
Avocado 6-8 Cut in half, remove pits, spray grill with nonstick cooking spray HI 3-5 mins Flipping not necessary
Bananas 4 Peel, cut in half lengthwise HI 4 mins Flip halfway through cooking
Lemons & limes 5 Cut in half lengthwise HI 4 mins Flip halfway through cooking
Mango 4-6 Cut in half, remove skins and pits HI 4–8mins Flip halfway through cooking
Melon 6-8 spears N/A HI 4–6 mins Flip halfway through cooking
Pineapple 6-8 slices or spears Cut in 2-inch pieces HI 5–8 mins Flip halfway through cooking
Stone Fruit 6-8 Cut in half, remove pits, press cut-side down on grill grate HI 5–7 mins Flipping not necessary
BREAD/CHEESE
Bread (baguette or ciabatta) 12-16-inch loaf Cut in 1 /-inch slices, brushed with canola oil HI 3–5 mins Flip halfway through cooking
Halloumi Cheese 24-36 oz Cut in /-inch slices HI 3–6 mins Flip halfway through cooking
48 Cooking Charts 49
Questions? ninjakitchen.com
TIP Want to add smoke? See page 9 for Woodfire
Flavor Technology interaction.
GRILL CHART (CLOSED-HOOD COOKING)

FOOD VOLUME (UP TO) PREP COOK TEMP COOK TIME INTERACTION
FROZEN POULTRY
Chicken breast, boneless 6 breasts (7-9 oz each) Marinate or season as desired MED 18–22 mins Flip 2 or 3 times during cooking
Chicken thighs, bone-in 6 thighs (4-7 oz each) Marinate or season as desired MED 20–25 mins Flip 2 or 3 times during cooking
Turkey burgers 4-6 patties Season with salt and pepper MED 6–10 mins Flip halfway through cooking
FROZEN BEEF
Beef burgers 6 patties, 1-inch thick Season with salt and pepper MED 7–12 mins Flip halfway through cooking
Filet Mignon 6 steaks (6-8 oz each) 1 1/4 - 1 1/2-inch thick Marinate or season as desired MED 17–22 mins Flip 2 or 3 times during cooking
New York strip 4 steaks (10-12 oz each) 1 1/4 - 1 1/2-inch thick Marinate or season as desired MED 17–21 mins Flip 2 or 3 times during cooking
Ribeye 3 steaks (14-16 oz each) 1 1/4-inch thick Marinate or season as desired MED 20–25 mins Flip 2 or 3 times during cooking
FROZEN PORK
Pork chops, boneless 6-8 boneless chops (8 oz each) Marinate or season as desired MED 15–20 mins Flip 2 or 3 times during cooking
Pork chops, bone-in 4 thick cut, bone-in (10-12 oz each) Marinate or season as desired HI (375°F) 23–27 mins Flip halfway through cooking
Pork tenderloins 2 whole tenderloins (1-1 1/2 lbs each) Marinate or season as desired MED 17–23 mins Flip 2 or 3 times during cooking
Sausages, uncooked 10-12 each N/A LO 12–18 mins Flip 2 or 3 times during cooking
FROZEN SEAFOOD
Halibut 6 fillets (5-6 oz each) Coat lightly with canola oil, season as desired HI 13–17 mins Flip halfway through cooking
Salmon 6 fillets (6 oz each) Coat lightly with canola oil, season as desired HI 13–17 mins Flip halfway through cooking
Shrimp (large or jumbo) 1 1/2 lbs Coat lightly with canola oil, season as desired HI 5–6 mins Flip halfway through cooking
FROZEN VEGETARIAN
Veggie burger 6 patties N/A HI 8–10 mins Flip halfway through cooking
50 Cooking Charts 51
Questions? ninjakitchen.com
FROZEN GRILL CHART (CLOSED-HOOD COOKING)
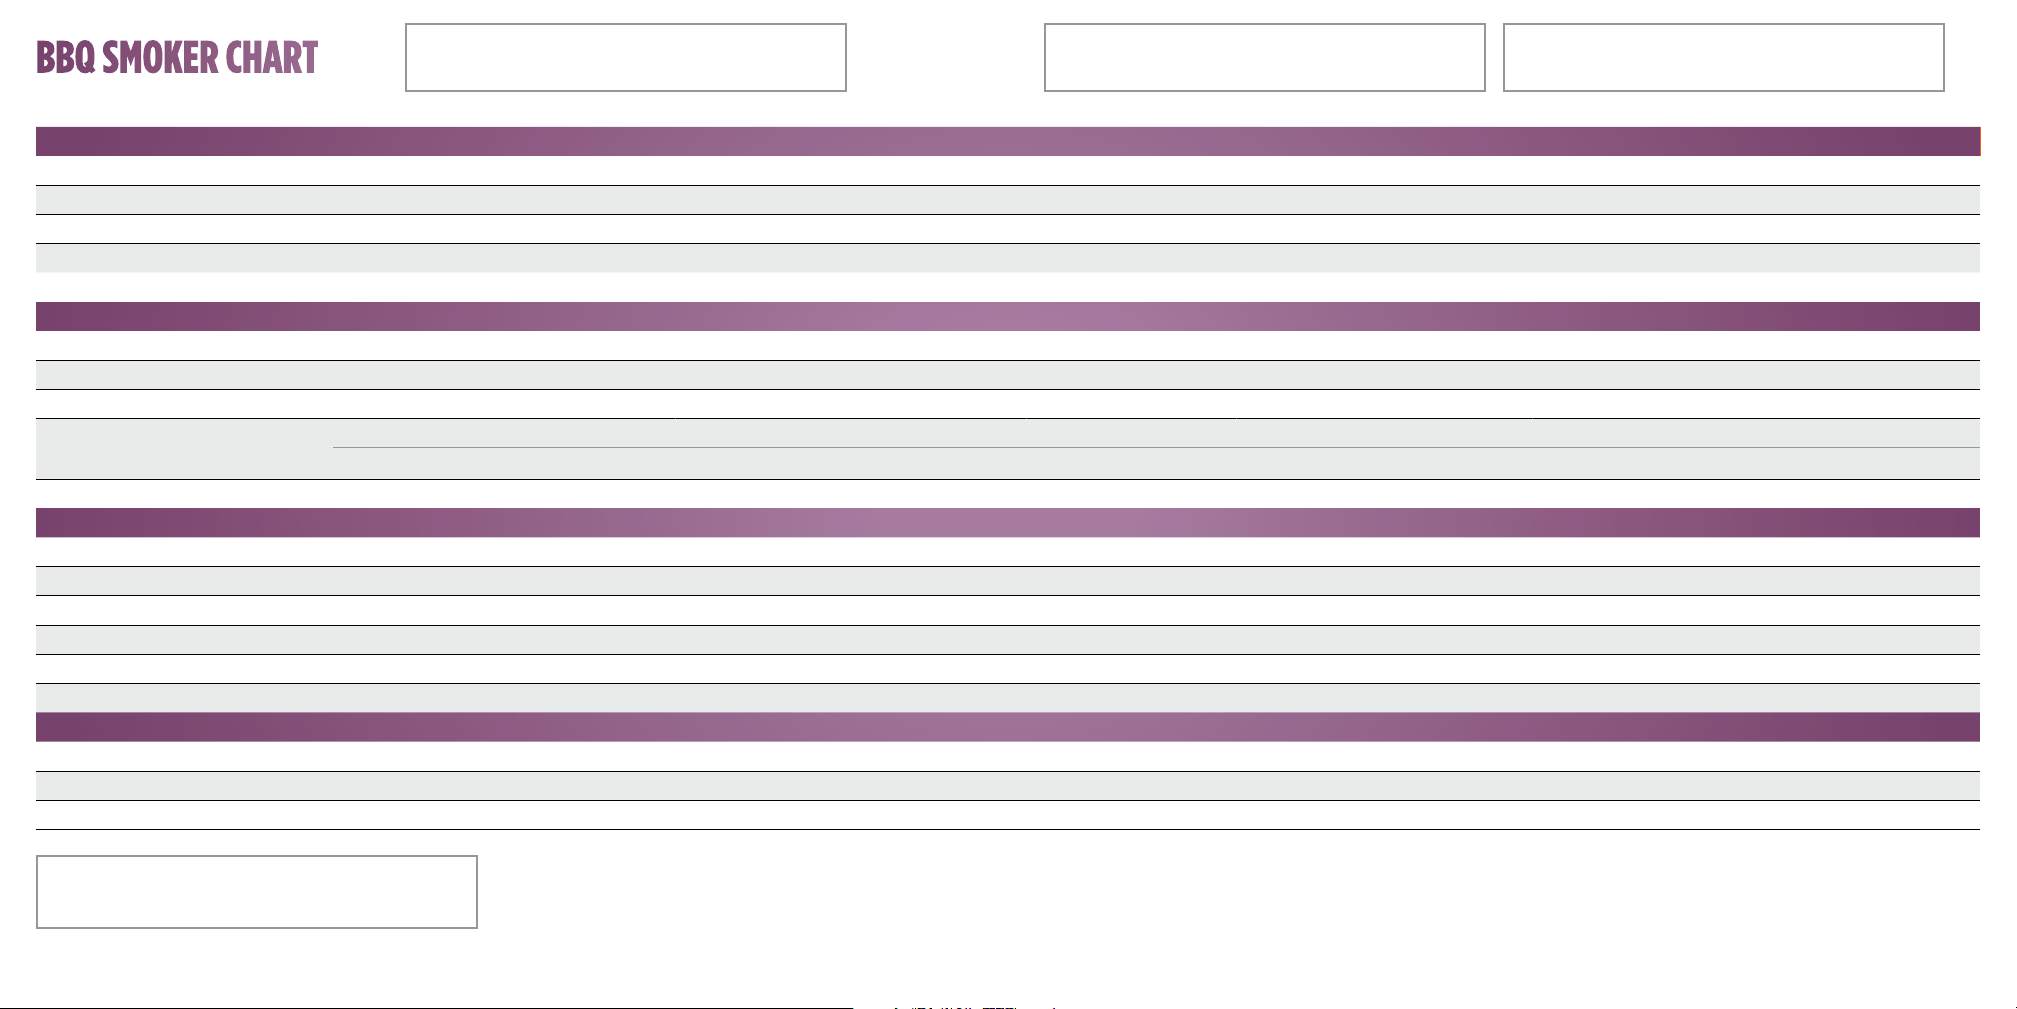
BBQ SMOKER CHART
Season as desired VOLUME (UP TO) PREP COOK TEMP COOK TIME INTERNAL TEMP
BEEF
Chuck Roast 3–4 lbs Season as desired 250°F 4–5 hours 203°F
Brisket 5–9 lbs, point cut Season as desired 250°F 5–8 hours 206°F, Flip halfway through cooking
Bone-In Short Ribs 6–9 pieces, 6–8 ounces each Season as desired 275°F 4–5 hours 203°F
Boneless Short Ribs 6–9 pieces, 6–8 ounces each Season as desired 275°F 3–4 hours 203°F
Tri Tip 2–3 lbs Season as desired 325°F 20–30 mins 120°F
PORK
Shoulder 4–5 lbs Season as desired 250° 4–6 hours 203°F
Tenderloin 2–3 tenderloins, 1–2 lbs each Season as desired 300°F 35–45 mins 145°F
Loin 3–4 lbs Season as desired 250°F 3–4 hours 180°–190°F
Ribs – Baby Back
1 rack, cut in half Season as desired 300°F 1–2 hours 190°–203°F
2 racks, cut in half Season as desired 300°F 1 1/2–2 hours 190°–203°F
Ribs – St. Louis Style 1 rack, cut in half Season as desired 300°F 2–4 hours 165°F
POULTRY
Whole Chicken 4–6 lbs Season as desired 375°F 45 mins–1 1/2 hours 165°F
Boneless/Bone-In Chicken Thighs 6–8 pieces, 4–6 ounces each Season as desired 375°F 15–20 mins 165°F
Turkey Breast 3–4 lbs Season as desired 350°F 45 mins–1 1/2 hours 165°F, Flip halfway through cooking
Turkey Legs 6 pieces, 6–8 ounces each Season as desired 375°F 30–45 mins 165°F
Duck Breast 4–6 pieces, 4–6 ounces each Season as desired 350°F 45–60 mins 150°F
Duck Legs 4–6 pieces, 4–6 ounces each Season as desired 350°F 45–60 mins 165°F
LAMB/VEAL
Lamb Shanks 3–5 lbs, 1 1/2 lbs each Season as desired 250°F 3–5 hours 203°F
Boneless Lamb Leg 3–6 lbs, trimmed and bound Season as desired 250°F 6–8 hours 203°F
Veal Shanks 3-5 pounds, 1 1/2 pounds each Season as desired 250°F 4–5 hours 203°F
52 Cooking Charts 53
Questions? ninjakitchen.com
TIP When smoking, do not add any oil to the food. If oil is
necessary, add very little.
TIP For added flavor, grill the exterior of the protein and
then run through on the smoker setting
TIP For best results, after cooking, allow small proteins to
rest for at least 10 minutes and large proteins up to 1
hour wrapped in plastic wrap.
TIP For proteins with a thick fat cap, like brisket and pork
shoulder, trim o enough fat so that 1/4-inch remains.
Then place on the grill fat side up.

AIR CRISP CHART
FOOD VOLUME (UP TO) PREP COOK TEMP COOK TIME INTERACTION
FROZEN FOODS
Chicken cutlets 6 cutlets N/A 390°F 15–18 mins Flip halfway through cooking
Chicken nuggets 2-3 boxes (24–36 oz) N/A 390°F 13–15 mins Shake frequently during cooking
Fish fillets 12 fillets, breaded N/A 390°F 10–15 mins Flip halfway through cooking
Fish sticks 30 fish sticks (22 oz, approx. 2 boxes) N/A 390°F 10–13 mins Flip halfway through cooking
French fries 1 lb N/A 350°F 18–20 mins Shake frequently during cooking
French fries 2 lbs N/A 350°F 23–27 mins Shake frequently during cooking
French fries 4 lbs N/A 390°F 30–40 mins Shake frequently during cooking
Mozzarella sticks 1 large box (32 oz) N/A 375°F 6–8 mins Flip halfway through cooking
Pot stickers 2 lbs N /A 390°F 15–20 mins Flip halfway through cooking
Pizza rolls 1 large bag (approx. 100ct) N/A 390°F 10–15 mins Shake frequently during cooking
Popcorn shrimp 2 boxes (24 oz) N/A 390°F 10–13 mins Shake frequently during cooking
Sweet potato fries 1 bag (approx. 20–24 oz) N/A 390°F 17–21 mins Shake frequently during cooking
Sweet potato fries 2 bags (approx. 40 oz) N/A 390°F 20–25 mins Shake frequently during cooking
Tater tots 1 bag (approx. 24 oz) N /A 390°F 15–18 mins Shake frequently during cooking
PORK
Pork chops, boneless 6-8 boneless chops (8 oz each) Marinate or seasoned as desired 390°F 20–23 mins Flip halfway through cooking
Pork chops, bone-in 4 thick cut, bone-in (10–12 oz each) Marinate or seasoned as desired 390°F 20–23 mins Flip halfway through cooking
Pork tenderloins 3 whole tenderloins (1– 1 1/2 lbs each) Marinate or seasoned as desired 390°F 20–25 mins Turn frequently through cooking
Bacon 6 strips, thick cut N/A 390°F 10–13 mins Turn frequently through cooking
Sausages 10 each N/A 390°F 10–13 mins Turn frequently through cooking
POULTRY
Chicken breast, boneless 4-6 breasts (1/2–3/4 lbs each) Marinate or seasoned as desired 390°F 8–13 mins Flip halfway through cooking
Chicken thighs, boneless 2 lbs Marinate or seasoned as desired 390°F 12–17 mins Flip halfway through cooking
Chicken thighs, bone-in 6 (4-7 oz each) Marinate or seasoned as desired 390°F 15–20 mins Flip halfway through cooking
Chicken wings 3 1/2 lbs Marinate or seasoned as desired 390°F 40–50 mins Flip 2-3 times through cooking
54 Cooking Charts 55
Questions? ninjakitchen.com
TIP Want to add smoke? See page 9 for Woodfire
Flavor Technology interaction.

AIR CRISP CHART
FOOD VOLUME (UP TO) PREP COOK TEMP COOK TIME INTERACTION
VEGETABLES
Asparagus 2 bunches Trimmed, coat lightly with canola oil, season as desired 390°F 6–9 mins Flip 2 or 3 times through cooking
Beets 6 Peeled, coat lightly with canola oil, season as desired 390°F 25–30 mins Flip halfway through cooking
Bell peppers 4–6 peppers Cut into quarters, coat lightly with canola oil, season as desired 400F 9–13 mins Flip halfway through cooking
Broccoli 2 heads Cut into 1-inch pieces, coat lightly with canola oil, season as desired 390°F 10–13m Toss frequently through cooking
Brussel sprouts 2–3 lbs Halved, trimmed, coat lightly with canola oil, season as desired 390°F 20–30 mins Toss frequently through cooking
Carrots 2 lbs Peeled, cut into 1 or 2-inch pieces, coat lightly with canola oil,
season as desired 390°F 20–23 mins Toss frequently through cooking
Cauliflower 2–3 heads (2–4 lbs total) Cut into 1-inch pieces, coat lightly with canola oil,
season as desired 390°F 30–40 mins Flip 2 or 3 times through cooking
Corn on the Cob 4–6 cobs Coat lightly with canola oil, season as desired 390°F 10–15 mins Flip 2 or 3 times through cooking
Kale (for chips) 8 cups, packed Coat lightly with canola oil, season as desired 390°F 8–11 mins Flip halfway through cooking
Green beans 24 oz Trimmed, coat lightly with canola oil, season as desired 390°F 15–20 mins Toss frequently through cooking
Mushrooms 2–3 lbs Halved or sliced, coat lightly with canola oil, season as desired 390°F 7–9 mins Flip halfway through cooking
Potatoes, russet
3 lbs Cut in 1-inch wedges, toss with 1–3 Tbsp oil 390°F 25–30 mins Shake frequently during cooking
2 lbs Hand-cut fries*, thin, toss with 1–3 Tbsp oil 390°F 22–24 mins Shake frequently during cooking
2 lbs Hand-cut fries*, thick, toss with 1–3 Tbsp oil 390°F 25–30 mins Shake frequently during cooking
6–8 whole Pierce with a fork 390°F 45–50 mins Shake frequently during cooking
Potatoes, sweet
2 lbs Cut in 1-inch chunks, toss with 1–3 Tbsp oil 390°F 30–35 mins Shake frequently during cooking
6–8 whole Pierce with a fork 390°F 50–55 mins Shake frequently during cooking
Squash or zucchini 1 pound Cut in quarters lengthwise, coat lightly with canola oil,
season as desired 390°F 10–14 mins Flip halfway through cooking
56 Cooking Charts 57
Questions? ninjakitchen.com
TIP Want to add smoke? See page 9 for Woodfire
Flavor Technology interaction.

INGREDIENT
PREPARATION
TEMP DEHYDRATE TIME
FRUITS & VEGETABLES
Apples Cut in 1/8-inch slices, remove core, rinse in lemon water, pat dry 135°F 6–8 hours
Asparagus Cut in 1-inch pieces, blanch 135°F 6–8 hours
Bananas Peel, cut in 3/8-inch slices 135°F 6–8 hours
Beets Peel, cut in 1/8-inch slices 135°F 6–8 hours
Eggplant Peel, cut in 1/4-inch slices, blanch 135°F 6–8 hours
Fresh herbs Rinse, pat dry, remove stems 135°F 4 hours
Ginger root Cut in 3/8-inch slices 135°F 6 hours
Mangoes Peel, cut in 3/8-inch slices, remove pit 135°F 6–8 hours
Mushrooms Clean with soft brush (do not wash) 135°F 6–8 hours
Pineapple Peel, cut in 3/8–1/2-inch slices, remove core 135°F 6–8 hours
Strawberries Cut in half or in 1/2-inch slices 135°F 6–8 hours
Tomatoes Cut in 3/8-inch slices; blanch if planning to rehydrate 135°F 6–8 hours
MEAT, POULTRY, FISH
Beef jerky Cut in 1/4-inch slices, marinate overnight 150°F 5–7 hours
Chicken jerky Cut in 1/4-inch slices, marinate overnight 150°F 5–7 hours
Turkey jerky Cut in 1/4-inch slices, marinate overnight 150°F 5–7 hours
Salmon jerky Cut in 1/4-inch slices, marinate overnight 150°F 3–5 hours
DEHYDRATE CHART TIP Want to add smoke? See page 9 for Woodfire
Flavor Technology interaction.

Notes
61
Questions? ninjakitchen.com60

OG751_IG_QSG_MP_Mv6
© 2022 SharkNinja Operating LLC.
NINJA FOODI FAMILY and NINJA WOODFIRE are trademarks of SharkNinja Operating LLC.
For more recipes, visit ninjakitchen.com/recipes
For accessories and replacement parts, visit ninjaaccessories.com
Looking for more recipe inspiration,
tips, and tricks?
Join us and thousands of Foodi friends
on the Ocial Ninja Foodi Family™ Community.
Facebook.com/groups/NinjaFoodiFamily
@NinjaKitchen
youtube.com/EPNinjaKitchen
PRO OUTDOOR GRILL
WITH BUILT IN THERMOMETER
