Loading ...
Loading ...
Loading ...

Measuring the Size of a Target
Before you can use the meter stick or yardstick feature, you must enable it (Pro Settings, page 13).
You can use the meter stick or yardstick feature to measure the size of a target from a distance.
1 Range the target.
2 Tap the ranging button until the scale appears.
NOTE: If you have set fixed aim points, you must tap the button two times. If you have not set fixed aim
points, you must tap the button only once.
The device displays the scale measurement of one meter or one yard at the measured distance. You can use
the scale to estimate the size of your target.
Using Stalk Mode
Before you can use stalk mode, you must enable stalk mode (Pro Settings, page 13).
Stalk mode disables the remote trigger cable to prevent you from activating the rangefinder unintentionally.
1 Hold PWR until the prompt appears.
The device asks you if you want to enter stalk mode.
2 Select YES.
To wake the device from stalk mode, press OK. The remote trigger cable is unlocked until you reenter stalk
mode.
Settings
Display Settings
From the main menu, select > DISPLAY.
BRIGHTNESS: Shows and sets the display brightness.
COLOR: Sets options for the display color (Color Settings, page 12).
TIMEOUT: Sets the amount of time the display is active before it turns off.
NOTE: The display timeout automatically reduces to a maximum of 30 seconds while operating the device in
temperatures below 0°C (32°F).
AIM POINT SHAPE: Sets the shape of the ranged aim point.
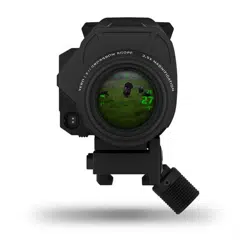
STEADY AIM: Enables the steady aim feature on the device reticle (Display Overview, page 9).
RANGING ANGLE GAUGE: Sets the angle gauge to appear next to the reticle while ranging a target.
AIM POINT LEVEL: Sets a level indicator to appear with the measured aim point (Display Overview, page 9).
LEVEL GAUGE: Sets the level gauge to appear on the display.
BUBBLE LEVEL: Sets the bubble level to appear on the display. The bubble level provides a quick visual indicator
of how severely the crossbow is tilted. For best accuracy, you should always keep the bubble level centered
while shooting the crossbow.
COMPASS: Sets the compass to appear on the display (Display Overview, page 9).
TARGET LOCK: Sets the device to display TARGET LOCKED when range finder readings are consistently the
same value.
DATA FIELDS: Sets which indicators appear while viewing the reticle (Data Fields, page 13).
Color Settings
From the main menu, select > DISPLAY > COLOR.
AUTOMATIC DISPLAY COLOR: Sets the display and aim points to automatically change to red in low-light
conditions and green in bright conditions.
DISPLAY COLOR: Sets the primary color for the display.
AIM POINT COLOR: Sets the aim point color.
12 Settings
Loading ...
Loading ...
Loading ...