Loading ...
Loading ...
Loading ...
Assemble the Rail (Continued)
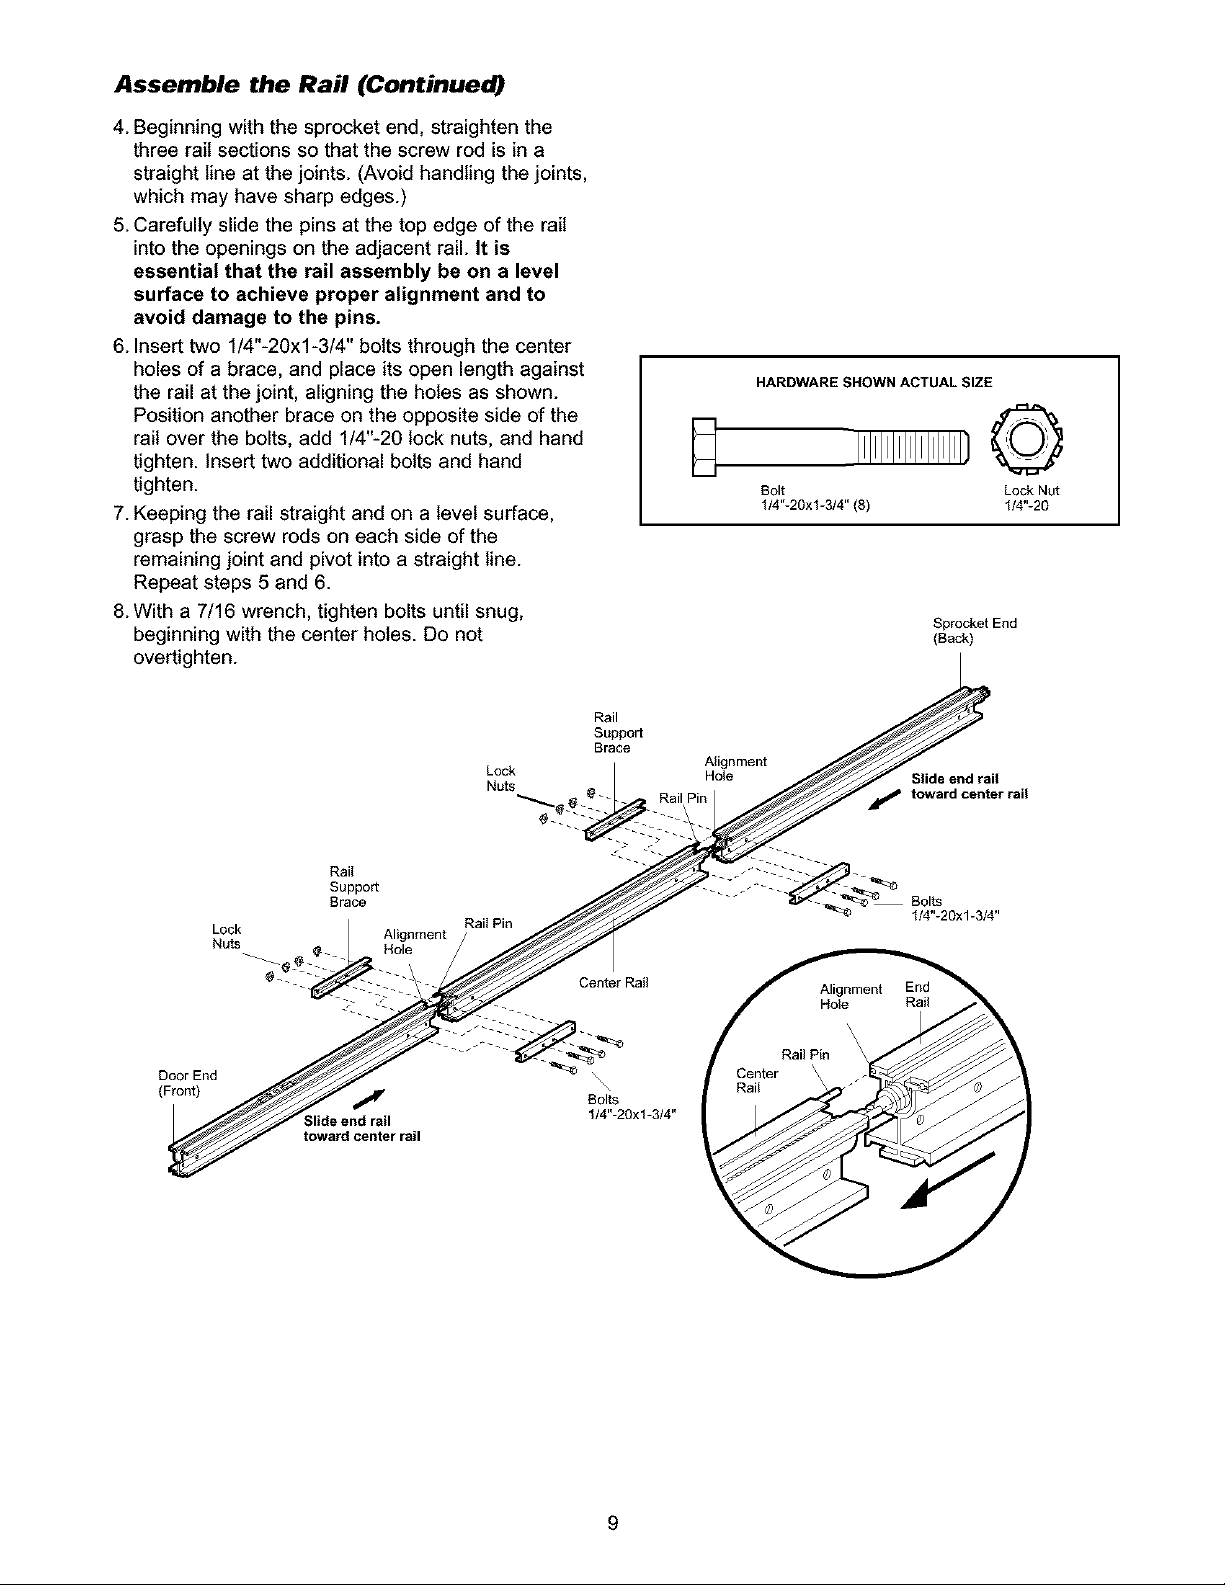
4. Beginning with the sprocket end, straighten the
three rail sections so that the screw rod is in a
straight line at the joints. (Avoid handling the joints,
which may have sharp edges.)
5. Carefully slide the pins at the top edge of the rail
into the openings on the adjacent rail. It is
essential that the rail assembly be on a level
surface to achieve proper alignment and to
avoid damage to the pins.
6. Insert two 1/4"-20xl-3/4" bolts through the center
holes of a brace, and place its open length against
the rail at the joint, aligning the holes as shown.
Position another brace on the opposite side of the
rail over the bolts, add 1/4"-20 lock nuts, and hand
tighten. Insert two additional bolts and hand
tighten.
7. Keeping the rail straight and on a level surface,
grasp the screw rods on each side of the
remaining joint and pivot into a straight line.
Repeat steps 5 and 6.
8. With a 7/16 wrench, tighten bolts until snug,
beginning with the center holes. Do not
overtighten.
E
HARDWARE SHOWN ACTUAL SIZE
I=1=1=1=1=1=1=1=1=1)@
Bolt Lock Nut
1/4"-20xl-3/4" (8) 114"-20
Sprocket End
(Back)
Rail
Support
Brace
Door End
(Front)
Lock Alignment
Nuts Hole
Slide end rail
toward center rail
Rail
Support
Brace
Rail Pin
Center Rail
Alignment
Hole
Slide end rail
toward center rail
Bolts
I/4"-20xl-3/4"
9
Loading ...
Loading ...
Loading ...