Loading ...
Loading ...
Loading ...
ENGLISH I 17
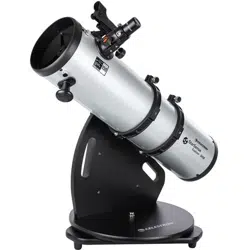
b. Adjust one pair of screws at a time. Start by loosening
one of the screws in the pair and tightening the other
(Figure 20).
Figure 20: For the 130 Tabletop Dob, three sets of push-pull screws in
the mirror cell adjust the primary mirror’s tilt. Loosen one screw in the
pair and tighten the other to adjust the tilt.
c. If the mirror tilts opposite the desired direction, loosen
the screw you previously tightened and tighten the
other screw in the pair.
d. Once you have adjusted one pair of screws as much
as possible, move on to another pair of screws.
e. Continue adjusting until the reflection of the secondary
mirror is centered within the reflection of the primary
mirror. When finished, the view through the collimation
cap should look like Figure 16.
f. Replace the rear cover on the mirror cell with the three
screws removed previously.
For the 114 and 150 Tabletop Dobs, you won’t need
any tools to tilt the primary mirror. Instead, simply adjust
the thumbscrews. Three thumbscrews are locking
screws,while the other three thumbscrews adjust the tilt.
a. Start by loosening all three of the locking
thumbscrews (Figure 21).
Figure 21: : The 114 and 150 Tabletop Dobs have three spring-loaded
collimation thumbscrews that adjust the tilt of the primary mirror. The other
three thumbscrews lock the mirror once you finish making tilt adjustments.
LOCKING
THUMBSCREWS
COLLIMATION
THUMBSCREWS
b. Adjust the collimation thumbscrews one at a time.
Each collimation thumbscrew is spring-loaded so
you can rotate it clockwise or counterclockwise.
c. Continue adjusting the screws until the reflection
of the secondary mirror is centered within the
reflection of the primary mirror.
d. Re-tighten the three locking thumbscrews until they
are snug.
e. When finished, the view through the collimation cap
should look like Figure 16.
Your telescope’s optics are now aligned and ready to use.
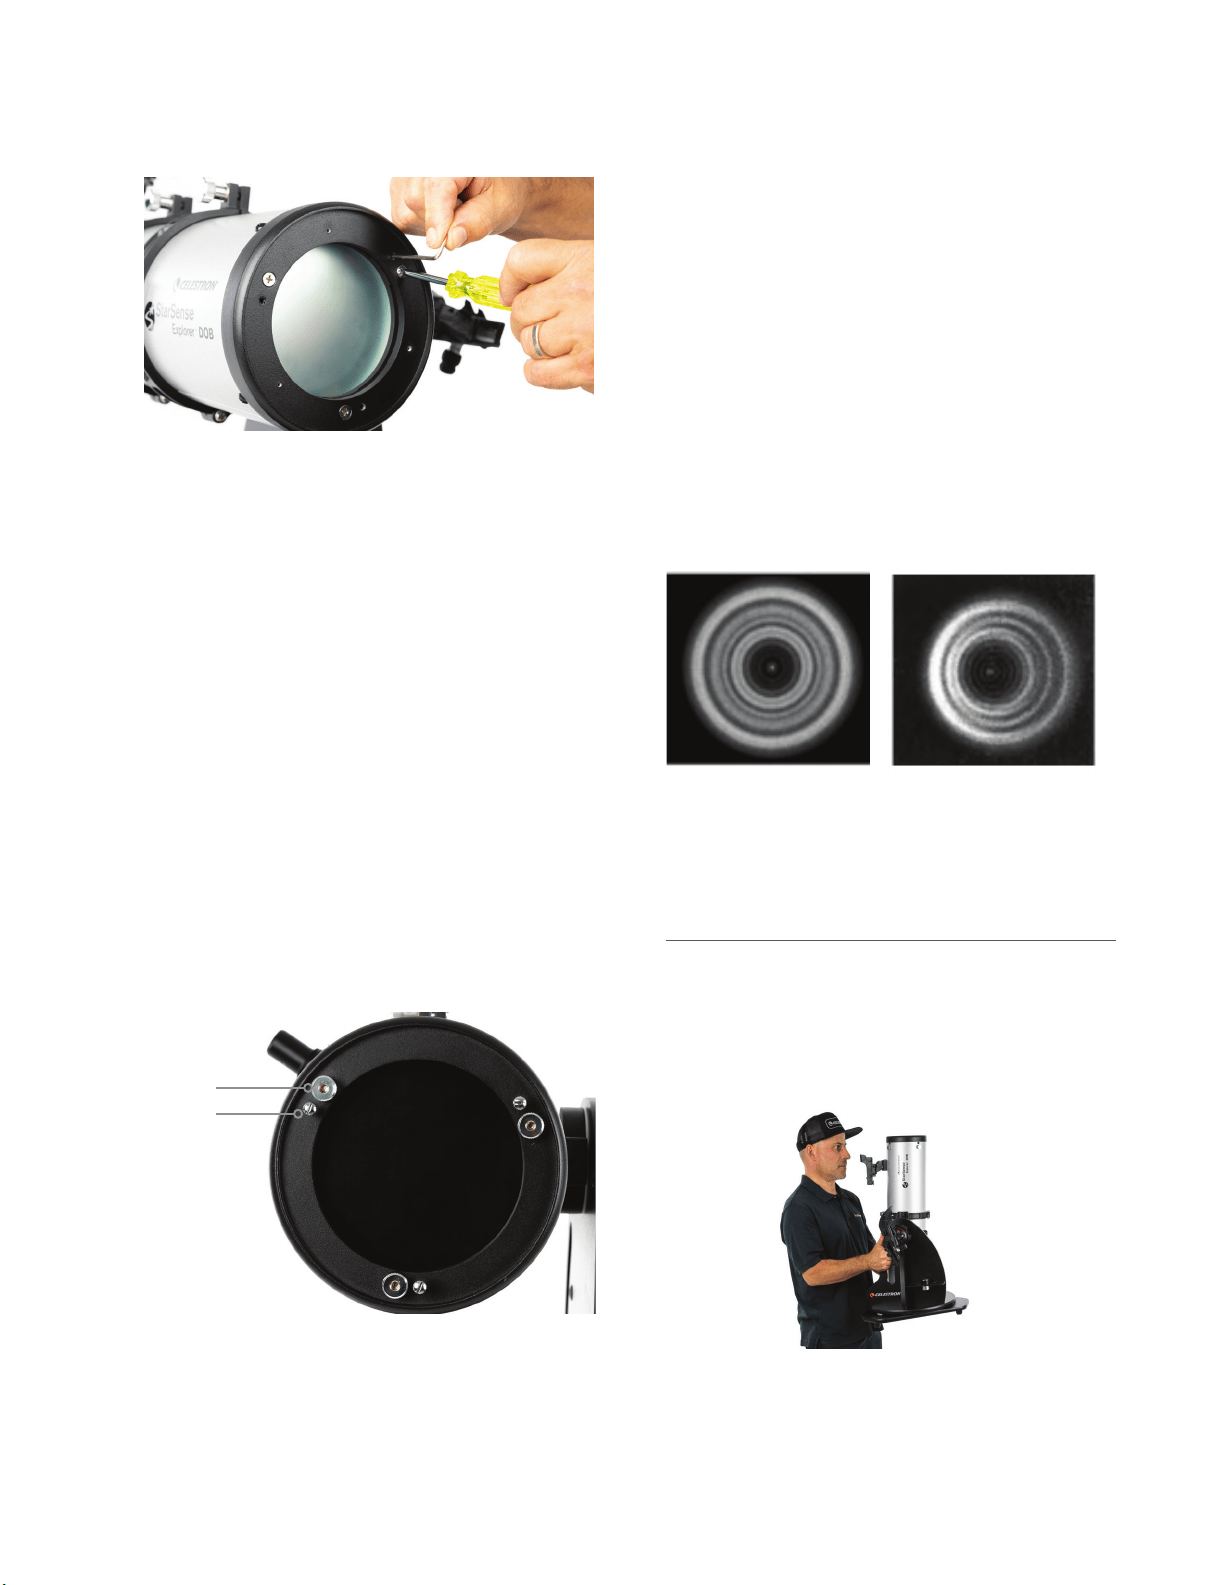
You can confirm a telescope’s alignment at night by pointing
the telescope at a bright star at high magnification. Center
the star in the field of view and slightly defocus the star—it
should appear like a circle with a hole in the middle. (The
“hole” is the shadow from the secondary mirror.) If the
hole is not centered within the circle, you’ll need to make
additional adjustments to collimation (Figure 22).
GOOD COLLIMATION NEEDS ADJUSTMENT
Figure 22: You can check collimation by defocusing a bright star centered
in the field of view and checking to see if the “hole” is centered. If it is not
centered, some adjustment is needed.
TRANSPORTING
Transporting the StarSense Explorer Tabletop Dobsonian
is easy. In most cases, you won’t need to disassemble
the scope. Just grasp the base with one hand on the
integrated handle and support the bottom of the base
with your other hand (Figure 22a).
Figure 22a: The SSE Tabletop Dobs are very portable and can be moved
without any disassembly required
Loading ...
Loading ...
Loading ...