Loading ...
Loading ...
Loading ...

18 English
Initial startup
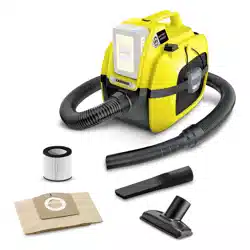
Connecting accessories
Illustration H
1. Press the suction hose into the suction hose con-
nection on the device until it latches into place.
a To remove, press the latch and pull the suction
hose out.
2. Connect the vacuum nozzle to the handle.
Illustration J
3. Connect the crevice nozzle to the handle.
Inserting the battery pack
Illustration K
1. Push the battery pack into the battery pack mount-
ing from above until the battery pack latches into
place.
Note
Use the battery packs Battery Power (+) 18/25 or
18/50 only.
Switch on the device
Illustration L
1. Press the I button to switch the device on.
The suction and blowing functions are switched on.
Operation
ATTENTION
Damage to the device
Always ensure that the cartridge filter is inserted, for
both wet vacuuming and dry vacuuming.
Dry vacuuming
ATTENTION
Damage to the cartridge filter
When changing from wet to dry vacuuming, a wet car-
tridge filter can become damaged and unusable.
Allow the cartridge filter to dry completely before dry
vacuuming or replace it with a dry cartridge.
Replace the cartridge filter as necessary.
1. Insert the filter bag when vacuuming fine dust.
The fill degree of the filter bag depends on the
amount of dirt vacuumed.
The filter bag must be changed more frequently
when vacuuming fine dust, sand, etc.
A damaged filter bag can rupture, so be sure to
change the filter bag in time.
Wet vacuum cleaning
ATTENTION
Damage due to moisture
Do not use a filter bag for wet vacuum cleaning.
Note
When the container is full, a float switch closes the suc-
tion opening and the device runs at a higher speed.
Switch off the device immediately and empty the con-
tainer.
1. To attach the upholstery nozzle or crevice nozzle to
the handle in order to vacuum up moisture or liquids,
see Chapter Connecting accessories.
Blowing function
Cleaning of locations that are difficult to access or
where vacuuming is not possible, e.g. leaf litter from a
gravel bed.
Illustration M
1. Push the suction hose into the blower connection
until the suction hose latches into place.
Finishing operation
Illustration L
1. Press the 0 button to switch the device off.
Illustration N
2. Push the battery pack unlocking button forwards
and pull the battery pack upwards out of the battery
pack mounting.
3. Charge the battery pack if necessary, see chapter
Charging process.
Emptying the container
Illustration O
1. Open the device, see Chapter Installation.
2. Empty the container.
3. Close the device, see Chapter Installation.
Storing the device
Illustration P
1. Store the upholstery nozzle and crevice nozzle on
the device.
2. For storage the suction hose, wind the suction hose
around the device and fasten using the fastening
straps.
3. Store the device in a dry room.
Storing the battery pack
Note
Regardless of the vacuuming operations, the LC display
uses a small amount of the battery capacity, regardless
of whether the battery pack is inside or outside the de-
vice.
1. See chapter Storage.
Transport
몇 CAUTION
Failure to observe the weight
Risk of injury and damage
Be aware of the weight of the device during transport
and storage.
1. When transporting in vehicles, secure the device
against slipping and tipping over according to the
applicable guidelines.
Manual transport
1. Lift and carry the device by the carrying handle.
Transport in vehicles
1. Secure the device against slipping and tipping over.
Care and service
Device and accessories
1. Clean the device and accessory parts made of plas-
tic with a commonly available plastic cleaner.
2. Rinse the container and accessories with water as
necessary and dry them thoroughly before further
use.
3. Regularly check the battery terminals for soiling and
clean them as necessary.
Cleaning the cartridge filter
Note
Recommendation: Replace the cartridge filter 1x per
year.
1. Open the device, see Chapter Installation.
Illustration Q
2. Remove the cartridge filter.
Illustration R
3. If necessary, clean the cartridge filter under running
water but do not rub or scrub it.
Loading ...
Loading ...
Loading ...