Loading ...
Loading ...
Loading ...
17
CONTACTING CUSTOMER CARE
If service is required, call your authorized service agency.
Have the following information readily available.
• Model number
• Serial number
• Date purchased
• Name of dealer from whom purchased
Clearly describe the problem that you are having. If you
are unable to obtain the name of an authorized service
agency, or if you continue to have service problems,
contact LYNX Grills, Inc at 1-888-289-5969 or write to:
Lynx Grills, Inc
62201 Hwy 8 W
Greenwood, MS 38930
Record the following information indicated below. You will
need it if service is ever required. The serial number and
model number can be located either on the underside of
the drip tray (if you have one), on the heat shield behind
the front panel, or on the inside left panel wall.
Record the information indicated below. You will need it if
service is ever required.
Model number ________________________________
Serial number ________________________________
Date of purchase ______________________________
Date installed ________________________________
Dealer’s name _______________________________
Dealer's Address ______________________________
____________________________________________
If service requires installation of parts, use only authorized
parts to ensure protection under the warranty.
KEEP THIS MANUAL FOR FUTURE REFERENCE.
LYNX GRILLS, LLC
Greenwood, Mississippi 38930
THIS DESIGN CERTIFIED UNDER ANSI Z21.58; CSA 1.6 OUTDOOR COOKING GAS APPLIANCE
NAT. 4” (996 Pa) LP/PROP 10” WCP (2492 Pa)
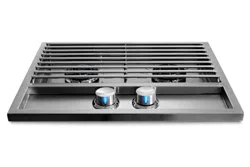
LOW HEAT FLAME ADJUSTMENT
The burners on your Lynx accessory feature an adjustable
low setting. Fluctuations in gas pressure, gas conversion
and even in the quality of the gas itself may a ect burner
performance at the "LOW" or “MED” setting. It could be
either too high or too low causing the fl ame to turn o .
To adjust the burner setting:
1. Make sure the grill accessory is cool.
2. Remove the grates so that you can see the fl ame while
adjusting the burner.
3. Light the burner and set it to "LOW". (all the way
counter- clockwise).
4. Pull o the control knob.
5. While holding the valve shaft with pliers, insert a
thin fl at-blade screwdriver into the shaft and, while
watching the fl ame, adjust it to a minimum stable
setting.
LIGHTING INSTRUCTIONS
Loading ...
Loading ...
Loading ...