Loading ...
Loading ...
Loading ...

12
ELECTRIC CONNECTIONS
OPTIONAL ELECTRICAL KITS
Each accessory includes 6 feet of wiring (coiled inside the back of the accessory) to connect the accessory to a Lynx grill.
Additionally, Lynx manufactures 2 specialized electrical kits that you may purchase for your accessory, depending upon how
it will be installed. Each electrical kit ships with an instructional sheet for assembly. Assembly instructions and schematics/
drawings can also be found on our website at www.lynxgrills.com.
LASK Lynx Accessory Switch Kit
LPEK Lynx Power Extension Kit
This switch and transformer kit allows independent control of a Lynx accessory
burner without connection to a grill. The kit contains a transformer and mounting
bracket as well as a switch assembly with a mounting plate.
Lynx Power Extension Kit provides 12 feet of additional wire between your Lynx Grill
and accessory burner.
The accessory electrical harnesses are designed to provide power for both ignition and lighting. While ignition is controlled
at the accessory, lighting is controlled at the grill.
You can control lighting at the accessory by installing the Lynx Accessory Light Switch (LASK).
Disconnect the 4-pin connector on the grill and connect those plugs to the mating plugs on your accessory.
Important note: If using multiple Lynx accessories with the Control Illumination/Blue LED'S, a connector for this purpose is
built into the accessory wiring. This will allow you to use the light switch on your Lynx grill to actuate the power on more
than one accessory.
Installation requires an outdoor 120VAC 15A GFI (Ground Fault Interrupter) electrical outlet adjacent to the accessory.
The GFI outlet features an internal breaker that reduces shock hazard. This type of outlet should be installed by a qualifi ed
electrician inside the enclosure for built-in units.
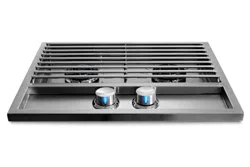
The built-in side burners are designed for connection to an adjacent Lynx grill with a 12-volt transformer to provide power
for lighting and ignition. A LASK switch kit may be used if ho gril is available for connection. The side burners use a
standard 9V battery that provides backup power for the electronic ignition system.
To install or replace the battery, follow this procedure:
1. Locate the battery compartment on the inside rear wall of the cart, or inside the built-in enclosure. The cart has an access
panel on the back side that allows easy access to the battery holder.
2. Disengage the battery compartment by pushing the battery cover in the direction indicated by the arrow on the cover.
You may also use a fl at head screwdriver.
3. The battery compartment will disengage and protrude so that you may pull and remove the battery and compartment.
4. Insert and/or replace a new 9V battery into the battery compartment.
If the electrical system fails to operate, a connection may have come loose in shipping or the GFI may have tripped,
requiring a reset.
The grill accessory does not come with its own power source. It may be powered directly from your Lynx Grill.
When a Lynx grill is not available or if the grill is not located close enough to the accessory a Lynx LASK (Lynx Accessory
Switch Kit) is available as an optional purchase.
CONNECTING THE WIRING
Loading ...
Loading ...
Loading ...
