To replace the RO cartridge:
1. Turn off the water supply and close the storage tank valve (if
applicable), then open the RO faucet to relieve pressure.
2. Remove (turn to the left) the sump from the filter head. Be
careful . . . the sump is full of water.
3. Remove and discard the RO cartridge in a proper manner.
Flush the insides of the sump with fresh water. Do not lose the
large o-ring seals.
NOTE: Sanitizing is recommended after servicing inner parts of the
system. See “Sanitize, Pressure Test & Purge” section of
your owner’s manual.
4. Insert new RO cartridges with o-ring seals toward the top, and
with lubricated o-ring in place, turn to the right to reattach the
sump.
5. Remove and replace batteries to reset counter and timer. (moni-
tored models only).
6. Turn on the water supply to the RO.
7. Open the RO faucet to allow air to escape, then close.
8. Important purging instructions: The RO cartridge contains a
food grade preservative that you should clean from it before
using water from the system. The preservative will give product
water an unpleasant taste and odor. Purge the membrane car-
tridge by allowing the storage tank to fill with product water
(takes about 4 hours), then open the faucet and drain. Repeat
at least 6 times (see your owner’s manual). Then the RO
system is ready to make product water for use.
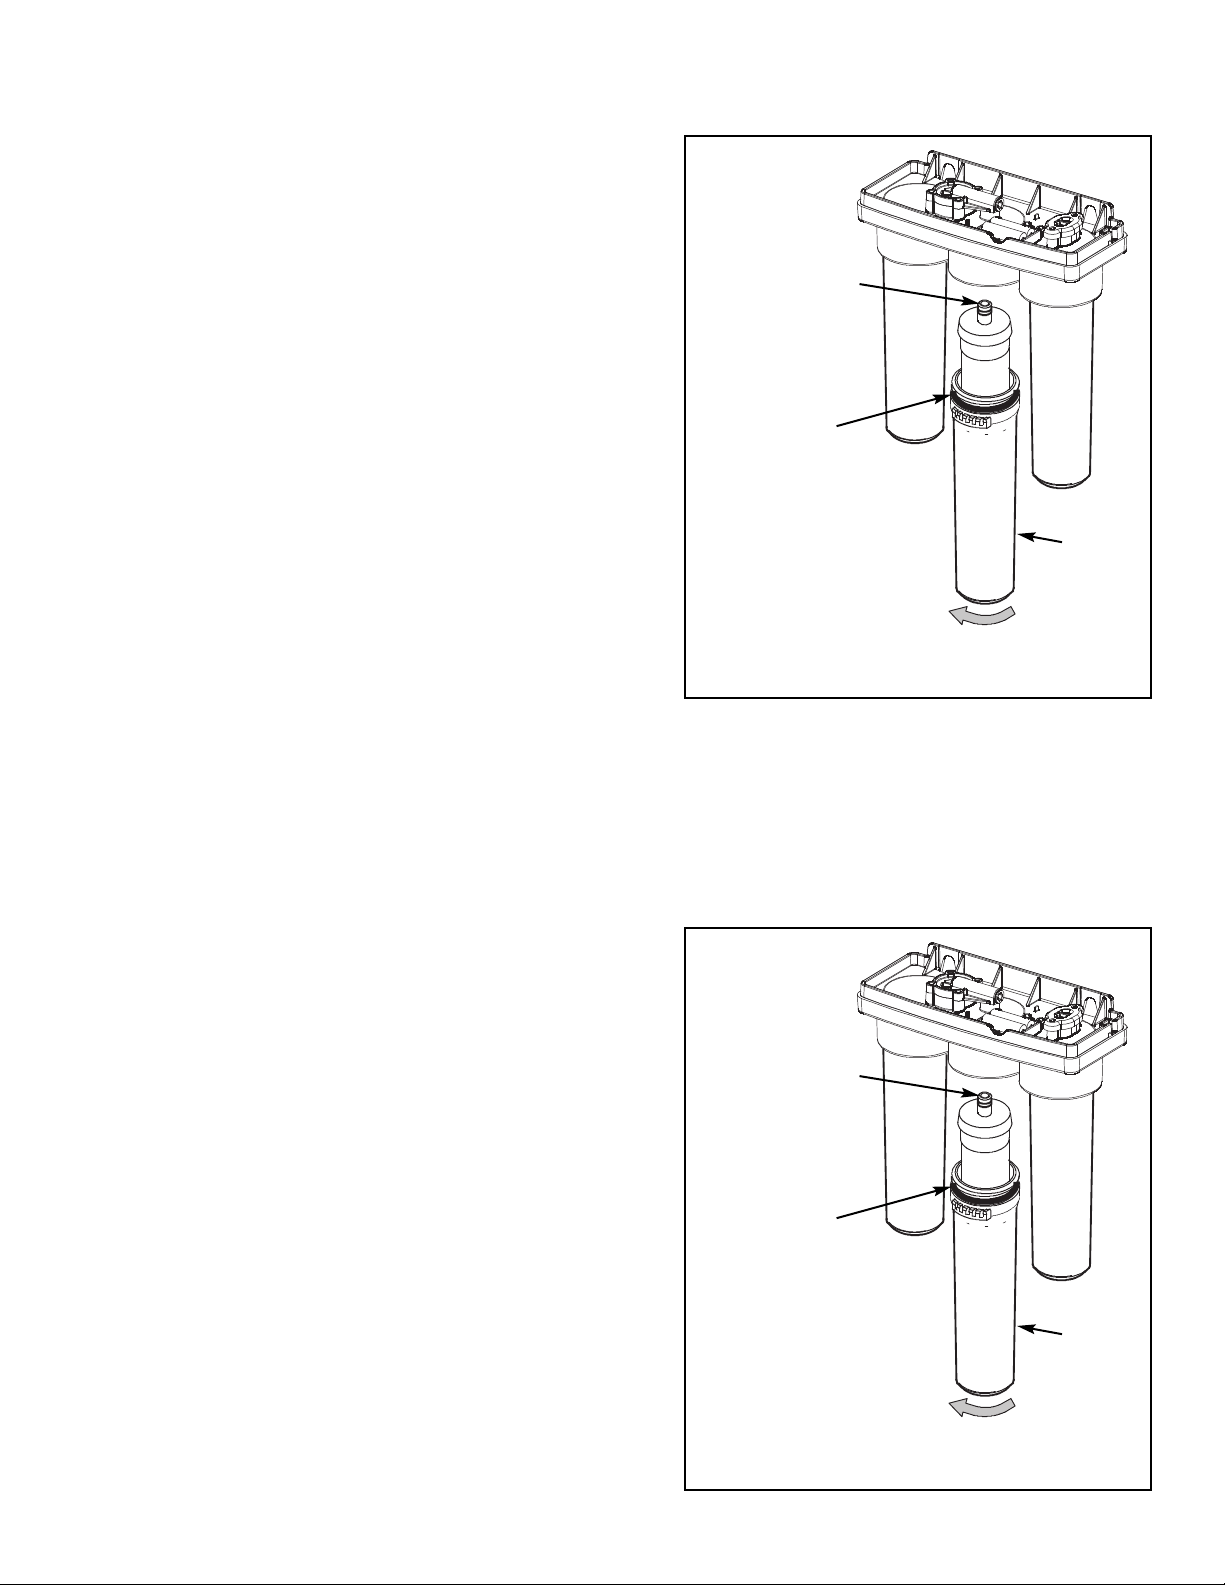
REPLACEMENT RO MEMBRANE CARTRIDGE
Part Nos. 7233557, 7264223, 7267962 & 7267970
RO Cartridge
(cartridge o-ring
seals on this end)
Figure 1
7322013 (Rev. B 2/19/14)
Sump
O-Ring
Seal
Turn sump to the left to remove.
Turn sump to the right to install and tighten.
To replace the RO cartridge:
1. Turn off the water supply and close the storage tank valve (if
applicable), then open the RO faucet to relieve pressure.
2. Remove (turn to the left) the sump from the filter head. Be
careful . . . the sump is full of water.
3. Remove and discard the RO cartridge in a proper manner.
Flush the insides of the sump with fresh water. Do not lose the
large o-ring seals.
NOTE: Sanitizing is recommended after servicing inner parts of the
system. See “Sanitize, Pressure Test & Purge” section of
your owner’s manual.
4. Insert new RO cartridges with o-ring seals toward the top, and
with lubricated o-ring in place, turn to the right to reattach the
sump.
5. Remove and replace batteries to reset counter and timer. (moni-
tored models only).
6. Turn on the water supply to the RO.
7. Open the RO faucet to allow air to escape, then close.
8. Important purging instructions: The RO cartridge contains a
food grade preservative that you should clean from it before
using water from the system. The preservative will give product
water an unpleasant taste and odor. Purge the membrane car-
tridge by allowing the storage tank to fill with product water
(takes about 4 hours), then opening the faucet and drain.
Repeat at least 6 times (see your owner’s manual). Then the
RO system is ready to make product water for use.
REPLACEMENT RO MEMBRANE CARTRIDGE
Part Nos. 7264223, 7267962 & 7267970
RO Cartridge
(cartridge o-ring
seals on this end)
Figure 1
7322013 (Rev. B 2/19/14)
Sump
O-Ring
Seal
Turn sump to the left to remove.
Turn sump to the right to install and tighten.