DVB-U2900
Instruction Manual
VllS Hi-Fi
VIDEO
www.samsungasc.com
iiiiiiiiiiiiiiiiiiiiiiiii,_,_,_,_,_,_,_,_,_,'..............................................................................................................
WARNING:
TOPREVENT DAMAGEWNICH MAYRESULT IN
FIREOR ELECTRICSHOCKHAZARD DO NOT
EXPOSE TNISAPPLIANCE TO RAIN OR
MOISTURE
WARNING:
TO AVOID HAZARDOUS EXPOSURE TO
INVISIBLE LASER RADIATION, DO NOT OPEN
OR REMOVE/DEFEAT LASERTRANSPORT
PROTECTIVE HOUSING
USER/INSTALLERCAUTION:
Yourauthoritytooperatethis FCC certified
equipl:Tent could be voided if you r:Takechanges or
modificationsnotexpresslyapproved bythe
manufacturer, who is responsibleforcompliance
with Part 15 FCC rules
NOTETOCATVSYSTEMINSTALLER:
This reminder isprovided tocall the CATVsystem
installer's attention to Article 820-40 of[he
National ElectronicCodethatprovidesguidelines
for proper grounding and, in particular, specifies
thatthecableground shall beconnected to[he
grounding system ofthebuilding, asclosetothe
pointofcableentryas practical
....... .......
I sin[ende0toalert
I theusertothepresenceof
I _ urfinsu ated dangerousvoltage
I -- within the product'senclosure
I that may be of sufficient
I magn tudeto constitute risk of
I n,eo l ric L
I olislntendeO[oaler[
I !W\ theusertothepresenceof
I Z __'&_ irnportantoperatlng and
I i tructioos,nthe
I literatureaccompanyingthis
Copy Notification
Federal law provides severe civil and criminal
penalties for the unauthorized reproduction,
distribution, or exhibition of copyrighted motion
pictures and videotapes. (Title 17r United States
Code, Sections 501 and 506)
Macrovision Notification
This product incorporates copyright protection
technology that isprotected by method claims of
certain US patents and other intellectual property
rights owned by Macrovision Corporation and other
rights owners Use of this copyright protection
technology must be authorized by Macrovision
Corporation, and is intended for home and other
limited viewing uses only unless otherwise
authorized by Macrovision Corporation Reverse
engineering or disassembly is prohibited
CAUTION:
To prevent fire, shock hazard, or annoying
interference, use only the recommended
accessories To prevent electric shock, do not use
this (polarized) plug with an extension cord,
receptacle, or other outlet unless the blades can be
fully inserted to prevent blade exposure To reduce
the risk of electric shock, do not remove the unit
cover or back There are no serviceable parts
inside Refer servicing to qualified personnel only
CUIDADO:
Para prevenir incendio, nesgo de choque, o
interferencia enfadosar use solamente los
accesorios recomendados Para prevenir
electrochoque, no use este enchufe (polarizado)
con un cordon de extension, tomb de corriente, o
cualquier otra tomB a menos que los dientes
puedan ser completamente insertados para preven_r
exposicion de los dientes Para reducir el riesgo de
descarga electrica, no remueva la cubierta o la
parte posterior del equipo Den[to del equipo no
hay partes que requieren servicio Dir_ase
solamente a personal calFicado cuando requ_era
servido
ATTENTION:
Po_r e_ _e_ _7_ r _E_9_ de c_ocs¢ ou
accessoires recommandes Pour eviter les chocs
electriques, ne pas employer cette prise (polarisee)
avec une rallonger une prise de courant ou une
autre sortie de courant a nToins que les lames
peuvent ¢tre inserees a fond pour I'exposition des
lames Pour reduire les nsques de chocs
electriques, ne pas retirer le couvercle ou I'arriere
du module. II n'y a pas de piece utilisable
I'interieur Ne faire effectuer I'entreden que par un
personnel qualifie
Important Safety Instructions
))))))))))))))))
1. Read these instructions.
2. Keep these instructions.
3. Heed allwarnings.
4. Followallinstructions. ))))))))))))))))
5. Do notuse thisapparatusnear water. ))))))))))))))))
6m C_ea. O._ with dry c_othl HHHHHHHH
7. DO not block any ventilation openings. Install in accordance with the manufacturer's instructions. ))))))))))))))))
8. Do not install near any heat sources such as radiators, heat registers, or other apparatus (including amplifiers) that
produce heat.
9. Do not defeat the safety purpose of the polarized or grounding-type plug. A polarized plug has two blades with
one wider than the other. A grounding type plug has two blades and a third grounding prong. The wide blade or
the third prong are provided for your safety. If the provided plug does not fit into your outlet, consult an
electrician for replacement of the obsolete outlet.
10. Protect the power cord from being from being walked on or pinched particularly at plugs, convenience
receptacles, and the point where they exit from the apparatus.
11. Only use attachments/accessories specified by the manufacturer.
12. Use only with cart, stand, tripod, bracket, or table specified by the manufacturer, or sold with the apparatus.
When a used, caution when moving the cart/apparatus combination to avoid injury from tip-over.
13. Unplug this apparatus. When acart is used, use caution when moving the cart/apparatus combination to avoid
injury from tip-over.
14. Refer all servicing to qualified service personnel. Servicing is required when the apparatus has been damaged in
any way, such as power-supply cord or plug is damaged, liquid has been spilled or objects have fallen into the
apparatus, the apparatus has been exposed to rain or moisture, does not operate normally, or been dropped.
((((((((((((((((((((((((((((((((((..........................................................
Table of Contents 1
iiiiiiiiiiiiiiiiiii
iiiiiiiiiiiiiiiiiii
iiiiiiiiiiiiiiiiiii
iiiiiiiiiiiiiiiiiii
iiiiiiiiiiiiiiiiiii
iiiiiiiiiiiiiiiiiii
iiiiiiiiiiiiiiiiiii
iiiiiiiiiiiiiiiiiii
iiiiiiiiiiiiiiiiiii • Safety
iiiiiiiiiiiiiiiiiii
iiiiiiiiiiiiiiiiiii • Important Safety Instructions ....................................... 3
iiiiiiiiiiiiiiiiiii
iiiiiiiiiiiiiiiiiii
iiiiiiiiiiiiiiiiiii • Feature Summary
iiiiiiiiiiiiiiiiiii • FeatureSummary ............................................... 7
iiiiiiiiiiiiiiiiiii • Unpack ........................................................ 7
iiiiiiiiiiiiiiiiiii • DiscTypeandCharacteristics ...................................... 8
iiiiiiiiiiiiiiiiiii
!!!!!!!!!!!!!!!!!!!
iiiiiiiiiiiiiiiiiii • 1- System Overview
iiiiiiiiiiiiiiiiiii • FrontPanelOverview ............................................. 9
iiiiiiiiiiiiiiiiiii • RearPanel ..................................................... 10
iiiiiiiiiiiiiiiiiii • FrontPanelDisplay .............................................. 10
iiiiiiiiiiiiiiiiiii • RemoteOontrolOverview ......................................... 11
iiiiiiiiiiiiiiiiiii • Insert Batteries into Remote ........................................ 11
iiiiiiiiiiiiiiiiiii • Using the TV Buttons on the Remote Control .......................... 12
iiiiiiiiiiiiiiiiiii
iiiiiiiiiiiiiiiiiii
iiiiiiiiiiiiiiiiiii • 2- Getting Started
iiiiiiiiiiiiiiiiiii R Basic Connections/Auto Setup...................................... 13
iiiiiiiiiiiiiiiiiii
iiiiiiiiiiiiiiiiiii
iiiiiiiiiiiiiiiiiii • 3- Basic Operation
iiiiiiiiiiiiiiiiiii • DeckOontrolButtons ............................................. 14
iiiiiiiiiiiiiiiiiii • BasicDVDOperation ............................................. 14
iiiiiiiiiiiiiiiiiii • BasicVOROperation ............................................. 15
iiiiiiiiiiiiiiiiiii • BasicTVTunerOperations ........................................ 16
iiiiiiiiiiiiiiiiiii
iiiiiiiiiiiiiiiiiii• 4-systemSetup
iiiiiiiiiiiiiiiiiii • On-Screen Menu Navigation ....................................... 16
iiiiiiiiiiiiiiiiiii • MenuLanguage ................................................. 17
iiiiiiiiiiiiiiiiiii • ManualClockSet ................................................ 18
iiiiiiiiiiiiiiiiiii • TunerBandSetting .............................................. 19
iiiiiiiiiiiiiiiiiii , AutoOhannelMemory ............................................ 20
iiiiiiiiiiiiiiiiiii • Channel Add/Delete .............................................. 21
iiiiiiiiiiiiiiiiiii • AutoPowerOff .................................................. 22
iiiiiiiiiiiiiiiiiii • FrontPanelDimmer .............................................. 23
iiiiiiiiiiiiiiiiiii • RF Output Channel .............................................. 23
iiiiiiiiiiiiiiiiiii
iiiiiiiiiiiiiiiiiii
iiiiiiiiiiiiiiiiiii
iiiiiiiiiiiiiiiiiii
iiiiiiiiiiiiiiiiiii
iiiiiiiiiiiiiiiiiii
Table of Contents
• 5- DVD Setup
• Player Menu Language ...........................................
• Disc Menu Language .............................................
• Audio Language .................................................
• Subtitle Language ...............................................
• Parental .......................................................
• Digital Output ...................................................
• DTS ..........................................................
• Dynamic Compression ............................................
• 2XScan Audio ..................................................
• TV Aspect Ratio .................................................
• 6 - DVD Sound Setup
• A/VReceiverConnections.........................................
24
24
25
25
26
27
28
29
3O
31
32
• 7 - DVD Operations
• Special Playback Features ........................................
• Disc Menu Navigation ............................................
• Screen Fit Playback ..............................................
• Title/Chapter/Time Selection .......................................
• Zoom .........................................................
• Angle View .....................................................
• Subtitle .......................................................
• Audio .........................................................
• 3D Sound ......................................................
• Repeat Chapter/Title .............................................
• Bookmarks ....................................................
• Programmed Playback ...........................................
• Random Playback ..............................................
• MP3 Playback ..................................................
33
34
34
35
36
36
37
38
38
39
40
41
41
42
• 8 - Memory Stick
• Memory Stick ..................................................
• DAM (Digital Audio Manager) Playback ...............................
• Memory Stick Pull out ............................................
• DPM (Digital Photo Manager) Playback ...............................
• Slide Show .....................................................
• Slide Show Order ..............................................
• Photo View .....................................................
• Edit Photo ......................................................
43
47
48
48
5O
51
52
53
5
--------------• ,,i -VCRvariabl e,,SearcAut°PlaTryacking.S.pecial VCRPlaybaCskWHSPlaybacPklaybac.,k.. ' _'' ' "' ' ' .. ' ' ."."."."."._".". .".".".".".".".".". .".".".".".".".".". .".".".".".".".".""' '"""' ' ' ' ' """"" ' ' ' ' ' """""' ' ' ' ' """""' ' ' ' ' """"" ' ' ' ' ' ""e"ystem".'.F.eatures.....
--------------• •i0 -uVCsRpeciRalecordSpeeO"_ne'T°uch Recordings...(OTR)B.asic Rec°rding'R'ec°rdinRgec°rdin,g.._eatures".''. '.'. '. '. '.. . . . . . . . . . . . . '. '.'. '. '.'. '.'. '. '.'..' . . . . . . . . .. .....".. "...................................
..................• R11- TimerRecordinHgowto Set a Timer Recording
• Aippendixds. AdvanCeonnecting_A- OtherVide_vide°/c°mp°nentC°nnecti°n_'t°nit°rTSvtere° C°nnecti°nSC°nnecti°ns"Vide°.C.onnectiOnEquipment.S....................' .' (fo........DVD).........'.' .'...............' .'.' ..............".."............................r
• Appendix B- Help
• Technical Specidcaqons ...........................................
515454555
5_57589
6O
6_61623
65
1
Feature Summary
DVD+VCR Features
Perfect compatibilityto playbackDVDs, VCDs, audioCDs, MP3 discs orVHSTapes.
• EnjoyaDVDmovie while recording a TV show tothe VCR.
Auto Setup instantly finds thetime and runs channelsearch.
i REinputs and outputs for allkindsofTVs available.
•Composite, S-Video,and Component video outputs
• Universal remoteprovides the fuil operation onDVD+VCR.
On-Screen Program(english/French/Spanish).
DVD Features
• 1O_bitvideo digitaltoanalog converter and 27MHz advanced digitalfilter
Playback of96KHz/24-bit sources.
• DTSdigital output for DTS-enhanced DVDs.
• Playback MP3 files from CD-ROM.
Continued audioduring2xspeed playback.
VCR Features
Hi-FiStereoVCR.
14headsfor superior slowmotion and stop action
• Playback of S-VHS tapes at better than standard resolution.
VISS Scan, Zero Return, BlankSearch.
•8-event/1 month timer recording.
•Time remaining counter, real time counter.
Note
*Discs which cannotbe playedwith this player. *Ability toplaybackmay dependon recording
DVD-ROM _ DVD-RAM •conditions. .
CD-ROM • CDV • DVD-R • CD-RW
•CDI SVC,CVD DVD+RW,-RW PhotoCD
• HDlayer of super AudioCD
*CDGs playaudio only, notgraphics.
iiiiiiiiiiiiiiiiiiiiiiiiiiiiii
Unpack
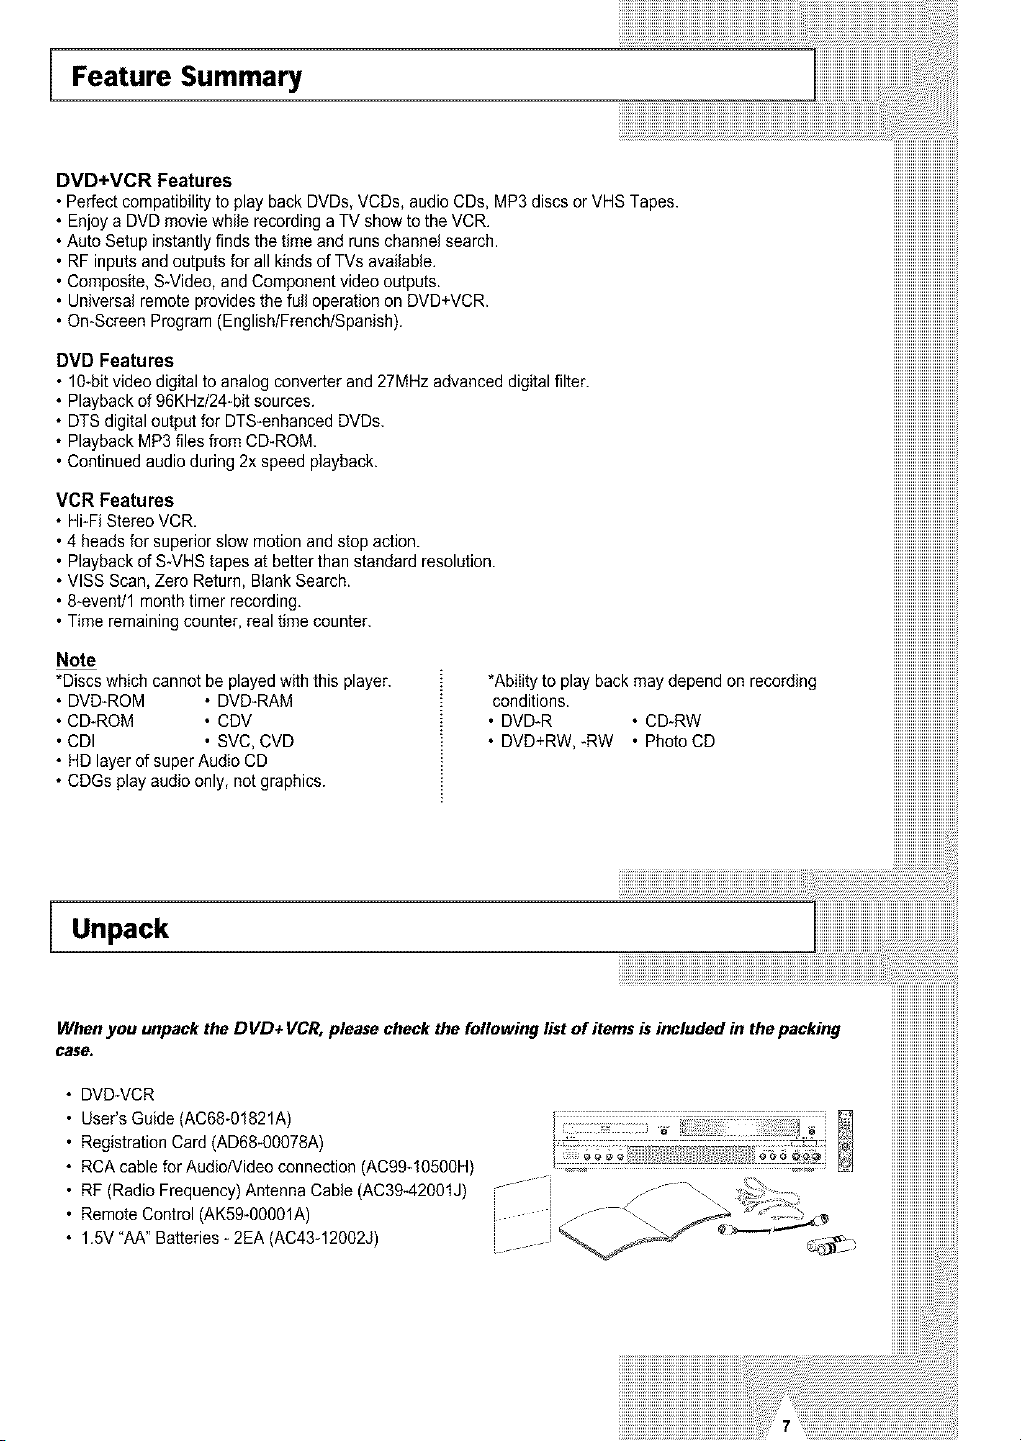
Whenyou unpack the DVD+ VCR,please check the following listof items is included in thepacking
case.
DVD-VCR
User's Guide (AC68-01821A)
Registration Card (AD68-0O078A)
RCAcable for AudioNideo connection (AC99-1050OH)
RF(Radio Frequency) Antenna Cable(AC39-42O01J)
Remote Control(AK59-o0g01A)
1.5V "AA" Batteries - 2EA (AC43-12002J)

__and Characteristics 1
Th s DVD payer is capable of playing tile following types of discs with tile corlesponding loges
al I
I
_ous screenandaudio I
I
I
V I D E 0 DlUb_e_ded semenmenu, I
I
I
!
" }/ compressiontechnology I
,O_GITALVIQm --- 31/2'1 20mini I
Zo
I
• I
I
!
!
I
quality over time........_
Marki_ _
F_ _ On_LB, STEREO DIGITAL _I,ll,-- _
•Play •NTSCbloddCast• Dolby •Stereodlsc•Dtgltal •DTSdsc •MP3 dlsc •MEMORY
Reg,on _,sl_r_n Uo_A' D,g,tadsc Audodisc STCK
Numbe* Japanetc '
Both the DVD player and the discs are coded byregion These regional codes must
match in order for the disc to play f the cedes de net match, the d sc will not pay
The Region Number forthis player isdescribedon the rear panel of the player.
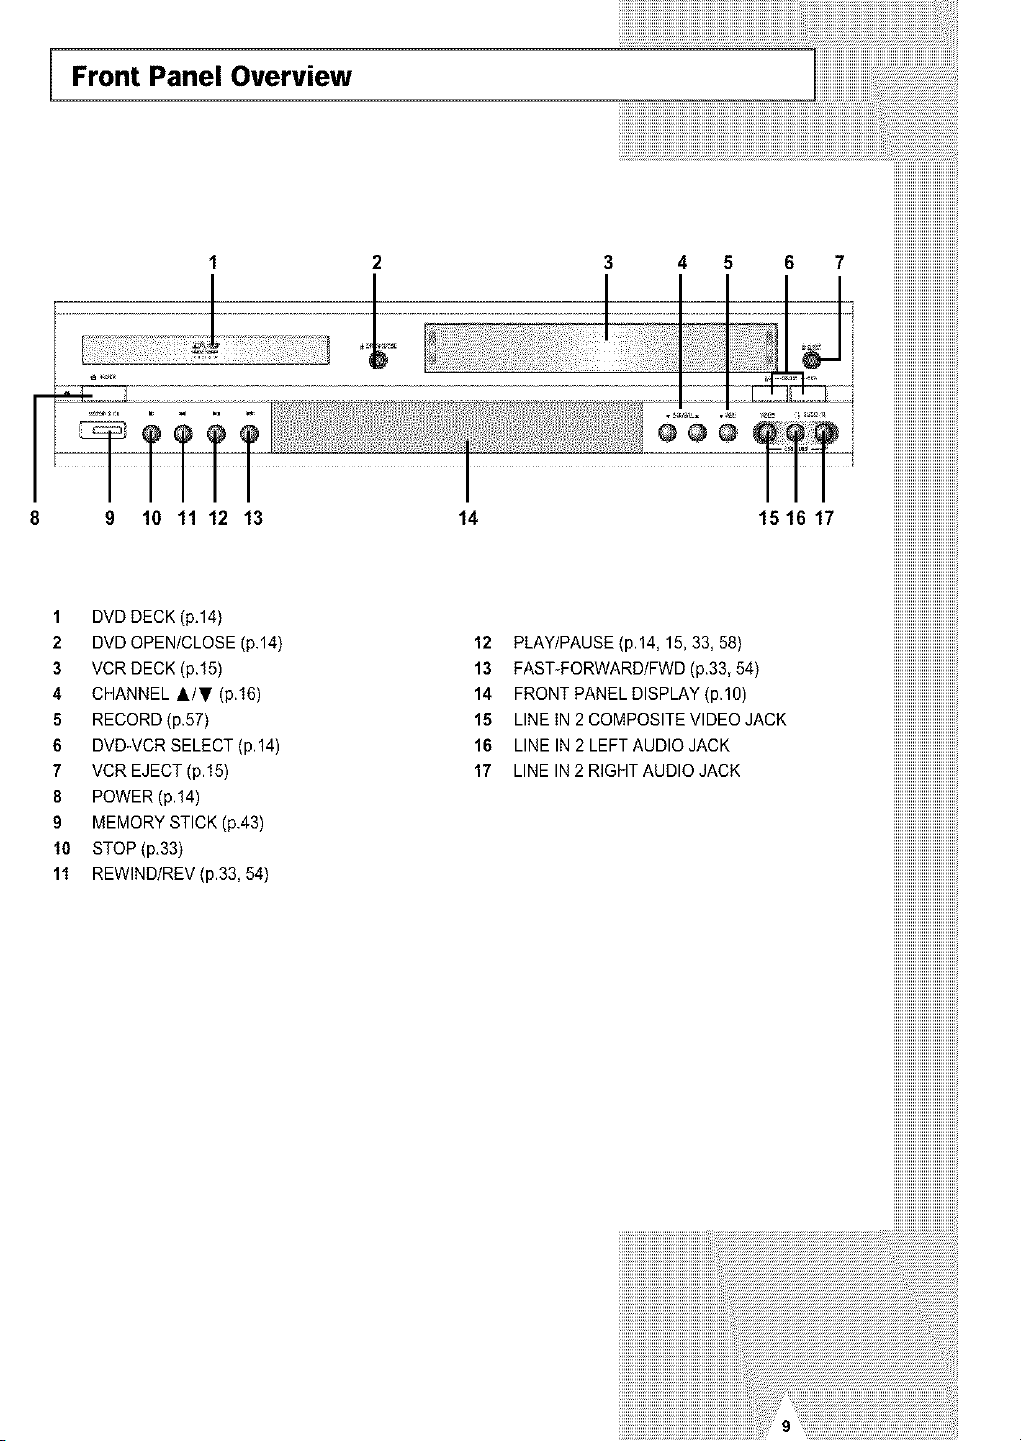
Front Panel Overview
2 3 4 5 6 7
9 10 11 12 13
1 DVDDECK (p,14)
2 DVDOPEN/CLOSE (p.14)
3 VCR DECK (p.15)
4 CHANNEL &IT (p.16)
5 RECORD(p.57)
6 DVD-VCR SELECT (p.14)
7 VCREJECT (p.15)
8 POWER (p.14)
9 MEMORYSTICK (p.43)
10 STOP(p,33)
11 REWlND/REV (p.33, 54)
14
12
13
14
15
16
17
iiiiiiiiiiiiiiiiiiiiiiiiiiiiiii
iiiiiiiiiiiiiiiiiiiiiiiiiiiiiii
iiiiiiiiiiiiiiiiiiiiiiiiiiiiiii
iiiiiiiiiiiiiiiiiiiiiiiiiiiiiii
iiiiiiiiiiiiiiiiiiiiiiiiiiiiiii
iiiiiiiiiiiiiiiiiiiiiiiiiiiiiii
iiiiiiiiiiiiiiiiiiiiiiiiiiiiiii
iiiiiiiiiiiiiiiiiiiiiiiiiiiiiii
iiiiiiiiiiiiiiiiiiiiiiiiiiiiiii
151617 iiiiiiiiiiiiiiiiiiiiiiiiiiiiiii
iiiiiiiiiiiiiiiiiiiiiiiiiiiiiii
iiiiiiiiiiiiiiiiiiiiiiiiiiiiiii
iiiiiiiiiiiiiiiiiiiiiiiiiiiiiii
iiiiiiiiiiiiiiiiiiiiiiiiiiiiiii
iiiiiiiiiiiiiiiiiiiiiiiiiiiiiii
iiiiiiiiiiiiiiiiiiiiiiiiiiiiiii
iiiiiiiiiiiiiiiiiiiiiiiiiiiiiii
iiiiiiiiiiiiiiiiiiiiiiiiiiiiiii
iiiiiiiiiiiiiiiiiiiiiiiiiiiiiii
iiiiiiiiiiiiiiiiiiiiiiiiiiiiiii
iiiiiiiiiiiiiiiiiiiiiiiiiiiiiii
PLAY/PAUSE(P'14, 15,33, 581 iiiiiiiiiiiiiiiiiiiiiiiiiiiiiii
FAST-FORWARD/FWD (p,33, 54) iiiiiiiiiiiiiiiiiiiiiiiiiiiiiii
FRONTPANEL DISPLAY(P'10) iiiiiiiiiiiiiiiiiiiiiiiiiiiiiii
LINEIN2COMPOSITEVIDEO JACK iiiiiiiiiiiiiiiiiiiiiiiiiiiiiii
LINEIN2LEFT AUDIO JACK iiiiiiiiiiiiiiiiiiiiiiiiiiiiiii
LINEIN2RIGHTAUDIO JACK iiiiiiiiiiiiiiiiiiiiiiiiiiiiiii
iiiiiiiiiiiiiiiiiiiiiiiiiiiiiii
iiiiiiiiiiiiiiiiiiiiiiiiiiiiiii
iiiiiiiiiiiiiiiiiiiiiiiiiiiiiii
iiiiiiiiiiiiiiiiiiiiiiiiiiiiiii
iiiiiiiiiiiiiiiiiiiiiiiiiiiiiii
iiiiiiiiiiiiiiiiiiiiiiiiiiiiiii
iiiiiiiiiiiiiiiiiiiiiiiiiiiiiii
iiiiiiiiiiiiiiiiiiiiiiiiiiiiiii
iiiiiiiiiiiiiiiiiiiiiiiiiiiiiii
iiiiiiiiiiiiiiiiiiiiiiiiiiiiiii
iiiiiiiiiiiiiiiiiiiiiiiiiiiiiii
iiiiiiiiiiiiiiiiiiiiiiiiiiiiiii
iiiiiiiiiiiiiiiiiiiiiiiiiiiiiii
iiiiiiiiiiiiiiiiiiiiiiiiiiiiiii
iiiiiiiiiiiiiiiiiiiiiiiiiiiiiii
iiiiiiiiiiiiiiiiiiiiiiiiiiiiiii
iiiiiiiiiiiiiiiiiiiiiiiiiiiiiii
iiiiiiiiiiiiiiiiiiiiiiiiiiiiiii
iiiiiiiiiiiiiiiiiiiiiiiiiiiiiii
iiiiiiiiiiiiiiiiiiiiiiiiiiiiiii
iiiiiiiiiiiiiiiiiiiiiiiiiiiiiii
iiiiiiiiiiiiiiiiiiiiiiiiiiiiiii
iiiiiiiiiiiiiiiiiiiiiiiiiiiiiii
iiiiiiiiiiiiiiiiiiiiiiiiiiiiiii
iiiiiiiiiiiiiiiiiiiiiiiiiiiiiii
iiiiiiiiiiiiiiiiiiiiiiiiiiiiiii
iiiiiiiiiiiiiiiiiiiiiiiiiiiiiii
iiiiiiiiiiiiiiiiiiiiiiiiiiiiiii
iiiiiiiiiiiiiiiiiiiiiiiiiiiiiii
iiiiiiiiiiiiiiiiiiiiiiiiiiiiiii
iiiiiiiiiiiiiiiiiiiiiiiiiiiiiii
iiiiiiiiiiiiiiiiiiiiiiiiiiiiiii
iiiiiiiiiiiiiiiiiiiiiiiiiiiiiii
iiiiiiiiiiiiiiiiiiiiiiiiiiiiiii
iiiiiiiiiiiiiiiiiiiiiiiiiiiiiii
iiiiiiiiiiiiiiiiiiiiiiiiiiiiiii
iiiiiiiiiiiiiiiiiiiiiiiiiiiiiii
iiiiiiiiiiiiiiiiiiiiiiiiiiiiiii
iiiiiiiiiiiiiiiiiiiiiiiiiiiiiii
iiiiiiiiiiiiiiiiiiiiiiiiiiiiiii
iiiiiiiiiiiiiiiiiiiiiiiiiiiiiii
iiiiiiiiiiiiiiiiiiiiiiiiiiiiiii
iiiiiiiiiiiiiiiiiiiiiiiiiiiiiii
iiiiiiiiiiiiiiiiiiiiiiiiiiiiiii
iiiiiiiiiiiiiiiiiiiiiiiiiiiiiii
iiiiiiiiiiiiiiiiiiiiiiiiiiiiiii
iiiiiiiiiiiiiiiiiiiiiiiiiiiiiii
iiiiiiiiiiiiiiiiiiiiiiiiiiiiiii
iiiiiiiiiiiiiiiiiiiiiiiiiiiiiii
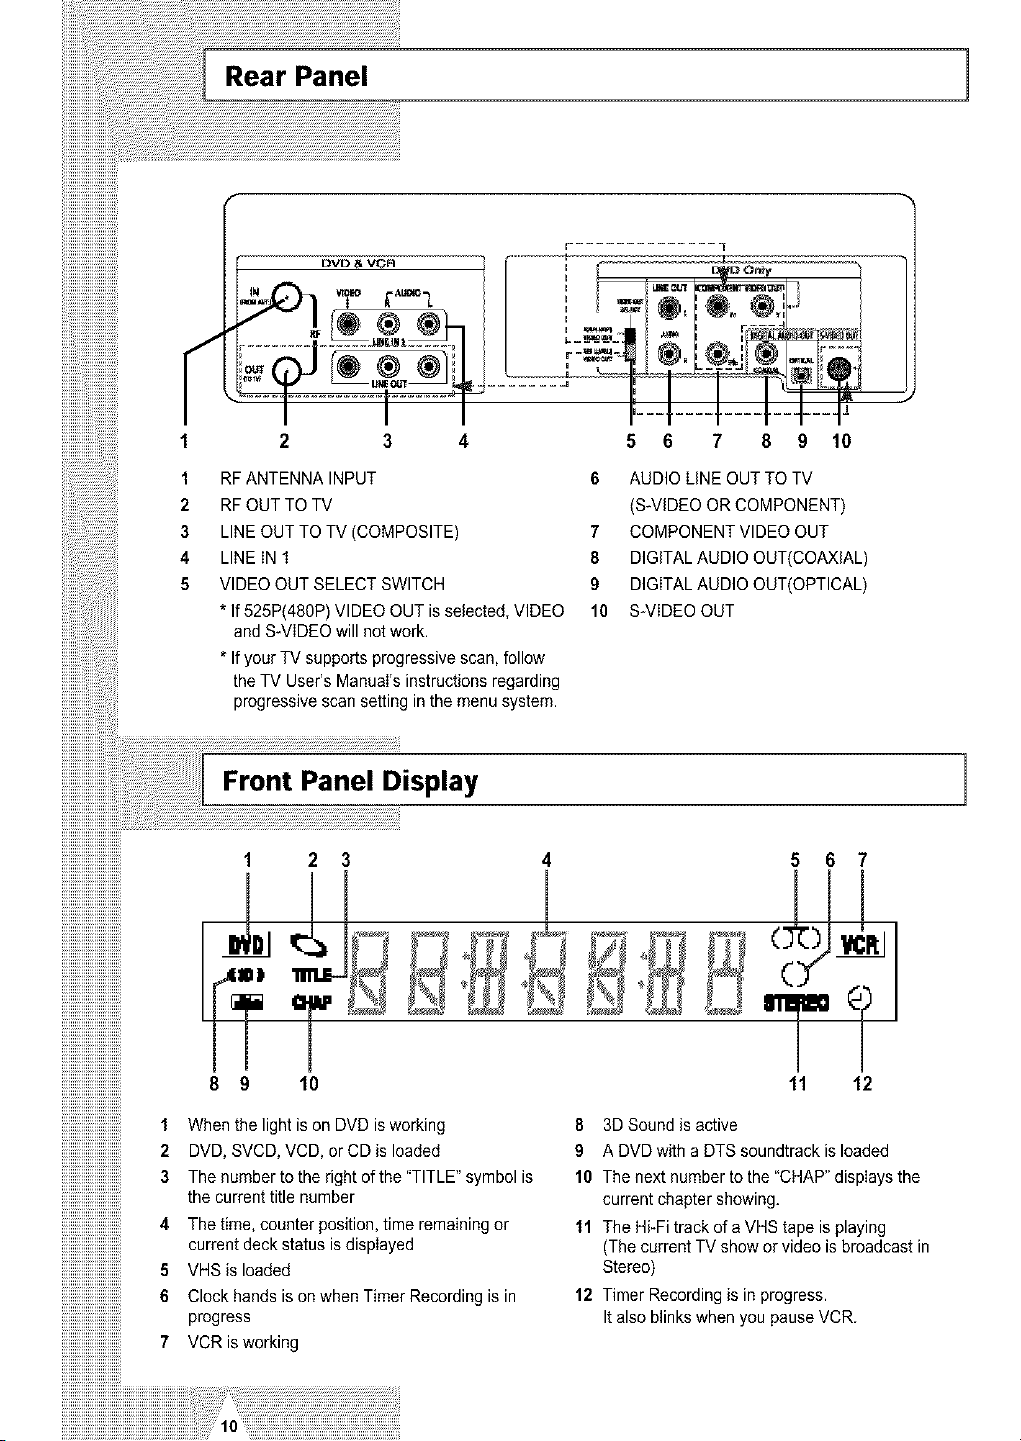
Rear Panel ]
1
2
3
4
5
RFANTENNA INPUT
RFOUTTO TV
LINEOUTTO TV (COMPOSITE)
LINEIN 1
VIDEO OUTSELECT SWITCH
* If 525P(480P)VIDEO OUTisselected, VIDEO
and S_VlDEO will not work.
* If your TV supports progressive scan,follow
the TV User's Manual's instructions regarding
progressive scan setting in the menusystem.
5 6 7 8 9 10
6 AUDIO LiNE OUTTO TV
(S-VIDEOORCOMPONENT)
7 COMPONENTVIDEO OUT
8 DIGITAL AUDIO OUT(COAXIAL)
9 DIGITAL AUDIO OUT(OPTICAL)
10 S-VIDEO OUT
Front Panel Display 1
!!!!!!!!!!!!!!!!!!!!!!!!!!!!
!!!!!!!!!!!!!!!!!!!!!!!!!
iiiiiiiiiiiiiiiiiiiiiiiiiill1 2
!!!!!!!!!!!!!!!!!!!!!!!!!!!! _L
!!!!!!!!!!!!!!!!!!!!!!!!!
!!!!!!!!!!!!!!!!!!!!!!!!!!!!
!!!!!!!!!!!!!!!!!!!!!!!!!
!!!!!!!!!!!!!!!!!!!!!!!!!!!!
!!!!!!!!!!!!!!!!!!!!!!!!!
!!!!!!!!!!!!!!!!!!!!!!!!!!!! _ _l
!!!!!!!!!!!!!!!!!!!!!!!!!
!!!!!!!!!!!!!!!!!!!!!!!!!!!!
!!!!!!!!!!!!!!!!!!!!!!!!!
iiiiiiiiiiiiiiiiiiiiiiiii_
!!!!!!!!!!!!!!!!!!!!!!!!!!!!
!!!!!!!!!!!!!!!!!!!!!!!!! m
!!!!!!!!!!!!!!!!!!!!!!!!!!!!
!!!!!!!!!!!!!!!!!!!!!!!!!
!!!!!!!!!!!!!!!!!!!!!!!!!!!!
!!!!!!!!!!!!!!!!!!!!!!!!!
!!!!!!!!!!!!!!!!!!!!!!!!!!!!
!!!!!!!!!!!!!!!!!!!!!!!!!
!!!!!!!!!!!!!!!!!!!!!!!!!!!!
!!!!!!!!!!!!!!!!!!!!!!!!!
iiiiiiiiiiiiiiiiiiiiiiiiiill8 9 lo
!!!!!!!!!!!!!!!!!!!!!!!!!
!!!!!!!!!!!!!!!!!!!!!!!!!!!!
iiiiiiiiiiiiiiiiiiiiiiiii!!!1 When the lightis onDVD is working
iiiiiiiiiiiiiiiiiiiiiiiiiill2 DVD, SVCD, VCD, orCDisloaded
iiiiiiiiiiiiiiiiiiiiiiiii!!_3 The number totherightofthe "TITLE" symbol is
iiiiiiiiiiiiiiiiiiiiiiiii!!_ the currenttitle number
!!!!!!!!!!!!!!!!!!!!!!!!!!!!
iiiiiiiiiiiiiiiiiiiiiiiii!!_4 The time, counter position,time remainingor
iiiiiiiiiiiiiiiiiiiiiiiii!!_ currentdeckstatusiediepIayed
iiiiiiiiiiiiiiiiiiiiiiiiiii:5 VHSisloaded
iiiiiiiiiiiiiiiiiiiiiiiii_6 ClockhandsisonwhentimerRecordingisin
iiiiiiiiiiiiiiiiiiiiiiiii"progress
iiiiiiiiiiiiiiiiiiiiiiiiiill7 VCRisworking
!!!!!!!!!!!!!!!!!!!!!!!!!
!!!!!!!!!!!!!!!!!!!!!!!!!!!!
!!!!!!!!!!!!!!!!!!!!!!!!!
iiiiiiiiiiiiiiiiiiiiiiiiiiiiiiiiiiiiiiiiiiiiiiiiiiiiiiiiiiiiiiiiii!iiiiii!i!ii!;_
5 6 7
11 12
It also blinks when you pauseVCR.
8 3D Sound isactive
9 A DVDwith aDTSsoundtrack isloaded
10 Thenext number tothe "CHAP"displaysthe
current chapter showing.
11 TheHi-Fitrack ofa VHS tapeisplaying
(The currentTV showorvideo isbroadcast in
Stereo)
12 Timer Recording isin progress.
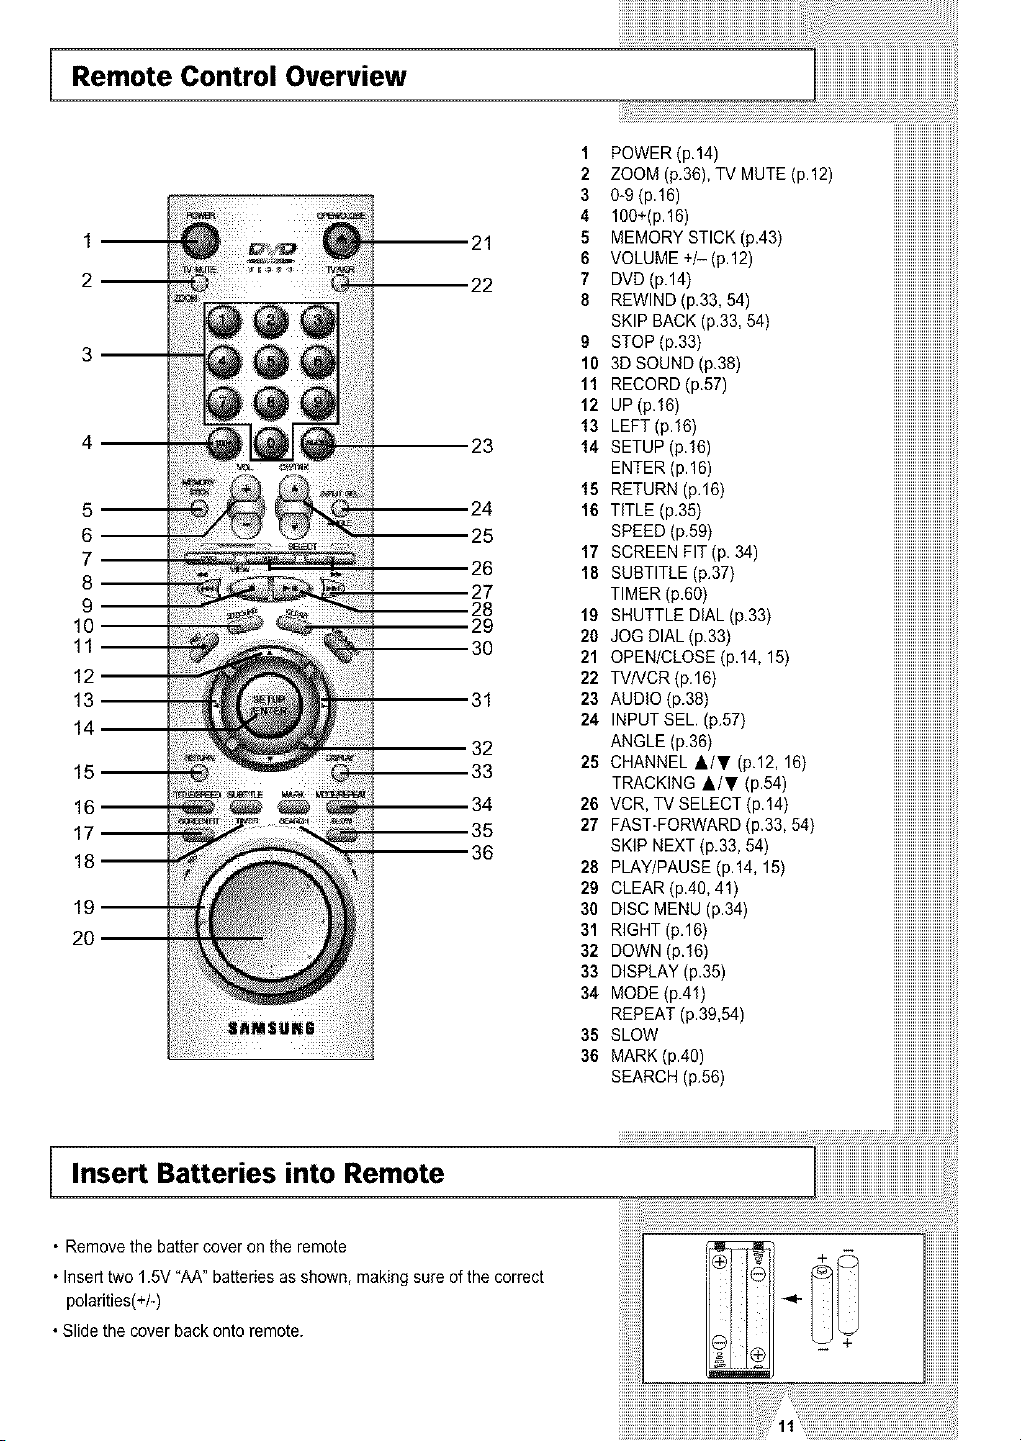
Remote Control Overview
5 m
6--
7--
8--
9--
11--
12
Insert Batteries into Remote
23
,24
25
,26
27
28
29
30
32
33
34
35
36
iiiiiiiiiiiiiiiiiiiiiiiiiiiiiiiiiiiiiiiiiiiiiiiiiiiiiii i i,i,!
1 POWER(p.14) iiiiiiiiiiiiiiiiiiiiiiiiiii
2 ZOOM (p.36),TV MUTE(p.12) iiiiiiiiiiiiiiiiiiiiiiiiiii
3 0-9 (p.16) iiiiiiiiiiiiiiiiiiiiiiiiiii
4 100+(p.16) iiiiiiiiiiiiiiiiiiiiiiiiiii
5 MEMORY STICK (p.43) iiiiiiiiiiiiiiiiiiiiiiiiiii
6 VOLUME+/-(p.12) iiiiiiiiiiiiiiiiiiiiiiiiiii
7 DVD(p.14) iiiiiiiiiiiiiiiiiiiiiiiiiii
8 REWIND(p.33,54) iiiiiiiiiiiiiiiiiiiiiiiiiii
SKIP BACK(p.33, 54) iiiiiiiiiiiiiiiiiiiiiiiiiii
9 STOP(p.33) iiiiiiiiiiiiiiiiiiiiiiiiiii
10 3D SOUND (p.38) iiiiiiiiiiiiiiiiiiiiiiiiiii
11 RECORD(p.57) iiiiiiiiiiiiiiiiiiiiiiiiiii
12 UP(p.16) iiiiiiiiiiiiiiiiiiiiiiiiiii
13 LEFT(p16) iiiiiiiiiiiiiiiiiiiiiiiiiii
14 SETUP(p.16) iiiiiiiiiiiiiiiiiiiiiiiiiii
ENTER(p.16) iiiiiiiiiiiiiiiiiiiiiiiiiii
15 RETURN(p.16) iiiiiiiiiiiiiiiiiiiiiiiiiii
16 TITLE(p.35) iiiiiiiiiiiiiiiiiiiiiiiiiii
SPEED(p.59) iiiiiiiiiiiiiiiiiiiiiiiiiii
17 SCREEN FIT (p. 34) iiiiiiiiiiiiiiiiiiiiiiiiiii
18 SUBTITLE(p.37) iiiiiiiiiiiiiiiiiiiiiiiiiii
TIMER(p.60) iiiiiiiiiiiiiiiiiiiiiiiiiii
19 SHUTTLE DiAL (p.33) iiiiiiiiiiiiiiiiiiiiiiiiiii
20 JOGDIAL(p.33) iiiiiiiiiiiiiiiiiiiiiiiiiii
21 OPEN/CLOSE (p.14, 15) iiiiiiiiiiiiiiiiiiiiiiiiiii
22 TVNCR(p.16) iiiiiiiiiiiiiiiiiiiiiiiiiii
23 AUDIO(p.38) iiiiiiiiiiiiiiiiiiiiiiiiiii
24 INPUTSEL (p.57) iiiiiiiiiiiiiiiiiiiiiiiiiii
ANGLE(p.36) iiiiiiiiiiiiiiiiiiiiiiiiiii
25 CHANNEL &/T (p.12, 16) iiiiiiiiiiiiiiiiiiiiiiiiiii
TRACKING A/T (p.54) iiiiiiiiiiiiiiiiiiiiiiiiiii
26 VCR, TV SELECT (p.14) iiiiiiiiiiiiiiiiiiiiiiiiiii
27 FAST-FORWARD (p.33, 54) iiiiiiiiiiiiiiiiiiiiiiiiiii
SKIPNEXT(p.33,54) iiiiiiiiiiiiiiiiiiiiiiiiiii
28 PLAY/PAUSE(p.14,15) iiiiiiiiiiiiiiiiiiiiiiiiiii
29 CLEAR(p.40,41) iiiiiiiiiiiiiiiiiiiiiiiiiii
30 DISC MENU (p.34) iiiiiiiiiiiiiiiiiiiiiiiiiii
31 RIGHT(p.16) iiiiiiiiiiiiiiiiiiiiiiiiiii
32 DOWN (p.16) iiiiiiiiiiiiiiiiiiiiiiiiiii
33 DISPLAY(p.35) iiiiiiiiiiiiiiiiiiiiiiiiiii
34 MODE(p.41) iiiiiiiiiiiiiiiiiiiiiiiiiii
REPEAT(p39,54) iiiiiiiiiiiiiiiiiiiiiiiiiii
35 SLOW iiiiiiiiiiiiiiiiiiiiiiiiiii
36 MARK(p.40) iiiiiiiiiiiiiiiiiiiiiiiiiii
SEARCH(p.56) iiiiiiiiiiiiiiiiiiiiiiiiiii
• Remove the batter coveronthe remote
• Inserttwo1.5V "AA" batteriesas shown, makingsureof the correct
polarities(+/-)
•Slidethe cover backontoremote.
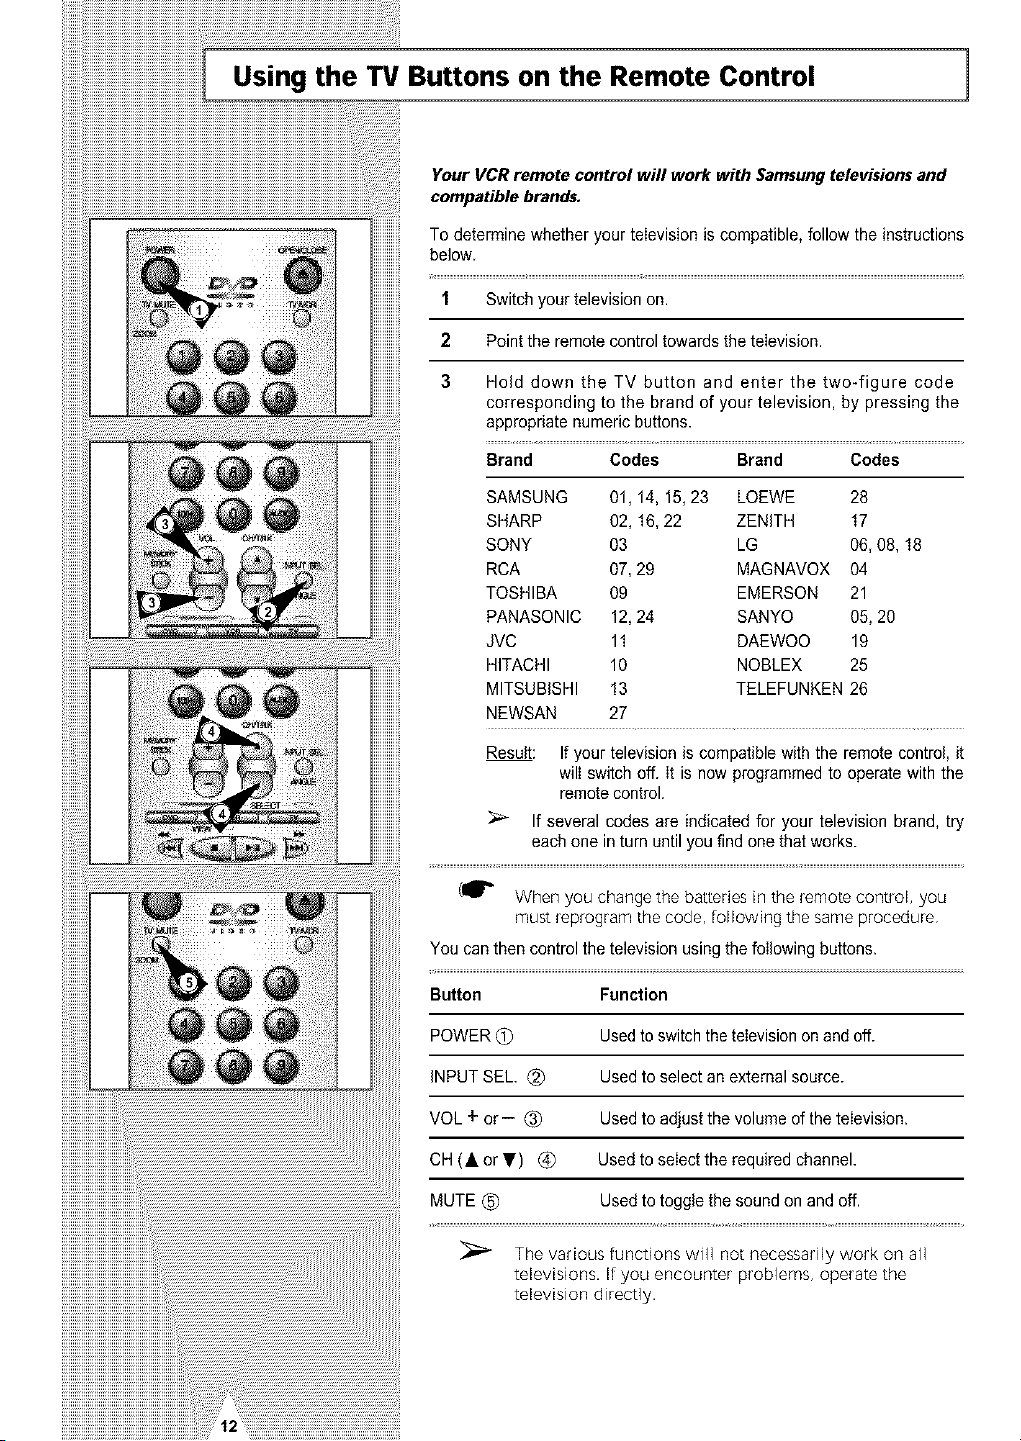
Using the TV Buttons on the Remote Control 1
Your VCRremote control will work with Samsungtelevisions and
compatible brands.
To determine whether yourteIevisionis compatible,follow the instructions
below
1 Switch yourtelevision on.
2 Point the remotecontrol towardsthe teIevision.
3 Hold down the TV button and enter the two-figure code
corresponding to the brand of your television, by pressing the
appropriate numeric buttons.
Brand Codes Brand Codes
SAMSUNG 01, 14, 15, 23 LOEWE 28
SHARP 02, 16, 22 ZENITH 17
SONY 03 LG 06, 08, 18
RCA 07, 29 MAGNAVOX 04
TOSHIBA 09 EMERSON 21
PANASONIC 12,24 SANYO 05, 20
JVC 11 DAEWOO 19
HITACHI 10 NOBLEX 25
MITSUBISHI !3 TELEFUNKEN 26
NEWSAN 27
Result: If your television iscompatible with the remote control, it
will switch off. it isnow programmed to operate with the
remotecontrol.
If several codes are indicated for your television brand, try
each one in turn untilyoufind one that works.
(_" When you change the batteries in the remote control, you
must _p_ogram the code, following the same procedure
You canthencontrol the television usingthe foIIowing buttons.
Button Function
POWER (_) Used toswitchthetelevision onand off.
iNPUTSEE (_) Used to selectanexternalsource.
VOL + or- (_) Used to adjust the volumeofthetelevision.
OH(• or T) (_ Used to selectthe required channel.
MUTE(_) Used totoggle the sound onand off.
The various functions will not necessarily work on all
televisions. If you encounter problems, operate the
television direct]y.
Basic Connections/Auto Setup
In this section, you will connect the DVD-VCR to your television
and run Auto Setup, which automatically searches for channelsand
setstheplayer's internal clock.
NOTES:
• See Appendix A forAdvanced Connections.
• Standard RF or Line connection between DVD-V2500 &your TV
are required torun DVD+VCR setup menu, even if
connect S-Video or Component Video Output //_you
for a better picture quality.
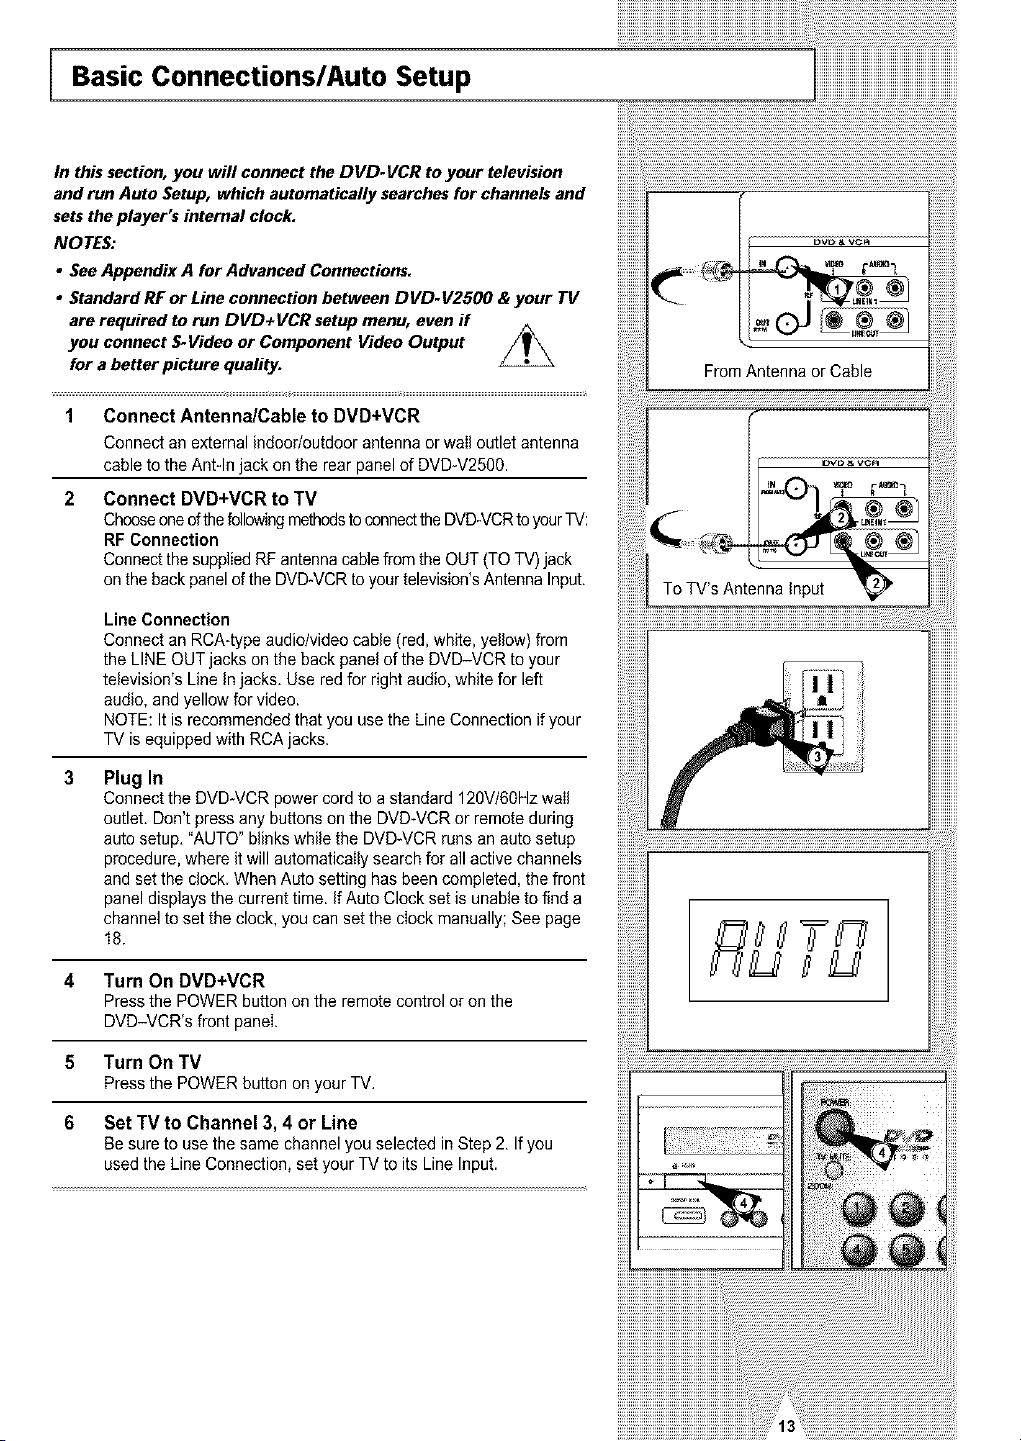
1 Connect Antenna/Cable to DVD+VCR
Connect anexternalindoor/outdoor antennaor wail outlet antenna
cable tothe Ant-In jack onthe rear panel of DVD-V2500.
2 Connect DVD+VCR to TV
Chooseoneof thefollowingmethodsto connecttheDVD-VCRto yourTV:
RFConnection
Connectthe supplied RFantennacablefromthe OUT(TOTV)jack
onthe backpanel oftheDVD-VCR toyour television's AntennaInput.
Line Connection
Connect anRCA-typeaudio/video cable (red, white, yellow)from
the LINEOUTjacks onthe backpanelof the DVD-VCR to your
television's Line in jacks. Use red for right audio,whitefor left
audio, and yellow for video.
NOTE: It isrecommended that youusethe Line Connection ifyour
TV isequipped with RCAjacks.
Plug In
Connectthe DVD-VCR powercord to a standard 120V/60Hz wail
outlet. Don't pressany buttons onthe DVD-VCR or remoteduring
autosetup. "AUTO"blinks while the DVD*VCRrunsanautosetup
procedure, where itwill automaticallysearchfor allactivechannels
and setthe clock. WhenAutosetting hasbeen completed,the front
paneldisplaysthe currenttime. If Auto Clock set isunable tofinda
channel tosetthe clock, you cansetthe clock manually; See page
18.
4 Turn On DVD+VCR
Press the POWER button onthe remotecontrol or onthe
DVD-VCR's front panel.
5 Turn On TV
Press the POWER button onyourTV,
6 Set TV to Channel 3, 4 or Line
Besureto usethe same channelyouselected in Step 2. If you
used the LineConnection, set yourTV to itsLine Input.
From Antenna or Cable
f
To TV'sAntenna input
Buttons 1
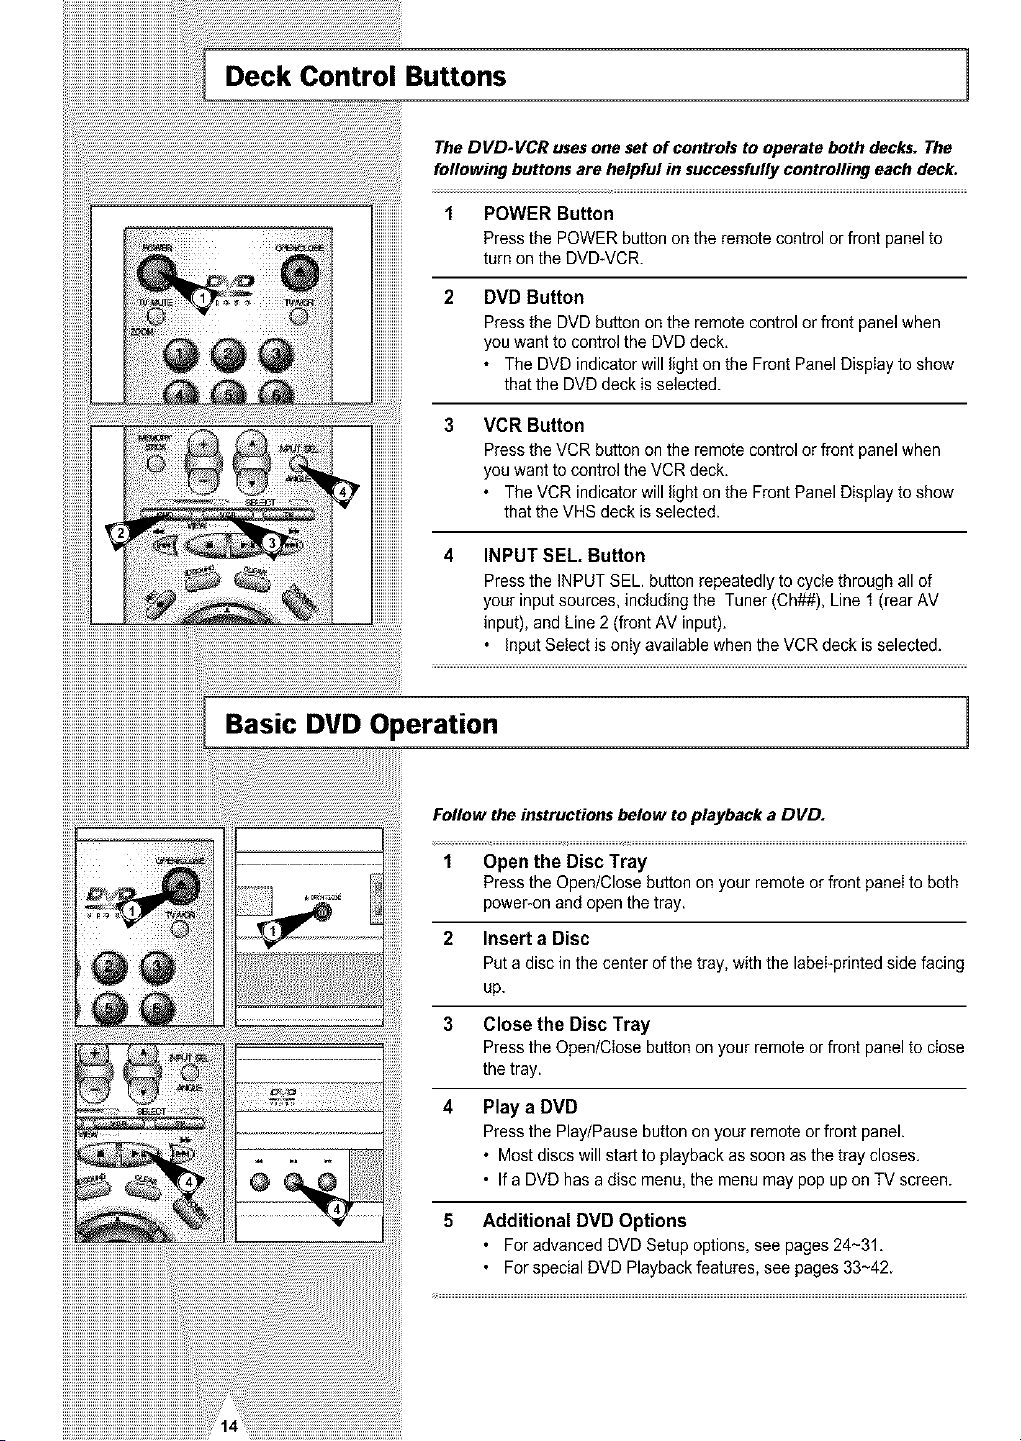
The DVD-VCR uses one set of controls to operate both decks. The
following buttons are helpful in successfully controlling each deck.
ii!!!! !!!!i i!!ilil
iiiiiii!iiii!ii!i!i!!i!iiiiii!iiii! !! i{iiii!ii!ililiiii!iiiiiii!!iiiiii
POWER Button
Press the POWER button onthe remote controlor front panel to
turn onthe DVD-VCR.
DVD Button
Press the DVDbutton onthe remotecontrol or front panel when
you wanttocontrol theDVD deck.
• TheDVD indicatorwill lightonthe FrontPanel Display to show
that the DVDdeck isselected.
3 VCR Button
4
Press theVCR button onthe remotecontrol or front panel when
you wanttocontrol theVCR deck.
• TheVCR indicatorwill lightonthe FrontPanel Display toshow
that the VHS deck is selected.
INPUT SEL, Button
Press the INPUTSEL. button repeatedly to cycle through all of
yourinput sources, including the Tuner(Ch##), Line 1 (rearAV
input), and Line2(front AV input).
. InputSelect isonly availablewhen the VCR deckisselected.
Basic DVD Operation ]
Follow the instructionsbelow to playback a DVD.
1 Open the Disc Tray
Press the Open/Close button onyour remoteor frontpaneltoboth
poweFon and openthetray.
2 Insert a Disc
Putadisc in the center of the tray,with the label-printed side facing
up.
3 Close the Disc Tray
Press the Open/Close button onyour remoteor front panel toclose
the tray.
4 Play a DVD
Press the Play/Pause button on your remoteor front panel.
• Most discs will start to playback assoon as the tray closes.
• If a DVDhas a disc menu, the menumay pop upon TV screen.
5 Additional DVD Options
• ForadvancedDVD Setupoptions, seepages24~31.
° Forspecial DVDPlaybackfeatures,see pages33~42.
!!!!!!!!!!!!!!!!!!!!!!!!!!!!!!!!!!!!!!!!!!!!!!!!!!!!!!!!!!!!!!!!!!!!!!!!!!!!!!!!!! iii
Basic VCR Operation
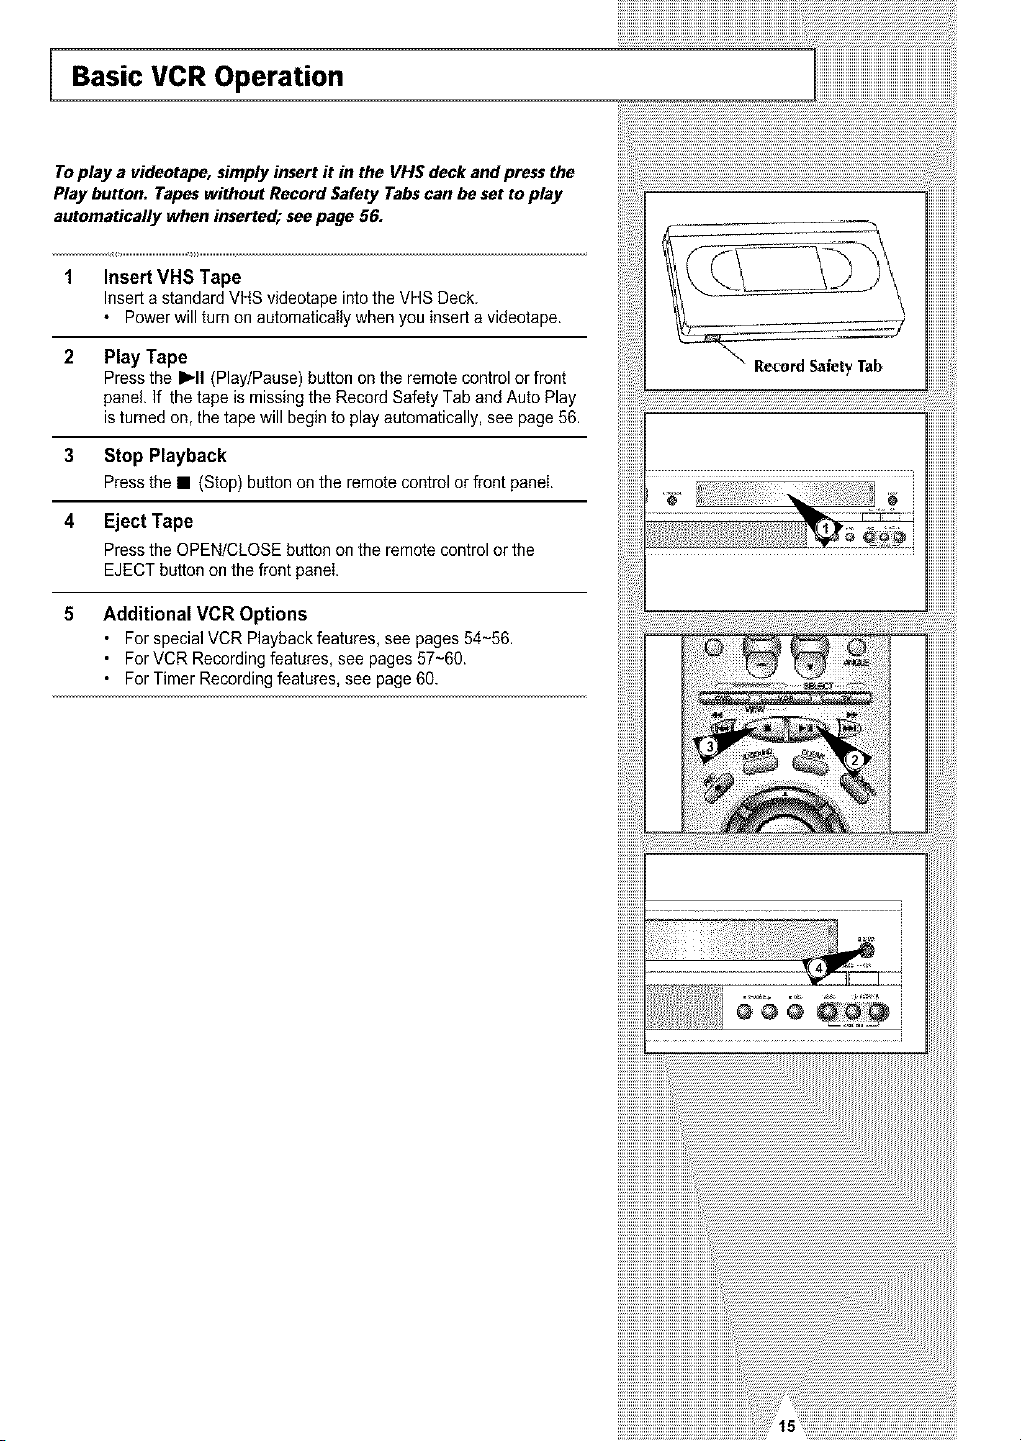
To play a videotape, simply insert it in the VH$ deck and press the
Play button. Tapes without Record Safety Tabs can be set to play
automatically when inserted; see page 56.
1 Insert VHS Tape
Insertastandard VHS videotape intothe VHS Deck.
• Powerwillturn onaatomaticaIly when youinserta videotape.
2 Play Tape
Press the I_'11(Play/Pause) button onthe remote controlor front
panel. If the tapeismissing the RecordSafetyTaband Auto Play
isturned on, thetapewill begin toplayautomatically, see page56.
3 Stop Playback
Press the • (Stop)button onthe remotecontrol or front panel
4 Eject Tape
Press the OPEN/CLOSE batten onthe remote controlor the
EJECT batten onthe frontpanel
5 Additional VCR Options
• Forspecial VCRPlayback features, seepages 54~56.
• ForVCR Recording features, see pages57~60.
• ForTimer Recording features, see page60.
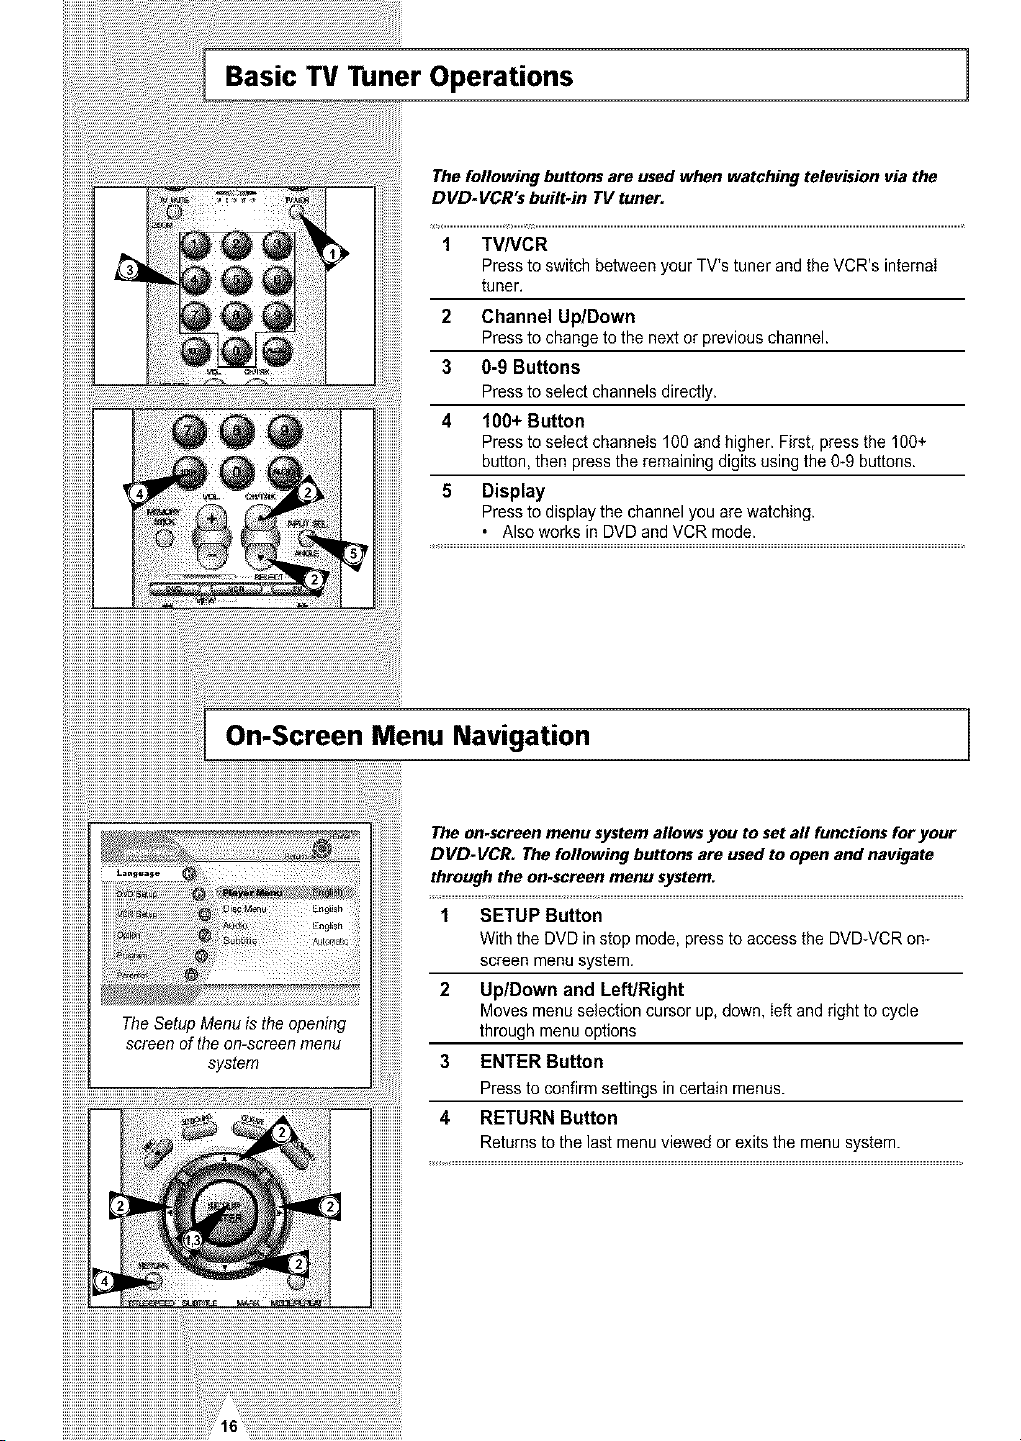
Basic TV Tuner Operations ]
The following buttons are usedwhen watching television via the
DVD-VCR"s built-in TV tuner.
1 TV/VCR
Press to switch between your TV'stuner and the VCR's internaI
tuner.
2 Channel Up/Down
Press to change tothe nextor previous channel.
3 0-9 Buttons
Press to select channelsdirectly.
4 101)+ Button
Press to select channels 100 and higher. First, press the 100+
button, then press the remaining digitsusingthe 0-9 buttons.
5 Display
Press to displaythe channel youarewatching.
• Also works in DVDand VCR mode.
On-Screen Menu Navigation
TheSetupMenu isthe opening
screen oftheon-screen menu
system
The on.screenmenu system allows you to set all functions for your
DVD-VCR. The following buttons are used toopen and navigate
through the on-screen menu system.
1 SETUP Button
Withthe DVDin stop mode, press toaccessthe DVD-VCR on-
screen menusystem.
2 Up/Down and Left/Right
Movesmenuselectioncursor up,down, leftand right to cycle
through menuoptions
3 ENTER Button
Press to confirm settings in certain menus.
4 RETURN Button
Returnstothe last menuviewed or exits the menusystem.
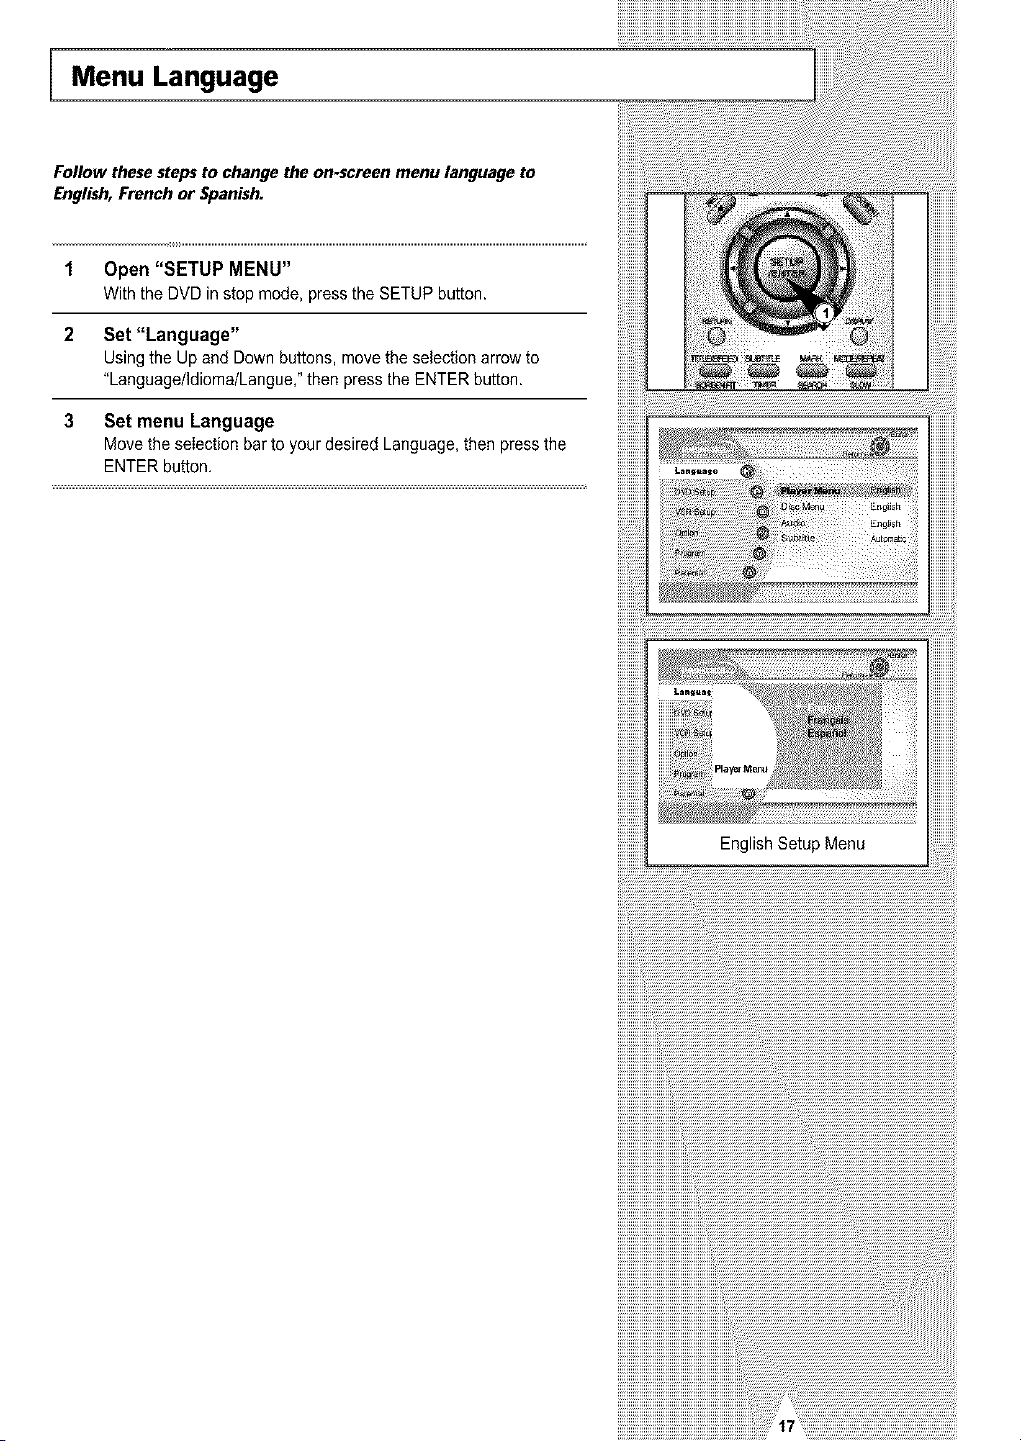
Menu Language
Follow these steps to change the on.screen menu language to
English, French or Spanish.
1 Open "SETUP MENU"
With the DUD in stop mode, press the SETUP button.
2 Set "Language"
Using the Up and Down buttons, move the selectionarrowto
"Language/ldioma/Langue," then press the ENTER button.
3 Set menu Language
Move the seIectionbartoyour desired Language,then press the
ENTER button,
English Setup Menu

Manual Clock Set 1
iiiiiiiiiiii_
AlJ[o
M_nual
RETURN Av ENTER
TIME DATE YEAR
120Q_ 1/01 2002 TUE
RETURN AV '41,
If Auto Setup was unable to find a local TV station to set the DVD-
VCR's internal clock, follow these instructions to set the date/time
manually.
NOTE: It is important to set the clock for accurate Timer
Recording.
1 Open "SETUP MENU"
Withthe DVDin stop mode, press the SETUP button.
2 Select "VCR Setup"
Using the upand down buttons, move the selection cursor to
"VCR Setup," thenpress ENTER to select.
3 Select "Clock"
Using the upand down buttons, move the selection cursor to
"ClockSet/Adjust,"then pressENTERto select.
4 Select "MANUAL"
Move the selectionarrowto "MANUAL", then press ENTER toturn
this feature "On,"
The"SetClock Menu"will change as shown.
5 Set the Clock
Press LEFT/RIGHTtoselecteach ofthefollowing options, then
press UP/DOWN to seteach option:
• Set Hour - Setthe hour usingthe upand down buttons.
• Set Minute- Set the minuteusing the up and down buttons.
• Set Month - Set the month using the upand down buttons.
• Set Day - Setthe day using the upand down buttons.
• SetYear - Set the year using the up and down buttons.
6 Confirm Settings
Press the RETURN button to saveyourclock settingsand returnto
the Setupmenu.
• Press Returnagaintoexit.
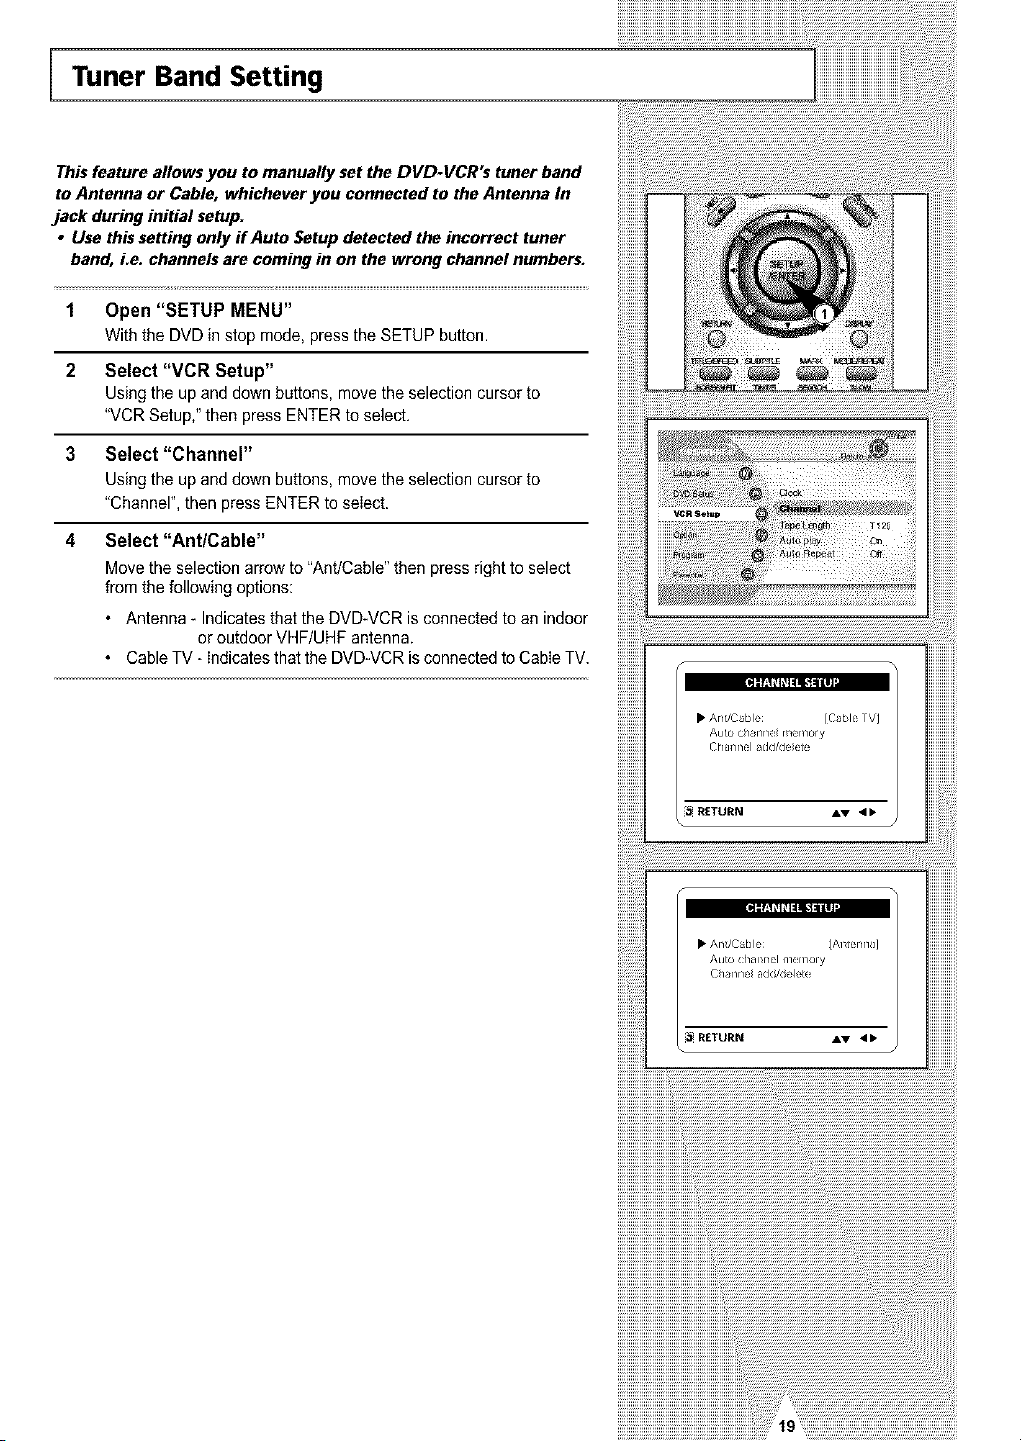
Tuner Band Setting
This feature allows you to manually set the DVD-VCR's tuner band
to Antenna or Cable, whichever you connected to the Antenna In
jack during initial setup.
• Use this setting only if Auto Setup detected the incorrect tuner
band, Le. channels are coming in on the wrong channel numbers.
1 Open "SETUP MENU"
Withthe DUD in stop mode, press the SETUPbutton.
2 Select "VCR Setup"
Using the upand downbuttons, move the selection cursor to
"VCRSetup,"then press ENTER toselect.
3 Select "Channel"
Using the upand down buttons, movethe selection cursor to
"Channel",then pressENTER toseIect.
4 Select "Ant/Cable"
Movethe selection arrow to"Ant/Cable"then pressright to select
fromthe following options:
• Antenna- Indicatesthat the DVD-VCR isconnected toanindoor
or outdoorVHF/UHF antenna.
CableTV -Indicatesthat the DVD-VCR isconnected toCabIe TV.
• Anl/Cable IAistenrlaJ
Au[o chafer/el nler/_ory
Ch_r/rlelad(!/_!ele[e
[_ RETURN AV 4b
iiiiiiiiiiiiiiiiiiiil}_{iii}¸}¸}¸}¸}¸}¸}¸}¸}¸}¸}¸}¸}¸}¸}¸}¸}¸}¸}¸}¸}¸}¸}¸}¸}¸}¸}¸}¸}¸}¸}¸}¸}¸}¸}¸}¸}¸}¸}¸}i;i;iiiiiiiiiiiiiiiiiiiiiiiiiiiiiiiiiiiiiiiiiiiiiiiiiiiiiiiiiiiiiiiiiiiiiiiiiiiiiiii
iiiiiiiiiiiiiiiiiiiiiiiii_@7777777777777777777777777777777777777777777_!ii!
iiiiiiiiiiiiiiiiiiiiiiiiiiiiiiiiiiiiiiiiiiiiiiiiiiiiiiiiiiiiiiiiiiiii 'i i
iiiiiiiiiiiiiiiiiiiiiiiiiiiiiiiiiiiiiiiiiiiiiiiiiiiiiiiiiiiiiiiiiiiiiiiii
IIIIIIIIIIIIIIIIIIIIIIIIIIIIIIIIIIIIIIIIIIIIIB.......................................................................
iiiiiiiiiiiiiiiiiiiiiiiiiiiiiiiiiiiiiiiiiiiiiiiiii.................................................................................................................................................
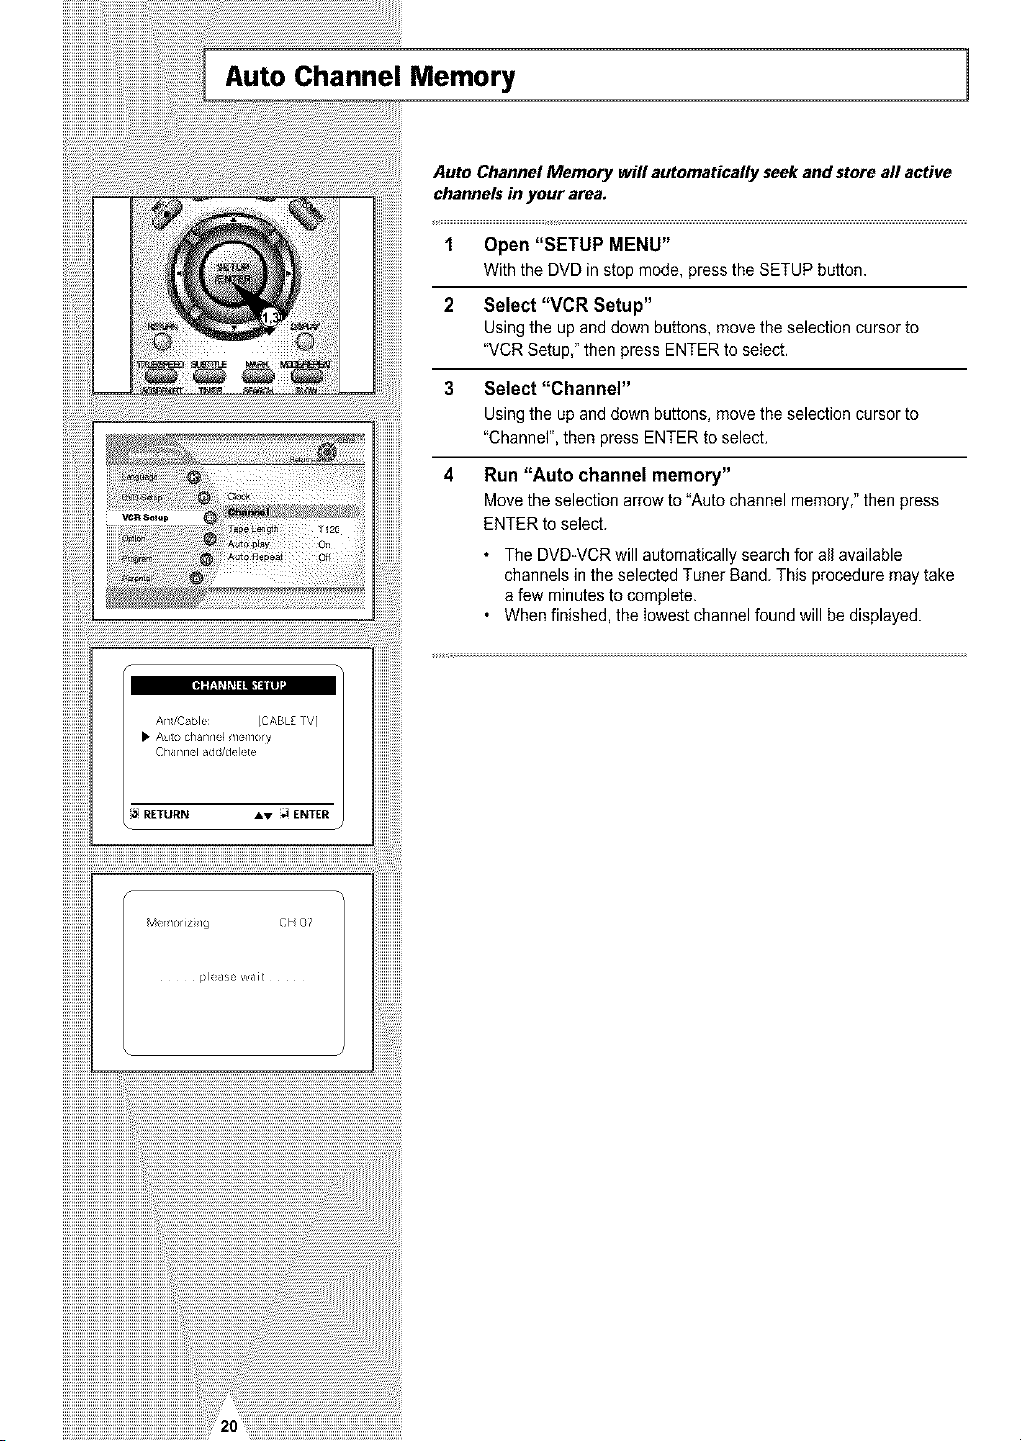
Auto Channel Memory 1
Auto Channel Memory will automatically seek and store all active
channels in your area.
1 Open "SETUP MENU"
With the DVD in stop mode, press the SETUPbutton.
2 Select "VCR Setup"
Using the upand down buttons, move the selection cursor to
"VCRSetup,"then press ENTER to select.
3 Select "Channel"
Using the upand down buttons, move the selection cursor to
"Channel",then pressENTERtoselect.
4 Run "Auto channel memory"
Move the selectionarrow to"Auto channel memory,"then press
ENTER toselect.
• TheDVD-VCR will automaticallysearch for all available
channelsin the selected Tuner Band.This proceduremay take
a few minutestocomplete.
• Whenfinished,the lowest channelfound will bedisplayed.
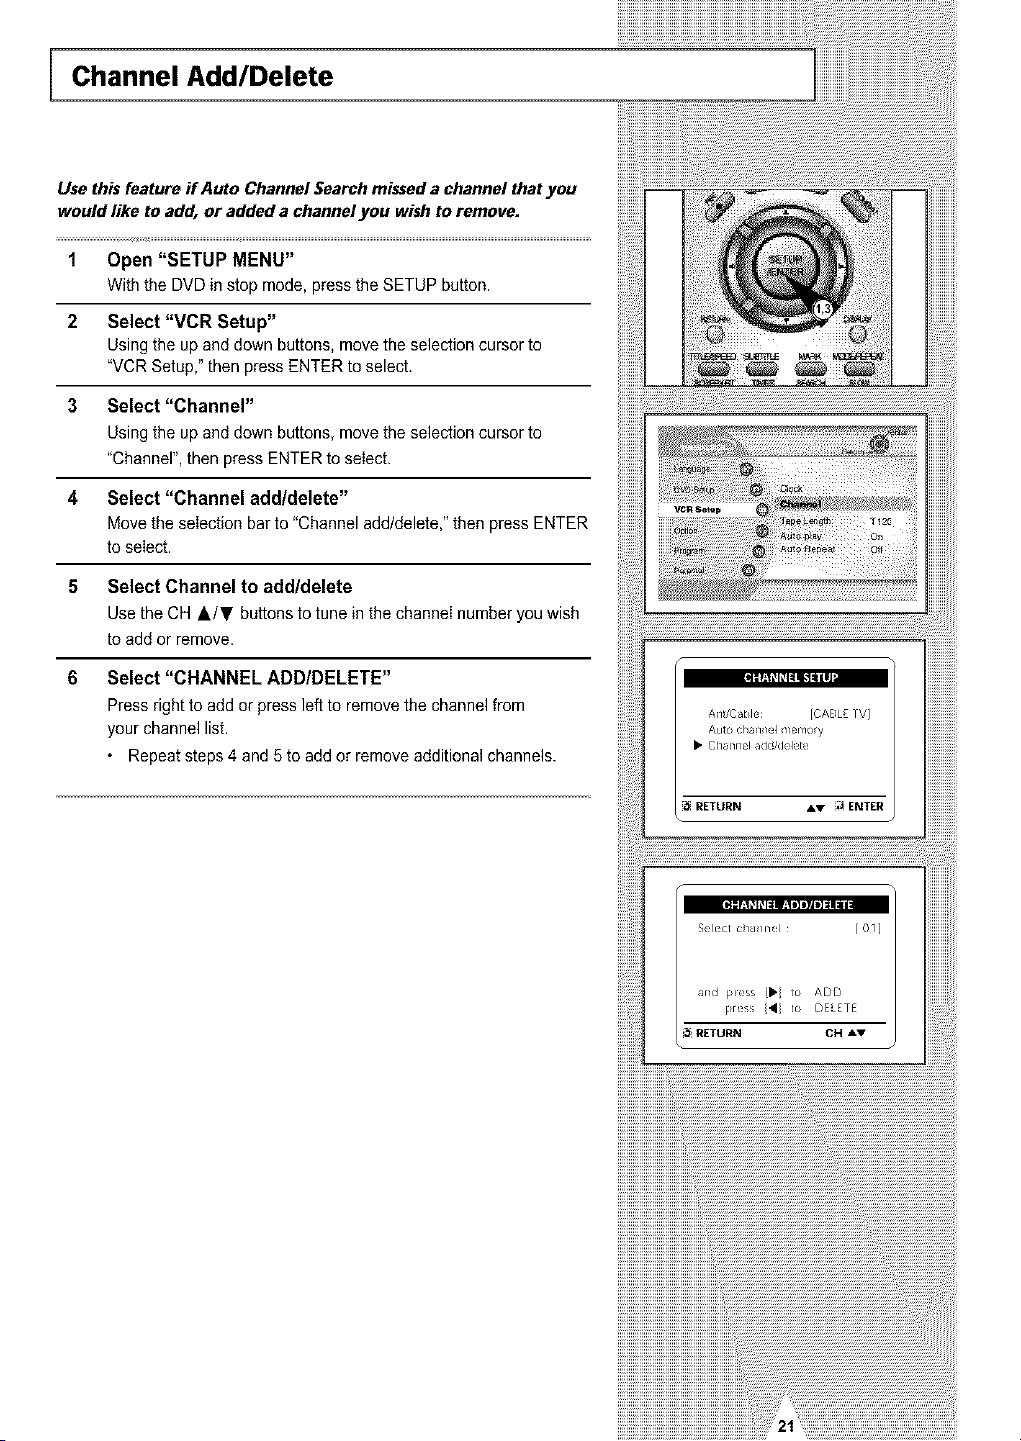
Channel Add/Delete
Use this feature if Auto Channel Searchmissed a channel that you
would like to add,or added a channel you wishto remove.
1 Open "SETUP MENU"
With the DVDin stop mode, press the SETUP button.
2 Select "VCR Setup"
Using the upand down buttons, move the selectioncursor to
"VCRSetup," then pressENTERtoselect.
3 Select "Channel"
Using the upand down buttons, move the selectioncursor to
"Channel",then pressENTER toselect.
4 Select "Channel add/delete"
Move the selectionbar to"Channel add/delete," thenpress ENTER
toselect.
5 Select Channel to addldelete
Use the CH &/T buttons to tune in the channelnumber youwish
toadd or remove.
6 Select "CHANNEL ADD/DELETE"
Press right toadd orpressleftto remove the channel from
yourchannel list.
• Repeatsteps 4 and 5 toadd or remove additionalchannels.
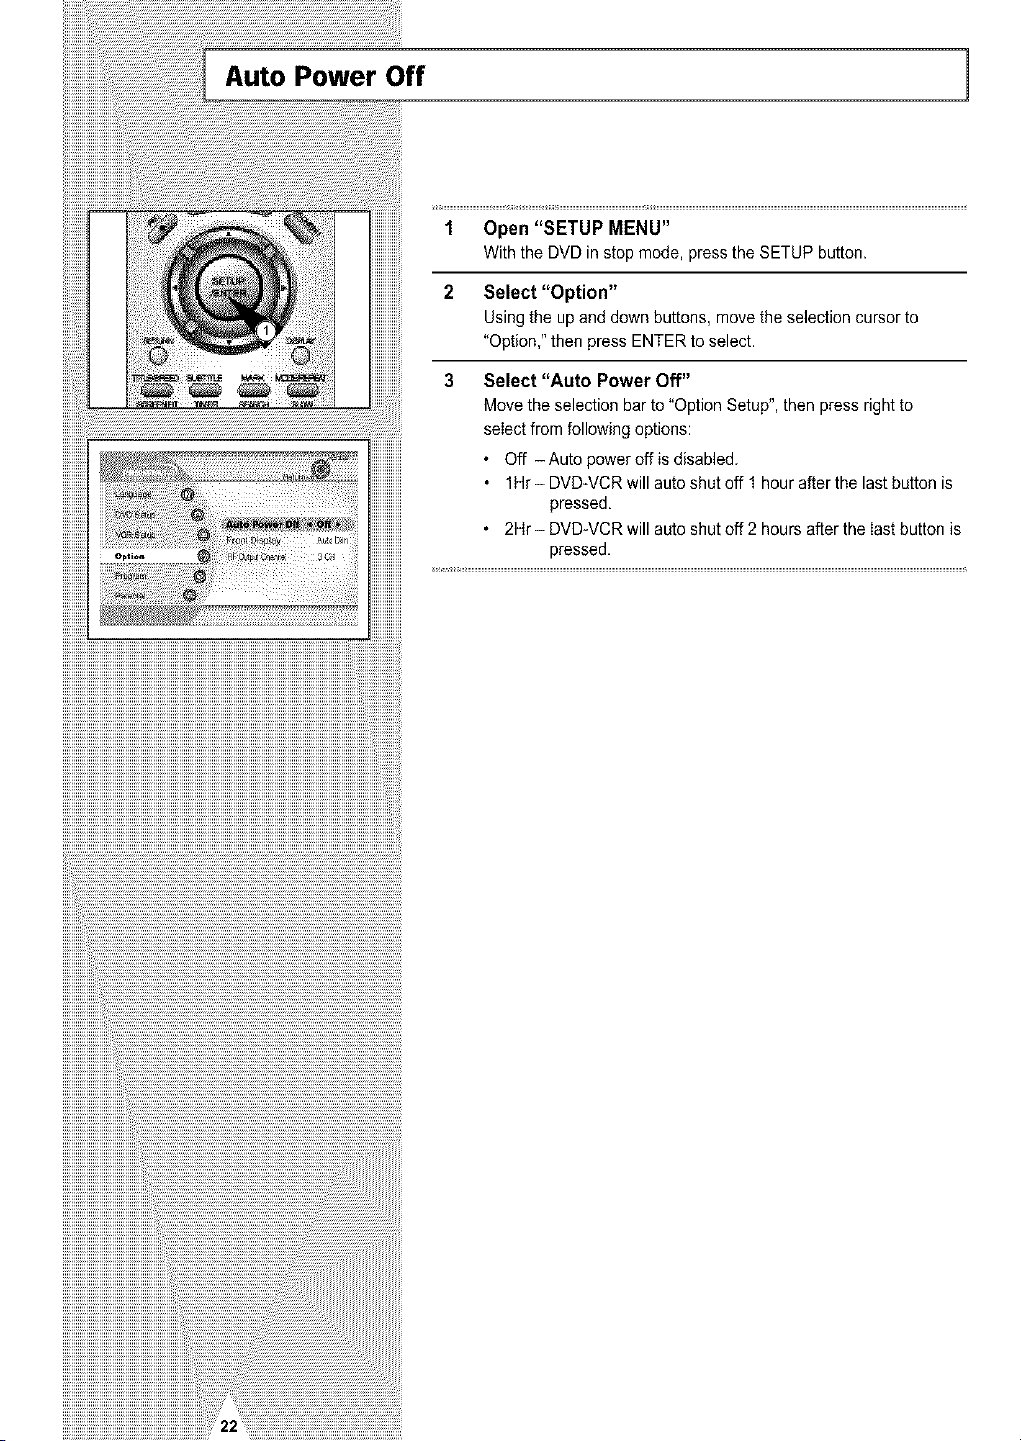
Auto Power Off ]
1 Open "SETUP MENU"
With the DVD in stop mode, presstheSETUP button.
2 Select "Option"
Using the upand down buttons, move the selection cursor to
"Option," thenpress ENTER to select.
3 Select "Auto Power Off"
Movetheselectionbar to_'OptionSetup",then pressright to
selectfrom following options:
• Off - Auto poweroff is disabled.
• 1Hr- DVD-VCR will auto shut off 1 hour afterthe last button is
pressed,
• 2Hr- DVD-VCR will autoshutoff 2 hours afterthe Iastbutton is
pressed.
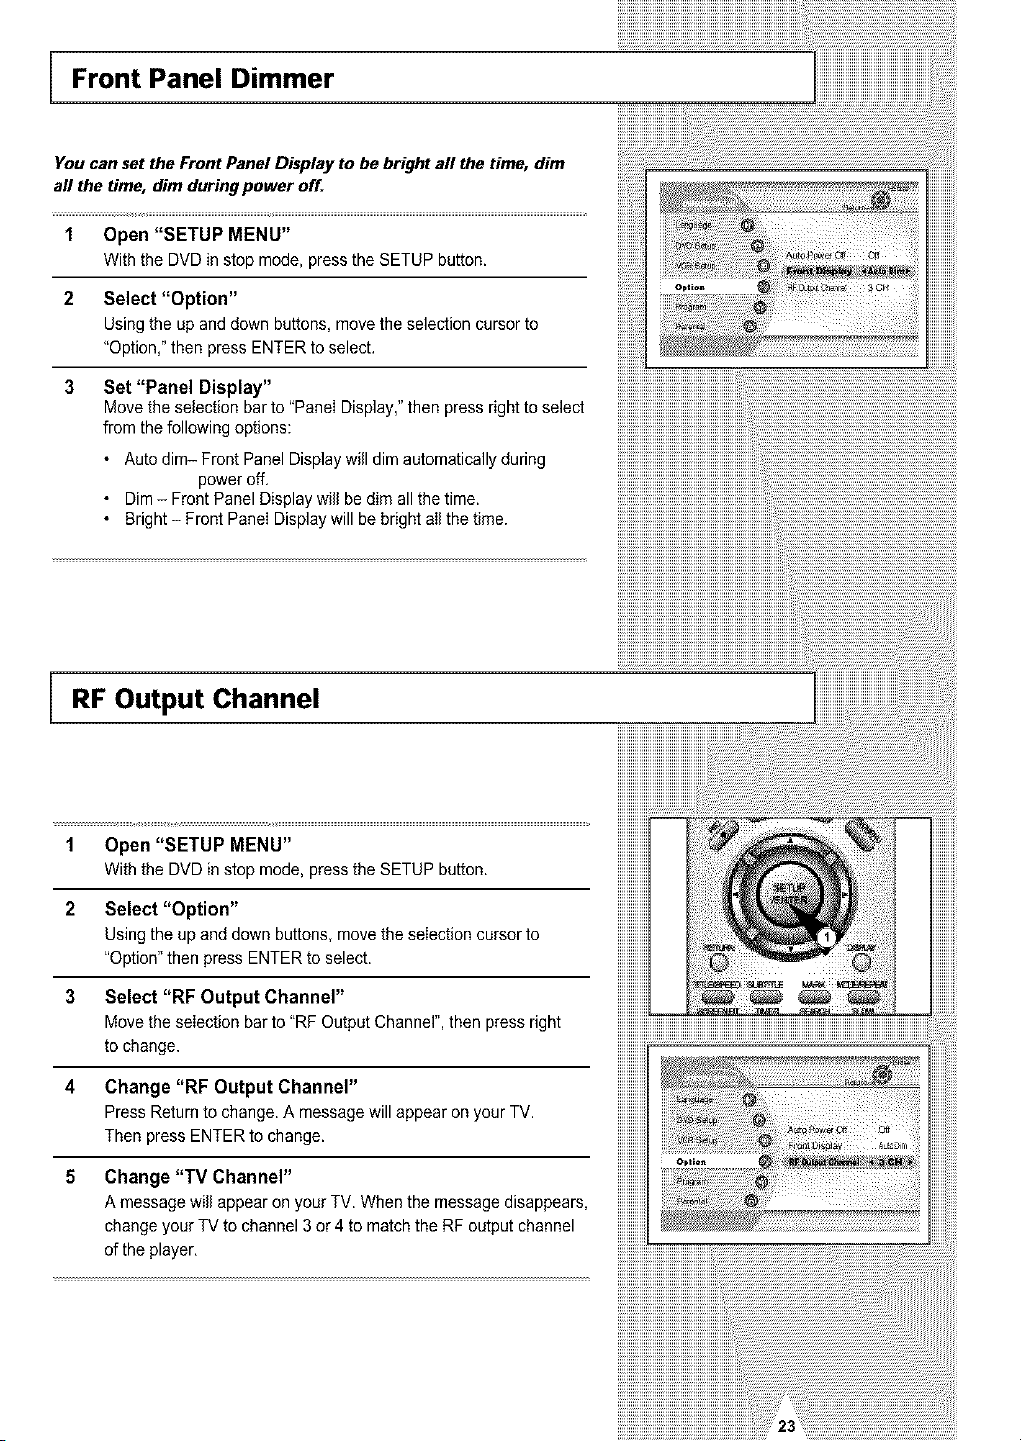
Front Panel Dimmer
You can set the Front Panel Display to be bright all the time, dim
aft the time, dim during power off.
1 Open "SETUP MENU"
Withthe DVDinstopmode,presstheSETUPbutton.
2 Select "Option"
Usingthe upanddownbuttons,movethe selectioncursorto
"Option,"then pressENTERto select.
3
Set "Panel Display"
Move the selection bar to"PaneIDisplay," then press rightto select
from the following options:
• Auto dim- Front Panel Display will dimautomaticallyduring
poweroff.
• Dim - Front Panel Display will bedimall the time.
• Bright- Front PaneIDisplay will bebright alI the time.
RF Output Channel
1 Open "SETUP MENU"
Withthe DVDin stop mode, press the SETUP button.
2 Select "Option"
Using the up and down buttons, move the selection cursor to
"Option" thenpress ENTERtoselect.
3 Select "RF Output Channel"
Movetheselection bar to "RF Output Channel",then press right
tochange.
4 Change "RF Output Channel"
Press Return to change.A message will appearonyourTV.
Then press ENTER to change.
5 Change "TV Channel"
A message will appear onyourTV. Whenthe message disappears,
change your TV tochannel 3 or4tomatchthe RF output channel
oftheplayer.
iiiiiiiiiiiiiiiiiiiiiiiiiiiiiiiiiiiiiiiiiiii'i_iiiiiii¸iiiiiiiiiiiii!'i¸_i__i!_!_!_i_jii'23i_i!ii_ii_iiiiiiiiiiiiiiiiiiii_iiiiiiiiiiiiiii_ilj_ii_!i
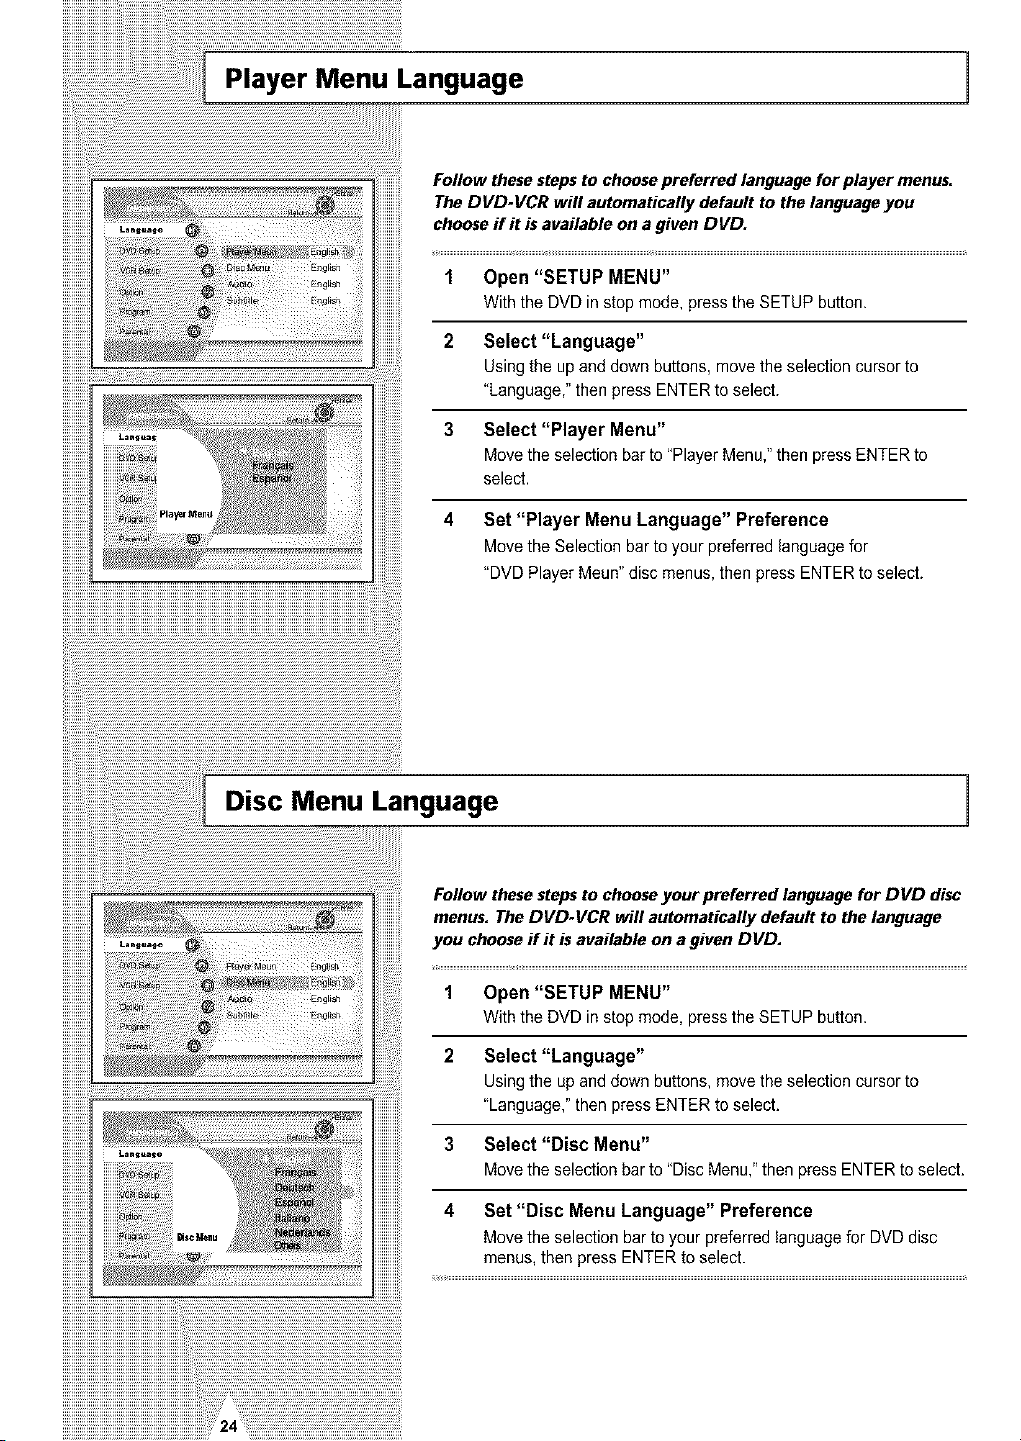
Player Menu Language 1
iiiiiiiiiiii
Follow thesestepsto choosepreferred language for player menus.
The DVD-VCR will automatically default to thelanguage you
chooseif it is available ona given DVD.
1 Open "SETUP MENU"
With the DVD in stop mode, presstheSETUP button.
2 Select "Language"
Using the upand down buttons, move the selectioncursor to
"Language," then press ENTER toselect.
3 Select "Player Menu"
Move theselectionbar to "PlayerMenu,"thenpress ENTERto
select.
4 Set "Player Menu Language" Preference
Move theSelection bar toyour preferred languagefor
"DVD PlayerMeun"disc menus, then press ENTER to select.
Disc Menu Language
1
Follow thesestepsto chooseyour preferred language for DVD disc
menus. TheDVD-VCR will automatically default to the language
you chooseff it isavailable on a given DVD.
1 Open "SETUP MENU"
Withthe DVD instop mode, press the SETUP button.
2 Select "Language"
Using the upand down buttons, move theselection cursor to
"Language," then press ENTER to select.
3 Select "Disc Menu"
Move the selectionbar to"DiscMenu,"thenpress ENTER to select.
4 Set "Disc Menu Language" Preference
Movethe selection barto yourpreferred language for DVDdisc
menus, then press ENTERtoselect.
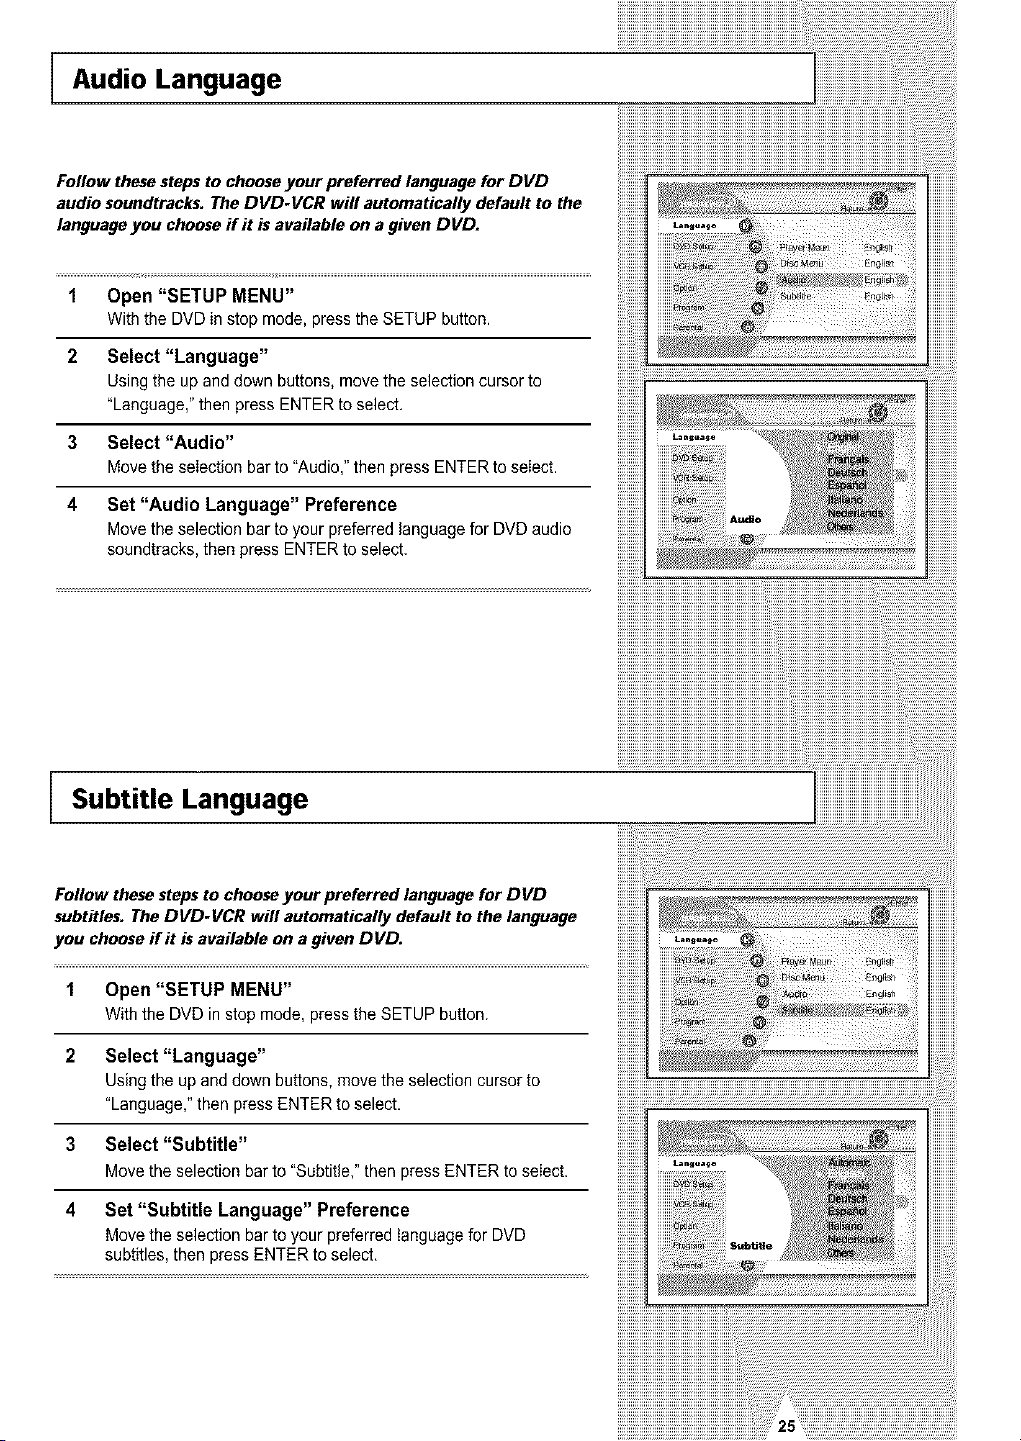
i Audio Language
Follow these steps to choose your preferred language for DVD
audio soundtracks. The DVD-VCR wifl automatically default to the
language you choose if it is available on agiven DVD.
1 Open "SETUP MENU"
With the DVDin stop mode, press the SETUP button.
2 Select "Language"
Using the upand down buttons, move the selectioncursor to
"Language," thenpress ENTER to select.
3 Select "Audio"
Move the selectionbar to"Audio," then pressENTERtoselect.
4 Set "Audio Language" Preference
Movetheselection bar toyourpreferred languagefor DVD audio
soundtracks, thenpress ENTERtoselect.
Subtitle Language
Follow thesestepsto chooseyour preferred language for DVD
subtitles. The DVD-VCR will automatically default to the language
you chooseflit isavailable ona given DVD.
1 Open "SETUP MENU"
Withthe DVD instop mode, press the SETUP button.
2 Select "Language"
Using the upand down buttons, movethe selection cursor to
"Language," then press ENTER to select.
3 Select "Subtitle"
Movethe selection barto "Subtitle,"then pressENTERto seIect.
4 Set "Subtitle Language" Preference
Movethe selection barto yourpreferred tanguage for DVD
subtitles,then press ENTER toselect.
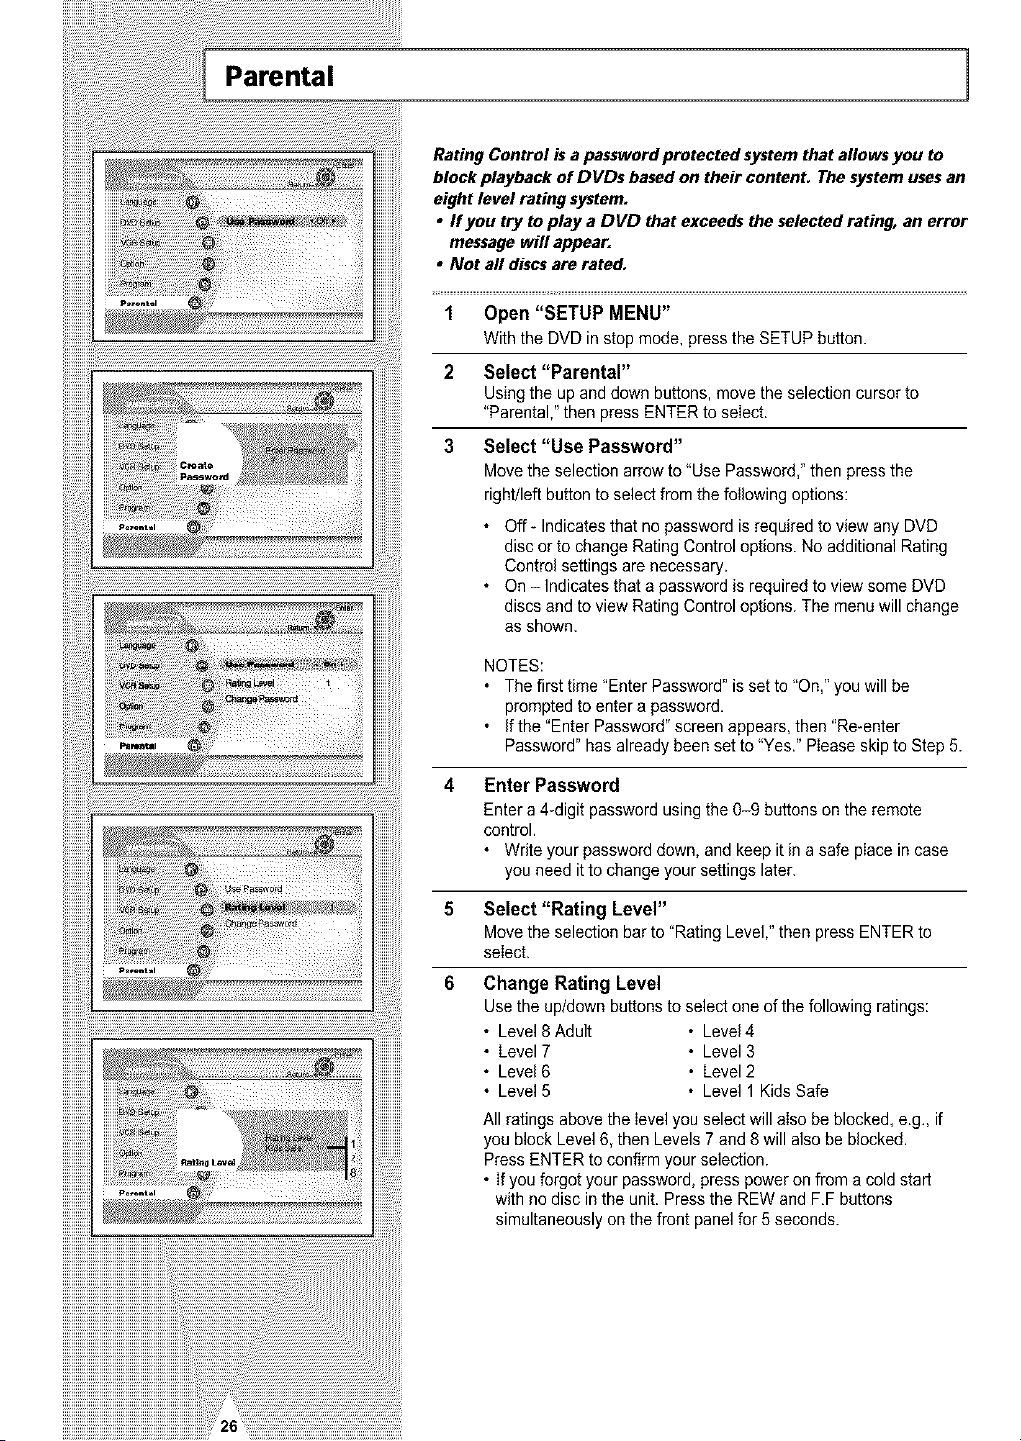
Parental 1
Rating Control is apassword protected system that allows you to
block playback of DVDs based on their contenL The system uses an
eight level rating system.
• ffyou try to play a DVD that exceeds the selected rating, an error
message will appear.
• Not aft discs are rated.
i¸¸¸¸¸¸¸¸¸¸¸¸¸¸¸¸¸¸¸¸¸¸¸¸¸¸¸¸¸¸¸¸¸¸¸¸¸_====__ _
1 Open "SETUP MENU"
With the DVD in stop mode, press the SETUPbutton.
2 Select "Parental"
Usingtheupanddownbuttons,movetheselectioncursorto
"Parental,"then pressENTERto select.
3 Select "Use Password"
Move the selectionarrow to"UsePassword," then press the
right/left button toselect fromthe following options:
• Off- Indicatesthat nopassword isrequired toview any DVD
disc or tochange Rating Controloptions. Noadditional Rating
Controlsettings are necessary.
• On- Indicatesthat a password isrequired to view some DVD
discs and toview Rating Controloptions. The menuwill change
as shown.
NOTES:
• Thefirsttime "EnterPassword" isset to"On," you will be
promptedto enter a password,
• Ifthe"EnterPassword"screenappears, then"Re-enter
Password" hasalready been setto"Yes." Please skip toStep 5.
4 Enter Password
Enter a 4_digitpassword usingthe 0-9 buttons onthe remote
control.
• Writeyour password down, and keep it inasafe place in case
youneed ittochange your settingslater.
5 Select "Rating Level"
Move the selectionbar to"Rating Level," then pressENTER to
select.
6 Change Rating Level
Use the up/down buttons to select one ofthe following ratings:
• Level8Adult • Level4
• Level 7 • Level 3
• Level6 • Level2
• Level5 • Level 1 Kids Safe
All ratingsabovethe level youselectwill also beblocked, e.g., if
you block Level 6,then Levels 7 and 8 will alsobe blocked.
Press ENTER to confirm your selection.
• If you forgot your password, presspoweronfrom a coldstart
with nodisc inthe unit. Press the REWand F.F buttons
simultaneouslyonthe front panel for 5 seconds.
Digital Output
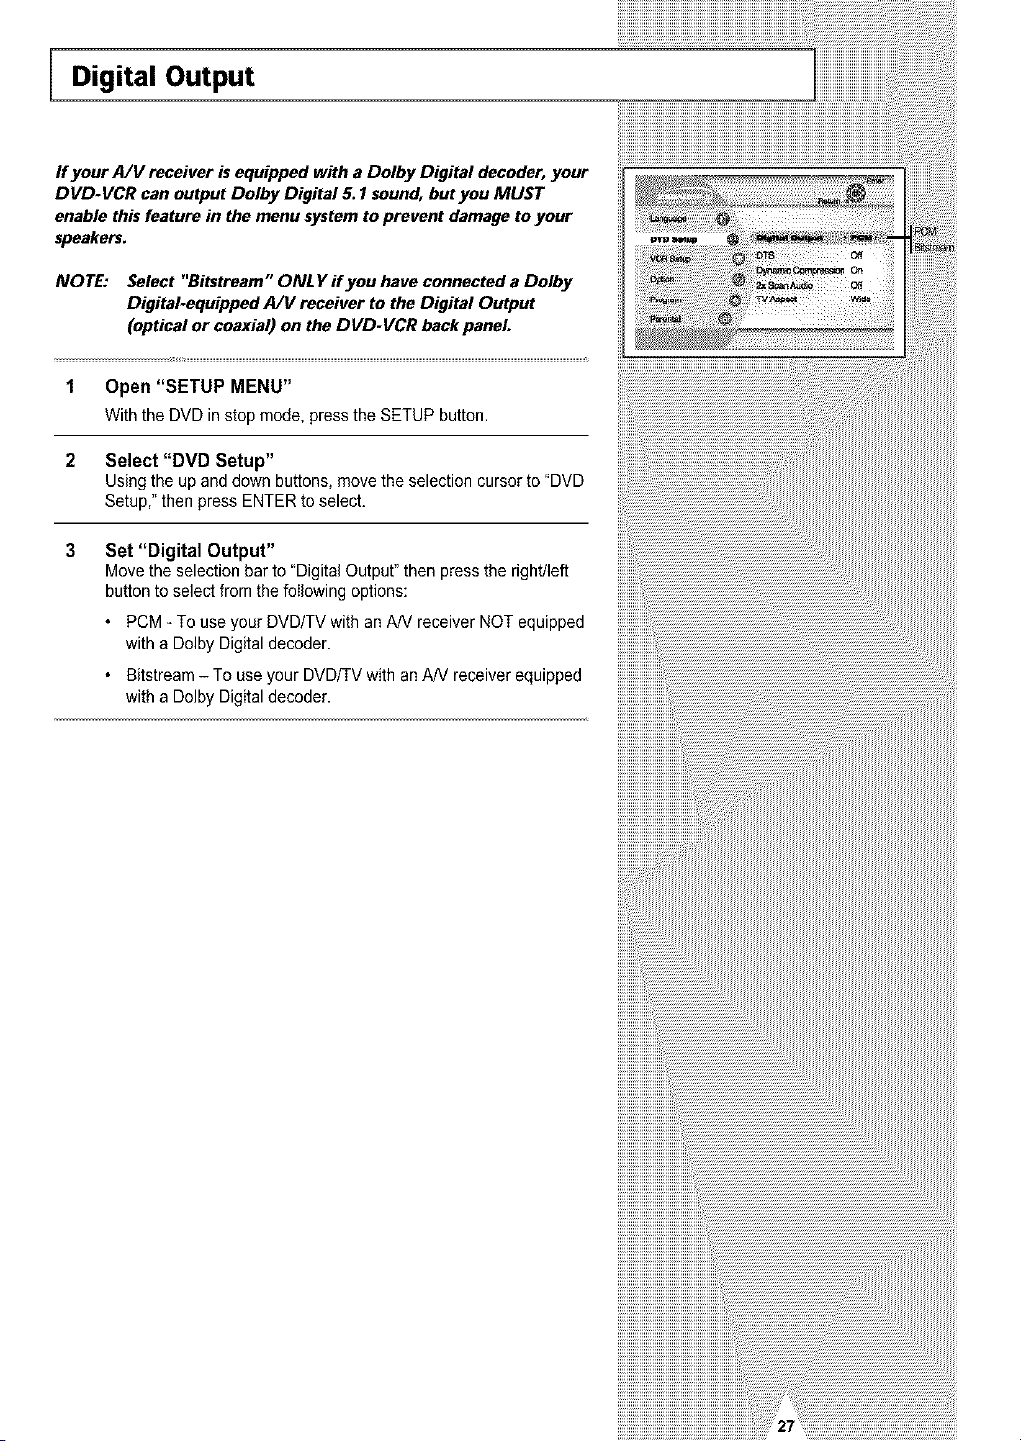
If your A/V receiver is equipped with a Dolby Digital decoder, your
DVD-VCR can output Dolby Digital 5.1 sound, but you MUST
enable this feature in the menu system to prevent damage to your
speakers.
NOTE: Select "Bitstream" ONLY if you have connected a Dolby
Digital-equipped A/t/receiver to theDigital Output
(optical or coaxial) on the DVD-VCR back panel
1 Open "SETUP MENU"
Withthe DVD instop mode, press the SETUP button.
2 Select "DVD Setup"
Using the upand down buttons, movethe selection cursor to"DVD
Setup,"then pressENTERtoselect.
3 Set "Digital Output"
Movethe selection barto "Digital Output"then press the right/left
button to selectfrom thefollowing options:
PCM-To useyour DVD/TV with anA/Vreceiver NOTequipped
with a Dolby Digital decoder.
Bitstream- To useyourDVDF£Vwith anAN receiver equipped
with a Dolby Digital decoder.
!!!!!!!!!!!!!!!!n

DTS 1
iiiiiiiiiiiiiiiiiiiiiiiiiiiiiiiiiiiiiiiiiiiiiiiiiiiiiiiiiiiiiiiiiiiiiiiiiiiiiiiiiiiiiiiiiiiiiiiiiiiiiiiii_!iiiiiiiiiiiiiiiiiiiiiiiiiiiiiiiiiiiiiiiiiiiiiii_
If your A/V receiver is equipped with a DTS decoder, your DVD-
VCRcan output DTS digital sound, but you MUST enable this
feature in themenu system.
iiiiiiiiiiiiiiiiiiiiiiiiiiiiiiiiiiiiiiiiiiiiiiiiiiiiiiiiiiiiiiiiiiiiiiiiiiiiiiiiiiiiiiiiiiiiiiiiiiiiiiiiiiiiiiiiiiiiiiiiiiiiiiiiiiiiiiiiiiiiiiiiiiiiiiiiii_
NOTE: Select "On" ONLY ff you have connected a DTS-equipped
A/V receiver to the DIGITAL AUDIO OUT (optical or coaxial) on
the DVD-VCR back panel.
1 Open "SETUP MENU"
Withthe DVD instop mode, press the SETUP button.
2 Select "DVD Setup"
Using the upand down buttons, move the selection cursor to "DVD
Setup," then pressENTERto select.
3 Set "DTS"
Move the selection bar to"DTS,"then pressright or Iefttoselect
fromthe following options:
• Off- To useyourDVD/TV with an AN receiverNOTequipped
with a DTSdecoder.
• On - To useyour DVD/TV with anA/V receiver equippedwith a
DTSdecoder.

Dynamic Compression
Dynamic Compression restrains the dynamic range of sound, Le.
the difference between the calm and noisy passage of a DVD audio
track.
1 Open "SETUP MENU"
Withthe DUD in stop mode, press the SETUPbutton.
2 Select "DVD Setup"
Using the up/down and left/right buttons,move the selectioncursor
to"DVDSetup,"then press ENTER to select.
3 Set "Dynamic Compression"
Movethe selection barto "Dynamic Compression," then press
rightor left to selectfrom the following options:
• On- Thetotal dynamic range of the DVDsoundtrack will be
compressed, so quiet passages will be louder and loud
passages will besofter.
. Off- The originaldynamicrange will bepreserved.
i llii ii ii ii ii ii ii ii ii ii ii ii ii ii ii ii ii ii ii ii ii ii ii ii ii ii ii ii ii ii ii ii ii ii ii ii ii ii ii ii ii ii ii ii ii ii ii ii ii ii ii ii ii ii ii ii ii ii ii ii ii ii ii ii ii ii ii ii ii ii ii ii ii ii ii ii ii ii ii ii
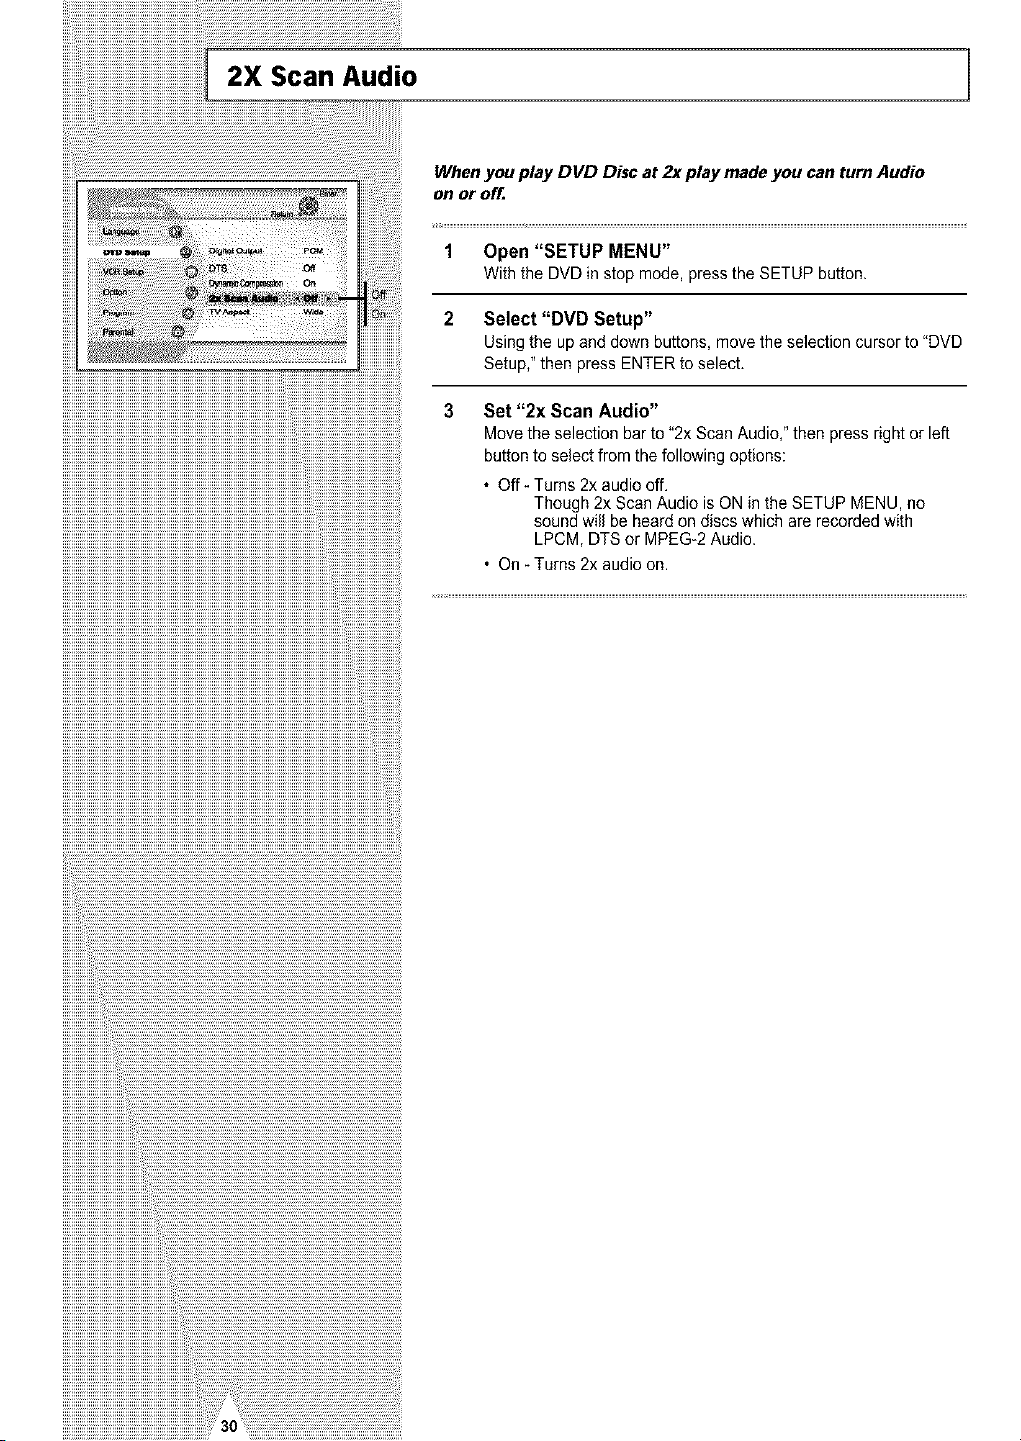
2X Scan Audio
When you play DVD Disc at 2x play made you can turn Audio
on or off=
1 Open "SETUP MENU"
With the DVDin stop mode, presstheSETUP button.
2 Select "DVD Setup"
Using the upand down buttons, move the selectioncursor to"DVD
Setup," then pressENTERtoselect.
3 Set "2x Scan Audio"
Move the selectionbar to"2x Scan Audio,"then press right or left
button toselectfrom the following options:
• Off- Turns 2x audiooff.
Though 2x Scan Audio isON in the SETUPMENU,no
soundwill beheardondiscs which are recordedwith
LPCM, DTS or MPEG-2 Audio.
• On -Turns 2x audioon.
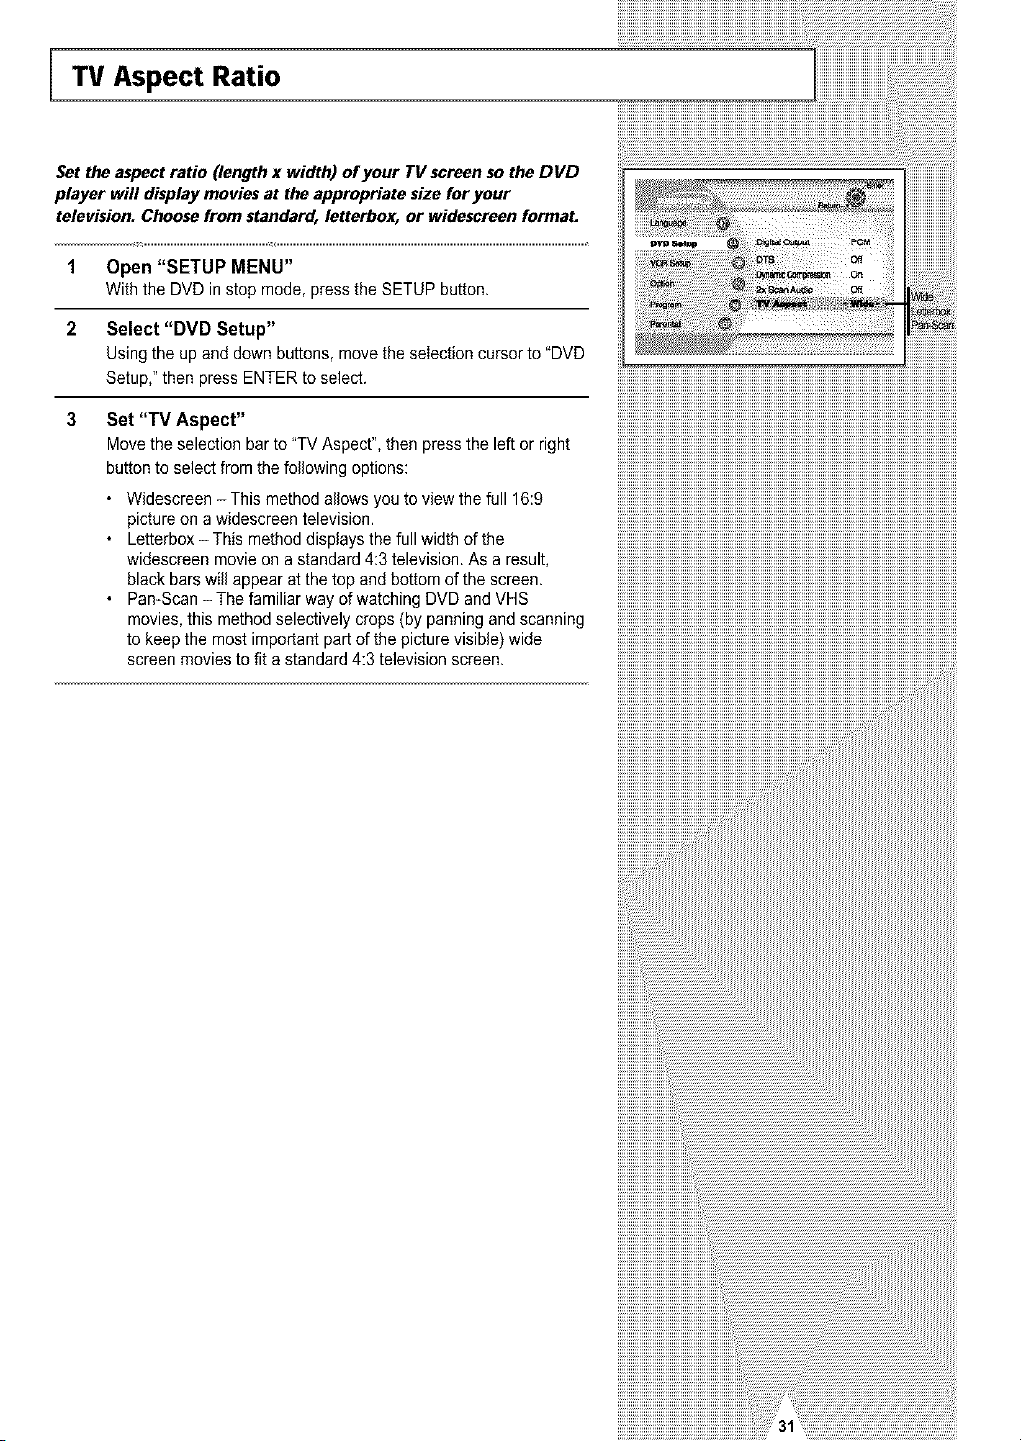
"IV Aspect Ratio
Set the aspect ratio (length x width) of your TV screen so the DVD
player will display movies at the appropriate size for your
television. Choose from standard, letterbox, or widescreen formal
1 Open "SETUP MENU"
With the DVDin stop mode, presstheSETUP button.
2 Select "DVD Setup"
Using the upand down buttons, movetheselection cursor to"DVD
Setup," then pressENTER toselect.
3 Set "TV Aspect"
Move the selection bar to"TVAspect",then press the leftor right
button toselect fromthe following options:
• Widescreen - This method allows youtoview the full 16:9
picture ona widescreentelevision.
• Letterbox - This methoddisplaysthe fullwidthofthe
widescreen movie on a standard 4:3television. As a result,
blackbars will appearatthetop and bottom ofthe screen.
• Pan-Scan - Thefamiliarway ofwatching DVD and VHS
movies, this method selectively crops(by panning and scanning
tokeep the most important part ofthe picturevisible) wide
screen movies tofitastandard 4:3 television screen.
!!!!!!!!!!!!!!!!_
A/V Receiver Connections 1
iiiiiiiiiiiiiiiiiiiiiiiiiiiiiiiiiiiiiiiiiiiiiiiiiiiiiiiiiiiiiiiiiiiiiiiiiiiiiiiiiiiiiiiiiiiiiiiiiiiiiiiiiiiiiiiiiiiiiiiiiiiiiiiiiiiiiiiiiiiiiiiiiiiiiiiiii_
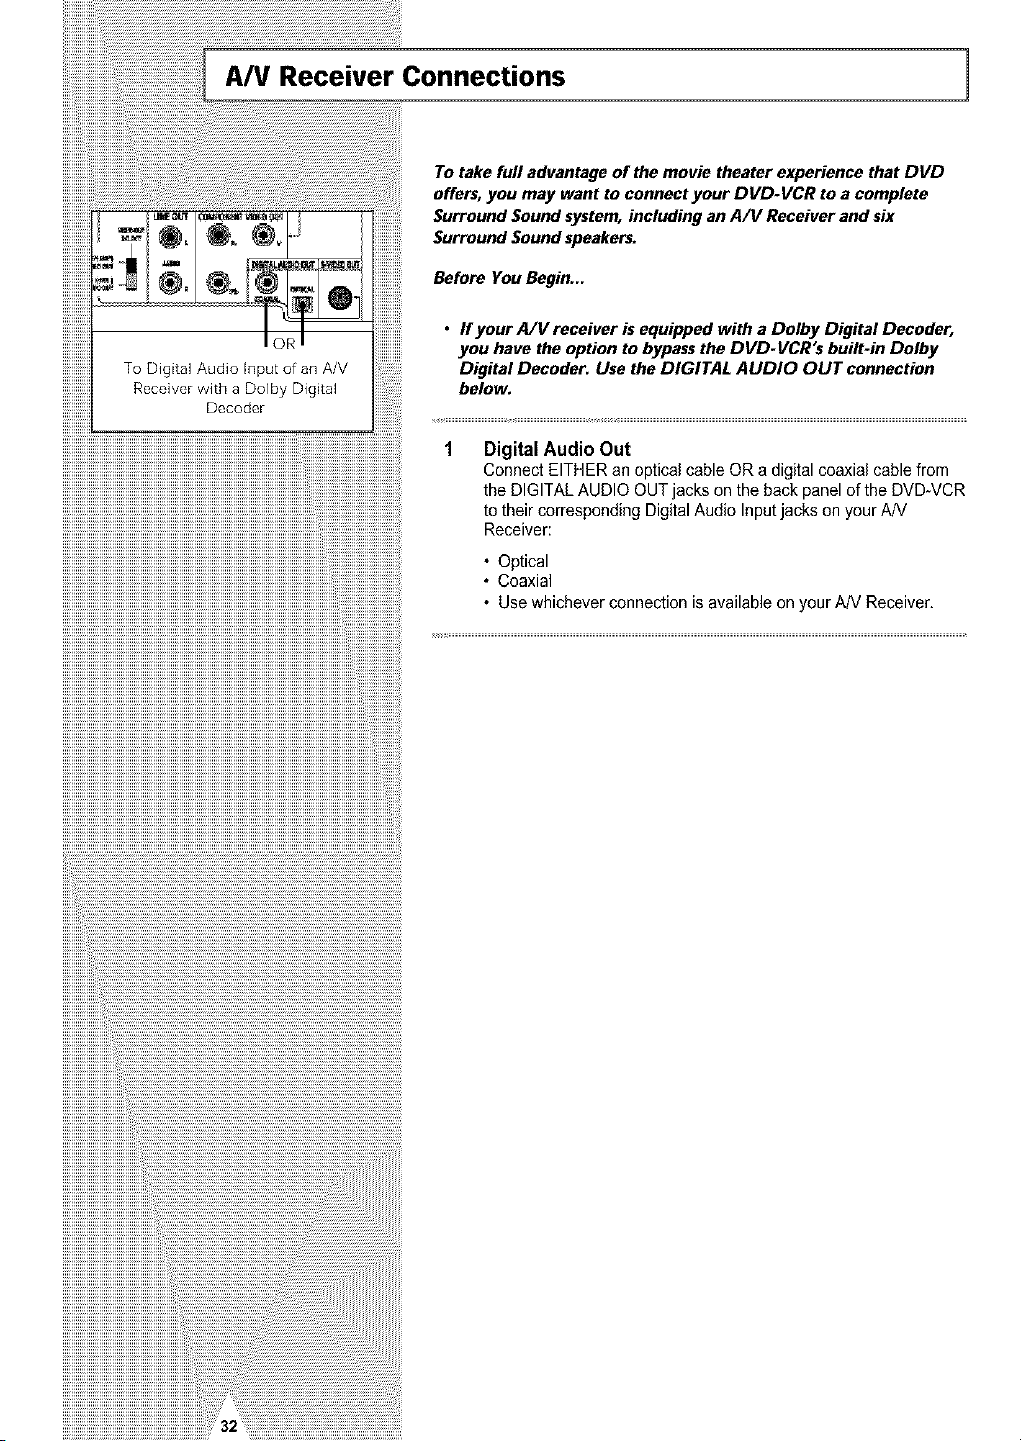
To take full advantage of the movie theater experience that DVD
offers, you may want to connect your DVD-VCR to a complete
Surround Sound system, including an A/V Receiver and six
Surround Sound speakers.
Before YouBegin...
• ffyour A/V receiver is equipped with a Dolby Digital Decoder,
you have theoption to bypassthe DVD-VCR's built-in Dolby
Digital Decoder. Use the DIGITAL AUDIO OUT connection
below.
Digital Audio Out
Connect EITHER anoptical cableOR a digital coaxialcable from
the DIGITAL AUDIO OUTjacks onthe back panel ofthe DVD-VCR
totheir corresponding Digital Audio Input jacks onyourAN
Receiver:
• Optical
• Coaxial
• Use whichever connection isavailable onyourAN Receiver.
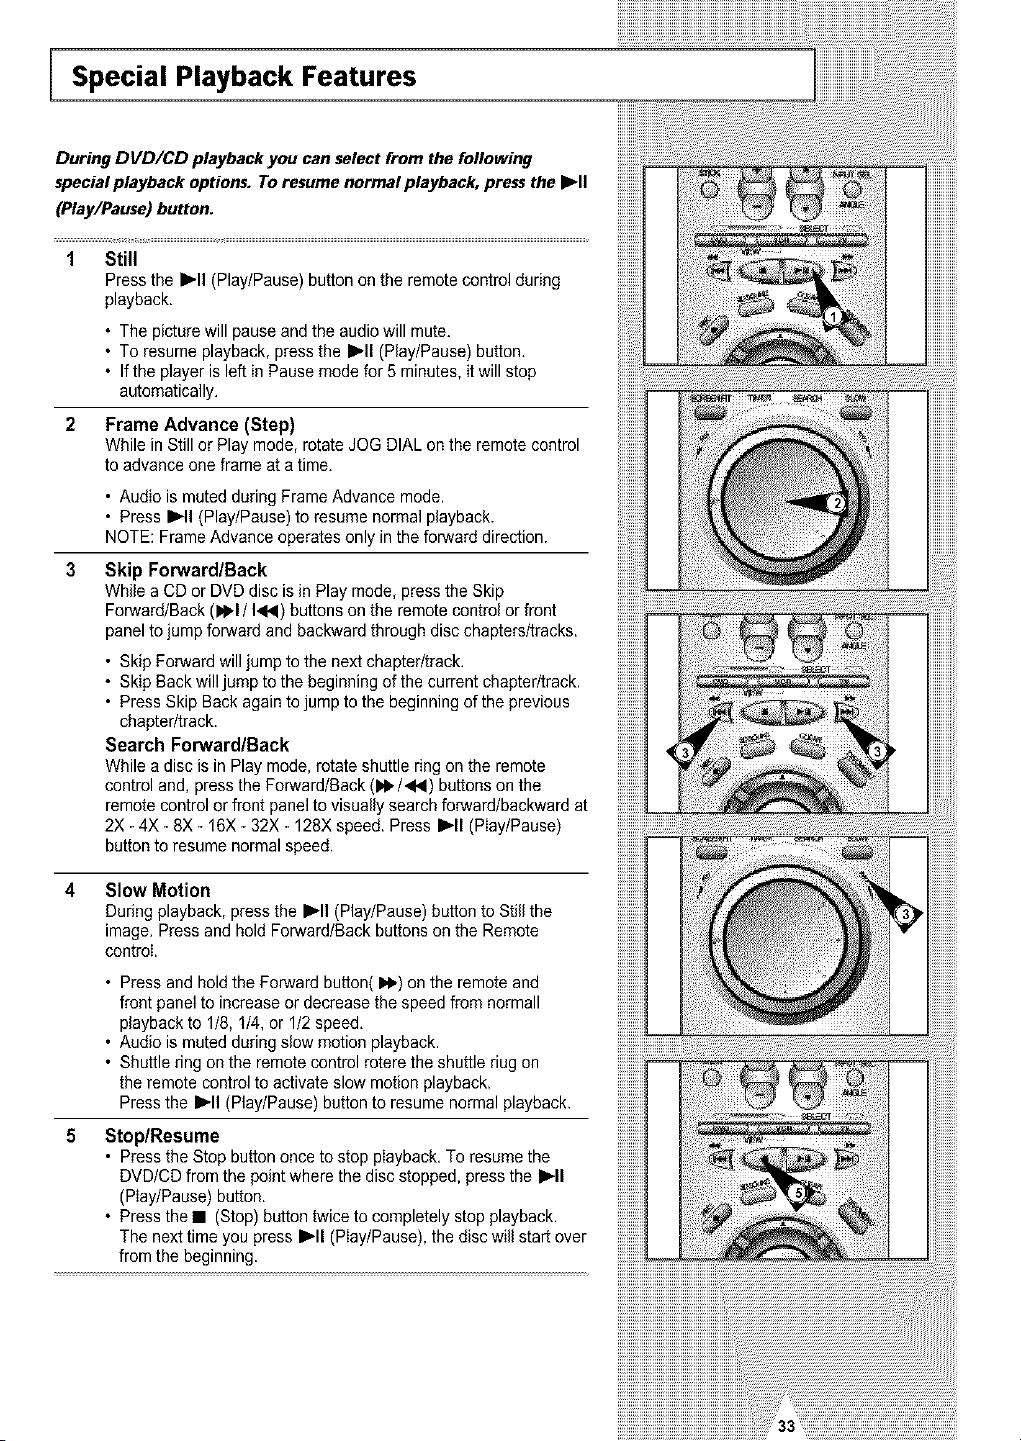
Special Playback Features
During DVD/CD playback you can select from the following
special playback options. To resume normal playback, press the I_ll
(Play/Pause) button.
1 Still
Press the I_'11(Play/Pause) button on the remotecontrol during
playback.
• The picturewill pauseand theaudiowill mute.
• To resume playback,press the I_'11(Play/Pause) button.
• If the playerisleft in Pausemodefor 5 minutes, itwill stop
automatically.
2 Frame Advance (Step)
While in Still or Play mode, rotate JOG DIALonthe remotecontrol
toadvance one frame ata time.
• Audio ismutedduring FrameAdvance mode.
• Press I_11(Play/Pause)to resume normal playback.
NOTE: Frame Advanceoperates only in the fot_vard direction.
Skip ForwardlBack
While a CDor DVDdisc isin Playmode, press the Skip
Fot_vard/Back (1_1/ 1<14)buttonson the remote controlor front
panelto jump fot_vardand backward through discchapters/tracks,
• Skip Forward will jumpto thenext chapter/track.
• Skip Backwilljump tothe beginningof thecurrent chapter/track,
• Press Skip Backagain tojump tothe beginningof the previous
chapter/track,
Search ForwardlBack
While a disc isin Play mode, rotate shuttle ring on the remote
control and, pressthe Forward/Back (IPI_/<4) buttons onthe
remote controlor front panel tovisually searchforward/backward at
2X-4X-8X - 16X -32X -128Xspeed. Press I_11(PIay/Pause)
button to resumenormal speed.
iiiiiiiiiil
Slow Motion
Duringplayback, press the I_11(Play/Pause) button toStillthe
image. Press and hold Forward/Back buttons onthe Remote
control.
• Press and holdthe Forward button(_1_)onthe remote and
front panel toincrease ordecrease the speed fromnormall
playback to 1/8, 1/4, or 1/2speed.
• Audio ismutedduring slew motionplayback.
• Shuttlering onthe remotecontrol roterethe shuttle riug on
the remote controltoactivateslow motionplayback.
Press the _'11(Play/Pause)button toresumenormal playback.
Stop/Resume
• Press the Stop button once tostop playback.To resumethe
DVD/CD from the point where thedisc stopped,press the I_11
(Play/Pause)button.
• Press the • (Stop)button twice to completely stopplayback.
The next time youpress I_'11(Play/Pause),the disc will start over
from the beginning.
_iiiiiiiiiiiiiiiiiiiiiiiiiiiiiiiiiiiiiiiiiiiiiiiiiiiiiiiiiiiiiiiiiiiiiii_
]
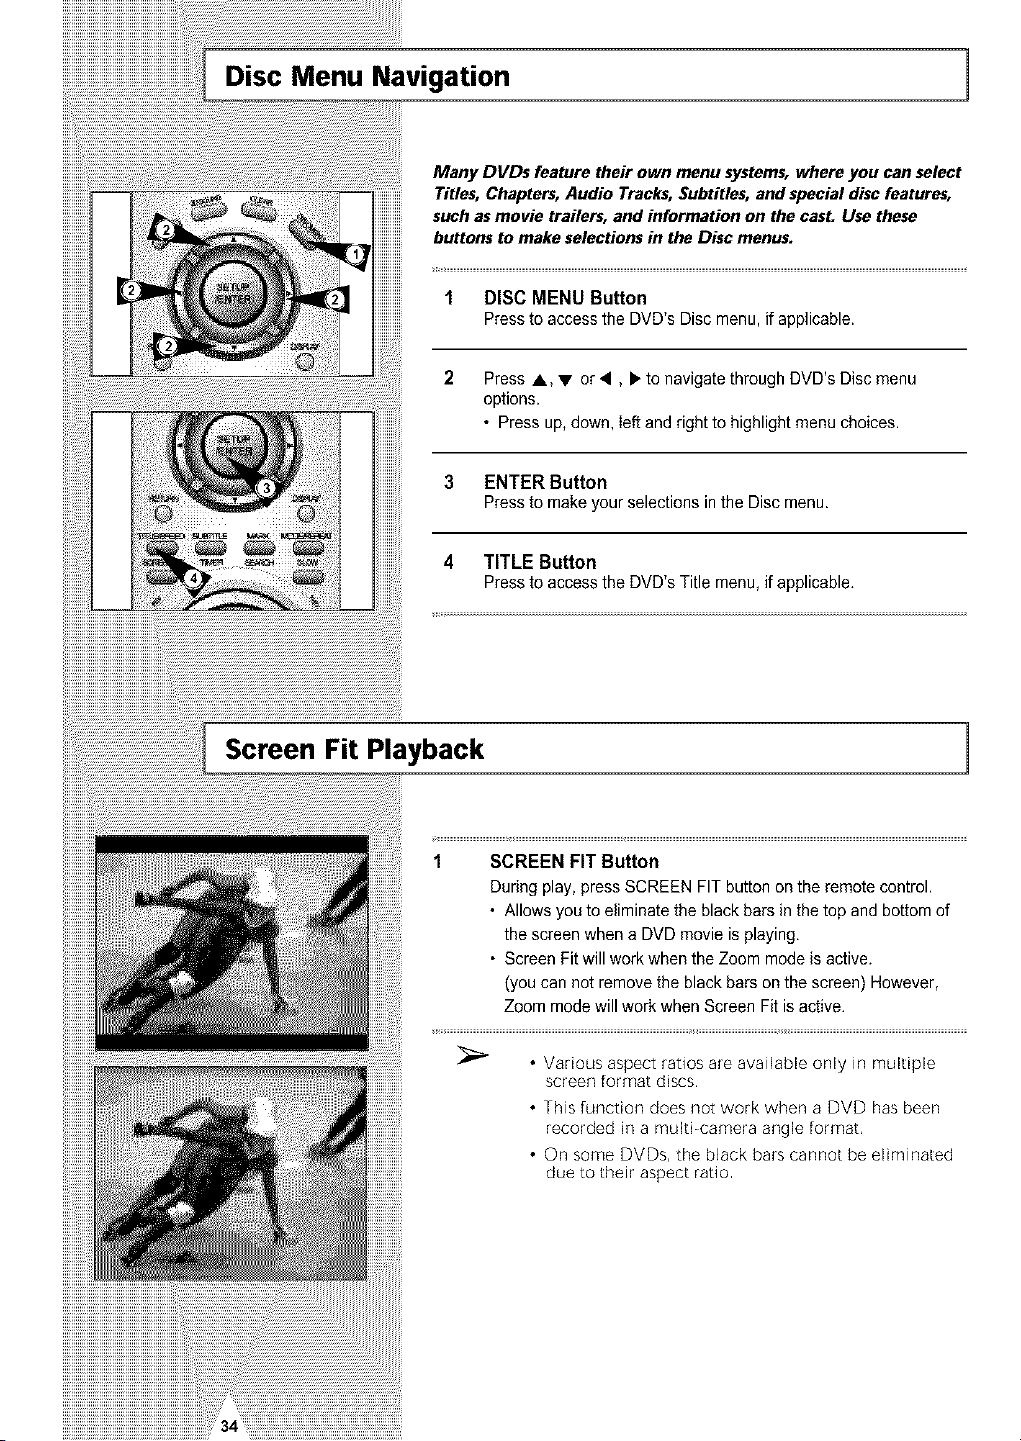
Many DVDs feature their own menu systems, where you can select
Titles, Chapters, Audio Tracks, Subtitles, and special disc features,
such as movie trailers, and information on the casL Use these
buttons to make selections in the Disc menus.
1 DISC MENU Button
Press to accessthe DVD's Disc menu, if applicable.
2 Press A,V or<, _"to navigate through DVD's Disc menu
options.
• Press up, down, leftand right tohighlightmenu choices.
3 ENTER Button
Press to makeyour selections inthe Discmenu.
4 TITLE Button
Press to accessthe DVD's Title menu, ifapplicable.
Screen Fit Playback
]
1 SCREEN FIT Button
Duringplay,pressSCREEN FIT button onthe remotecontrol.
• Allowsyou toeliminatethe blackbars in thetop and bottom of
the screen whena DVDmovie isplaying.
• Screen Fitwillwork when the Zoom mode is active.
(youcannot removethe blackbars onthe screen) However,
Zoom mode will workwhen Screen Fitisactive.
• Various aspect ratios are available only in multiple
screen format discs,
• This function does net work when a DVD hasbeen
recorded in a multi-camera angle format,
• On some DVDs, the black bars cannot beeliminated
due to thek aspect ratio
Title/Chapter/Time Selection
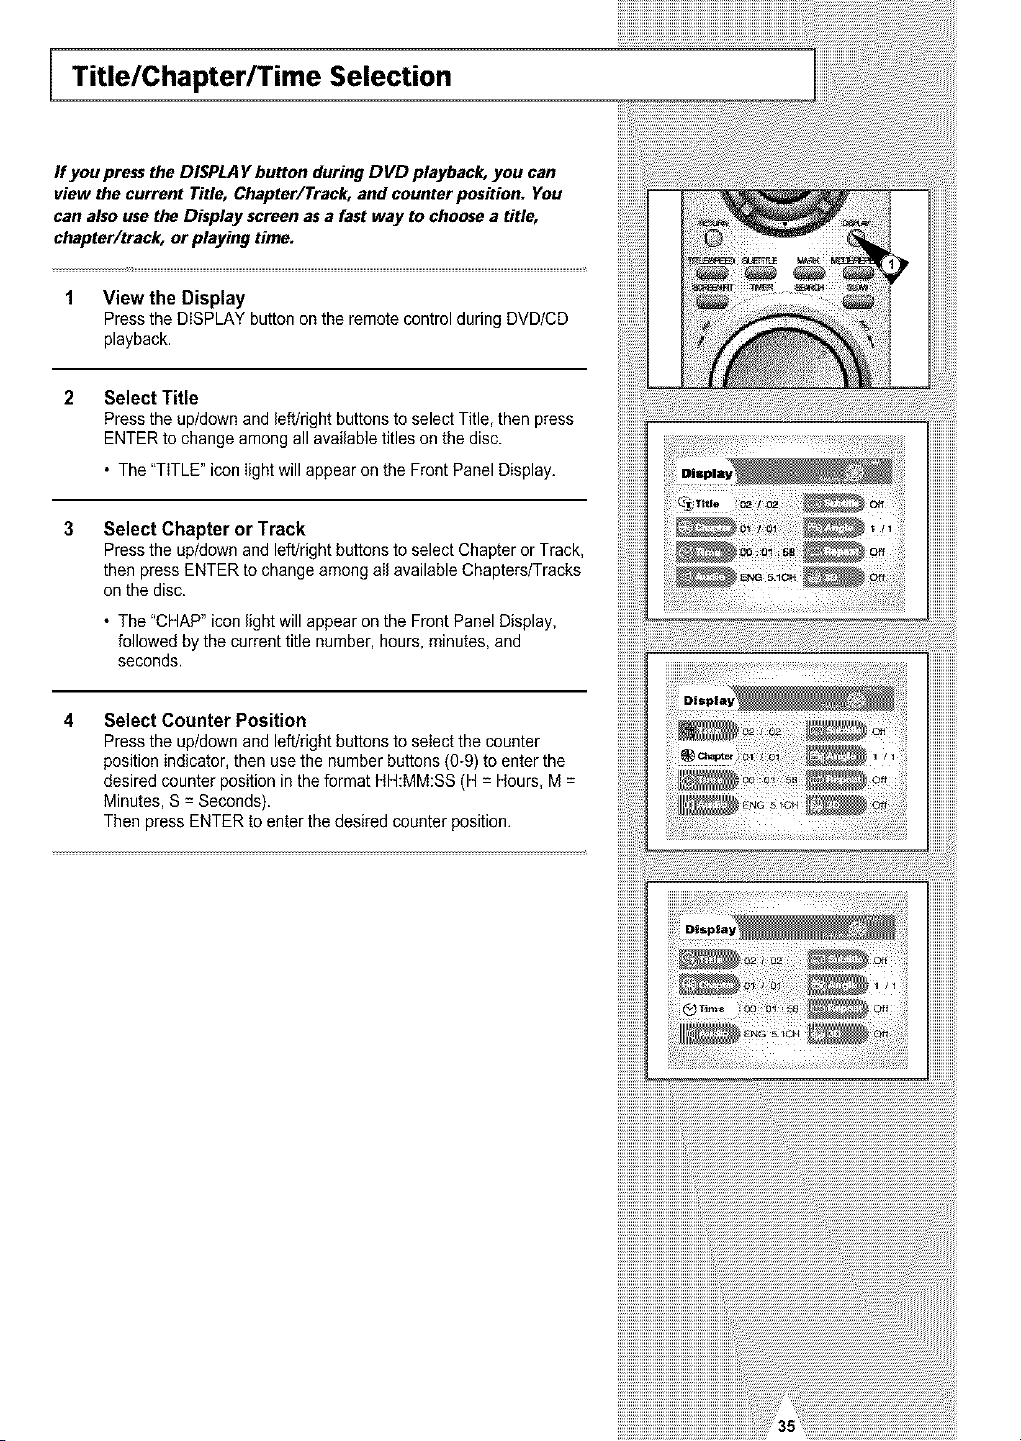
If you press the DISPLA Ybutton during DVD playback, you can
view the current Title, Chapter/Track, and counter position. You
can also use the Display screen as a fast way to choose a title,
chapter/track, or playing time.
1 View the Display
Press the DISPLAY button onthe remotecontrol during DVD/CD
playback.
Select Title
Press the up/down and left/right buttons toselect Title, thenpress
ENTER to change among allavailabletitles on the disc.
• The"TITLE" iconlight will appearonthe Front Panel Display.
Select Chapter or Track
Press the up/down and left/right buttons toselect Chapter orTrack,
then press ENTER to change among allavailable Chapters/Tracks
on thedisc.
• The"CHAP"iconlightwill appearonthe Front PanelDisplay,
followed by the currenttitle number, hours, minutes, and
seconds.
Select Counter Position
Press the up/down and left/right buttons toselectthe counter
position indicator, then usethe numberbuttons (0-9)toenter the
desired counter positionin the format HH:MM:SS (H =Hours,M =
Minutes, S = Seconds).
Then press ENTER toenter the desired counter position.
iiiiiiiiiiiiiiiiiiiiiiiiiiiiiiiiii,,_ _;i_ iilil
..............................................................Zoom
1
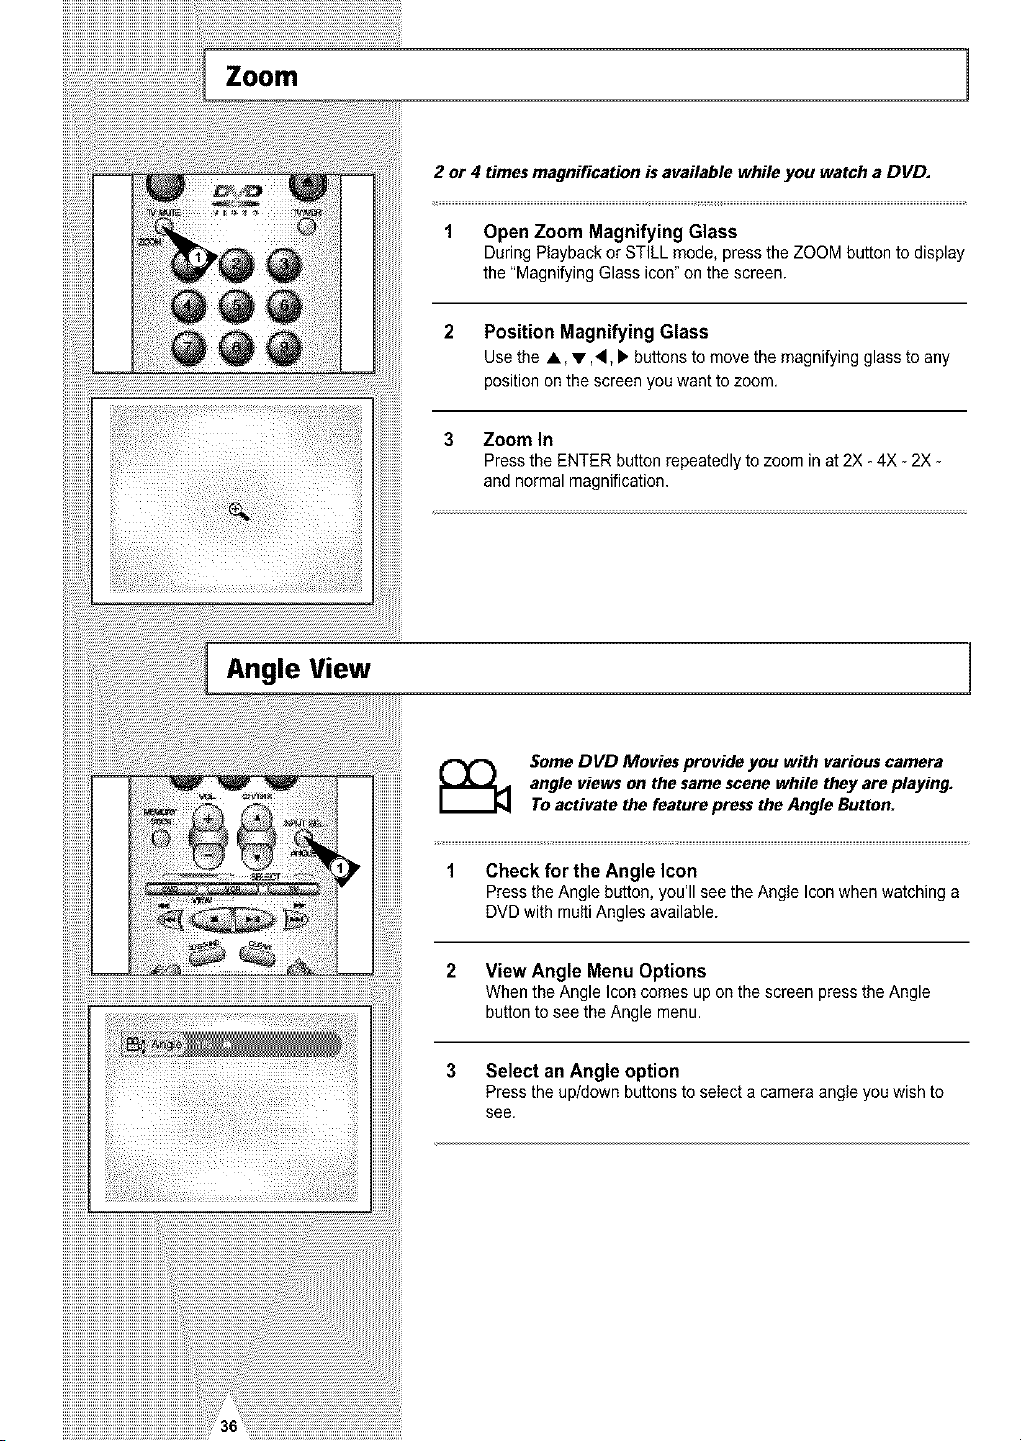
2 or 4 times magnification is available while you watcha DVD.
1 Open Zoom Magnifying Glass
DuringPlayback orSTILLmode, press the ZOOM button to display
the "MagnifyingGlass icon" onthe screen.
2 Position Magnifying Glass
Use the A, • A, _ buttons tomove the magnifying glass to any
positionon the screenyou wanttozoom,
3 Zoom In
Press the ENTER button repeatedly to zoom in at 2X-4X-2X -
and normal magnification.
Angle View 1
Some DVD Movies provide you with various camera
angle views on the same scene while they are playing.
To activate the feature press the Angle Button.
1 Check for the Angle Icon
Press the Angle button, you'll seethe Angle Iconwhen watching a
DVDwith multiAngles available.
2 View Angle Menu Options
When theAngle Iconcomesuponthe screen press the Angle
button toseethe Angle menu.
3 Select an Angle option
Press the up/down buttons toseIect a cameraangle youwish to
see.
Subtitle
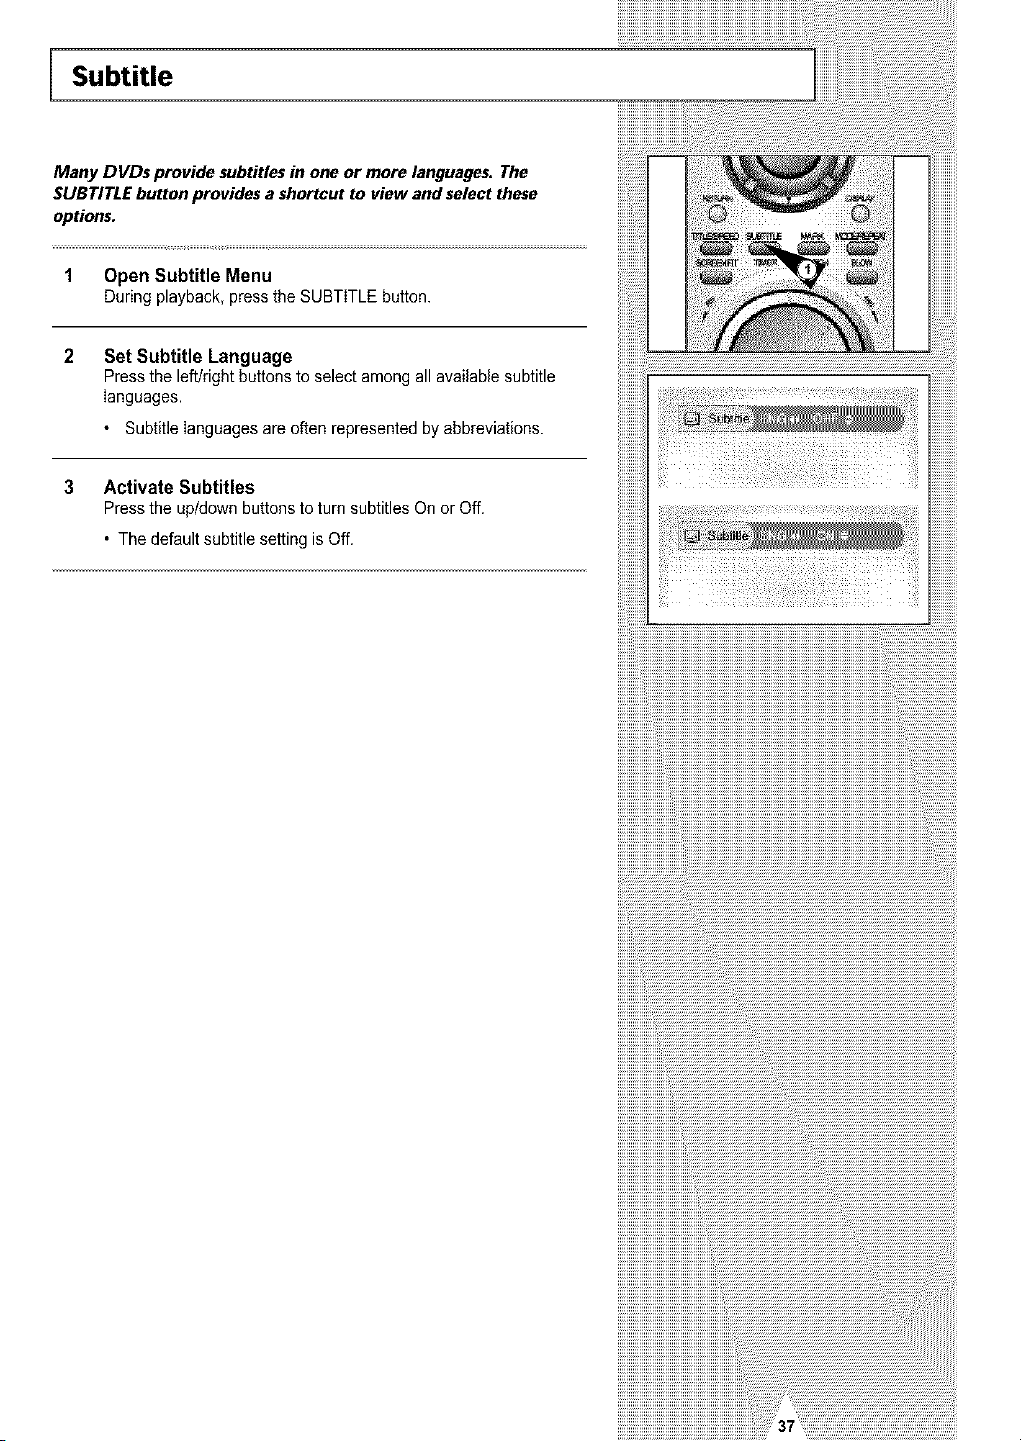
Many DVDs provide subtitles in one or more languages. The
SUBTITLE button provides a shortcut to view and select these
options.
1 Open Subtitle Menu
Duringplayback,pressthe SUBTITLEbutton.
Set Subtitle Language
Press the left!right buttons to selectamongall available subtitle
languages.
• Subtitlelanguages areoftenrepresented by abbreviations.
3 Activate Subtitles
Press the up/down buttons toturn subtitles On or Off.
• Thedefaultsubtitle setting isOff.
i llii ii ii ii ii ii ii ii ii ii ii ii ii ii ii ii ii ii ii ii ii ii ii ii ii ii ii ii ii ii ii ii ii ii ii ii ii ii ii ii ii ii ii ii ii ii ii ii ii ii ii ii ii ii ii ii ii ii ii ii ii ii ii ii ii ii ii ii ii ii ii ii ii ii ii ii ii ii ii ii
iiiiiiiiiiiii!
iiiiiiiiiiiii!
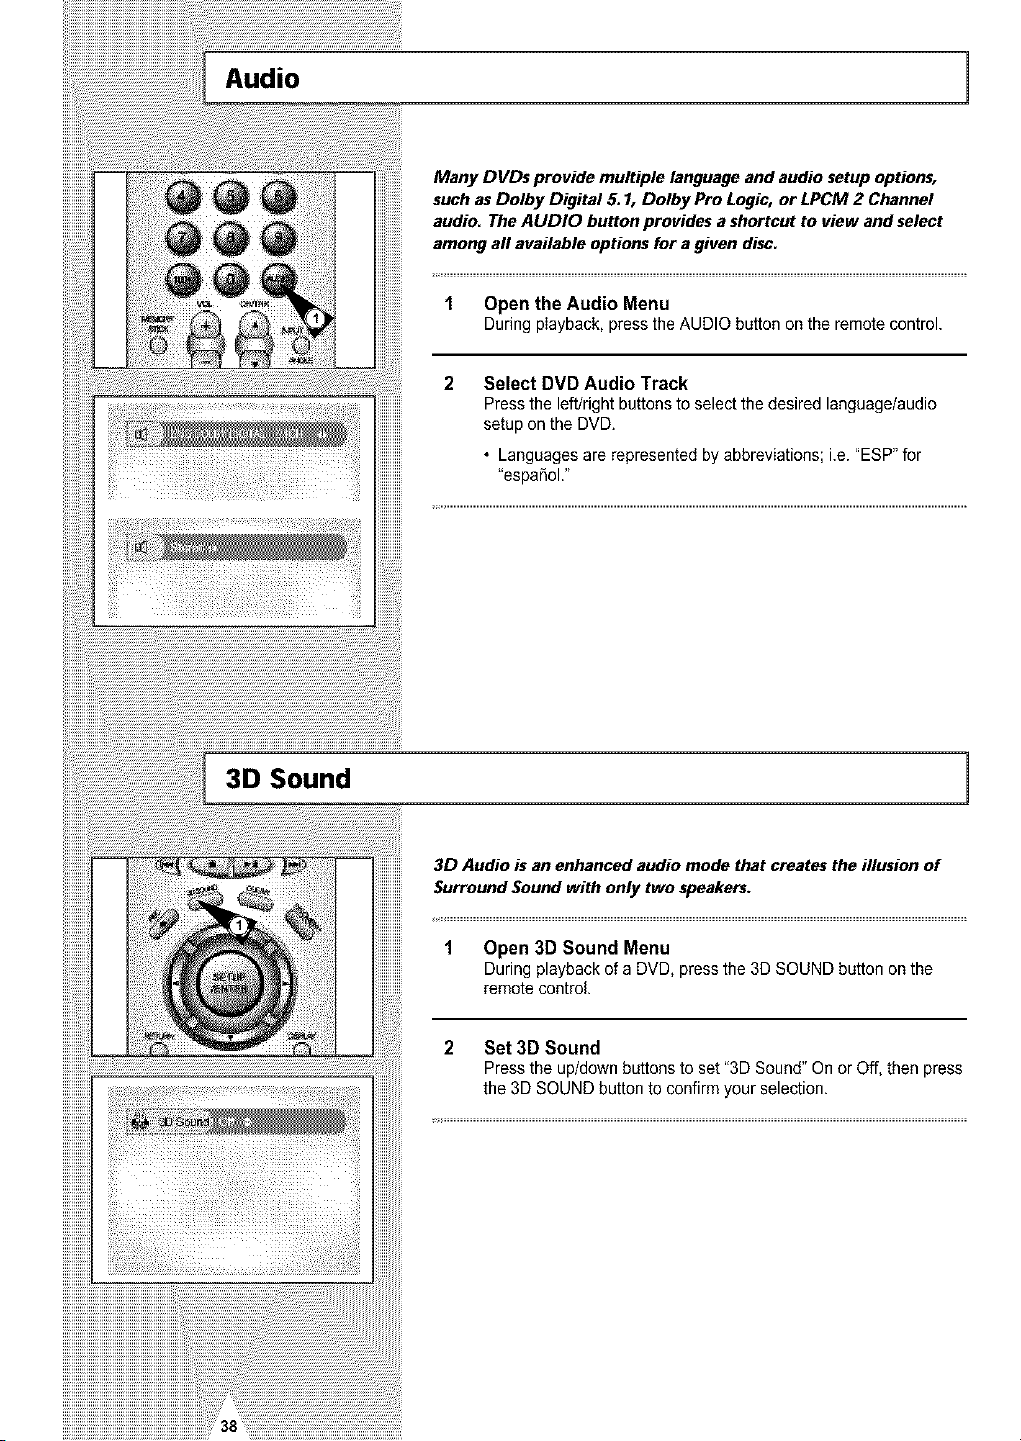
Audio 1
Many DVDs provide multiple language and audio setup options,
suchasDolby Digital 5.1, Dolby Pro Logic,or LPCM 2 Channel
audio. The AUDIO button provides a shortcut to view and select
among aftavailable optionsfor a given disc.
1 Open theAudioMenu
Duringplayback,presstheAUDIObuttononthe remotecontrol.
Select DVD Audio Track
Press the left/right buttons to selectthe desired language/audio
setupon theDVD.
• Languages arerepresented by abbreviations; i.e."ESP"for
"espa_ol."
3D Sound 1
3D Audio is an enhanced audio mode that createsthe illusion of
Surround Sound with only two speakers.
1 Open 3D Sound Menu
Duringplayback ofa DVD,pressthe 3DSOUND button onthe
remote control.
2 Set 3D Sound
Press the up/down buttons to set"3DSound" On or Off,thenpress
the 3D SOUNDbutton toconfirmyour selection.
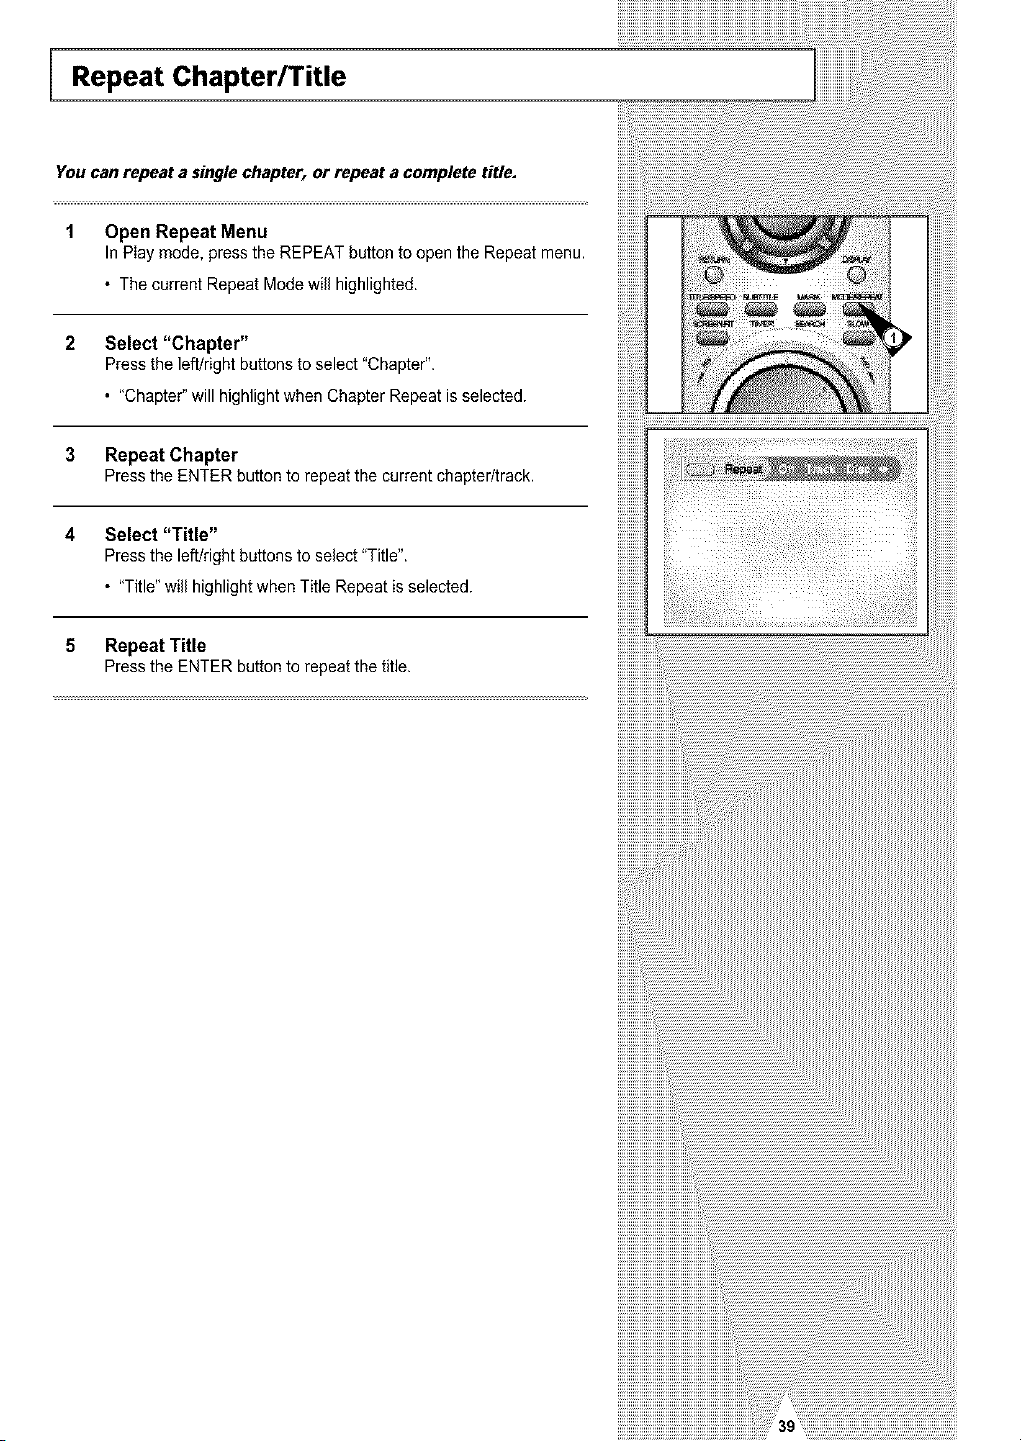
Repeat Chapter/Title
You canrepeat a singlechapter, or repeat a complete title.
1 Open Repeat Menu
InPlay mode, press the REPEATbutton toopenthe Repeatmenu.
• Thecurrent Repeat Modewill highlighted.
2 Select "Chapter"
Press the left/right buttons to select "Chapter".
• "Chapter"will highlightwhen Chapter Repeatisselected.
3 Repeat Chapter
Press the ENTER button to repeat the currentchapter/track,
4 Select "Title"
Press the left!right buttons to select "Title".
• "Title"will highlightwhen Title Repeat isselected.
5 Repeat Title
Press the ENTER button to repeat the title.
!!!!!!!!!!!!!!!!n
Bookmarks 1
You can insertup to three Bookmarksonyour DVDs, so you can
jump quickly to your favorite scene or song.
1 Open Bookmark Menu
Duringplayback,press the MARK button onthe remotecontrol.
The "Mark" header willappear onthe screen.
Select Bookmark Placeholder
Press the left/right buttons to moveto one of the three bookmark
placeholders (- --).
• Theselected placeholder will behighlighted.
Set theBookmark
Playthe DVDtothesceneyou wanttobookmark,then pressthe
ENTERbutton.The placeholderwill changeto a number(1,2 or
3).
• You cancontinue setting upto three bookmarks.
• Whenfinished, press the MARK button toexit.
• Dependingonthe disc, the bookmark function may not work.
Play Bookmark
• During playback, press the MARK button onthe remote control.
• Press theleft/right buttons to movetoa previously set bookmark.
• Press the Play/Pause button toplay the bookmark.
• Press the CLEAR button tocancel the bookmark.
• Press the MARK button again to exit the Bookmark menu.
Programmed Playback
Programmed Playbacklets you set a custom order for playback of
chapters/tracks ona DVD or CD.
1 Open Playback ModeMenu
WhileinStopmode,pressthe MODEbutton.
2 Select "PROGRAM"
Using the left/right buttons, move the selection bar to "PROGRAM"
then press ENTER to select.
3
Select Chapter/Track
Press the up/down and left/rightbuttons toselectthe first
chapter/track in yourrevised playback list, then press the ENTER
button.
4
Program Playback Order
Use the up/down and left/right buttons to selectthe remaining
chapters/tracks, pressing Enterafter each.
• Press the CLEAR button tochange selections.
5
Play Revised Order
Press the I_11(Play/Pause) button. Thedisc will playback in the
custom programmed order,
• While in playback mode, press the CLEAR button onthe remote
control tocanceI Programmed Play.
Random Playback
DVD Random Playback letsthe DVD-VCR seta random order for
playback of chapters/tracks ona DVD or CD.
1 Open Playback ModeMenu
In Stopmode,pressthe MODEbatten.
Select "RANDOM"
Using the left/right buttons, move the selection arrowto"Random
On,"thenpress ENTER toselect.
Press the "Play" button
Thedisc will playbackautomatically in random order.
3 Cancel Random Play
Press the CLEAR batten on the remotecontrol to cancel Random
Play.

MP3 Playback 1
MP3 is a popular music format which allows you to compress
music files up to 1/12 of their original size while retaining near CD
quality sound. Your DVD-VCR canplayback MP3 flies burned onto
a CD-R disc.
1 Insert Disc
InsertaCD-Rwith MP3 files intothe DVDdeck.
• TheMP3 main menuwill appearafter a few seconds and the
firstsong onthe disc will begin playing.
2 Select Folder
Press the up/down buttons toselect the folder which containsthe
MP3 flies youwant tohear, then press Enter to select.
• Ifthere are more than 8foldersonthe disc, press RETURN to
viewadditional folders.
• If there are nofolders onthe CD-R, skip to Step3.
3 Select MP3 File
Press the up/down buttons to selectthe desired MP3 file.
• If there are more than 10MP3 files in the selectedfolder, press
the left/right buttons toview additional MP3 flies.
• Press the Returnbutton to backupandselect anotherfolder.
4 PI_
Press the ENTER button onthe remotecontroIto playthe selected
song.
• Whilethe song isplaying, youcan usethe up/down buttons to
browsethrough other folders.
Press the• (Stop)button onthe remotecontrol to stop playback.
i ........................................................................................................................................................................................................................................
To ensure proper playback of discs burned from MP3 files, make
surethe files have been recorded at a bit rate of at least 128
kbps
If there are any gaps (blank data) on multi-session discs, you
may experience playback problems
On discs that are recorded with a Variable Bit Rate(VBR), e,g
from 32 to 320 kbps, the sound may cut in and out,
Memory Stick
iiiiiiiiiiiiiiiiiiiiiiiii
iiiiiiiiiiiiiiiiiiiiiiiii
iiiiiiiiiiiiiiiiiiiiiiiii
iiiiiiiiiiiiiiiiiiiiiiiii
"Memory Stick"is a new compact, portable and versatile IC (Integrated Circuit) recording medium with iiiiiiiiiiiiiiiiiiiiiiiii
a data capacity that exceeds a floppy disk. iiiiiiiiiiiiiiiiiiiiiiiii
"Memory Stick" isspecially designed for digital data exchange among "Memory Stick" compatible iiiiiiiiiiiiiiiiiiiiiiiii
devices, iiiiiiiiiiiiiiiiiiiiiiiii
eeauseitis movohIe.the'MemoryStick'canalsoheused,orexternaldotostoroge,iiiiiiiiiiiiiiiiiiiiiiiii
There are two types of "Memory Sticks". iiiiiiiiiiiiiiiiiiiiiiiii
One isthe regular "Memory Stick"and the other is the "MagicGate Memory Stick" equipped with iiiiiiiiiiiiiiiiiiiiiiiii
"MagicGato" copyright protection technology, iiiiiiiiiiiiiiiiiiiiiiiii
" agicGato'isacopyrightprotectiontechnoIogythatusesencryption.iiiiiiiiiiiiiiiiiiiiiiiii
iiiiiiiiiiiiiiiiiiiiiiiii
iiiiiiiiiiiiiiiiiiiiiiiii
1 MagicGateMemory Stick iiiiiiiiiiiiiiiiiiiiiiiii
Canbeused for both copyright-protected and regulardata. iiiiiiiiiiiiiiiiiiiiiiiii
iiiiiiiiiiiiiiiiiiiiiiiii
iiiiiiiiiiiiiiiiiiiiiiiii
iiiiiiiiiiiiiiiiiiiiiiiii
2 MemoryStick iiiiiiiiiiiiiiiiiiiiiiiii
Canbeusedforregulardataonly iiiiiiiiiiiiiiiiiiiiiiiii
iiiiiiiiiiiiiiiiiiiiiiiii
iiiiiiiiiiiiiiiiiiiiiiiii
iiiiiiiiiiiiiiiiiiiiiiiii
iiiiiiiiiiiiiiiiiiiiiiiii
iiiiiiiiiiiiiiiiiiiiiiiii
iiiiiiiiiiiiiiiiiiiiiiiii
• Meg_cGe_eMomo,yS_ck_w_hcopy,gh_-p,o_oo_oOde_acar,r,o_bou_edin_h_°r,J_ iiiiiiiiiiiiiiiiiiiiiiiii
iiiiiiiiiiiiiiiiiiiiiiiii
iiiiiiiiiiiiiiiiiiiiiiiii
iiiiiiiiiiiiiiiiiiiiiiiii
iiiiiiiiiiiiiiiiiiiiiiiii
iiiiiiiiiiiiiiiiiiiiiiiii
iiiiiiiiiiiiiiiiiiiiiiiii
iiiiiiiiiiiiiiiiiiiiiiiii
iiiiiiiiiiiiiiiiiiiiiiiii
iiiiiiiiiiiiiiiiiiiiiiiii
iiiiiiiiiiiiiiiiiiiiiiiii
iiiiiiiiiiiiiiiiiiiiiiiii
iiiiiiiiiiiiiiiiiiiiiiiii
iiiiiiiiiiiiiiiiiiiiiiiii
iiiiiiiiiiiiiiiiiiiiiiiii
iiiiiiiiiiiiiiiiiiiiiiiii
iiiiiiiiiiiiiiiiiiiiiiiii
iiiiiiiiiiiiiiiiiiiiiiiii
iiiiiiiiiiiiiiiiiiiiiiiii
iiiiiiiiiiiiiiiiiiiiiiiii
iiiiiiiiiiiiiiiiiiiiiiiii
iiiiiiiiiiiiiiiiiiiiiiiii
iiiiiiiiiiiiiiiiiiiiiiiii
iiiiiiiiiiiiiiiiiiiiiiiii
iiiiiiiiiiiiiiiiiiiiiiiii
iiiiiiiiiiiiiiiiiiiiiiiii
iiiiiiiiiiiiiiiiiiiiiiiii
iiiiiii!...........................................
!!!!!!!!!!!!!............................................................................................................................................
ii _!_!_!_i:i:i:i:i:i:i:i:i:i:i:i:i:i:i:i:i:i:i:i:i:i:i:i:i:i:i:i:i:i:i:i:i:i:i:i:i:i:i:i:i:i:i:i:i:i:i:i:i:i:i:i:i:i:i:i:i:i:i:i:i:i:i:i:
1
The Memory Stick worksin the DVD MODE only.
1 Datacanbecomecorrupted in the following instances:
- When the"Memory Stick" istaken out or the power is turned offwhile usingthe DPM
(DigitalPhoto Manager) or DAM(DigitalAudio Manager) function.
Whenusing the"Memory Stick" in a locationsubject to staticelectricity orelectricnoise.
2 Memorysticks can onlyberead in this unit, not written.
3 Do not attachanyother material thanthesupplied labelonthe label space.
4 Attach the label so that it does not stickout from the properattachment location.
5 When movingor storingthe "MemoryStick", usethe storagecase.
6 Do not touch the "Memory Stick" connector with your finger or metallic objects.
7 Do not bend,drop or apply strong shock tothe"MemoryStick."
8 Do not disassemble or modify the "MemoryStick."
9 Do not allow the "MemoryStick" to get wet.
Memory Stick
iiiiiiiiiiiiiiiiiiiiiii
iiiiiiiiiiiiiiiiiiiiiii
iiiiiiiiiiiiiiiiiiiiiii
iiiiiiiiiiiiiiiiiiiiiii
iiiiiiiiiiiiiiiiiiiiiii
ling/removin iiiiiiiiiiiiiiiiiiiiiii
iiiiiiiiiiiiiiiiiiiiiii
iiiiiiiiiiiiiiiiiiiiiii
iiiiiiiiiiiiiiiiiiiiiii
iiiiiiiiiiiiiiiiiiiiiii
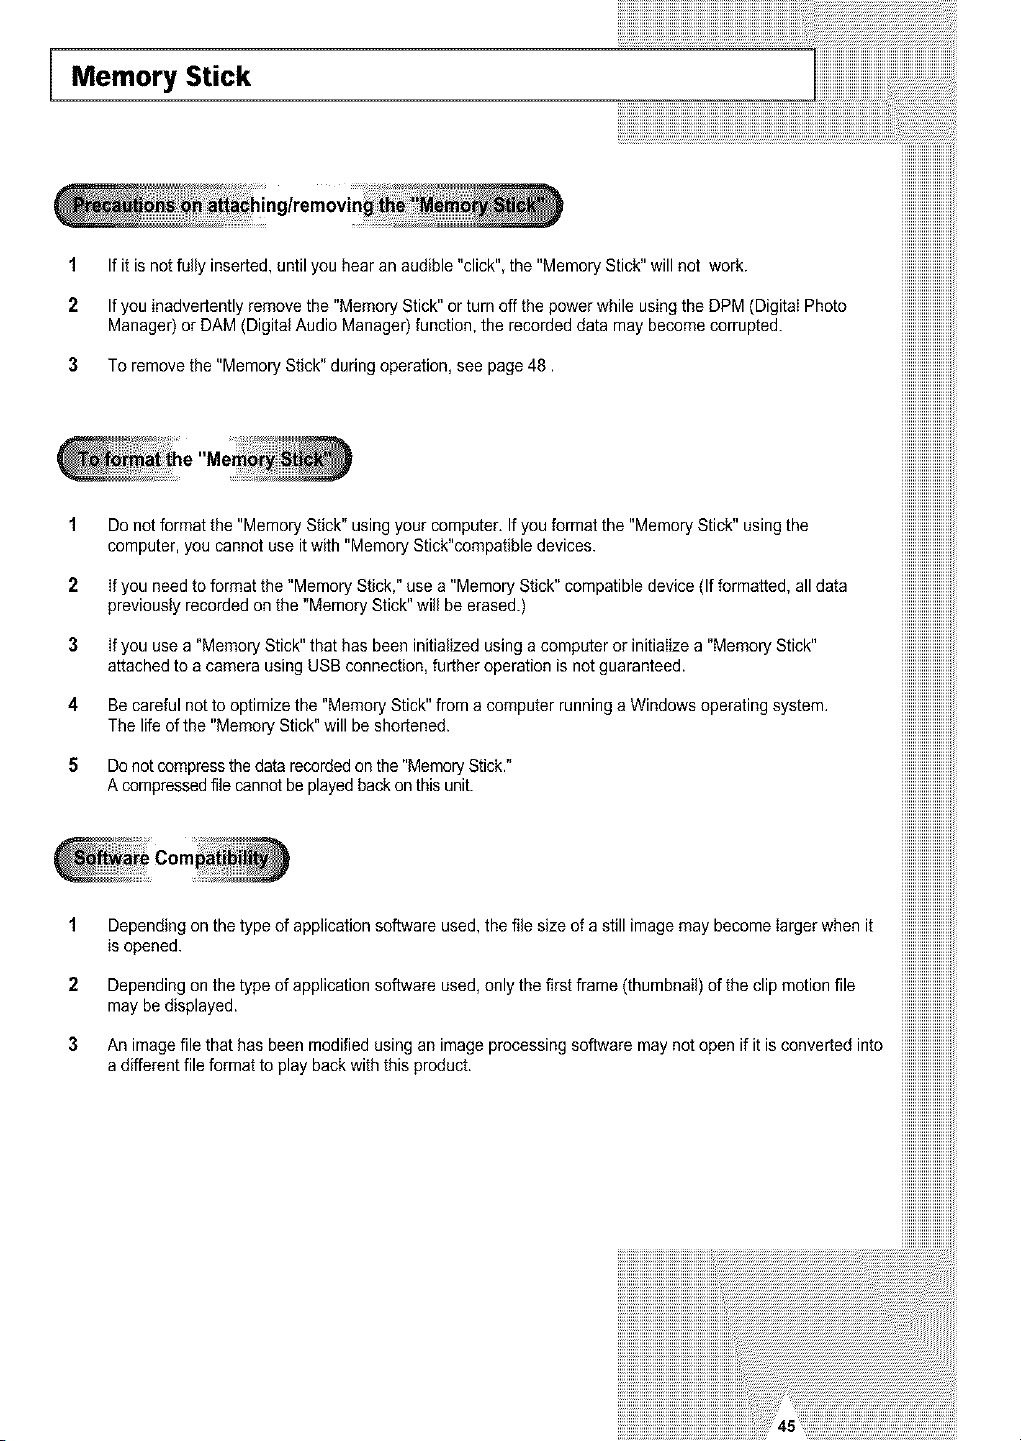
1 If it isnot fully inserted,untilyou hearan audible"click", the "MemoryStick" will not work. iiiiiiiiiiiiiiiiiiiiiii
iiiiiiiiiiiiiiiiiiiiiii
iiiiiiiiiiiiiiiiiiiiiii
2 If youinadvertently remove the "Memory Stick" or turnoffthe powerwhileusing the DPM(Digital Photo iiiiiiiiiiiiiiiiiiiiiii
Manager) or DAM(DigitalAudio Manager)function, the recorded datamay become corrupted, iiiiiiiiiiiiiiiiiiiiiii
iiiiiiiiiiiiiiiiiiiiiii
iiiiiiiiiiiiiiiiiiiiiii
3 To removethe "MemoryStick" during operation, see page48. iiiiiiiiiiiiiiiiiiiiiii
iiiiiiiiiiiiiiiiiiiiiii
iiiiiiiiiiiiiiiiiiiiiii
iiiiiiiiiiiiiiiiiiiiiii
iiiiiiiiiiiiiiiiiiiiiii
iiiiiiiiiiiiiiiiiiiiiii
iiiiiiiiiiiiiiiiiiiiiii
iiiiiiiiiiiiiiiiiiiiiii
iiiiiiiiiiiiiiiiiiiiiii
iiiiiiiiiiiiiiiiiiiiiii
iiiiiiiiiiiiiiiiiiiiiii
iiiiiiiiiiiiiiiiiiiiiii
iiiiiiiiiiiiiiiiiiiiiii
iiiiiiiiiiiiiiiiiiiiiii
iiiiiiiiiiiiiiiiiiiiiii
iiiiiiiiiiiiiiiiiiiiiii
iiiiiiiiiiiiiiiiiiiiiii
1 Do not format the "Memory Stick" usingyourcomputer. If youformatthe "MemoryStick" using the iiiiiiiiiiiiiiiiiiiiiii
computer,youcannot useitwith "MemoryStick"compatible devices, iiiiiiiiiiiiiiiiiiiiiii
iiiiiiiiiiiiiiiiiiiiiii
iiiiiiiiiiiiiiiiiiiiiii
2 If you needtoformat the "MemoryStick," usea "MemoryStick" compatible device (Ifformatted, all data iiiiiiiiiiiiiiiiiiiiiii
previouslyrecordedonthe "Memory Stick"will beerased.) iiiiiiiiiiiiiiiiiiiiiii
iiiiiiiiiiiiiiiiiiiiiii
iiiiiiiiiiiiiiiiiiiiiii
3 If you usea "MemoryStick" that hasbeeninitialized using a computer or initialize a "Memory Stick" iiiiiiiiiiiiiiiiiiiiiii
attachedtoacamerausingUSBconnection, furtheroperationisnotguaranteed, iiiiiiiiiiiiiiiiiiiiiii
iiiiiiiiiiiiiiiiiiiiiii
iiiiiiiiiiiiiiiiiiiiiii
4 Becarefulnot to optimizethe "MemoryStick" from a computer runninga Windows operating system, iiiiiiiiiiiiiiiiiiiiiii
Thelifeofthe"MemoryStick"willbeshortened. iiiiiiiiiiiiiiiiiiiiiii
iiiiiiiiiiiiiiiiiiiiiii
iiiiiiiiiiiiiiiiiiiiiii
5 Donot compress thedatarecordedonthe "Memory Stick." iiiiiiiiiiiiiiiiiiiiiii
A compressedfile cannotbeplayedbackon this unit. iiiiiiiiiiiiiiiiiiiiiii
iiiiiiiiiiiiiiiiiiiiiii
iiiiiiiiiiiiiiiiiiiiiii
iiiiiiiiiiiiiiiiiiiiiii
iiiiiiiiiiiiiiiiiiiiiii
iiiiiiiiiiiiiiiiiiiiiii
iiiiiiiiiiiiiiiiiiiiiii
iiiiiiiiiiiiiiiiiiiiiii
iiiiiiiiiiiiiiiiiiiiiii
iiiiiiiiiiiiiiiiiiiiiii
iiiiiiiiiiiiiiiiiiiiiii
iiiiiiiiiiiiiiiiiiiiiii
iiiiiiiiiiiiiiiiiiiiiii
iiiiiiiiiiiiiiiiiiiiiii
1 Dependingonthe type ofapplication software used, the file size ofa still imagemay become larger when it iiiiiiiiiiiiiiiiiiiiiii
isopened, iiiiiiiiiiiiiiiiiiiiiii
2 Dependingonthe type ofapplication software used, onlythe first frame (thumbnail)ofthe clipmotion file iiiiiiiiiiiiiiiiiiiiiii
maybedisplayed, iiiiiiiiiiiiiiiiiiiiiii
3 An imagefilethathas beenmodified usingan imageprocessingsoftware may notopen ifit isconverted into iiiiiiiiiiiiiiiiiiiiiii
a differentfile format toplay backwith this product, iiiiiiiiiiiiiiiiiiiiiii
Memory Stick 1
iiiiiiiiiiiiiiiii_
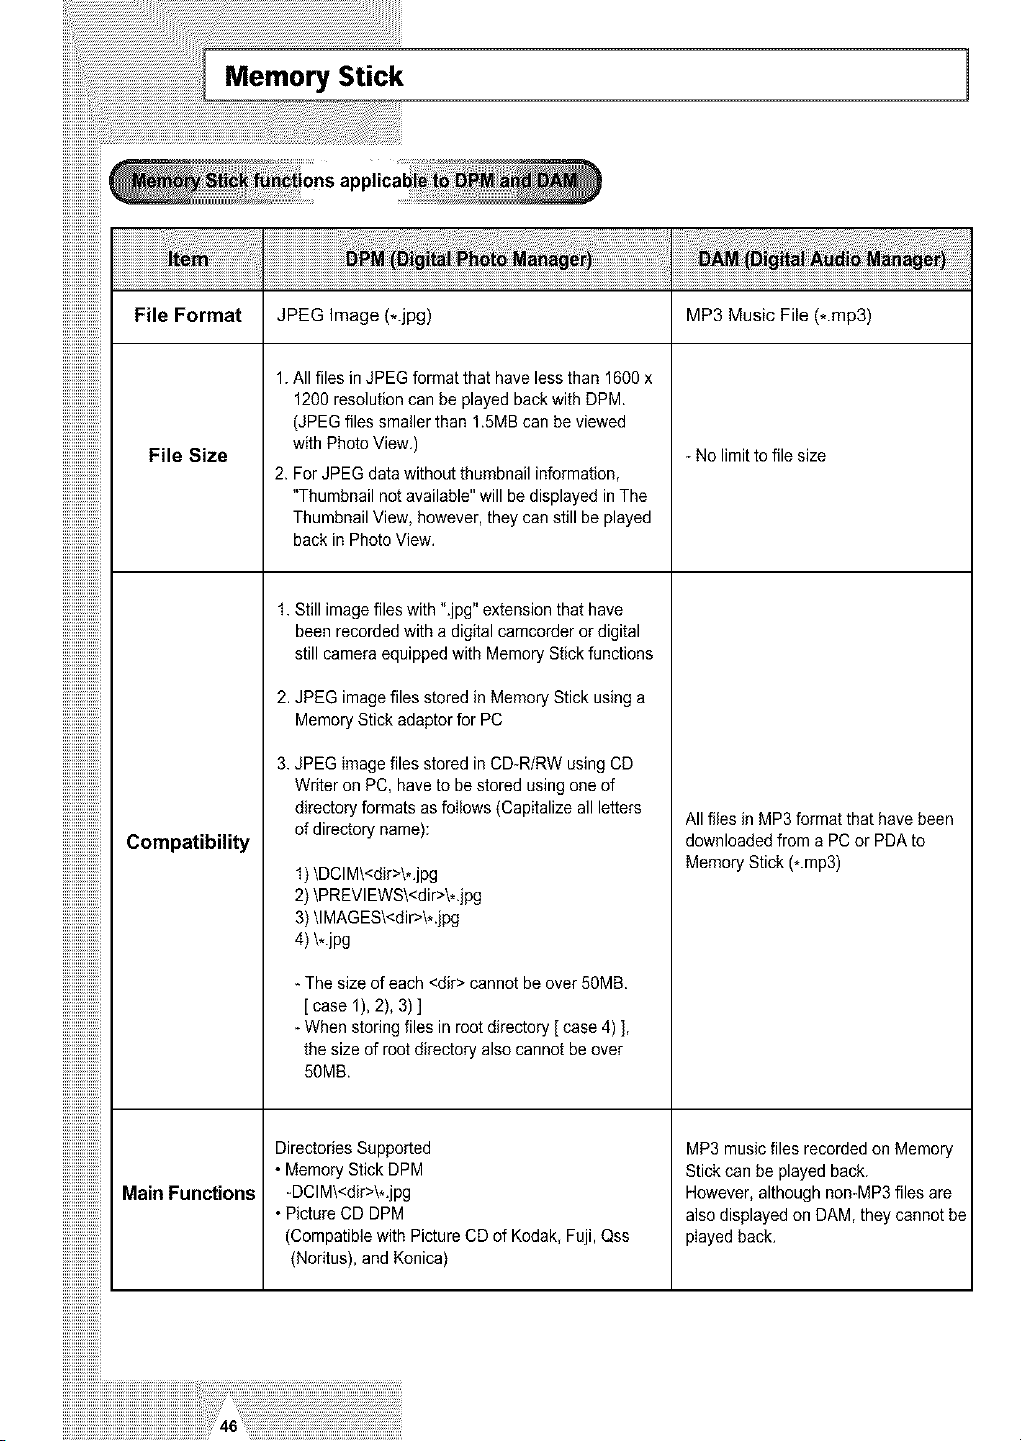
File Format
File Size
Compatibility
MainFunctions
iiiiiiiiiiiiiiiii_
JPEG Image (*.jpg)
1. Allfiles in JPEG formatthat have less than 1600x
1200resolutioncanbe played backwith DPM
(JPEGfiles smallerthan 1.5MB canbe viewed
with PhotoView.)
2.ForJPEG data without thumbnailinformation,
"Thumbnail not available" will bedisplayed in The
Thumbnail View, however,they canstillbe played
back in PhotoView.
1.Still imagefiles with ".jpg" extension that have
been recorded with adigital camcorderordigital
stillcamera equipped with MemoryStickfunctions
2.JPEG imagefiles stored in MemoryStick using a
MemoryStick adaptor for PC
3.JPEG imagefiles stored in CD-R/RW using CD
Writer onPC, have tobestored usingone of
directoryformats as follows (Capitalizeall letters
ofdirectory name):
1) \DCIM\<dir>\*.jpg
2) \PREVIEWS\<dir>\*.jpg
3) \lMAGES\<dir>\*.jpg
4) \*.jpg
-Thesize ofeach <dir> cannotbeover50MB.
[ case 1), 2), 3)]
-Whenstoring files inroot directory [ case4) ],
the size ofrootdirectory alsocannot beover
50MB.
Directories Supported
•Memory Stick DPM
-DCIM\<dir>\*.jpg
•Picture CD DPM
(Compatible with PictureCDof Kodak, Fuji, Qss
(Noritus), and Konica)
MP3 Music File (*.mp3)
-No limit to file size
Allflies in MP3 format that have been
downloaded from a PC or PDA to
MemoryStick (*.mp3)
MP3 musicfiles recorded on Memory
Stick can beplayed back.
However,althoughnon-MP3 files are
alsodisplayedonDAM, they cannot be
playedback.
DAM (Digital Audio Manager) Playback
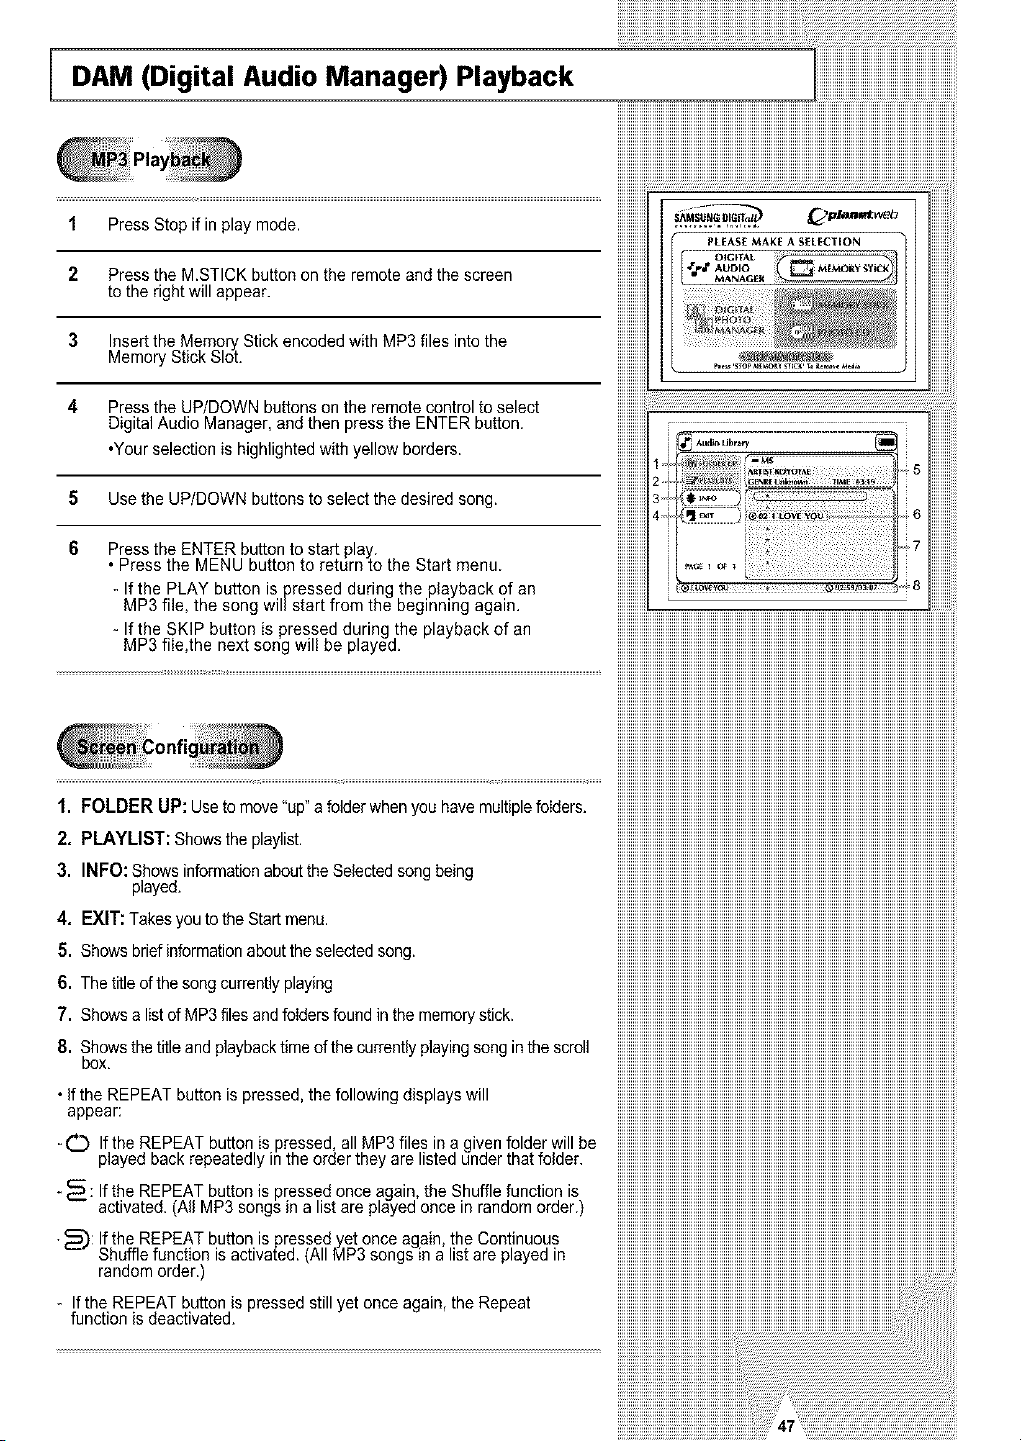
1 Press Stop if in play mode.
2 Press the MSTICK button onthe remoteand the screen
totherightwill appear.
3 Insertthe MemoryStick encodedwith MP3 files intothe
MemoryStick Slot.
4 Press the UP/DOWN buttons onthe remote controltoselect
Digital Audio Manager,and then pressthe ENTERbutton.
•Your selection ishighlightedwith yellow borders.
5 Use the UP/DOWN buttons to selectthe desired song.
6 Press the ENTER button to start play.
Press the MENU button to return to the Start menu.
- If the PLAY button ispressed during the playback ofan
MP3 file, the song willstart from the beginning again.
- If the SKIP button is pressed during the playback of an
MP3 file,the next song will beplayed.
1. FOLDER UP: Use to move"up"afolderwhenyou have multiplefolders.
2. PLAYLIST: Showsthe playlist.
3. INFO: Showsinformation aboutthe Selectedsong being
played.
4. EXIT: Takes youto the Start menu.
5. Shows brief informationabouttheselectedsong.
6. Thetitle ofthe song currently playing
7. Showsa list ofMP3 filesand foIdersfound in thememorystick.
8. Showsthe title and playback timeofthecurrentlyplayingsong in the scroll
box.
•If the REPEAT button ispressed,the following displayswill
appear:
-C_ Ifthe REPEAT button ispressed,all MP3 files in a given folderwill be
playedbackrepeatedly inthe orderthey arelisted underthat folder.
-_: If the REPEAT buttonis pressed once again, theShuffle function is
activated. (All MP3 songs in a listareplayed once in random order.)
•_): If the REPEAT button is pressed yetonce again, the Continuous
Shufflefunction isactivated. (All MP3songs in a listareplayed in
random order.)
- If the REPEAT button ispressed still yetonce again,the Repeat
function isdeactivated.
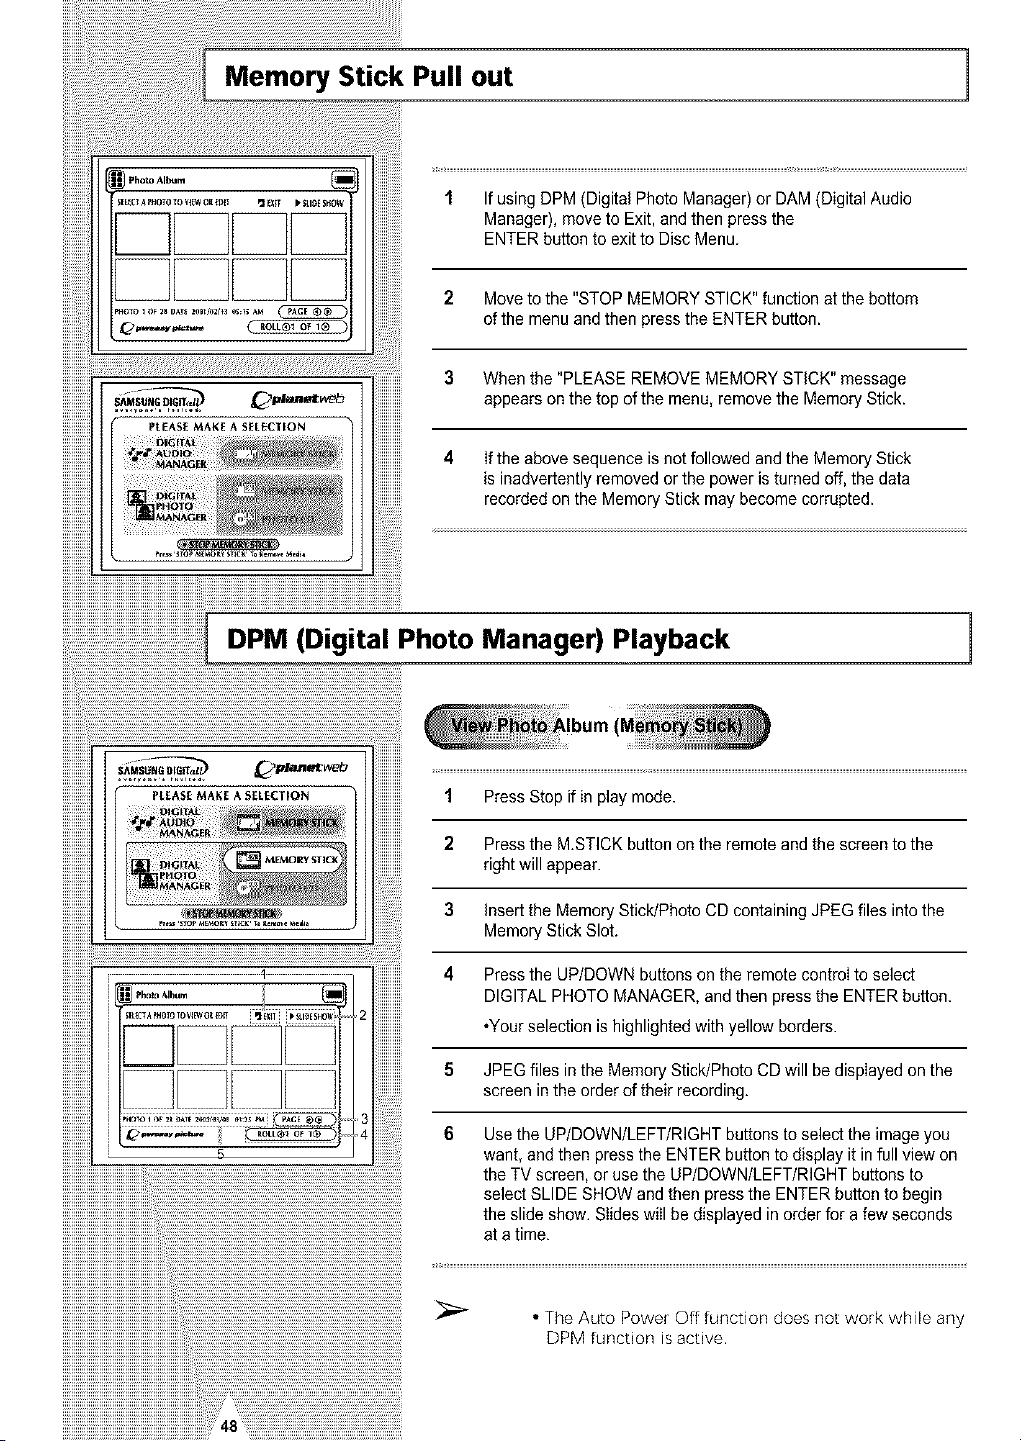
Memory Stick Pull out ]
1 If using DPM(Digital PhotoManager) or DAM(Digital Audio
Manager), move to Exit, and thenpress the
ENTER button toexit toDisc Menu.
2 Move tothe "STOP MEMORY STICK" function at the bottom
ofthe menuandthen press the ENTERbutton.
3 Whenthe "PLEASE REMOVEMEMORY STICK" message
appears onthe top ofthe menu, removethe MemoryStick.
4 If the abovesequence is not followed and the Memory Stick
is inadvertently removed orthe power isturned off, the data
recordedonthe Memory Stick may become corrupted.
1 Press Stop ifin play mode.
2 Press the M.STICK button onthe remoteand the screen to the
rightwill appear.
3 Insertthe MemoryStick/PhotoCD containing JPEG files intothe
MemoryStick Slot.
4 Press the UP/DOWN buttons onthe remotecontrol to select
DIGITAL PHOTO MANAGER,and then press the ENTER button.
*Yourselection ishighlightedwith yellow borders.
5 JPEGfiles in the MemoryStick/Photo CDwill bedisplayedon the
screen in the orderoftheir recording.
DPM (Digital Photo Manager) Playback
_,..'_-,,,--.,- 6 Use the UPIDOWN/LEFT/RIGHT buttonstoselect the imageyou
want, and thenpress the ENTER button todisplay itin full viewon
;: the TV screen, or usethe UPIDOWNILEFTIRIGHT buttons to
! select SLIDE SHOWand thenpress the ENTER button tobegin
the slide show.Slides will bedisplayed in order for a fewseconds
ata time.
r
• The Auto Power Off function does not work while any
DPM function isactive.

DPM (Digital Photo Manager) Playback
1 Insertthe Memory PhotoCDcontaining JPEGflies into the DVD
TRAY slot.
2 The PhotoCD will be auto play,and then the screentothe vight
will appear.
3 Press the UP/DOWN buttons onthe remotecontroltoselect
DIGITAL PHOTO MANAGER, and thenpress the ENTER button.
*Yourselection ishighlightedwith yellow borders.
4 JPEGfiles in the Photo CD will bedisplayed onthe screen in the
orderoftheir recording.
5 Use theUP/DOWN/LEFT/RIGHT buttons to selectthe imageyou
want, and then press the ENTER button todisplayitin full view on
the TV screen, or usethe UP/DOWN/LEFT/RIGHT buttons to
selectSLIDE SHOW press ENTER, and the silde showwill begin.
Slideswill bedisplayed in orderfor a fewsecondsat a time.
1 EXIT: Takesyoutothe Startmenu.
2 SLIDE SHOW : Begins the slide show.
3 PAGE : Highlightthe PAGE menu item and use
LEFT/RIGHT buttons to movetothe nextpageof
thumbnails.
4 ROLL: Allows navigation when there aremultiple directories
below'/DCIM' of MemoryStick. (Seepage46)
5 Photo Information.
iiiiiiiiiiiiiiiiiiiiiiii_iiiiiiiiiiiiiiiiiiiiiiiiiiiiiiiiiiiiiiiiiiiiiiiiiiiiiiiiiiiiiiiiiiiiiiiiiiiiiiiiiiiiiiiiiiiiiiiiiiiiiiiiiiiiiiiiiiiii
iiiiiiiiiiiiiiiiiiiiiiiiii_iiiiiiiiiiiiiiiiiiiiiiiiiiiiiiiiiiiiiiiiiiiiiiiiiiiiiiiiiiiiiiiiiiiiiiiiiiiiiiiiiiiiiiiiiiiiiiiiiiiiiiiiiiiiiiiiiiiii
iiii
iiiiiiii
iiiiiiiiiiiiii
iiiiiiiiiiiiiiiL
iiiiiiiiiiiiiiiiii
iiiiiiiiiiiiiiiiiiiiiiiiiiiiiiiiiiiiiiiiiiiiiiiiiiiiiiiiiiiiiiiiiiiiii i
iiiiiiiiiiiiiiiiiiiiiiiiiiiiiiiiiiiiiiiiiiiiiiiiiiiiiiiiiiiiiiiiiiiiiiiii
iiiiiiiiiiiiiiiiiiiiiiiiiiiiiiiiiiiiiiiiiiiiiiiii_.......................................................................
iiiiiiiiiiiiiiiiiiiiiiiiiiiiiiiiiiiiiiiiiiiiiiiiii.................................................................................................................................................
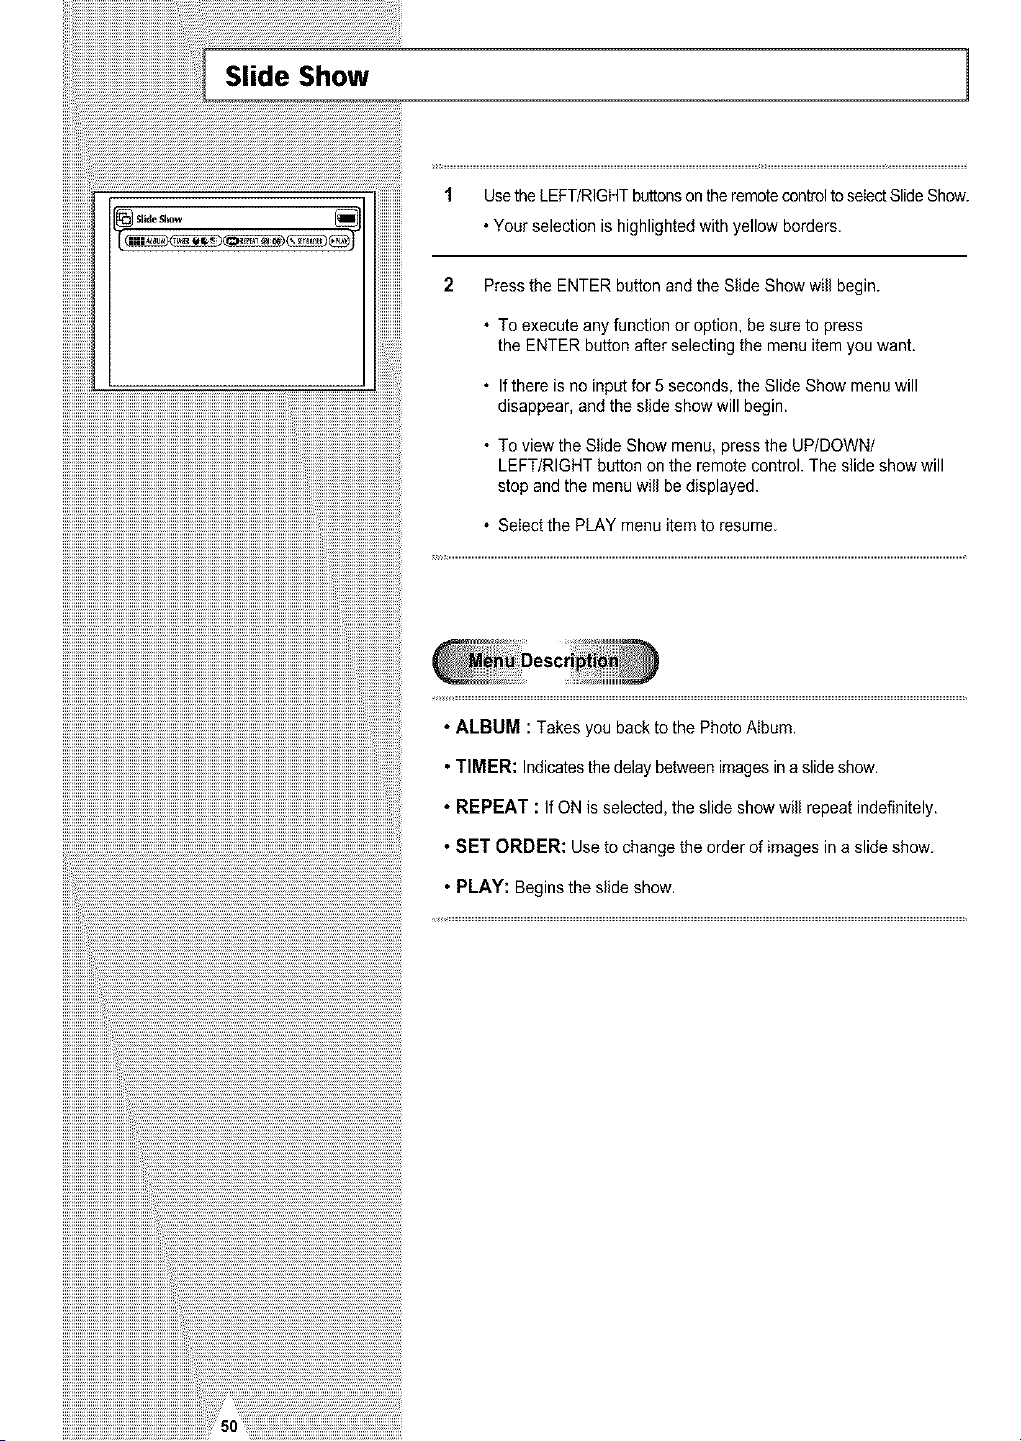
iiiiiiiiiii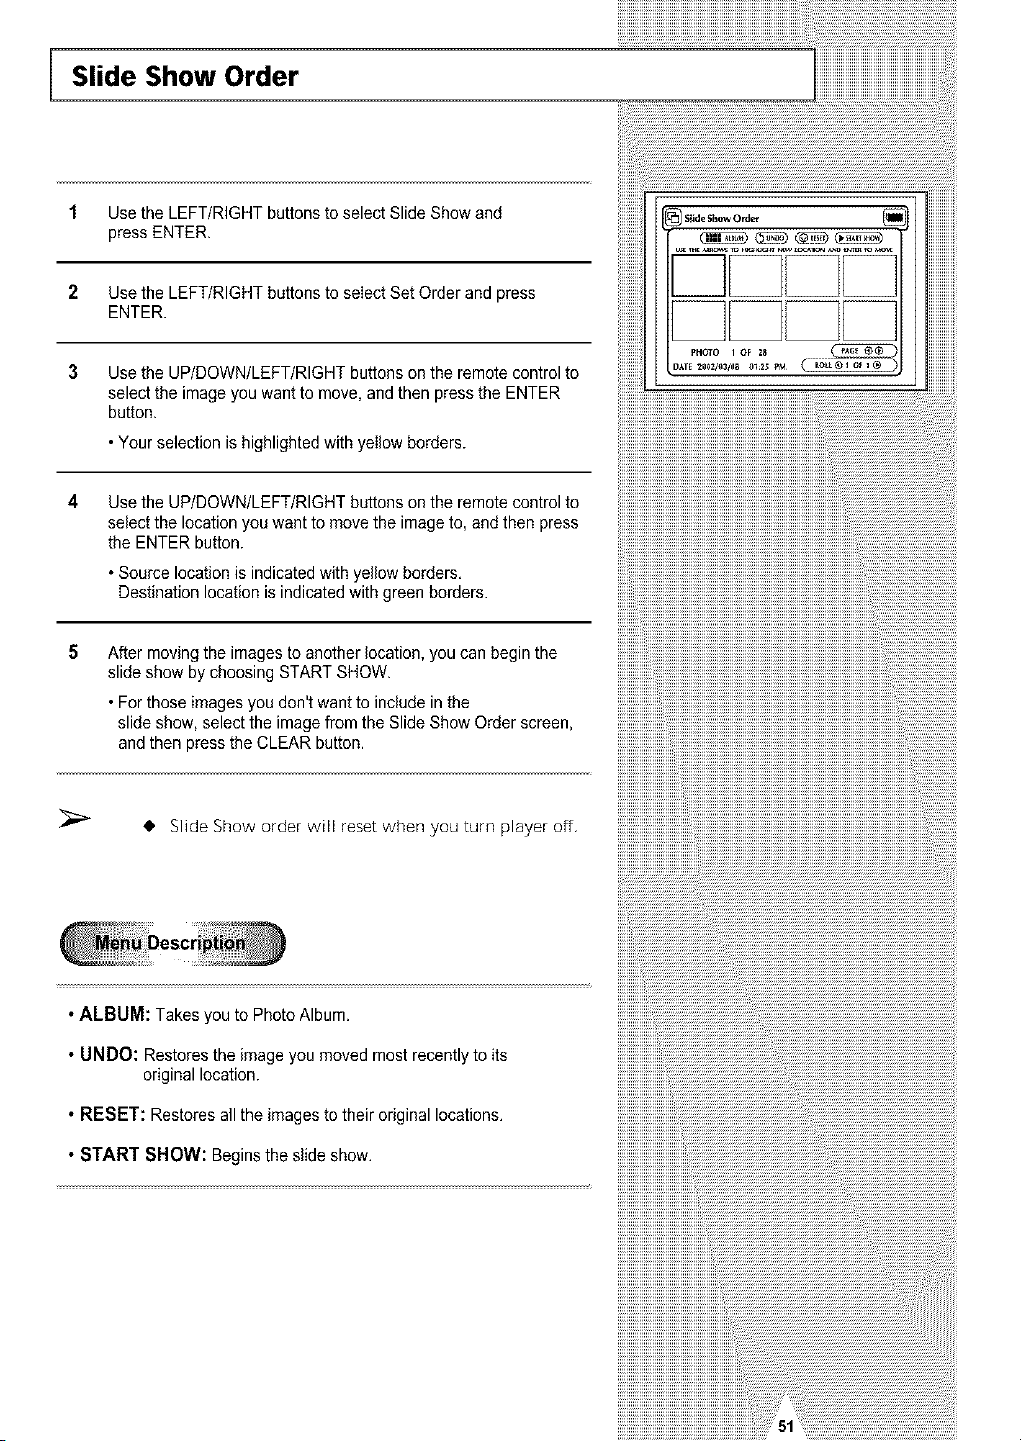
Slide Show Order
1 Use the LEFT/RIGHTbuttons to select SlideShowand
pressENTER.
2 Use the LEFT/RIGHTbuttons to select SetOrderand press
ENTER.
3 Usethe UP/DOWN/LEFT/RIGHT buttons onthe remote controlto
selectthe imageyouwantto move,and then pressthe ENTER
button.
•Yourselection is highlighted with yellow borders.
4
Use the UP/DOWN/LEFT/RIGHT buttons onthe remote controlto
selectthe location you wanttomove the imageto,and then press
the ENTER button.
•Source locationisindicatedwith yellow borders.
Destination locationisindicatedwith green borders.
5
Aftermovingthe imagestoanother location,you canbeginthe
slide show by choosing START SHOW.
•Forthoseimagesyou don'twant to include in the
slide show, selectthe imagefrom the SlideShow Order screen,
and then press the CLEAR button.
Slide Show o_der will _eset when you turn player off,
•ALBUM: Takesyou to PhotoAlbum.
• UNDO: Restoresthe imageyoumoved most recentlytoits
original location.
• RESET: Restores allthe images totheir originallocations.
• START SHOW: Beginsthe slideshow.
;;;;;;;;;;;;;;;;;;;;;;;;;;;;;;;;;;_a????????????????????????????????????????????????????????????_;_¸¸¸iiiiiiiiiiiiiiiiiiiiiiiiiiiiiiiiiiiiiiiiiiiiiiii
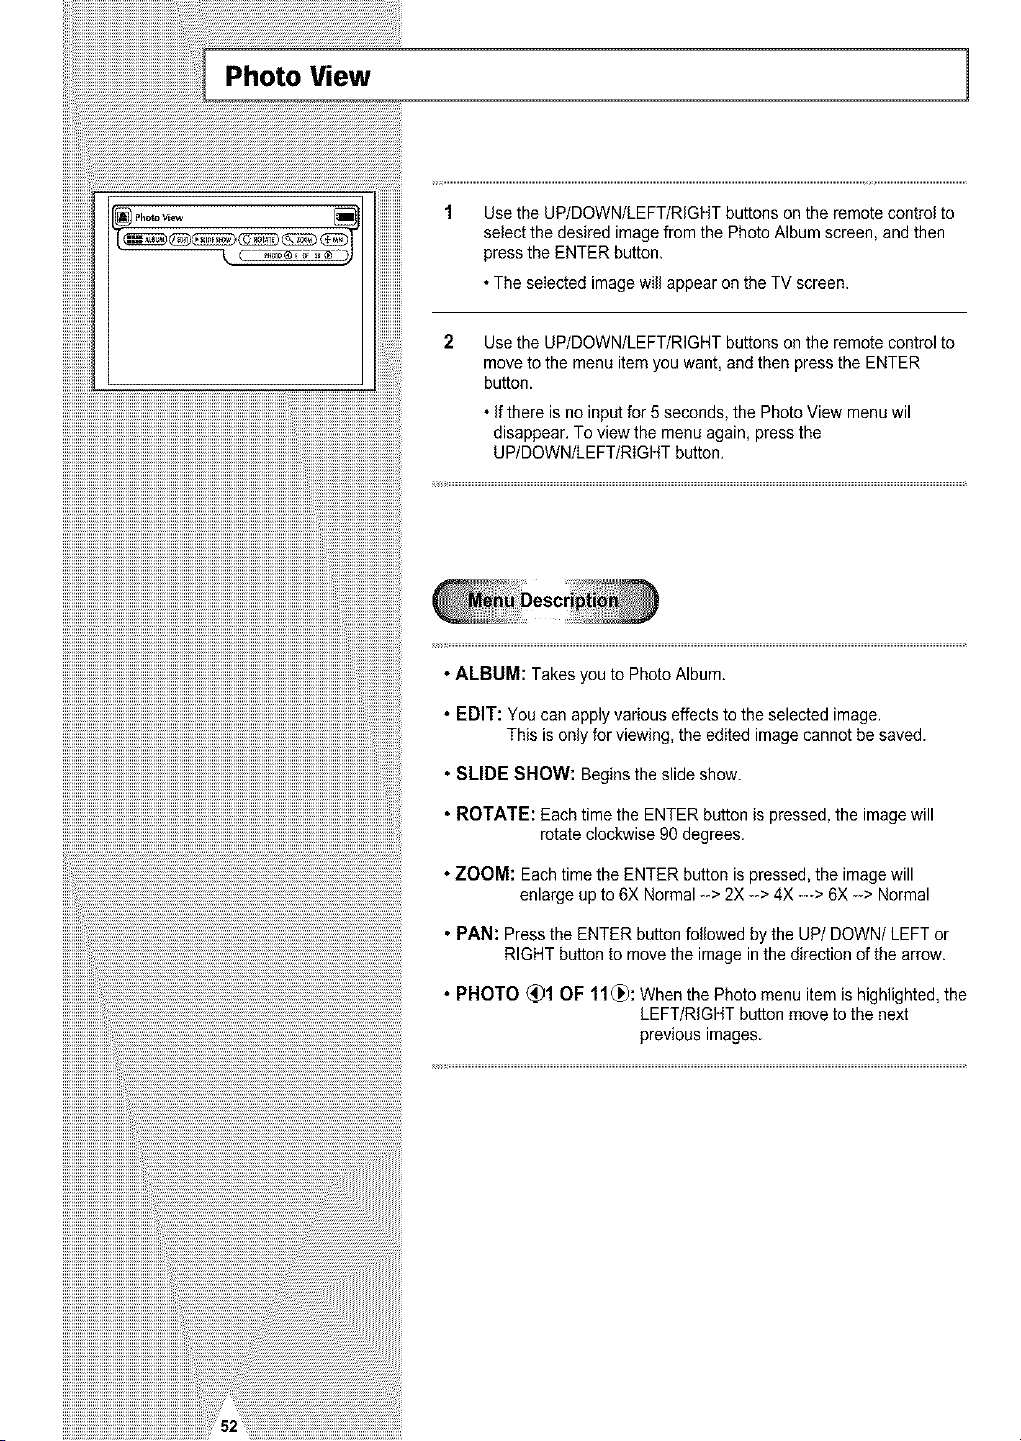
iiiiiiiiiii![p.o,ovie. ]
_ 9,,
1 Use the UP/DOWN/LEFT/RIGHTbuttons onthe remotecontrol to
selectthe desired imagefrom the Photo Albumscreen, and then
pressthe ENTER button.
•The seIectedimagewill appearonthe TV screen.
Use the UP/DOWN/LEFT/RIGHT buttonson the remote controlto
moveto the menu item youwant, and then press the ENTER
button.
• If there isno input for 5 seconds, the PhotoView menu wil
disappear. To viewthe menu again,press the
UP/DOWN/LEFT/RIGHT button.
•ALBUM: Takesyou to PhotoAlbum.
• EDIT: You canapply variouseffects tothe selectedimage.
This isonlyfor viewing, the editedimagecannot besaved.
• SLIDE SHOW: Begins theslideshow.
• ROTATE: Each time the ENTER button ispressed,the imagewill
rotate clockwise 90degrees.
•ZOOM: Each time the ENTER button ispressed,the imagewill
enlarge upto6X Normal --> 2X-->4X --->6X-_> Normal
• PAN: Press the ENTER buttonfollowed by the UP/DOWN/LEFT or
RIGHTbutton tomove the imageinthe direction of the arrow.
• PHOTO (_)1 OF 11(_: Whenthe Photomenu item ishighlighted,the
LEFT/RIGHT button move tothe next
previous images.
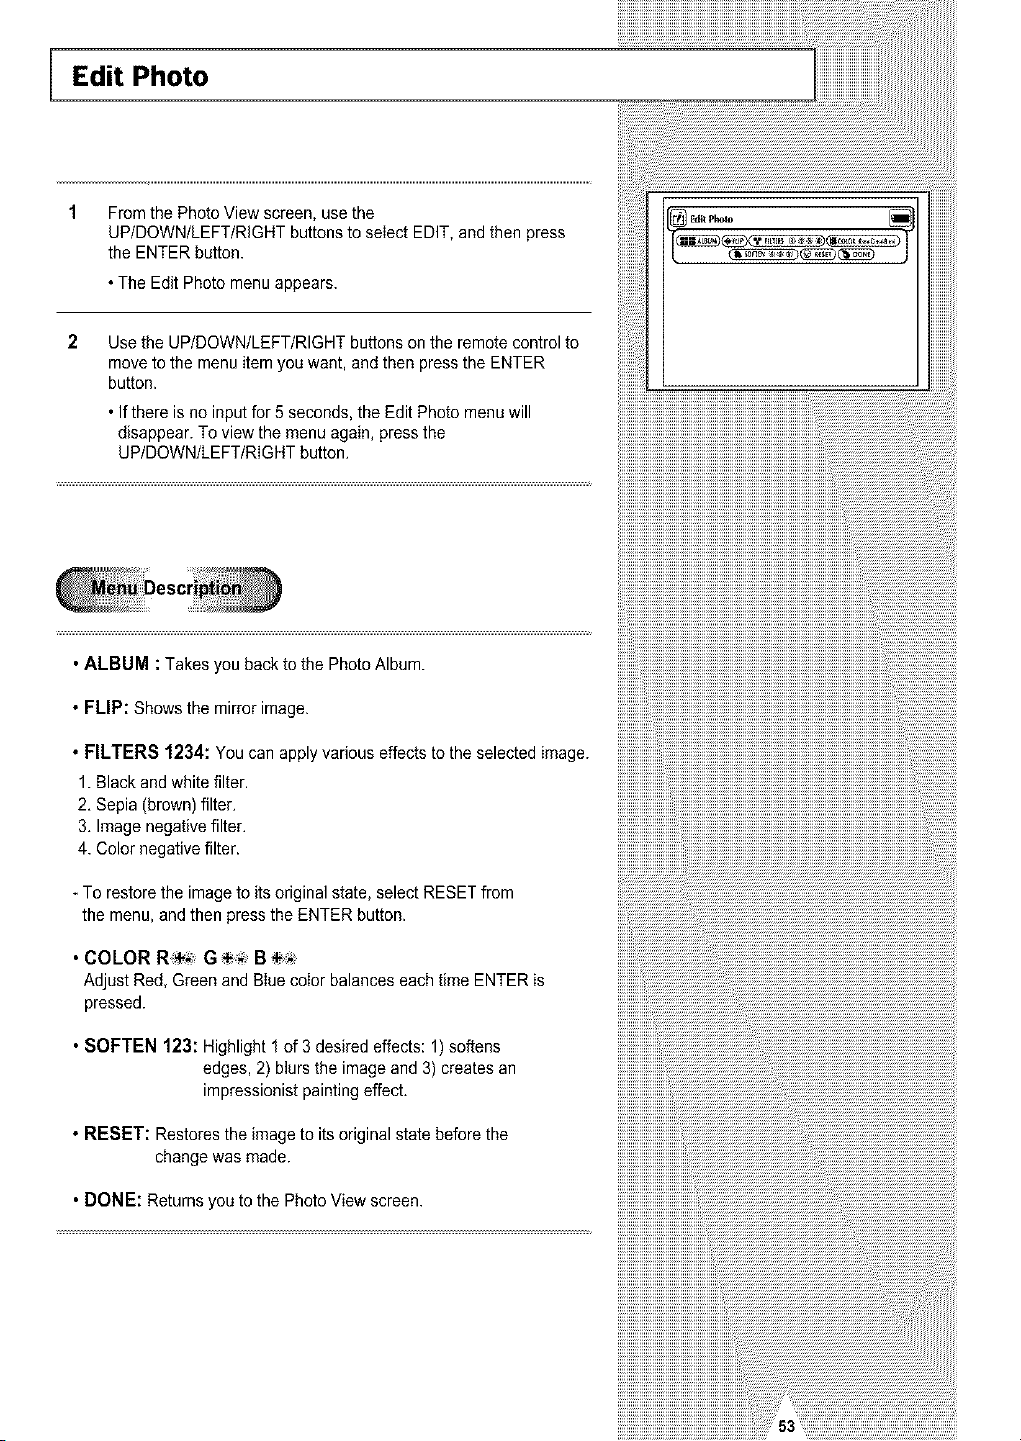
Edit Photo
From the PhotoViewscreen, use the
UP/DOWN/LEFT/RIGHT buttonstoseIect EDIT,and then press
the ENTER button.
•TheEditPhoto menuappears.
2 Usethe UP/DOWN/LEFT/RIGHT buttons onthe remote controlto
move tothe menuitem youwant, and then pressthe ENTER
button.
•If there isno input for 5 seconds,the EditPhoto menuwill
disappear. To view the menu again,press the
UP/DOWN/LEFT/RIGHT button.
• ALBUM : Takesyou backto the PhotoAlbum.
• FLIP: Shows the mirrorimage.
.FILTERS1234:Youcanapplyvariouseffectstotheselectedimage.
1.Black and white filter.
2. Sepia (brown) filter.
3.Image negative filter.
4. Colornegative filter.
To restorethe imageto its originalstate, selectRESETfrom
the menu, and thenpress the ENTER button.
• COLORR_ G B_
Adjust Red, Green and Blue color balances each time ENTERis
pressed.
• SOFTEN 123: Highlight 1 of 3 desired effects: 1)softens
edges, 2) blurs the imageand 3)creates an
impressionist paintingeffect.
• RESET: Restoresthe imagetoitsoriginal state before the
change was made.
• DONE: Returns youtothe PhotoView screen.
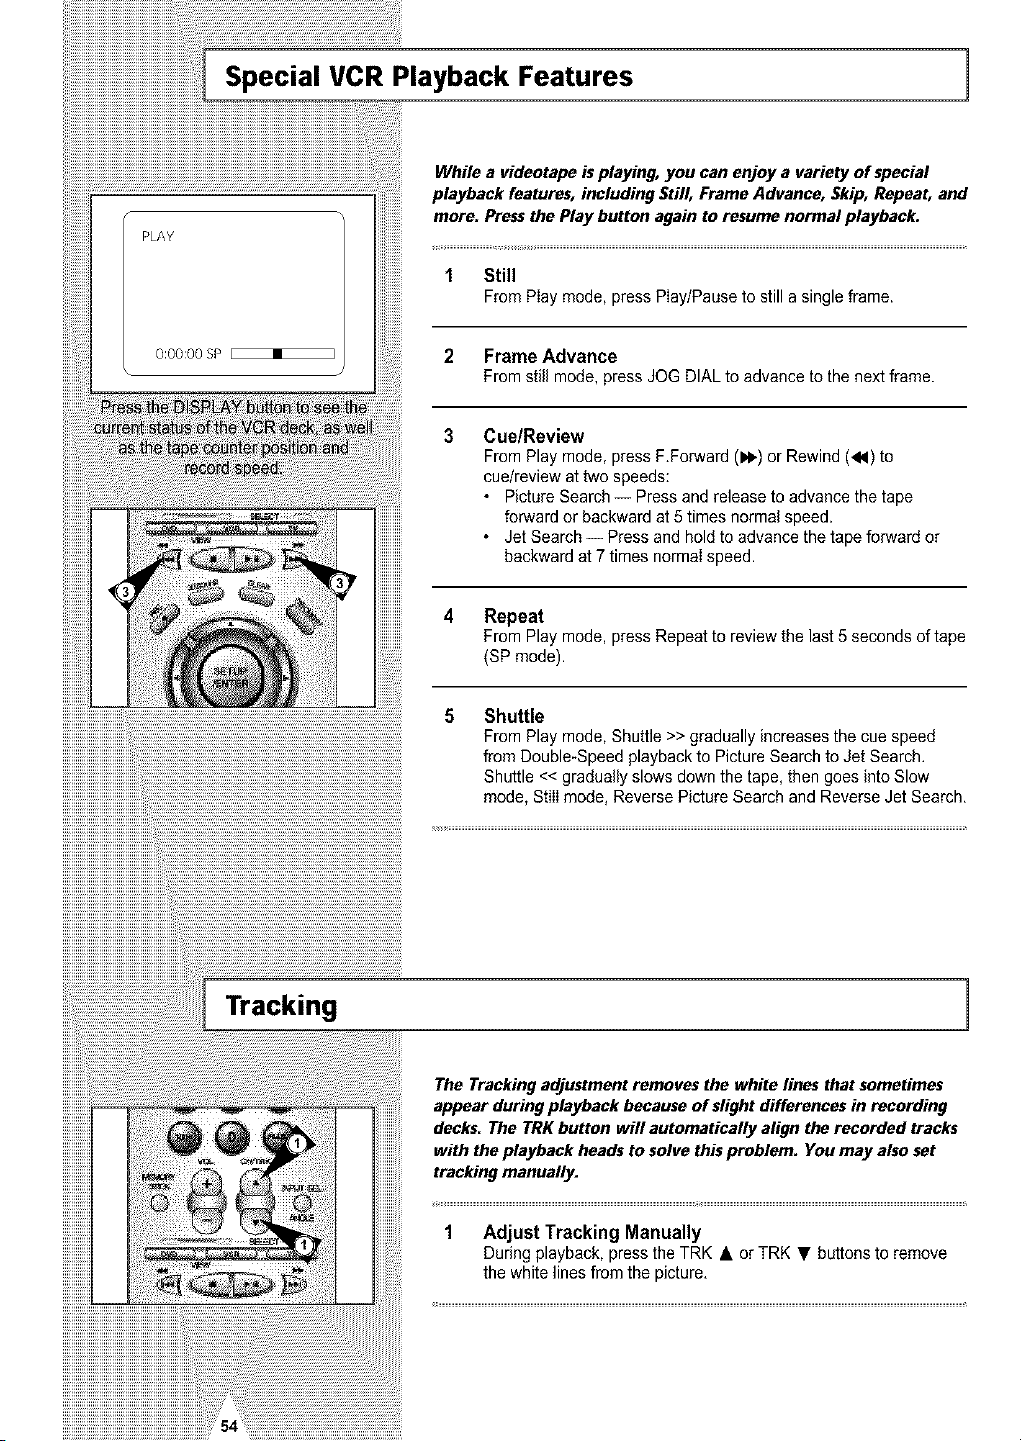
1 Still
FromPlaymode,pressPlay/Pausetostillasingleframe.
2 Frame Advance
Fromstill mode, press JOG DIALtoadvance tothe nextframe.
3 Cue/Review
FromPlay mode, press F.Forward (1_) or Rewind (_1) to
cue/review at twospeeds:
• PictureSearch -- Press and release to advance the tape
forwardor backward at5 times normal speed.
• JetSearch -- Pressand holdto advancethe tape forwardor
backward at 7 times normaIspeed.
4 Repeat
From Play mode, press Repeat to review the last 5 seconds of tape
(SP mode).
5 Shuttle
From Play mode, Shuttle>> gradually increases the cuespeed
from Double-Speed playbackto PictureSearchto JetSearch.
Shuttle << gradually slowsdown thetape,then goes intoSlow
mode, Stillmode, Reverse PictureSearch and ReverseJet Search.
Tracking
The Tracking adjustment removes the white lines that sometimes
appear during playback because of slight differences in recording
decks. The TRK button will automatically align the recorded tracks
with the playback heads to solve this problem. You may also set
tracking manually.
1 Adjust Tracking Manually
Duringplayback, press the TRK • or TRK • buttons to remove
the whitelines fromthe picture,
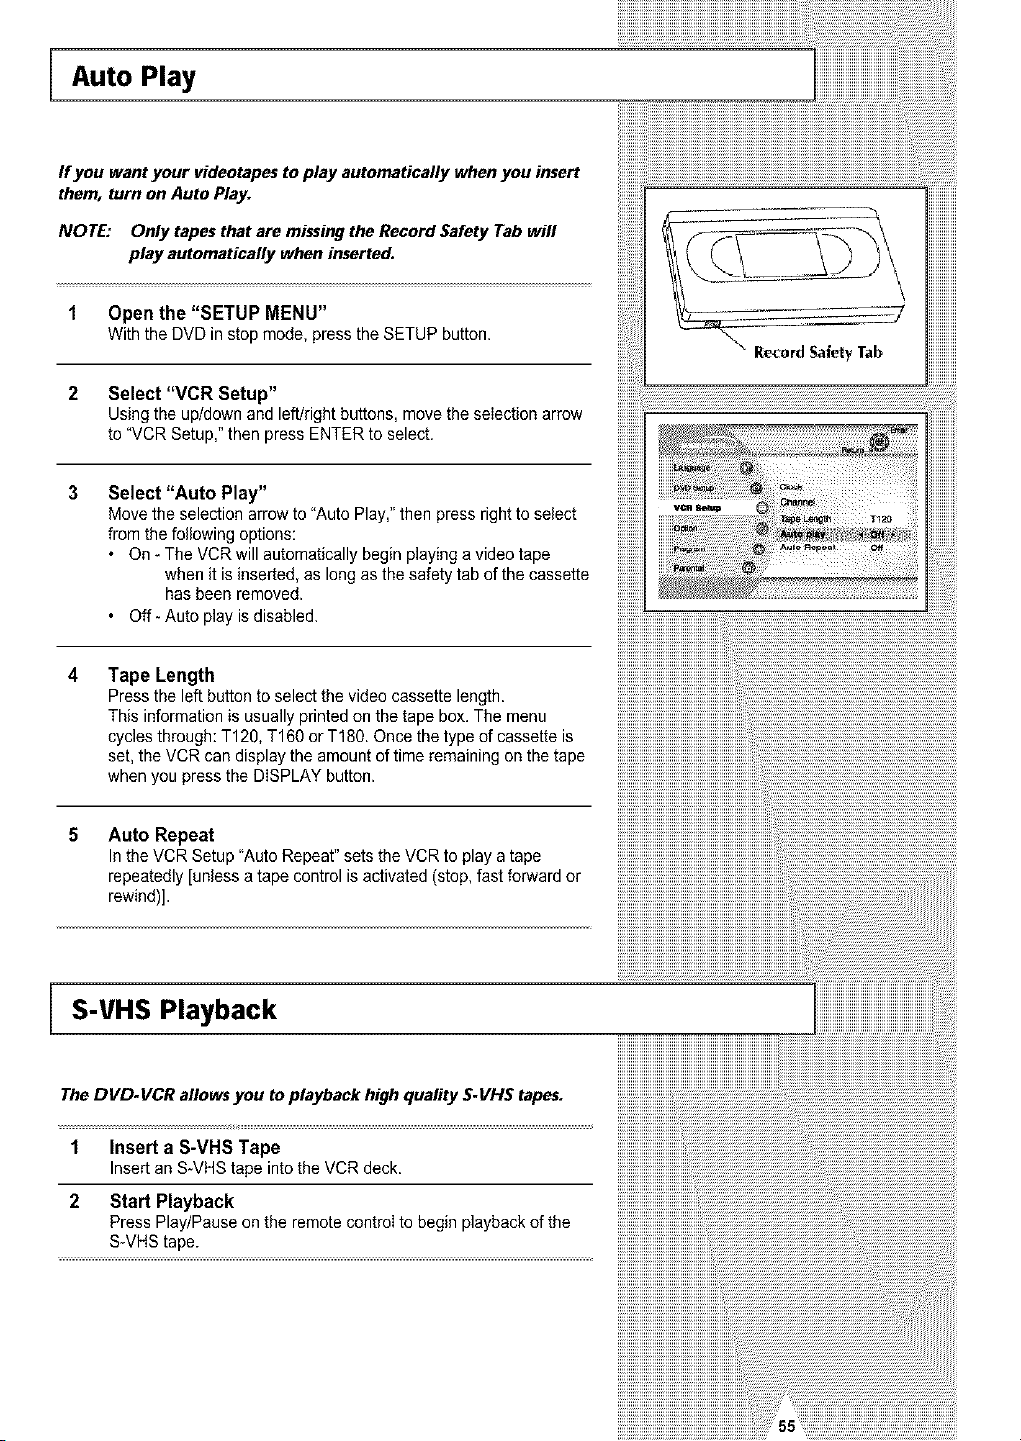
Auto Play
If you want your videotapes to play automatically when you insert
them, turn on Auto Play.
NOTE: Only tapesthatare missing the Record Safety Tab will
play automatically when inserted.
1 Open the "SETUP MENU"
Withthe DVDin stop mode, press the SETUP button.
2 Select "VCR Setup"
Using the up/down and left/right buttons, movethe selection arrow
to"VCRSetup,"then press ENTER toselect.
3 Select "Auto Play"
Move the selection arrow to "Auto Play," then pressright to select
fromthe following options:
• On -TheVCRwill automatically beginplaying a video tape
when it isinserted, as long as the safety tab ofthe cassette
hasbeen removed.
• Off- Auto play isdisabled.
• Recerd Safety Tab
4 Tape Length
Press theleftbutton to selectthe videocassette length.
This informationisusuallyprinted onthe tape box. The menu
cycles through: T120, T160 orT180.Once thetype ofcassette is
set,the VCR candisplay theamountoftime remaining onthe tape
when you press the DISPLAY button.
5 Auto Repeat
IntheVCR Setup"Auto Repeat"setstheVCR to playa tape
repeatedly [unless a tapecontrol isactivated (stop,fastforwardor
rewind)].
S-VHS Playback
The DVD.VCR aflowsyou toplayback highquality S.VHS tapes.
1
2
Insert a S-VHS Tape
Insertan S_VHStape intothe VCRdeck.
Start Playback
Press Play/Pause on the remotecontrol tobegin playback of the
S-VHS tape.
iiiiiiiiiiiiiiiiiiiiiiiiiiiiiiiiii ..........................................................
iiiiiiiiiiiiiiiiiiiiiiiiiiiiiiiiiiiiiiiiiiiiiiiiiiiiiiiiiiiiiiiiiiii i! ii

Variable Search System 1
Scan and play:
pre&s [4] or [H
Go to [0:06:00|:
Presslay
End search:
Press [v]
0:00:00 SP
Press the SEARCH button to display the search screen in the stop
mode. When a program is recorded, the starting point is given an
Index mark for easy location. However, the VH$ Index Search
System (VIS$) cannot recognize index marks made by old VCRs. ff
the VCR has trouble finding a mark, it isprobably because the
cassette was recorded on a VCR without VI$S. If you want to index
two programs in a row, set your VCR to stop, then start recording
each program. Pause has no effect on index marks.
1 Scan and play
Use scanand playwhen youdon't know exactlywhere a program
isIocated onacassettetape.
• Press right arrow for forwardscanor left arrow for reverse scan.
• Thedisplaywill show"Scan and Play".
• Whenan indexmark is found, theVCR playsfor aboutfive
seconds.
• Press the PLAY button toviewthat program.
If youdon't press PLAY,the VCRautomatically searches for the
next index, or until the end ofthe tape isreached.
Go to O:00:O0 stop
Use thisfeaturewhen youwantto searchfor the 0:00:00 counter
positionona cassette. Press the CLEAR button atthe point onthe
tapewhere youwanttosetthe counterto 0:go:00. Later, while a
cassette isstopped,press the uparrow button. The VCRwill
rewind or fastforward, searchingfor the O:00:OOcounter position,
and then automatically stopatthat position.
3 End search
Use this featurewhen youwantto searchfora blank position to
record a program ona cassette.While a cassetteisstopped, press
down arrow button. The VCRwill fast forward,searching for a
blank position,and thenautomatically stop at that position.
If the VCRreaches the end of the tape during end search,the tape
will beejected.
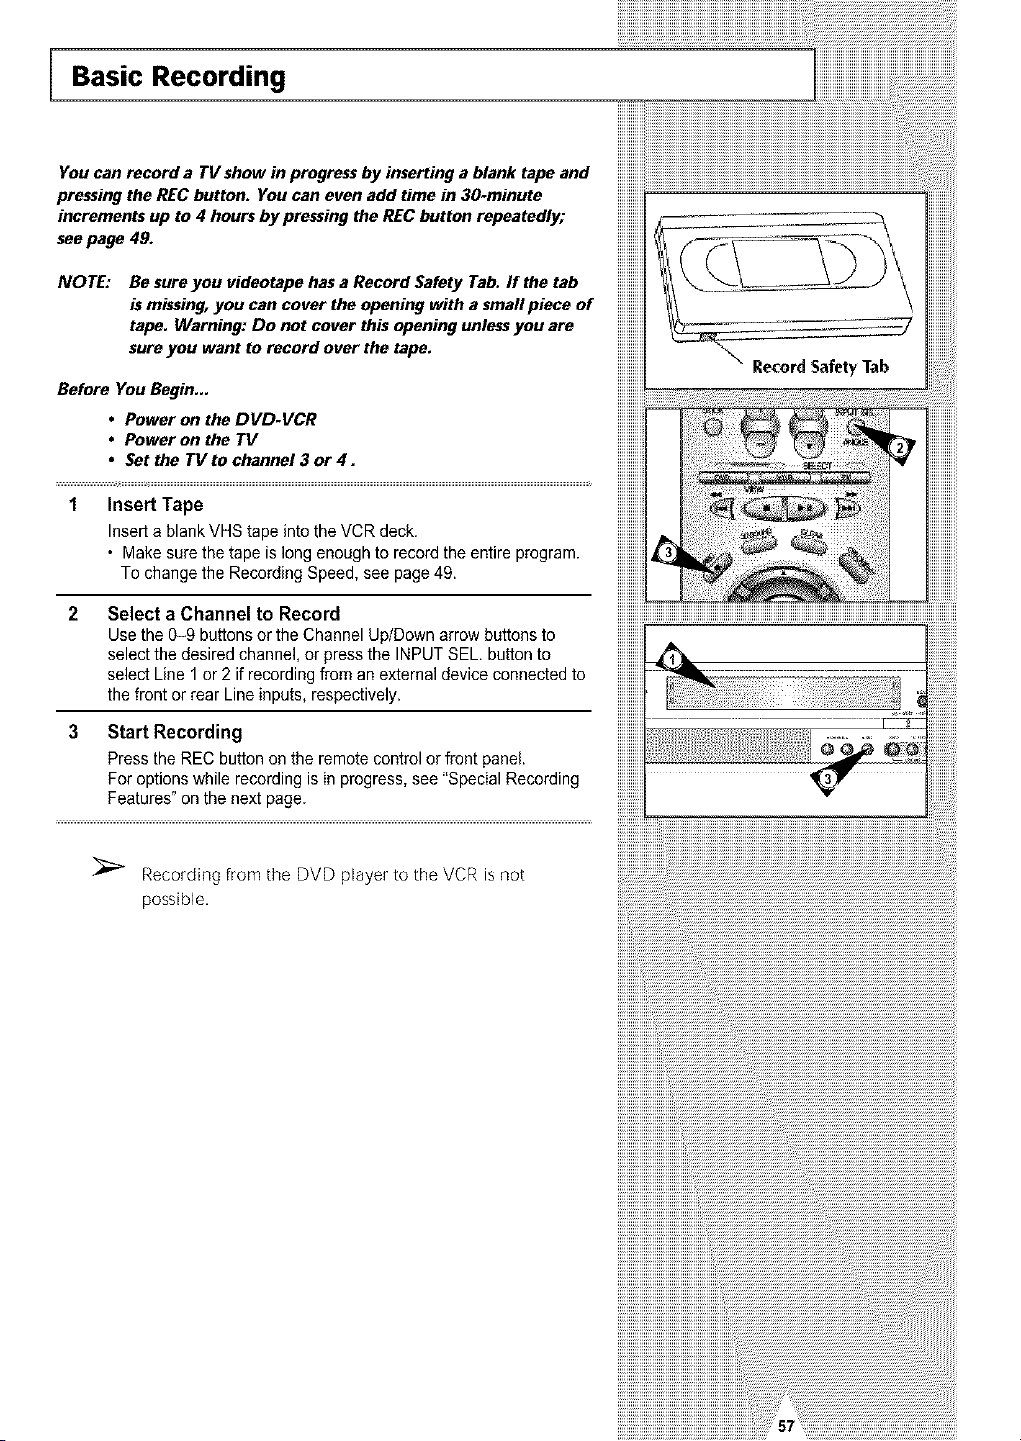
Basic Recording
You can record a TV show in progress by inserting a blank tape and
pressing the REC button. You can even add time in 30-minute
increments up to 4 hours by pressing the REC button repeatedly;
see page 49.
NOTE: Be sure you videotape has a Record Safety Tab. If the tab
is missing, you can cover the opening with a smafl piece of
tape. Warning: Do not cover this opening unless you are
sure you want to record over the tape.
Before YouBegin...
• Power onthe DVD-VCR
• Power onthe TV
• Set the TV tochannel 3 or 4.
1 Insert Tape
InsertablankVHStape intothe VCRdeck.
• Make sure the tape islong enoughto record the entire program.
To change the Recording Speed, see page49.
2
3
Select a Channel to Record
Use the 0-9 buttons orthe Channel Up/Downarrow battens to
selectthe desired channel, or press the INPUTSEL button to
select Line 1 or 2 ifrecording from anexternaldevice connectedto
the front or rear Line inputs, respectively.
Start Recording
Press the RECbutton onthe remotecontrol or front panel.
Foroptionswhile recording isin progress, see "Special Recording
Features" onthe next page.
Recording from the DVD player to the VCR isnot
possible,
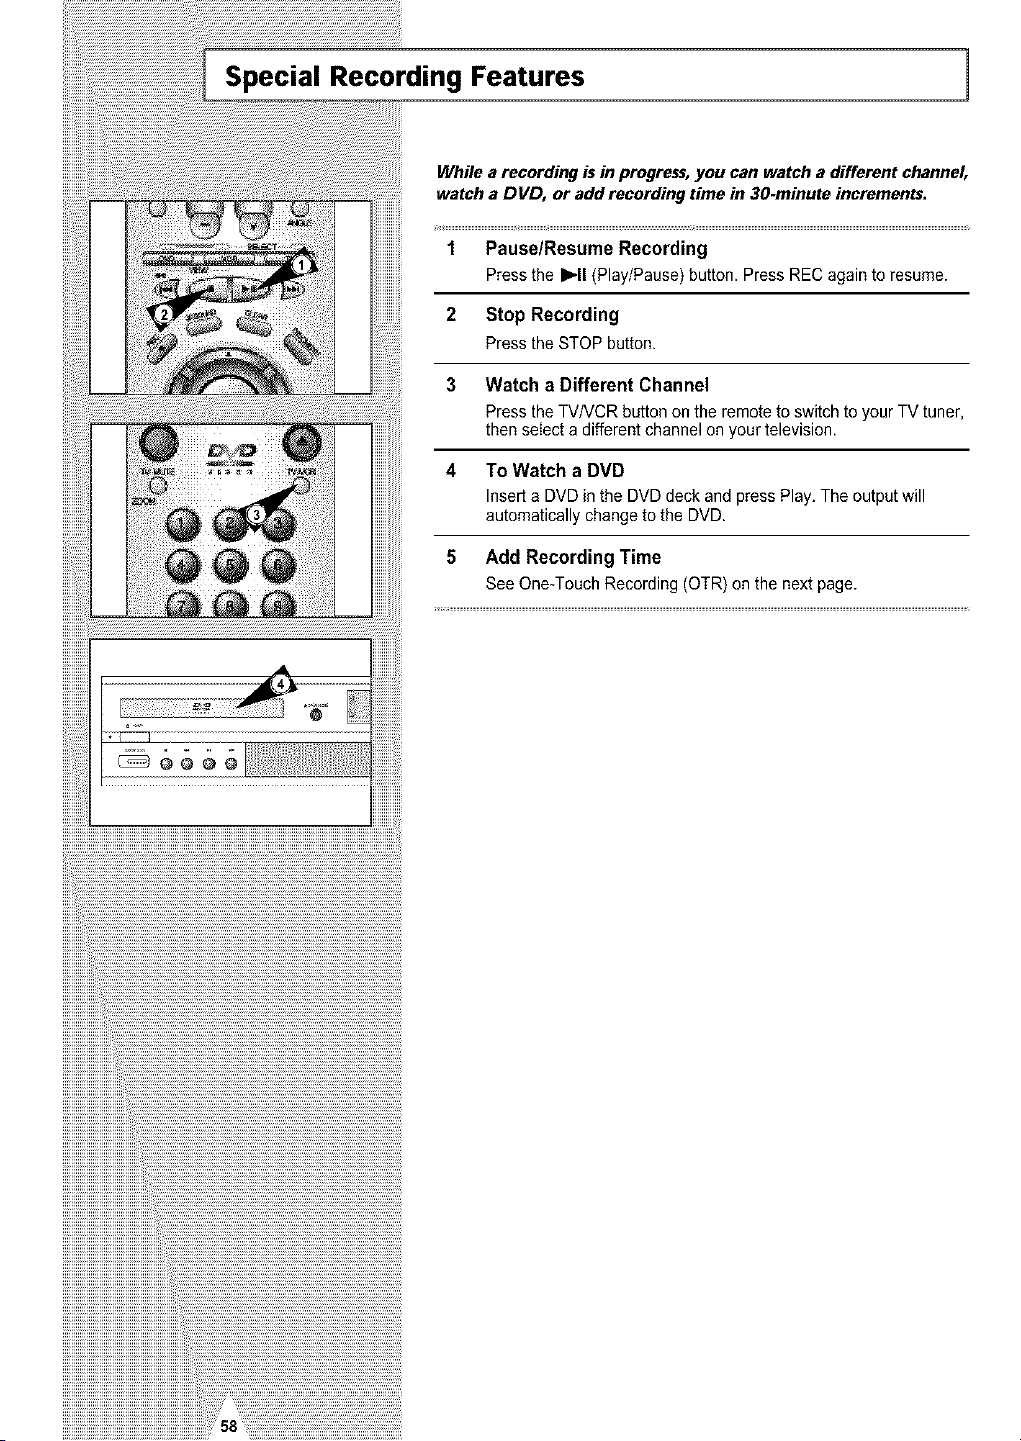
Special Recording Features 1
While a recording is in progress,you canwatch a different channel,
watch a DVD, or addrecording time in 30-minute increments.
1 Pause/Resume Recording
Press the I_11(Play/Pause) button. Press REC again toresume.
2 Stop Recording
Pressthe STOPbutton.
3 Watch a Different Channel
Press the TV/VCR button on the remotetoswitch toyour TV tuner,
then selecta differentchannel onyourtelevision.
4 To Watch a DVD
InsertaDVDin the DVD deckand press Play.Theoutput will
automaticallychange to the DVD.
5 Add Recording Time
See One-Touch Recording (OTR) onthe next page.
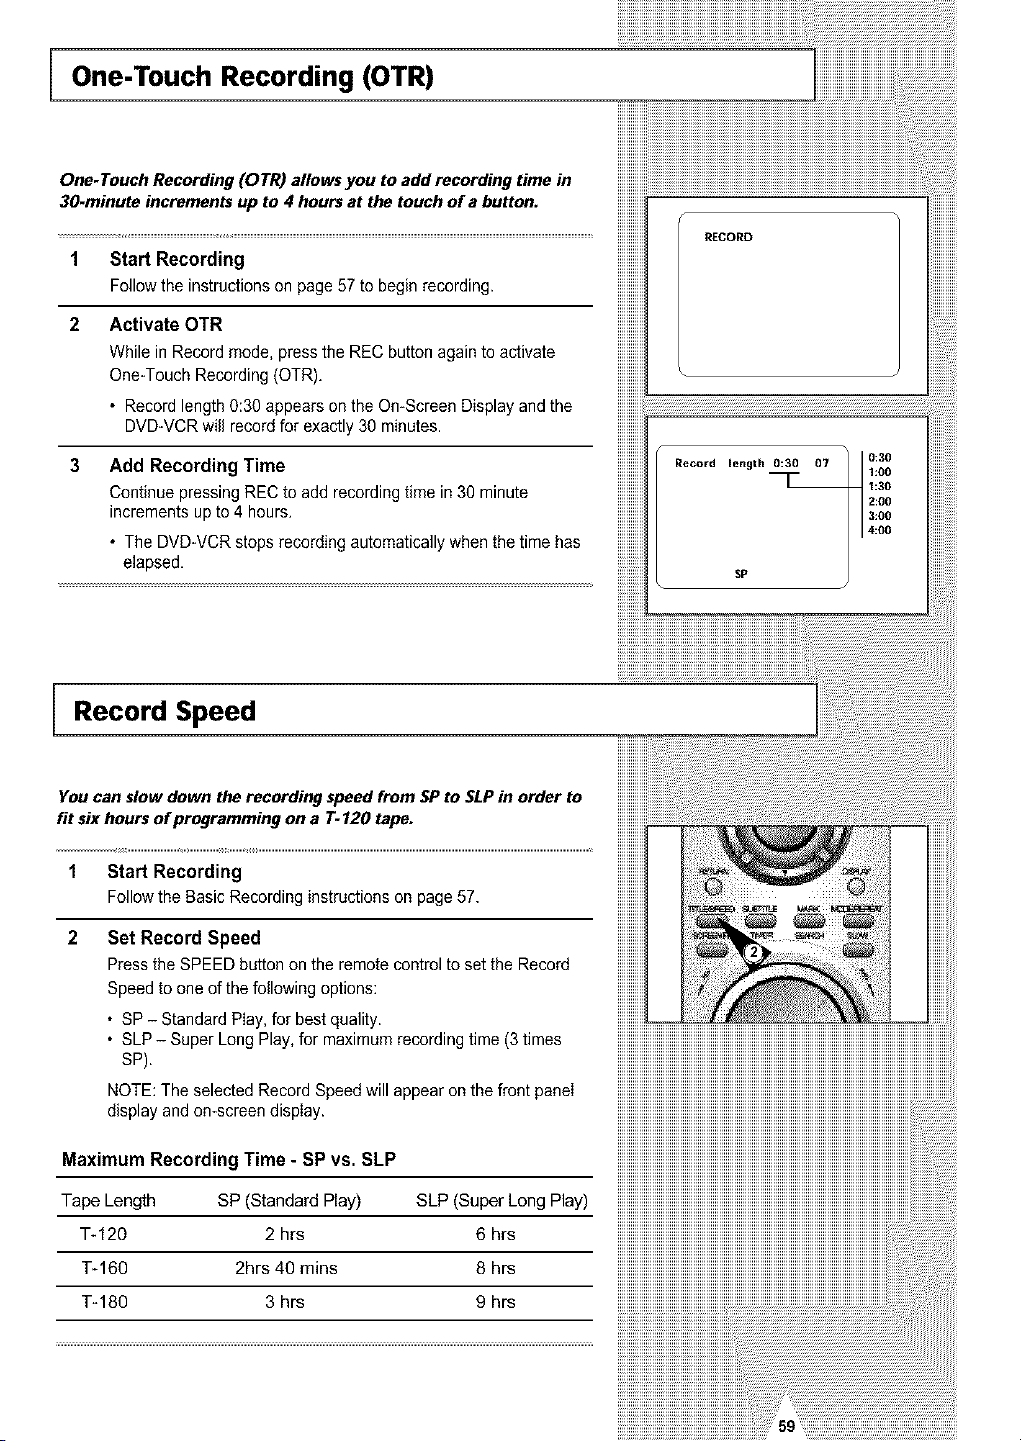
One-Touch Recording (OTR)
One-Touch Recording (OTR) allows you to add recording time in
30-minute increments up to4 hours at the touch of a button.
1 Start Recording
Follow the instructions onpage57 tobegin recording.
2 Activate OTR
While in Recordmode, press the REC buttonagaintoactivate
One-Touch Recording (OTR).
• Recordlength0:30 appears onthe On-ScreenDisplay and the
DVD-VCR will record for exactly 30minutes.
Add Recording Time
Continue pressing RECtoadd recording time in30 minute
increments upto4hours.
• TheDVD-VCR stops recording automaticallywhen thetime has
elapsed.
RECORD
Record length 0:30 07
0:30
1:00
1:30
2:00
Record Speed
You canslow down therecording speedfrom SPto SLPin order to
fitsixhours of programming ona 7"-120 tape.
1
2
Start Recording
Followthe BasicRecordinginstructionsonpage57.
Set Record Speed
Pressthe SPEEDbuttononthe remotecontrolto setthe Record
Speed toone ofthefollowing options:
• SP - Standard Play,for best quality.
• SLP - Super LongPlay,for maximum recording time (3 times
SP).
NOTE: Theselected RecordSpeedwill appear onthe front panel
display and on-screen display.
MaximumRecordingTime - SP vs.SLP
Tape Length SP (Standard Play) SLP (Super Long Play)
T-120 2 hrs 6 hrs
T-160 2hrs 40 rains 8 hrs
T-180 3 hrs 9 hrs
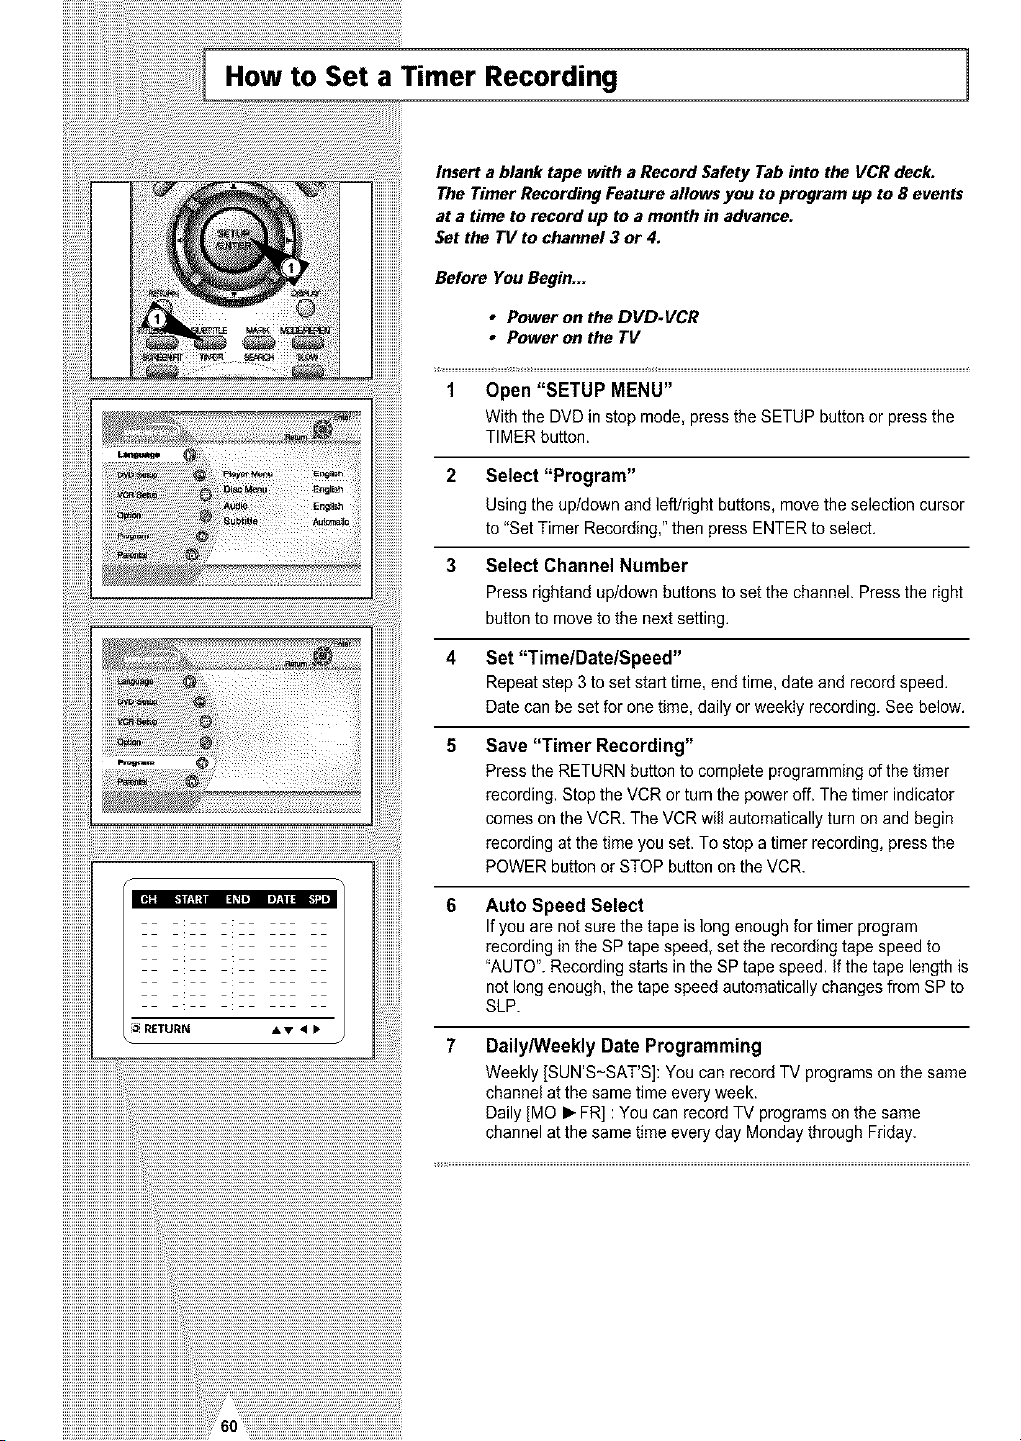
How to Set a Timer Recording 1
RETURN •• • •
iiiiiiiiiiiiiiiiiiiiiiiiiiiiiiiiiiiiiiiiiiiiiiiiiiiiiiiiiiiiiiiiii¸i!iil¸i i60¸¸¸;:_:_:_:_:_:_:_:_:_:_:_:_:_:_:_:_:_:_:_:_:_:_:_:_:_:_:_:_:_:_:_:_:_:_:_:_:_:_:_:_:_:_:_:_:_:_:_:_:_:_:_:_:_:_:_:_:_:_:_:_:_:_:_:_:_:_:_:_:_:_:_:_:_
Insert a blank tape with a Record Safety Tab into the VCR deck.
The Timer Recording Feature allows you to program up to 8 events
at a time to record up to a month in advance.
Set the TV to channel 3 or 4.
Before YouBegin***
• Power onthe DVD-VCR
• Power onthe TV
1 Open "SETUP MENU"
With the DVDin stop mode, press the SETUP button or press the
TIMER button.
2 Select "Program"
Using the up/down and left/right buttons, move the selection cursor
to "Set Timer Recording," then press ENTERtoselect.
3 Select Channel Number
Press rightand up/down buttons to set the channel. Press the right
button tomove tothe next setting.
Set "Time/Date/Speed"
Repeatstep 3 toset start time, end time, date and recordspeed.
Datecanbe setfor one time, daily or weekly recording. See below.
Save "Timer Recording"
Press the RETURN button to complete programming of the timer
recording.Stop the VCR orturnthe poweroff. Thetimer indicator
comes on the VCR. TheVCRwill automaticallyturn onand begin
recording at the time you set.To stop a timer recording, press the
POWER button orSTOP button on the VCR.
Auto Speed Select
If youare not sure the tape is long enoughfor timerprogram
recording in theSPtapespeed, setthe recording tape speedto
"AUTO". Recording starts inthe SPtape speed. If the tape lengthis
not longenough, the tape speed automatically changes from SPto
SLP.
Daily/Weekly Date Programming
Weekly [SUN'S-SAT'S]: You can record TV programson thesame
channelatthe sametime every week.
Daily[MO • FR]: You canrecordTV programsonthe same
channelatthe sametime every day Monday through Friday.
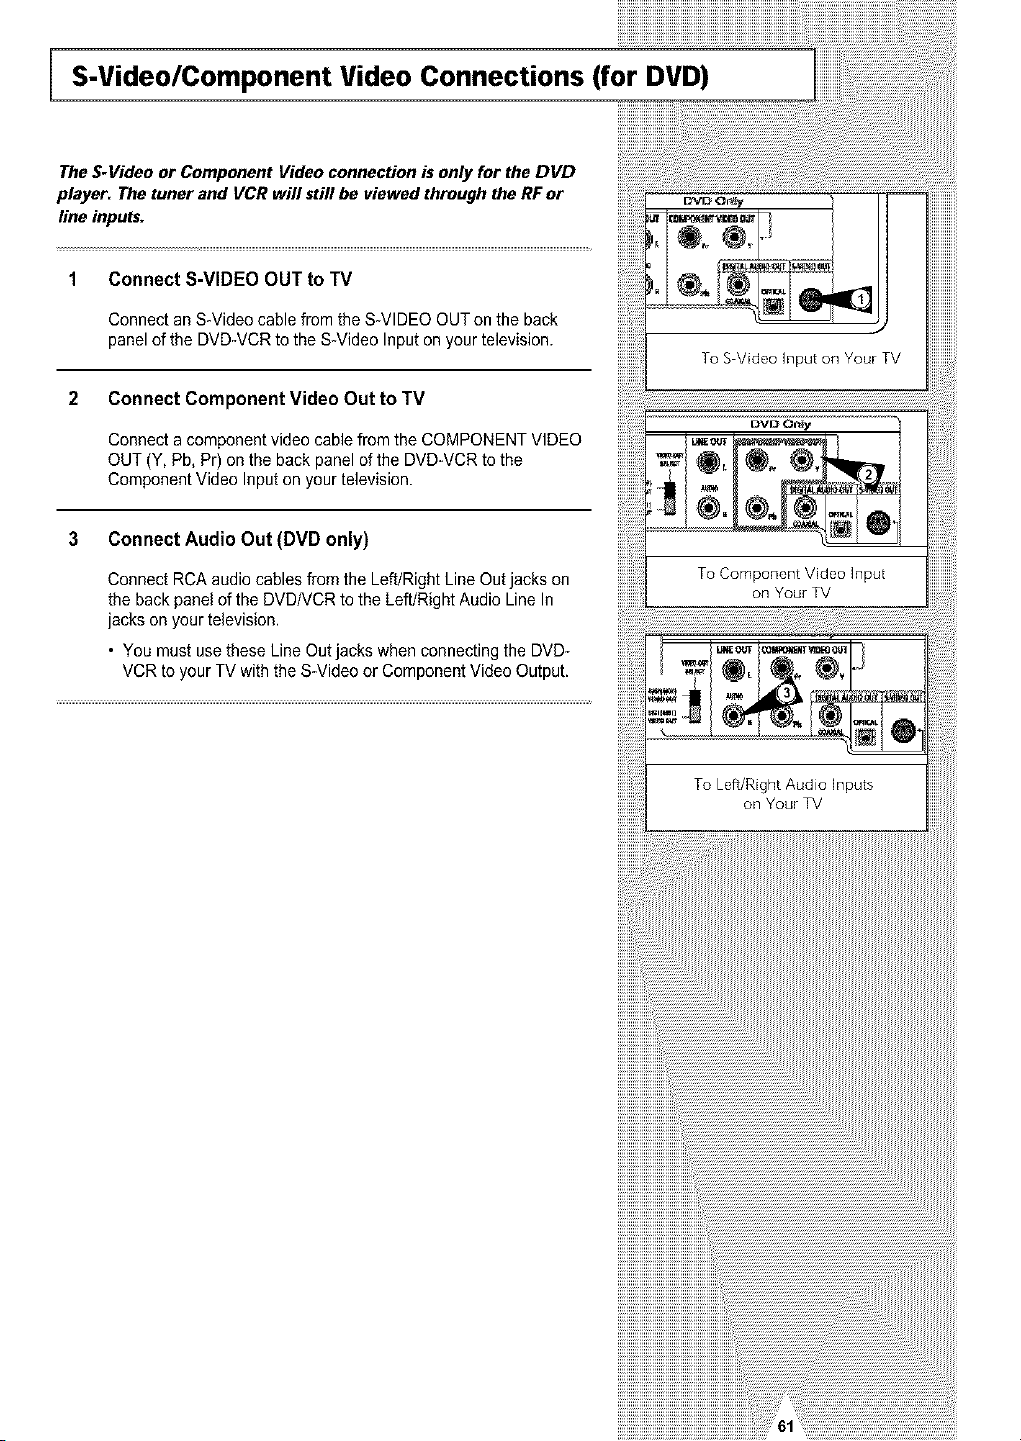
S-Video/Component Video Connections (for DVD)
The S-Video or Component Video connection is only for the DVD
player. The tuner and VCR will still be viewed through the RF or
line inputs.
Connect S-VIDEO OUT to TV
ConnectanS-Videocable fromthe S-VIDEO OUTon the back
panel ofthe DVD-VCR tothe S-Video Inputonyourtelevision.
2 Connect Component Video Out toTV
Connecta component video cable fromthe COMPONENT VIDEO
OUT(Y, Pb,Pr)onthe backpanelof the DVD-VCR tothe
Component Video Inputonyourtelevision.
3 Connect AudioOut(DVD only)
ConnectRCAaudiocables fromthe Left/Right Line Out jacks on
the back panel of the DVDNCR tothe Left/Right Audio Line In
jacks on your television.
• You must usetheseLine Outjacks when connectingthe DVD-
VCRtoyourTV with the S-Video or Component Video Output.
To Component Video Input
on Your TV
To Left/Right Audio Inputs
on Your TV
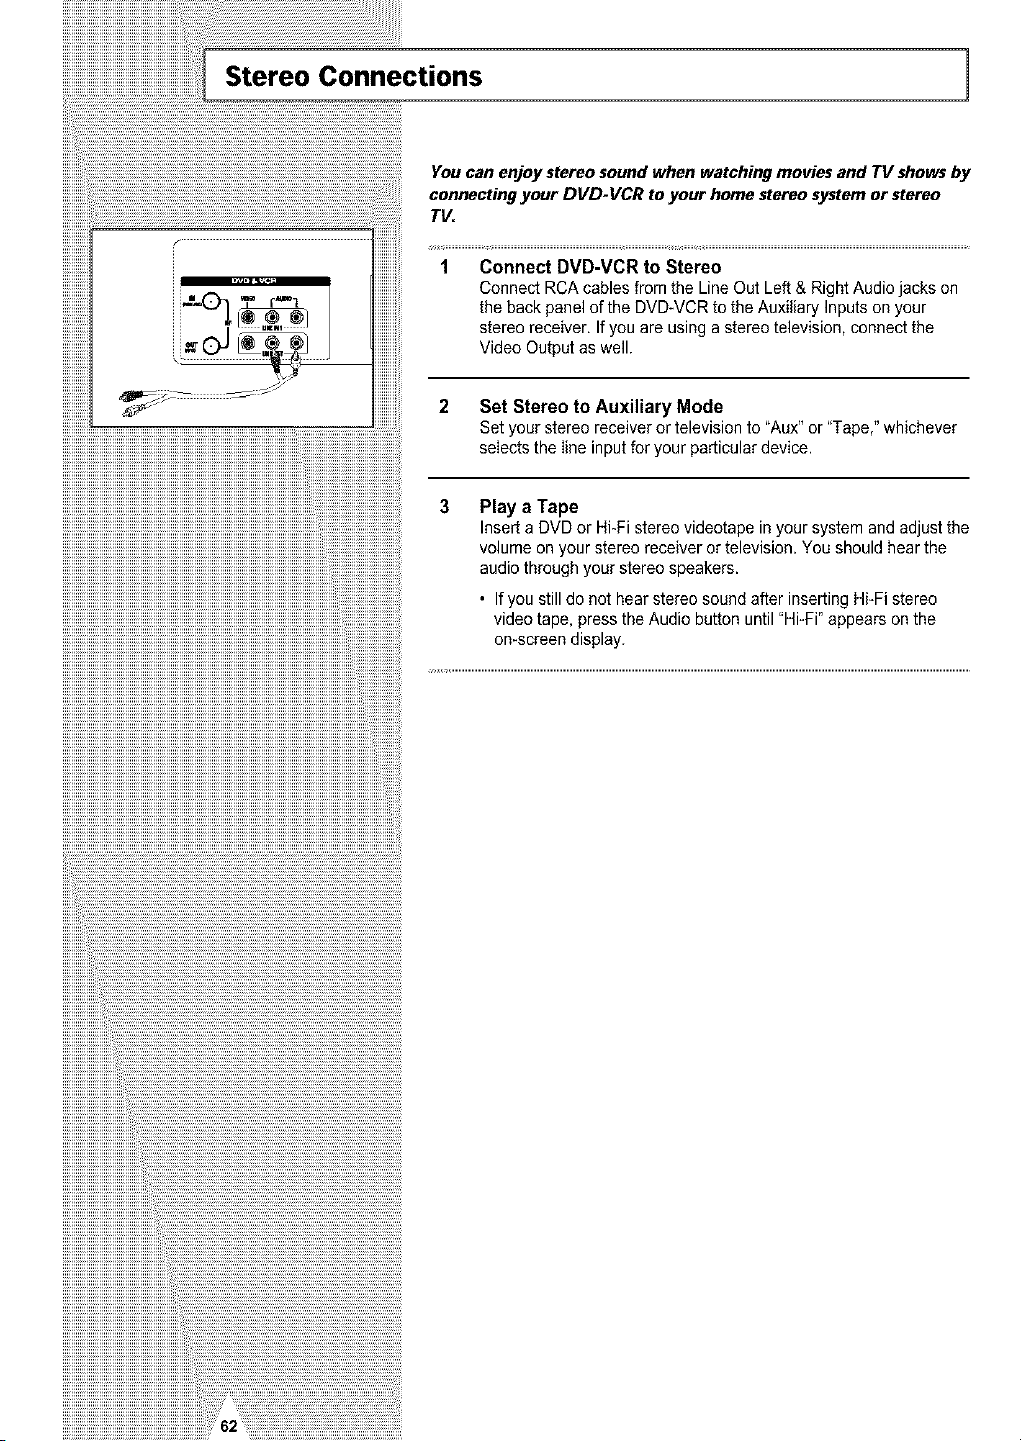
Stereo Connections 1
You can enjoystereo sound when watching moviesand TV showsby
connectingyour DVD-VCR to your home stereosystemorstereo
TV.
1 Connect DVD-VCR to Stereo
Connect RCAcables fromthe LineOut Left & RightAudio jacks on
the backpanelofthe DVD-VCR totheAuxiliary Inputsonyour
stereo receiver. If you are usingastereo television,connectthe
Video Outputaswell.
iiiiiiiiiiiiiiiiiiiiiiiiiiiiiiiiiiiiiiiiiiiiiiiiiiiiiiiiiiiiiiiiiiiiiiiiiiiiiiiiiiiiiiiiiiiiiiiiiiiiiiiiiiiiiiiiiiiiiiiiiiiiiiiiiiiiiiiiiiiiiiiiiiiiiiiiii_
2 Set Stereo to Auxiliary Mode
Setyourstereo receiver or television to "Aux"or"Tape," whichever
selects thelineinput for your particulardevice.
3 Play a Tape
InsertaDVDor Hi-Fistereo videotapein your system and adjust the
volume onyourstereo receiver ortelevision. You should hearthe
audio through yourstereo speakers.
• If you still do not hearstereo soundafter insertingHi-Fi stereo
video tape, press the Audio button until"Hi-Fi" appearsonthe
on-screendisplay.
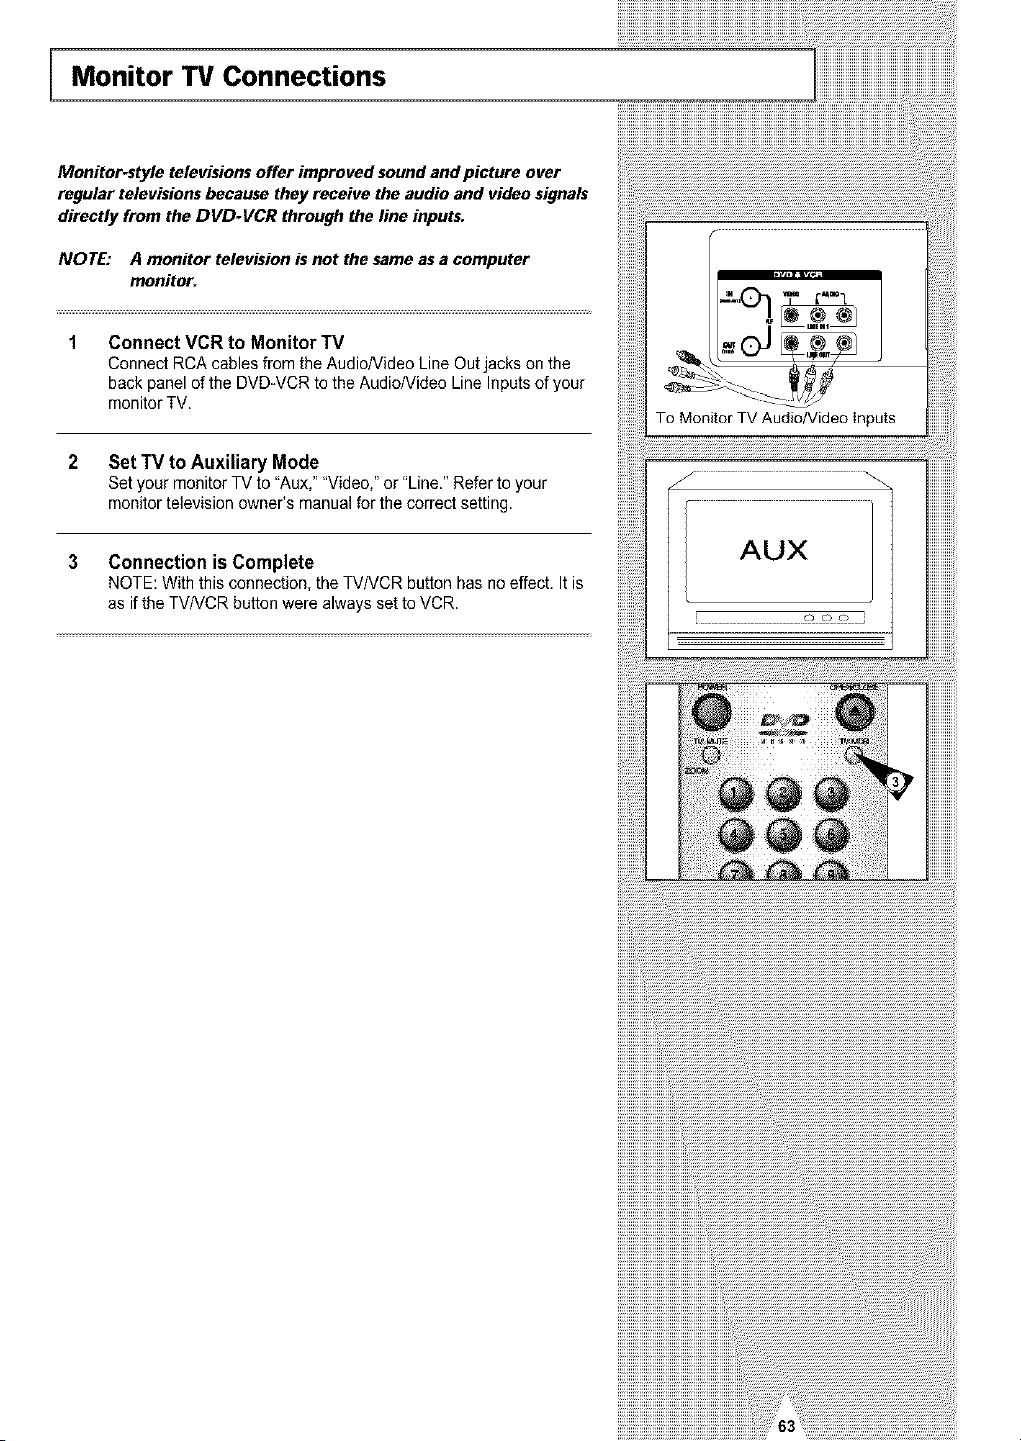
Monitor TV Connections
Monitor-style televisions offer improved sound and picture over
regular televisions because they receive the audio and video signals
directly from the DVD-VCR through the line inputs.
NOTE: A monitor television isnot the same as a computer
monitor.
Connect VCR to Monitor TV
ConnectRCAcables fromthe Audio/Video Line Outjacks onthe
backpanelofthe DVD-VCR tothe Audio/Video LineInputsofyour
monitorTV.
2 Set TV to Auxiliary Mode
SetyourmonitorTV to "Aux,""Video," or "Line." Refer toyour
monitortelevision owner's manual for the correct setting.
3 Connection is Complete
NOTE: Withthis connection, theTV/VCRbutton has no effect. It is
as ifthe TV/VCR button were always set toVCR.
To Monitor TV Audio/Video Inputs
AUX
o oo
L
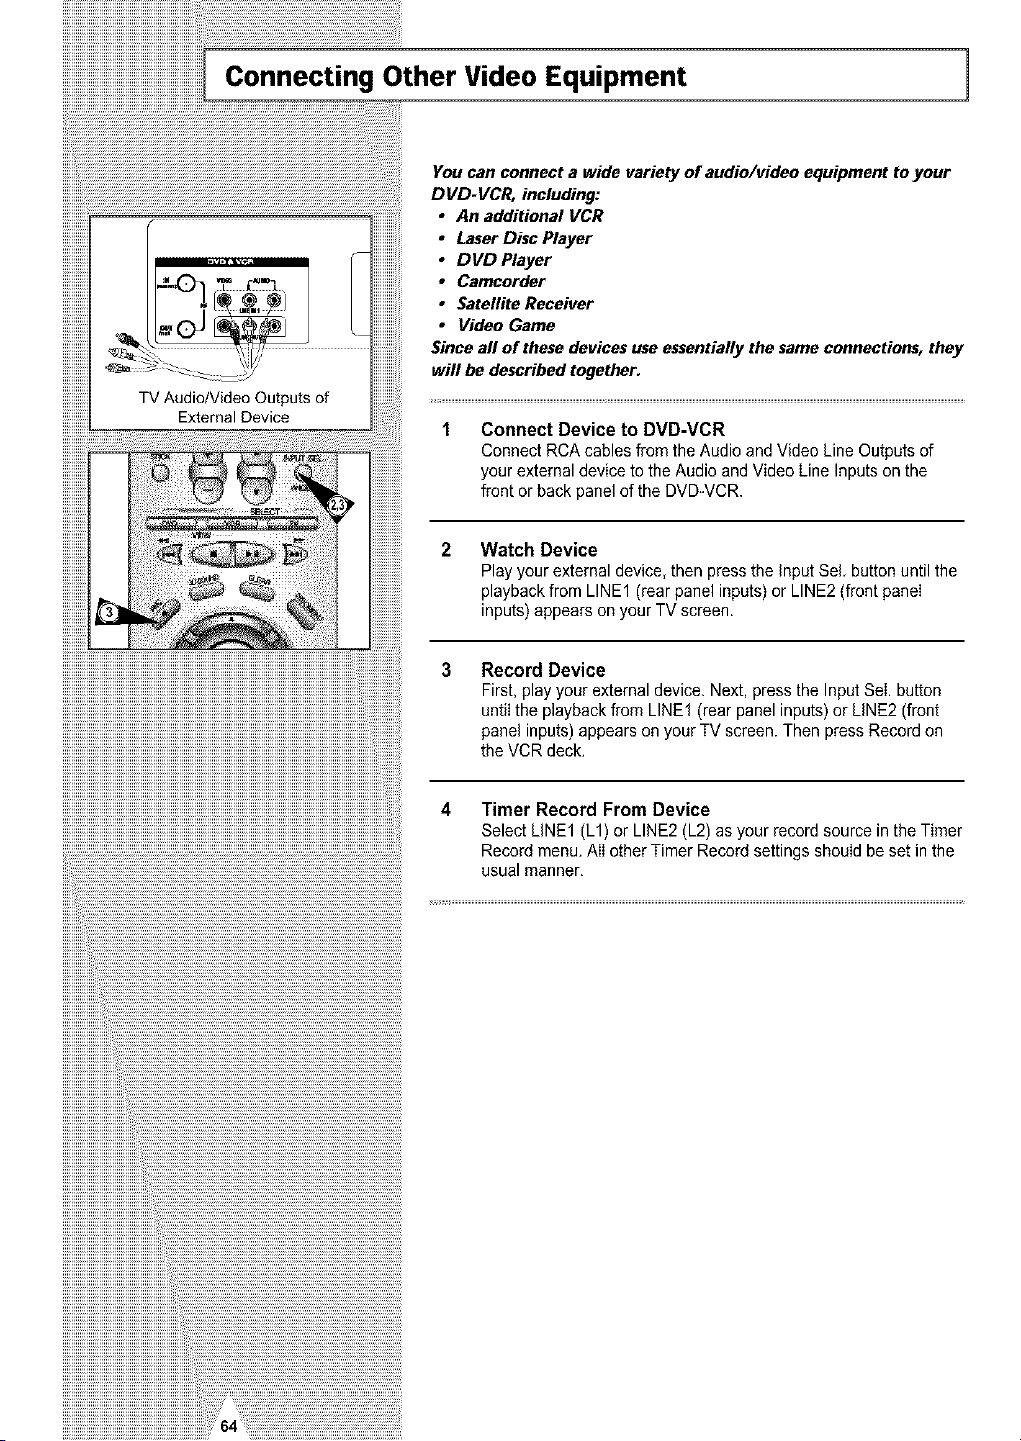
I Connecting Other Video Equipment 1
You can connect a wide variety of audio/video equipment to your
DVD-VCR, including:
• An additional VCR
• Laser Disc Player
• DVD Player
• Camcorder
• Satellite Receiver
• Video Game
Since all of thesedevices useessentiallythe same connections, they
will be described together.
Connect Device to DVD-VCR
Connect RCAcables from theAudioand Video Line Outputsof
yourexternal device totheAudioand Video Line Inputsonthe
front or back panel of the DVD-VCR.
2 Watch Device
Playyour external device, thenpress the input Sel button untilthe
playbackfrom LINE1 (rearpanel inputs)or LINE2 (frontpanel
inputs) appearsonyourTV screen.
3 Record Device
First,play your external device. Next, press the InputSei.button
untilthe playbackfrom LINE1 (rear panelinputs)or LINE2 (front
panel inputs)appearson your TV screen. Then press Recordon
the VCR deck.
4 Timer Record From Device
Select LINE1 (L1) or LINE2 (L2) as your recordsource in the Timer
Recordmenu. AII other Timer Recordsettings should besetin the
usual manner,
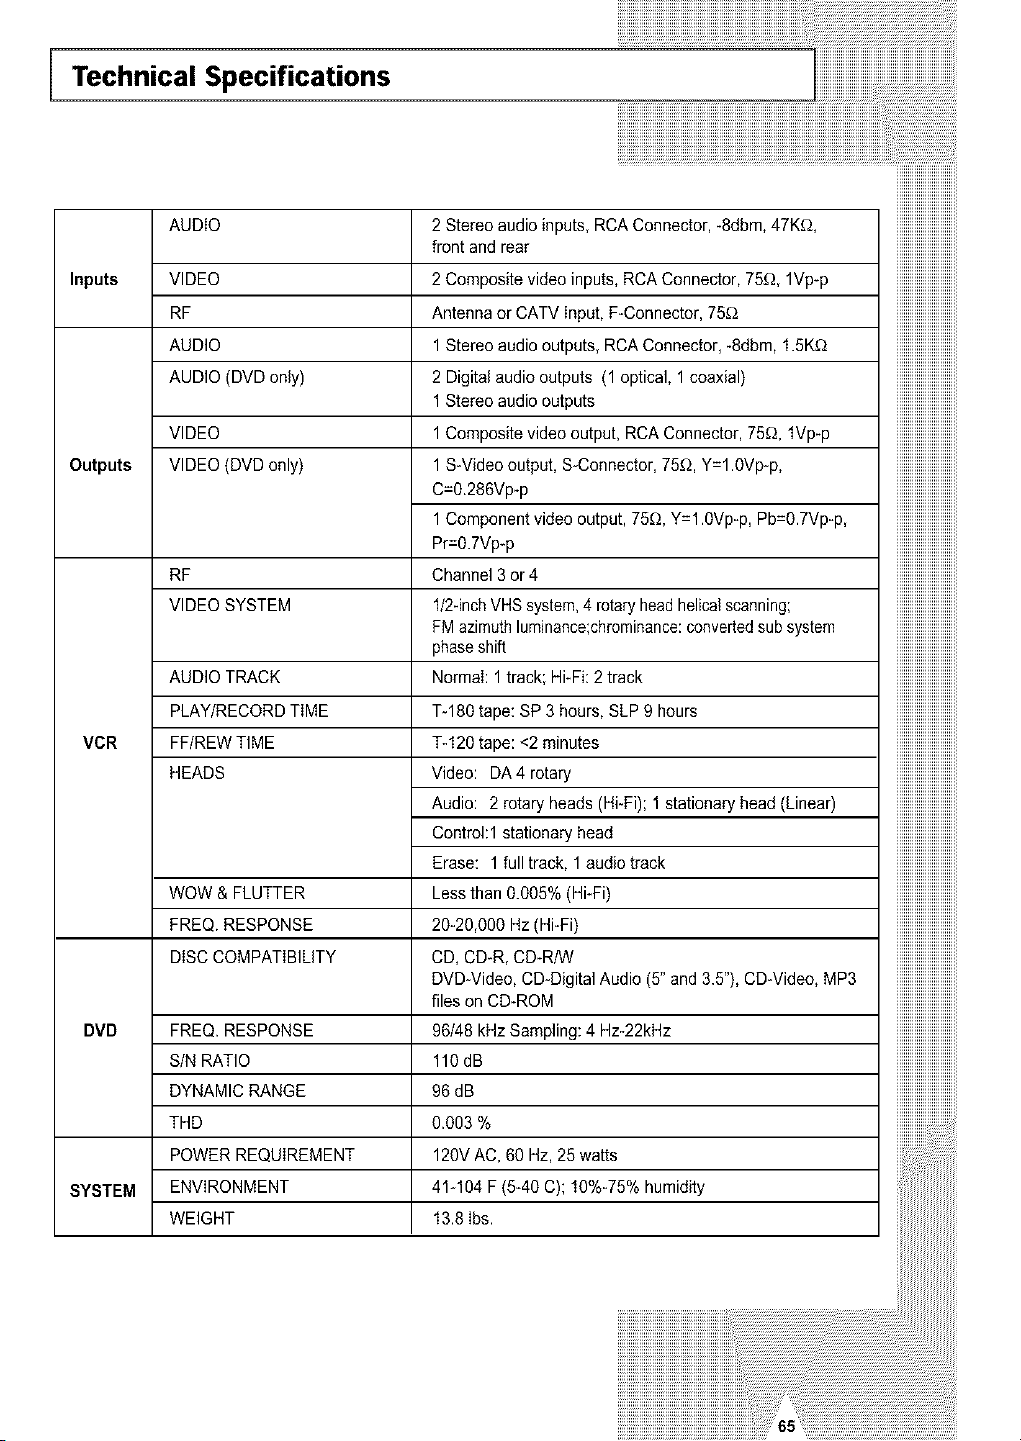
Technical Specifications
AUDIO
Inputs VIDEO
RF
AUDIO
AUDIO (DVD only)
VIDEO
Outputs VIDEO (DVD only)
RF
VIDEO SYSTEM
AUDIO TRACK
PLAY/RECORD TiME
VCR FF/REW TIME
HEADS
WOW & FLUTTER
FREQ. RESPONSE
DiSCCOMPATiBILiTY
DVD FREQ. RESPONSE
S/N RATIO
DYNAMIC RANGE
THD
POWER REQUIREMENT
SYSTEM ENVIRONMENT
WEIGHT
2 Stereo audio inputs, RCAConnector, -8dbm,47Kf_,
frontandrear
2 Composite video inputs,RCAConnector, 75_, 1Vp-p
Antennaor CATV Input, F-Connector, 75£_
1 Stereo audio outputs, RCAConnector, -8dbm, 1.5K'_
2 Digitalaudiooutputs (1 optical, 1 coaxial)
1 Stereo audio outputs
1 Composite video output, RCAConnector, 75'_, fVp-p
1 S-Video output, S-Connector,75f,_,Y=l.0Vp-p,
C=0.286Vp-p
1 Component videooutput,75'_, Y=l.0Vp-p, Pb=0.7Vp-p,
Pr=0.7Vp-p
Channel3 or4
f/2-inch VHS system,4 rotary headhelicalscanning;
FM azimuthluminance;chrominance:convertedsub system
phaseshift
Normal: 1 track;Hi-Fi: 2 track
T-180tape:SP3 hours, SLP 9 hours
%120 tape:<2 minutes
Video: DA4 rotary
Audio: 2rotary heads (Hi-Fi); 1 stationary head(Linear)
Controhl stationary head
Erase: 1 full track, 1 audio track
Lessthan0.005% (Hi-Fi)
20-20,000 Hz(Hi-Fi)
CD,CD-R, CD-R/W
DVD-Video, CD-Digital Audio (5"and 3.5"),CD-Video,MP3
files onCD-ROM
96/48 kHz Sampling: 4 Hz-22kHz
110dB
96dB
0.003%
120VAC, 60Hz,25 watts
41-104F(5-40 C); 10%-75% humidity
13.8Ibs.
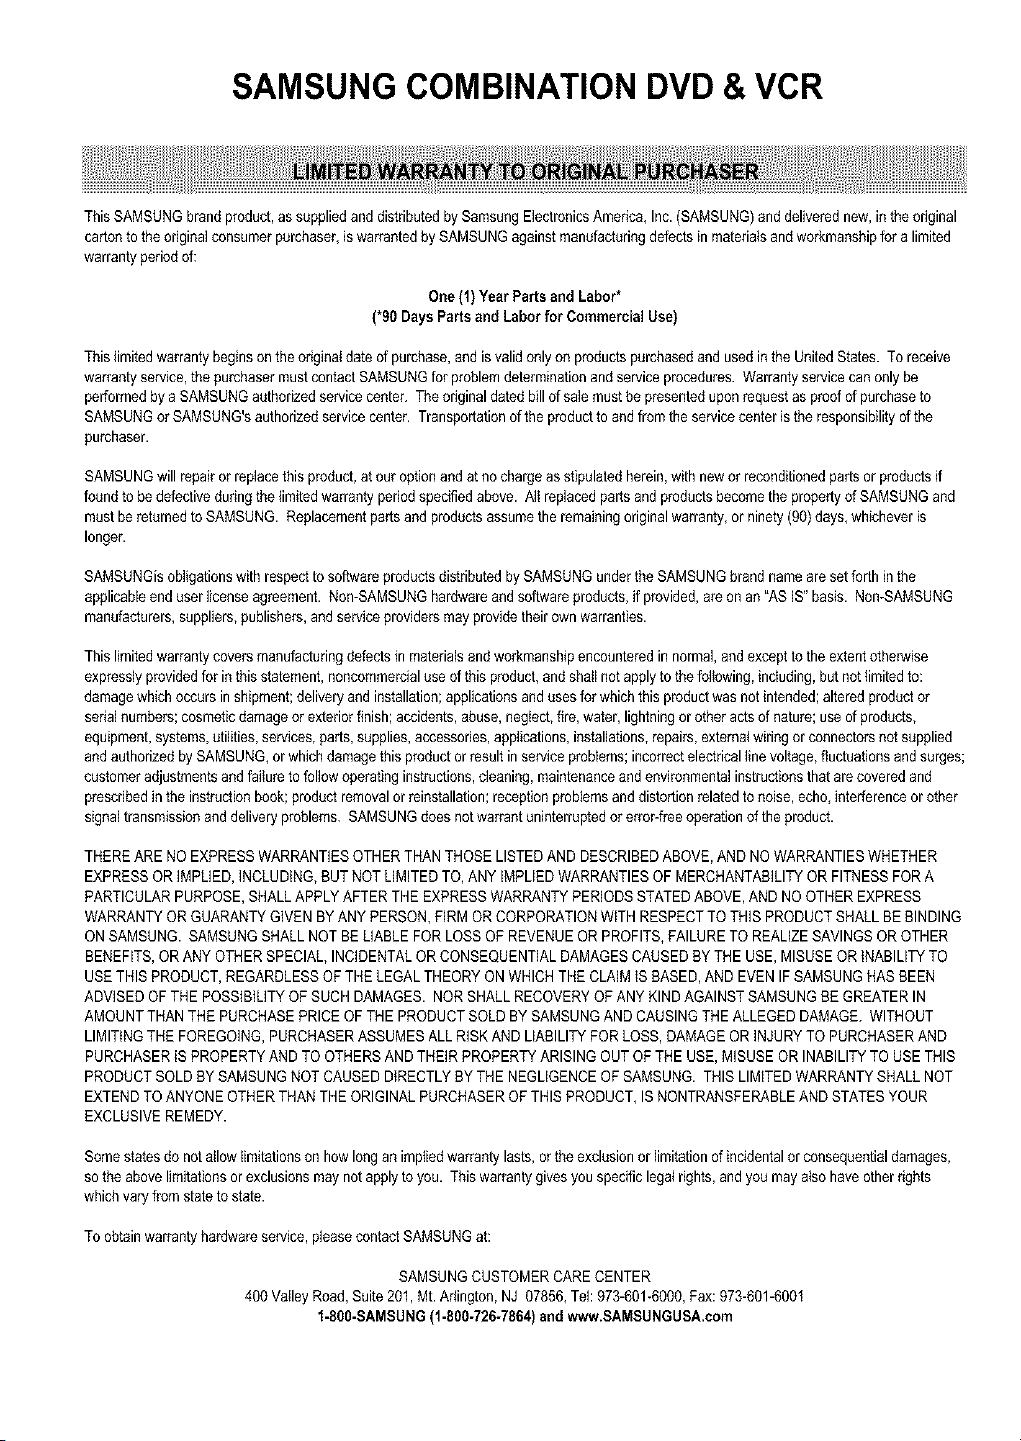
SAMSUNG COMBINATION DVD&VCR
ThisSAMSUNG brandproduct,as suppliedanddistributedbySamsung ElectronicsAmerica, Inc.(SAMSUNG)and deliverednew, inthe original
carton to the originalconsumer purchaser,iswarrantedby SAMSUNGagainst manufacturingdefects in materialsand workmanshipfor alimited
warrantyperiodof:
One (1) YearParts and Labor*
(*90Days Parts and Laborfor CommercialUse)
Thislimitedwarrantybegins on the odginatdate ofpurchase, and isvalid onlyon productspurchasedand usedin the UnitedStates. Toreceive
warrantyservice,the purchasermustcontact SAMSUNGforproblem determinationand serviceprocedures. Warranty servicecan onlybe
performedbyaSAMSUNGauthorizedservicecenter. Theoriginal dated bill ofsale musthe presentedupon request asproofof purchaseto
SAMSUNGor SAMSUNG'sauthorized servicecenter. Transportationofthe producttoandfromthe servicecenter isthe responsibilityofthe
purchaser.
SAMSUNGwillrepair orreplacethis product,at ouroptionand at nochargeas stipulatedherein,with new or reconditionedparts orproductsif
foundto be defectiveduringthe limitedwarrantyperiodspecified above. Altreplacedparts and products becomethe property ofSAMSUNGand
mustbereturnedtoSAMSUNG. Replacementpartsandproducts assumethe remaining originalwarranty, or ninety(90)days,whichever is
longer.
SAMSUNGisobligationswith respectto software products distributed bySAMSUNGunderthe SAMSUNGbrandname aresetforth inthe
applicableend user license agreement. Non-SAMSUNGhardwareand software products, if provided, areonan "AS iS" basis. Non-SAMSUNG
manufacturers,suppliers,publishers,and serviceprovidersmayprovidetheir own warranties.
Thislimitedwarrantycovers manufacturingdefects in materials andworkmanshipencounteredin normal,andexcept to the extentotherwise
expressly providedforin thisstatement, noncommercialuse ofthis product,and shallnotapply to the following,including,but not {imitedto:
damagewhichoccurs inshipment;deliveryand installation;applications anduses forwhichthis productwas not intended; altered productor
serial numbers;cosmetic damageor exteriorfinish;accidents,abuse,neglect,fire,water,lightningorotheractsof nature; useof products,
equipment,systems, utilities,services,parts, supplies, accessories,applications,installations, repairs,extematwiringorconnectorsnotsupplied
and authorized by SAMSUNG,orwhichdamagethisproductorresultin serviceproblems; incorrectelectrical line voltage, fluctuations and surges;
customeradjustmentsand failureto followoperatinginstructions,cleaning,maintenanceand environmentalinstructionsthat arecoveredand
prescribedin the instruction book;productremovalorreinstallafion;receptionproblems and distortionrelated to noise, echo,interferenceorother
signaltransmission and deliveryproblems. SAMSUNGdoesnotwarrantuninterruptedorerror-freeoperationofthe product.
THEREARE NOEXPRESSWARRANTIESOTHERTHANTHOSELISTEDANDDESCRIBEDABOVE,AND NO WARRANTIESWHETHER
EXPRESSOR IMPLIED,iNCLUDING,BUT NOT LIMITEDTO, ANYIMPLIEDWARRANTIESOF MERCHANTABILITYOR FITNESS FOR A
PARTICULARPURPOSE,SHALLAPPLY AFTERTHE EXPRESSWARRANTYPERIODSSTATED ABOVE,AND NO OTHER EXPRESS
WARRANTYORGUARANTYGIVEN BYANY PERSON,FIRMOR CORPORATIONWiTH RESPECTTO THISPRODUCTSHALLBEBINDING
ON SAMSUNG. SAMSUNGSHALLNOTBELIABLEFOR LOSS OF REVENUEOR PROFITS, FAILURETO REALIZESAVINGSOROTHER
BENEFITS,OR ANYOTHER SPECIAL,INCIDENTAL ORCONSEQUENTIALDAMAGESCAUSEDBY THEUSE,MISUSEOR iNABILITY TO
USETHISPRODUCT, REGARDLESSOF THELEGAL THEORYON WHICH THECLAIMISBASED, AND EVENIFSAMSUNGHASBEEN
ADVISED OFTHE POSSIBILITYOF SUCHDAMAGES. NOR SHALLRECOVERYOFANYKINDAGAINST SAMSUNGBE GREATERIN
AMOUNTTHANTHEPURCHASE PRICE OF THEPRODUCTSOLDBYSAMSUNGAND CAUSINGTHEALLEGEDDAMAGE. WITHOUT
LIMITINGTHEFOREGOING,PURCHASERASSUMESALL RISKANDLIABILITY FORLOSS, DAMAGEOR iNJURYTO PURCHASERAND
PURCHASERIS PROPERTYANDTO OTHERSAND THEIRPROPERTYARISING OUT OF THEUSE, MISUSEOR INABILITYTO USETHIS
PRODUCTSOLDBYSAMSUNGNOT CAUSEDDIRECTLYBYTHENEGLIGENCEOF SAMSUNG. THISLIMITEDWARRANTYSHALLNOT
EXTENDTOANYONE OTHERTHANTHEORIGINALPURCHASEROF THISPRODUCT, IS NONTRANSFERABLEANDSTATESYOUR
EXCLUSIVEREMEDY.
Somestates donot allowlimitationson howlongan impliedwarranty lasts,ortheexclusionor limitationof incidentalor consequentialdamages,
so theabovelimitationsorexclusionsmaynot applyto you. Thiswart_nty gives you specific legal rights,and youmay also haveotherdghts
whichvaryfromstateto state.
Toobtainwart_nty hardwareservice,pleasecontact SAMSUNGat:
SAMSUNGCUSTOMERCARE CENTER
400 ValleyRoad, Suite201, Mt. Arlington, NJ 07856, Tel:973-601-6O0O,Fax: 973-601-6001
1-8O8-SAMSUNG(1-800-726-7864)and www.SAMSUNGUSA,com

SAMSUNG ELECTRONICS AMERICA, INC.
HEADQUARTERS
105 Challenger Road, Ridgefield Park, N.J,
07660-0511
TEL: 1-800-SAMSUNG
SERVICE DIVISION
400 Valley Road, Suite 201, Mount Arlington, NJ 07856
1-800-SAMSUNG (1-800-726-7864)
www.SAMSUNGUSA.com
ELECTROM¢$
AC68-O1821A