_.... i,iiiii_..........................................................
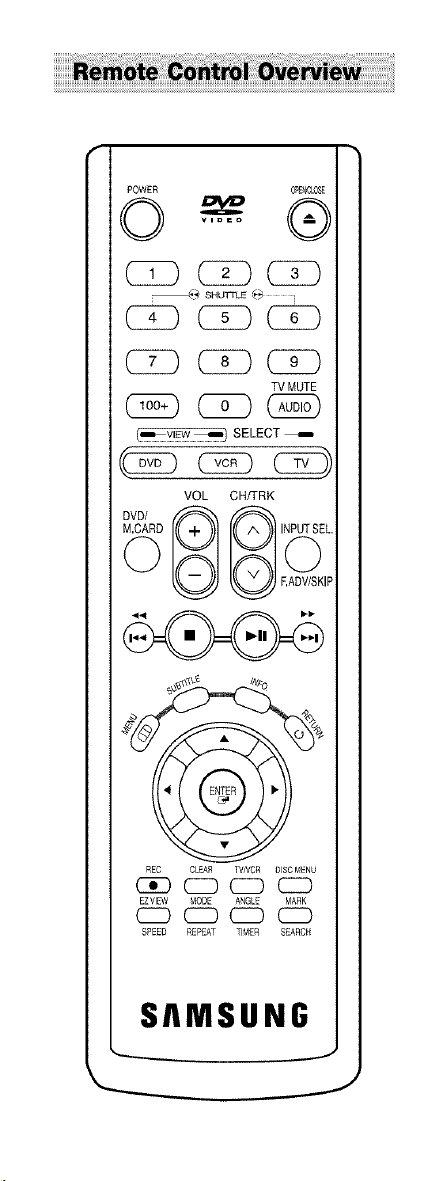
POWER C_3LOSE
0_®
_ SHUTTDE _:_
( )( )( )
TV MUTE
C_) CZ) (?_)
[_y!_ _ SELECT
_c c
VOL CH/TRK
G°
EADV/SKIP
REC CLEAR WNCR DISCMENU
C3E) CZD CZD CZ3
EZVIEW MODE ANGLE MARK
_ (_)CZ) CZ)
SPEED REPEAT TIMER SEARCH
SAMSUNG
J

CA UTI O N /x Thissymbolisintendedto alertthe usertothepresenceof uninsulated
Z
'dangerousvoltage'_withintheproduct'senclosurethatmaybeof sufficient
magnitudetoconstitutea riskoftireorelectricshooktopersons.
CAUTION:TOREDUCETHERISKOFELECTRIC Thissymbolisintendedto alertthe userto thepresenced important0per-
SHOCK,DONOTREMOVECOVER(ORBACK). atingandmaintenance(servicing)instructionsintheliteratureaccompany-
NOUSERSERVICEABLEPARTSINSIDE.REFER
SERVICING TO QUALIFIED SERVICE PERSONNEL. ingtheappliance
Note toCATV system installer: Thisreminder isprovidedtocall CATV systeminstalIefieattention to Article 820-40 of
the National ElectricalCode (Section54 ofCanadian ElectricalCode, Part t)that providesguidelines forproperground-
ing and, in particular,specifiesthat the cable ground shallbeconnectedto the groundingsystemof the buildingas
closeto the point ofcable entry aspractical.
Caution: FCC regulationsstatethat any unauthorized changes ormodificationsto thisequipment mayvoidthe user's
authority to operate it.
Caution: Topreventelectricshock,matchwide blade ofplugto wide slot, fully insert.
Attention: Pour eviterles chocsetectriquee,introduirela lamele plus largede la fiche danslabornecorrespondantede
la priseet pouseerjusqu'aufond.
Important :OneFederal Courthasheld that unauthorizedrecordingof copyrightedTVprograms isan infringementof
U.S. copyrighttaws.
Certain Canadianprograms maybe copyrightedand anyunauthorizedrecordingin wholeor in partmaybea violation
of theserights.
Toprevent damagewhich may result in fire orelectric shock hazard,
do not expose this appliance to rain or moisture.
Important Safety Instructions
1. Read theseinstructions.
2. Keep theseinstructions.
3. Heed allwarnings.
4. Followallinstructions.
5. Donot usethisapparatusnear water.
6. Cleanonlywithdry cloth.
7. Donot blockany ventilationopenings.Installin accordancewiththemanufacturer's instructions.
8. Donot install nearanyheat sources such asradiators, heat registers,stoves,orotherapparatus (includingampli
tiers) that produceheat.
9. Donot defeatthe safety purposeofthe polarizedorgrounding-type plugA polarizedplughastwoblades withone
wider than the other.A groundingtypeplug hastwoblades and athird groundingprong. Thewideblade orthe
third prong areprovided foryour safety. If the provided plugdoesnot tit intoyour outlet,consultan electrician for
replacementof the obsolete outlet.
10. Protectthe power cord from beingwalked on or pinchedparticularly at plugs, conveniencereceptacles,and the
pointwheretheyexitfromthe apparatus.
11. Onlyuse attachments/accessoriesspecifiedby the manufacturer.
12. Use only with cart, stand,tripod, bracket, ortablespecified by the manufacturer,orsoldwiththeapparatus.When
acart isused,usecaution when moving the caWapparatuscombinationtoavoid injuryfromtip-oven
13. Unplugthis apparatusduringlightningstorms orwhenunused forlongperiodsof time.
14. Referall servicingtoqualifiedservicepersonnel.Servicing isrequiredwhenthe apparatushasbeen damagedin
anyway,suchaspower-supply cord orplug isdamaged,liquidhas been spilled orobjectshavefallen intothe
apparatus,the apparatushas been exposedtorain or moisture,doesnot operate normally,orhasbeen dropped.
• Safety
important Safety Instructions............. 2
• Welcome
Feature Summary ..................... 4
Disc Type and Characteristics ............ 4
• 1- System Overview
Unpack ............................. 5
Front Panel Overview .................. 6
Rear Panel .......................... 6
Front Panel Display .................... 7
insert Batteries into Remote ............. 7
• 2- Getting Started
Basic Connections/Auto Setup ........... 7
• 3-Advanced Connections
Using the TV Buttonson the RemoteControl .. 8
Stereo Connections .................... 8
S-VidedComponentVideoConnections(forDVD).... 9
MonitorTV Connections ................. 9
Connecting OtherVideo Equipment ......... 10
• 4-DVDSound Setup
A/VReceiver Connections................ 10
• 5-Basic Operation
Deck Control Buttons ................... 11
BasicDVD Operation ................... 11
BasicVCR Operation ................... 11
BasicTVTunerOperations ............... 12
• 6 -System Setup
On-Screen Menu Navigation .............. 12
Menu Language ....................... 12
Manual Clock Set ...................... 13
TunerBandSetting ..................... 13
RF OutputChannel..................... 14
Auto ChannelMemory................... 14
ChannelAdd/Delete .................... 15
Front Panel Dimmer .................... 15
Auto Power Off ........................ 16
• 7-DVD Setup
Disc MenuLanguage ................... 16
AudioLanguage ....................... 17
Subtitle Language...................... 17
Digital Output ......................... 18
DTS ............................... 18
DynamicCompression .................. 19
PCM DownSampling ................... 19
TV Aspect Ratio ....................... 20
BlackLevel .......................... 20
Aft VideoOut ......................... 21
Parental............................. 21
• 8- DVD Operations
Speciat PlaybackFeatures ............... 22
Disc MenuNavigation ................... 23
EZ View ............................. 23
Title/Chapter/TimeSelection .............. 24
AngleView........................... 25
Subtitle ............................. 25
A to B Repeat ......................... 26
RepeatChapter/Title .................... 26
Audio............................... 27
Bookmarks........................... 27
Function (DVD) ........................ 28
• 9-VCRPlayback
SpeciatVCR PlaybackFeatures ............ 28
Tracking............................. 29
Auto Play ............................ 29
S-VHS Playback ....................... 29
Variable SearchSystem ................. 30
• 10 -VCRRecording
BasicRecording ....................... 30
SpecialRecording Features ............... 31
One-TouchRecording (OTR) .............. 31
RecordSpeed ........................ 32
• 11 -Timer Recording
Howto Set a Timer Recording ............. 32
Function (VCR) ........................ 33
• 12 -Advanced Functions.
Howto insert aMemoryCard ............. 33
Clips Menufor MP3/WMA/JPEG ........... 34
Folder Selection ....................... 34
MP3/WMAPlay ....................... 35
JPEGPlayback ....................... 36
Program Play & RandomPiny ............. 37
• Appendix - Help
Technical Specifications ................. 38
DVD-VCRFeatures
• PerfectcompatibilitytoplaybackDVDs,
AudioCDs,MP3,WMAdiscs,VCD,SVCD,
JPEGFILESCDs,orVHSTapes.
• EnjoyaDVDmoviewhilerecordingaTV
showtotheVCR.
• AutoSetupinstantlyfindsthetimeandruns
channelsearch.
• RFinputsandoutputsforallkindsof TVs
available.
• Composite,S-Video,andComponentVideo
outputs.
• Universalremoteprovidesthefulloperation
onDVD-VCR.
• On-ScreenProgram
(English/French/Spanish).
DVDFeatures
• 10-bitvideodigitaltoanalogconverterand
27MHzadvanceddigitalfilter.
• Playbackof96KHz/24-bitsources.
• 7in2slottosupport7typesofmemory
cards:MMC,SD,SmartMediaCard,
CompactFlash,MicroDrive,MemoryStick
andMemoryStick-Pro.
• PlaybackMP3-CDs.
VCRFeatures
• Hi-FiStereoVCR.
• Superiorslowmotionandstopaction
(with4heads).
• PlaybackofS-VHStapeswithabetterthan
standardresolution.
• INTROScan,ZeroReturn,andENDSearch.
• 7-event/1monthtimerrecording.
• Timeremainingcounter,realtimecounter.
Note
* Discs which cannot be played with this
player.
• DVD-ROM • DVD-RAM
• CDI • CDV
• HD layer of super Audio CD
• CDGs play audio only, not graphics.
* Ability to play back may depend on recording
conditions.
• DVD-R • CD-RW
• DVD+RW, -RW • CD-ROM
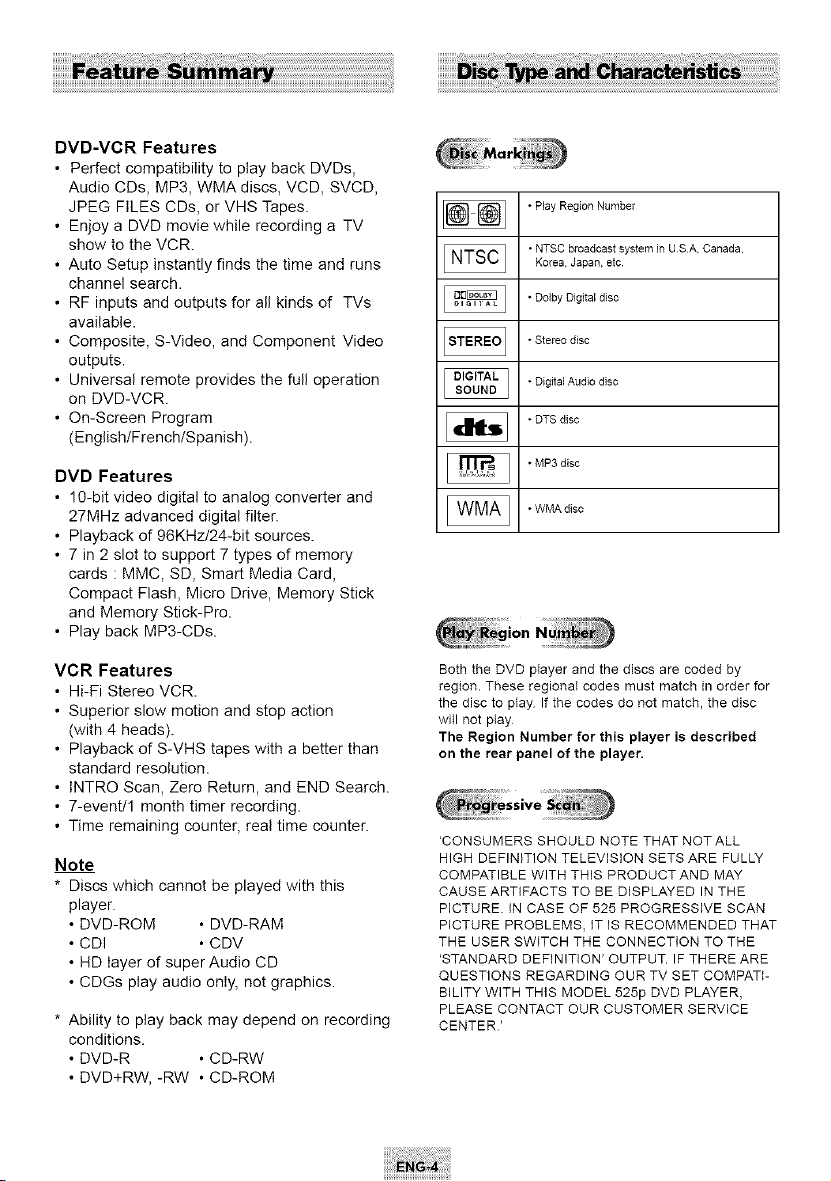
* PbayRegion Number
* NTSC broadcast system JnUSA, Canada.Korea, Japan, etc
* Dolby Digital disc
* Stereo disc
* Digital Audio disc
• DTS d+sc
• MP3 disc
• WMA disc
Both the DVD player and the discs are coded by
region. These regional codes must match in order for
the disc to play Ifthe codes do not match, the disc
will not play
The Region Number for this player is described
on the rear panel of the player.
'CONSUMERS SHOULD NOTE THAT NOT ALL
HIGH DEFINITION TELEVISION SETS ARE FULLY
COMPATIBLE WITH THIS PRODUCTAND MAY
CAUSE ARTIFACTS TO BE DISPLAYED IN THE
PICTURE. IN CASE OF 525 PROGRESSIVE SCAN
PICTURE PROBLEMS, IT IS RECOMMENDED THAT
THE USER SWITCH THE CONNECTION TO THE
'STANDARD DEFINITION' OUTPUT. IF THERE ARE
QUESTIONS REGARDING OUR TV SET COMPATI-
BILITY WITH THIS MODEL 525p DVD PLAYER,
PLEASE CONTACT OUR CUSTOMER SERVICE
CENTER'
I I
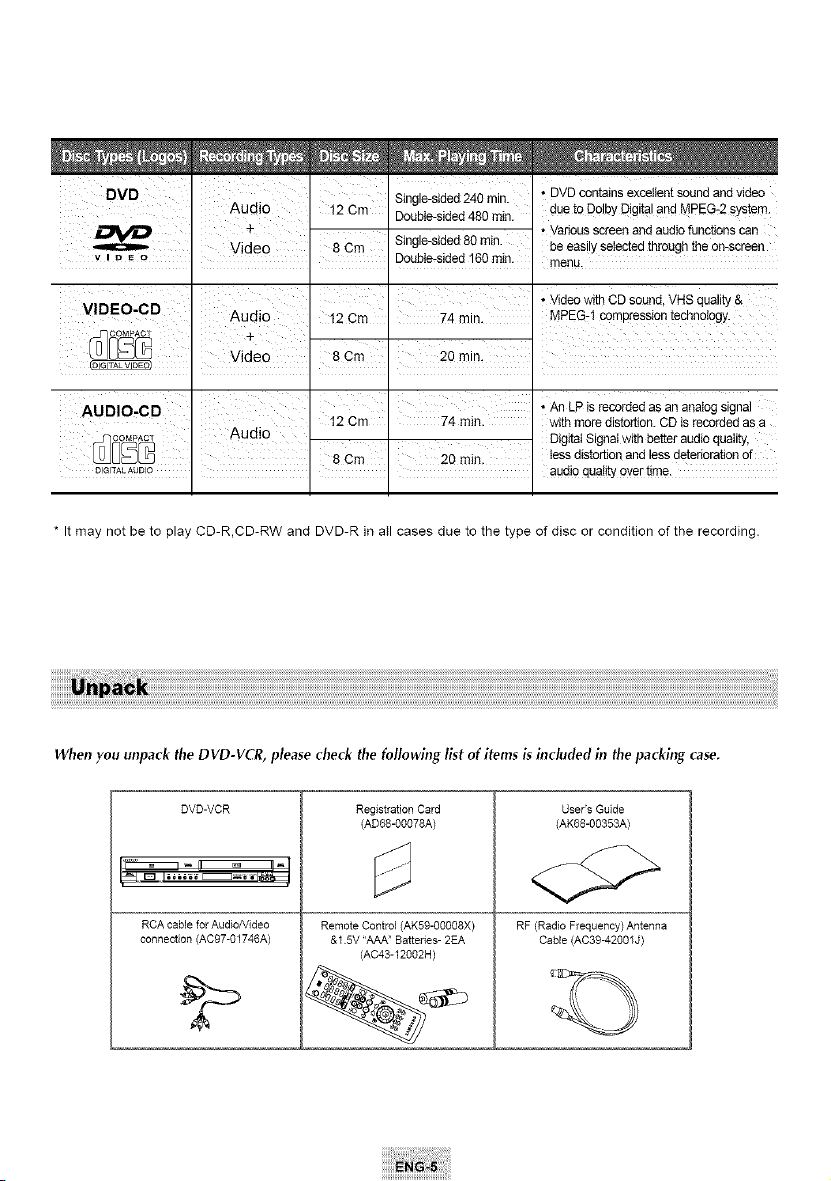
Single-sided240 min. • DVD containsexcellentsoundand video
DVD 12 Cm Double-sided480 rain. due to DolbyDigitalandMPEG-2 system.
•Variousscreen and audiofunctionscan
8Cm Single-sided 80 rain. be easilyselectedthroughtheon-screen
v _DE o Double-sided160rain. menu.
I I
I •VideowithCD sound,VHSquality&
VIDEO-CD Aud o 12 Cm 74 m n MPEG-1 compression technology.
' *AnLPisrecorded asananalogsignal
74 ruth. withmore disto_on. CD isrecordedas a
DigitaISignalwith betteraudioquaIity,
tessdistortionand less deteriorationof
D_I_'ALAUDO . . I . audioqualityover time.
* Itmay not be to play CD-R,CD-RW and DVD-R in all cases due to the type of disc or condition of the recording.
When you unpack the DVD-VCR, please check the following Igt of items g included in the packing case.
DVD-VCR
RCA cable for Audio/Video
connection (AC97-01746A)
Registration Card
(AD68-00078A)
RemoteControl(AK59-00008X)
&15V "AAA"Batteries-2EA
(AC43-12002H)
User's Guide
(AK68-00353A)
RF(Radio Frequency)Antenna
Cable (AC39-42001 J)
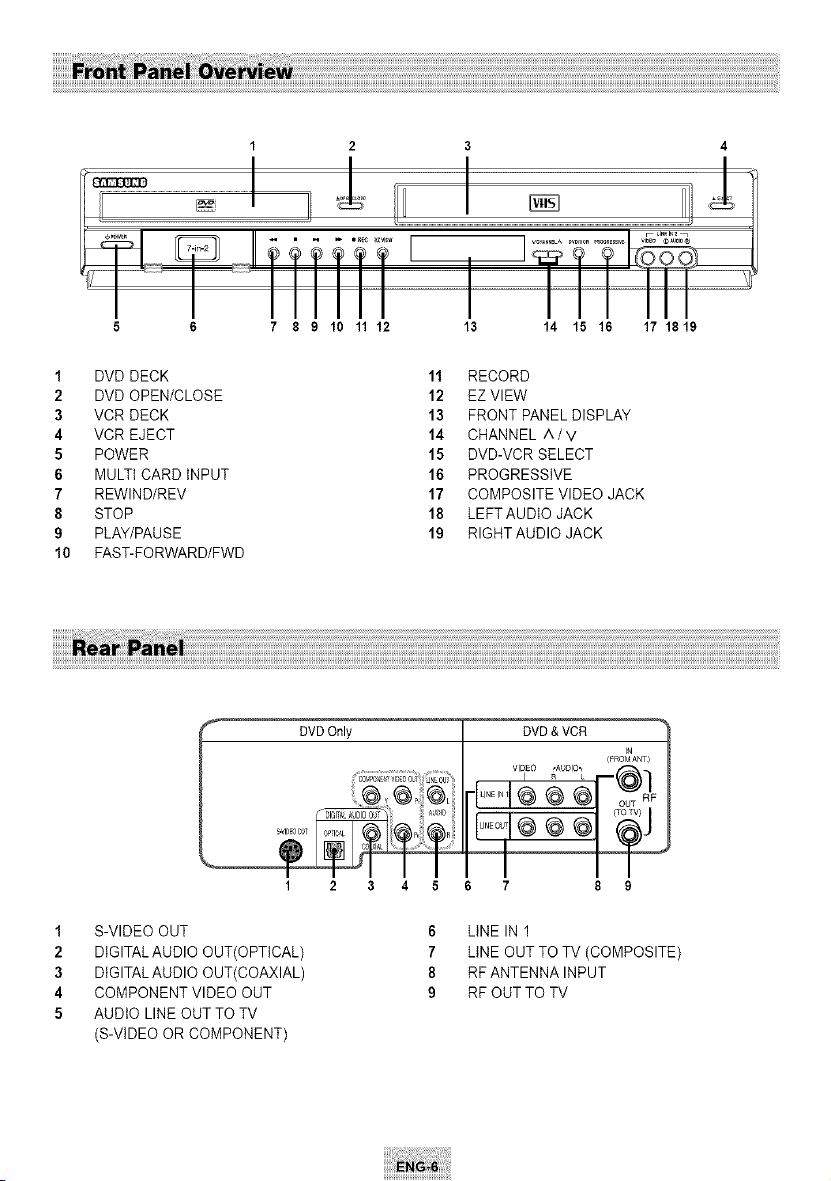
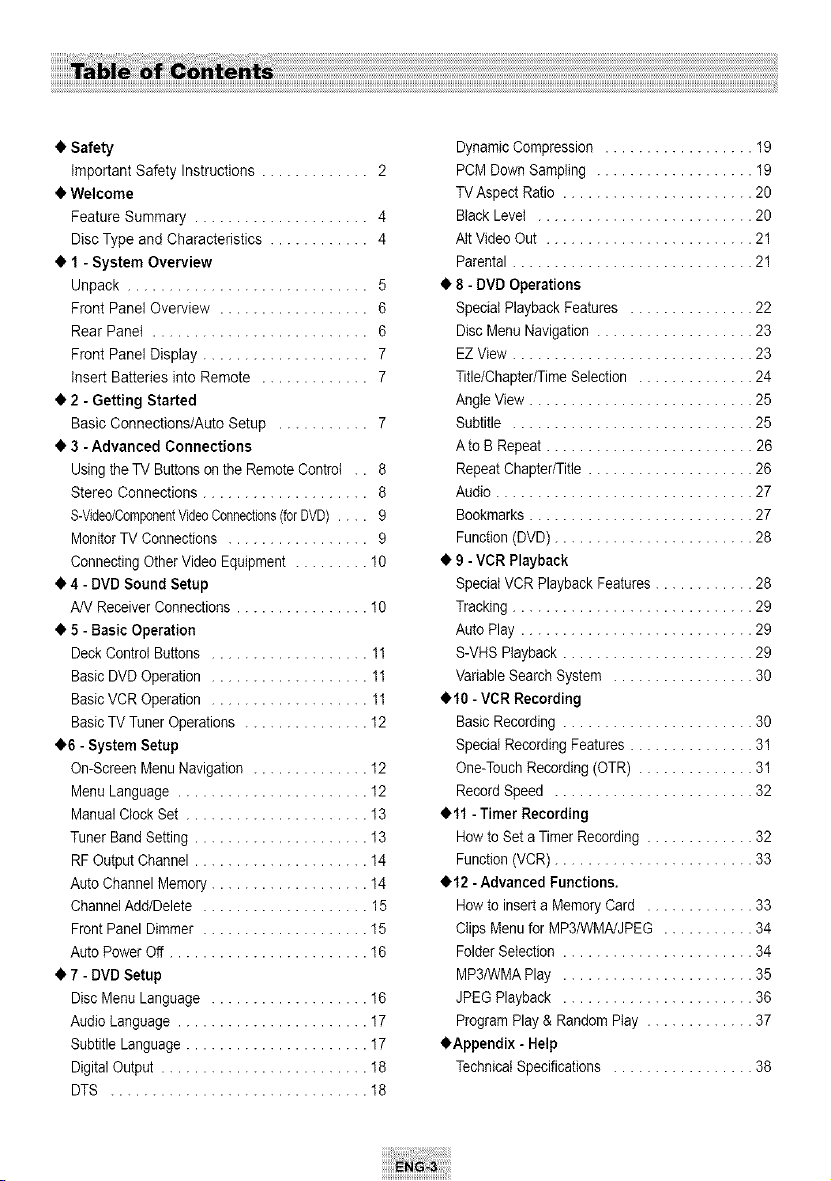
5 6 7 8 9 10 11 12 13 14 15 16 17 1819
1 DVD DECK
2 DVD OPEN/CLOSE
3 VCR DECK
4 VCR EJECT
5 POWER
6 MULTICARD INPUT
7 REWlND/REV
8 STOP
9 PLAY/PAUSE
10 FAST-FORWARD/FWD
11 RECORD
12 EZVIEW
13 FRONTPANELDISPLAY
14 CHANNEL ^/V
15 DVD-VCR SELECT
16 PROGRESSIVE
17 COMPOSITE VIDEO JACK
18 LEFTAUDIO JACK
19 RIGHT AUDIO JACK
1 S-VIDEO OUT
2 DIGITALAUDIO OUT(OPTICAL)
3 DIGITALAUDIO OUT(COAXIAL)
4 COMPONENT VIDEO OUT
5 AUDIO LINE OUT TOTV
(S-VIDEO OR COMPONENT)
3 4
%
DVD&VCR
r J
/_ROMANr)
7 8 9
6 LINE IN 1
7 LINE OUT TOTV (COMPOSITE)
8 RF ANTENNA INPUT
9 RF OUT TO TV
1 2 3
4 5
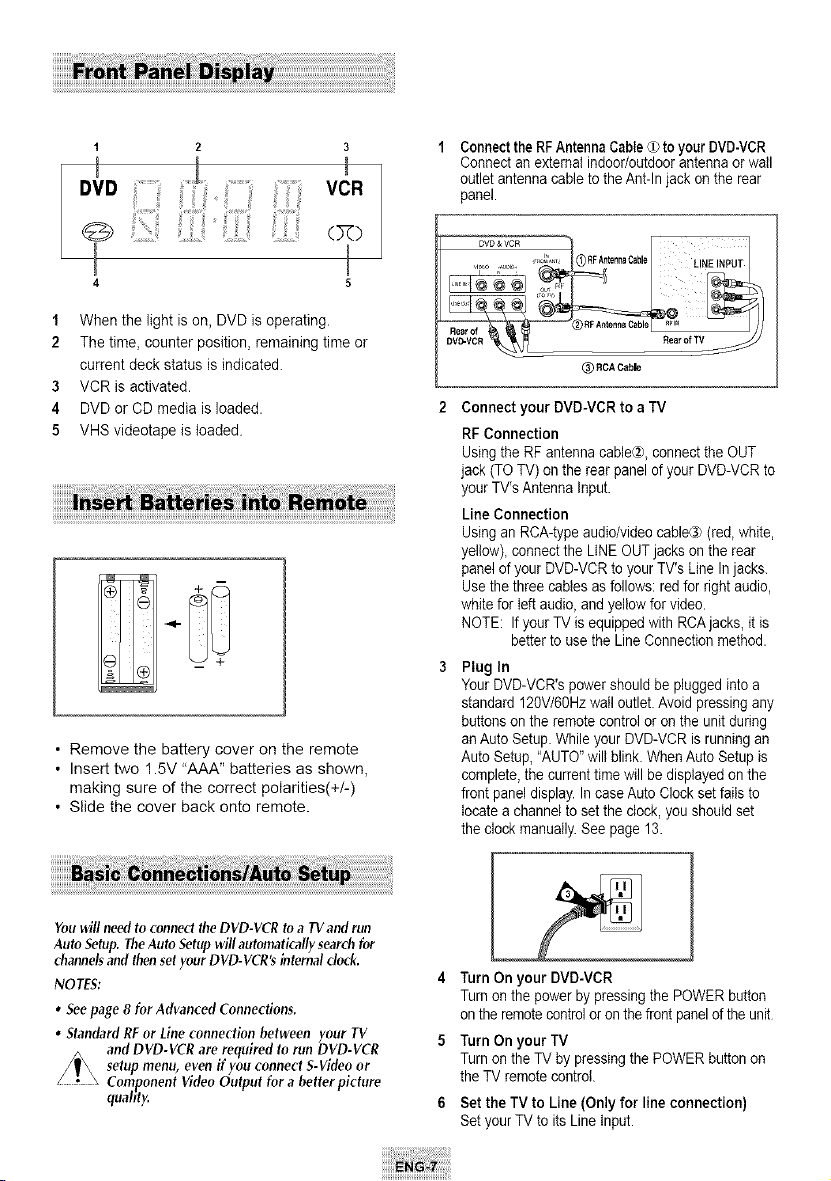
1 When the light is on, DVD is operating.
2 Thetime, counter position, remaining time or
current deck status isindicated.
3 VCR is activated.
4 DVD or CDmedia isloaded.
5 VHS videotape istoaded.
• Remove the battery cover on the remote
• Insert two 1.5V "AAA" batteries as shown,
making sure of the correct polarities(+/-)
• Slide the cover back onto remote.
Connectthe RFAntennaCable(_toyour DVD-VCR
Connectan external indoor/outdoorantennaorwall
outletantenna cable to the Ant-In jack on the rear
panel.
DVD &
VCR
,_,_, _(_ RFAntennaC_ble
0,,
DVD-VCR _
@RCACable
__ L!NEINPUT
Rearof_
Connect your DVD-VCR to aTV
RF Connection
Using the RF antennacable@, connectthe OUT
jack (TOTV)onthe rear panelof your DVD-VCR to
your TV's AntennaInput.
Line Connection
Using anRCA-typeaudio/video cable@ (red,white,
yellow), connect the LINE OUT jackson therear
panelof your DVD-VCR to your TV's Line In jacks.
Use the three cablesas follows:redforright audio,
white forleft audio,and yellow forvideo.
NOTE: If your TV isequipped with RCAjacks,it is
better tousetheLineConnectionmethod.
Plug In
Your DVD-VCR's power should be plugged intoa
standard120V/60Hzwailoutlet. Avoid pressing any
buttons onthe remote controlor on the unitduring
an Auto Setup.While your DVD-VCR isrunningan
Auto Setup,"AUTO"will blink.WhenAuto Setupis
complete, the current time will be displayed on the
frontpaneldisplay. In case Auto Clock set fails to
locate a channel tosetthe clock, you should set
the clockmanually. See page 13.
You will need to connect theDVD-VCR to a TV and run
Auto Setup.TheAuto Setupwill automatically searchfor
channelsand then set your DVD-VCR's internal clock.
NOTES:
• Seepage 8 for Advanced Connections.
• Standard RF or Lineconnection between your TV
and DVD-VCR are required to run DVD-VCR
setup menu, even if you connect S-Video or
Component Video Output for a better picture
quabty.
4 Turn On your DVD-VCR
Turn on the powerbypressing the POWER button
on the remotecontroloron the front panelof the unit
5 Turn On your TV
Turn on the TV by pressingthe POWERbutton on
the TVremote control.
6 Set theTV to Line (Only for lineconnection)
Set your TV toits LineInput.
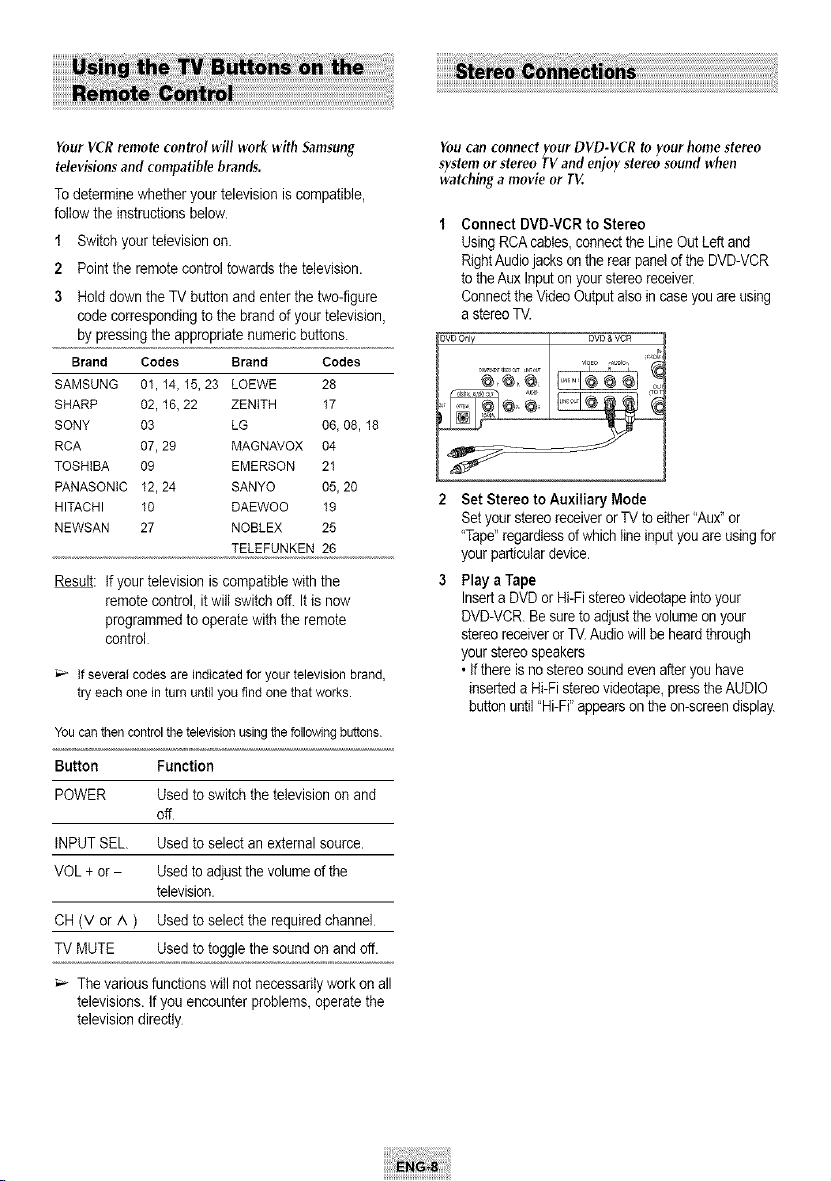
Your VCRremote control will work with Samsung
televisions and compatible brands.
Todeterminewhether your televisioniscompatible,
follow the instructionsbelow.
1 Switch your television on.
2 Point the remote control towards the television.
3 Holddown the TVbutton and enterthe two-figure
codecon-espondingto the brand of your television,
by pressingthe appropriatenumericbuttons.
Brand Codes Brand Codes
SAMSUNG 01, 14, 15,23 LOEWE 28
SHARP 02, 16,22 ZENITH 17
SONY 03 LG 06, 08, 18
RCA 07,29 MAGNAVOX 04
TOSHIBA 09 EMERSON 21
PANASONtC 12,24 SANYO 05, 20
HITACHI 10 DAEWOO 19
NEWSAN 27 NOBLEX 25
TELEFUNKEN 26
Result: Ifyour televisioniscompatible with the
remote control,it will switchoff It isnow
programmed to operatewith the remote
control
if several codes are indicated for your television brand,
try each one in turn until you find one that works.
Youcanthencontrolthe televisionusingthefollowingbuttons.
Button Function
POWER Usedtoswitchthetelevisionon and
off
INPUTSEL. Usedtoselectanexternal source.
VOL+or- Usedto adjustthe volumeof the
television.
CH(V or ^ ) Usedto select the required channel
TVMUTE Used to togglethe sound onand off.
Thevariousfunctionswill not necessarilywork on all
televisions. If youencounterproblems_operate the
televisiondirectly
You can connect yourDVD-VCR to your home stereo
system orstereo TVand enjoy stereo sound when
watching a movie or TV.
Connect DVD-VCRto Stereo
Using RCAcables,connecttheLineOutLeft and
RightAudiojackson the rearpanelof the DVD-VCR
to the AuxInputon your stereoreceiver
Connectthe Video Outputalso incaseyouareusing
astereoTV.
Set Stereo to Auxiliary Mode
Set your stereoreceiverorTVto either"Aux"or
"Tape"regardlessof which Iineinputyouareusingfor
your particulardevice.
Play a Tape
InsertaDVD or Hi-Fi stereovideotapeintoyour
DVD-VCR.Be sure to adjustthe volumeon your
stereoreceiverorTV.Audio will be heardthrough
your stereospeakers
• If thereis no stereosound evenafteryouhave
inserteda Hi-Fi stereovideotape,pressthe AUDIO
buttonuntil "Hi-Fi"appearson the on-screendisplay.
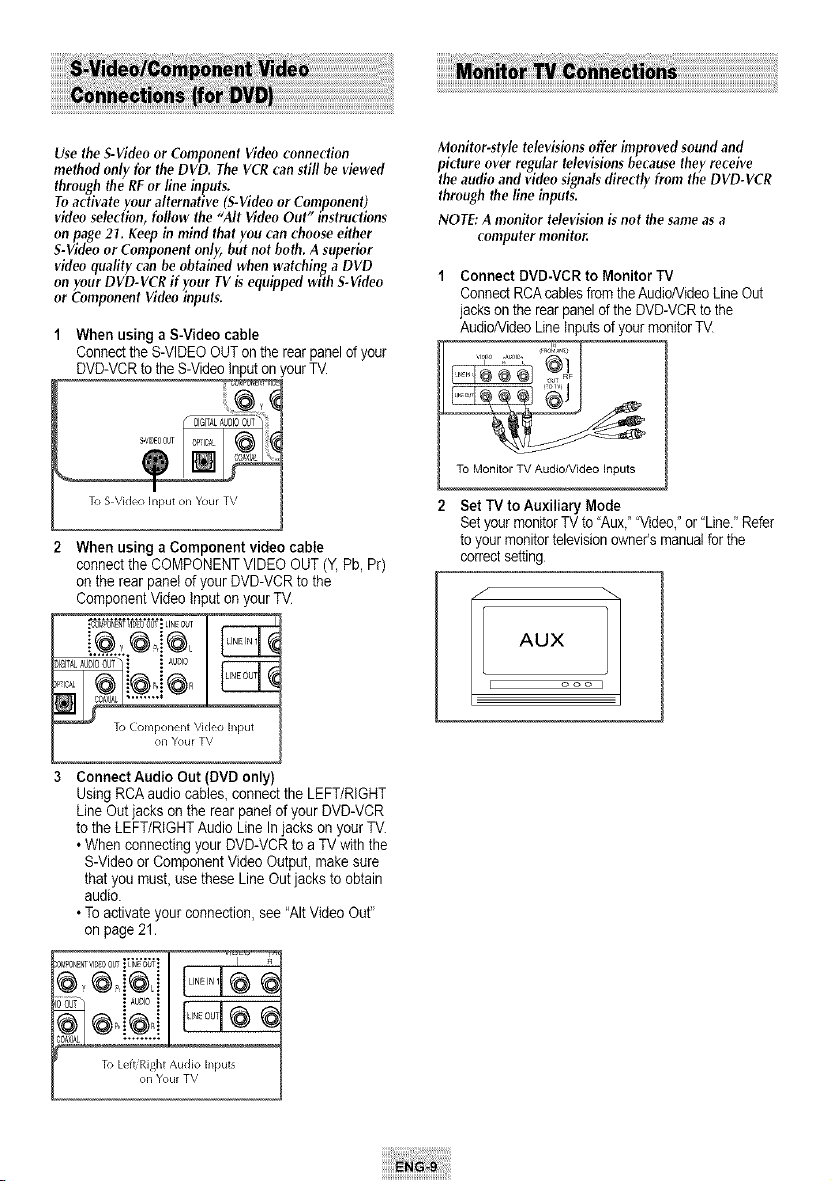
Use theS-Videoor Component Video connection
method only for the DVD. TheVCRcan still be viewed
through the RFor line inputs.
To activate your alternative (S-Video orComponent)
video selection, follow the "AItVideo Out" instructions
onpage 21. Keep inmind that you can choose either
S-Videoor Component only, but not both. Asuperior
video quality can be obtained when watching a DVD
on your DVD-VCR if your TV is equipped with S-Video
orComponent Video inputs.
When usingaS-Video cable
Connectthe S-VIDEOOUTon the rearpanelof your
DVD-VCRto the S-Video inputon your TV.
I
To S VMeo input on Your TV
2 When using a Component video cable
connectthe COMPONENTVIDEO OUT (Y, Pb, Pr)
on the rear panelof your DVD-VCRto the
ComponentVideoInput on your TV
_IGITA_Au_i'0'_'u'?"ii_u0,0
To Component Video Input
on ¥oul TV
Monitor-style televisions offer improved sound and
picture over regular televisions because they receive
the audio and video signals directly from the DVD-VCR
through the line inputs.
NOTE: A monitor television isnot the sameasa
computer monitor.
1 Connect DVD-VCR toMonitor TV
ConnectRCA cablesfromtheAudio/VideoLineOut
jacks onthe rear panelofthe DVD-VCRto the
Audio/VideoLineInputs of your monitorTV.
,%-voF/
To Monitor TV Audio/Video inputs
2 Set W to Auxiliary Mode
Setyour monitorTV to"Aux,_'"Video,"or"Line/' Refer
toyour monitortelevisionowner's manualfor the
correctsetting
1
[ ooo
3 Connect Audio Out (DVDonly)
Using RCA audiocables,connecttheLEFT/RIGHT
LineOutjackson the rear panelof your DVD-VCR
to the LEFT/RIGHTAudio LineIn jackson your TV.
• Whenconnectingyour DVD-VCR toa TV with the
S-Video orComponentVideo Output, makesure
that youmusLuse theseLineOutjacksto obtain
audio.
• Toactivateyour connection, see "AItVideo Out"
on page 21.
_Ot,tPONENT'/IDEOOU_ I _°N_E'_'Of I
;()UT .:AUDIOi
I A
To Left Right Audio inputs
on Youl TV
iiilJ_::iiiii_i_iii__i_:!i!iiiiil¸¸iii¸__iiii_i¸¸¸ii_iiiiiiiil!_il¸¸¸iil!:!iii!iililiiiiiii:_!i¸¸¸!¸¸¸i!iiiiif!!iili:i!iiiiiiiiiiiiiiiiiiiiiiiiiiiiiiiiiiiiiiiiiiiiiiiiiiiiii!i¸ii
iiiii[_iii_i!_i:o:_t_!_gi!i!i!_otheri!i!i!_die_oi_iiiiiiiiiiiiiiiiiiiiiiiiiiiiiiiiiiiiiiiiiiiiiiiiiiiiiiiiiiiiiiiiiiiiiiiiiiiiiiiiiiiiiiiiiiiiiiiiiiiiiiiiiiiiiiiiii_
iiiiiiiiiii i B !:
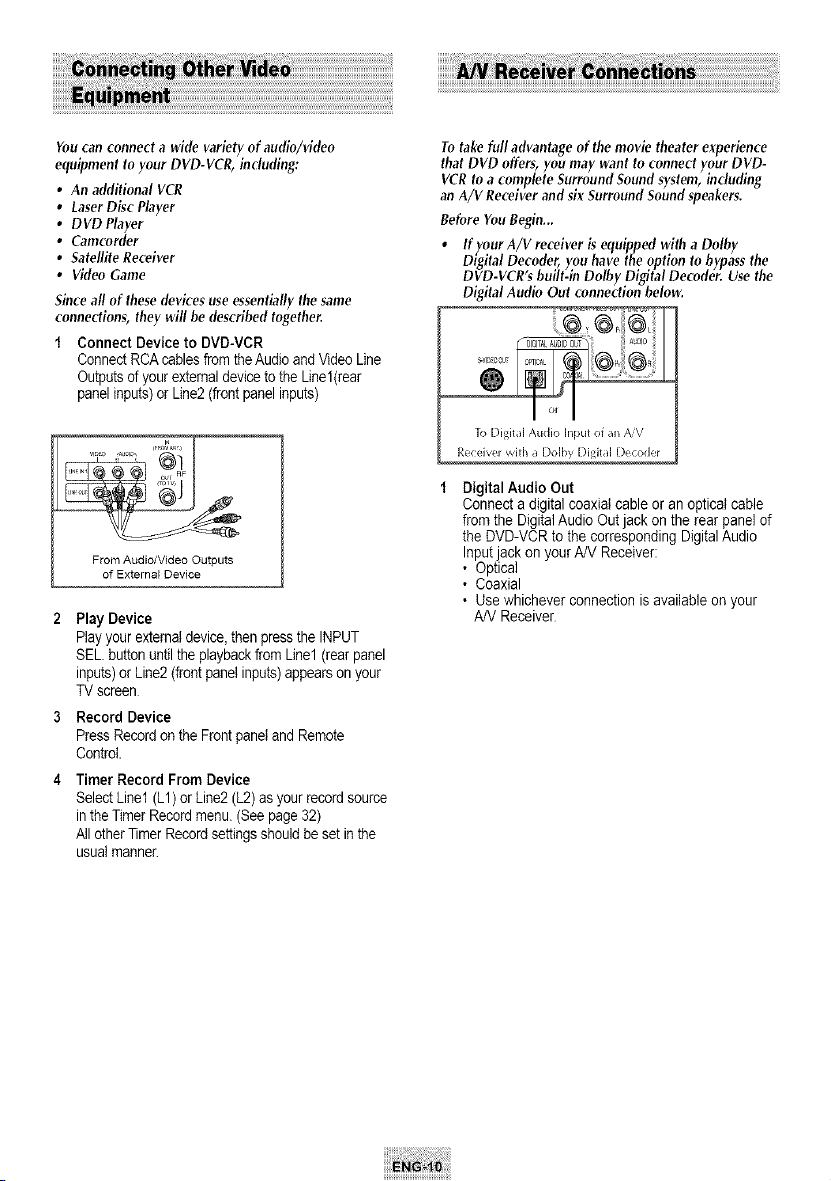
You can connect a wide variety of audio/video
equipment to your DVD-VCB, induding:
An additional VCB
LaserDisc Player
DVDPlayer
Camcorder
SatelliteReceiver
Video Game
Sinceallof thesedevicesuseessentiallythesame
connections,theywillbedescribedtogether.
t Connect Deviceto DVD-VCR
ConnectRCAcablesfromthe Audioand Video Line
Outputsof yourexternal deviceto the Linel(rear
panelinputs) orLine2(frontpanelinputs)
..... @iT
FromAudio/VideoOutputs
of ExternalDevice
Play Device
Playyour externaldevice,then pressthe INPUT
SEL.buttonuntil the playbackfromLine1(rear panel
inputs)orLine2(frontpanelinputs) appearsonyour
TV screen
3 RecordDevice
Press Recordon the Frontpanetand Remote
Control
4 TimerRecord From Device
SelectLine1(L1)orLine2 (L2)as your recordsource
inthe Timer Recordmenu.(Seepage32)
All other1]mer Recordsettingsshouldbe setin the
usualmanner
Totakefull advantageofthemovie theaterexperience
that DVD offers,youmay want to connectyourDVD-
VCBto a complete SurroundSoundsystem,including
an A/V Receiverand sixSurroundSoundspeakers.
BeforeYouBegin...
• Ifyour A/V receiver is equipped witha Dolby
Digital Decoder, you have the option to bypass the
DVD-VCB's built-in Dolby Digital Decoder. Use the
Digital Audio Out connection below.
To Digit tl Audio Input of an AiV
Re(eivel with t Dolby Digit tl Decodel
Digital Audio Out
Connecta digitalcoaxial cable oranopticalcable
fromthe DigitalAudio Outjack on the rearpanel of
the DVD-VCR tothe corresponding DigitalAudio
Inputjack on your A/V Receiver:
• Optical
• Coaxial
• Use whichever connection isavailable on your
AN Receiver
TheDVD-VCRusesone setof controls to operateboth
decks.Thefollowingbuttonsarehelpful in successfully
controllingeachdeck.
1 POWERButton
Press the POWER buttonon the remote controlor
frontpanelto turnon the DVD-VCR.
2 DVDButton
Pressthe DVD button on the remote control or
DVD-VCR button on the frontpanelwhen youwant
tocontrol the DVD deck.
• TheDVD indicator will light on the FrontPanel
Display toshowthat the DVD deck isselected
3 VCR Button
Pressthe VCR button on the remote control or
DVD-VCR button on the frontpanelwhen youwant
tocontrol the VCR deck.
• TheVCR indicator will light on the FrontPanel
Display toshowthat the VHS deck is selected.
4 INPUTeEL. Button
Pressthe INPUTSEL.button on the remote control
repeatedly to cycle through allof your input
sources, includingthe Tuner(Oh##),LineI (rear AV
input), and Line2(frontAVinput).
• Inputselection isonly available when the VCR
deck isselected.
Followthe instructionsbelow toplaybacka DVD.
1 Openthe DiscTray
PresstheOPEN/CLOSEbuttonon yourremotecontrolor
onthefrontpanelof the unitto turnon thepowerand
openthedisctray.
2 InsertaDisc
Putadiscinthe centerof thetray,withthelabel-printed
sidefacingup.
3 Closethe DiscTray
PresstheOPEN/CLOSEbuttonon yourremotecontrolor
onthefrontpanelofthe unitto closethedisctray
4 PlayaDVD
PresstheI-II(PLAY/PAUSE)buttonon yourremote
controloronthefrontpanelofthe unit.
,Mostdiscswillstartto playbackassoonasthetray
closes.
,Ifa DVDhasa MENU,the menumaypopup on%/
screen.
5 AdditionalDVDOptions
,Seepages16~21foradvancedDVDSetupoptions.
,Seepage22for specialDVDPlaybackfeatures.
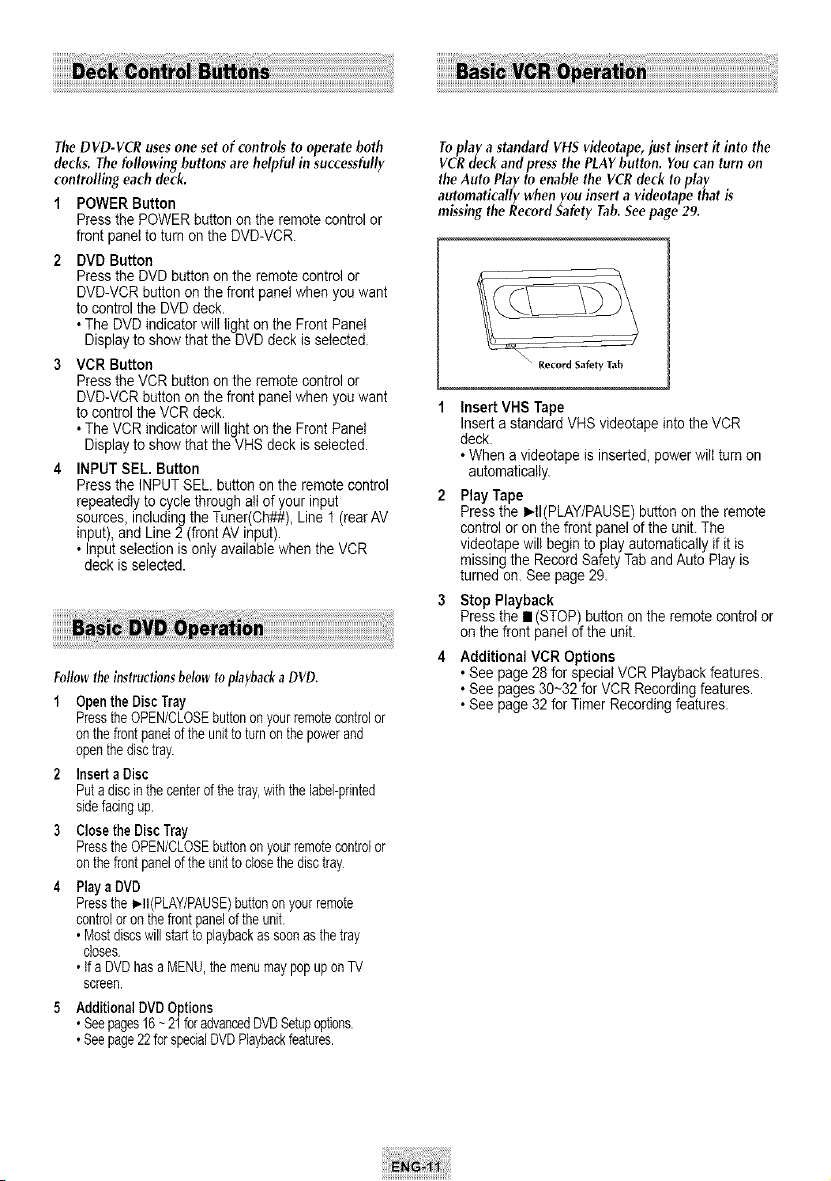
Toplay astandard VHS videotape, just insert it into the
VCR deck and press the PLAYbutton. You can turn on
the Auto Play to enable the VCR deck to pla}/
automatically when you insert a videotape that is
missing the Record Safety Tab.See page 29.
\" Record Safely Tab
Insert VHS Tape
Insert a standard VHSvideotape intothe VCR
deck.
• Whenavideotapeisinserted, powerwill turnon
automatically.
2 Play Tape
Press the I_-II(PLAY/PAUBE)button on the remote
controloron the frontpanelof the unit.The
videotape will begin toplay automaticallyif it is
missingtheRecord Safety Taband Auto Play is
tumed on. See page 29.
3 Stop Playback
Press the • (STOP) buttononthe remote controlor
on the frontpanelof the unit.
4 Additional VCR Options
• See page 28forspecial VCR Playbackfeatures.
• See pages30-32 forVCR Recordingfeatures.
• See page 32forTimer Recording features.
When watching TV using the DVD-VCR's built-in TV
tuner, use thebuttons below.
t TV/VCR
Press thisbutton to switch betweenyour TV's tuner
and the VCR's internattuner.
• Use thisbuttonwhen you want to watchTVwhile
in recordingmode.
2 Channel UP/DOWN
Use thesebuttonsto moveto the previousor the
nextchannel
3 0-9Buttons
Use thesebuttonsto selectthe desiredchannel
directly.
4 100 +Buttons
Press thisbutton to tune channels100 and above
First, pressthe 100+ button,then usethe numeric
buttons(0-9)toenter theremaining digits of the
channel number desired.
• Toactivatethis button, selectCableTV mode
duringtunerband setting. (See page 13)
5 (NFO, Button
Press thisbutton to display the current channel in
VCR mode.
• Thisbutton also worksand provides disc
information inDVDmode.
The on-screenmenus allow you toenableordg_able
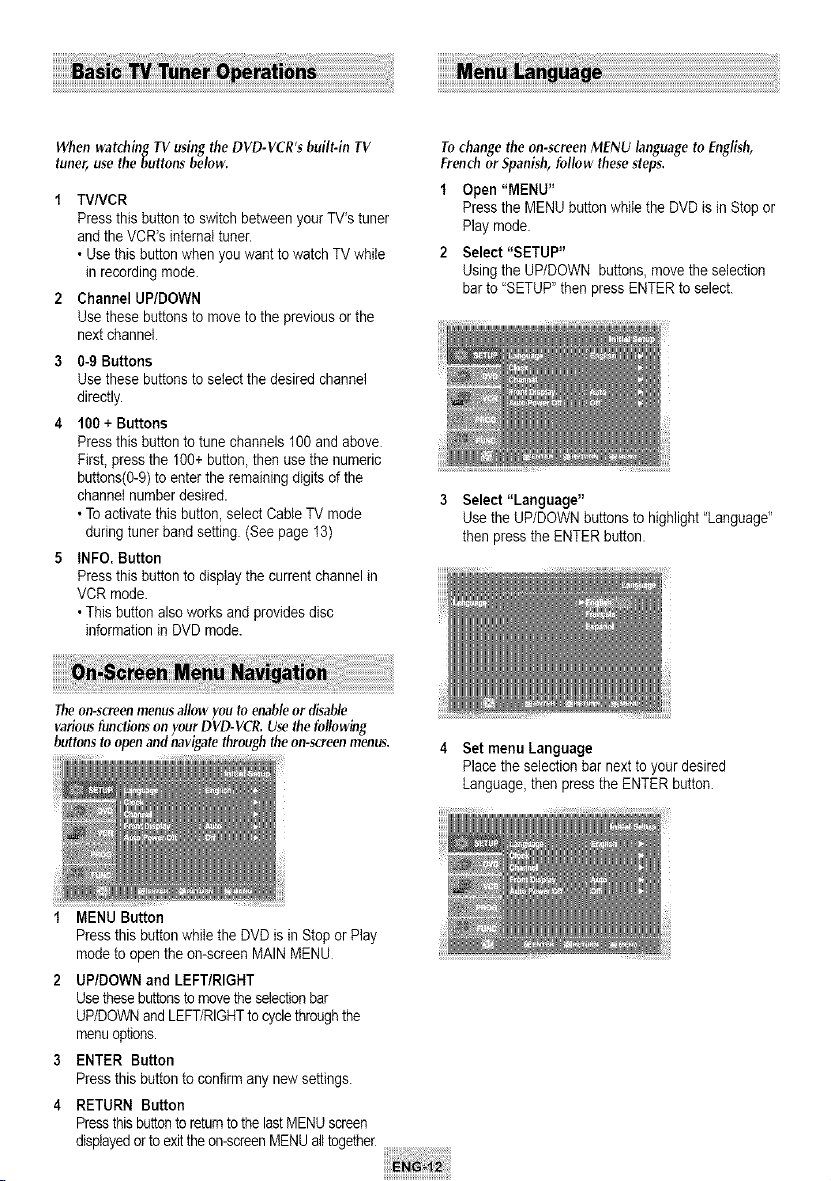
Tochangetheon-screenMENU languageto English,
FrenchorSpanish,followthesesteps.
1 Open "MENU"
Press the MENU buttonwhilethe DVD isin Stop or
Play mode.
2 Select "SETUP"
Using the UP/DOWN buttons, movethe selection
barto"SETUP"then pressENTER to select.
3 Select "Language"
Use the UP/DOWNbuttonstohighlight "Language"
then pressthe ENTERbutton.
variousfunctionson your D'VD-VCR.Usethefollowing
buttonsto openandnavigatethroughtheon-screenmenus.
1 MENU Button
4 Set menu Language
Place the selection barnext to your desired
Language,then presstheENTER button.
Press thisbutton whilethe DVDisinStop or Play
mode to open the on-screenMAIN MENU
2 UP/DOWN and LEFT/RIGHT
Usethesebuttonstomovethe selectionbar
UP/DOWNand LEFT/RiGHTto cycle throughthe
menuoptions.
3 ENTER Button
Pressthis button to confirm any new settings
4 RETURN Button
Pressthis buttonto returnto thelastMENUscreen
displayedorto exitthe on-screenMENUal_together_
IfAutoSetupfailsto settheDVD-VCR'sinternalclock
bylocatingalocal TV station,followthesestepstoset
thedateand timemanually.
NOTE:FuraccurateTimerRecording,yourDVD-VCR's
internaldockmustbesetcorrectly.
1 Open"MENU"
Press the MENU buttonwhilethe DVD isinStop or
Play mode
2 Select "SETUP"
Using the UP/DOWN buttons, movethe selection
barto "SETUP"then pressENTER to select.
3 Select "Clock"
Use the UP/DOWN buttonsto highlight"Ctock"
then pressthe ENTERbutton.
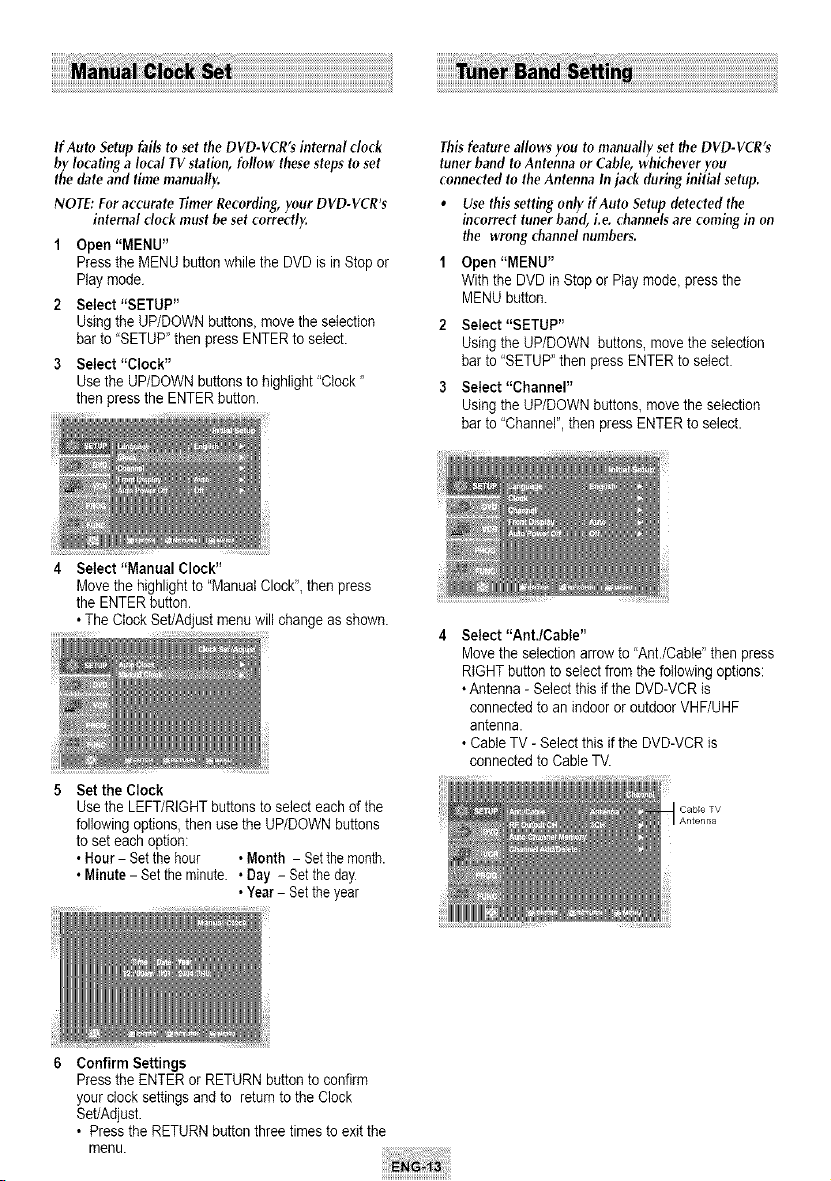
4 Select "Manual Clock"
Thisfeature allows you to manually setthe DVD-VCR's
tuner band to Antenna or Cable, whichever you
connected to the Antenna In jack during initial setup.
• Use this setting only if Auto Setup detected the
incorrect tuner band, i.e. channels are coming in on
the wrong channel numbers.
"1 Open "MENU"
With the DVD in Stop or Play mode, press the
MENU button.
2 Select "SETUP"
Using the UP/DOWN buttons, movethe selection
barto"SETUP"then pressENTER toselect.
3 Select "Channel"
Using the UP/DOWN buttons, movetheselection
barto"Channel",then pressENTER to select.
Movethe highlight to"ManualClock",then press
the ENTERbutton.
• TheClock Set/Adjust menu wiltchange as shown.
5 Setthe Clock
Select "Ant./Cable"
Movethe selection arrow to "Ant./CabW'then press
RIGHT button to selectfromthe followingoptions:
• Antenna- Select this if the DVD-VCR is
connectedtoan indooror outdoor VHF/UHF
antenna.
• CableTV-Select this if the DVD-VCR is
connectedtoCableTV.
Use the LEFT/RIGHTbuttons to selecteach of the
followingoptions, then usethe UP/DOWN buttons
toseteachoption:
• Hour- Set the hour • Month - Setthemonth.
• Minute- Set the minute. •Day - Set the day
• Year- Setthe year
6 Confirm Settings
Press the ENTER orRETURNbuttontoconfirm
your clock settingsand to returntothe Clock
Set/Adjust.
• Press the RETURNbutton three times to exitthe
menu.
Use thisfeature if DVD-VCR is connected to TV using
RFantenna cable.
Open "MENU"
Withthe DVD inStop or Play mode, pressthe
MENU button.
2 Select "SETUP"
Using the UP/DOWN buttons, movethe selection
barto"Setup"then pressENTER to select.
3 Select "Channel"
Using the UP/DOWN buttons,move the selection
barto"Channel,"then pressENTER to select
Auto ChannelMemory will automatically seekand store
allactive channelsinyourarea.
1 Open"MENU"
Withthe DVD in Stopor Play mode, pressthe
MENU button.
2 Select "SETUP"
Using the UP/DOWN buttons, move theselection
barto "SETUP"then pressENTERto select.
3 Select "Channel"
Using the UP/DOWN buttons, movethe selection
barto "Channel", then pressENTER to select
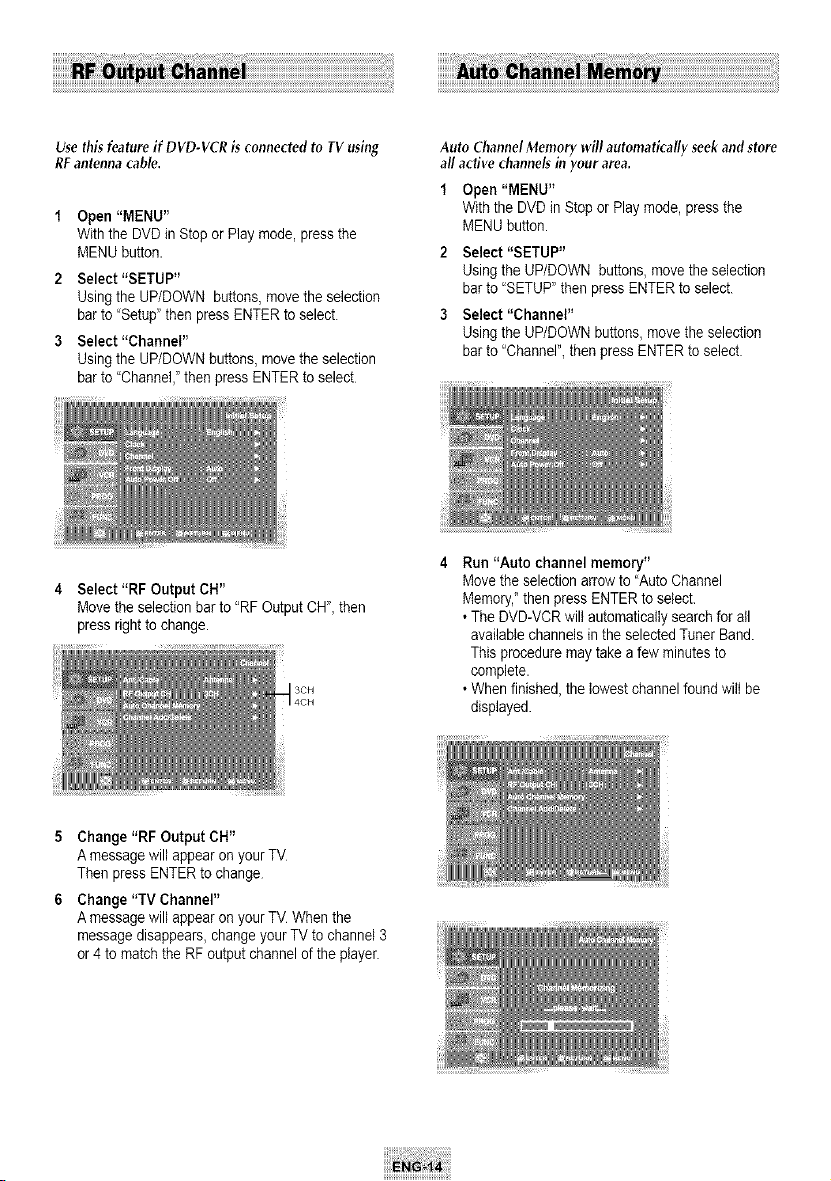
4 Select"RF Output CH"
Movethe selection barto"RF OutputCH", then
pressright to change.
Run"Auto channel memory"
Movethe selection arrow to"Auto Channel
Memory,_'then pressENTER to select.
• TheDVD-VCRwiltautomatically search for all
available channels in the selected Tuner Band.
Thisprocedure maytake afew minutesto
complete.
• Whenfinished,the lowest channel found willbe
displayed.
5 Change "RF Output CH"
A messagewillappear on your TV
ThenpressENTERtochange
6 Change"TV Channel"
A messagewillappear on your TV Whenthe
message disappears,change your TV to channel 3
or4tomatch the RFoutput channel of the player.
Use this feature if Auto Channd Searchmissed a
channd that you would like toadd or delete.
Open"MENU"
Withtile DVD in Stopor Play mode,pressthe
MENU button.
2 Select "SETUP"
Using the UP/DOWN buttons, movethe selection
barto 'SETUP"then pressENTER to select.
3 Select "Channel"
Using the UP/DOWN buttons, movethe selection
barto "Channel", then press ENTERtoselect
4 Select "Channel Add/Delete"
You can set the Front Panel Display to be brightall the
time, dim all the time, dim during power off.
Open" MENU"
Withthe DVD inStop or Play mode, pressthe
MENU button
Select "SETUP"
Using the UP/DOWN buttons, movethe selection
barto"SETUP_'then pressENTER toselect.
Movethe selection barto"ChannelAdd/Delete,"
then pressENTER toselect.
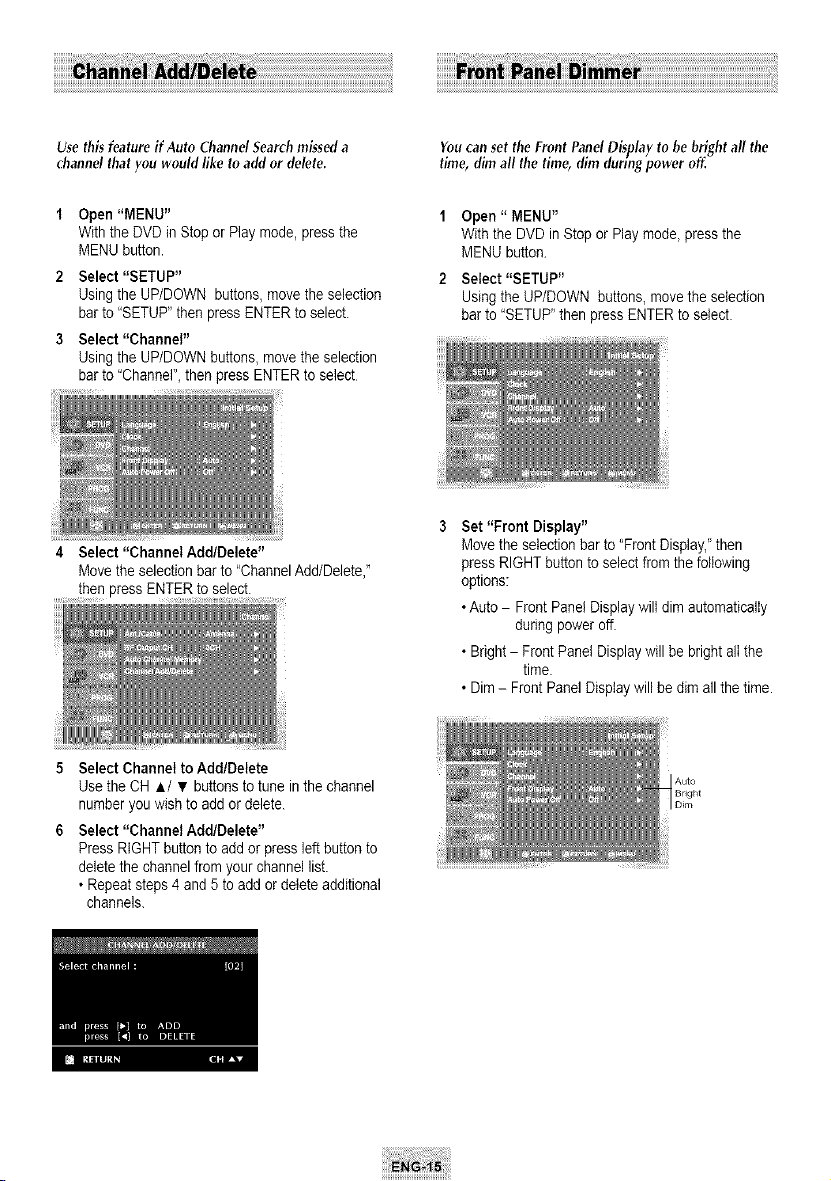
Set "Front Display"
Movethe selection barto"Front Display,"then
pressRIGHT button toselectfromthe following
options:
• Auto - FrontPanel Displaywill dim automatically
during poweroff.
• Bright- FrontPanelDisplaywill be bright allthe
time.
• Dim- Front Panel Displaywiltbe dim allthe time.
5 Select Channel toAdd/Detete
Use the CHA/• buttons to tune inthechannel
number youwishto add ordelete.
6 Select "Channel Add/Delete"
PressRIGHTbutton toadd or press left button to
deletethe channelfromyour channel list.
• Repeatsteps 4and 5to add ordeleteadditional
channels.
Bright
Open "MENU"
Withthe DVD ill Stop or Play mode, pressthe
MENU button.
2 Select "SETUP"
Using the UP/DOWN buttons,move the selection
barto"SETUP" then pressENTER toselect.
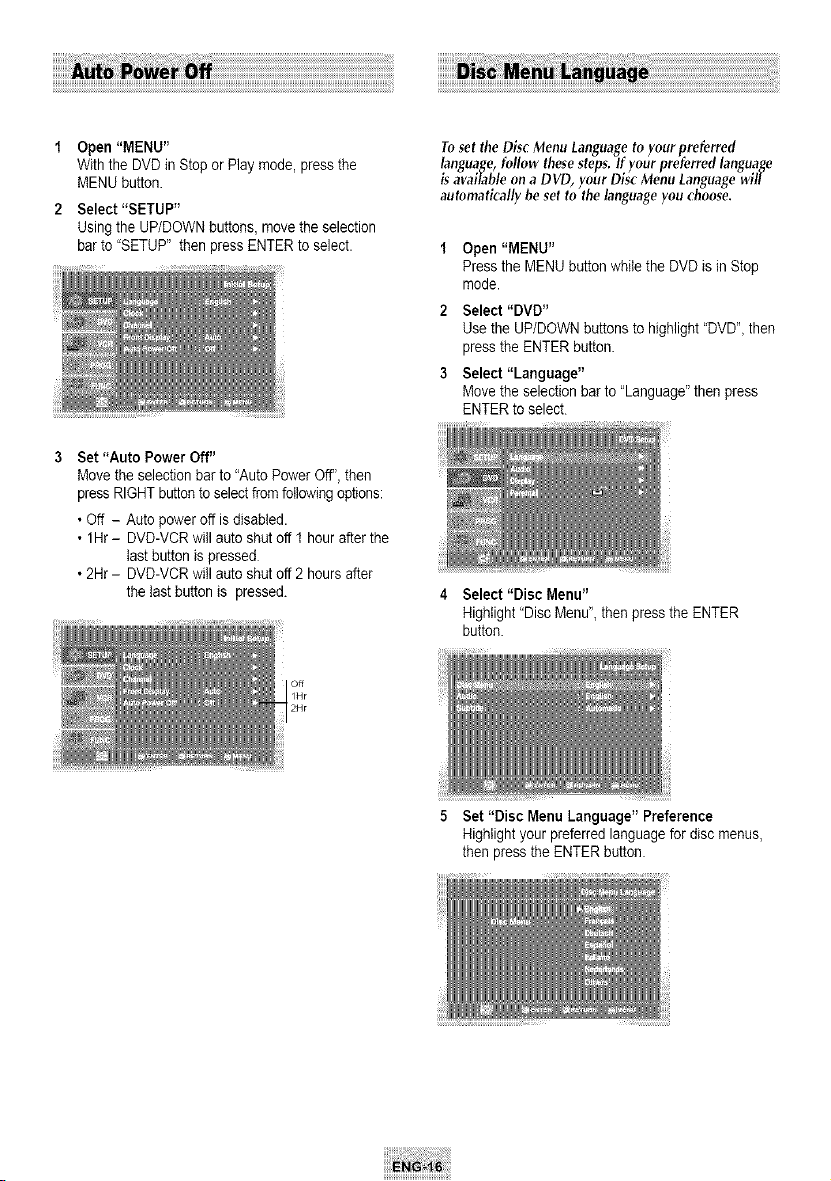
3 Set "Auto Power Off"
Movethe selection barto"Auto PowerOft', then
pressRIGHTbuttonto selectfrom followingoptions:
• Off - Auto poweroff isdisabled.
• 1Hr- DVD-VCR will auto shutoff I hourafter the
lastbuttonispressed
• 2Hr- DVD-VCR will auto shutoff 2hours after
the last button is pressed.
Toset the Disc Menu Languageto yourpreferred
language,followthesesteps.Ifyourpreferredlanguage
isavailable onaDVD, yourDiscMenuLanguagewill
automaticallybe setto thelanguageyouchoose.
t Open "MENU"
Press the MENU buttonwhilethe DVD isill Stop
mode.
2 Select "DVD"
Use the UP/DOWNbuttonsto highlight'DVD', then
pressthe ENTER button.
3 Select "Language"
Movethe selection barto "Language"then press
ENTER to select.
4 Select "Disc Menu"
Highlight"DiscMenu",then pressthe ENTER
button.
5 Set"Disc MenuLanguage" Preference
Highlightyour preferredlanguage fordisc menus,
then press theENTER button.

!!!!!!!!!! i
TosettheAudio Languageto yourpreferredlanguage,
followthesesteps.If yourpreferredlanguageis
available on a DVD, yourAudioLanguagewill
automaticallybe setto thelanguageyouchoose.
Toset the Subtitle Languageto your preferred language,
follow thesesteps.If your preferred language is
available on a DVD, your Subtitle Language will
automatically be set to the languageyou choose.
1 Open"MENU"
Press the MENU buttonwhilethe DVD isinStop
mode
2 Select "DVD"
Use the UP/DOWN buttonsto highlight"DVD" then
pressthe ENTER button.
3 Select "Language"
Movethe selection barto "Language"then press
ENTER to select.
Open "MENU"
Press the MENU buttonwhilethe DVD isinStop
mode.
2 Select "DVD"
Use the UP/DOWN buttons tohighlight "DVD"
then pressthe ENTER button.
3 Select "Language"
Movethe selection barto"Language"then press
ENTER to select.
4 Select "Audio"
Highlight"Audio," then pressthe ENTER button.
4 Select "Subtitle"
Highlight"Subtitle",then presstheENTER button
5 Set"Audio Language" Preference
Highlightyour preferredlanguage foraudio
soundtracks,then pressthe ENTER button
5 Set "Subtitle Language" Preference
Highlightyour preferredlanguagefor subtitles,then
pressthe ENTER button.

If your A/V receiver is equipped with a Dolby Digital
decoder, your DVD-VCR can output Dolby Digital 5.?
sound, butyou MUST enable this feature in the menu
system to prevent damage to your speakers.
NOTE: Select "Bitstream" ONLY ifyou have connected
a Dolby Digital-equipped A/V receiver to the
Digital Output (coaxial) on the DVD-VCR rear
panel.
Open "MENU"
Press the MENU buttonwhilethe DVD isin Stop
mode.
2 Select "DVD"
Use the UP/DOWN buttons tohighlight 'DVD"
then press theENTER button.
3 Select "Audio"
Highlight"Audio",then pressthe ENTER button.
If your A/V receiver g equipped with a DTS decoder,
your DVD-VCR can output DTS digital sound, but you
MUST enable this feature in the menu system.
NOTE: Select "On" ONLY if you have connected a
DTS-equipped A/V receiver to the Digital audio
Out (coaxial) on the DVD-VCR rear panel.
Open"MENU"
Press the MENU buttonwhilethe DVD isin Stop
mode.
2 Select "DVD"
Use the UP/DOWN buttons to highlight 'DVD"
then press theENTER button.
3 Select "Audio"
Highlight"Audio", then pressthe ENTER button.
4 Set"Digitat Output"
Highlight'DigitalOutput"then pressthe RIGHT
button toselectone of the followingoptions:
• PCM - Touse your DVD with an AN
receiver withoutaDolbyDigital
decoder.
• Bitstream-To useyour DVD with anA/V
receiver with aDolby Digital decoder.
Set "DTS"
Highlight "DTS" then press theRIGHT button to
selectoneof the followingoptions:
• Off- TouseyourDVD with an AN receiver
NOT equippedwith a DTS decoder
• On- Touseyour DVD with an AN receiver
equipped with aDTS decoder
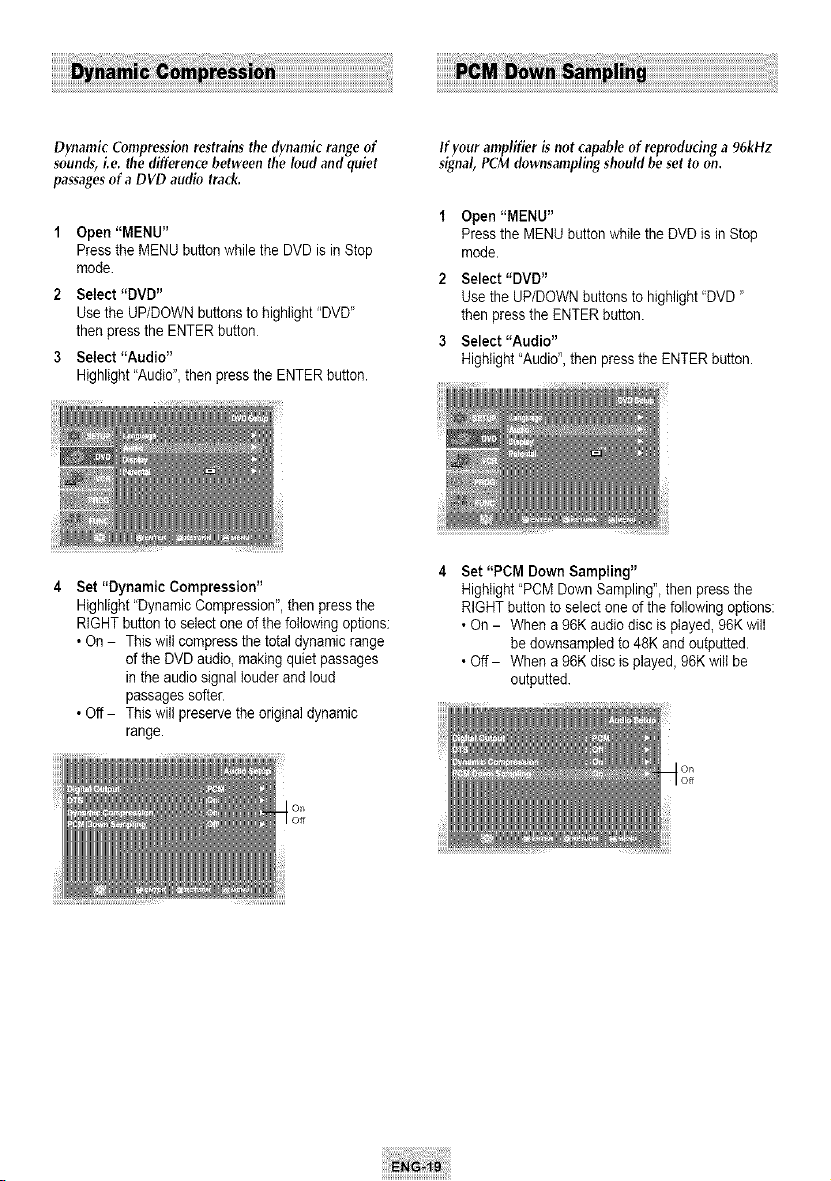
Dynamic Compressionrestrains the dynamic rangeof
sounds, i.e. the difference between the loud and quiet
passagesof aDVD audio track.
"1 Open"MENU"
Press the MENU buttonwhilethe DVD isinStop
mode
2 Select "DVD"
Use the UP/DOWN buttonsto highlight"DVD"
then pressthe ENTERbutton
3 Select "Audio"
Highlight"Audio", then pressthe ENTER button.
ff your amplifier isnot capable of reproducing a 96kHz
signal, PCM dewnsampling should be set to on.
Open"MENU"
Press the MENU buttonwhilethe DVD isinStop
mode.
2 Select "DVD"
Use the UP/DOWN buttons tohighlight "DVD"
then pressthe ENTER button.
3 Select "Audio"
Highlight"Audio", then press theENTER button.
4 Set "Dynamic Compression"
Highlight"Dynamic Compression",then press the
RIGHT button to selectone of the followingoptions:
• On - This wiltcompressthe totaldynamicrange
ofthe DVD audio,making quietpassages
in the audiosignallouder and loud
passages softer.
• Off - This will preservethe original dynamic
range.
Set "PCM DownSampling"
Highlight"PCMDownSampling",then pressthe
RIGHT button to selectone ofthe following options:
• On- When a 96K audiodisc isplayed, 96K will
be downsampiedto 48K and outputted.
• Off- When a 96K disc isplayed, 96Kwill be
outputted.
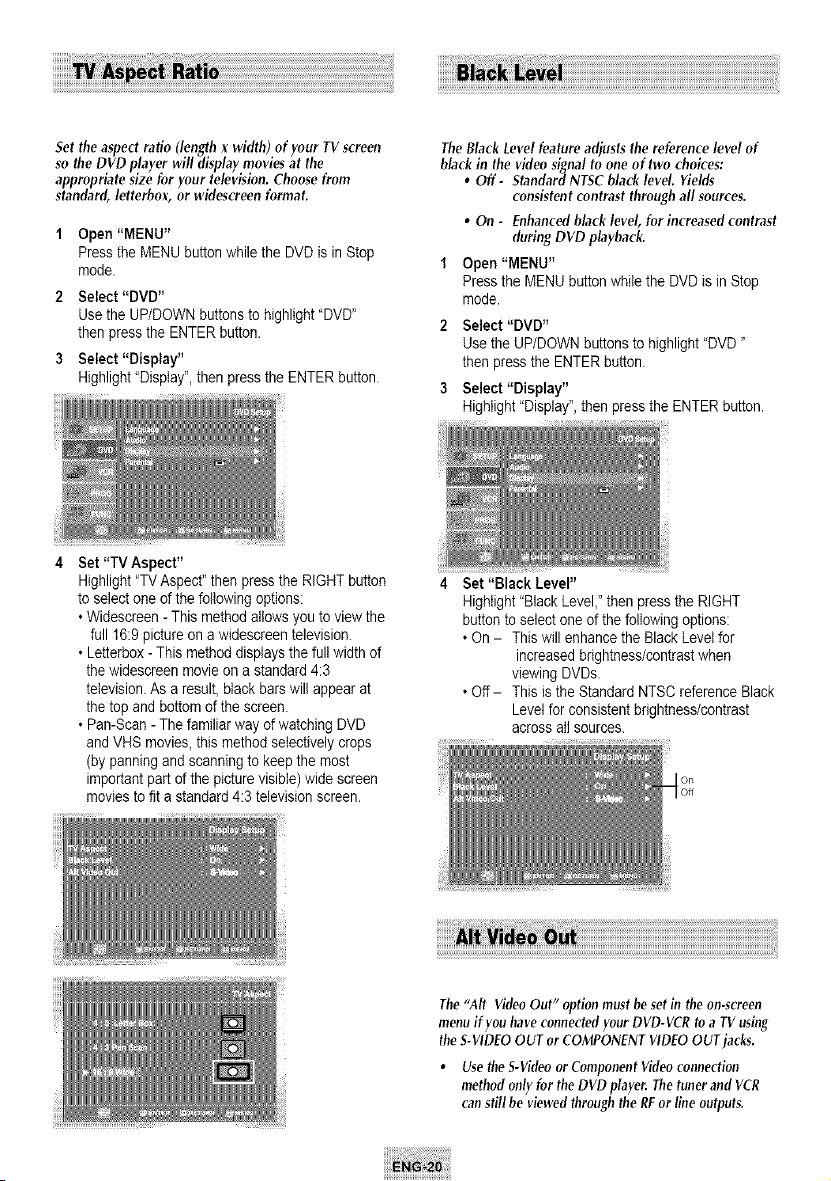
Set the aspectratio (length x width) of your TV screen
so the DVD player will display movies at the
appropriate size for your television. Choose from
standard, letterbox, or widescreen format.
Open"MENU"
Press the MENU buttonwhilethe DVD isin Stop
mode.
2 Select "DVD"
Usethe UP/DOWNbuttonsto highlight"DVD"
then press theENTER button.
3 Select "Display"
Highlight"Display", then pressthe ENTER button.
4 Set "TV Aspect"
The Black Level feature adjusts the reference level of
blackin the video signalto one of two choices:
• Off - Standard NTSC black level. Yields
consistent contrast through all sources.
• On - Enhancedblack level, for increased contrast
during DVD playback.
1 Open "MENU"
Press the MENU button while the DVD is in Stop
mode.
2 Select "DVD"
Use the UP/DOWN buttons to highlight "DVD"
then press theENTER button.
3 Select "Display"
Highlight"Display'_,then pressthe ENTER button.
Highlight"TV Aspect" then pressthe RIGHT button
toselectone of the followingoptions:
• Widescreen - Thismethod allows youtoviewthe
fullt6:9 picture on awidescreentelevision
• Letterbox- Thismethoddisplaysthe fullwidthof
the widescreenmovie on a standard4:3
television.As a result,blackbars will appear at
the top and bottom ofthe screen.
• Pan-Scan -Thefamiliar way of watching DVD
and VHSmovies,thismethodselectively crops
(by panningand scanningto keepthe most
importantpartof the picturevisible) widescreen
moviesto fit a standard4:3 televisionscreen.
4 Set "Black Level"
Highlight"Black Level," then pressthe RIGHT
buttonto selectone ofthe followingoptions:
• On - This will enhance the BlackLevel for
increasedbrightness/contrastwhen
viewing DVDs.
• Off- Thisisthe Standard NTSC reference Black
Levelfor consistent brightness/contrast
across atlsources.
i!i!i!i!i!i!i!i!i! ii!i!i!i!i!i!i!i!¸i!i!i!i!i!i!i!i!¸i!i!i!i!i!i!i!i!¸i!i!i!i!i!i!i!i!¸i!i!i!i!i!i!i!i!¸i!i!i!i!i!i!i!i!¸i!i!i!i!i!i!i!i!¸i!i!i!i!i!i!i!i!¸i!i!i!i!i!i!i!i!¸i!i!i!i!i!i!i!i!¸i!i!i!i!i!i!i!i!¸i!i!i!i!i!i!i!i!¸i!i!i!i!i!i!i!i!¸i!i!i!i!i!i!i!i! ill
The"Air VideoOut" optionmustbesetin the on-screen
menuif youhaveconnectedyour DVD-VCRtoa TV using
theS-VIDEOOUT orCOMPONENTVIDEOOUTjacks,
• Use the S-VideoorComponent Videoconnection
method onlyfor theDVD player, Thetuner and VCR
canstillbe viewed throughtheREorlineoutputs,
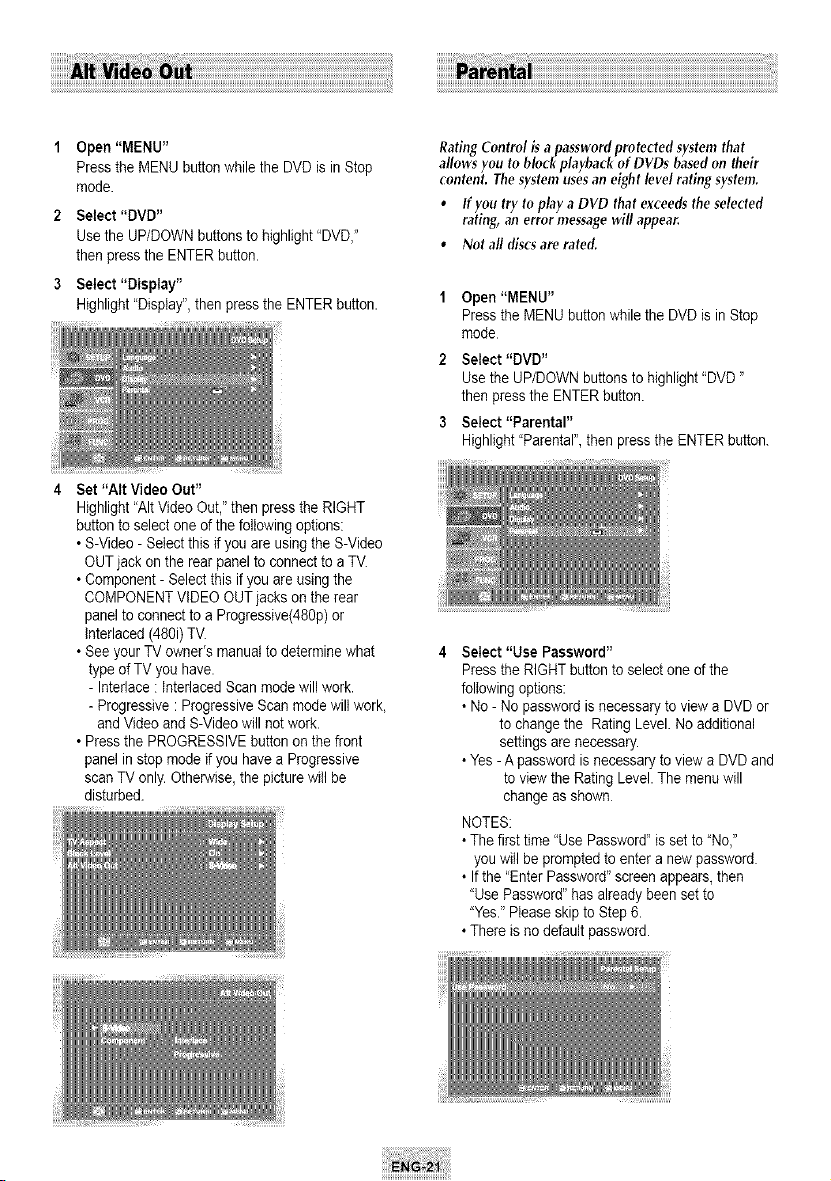
1 Open"MENU"
Press the MENU buttonwhilethe DVD isinStop
mode.
2 Select "DVD"
Use the UP/DOWNbuttonsto highlight"DVD,"
then pressthe ENTERbutton.
3 Select "Display"
Highlight"Display", then pressthe ENTER button.
4 Set "Att VideoOut"
Rating Control isapassword protected system that
allows you to block playback of DVDs basedon their
content. Thesystem uses an eight level rating system.
• If you try to play aDVD that exceeds the selected
rating, an error message will appear.
• Not all discsare rated.
Open "MENU"
Press the MENU buttonwhilethe DVD is inStop
mode
2 Select "DVD"
Use the UP/DOWN buttons tohighlight "DVD"
then pressthe ENTER button.
3 Select "Parental"
Highlight"Parental",then pressthe ENTER button.
Highlight"AItVideo Out," then pressthe RIGHT
button to selectoneof the followingoptions:
• S-Video - Selectthis if youare using the S-Video
OUT jack on the rearpanelto connect to a TV.
• Component- Selectthisif you areusing the
COMPONENTVIDEO OUT jacks on the rear
panelto connect toa Progressive(480p)or
Interlaced (480i) TV.
• See your TV owner's manual todeterminewhat
typeofTV you have.
- Interlace :InterlacedScanmode will work.
- Progressive: ProgressiveScanmodewiltwork,
and Video and S-Video will not work.
• Press the PROGRESSIVEbutton on the front
panelin stopmode if you have a Progressive
scan TVonly. Otherwise,the picture willbe
disturbed.
Select "Use Password"
Press the RIGHT button to selectone ofthe
followingoptions:
• No - Nopassword isnecessary to viewaDVD or
tochange the Rating Level. Noadditional
settingsarenecessary.
• Yes-A password isnecessaryto view aDVD and
toview the RatingLevel. Themenu will
change as shown
NOTES:
• Thefirsttime "UsePassword"issetto"No,"
youwillbe promptedto entera new password
• If the "EnterPassword"screen appears,then
"UsePassword"hasalreadybeen setto
"Yes."Pleaseskip toStep6.
• Thereisnodefaultpassword.
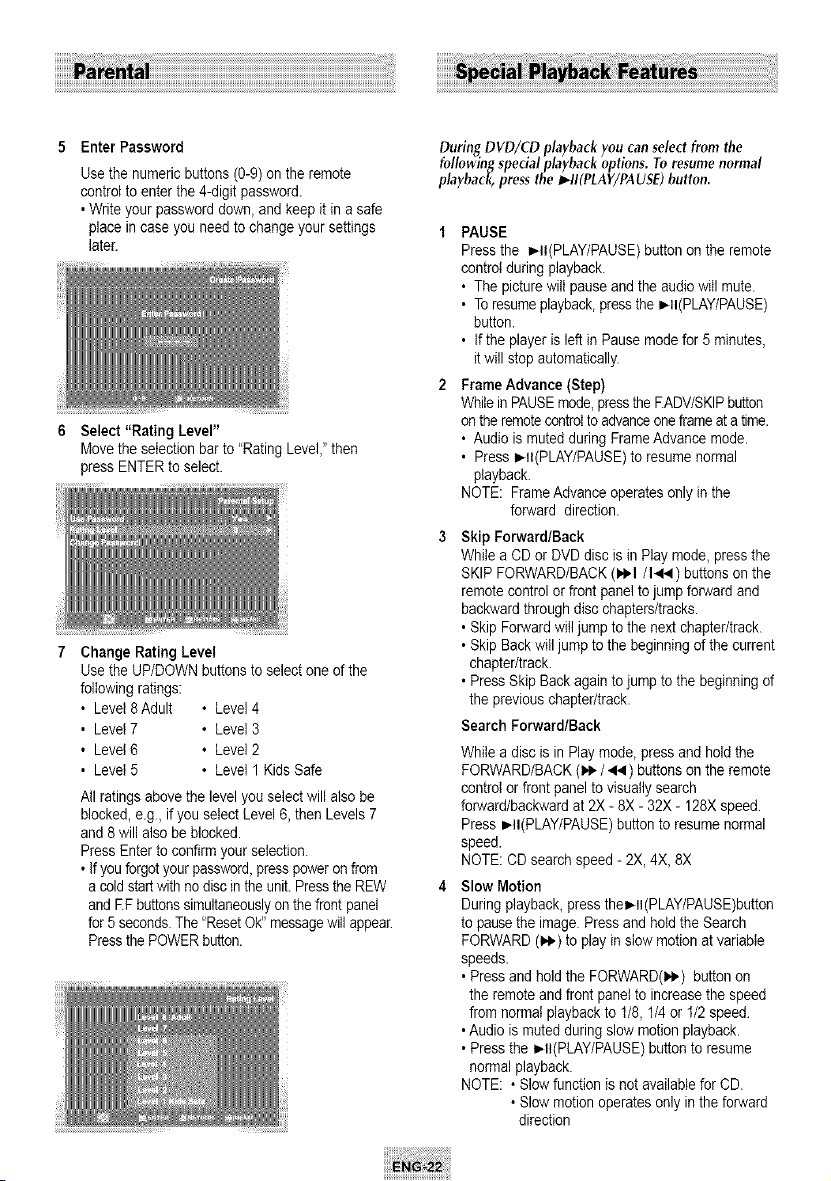
Enter Password
Use the numeric buttons (0-9)on the remote
controlto enter the 4-digitpassword.
,Writeyour password down, and keepit in asafe
place incase youneed to change your settings
later.
Select "Rating Level"
Movethe selection barto"Rating Level,"then
pressENTER to select.
7 Change Rating Level
Use the UP/DOWN buttons toselectone of the
followingratings:
, Level 8Adult • Level 4
, Level 7 • Level 3
, Level 6 • Level 2
, Level 5 • Level 1 Kids Safe
All ratingsabovethe level youselect wiltalso be
blocked,e.g, if you selectLevel 6,then Levels7
and 8 will also be blocked.
Press Enter to confirmyour selection.
• Ifyouforgot your password,presspower on from
a cold start withnodiscin the unit.Press the REW
and EF buttonssimultaneouslyonthe frontpanel
for5secondsThe"ResetOk" messagewill appear
Pressthe POWERbutton.
During DVD/CD playbackyoucanselectfromthe
followingspecialplaybackoptions. Toresumenormal
playback,pressthe _II(PLAY/PAUSE)button.
t PAUSE
Press the _II(PLAY/PAUSE)button on the remote
controlduringplayback.
, Thepicture will pauseand theaudio will mute.
• Toresumeplayback,pressthe I_II(PLAY/PAUSE)
button.
, If the playeris left in Pause mode for 5minutes,
it will stopautomatically.
2 FrameAdvance (Step)
Whileill PAUSEmode,presstheF.ADV/SKIPbutton
on the remotecontrolto advanceoneframeat a time.
, Audio ismutedduring FrameAdvancemode.
, Press I_II(PLAY/PAUSE)to resumenormal
playback.
NOTE: FrameAdvanceoperatesonlyin the
forward direction.
Skip Forward/Back
While aCDorDVD disc isin Play mode,press the
SKIPFORWARD/BACK(1_1/I,4) buttonson the
remote controlorfront panelto jumpforwardand
backward through disc chapters/tracks.
, Skip Forward will jumpto the nextchapter/track.
• Skip Back will jumpto the beginningofthe current
chapter/track.
, Press Skip Back againto jump to the beginningof
the previouschapter/track.
Search Forward/Back
While adisc isin Play mode, pressand holdthe
FORWARD/BACK(_IP-/ 44 ) buttons on the remote
controlorfrontpaneltovisually search
forward/backwardat2X -8X -32X - 128X speed
Press_II(PLAY/PAUSE)buttontoresumenormal
speed.
NOTE: CDsearchspeed-2X, 4X, 8X
Slow Motion
During playback, pressthe_ll(PLAY/PAUSE)button
topausethe image. Press and holdthe Search
FORWARD(_1_-)toplay in slowmotion at variable
speeds.
, Press and holdthe FORWARD(I*,) buttonon
the remote and frontpaneltoincreasethe speed
fromnormal playbackto t/8, 1/4 or 1/2 speed
,Audio ismutedduring slowmotion playback.
• Press the I_It(PLAY/PAUSE)button to resume
normal playback.
NOTE: • Slowfunction isnot available forCD.
• Slowmotionoperatesonlyintheforward
direction

5 Stop/Resume
• Press the STOPbuttononcetostopplayback. To
resume the DVD/CD from the pointwherethe
disc stopped, pressthe _II(PLAY/PAUSE)
button.
• Press the • (STOP) button twicetocompletely
stopplayback.Thenext timeyou pressI_11
(PLAY/PAUSE),the disc will start over fromthe
beginning.
Many DVDs feature their own menu systems,where
you can select Titles,Chapters, Audio Tracks,Subtitles,
and special disc features, such as movie trailers, and
information on the cast. Use thesebuttons to make
selections in the Disc menus.
1 DISC Menu
Press to access the DVD's Disc menu,if applicable.
2 Press UP/DOWN and LEFT/RIGHTto navigate
through DVD's Disc menu options.
• PressUP/DOWN and LEFT/RIGHT tohighlight
menu choices.
3 ENTER Button
Press tomakeyour selectionsin the Disc menu.
Press the EZ VIEW button on the front panel.
• Thescreensize changes when the button is
pressed repeatedly.
• Thescreenzoommode operatesdifferently
depending on the screensetting intheinitial setup
menu.
• Toensurecorrect operationofthe EZVIEW
button,youshould setthecorrectaspect ratio in
the initial setup.(See the page 20)
Ifyou areusing a16:9 TV
- For 16r9 aspect ratio discs
,WideScreen
Displaysthe content of the DVD title in 16:9
aspect ratio.
• Screen Fit
Thetop and bottomof thescreenare cut off.
Whenplaying a2.35:1aspect ratio disc, the
blackbars at the top and bottom of the screen
will disappear.Thepicturewill look vertically
stretched. (Dependingon the typeof disc, the
blackbars maynot disappear completely.)
• Zoom Fit
Thetop, bottom,left and right of the screenare
cut off and the centralportionofthe screen is
enlarged.
' I
II ..................
- For4:3 aspect ratio discs
• Normal Wide
Displaysthe content of the DVD title in 16:9
aspect ratio.
Thepicturewill look horizontallystretched
•ScreenFit
Thetopandbottomofthescreenarecutoffand
thefulIscreenappearsThepicturewilllook
verticallystretched.
•ZoomFit
Thetop,bottom,leftandrightofthescreenare
cutoffandthecentraIportionofthescreenis
enlarged.
•VerticalFit
Whena4:3DVDisviewedona16:9TV,black
barswillappearattheleftandrightofthescreen
inordertopreventthepicturefromlooking
horizontallystretched.
Ifyouareusinga4:3TV
-For t6:9 aspect ratiodiscs
• 4:3 Letter Box
Displays the contentof the DVD titlein 16:9
aspect ratio.
Thebiack bars will appear at the top and bottom
of the screen
• 4:3 Pan Scan
Theleft and right of the screen arecut off and
displaysthe centralportion of the 16:9 screen
• Screen Fit
Thetop and bottomof the screen arecut oftand
the fullscreen appears Thepicture will look
verticallystretched.
• Zoom Fit
Whena4:3 DVD is viewedon a16:9TV,black
bars will appear atthe left and right of the screen
in order to preventthe picturefromlooking
horizontally stretched.
- For4:3aspect ratiodiscs
• Normal Screen
Displays the contentof the DVD titlein4:3aspect
ratio
• Screen Fit
Thetop and bottomof the screen arecut offand
the fullscreen appears Thepicture would Iook
verticallystretched.
• Zoom Fit
Thetop, bottom,left and right of the screenare
cut off and the centralportionofthe screen is
enlarged
Thisfunction maybehavedifferentlydepending on
the typeofdisc.
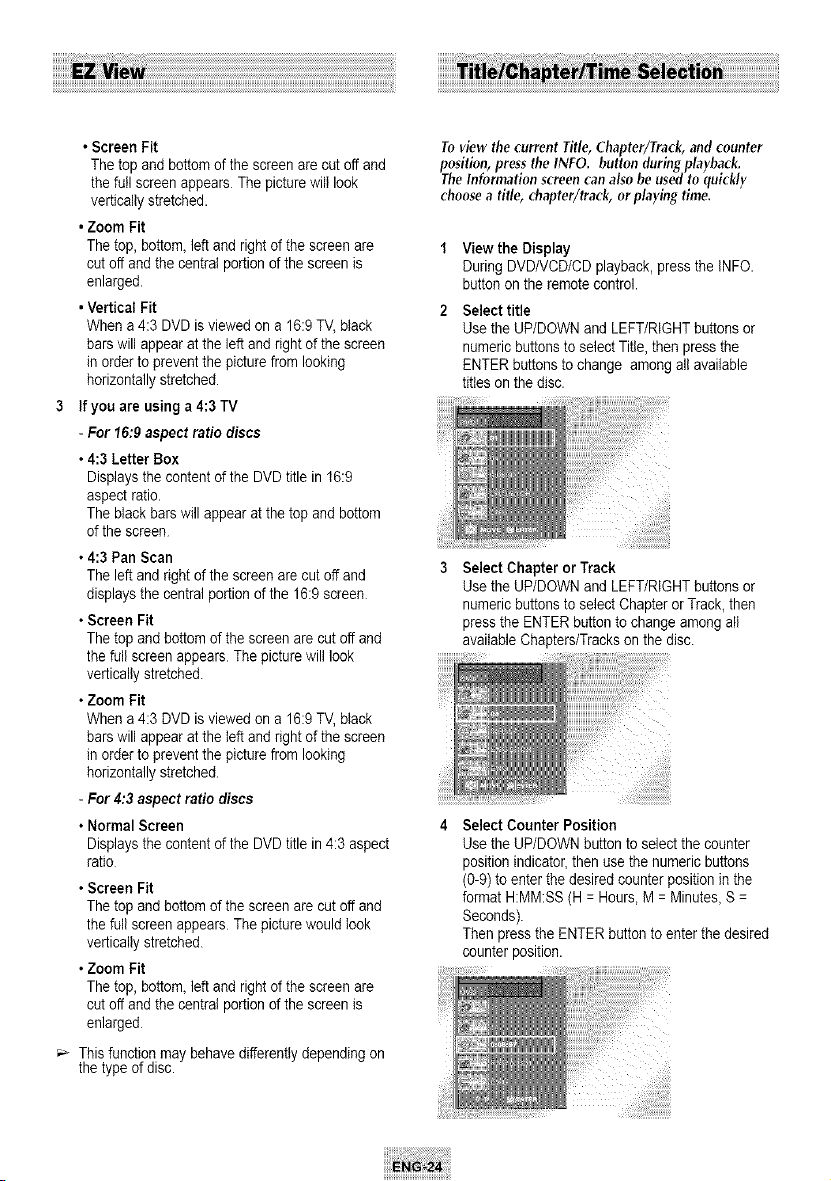
Toview the current title, Chapter/Track, and counter
position, press the INFO. button during playback.
The Information screencan also be used to quickly
choosea title, chapter/track, or playing time.
1 View the Display
During DVD/VCD/CDplayback, pressthe INFO.
buttonon the remote control.
Select title
Use the UP/DOWN and LEFT/RIGHTbuttons or
numeric buttonsto selectTitle,then press the
ENTER buttons tochange among allavailable
titles on the disc.
iiiiiiii b_
3 Select Chapter or Track
Use the UP/DOWN and LEFT/RIGHTbuttons or
numeric buttonsto selectChapter or Track, then
pressthe ENTER button tochange among atl
available Chapters/Tracksonthe disc.
iiiiiiiiiiiii
Select Counter Position
Use the UP/DOWN button to selectthe counter
positionindicator,then usethe numericbuttons
(0-9) to enter thedesired counterpositionin the
formatH:MM:SS (H= Hours, M =Minutes_S =
Seconds).
Thenpressthe ENTER buttontoenter the desired
counter position.
Tomakethescreendisappear,presstheINFO
buttonagain.
i!li
Toaccessthedesired titlewhenthere ismorethan
one inthedisc.Forexample,if there ismorethan
one movie on aDVD,each moviewillbe identified
MostDVD discs are recorded inchapterssothat
you can quicklyfind aspecificpassage.
Allowsplayback of thefilmfrom adesiredtime
You must enter thestartingtimeasareference.
Refers to thelanguage of thefilmsoundtrack.In the
example,the soundtrackisplayed in English5.1CH.
ADVD disc can haveuptoeight different
soundtracks.
Refers to thesubtitle languagesavailable in the
...........................................disc Youwill beabletochoosethesubtitles
language or, ifyou prefer,turnthemoff fromthe
screen. A DVD disc can have up to 32different
subfitles
;'_ When in VCD 2.0 mode (MENU ON), this function dose not
work. Use the DISC MENU button in VCD 2.0 mode to
select MENU ON or OFF.
Some DVDsprovide subtitles in one ormore languages.
You canuse the SUBTITLEbutton to quickly view and
change settings.
1 OpenSubtitle Menu
During playback, pressthe SUBTITLEbutton
2 Set Subtitle Language
Usethe LEFT/RIGHTbuttonsto selectfromthe
availablesubtitlelanguages
• Subtitle languagesarerepresented by
abbreviations.
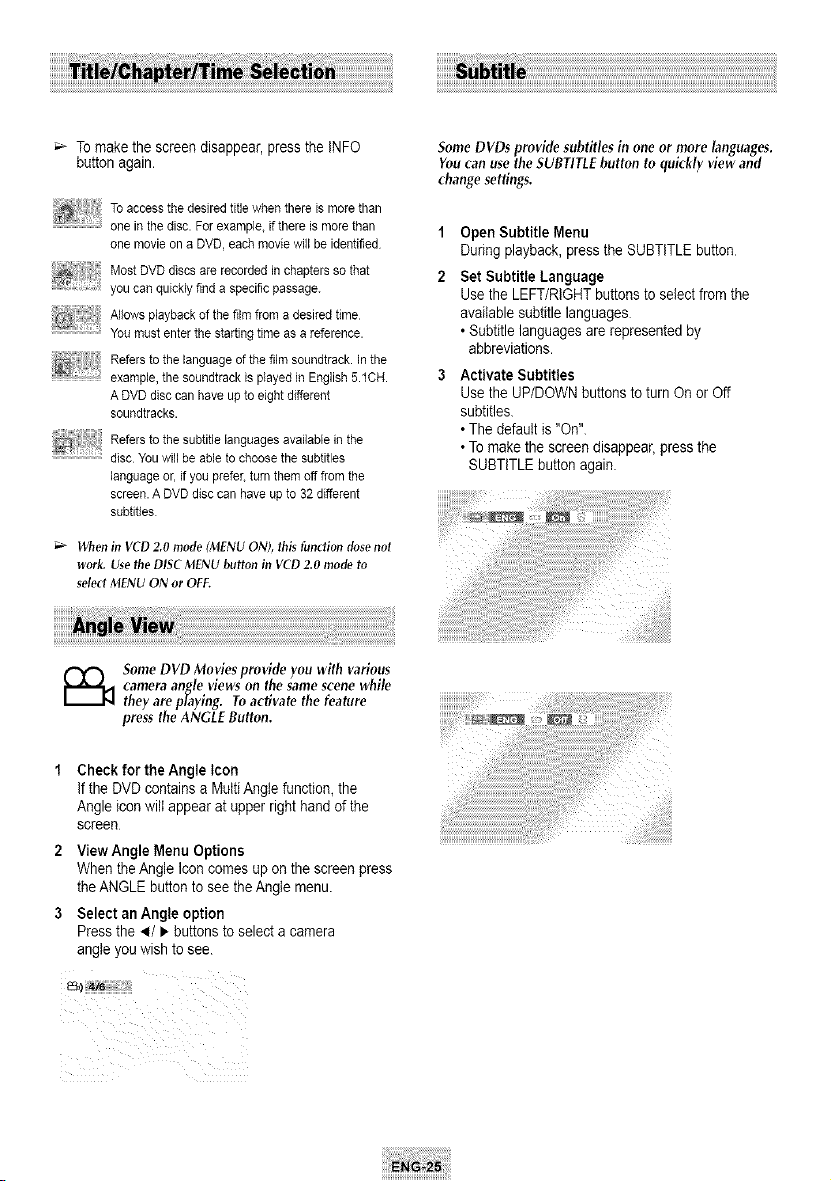
3 ActivateSubtitles
Usethe UP/DOWNbuttonsto turnOnor Off
subtitles.
• Thedefaultis"On".
• Tomakethe screendisappear,pressthe
SUBTITLEbutton again.
_ ome DVDMovies provide you with various
camera angle views on the same scene while
they are playing. Toacfivate the feature
press the ANGLEButton.
Check for the Angle Icon
Ifthe DVD containsaMulti Anglefunction,the
Angleicon will appear atupper right hand of the
screen
2 ViewAngle Menu Options
Whenthe AngleIconcomes up onthe screenpress
the ANGLE buttontoseethe Anglemenu.
3 Select an Angle option
Press the ,q/I_ buttons to selectacamera
angleyouwish tosee.
_ ii_iiiiiiiii:iiiiI_i

!!!!!!!!!!!!!!!!!!! !!!!!!!!!!!!!!!!!!!!!!!!!!!!!!!!!!!!!!!!!!!!!!!!!!!!!!!!!!!!!!!!!!!!!!!!!!!!!!!!!!!!!!!!!!!!!!!!!!!!!!!!!!!!!!!!!!!!!!!!!!!!!!!!!!!!!!!!!!!!!!!!!!!!!!!!!!!!!!!!!!!!!!!!!!!!!!!!!!!!!!!!!
A to B Repeat feature enablesyou to repeat the
designated section on a DVD, VCD or CD. Toactivate,
mark where to start(A) and where to end(B) of the
section you want to watch.
1 SelectA-B Repeat Function
Press the REPEATbutton whilein Play mode,then
usethe Left/Right buttonsto selectA-B Repeat.
• Whenyou selectA-B Repeat, "A-"will be
highlighted.
NOTE: Themenu will display "Track"inplaceof
"Chapter" if you areplayingaCD.
DVD
VCD/CD
You can repeat asinglechapter or a complete title.
DVD
t Open Repeat Menu
Press the REPEATbuttonwhilein Play mode to
open theRepeat menu.
• Thecurrent Repeat modewill be highlighted.
Select "Chapter /Title"
Use the LEFT/RIGHTbuttons to select"Chapter/
Title". Then pressthe ENTER buttontorepeat the
current Chapter/Title
The menu will display "Track/Disc" in place of
"Chapter/Title" if you are playing a VCD/CD
VCD/CD
2 Mark the Starting Point
Press the ENTER button at the beginningof the
segment youwantto repeat (PointA).
• Once youselect Point "A", "B" will be highlighted.
NOTE: TheminimumA-B Repeat timeis5seconds
3 Mark the Ending Point
Press the ENTER button againat the end of the
segment youwantto repeat (PointB).
• Thesegment will beginrepeatingin acontinuous
loop.
4 CanceIA-B Repeat
Press the REPEATbutton toopen the Repeat
Menu, usethe LEFT/RIGHT buttons tohighlight
"Off,"then press theENTER button.
;'_ When in VCD 2.0 mode (MENU ON), this function dose not
work.
t Open Repeat Menu
Press the REPEATbuttonwhilein Play mode to
open theRepeat menu.
• Thecurrent Repeat modewill be highlighted.
2 Repeat Track
Use the LEFT/RIGHTbuttons to select"Track/
Disc".Then pressthe ENTER button torepeat the
current Track/Disc.
Multiple audio language setup options, such as Dolby
Digital 5.1, Dolby Pro Logic, or LPCM 2 Channel audio,
are available on some DVDs. You can use the AUDIO
button to quickly view and select the options available
on a disc.
1 Open theAudio Menu
During playback, pressthe AUDIObutton on the
remote control
Select DVD Audio Track
Use the LEFT/RIGHTbuttons to selectthedesired
audiolanguage setupon the DVD.
• Languagesarerepresentedby abbreviations,e.g
"ENG"for"English."
DVD
VCD/CD
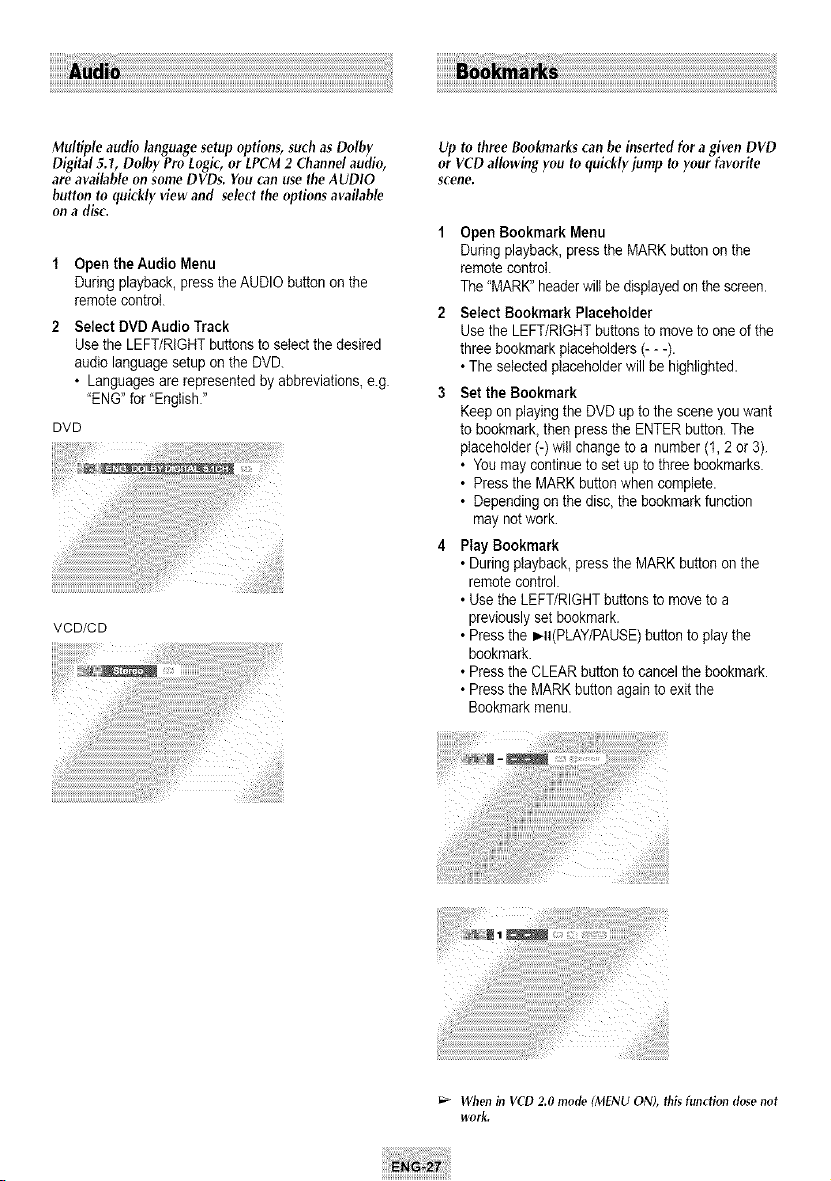
Up to three Bookmarks can be inserted fur agiven DVD
or VCD allowing you to quickly jump to your favorite
scene.
1 OpenBookmark Menu
During playback, pressthe MARKbutton onthe
remote control.
The"MARK"headerwilI be displayedon the screen.
2 Select Bookmark Placeholder
Usethe LEFT/RIGHTbuttonsto moveto one of the
threebookmark placeholders (- --).
• Theselectedptaceholderwill be highlighted.
3 Set the Bookmark
Keepon playingthe DVD up tothe scene youwant
tobookmark, then pressthe ENTER button.The
placehelder(-) willchange to a number (1,2or3).
• Youmaycontinue tosetupto three bookmarks.
• Press the MARKbuttonwhen complete.
• Depending on the disc,thebookmarkfunction
maynet work
4 Play Bookmark
• During playback, pressthe MARKbutton on the
remote control.
• Use the LEFT/RIGHTbuttonstomoveto a
previouslyset bookmark.
• Press the _II(PLAY/PAUSE)button toplay the
bookmark.
• Press the CLEAR button to cancelthe bookmark.
• Press the MARKbutton again toexit the
Bookmarkmenu.
When in VCD 2,0 mode (MENU ON), this function dose not
work.
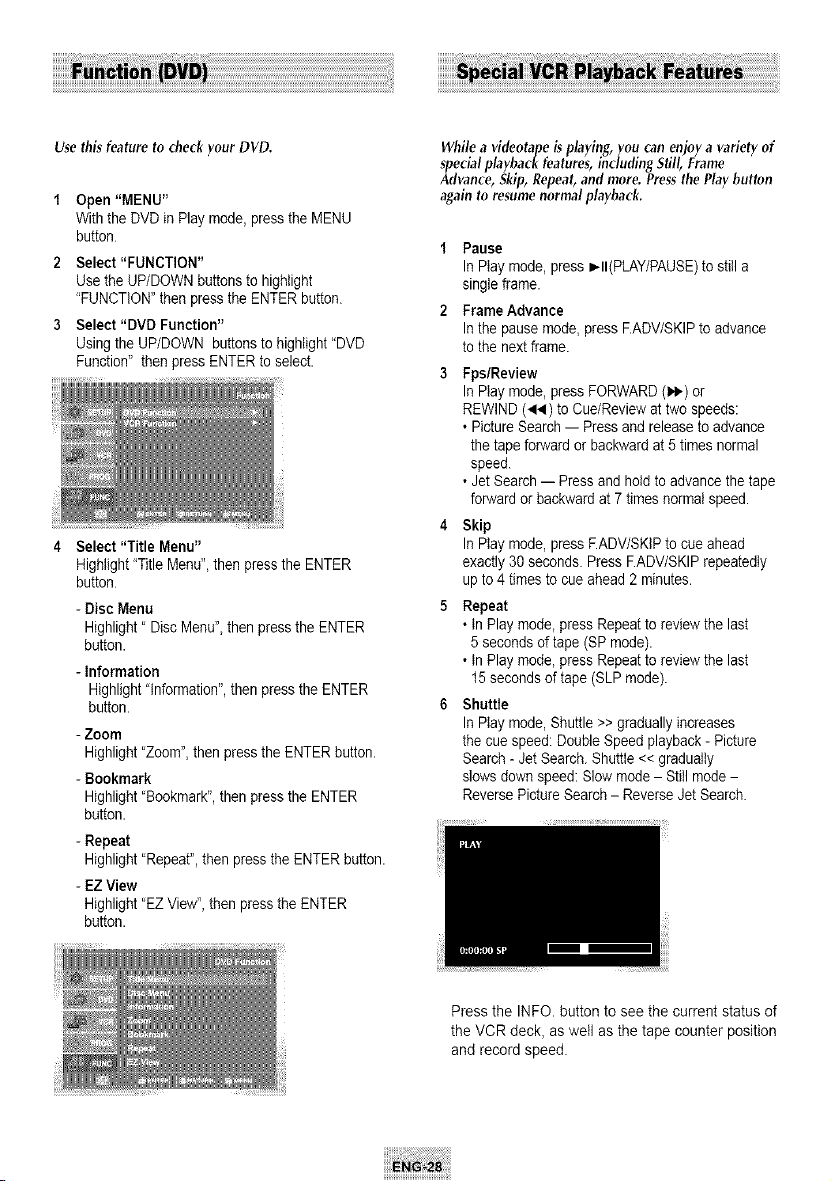
Use thisfeature to check your DVD.
Open"MENU"
Withthe DVD in Play mode,press the MENU
button
2 Select "FUNCTION"
Use the UP/DOWN buttons to highlight
"FUNCTION"then pressthe ENTER button.
3 Select"DVD Function"
Using the UP/DOWN buttons to highlight"DVD
Function" then pressENTER toselect.
4 Select "Title Menu"
Highlight"Title Menu", then press theENTER
button
- Disc Menu
Highlight" Disc Menu",then pressthe ENTER
button.
- Information
Highlight"Information", then pressthe ENTER
button.
- Zoom
Highlight"Zoom", then press theENTER button.
- Bookmark
Highlight"Bookmark",then pressthe ENTER
button.
- Repeat
Highlight'Repeat", then pressthe ENTER button.
- EZ View
Highlight"EZ View", then pressthe ENTER
button.
While avideotapeisplaying,youcan enjoya variety of
specialplaybackfeatures,including Still,Frame
Advance,Skip,Repeat,and more. Pressthe Play button
againto resumenormal playback.
t Pause
InPlay mode, press_II(PLAY/PAUSE)tostilla
singleframe.
2 FrameAdvance
In the pausemode, pressF.ADV/SKIPtoadvance
tothe nextframe.
3 Fps/Review
InPlay mode, pressFORWARD(l._-)or
REWIND(_1._)to Cue/Review attwo speeds:
• Picture Search-- Press and release toadvance
the tape forward or backwardat 5 times normal
speed.
• Jet Search-- Press and holdtoadvancethetape
forwardor backward at7 times normalspeed.
4 Skip
InPlay mode, pressEADV/SKIP tocueahead
exactly 30 seconds.Press F.ADV/SKIPrepeatedly
up to 4times tocueahead 2minutes.
5 Repeat
• InPlay mode, pressRepeatto reviewthe last
5seconds oftape (SP mode).
• InPlay mode, pressRepeatto reviewthe last
15 secondsof tape (SLP mode).
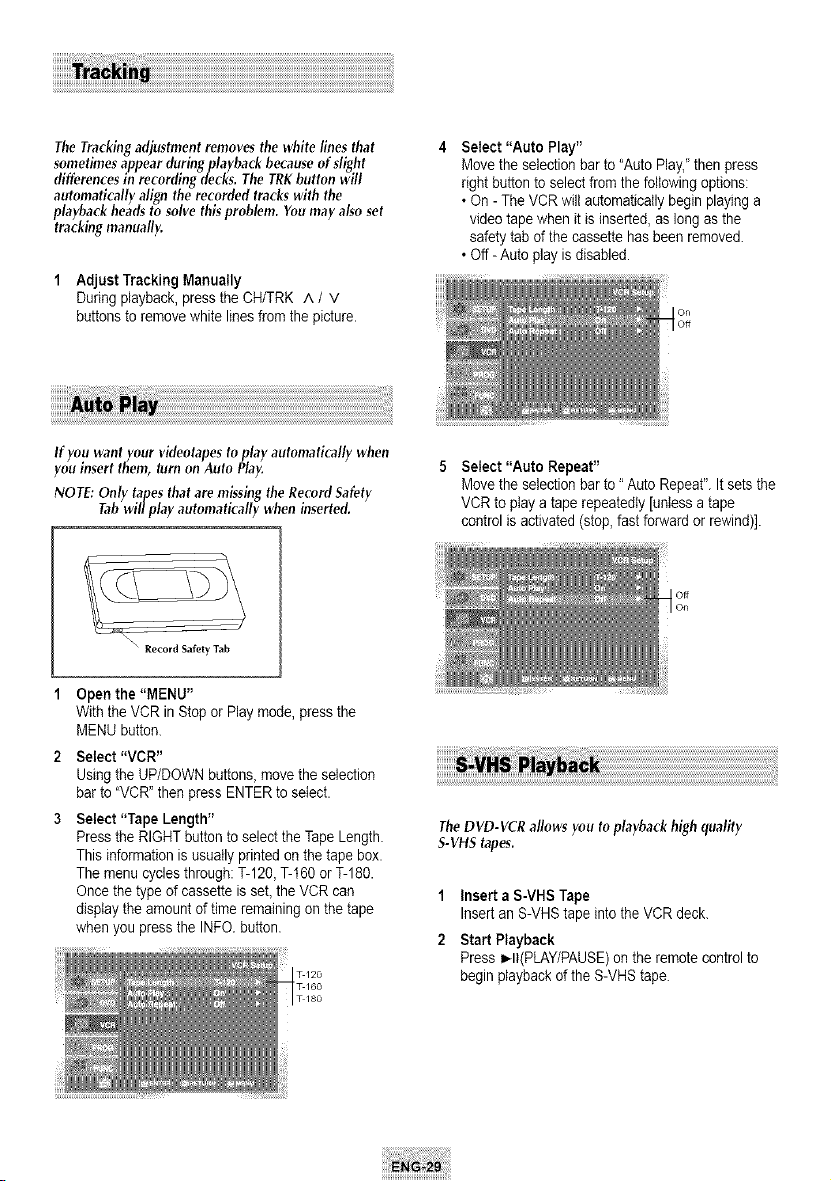
6 Shuttle
InPlay mode, Shuttle >>gradually increases
the cuespeed:DoubleSpeed playback - Picture
Search-Jet Search. Shuttle<< gradually
slows down speed:Slowmode - Still mode -
ReversePicture Search - ReverseJetSearch.
Pressthe INFO. button tosee the current status of
the VCR deck, aswell as the tape counter position
and record speed.
The Tracking adjustment removes the white lines that
sometimes appear during playback because of slight
differences in recording decks. The TRKbutton will
automatically align the recorded tracks with the
playback heads to solve this problem. You may alsoset
tracking manually.
1 Adjust Tracking Manually
During playback, pressthe CH/TRK A / V
buttons toremovewhite linesfrom the picture.
Select "Auto Play"
Movethe selection barto"AutoPlay,"then press
right buttontoselectfromthe followingoptions:
• On -TheVCR willautoma%atlybeginplayinga
video tape when it isinserted, as longas the
safety tab of the cassettehas been removed.
• Off-Auto play isdisabled.
On
Off
Ifyou want your videotapes toplay automatically when
you insert them, turn onAuto Play.
NOTE:Only tapes that are missing the Record Safety
Tabwill play automatically when inserted.
Select "Auto Repeat"
Movethe selection barto"Auto Repeat". Itsets the
VCR to playa tape repeatedly [unlessa tape
controlisactivated (stop, fastforward orrewind)].
Record Safety Tab
Openthe "MENU"
Withthe VCRinStop or Play mode, pressthe
MENU button.
2 Select "VCR"
Using the UP/DOWN buttons, movethe selection
barto "VCR" then pressENTERtoselect.
3 Select "Tape Length"
Press the RIGHT button to selecttheTape Length.
Thisinformationisusually printedon the tape box.
Themenu cyclesthrough: %120, %t60 orT-180.
Once the typeof cassetteisset,theVCR can
display the amountoftimeremaining on the tape
when youpresstheINFO. button.
TheDVD-VCR allows you to playback high quality
S-VHStapes.
1 Insert a S-VHSTape
Insert an S-VHS tape into the VCR deck.
2 StartPlayback
Press _II(PLAY/PAUSE)on the remote controlto
beginplayback ofthe S-VHS tape.
When aprogram isrecorded, thestarting point isgiven
an Index mark for easylocation. However, the VHS
Index Search System (VISS) cannot recognize index
marks made by old VCRs. If the VCR hastrouble finding
amark, it isprobably because the cassette was
recorded ona VCR without VISS.If you want to index
two programs ina row, setyour VCR to stop, then start
recording eachprogram.
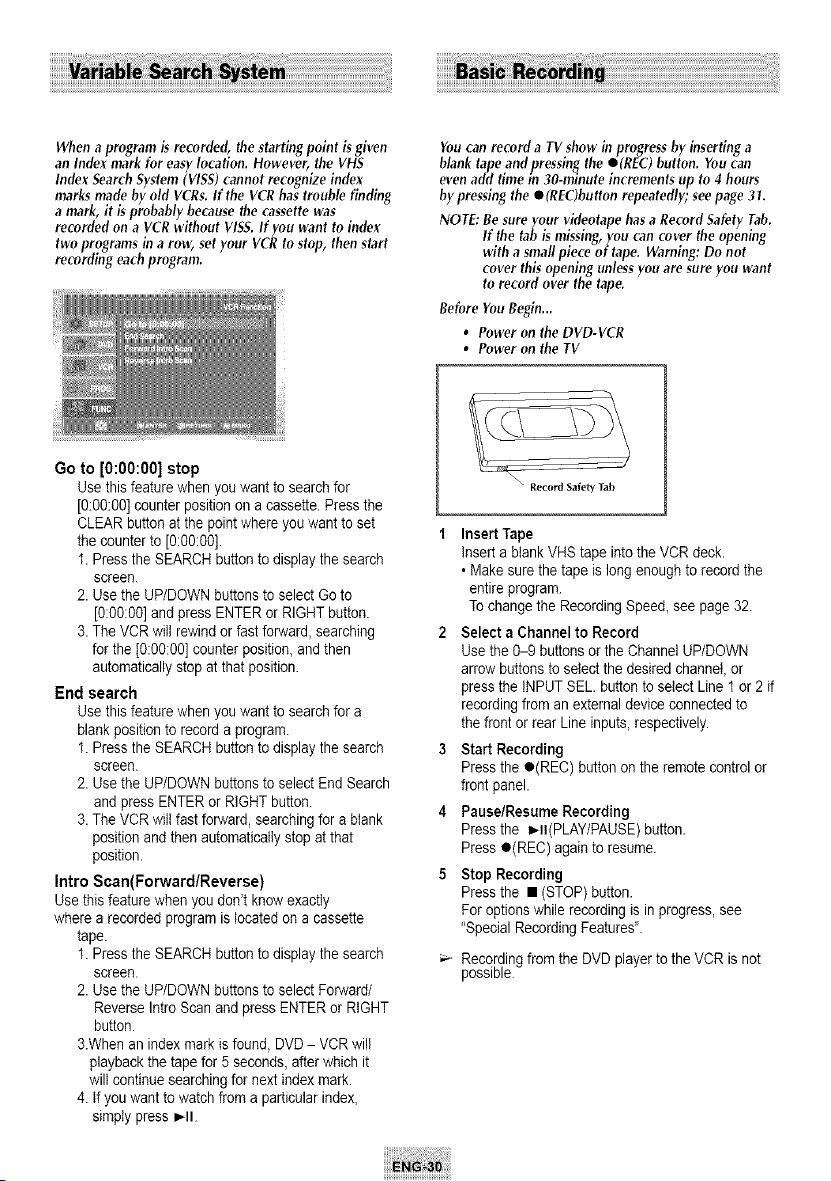
Youcan record a TV show inprogress by inserting a
blank tape and pressing the O(REC) button. Youcan
even add time in 30-minute incrementsup to 4 hours
by pressing the • (REC)button repeatedly; see page 31.
NOTE: Besure your videotape hasaRecord Safety Tab.
If the tab is missing, you can cover the opening
with asmallpiece of tape. Warning: Do not
cover this opening unless you are sure you want
to record over the tape.
Before YouBegin...
• Power on the DVD-VCR
• Power on the TV
Go to [0:00:00] stop
Use thisfeature when youwant to search for
[0:00:00]counter positionon a cassette.Press the
CLEAR button at the pointwhereyouwant toset
the counterto[0:00:00].
1. Press the SEARCHbutton to display the search
screen.
2.UsetheUP/DOWN buttons toselectGoto
[0:00:00]and pressENTER or RIGHT button.
3.The VCR witt rewind orfastforward,searching
forthe [0:00:00]counter position,and then
automatically stopatthat position.
End search
Use thisfeature when you want to search fora
blank positionto record a program.
1. Press the SEARCHbutton to display the search
screen.
2.UsetheUP/DOWN buttons toselectEnd Search
and pressENTER orRIGHT button.
3.The VCR will fastforward, searchingfor a blank
positionand then automatically stopat that
position.
Intro Scan(Forward/Reverse)
Use this featurewhen you don'tknowexactly
wherea recorded programislocated on a cassette
tape.
1. Press the SEARCHbutton to display the search
screen.
2.UsetheUP/DOWN buttons toselectForward/
ReverseIntroScan and press ENTER or RIGHT
button.
3.Whenanindex mark isfound,DVD - VCR will
playback the tape for5seconds, afterwhichit
wiltcontinue searchingfornextindex mark.
4.If youwant towatchfroma particularindex,
simply pressI_11
• Record Safety Tab
Insert Tape
insertablank VHStape intothe VCR deck.
, Makesure the tape islongenough to record the
entire program
Tochange the Recording Speed,see page 32.
2 Select aChannel to Record
Use the 0-9 buttons or the ChannelUP/DOWN
arrow buttonsto selectthe desired channel, or
pressthe INPUTSEL.buttonto selectLine 1or2if
recordingfroman external deviceconnectedto
the frontorrear Lineinputs, respectively.
3 Start Recording
Press the e(REC) buttononthe remote controlor
frontpanel.
4 Pause/Resume Recording
Press the I_It(PLAY/PAUSE)button.
Presse(REC) againto resume.
5 Stop Recording
Press the • (STOP) button.
For options while recordingisin progress,see
"Special Recording Features".
Recording fromthe DVD player tothe VCR isnot
possible
While a recording isin progress,you can watch a
different channel, a DVD, or add recording time in 30-
minute increments.
One-Touch Recording (OTR)allows you to add
recording time in 30-minute increments up to 4 hours
at the touch of a button.
Towatch adifferent channel
Makesure that you connect the DVD-VCR to the
TVusing an RFcable.
• During recording,Press the TVNCR buttononthe
remote control.Press the TV button to controlTV
and selectadifferentchannel.
2 ToWatchaDVD
InsertaDVD intheDVD deck and press _1t
(PLAY/PAUSE).Theoutput will automatically
change tothe DVD.
3 ToAdd Recording Time
See One-TouchRecording (OTR) onthe following.
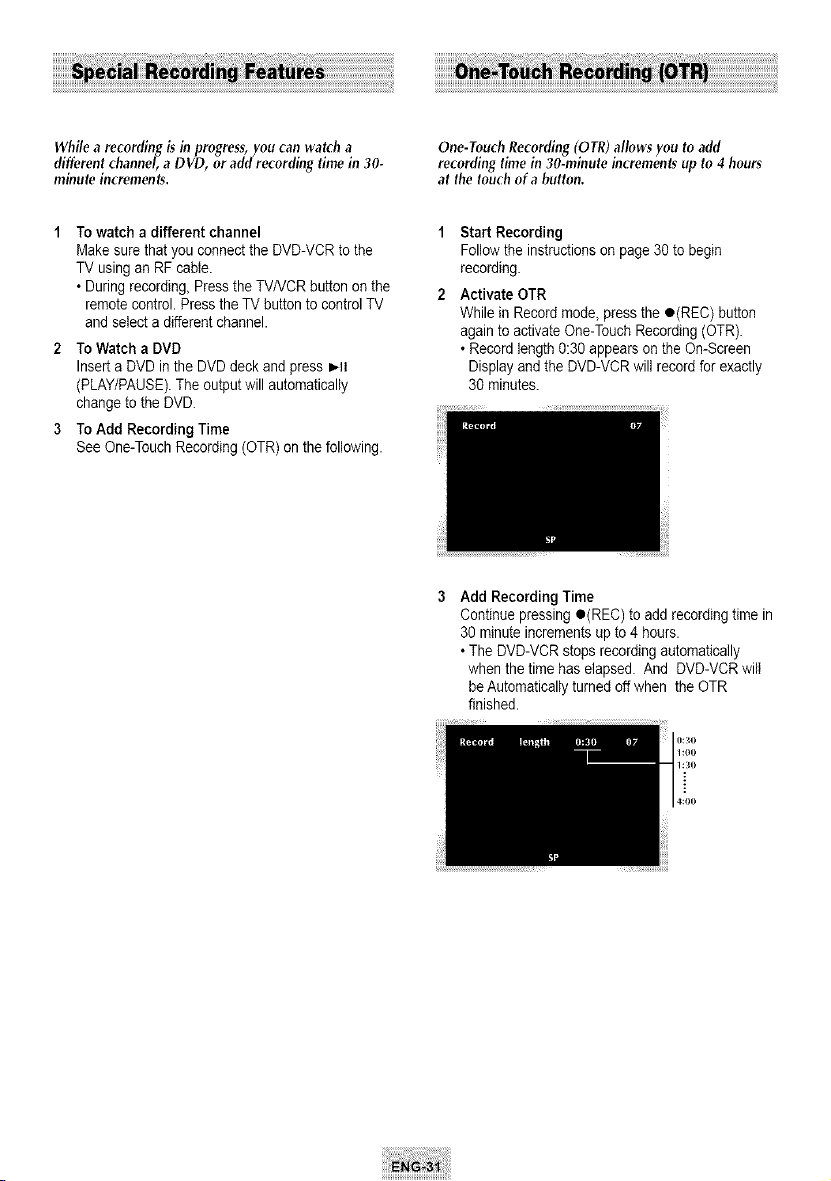
1 StartRecording
Followthe instructionson page 30 to begin
recording.
2 Activate OTR
While in Record mode,pressthe o(REC) button
againto activateOne-Touch Recording (OTR).
• Record length0:30 appearson the On-Screen
Display and the DVD-VCR will record forexactly
30 minutes.
3 Add Recording Time
Continuepressingo(REC) to add recordingtime in
30 minuteincrementsup to 4 hours.
• TheDVD-VCR stops recordingautomatically
when the time haselapsed. And DVD-VCR wiiI
be Automaticallyturnedoff when the OTR
finished.
YoucanslowdowntherecordingspeedfromSPto SI_P
inorder to fit sixhoursof programmingon a 7-120
tape.
1 Start Recording
Followthe BasicRecordinginstructionson page 30.
2 Set Record Speed
Press the SPEED button on the remote controlto
set the Record Speedto one of the following
options:
• SP - Standard Play, forbestquality.
• SLP- Super Long Play, formaximum recording
time(3 times SP).
NOTE:TheselectedRecord Speedwill appear on the
frontpaneldisplay and on-screen display.
Maximum Recording Time - SPvs,SLP
TapeLength SP(StandardPlay) SLP(SuperLongPlay)
%120 2 hrs 6hrs
%I60 2hrs 40 rains 8hrs
%180 3hrs 9hrs
Insert a blank videotape into the VCR deck. Resure to
leave the Record Safety Tabintact.
With the Timer Recording function, you canprogram
up to7 events at a time to record up toa month in
advance.
ToBegin Setting the Timer Recording,
• Turnon your DVD-VCR, and
• Turnonyour TV.
1 Open "MENU"
Press the MENU button or the TIMER button while
the VCR is in Stop or Play mode.
2 Select "Program"
Use the UP/DOWN buttons to highlight
"PROGRAM" then press the ENTER button.
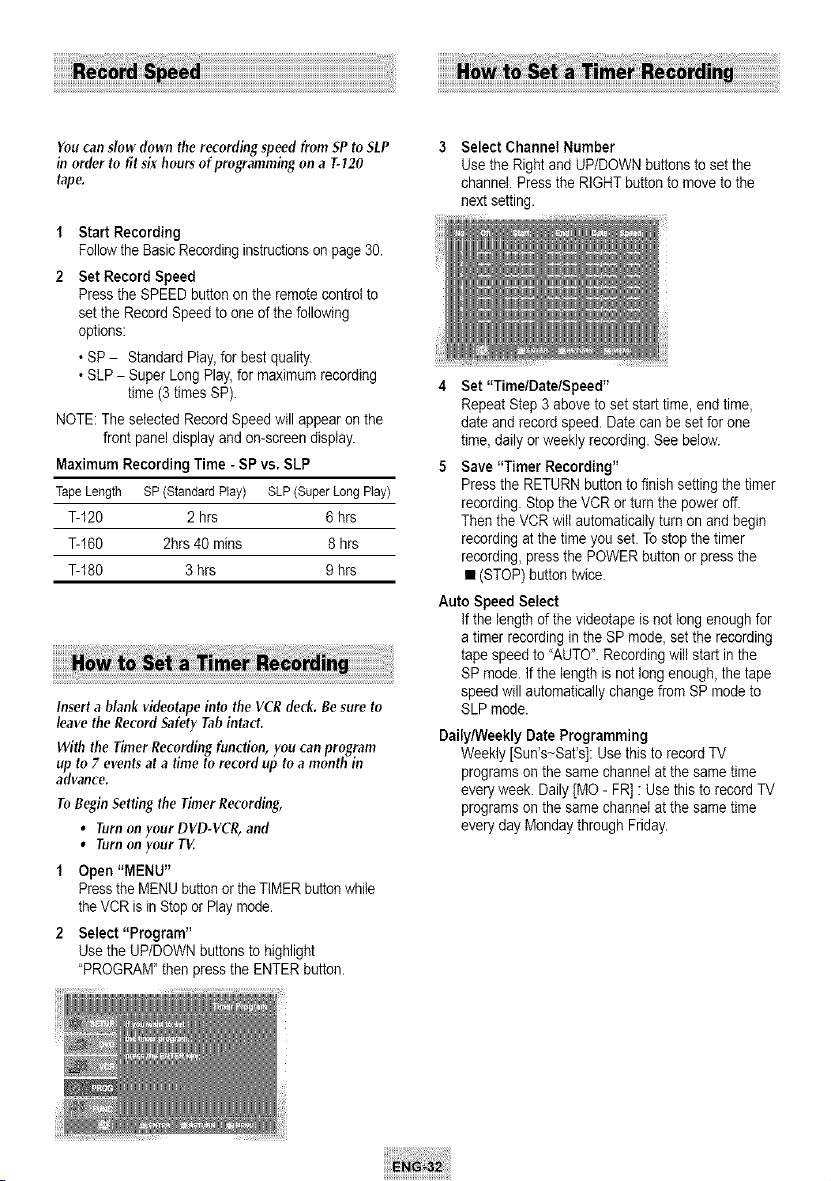
Select Channel Number
Use the Rightand UP/DOWN buttons tosetthe
channel. Press the RIGHT button to movetothe
nextsetting.
4 Set"Time/Date/Speed"
Repeat Step 3above tosetstart time,end time,
date and record speed.Date canbesetfor one
time,daily orweekly recording See below.
5 Save "Timer Recording"
Press the RETURNbuttontofinishsetting the timer
recording.StoptheVCR orturnthe poweroff.
Then theVCR willautomatically turnon and begin
recordingat the timeyou set.Tostop the timer
recording,pressthe POWERbuttonor pressthe
• (STOP) buttontwice
Auto Speed Select
Ifthe lengthofthe videotapeisnot tong enoughfor
atimer recordingin the SPmode, set the recording
tape speedto "AUTO".Recording will start in the
SP mode. If the lengthisnot longenough,the tape
speedwill automatically change fromSPmode to
SLPmode.
Daily/Weekly Date Programming
Weekly [Sun's-Sat's]: Usethisto record TV
programs on the samechannelatthe sametime
everyweek. Daily [MO- FR] :Usethistorecord TV
programs on the samechannelatthe sametime
everyday Monday through Friday.
1 Open"MENU"
In the DVDin Stopor Play mode,pressthe MENU
button.
2 Select "FUNCTION"
Use the UP/DOWN buttonsto highlight
"FUNCTION"then pressthe ENTER button.
3 Select "VCR Function"
Using the UP/DOWN buttons tohighlight "VCR
Function" then pressENTER to select.
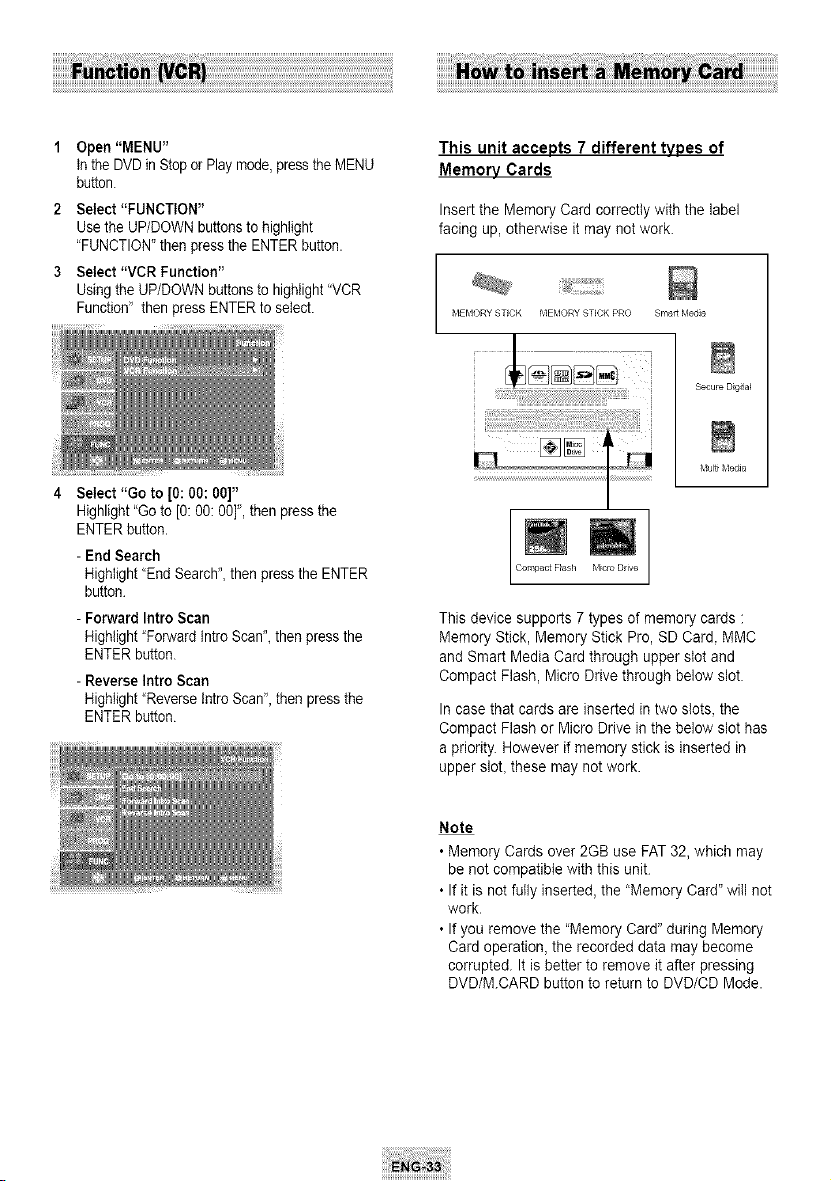
4 Select "Go to [0: 00:00]"
This unitaccepts 7 different typesof
MemoryCards
Insert the Memory Card correctly with the label
facing up, otherwise it maynotwork.
_,IEMORY STICK _,IEMORY STICK PRO Smart P,4edia
Highlight"Goto [0: 0O:0O]",then pressthe
ENTER button.
- End Search
Highlight"EndSearch",then press the ENTER
button
- Forward Intro Scan
Highlight"ForwardIntroScan",then pressthe
ENTER button.
- Reverse Intro Scan
Highlight"Reverse IntroScan",then pressthe
ENTER button.
_iii_i!i@_i!iiii_iili!_!i_!_!iii_i!iiii_i!iiii_i!iiii_i!iiii_i!iiii_i!iiii_i!iiii_i!iiiii_i;?_¸¸'¸_¸¸'¸_j
Secure Digita_
_,lulti _,ledia
Compact F_ash Micro D_ive
This device supports 7types of memory cards :
Memory Stick, Memory Stick Pro, SD Card, MMC
and Smart MediaCard through upper slot and
Compact Flash, Micro Drive through below slot.
Incase that cardsare inserted in two slots, the
Compact Flash or MicroDrive in the below slot has
apriority. However if memory stick isinserted in
upperslot, these may not work.
Note
• Memory Cards over 2GB use FAT32,which may
be not compatible with thisunit.
• Ifit isnot fully inserted, the "Memory Card" will not
work.
• Ifyouremove the "Memory Card" during Memory
Cardoperation, the recorded data may become
corrupted. Itis better to remove it after pressing
DVD/M.CARD button to returnto DVD/CD Mode.
i!i!i!i!i!i!i!i!i!i!i_ii!_!_!_i!_i!_ii_i_ii_i!_i!_i!_i!_,i_i!¸i!_i!_ii_i!i_!__!!_i!_!_i!_i!_i!
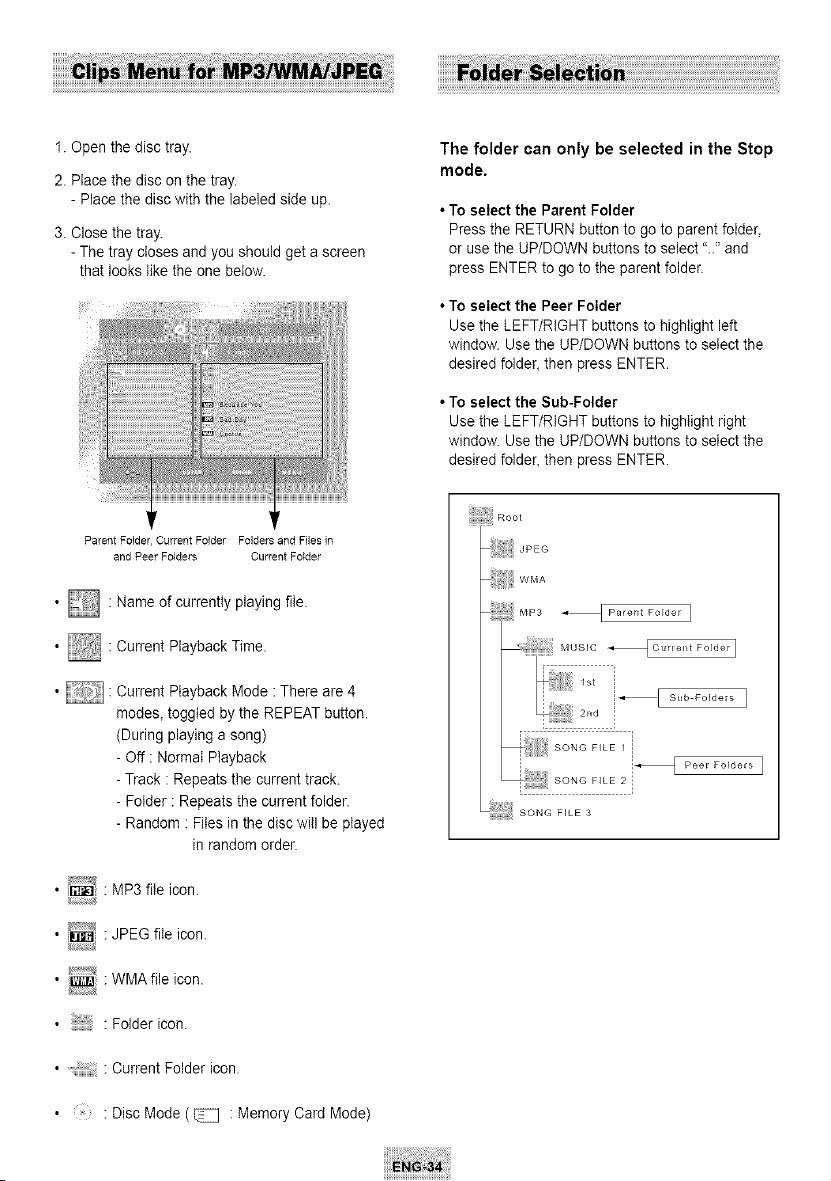
1.Open the disc tray.
2.Place the disc on the tray.
- Place the disc with the labeled side up.
3.Close the tray.
- The tray closes and you should get ascreen
that looks like the one below.
Parent Folder Current Folder Folders and Files in
The folder can only be selected in the Stop
mode.
• To selectthe Parent Folder
Pressthe RETURN button to go to parentfolder,
or usethe UP/DOWN buttonsto select ".." and
press ENTER to go to the parent folder.
• To select the Peer Folder
Use tile LEFT/RiGHT buttons tohighlight left
window. Usethe UP/DOWN buttons to select the
desiredfolder, then press ENTER.
• To selectthe Sub-Folder
Use tile LEFT/RiGHT buttons tohighlight right
window. Usethe UP/DOWN buttons to select the
desiredfolder, then press ENTER.
and Peer Folders Current Folder
• [] "Nameof currently playing file.
• [] "Current Playback Time.
• :Current Playback Mode : There are4
modes_toggted by the REPEAT button.
(During playinga song)
- Off : Normal Playback
- Track :Repeats the current track.
- Folder • Repeats the current folder.
- Random " Files in the disc will be played
in random order.
il_ " MP3file icon.
JPEG file icon.
i_ WMA fileicon.
t
Foldericon.
.... " Current Folder icon.
" Disc Mode (_ :Memory Card Mode)
,,,_,_,ii!ii_ii_ii_ii:i:ii_i_i_i_iiii!i_ii_iM_s,o_o ......_Fo,_o,1
Sub FoEders I
411iliiiii_ SONG FILE 3
When playing a CD-R
1. Openthe disctray.
2.Place the disc on the tray.
- Place the disc with the labeled side up.
3.Close the tray.
- The tray closes and you should get ascreen
that looks likethe one below.
When playing a Memory Card
1.Insert a Memory Card.
2.Press the DVD/MCARD button on the remote.
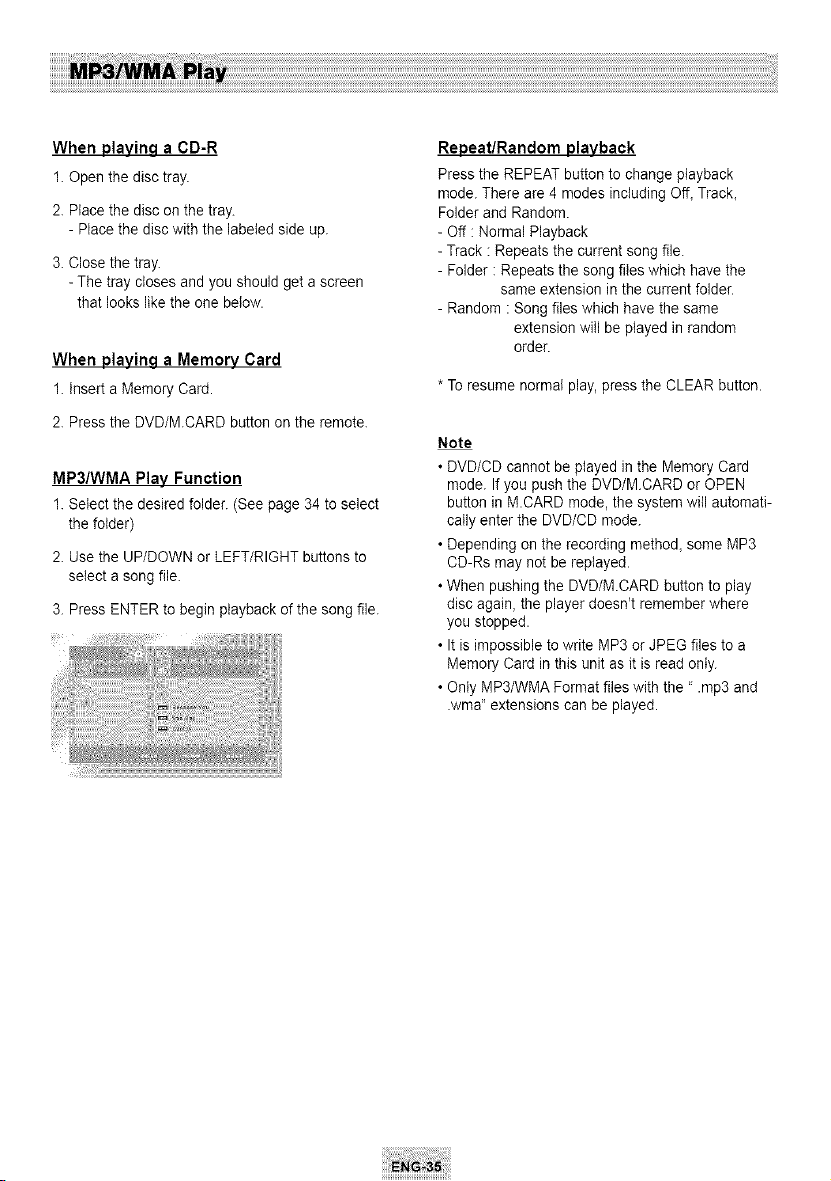
MP3/WMA Play Function
1.Select the desired folder. (See page 34 to select
the folder)
2.Use the UP/DOWN or LEFT/RIGHT buttons to
select a song file.
3.Press ENTER to begin playback of the song file.
Repeat/Random playback
Press the REPEAT button to change playback
mode. There are 4modes including Off, Track,
Folderand Random.
- Off : Normal Playback
- Track :Repeats the current songfile.
- Folder :Repeatsthe song files which have the
same extension in the current folder.
- Random : Song files which have thesame
extension will be played in random
order.
* Toresume normal play, press the CLEAR button.
Note
• DVD/CD cannot be played in the Memory Card
mode. Ifyou push the DVD/MCARD orOPEN
button in M.CARD mode, the system will automati-
callyenter the DMD/CD mode.
• Depending on the recording method, some MP3
CD-Rs maynot be replayed.
• When pushing the DVD/M.CARD button to play
disc again, the player doesn't remember where
you stopped.
• Itis impossible to write MP3 or JPEG files to a
Memory Card in thisunit as it isreadonly.
• Onty MP3/WMA Format files with the" .mp3 and
.wma" extensions can be played.
CD-R / Memory Card MP3/WMA file
When you record MP3/WMAfiles on the CD-
R/Memory Card, please refer to the following.
•Your MP3or WMA flies should be ISO9660 or JOLIET
format.
ISO9660 format and JotietMP3 orWMA files are
compatible with Microsoft's DOS and Windows, and with
Apple's Mac.
This format is themost widely used.
• Only Memory Card with FAT16format can be played.
• Memory Card over 2GB use FAT32, which may be not
compatible with this unit.
•When naming your MP3or WMA files, donot exceed 8
characters, and enter ".rap3, .wma" as the file
extension.
General name format of: Tifie rap3 orTitle.wma. When
composing your title, make sure that you use 8characters
or less, have no spaces in the name, and avoid the use of
special characters including: (.,/,\,=,+).
• Use adecompression transfer rate of at least 128
Kbps when recording MP3 files.
Sound quality with MP3 files basically depends on the =-ate
of compression/decompression you choose. Getting CD
audio sound requires an analog/digital sampling rate, that
isconversion to MP3format, of at least 128 Kbps and up
to 166 Kbps. However, choosing higher rates_ like 192
Kbps ormore, only rarely give better sound quality
Conversely, files with decompression rates below 128
Kbps will notbe played properly.
• Do nottry recordingcopyrightprotectedMP3files.
Certain "secured" files are encrypted and code protected
to prevent illegal copying. These files are of thefollowing
types: Windows MediaTM (registered trade mark of
Microsoft Inc) and SDMITM (registered trade mark of The
SDMI Foundation). You cannot copy such files.
• Important: The above recommendations cannot be taken
asa guarantee that the DVD player will play MP3
recordings, oras an assurance of sound quality. You
should note that certain technologies and methods for
MP3file recording on CD-Rs prevent optimal playback of
these files on your DVD player (degraded sound quality
and in some cases, inability of the player to read thefiles)
•This unit can play amaximum of 3000 files and 300
folders per disc
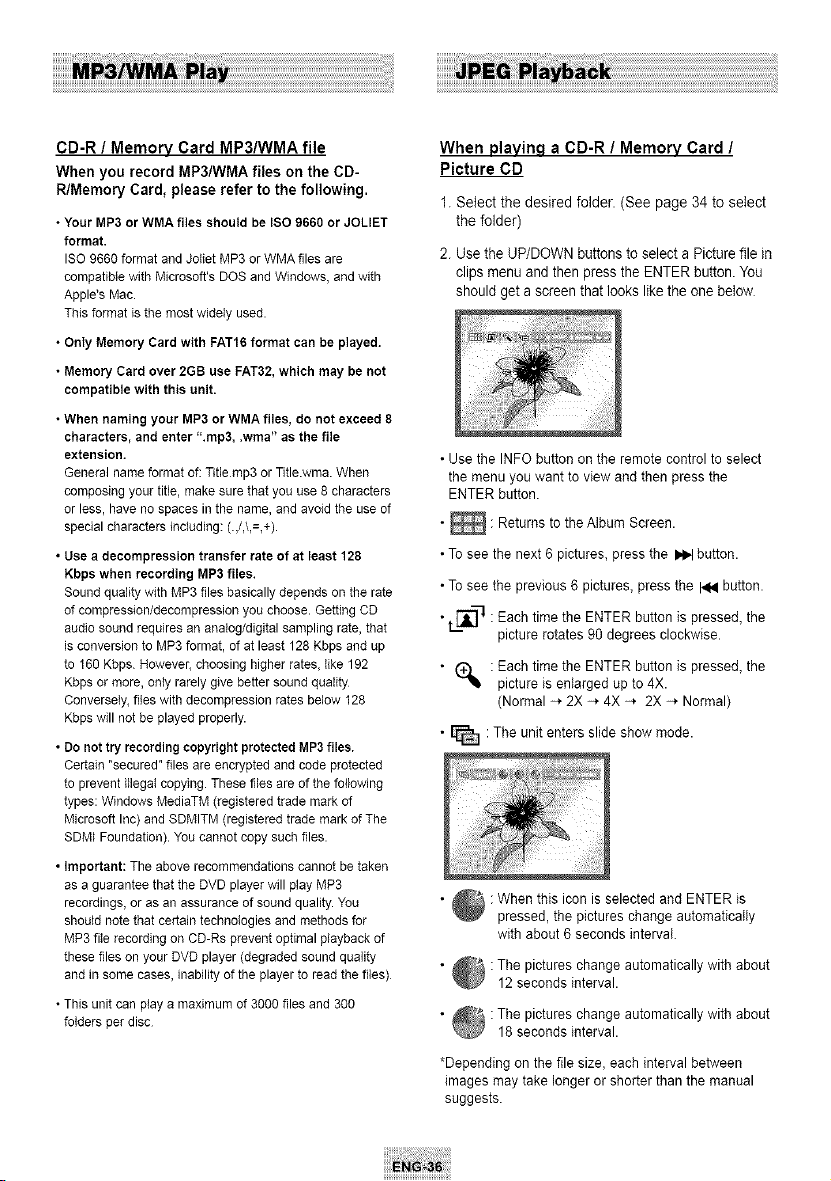
When playing a CD-R/ Memory Card /
Picture CD
1.Selectthe desired folder.(See page 34 to select
the folder)
2. Usethe UP/DOWN buttons toselectaPicture file in
clipsmenu and then pressthe ENTER button. You
should get ascreen that lookslike the one below
• Use the INFO button on the remote control to select
the menu you want to view and then press the
ENTER button.
• _ : Returns to the Album Screen.
•To see the next 6 pictures, press the _ button.
•To see the previous 6 pictures, press the HN button.
•, [_i_]-1 :Each time the ENTER button is pressed, the
picture rotates 90 degrees clockwise.
• _ :Each time the ENTER button is pressed, the
picture isenlarged up to 4X.
(Normal -* 2X -* 4X -* 2X -* Normal)
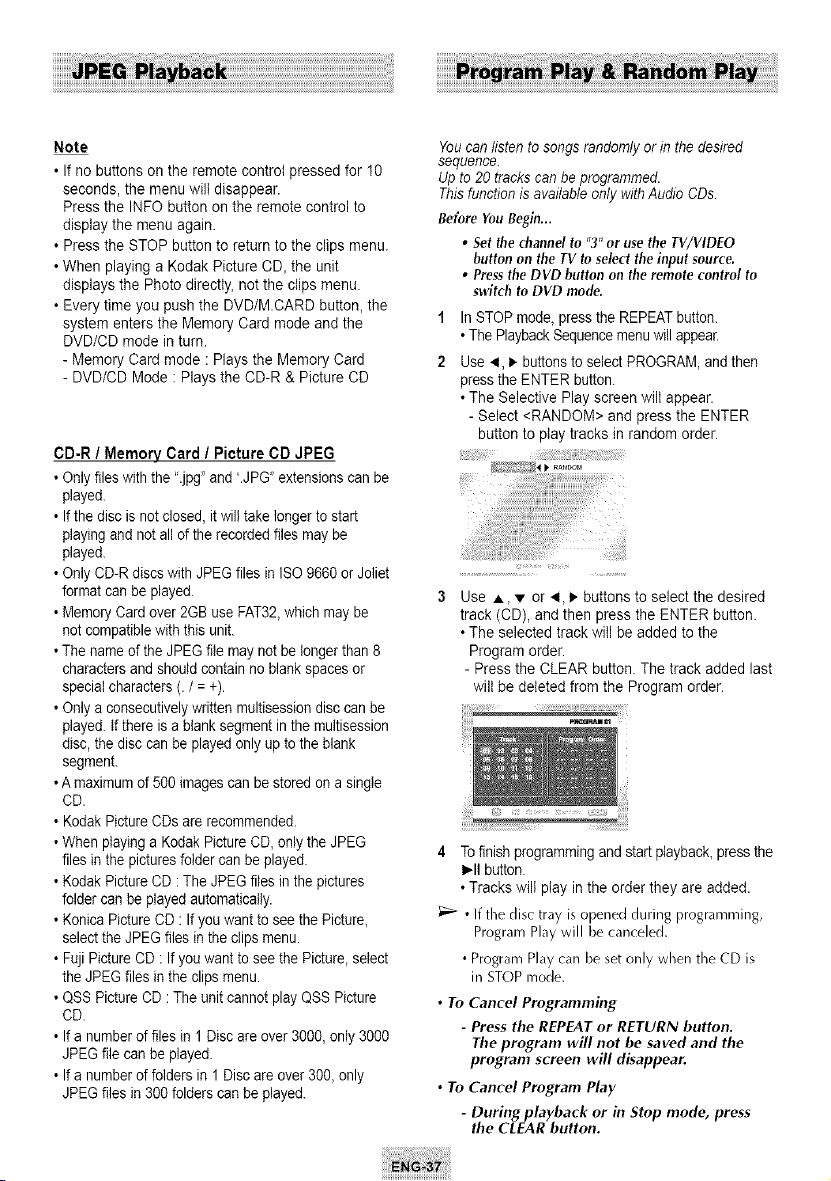
• _ :The unit enters slide show mode.
• _ : When this icon selected and ENTER is
pressed, the pictures change automatically
with about 6 seconds interval.
• _ :The pictures change automatically with about
_J 12 seconds interval.
• _ :The pictures change automatically with about
_B 18 seconds interval.
*Depending on the file size, each interval between
images may take longer or shorter than the manual
suggests.
Note
• Ifno buttons on the remote control pressed for 10
seconds, the menu will disappear.
Pressthe INFO button on the remotecontrol to
display the menu again.
• Press the STOP buttonto return to the clips menu.
• When playing a Kodak Picture CD,the unit
displays the Photo directly,notthe clips menu.
• Everytime you push the DVD/M.CARD button, the
system enters the Memory Card mode and the
DVD/CD mode inturn.
- Memory Card mode :Plays the Memory Card
- DVD/CD Mode :Plays the CD-R & Picture CD
CD-R / Memory Card / Picture CD JPEG
• Only files with the ".jpg"and '.JPG" extensionscanbe
played.
• If the disc isnot closed,it will takelonger to start
playingand not allof the recorded files maybe
played.
• Only CD-R discs with JPEG files in ISO9660 orJoliet
format canbeplayed
• MemoryCardover 2GBuseFAT32,whichmaybe
not compatible with this unit.
• Thename of the JPEGfile maynot be longerthan 8
characters and should contain no blank spacesor
special characters (./=+).
• Only aconsecutivelywritten multisessiondisc canbe
played. Ifthere isablank segment inthe multisession
disc, the disc canbe played only up to the blank
segment.
•A maximumof 500 images can be stored on asingle
CD.
• Kodak Picture CDs arerecommended.
• Whenplayinga Kodak Picture CD,only the JPEG
files in the picturesfolder canbe played.
• Kodak Picture CD:TheJPEGfiles inthepictures
folder can be played automatically.
• Konica Picture CD:If youwant toseethe Picture,
selectthe JPEGfiles intheclipsmenu.
• FujiPictureCD: Ifyouwant to seethePicture, select
the JPEGfiles in the clipsmenu.
• QSS Picture CD: Theunit cannotplay QSS Picture
CD.
• Ifa numberoffiles in 1 Disc areover 3000, only3000
JPEGfilecanbeplayed.
• Ifa numberoffoldersin 1 Disc areover 300, only
JPEGfiles in 300 folderscanbeplayed.
You can listen to songs randomly or in the desired
sequence.
Up to 20 tracks can be programmed.
This function is available only with Audio CDs.
Before YouBegin...
• Set the channel to "3" or usethe TV/VIDEO
button on the TV toselect the input source.
• Pressthe DVD button on the remote control to
switch toDVD mode.
1
2
In STOPmode, pressthe REPEAT button.
• ThePlaybackSequencemenuwill appear.
Use _1,• buttonsto selectPROGRAM,andthen
pressthe ENTER button.
• The Selective Play screen wiltappear.
- Select <RANDOM> and press the ENTER
button to play tracks in random order.
Use A, • or _1,_-buttons toselect the desired
track (CD), and then press the ENTER button.
• The selectedtrack will be added to the
Program order.
- Press the CLEAR button.The track added last
will be deleted from the Program order.
4 Tofinishprogrammingand start playback, pressthe
IHI button.
• Trackswill play in the order they are added.
• Ifthe disctray isopenedduring programming,
Program Play will be canceled.
• Program Play canbesetonly when the (D is
in STOPmode.
• To Cancel Programming
- Press the REPEAT or RETURN button.
The program will not be saved and the
program screen will disappear.
• To Cancel Program Play
- During playback or in Stop mode, press
the CLEAR button.
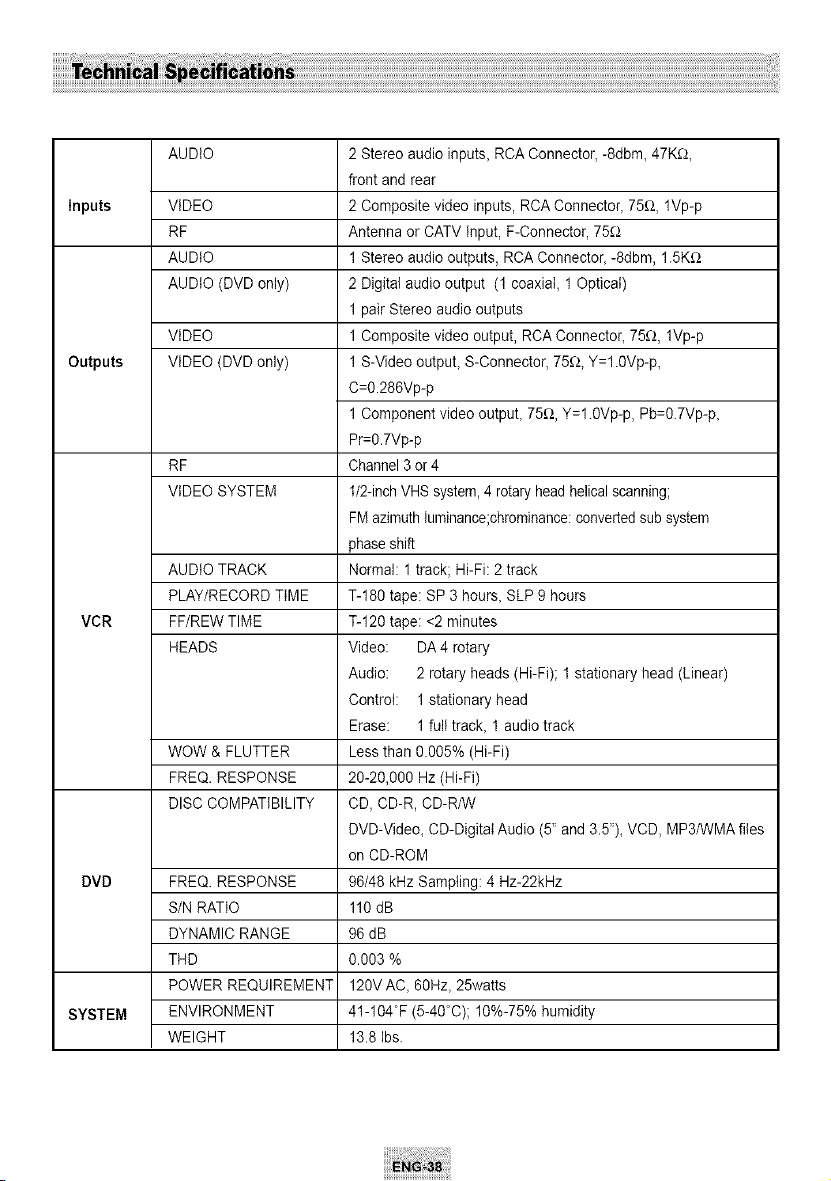
AUDIO
Inputs VIDEO
RF
AUDIO
AUDIO (DVD only)
VIDEO
Outputs VIDEO(DVD only)
RF
VIDEO SYSTEM
AUDIOTRACK
PLAY/RECORD TIME
VCR FF/REWTIME
HEADS
WOW & FLUTTER
FREQ. RESPONSE
DISC COMPATIBILITY
DVD FREQ. RESPONSE
SIN RATIO
DYNAMIC RANGE
THD
POWER REQUIREMENT
SYSTEM ENVIRONMENT
WEIGHT
2Stereo audio inputs_ RCA Connector,-8dbm_ 47K_2_
front and rear
2Composite video inputs, RCA Connector_75f_, lVp-p
Antenna orCATV Input, F-Connector, 75_
1Stereo audio outputs, RCA Connector_-8dbm, 1.5Kf_
2Digital audio output (1 coaxial, 1Optical)
1pair Stereo audiooutputs
1Composite video output, RCA Connector_75_2,lVp-p
1S-Video outpuL S-Connector, 75_2,Y=l.0Vp-p_
C=0.286Vp-p
1Component video outpuL 75f_, Y=l.0Vp-p, Pb=0.7Vp-p_
Pr=0.7Vp-p
Channel3 or4
1/2-inch VHS system,4 rotaryhead helical scanning;
FMazimuthIuminance;chrominance:converted sub system
phaseshift
Normal 1 track; Hi-Fi: 2track
%180 tape: SP3hours_ SLP9 hours
%120tape: <2minutes
Video: DA 4 rotary
Audio: 2rotary heads(Hi-Fi); 1 stationary head (Linear)
Control: 1stationary head
Erase: 1fulltracL 1audio track
Less than 0.005% (Hi-Fi)
20-20,000 Hz (Hi-Fi)
CD,CD-R, CD-R/W
DVD-Video_ CD-Digitat Audio (5' and 3.5')_VCD, MP3/WMA files
on CD-ROM
96/48 kHz Sampling: 4 Hz-22kHz
110 dB
96 dB
0.003 %
120V AC_ 60Hz_25watts
41-104°F (5-40°C); 10%-75% humidity
13.8 Ibs.

SAMSUNG COMBINATION DVD & VCR
ThisSAMSUNG brand product, as suppliedand distributed bySamsung ElectronicsAmerica, Inc. (SAMSUNG) and
delivered new, in the original carton to the original consumerpurchaser,is warranted bySAMSUNG against manufac-
turing defectsin materials and workmanship foro limitedwarranty period of:
One (1) Year Partsand Labor*
(*90Days PartsandLabor for CommercialUse)
Thislimitedwarranty begins onthe original date ofpurchase, and isvalid only on products purchasedand usedin
the UnitedStates.Toreceivewarranty service, the purchasermustcontact SAMSUNG forproblem determinationand
serviceprocedures.Warranty servicecan only be performed by a SAMSUNG authorizedservice center.The original
dated bill of sale mustbe presented upon requestas proofof purchasetoSAMSUNGor SAMSUNG'sauthorized ser-
vice center.Transportation ofthe product to and fromthe servicecenteristhe responsibility ofthe purchaser.
SAMSUNG will repair or replace this product,atouroption and at no charge asstipulatedherein, with new or
reconditionedparts or productsif found tobe defectiveduring the limitedwarranty period specifiedabove.All
replaced parts and products becomethe property ofSAMSUNGand mustbe returnedto SAMSUNG. Replacement
parts and products assumethe remaining original warranty,or ninety (90)days,whichever islonger.
SAMSUNG isobligations with respect to software products distributed by SAMSUNG under the SAMSUNG brand
nameare setforth in the applicable end user licenseagreement.Non-SAMSUNG hardwareand software products, if
provided, areonon "AS IS"basis.Non-SAMSUNG manufacturers,suppliers,publishers,and serviceproviders may
providetheir ownwarranties.
Thislimitedwarranty covers manufacturingdefects in materials and workmanship encountered in normal, and except
to the extentotherwiseexpresslyprovided for in this statement,noncommercialuseof this product,and shall not apply
to the following, including, but not limitedto:damagewhich occurs inshipment;delivery and installation; applications
and usesforwhichthisproductwas not intended; altered productor serial numbers;cosmeticdamage or exterior fin-
ish; accidents, abuse,ne?lect, fire, water,lightning orotheracts of nature; useof products,equipment, systems,utili-
ties, services,parts, supplies,accessories,applications,installations, repairs, external wiring orconnectorsnot sup-
plied and authorized by SAMSUNG, or whichdamage this productor resultin service problems;incorrectelectrical
line voltage, fluctuationsand surges;customer adjustmentsand failure to followoperating instructions,cleaning, main-
tenanceand environmental instructionsthat are covered and prescribed in the instruction book; productremoval or
reinstallation;receptionproblems and distortion relatedtonoise, echo,interference orothersignal transmissionand
delivery problems. SAMSUNG doesnot warrant uninterruptedorerror-free operationofthe product.
THEREARENO EXPRESSWARRANTIESOTHERTHANTHOSELISTEDAND DESCRIBEDABOVE,AND NO WARRANTIES
WHETHEREXPRESSOR IMPLIED,INCLUDING,BUTNOT LIMITEDTO,ANY IMPLIEDWARRANTIESOF MERCHANTABILITY
OR FITNESSFORA PARTICULARPURPOSE,SHALLAPPLYAFTERTHEEXPRESSWARRANTYPERIODSSTATEDABOVE,
AND NO OTHEREXPRESSWARRANTYOR GUARANTYGIVEN BYANY PERSON,FIRMOR CORPORATIONWITH
RESPECTTO THISPRODUCTSHALLBEBINDINGON SAMSUNG.SAMSUNGSHALLNOT BELIABLEFORLOSSOF REV-
ENUEORPROFITS,FAILURETO REALIZESAVINGSOROTHERBENEFITS,OR ANYOTHERSPECIAL,INCIDENTALOR
CONSEQUENTIALDAMAGESCAUSEDBYTHEUSE,MISUSEOR INABILITYTO USETHISPRODUCT,REGARDLESSOF THE
LEGALTHEORYON WHICHTHECLAIMIS BASED,AND EVENIFSAMSUNGHASBEENADVISEDOF THEPOSSIBILITY
OF SUCHDAMAGES.NORSHALLRECOVERYOF ANY KINDAGAINSTSAMSUNGBEGREATERINAMOUNTTHAN
THEPURCHASEPRICEOF THEPRODUCTSOLDBYSAMSUNGAND CAUSINGTHEALLEGEDDAMAGE. WITHOUTLIM-
ITINGTHEFOREGOING,PURCHASERASSUMESALLRISKAND LIABILITYFORLOSS,DAMAGEOR INJURYTO PURCHAS-
ERAND PURCHASERiSPROPERTYAND TOOTHERSAND THEIRPROPERTYARISINGOUTOF THEUSE,MISUSEOR
INABILITYTO USETHISPRODUCTSOLDBYSAMSUNGNOT CAUSEDDIRECTLYBYTHENEGLIGENCEOF SAMSUNG.
THISLIMITEDWARRANTYSHALLNOT EXTENDTOANYONE OTHERTHAN THEORIGINALPURCHASEROF THISPROD-
UCT,IS NONTRANSFERABLEAND STATESYOUREXCLUSIVEREMEDY.
Somestatesdo not allow limitationson how longanimpliedwarranty lasts,or the exclusionor limitation of incidental
or consequentialdamages, so the abovelimitationsorexclusionsmay not apply to you. Thiswarranty givesyou spe-
cific legal rights,and youmay also haveotherrightswhich vary fromstatetostate.
Toobtainwarranty hardware service, please contactSAMSUNG at:
SAMSUNGCUSTOMERCARECENTER
400 ValleyRoad,Suite201,Mt. Arlington,NJ 07856,Tel:973-601-6000,Fax:973-601-6001
1-800-SAMSUNG(1-800-726-7864)andwww.SAMSUNGUSA.com
SAMSUNG ELECTRONICS AMERICA, INC.
HEADQUARTERS
105 ChallengerRoad, Ridgefield Park,N.J.
07660-05!1
TEL: 1-800-SAMSUNG
SERVICE DIVISION
400 Valley Road, Suite 201,MountArlington, NJ 07856
1-800-SAMSUNG(1-800-726-7864)
www.SAMSUNGUSA.com
ELECTRONICS
AK68-00353A