Loading ...
Loading ...
Loading ...
USER MANUALPG 20
INSTALLING YOUR NEW
COOKER
• The cooker MUST BE installed and serviced only by an authorised person.
• A certificate of compliance must be supplied by installer and is to be kept by the customer.
• The packing materials must be removed before you install the cooker.
• You must follow the installation instructions in this booklet.
• The surrounding kitchen cabinets must be able to withstand 85°C. We will not accept responsibility for
damage caused by installation in to kitchen cabinets which cannot withstand 85°C.
• The appliance must not be installed in a corner. It must be installed at least 100mm from the side wall.
• The flexible pipe for gas models must have sufficient loops so the cooker can be moved for service.
• The vents; opening and all air spaces must not be blocked.
• The anti-tilt plate must be installed to avoid accidental tipping.
• The 18 stabilising bolt must be installed to avoid accidental moving.
• You must not pull the cooker by the door handles.
• Power socket, if provided for gas models, and electricity isolation switch for electric models and gas
models without a 20A plug, is to be installed in an accessible position near the cooker (but not behind
cooker).
• If the supply cord or cable is damaged, it must be replaced by an approved service agent or a similarly
qualified person in order to avoid a hazard.
Unpacking And Installation Instructions For Installer
• Please check the product and make sure that there is no damage.
• Read the relevant installation sections of this manual (16,17,18,19). Ensure understanding.
• Confirm that product is compatible with available electrical/gas supply. Ensure proposed installation
position does not conflict with installation sections.
• Check the attachment packing in good condition, complete accessories.
• Use screw driver to remove two fixed anti-tilt plate screws and pate.
Locating The Cooker
Study the diagrams below to be sure of the dimensions required to locate the cooker safely. Make sure that
the top of the cooker is at least 10mm higher than the level of the bench tops. The appliance has been
designed to fit in a 550mm wide gap in kitchen cabinets. The cooker may also be installed at the end of a
line of benches or with a free space on either side.
NOTE: To ensure cooker stability, both the anti-tilt and anti-movement/ stability bolt must be installed on all
cookers (electric and gas).
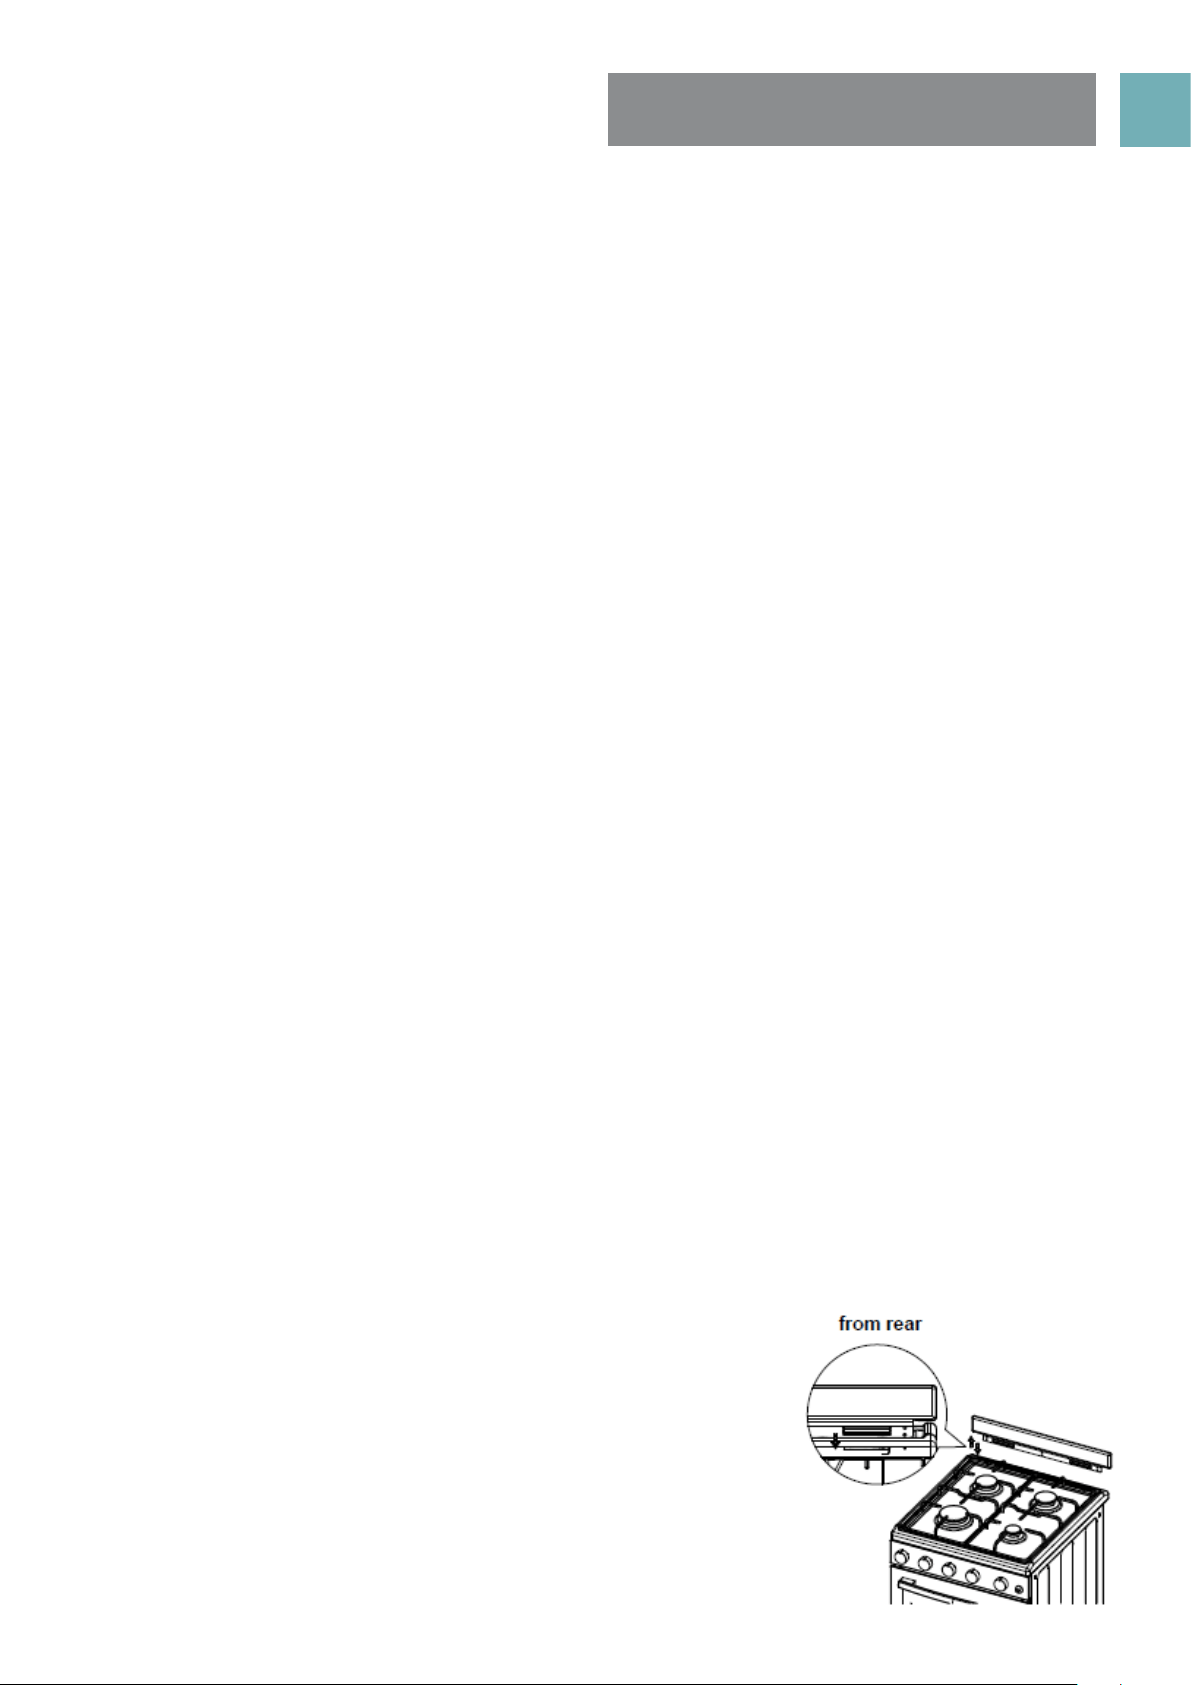
The splash back installation
• To replace the splash back, align the 2 tabs of the splash back with the corresponding holes in the hob
and push downwards.
• To remove the splash back, simply pull upwards.
• Clean the splash back in hot soapy water
• If required, pull the cooker back out and adjust the leveling feet as
required.
Loading ...
Loading ...
Loading ...