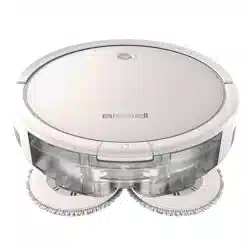
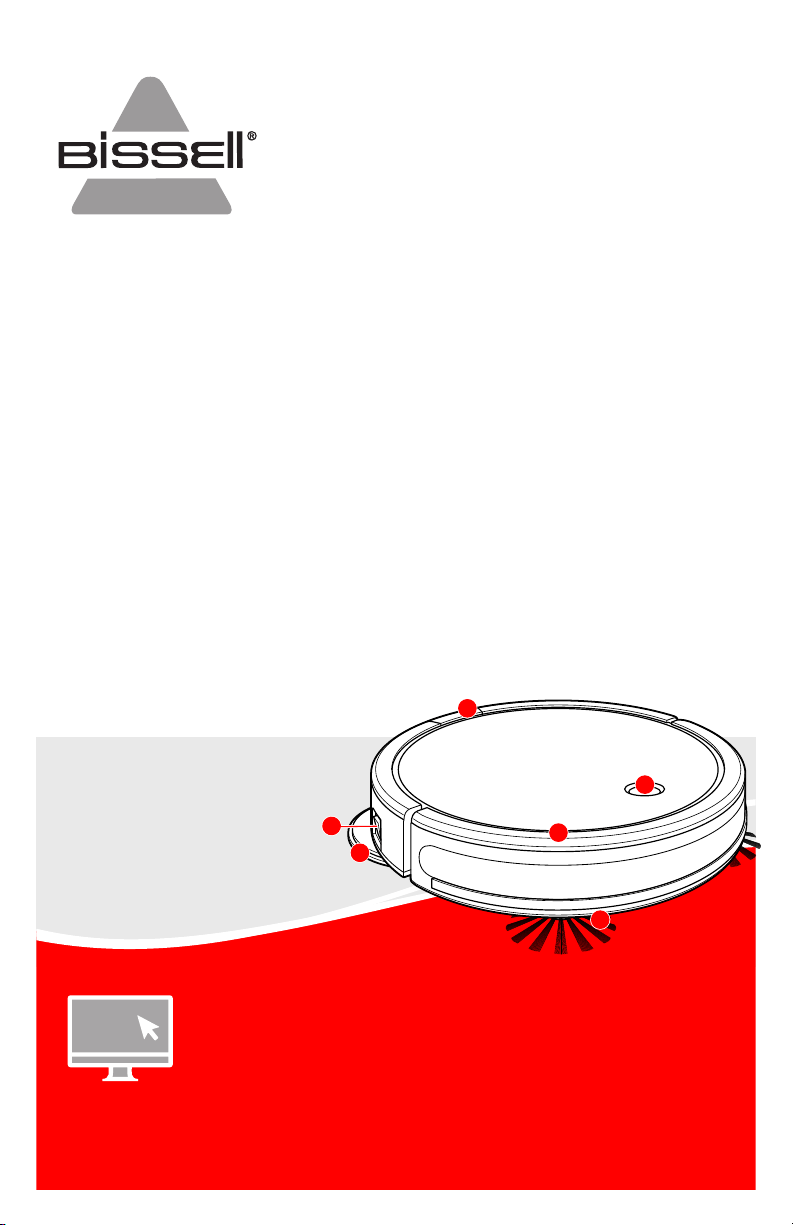
Product Overview
1. Tank Release Button
2. Power Switch
3. Mop Pads
4. Bumper
5. Start/Pause Button
6. Edge Cleaning Brushes
Go online for a comprehensive walkthrough
of your new purchase!
This guide has everything you need to get ready for first use,
including setting up, using and maintaining your machine,
but online you’ll find additional resources like tips and
troubleshooting, videos, product registration, parts, and more.
Go to support.BISSELL.com.
What’s in the Box? .......................................................... 3
Docking and Charging Your Robot ..................... 3
Connecting to the App ................................................ 4
Automatic Cleaning ........................................................4
Mop Mode ............................................................................. 5
Dry Vacuum Mode ...........................................................7
Cleaning the Brush Roll ............................................... 8
Removing and Cleaning the Caster Wheel ... 9
Replacing the Edge Cleaning Brushes.............. 9
Storing Your Robot ......................................................... 9
Cleaning the Sensors ................................................... 10
Replacing the Battery ................................................. 10
Troubleshooting ................................................................ 11
Warranty ................................................................................ 11
SPINWAVE® ROBOT
SERIES 2859, 3115
2
3
1
5
4
6
2 BISSELL.com
SAVE THESE INSTRUCTIONS
THIS MODEL IS FOR HOUSEHOLD USE ONLY.
IMPORTANT INFORMATION
• Do not turn your appliance ON until you are familiar with all instructions and operating procedures.
• This product contains a wireless device. Refer to FCC/IC Notice Document for regulatory information.
The software included in this product contains open source software. The open source licenses associated with this product may be obtained by visiting
www.BISSELL.com/opensource. With regards to GNU Lesser General Public License Version 2.1, you may obtain the complete corresponding source code
for a period of three years after the last shipment of this product by visiting BISSELL.com/opensource/2291 which leads to the download page for such
source code. This offer is valid to anyone in receipt of this information.
IMPORTANT SAFETY INSTRUCTIONS
WARNING
TO REDUCE THE RISK OF FIRE, ELECTRIC SHOCK OR INJURY
When using an electrical appliance, basic precautions should be
observed, including the following:
• Failure to follow the warnings and instructions may result in electric shock,
fire and/or serious injury.
• Unplug from outlet before conducting maintenance.
• Place the cords from other appliances out of the area to be cleaned.
• Do not operate the vacuum in a room where an infant or child is sleeping.
• Do not operate the vacuum in an area where there are lit candles or fragile
objects on the floor to be cleaned.
• Do not operate the vacuum in a room that has lit candles on furniture that
the vacuum may accidentally hit or bump into.
• Do not allow children to sit on the vacuum.
• Use indoors only.
• Do not immerse. Use only on hard floor surfaces moistened by the cleaning
process during Mop Mode.
• Do not allow to be used as a toy. Close attention is necessary when used by
or near children.
• Do not use for any purpose other than described in this user guide. Use only
manufacturer’s recommended attachments.
• Do not use with damaged cord, Docking Station or Charger. If appliance is
not working as it should, has been dropped, damaged, left outdoors, or
dropped into water, have it repaired at an authorized service center.
• Do not pull or carry by cord, use cord as a handle, close a door on cord, or
pull cord around sharp edges or corners. Do not run appliance over cord.
Keep cord, Docking Station or Charger away from heated surfaces.
• Do not unplug by pulling on cord. To unplug, grasp the Charger, not the cord.
• Do not handle Docking Station, Charger, contact points or appliance with
wet hands.
• Do not put any object into openings. Do not use with any opening blocked;
keep free of dust, lint, hair, and anything that may reduce air flow.
• Turn OFF all controls before unplugging.
• Do not use to pick up flammable or combustible liquids (lighter fluid,
gasoline, kerosene, etc.) or use in areas where they may be present while
vacuuming.
• Do not pick up anything that is burning or smoking, such as cigarettes,
matches or hot ashes while vacuuming.
• Do not use without dry tank, wet tank or filters in place.
• Use only BISSELL cleaning products intended for use with this appliance to
prevent internal component damage. See the “Mop Mode: Choosing Your
Formula” section of this manual.
• For use only with BYD battery pack model INR18650 M26-4S1P or BISSELL
model 1625424.
• For use only with SZ YingYuan charger model SAW12-190-0600UD.
• For use only with BISSELL Docking Station model 1624770.
• Keep hair, loose clothing, fingers, and all parts of body away from openings
and moving parts.
• Do not carry the appliance when in use.
• Do not use the appliance during charging.
• When battery pack is not in use, keep it away from other metal objects,
like paper clips, coins, keys, nails, screws, or other small metal objects, that
can make a connection from one terminal to another. Shorting the battery
terminals together may cause burns or a fire.
• Prevent unintentional starting. Ensure the ON/OFF switch is in the OFF
position before connecting to battery pack, picking up or carrying the
appliance. Do not carry the appliance with your finger on the switch.
• Recharge only with the charger specified by the manufacturer. A charger
that is suitable for one type of battery pack may create a risk of fire when
used with another battery pack.
• Do not use any battery pack which is not designed for use with the
appliance. Use of any other battery packs may create a risk of injury and fire.
• Under abusive conditions, liquid may be ejected from the battery; avoid
contact. If contact accidentally occurs, flush with water. If liquid contacts
eyes, additionally seek medical help. Liquid ejected from the battery may
cause irritation or burns.
• Do not use a battery pack or appliance that is damaged or modified.
Damaged or modified batteries may exhibit unpredictable behavior
resulting in fire, explosion or risk of injury.
• Do not expose a battery pack or appliance to fire or excessive temperature.
Exposure to fire or temperature above 130°C/265°F may cause explosion.
• Follow all charging instructions and do not charge the battery pack or
appliance outside of the temperature range 4-40°C/40-104°F. Charging
improperly or at temperatures outside of the specified range may damage
the battery and increase the risk of fire.
• Have servicing performed by a qualified repair person using only identical
replacement parts. This will ensure that the safety of the product is
maintained.
• Do not modify or attempt to repair the appliance or the battery pack.
• Do not use appliance in an enclosed space filled with vapors given off by
oil-based paint, paint thinner, some moth-proofing substances, flammable
dust, or other explosive or toxic vapors.
• Do not use to pick up toxic material (chlorine bleach, ammonia, drain
cleaner, etc.) while vacuuming.
• Do not incinerate the appliance even if it’s severely damaged. The batteries
can explode in a fire.
• Do not charge the machine outdoors.
• Do not position Docking Station near stairs or cliff edges.
• Keep appliance on a level surface.
• Clear the area to be cleaned. Remove excess clutter like power cords and
small objects from the floor that could entangle the appliance and tidy up
the cleaning area. Lift items such as curtains, and tablecloths off the floor.
• Do not pick up hard or sharp objects such as glass, nails, screws, coins, etc.
• This product contains a wireless device. Refer to website for regulatory
information.
• Brush or mop pads may start unexpectedly. Turn the Power Switch OFF
before cleaning or servicing.
• Plastic bags can be dangerous. To avoid danger of suffocation, keep this bag
away from babies and children.
READ ALL INSTRUCTIONS BEFORE USE.
BISSELL.com 3
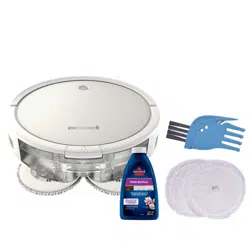
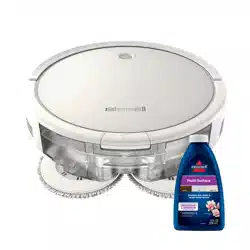
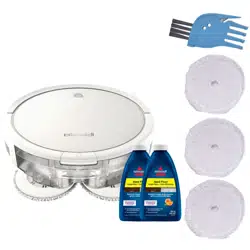
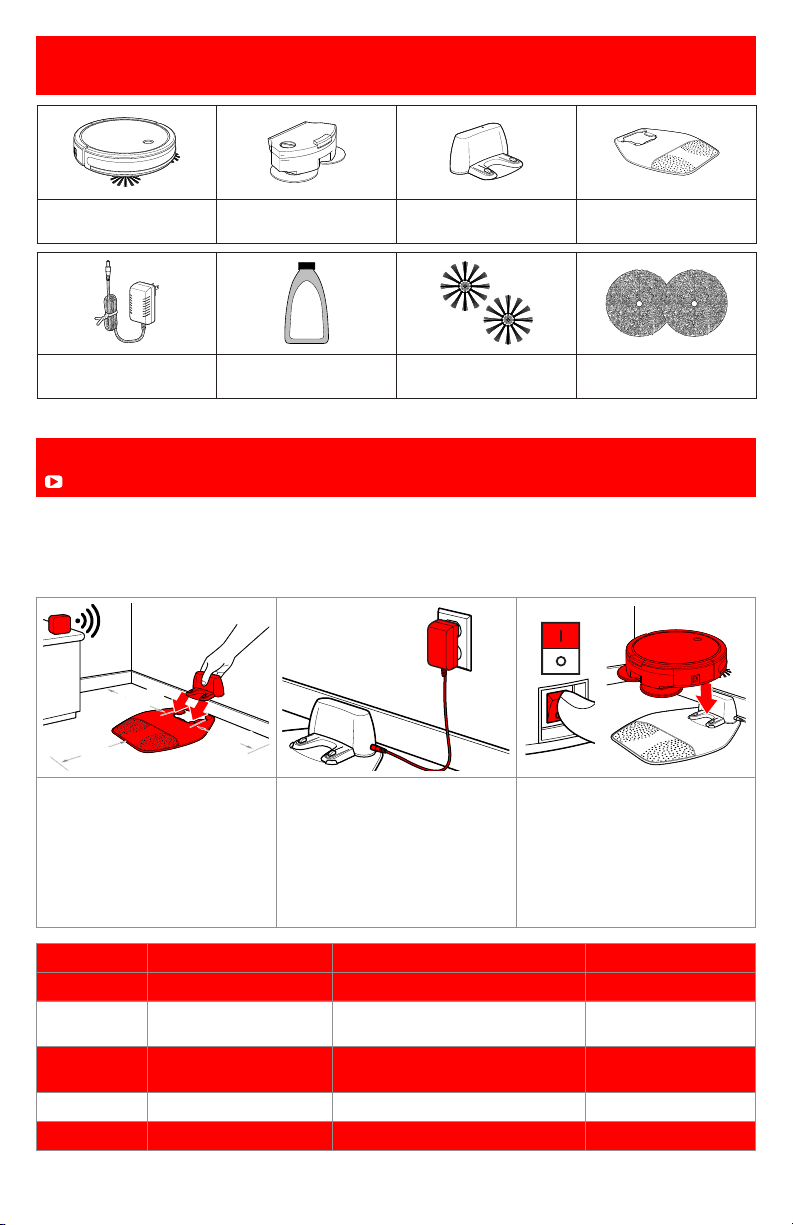
Formula
Water
BISSELL® SpinWave®
Robot with Dirt Bin
Mop Tank with
Mop Pads
Docking Station Docking Tray
Power Adapter Trial-Size Formula Edge Cleaning Brushes
(select models)
(2) Extra Mop Pads
What’s in the Box?
Standard accessories may vary by model.
Docking and Charging Your Robot
Go to support.BISSELL.com for assembly videos.
Note: The Docking Station & Docking Tray must be installed on a hard surface. The robot’s soft
surface sensors prevent it from cleaning carpets and area rugs in mop mode.
Be sure the device is near your WiFi router and the robot is fully charged or in the dock during the
pairing process.
Wi-Fi
80 inches
(2m)
40 inches
(1m)
40 inches
(1m)
40 inches
(1m)
40 inches
(1m)
40 inches
(1m)
Water
Formula
1. Place the back of Docking
Tray firmly against a wall.
Ensure there are at least 40
inches to one side, 40 inches
to the opposing side and no
obstructions in the front. Tip
the Docking Station into the
Docking Tray.
2. Insert the Docking Station
Power Adapter plug into the
port on the side of the Docking
Station. Plug the other end into
the wall outlet.
3. Turn the robot ON and put
it on the Docking Station. The
first charge will take 4-5 hours.
Status Button Light State Light Ring Sound
Power ON Pulse Once > Blink > On Pulse Once Activation Sound
Cleaning Blink > Fade In > On Pulse Once > Fade In >
30 seconds > Fade Out
Activation Sound
Charging Breathing Pulse Once > Breathing for
30 seconds > Off
1 Beep
Pairing Mode Blink Off 1 Beep
Paired On Solid for 5 Seconds > Fade Out 3 beeps
4 BISSELL.com
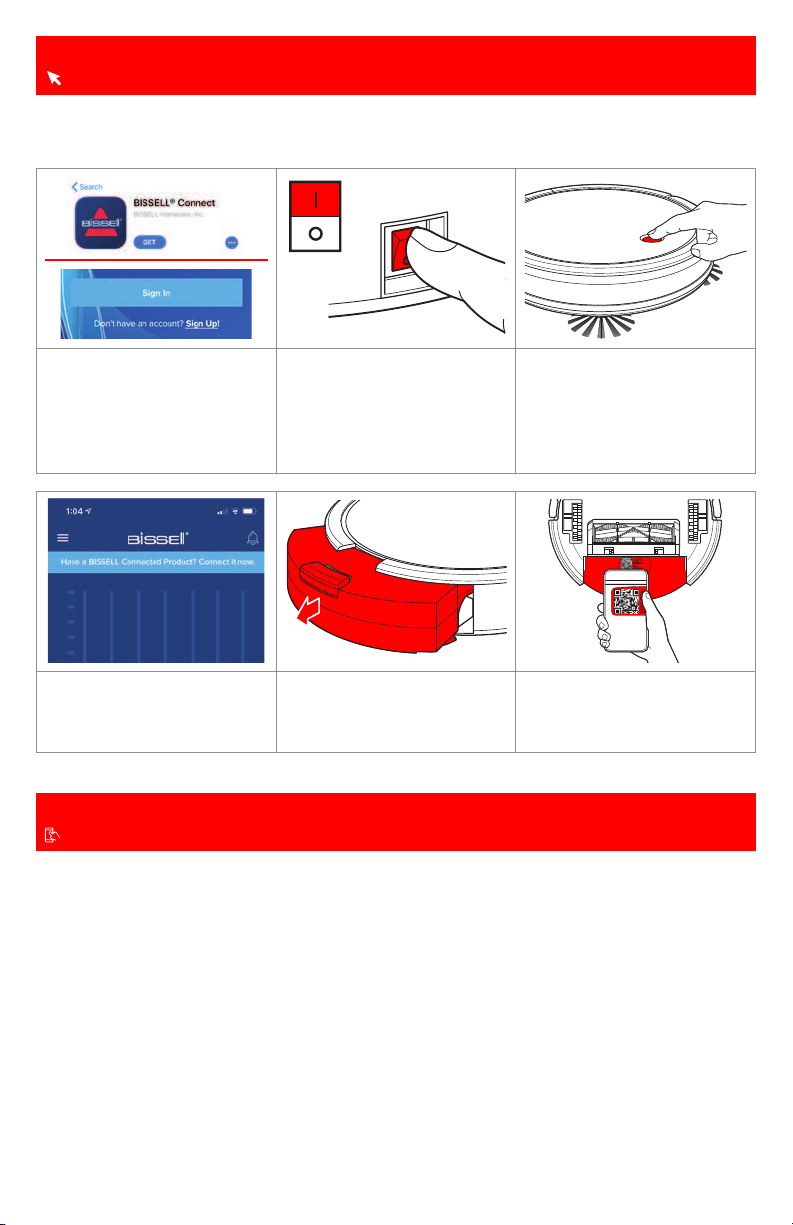
Connecting to the App
For more help, visit support.BISSELL.com.
Automatic Cleaning
Download the BISSELL Connect App to set up automatic features.
Downloading the BISSELL Connect App means you can change your robot’s cleaning mode, start,
pause, or stop your robot, schedule cleanings, view notifications, track your cleaning history, and
troubleshoot all from the palm of your hand.
1. In the App or Google
Play Store search “BISSELL
Connect” and download.
Once downloaded, open the
app and sign in or create a
new login.
2. Make sure you’re near your
WiFi router before turning the
robot ON (I).
3. To put the robot in pairing
mode, press and hold the
Start/Pause Button for 5
seconds until you hear a single
beep.
4. From the app, select “Have
a BISSELL Connected Product?
Connect it now.” Then choose
your product from the menu.
5. Remove the Dirt Bin and
turn the robot over to access
the setup QR code.
6. Scan the QR code, follow
the instructions in the app to
pair.
You can designate a day and time for your robot to run automatically using the BISSELL Connect App.
Once the robot is connected to the app, go to the Schedule tab and follow the on-screen prompts.
BISSELL.com 5
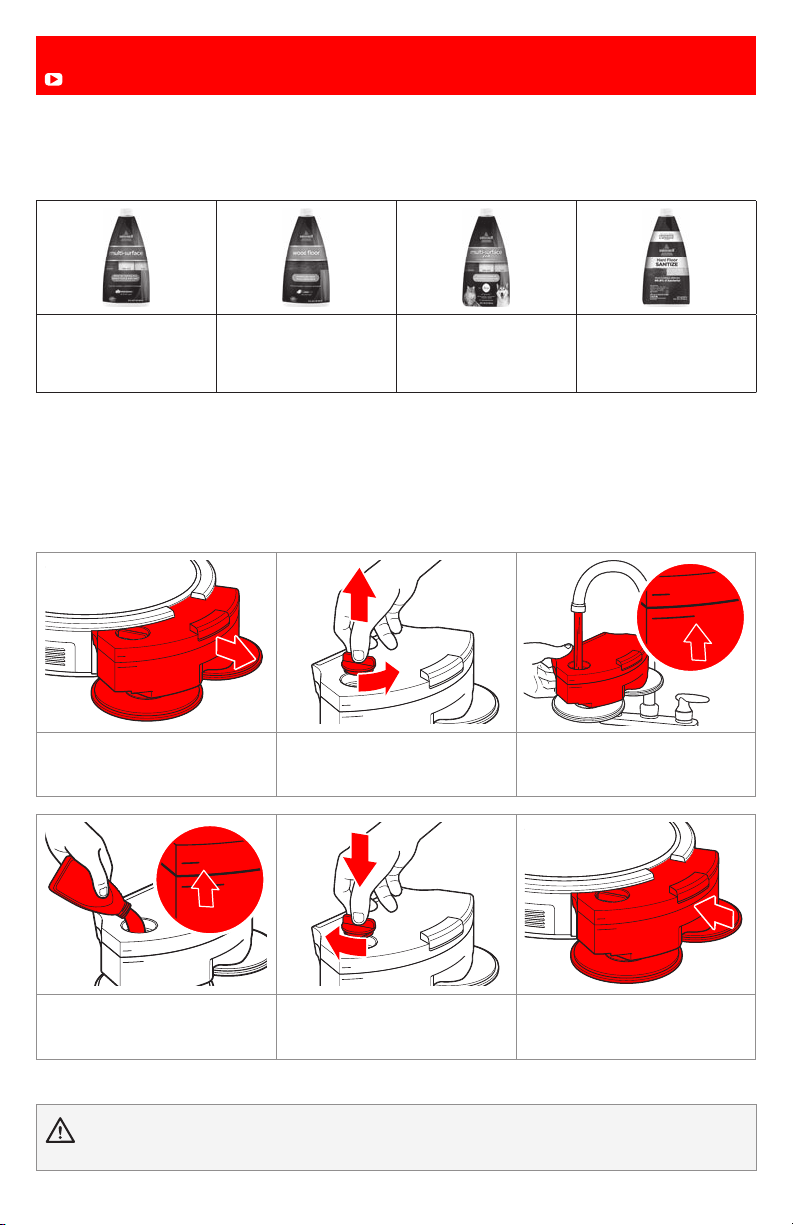
Filling Your Mop Tank
In Mop Mode, your BISSELL® SpinWave® Robot will clean using dual rear rotating mop pads combined
with a BISSELL formula to clean your home’s hard floors. While mopping, your SpinWave Robot will
also sweep and collect a limited amount of dry debris for a complete cleaning experience.
Formula
Water
Formula
Water
Formula
Water
Formula
Water
1. Turn the Power Switch OFF.
Press the button on top of the
tank and pull to remove.
2. Twist to unlock the tank cap
and pull up to remove.
3. Fill the tank with water to
the “Water” fill line.
Formula
Water
Formula
Water
Formula
Water
Formula
Water
4. Fill with a BISSELL formula
to the “Formula” fill line.
5. Twist the Mop Tank cap
back into place.
6. Reinstall the tank.
Note: Hold the tank level to
avoid leaking.
Multi-Surface Formula
Great for cleaning all
sealed hard floors.
Wood Floor Formula
Restores your wood floor’s
natural shine.
Pet Multi-Surface with
Febreze Formula
Removes pet odors to
clean and refresh.
Hard Floor Sanitize
Cleans and sanitizes,
eliminates 99.9% of
bacteria.*
Certain trademarks used under license from The Procter & Gamble Company or its affiliates.
*Kills 99.9% of Enterobacter aerogenes (ATCC 13408) and Staphylococcus aureus (ATCC 6538)
Mop Mode
More of a video person? Open up the BISSELL Connect App for how-to videos.
Choosing Your Formula
Keep plenty of BISSELL® formulas on hand so you can clean whenever it fits your schedule. Always
use genuine BISSELL formulas in your machine. Other formulas may harm the machine and void the
warranty. Do not use Hard Floor Sanitize Formula on area rugs or carpet.
WARNING To reduce the risk of fi re due to internal component damage use only BISSELL cleaning products
intended for use with this appliance.
6 BISSELL.com
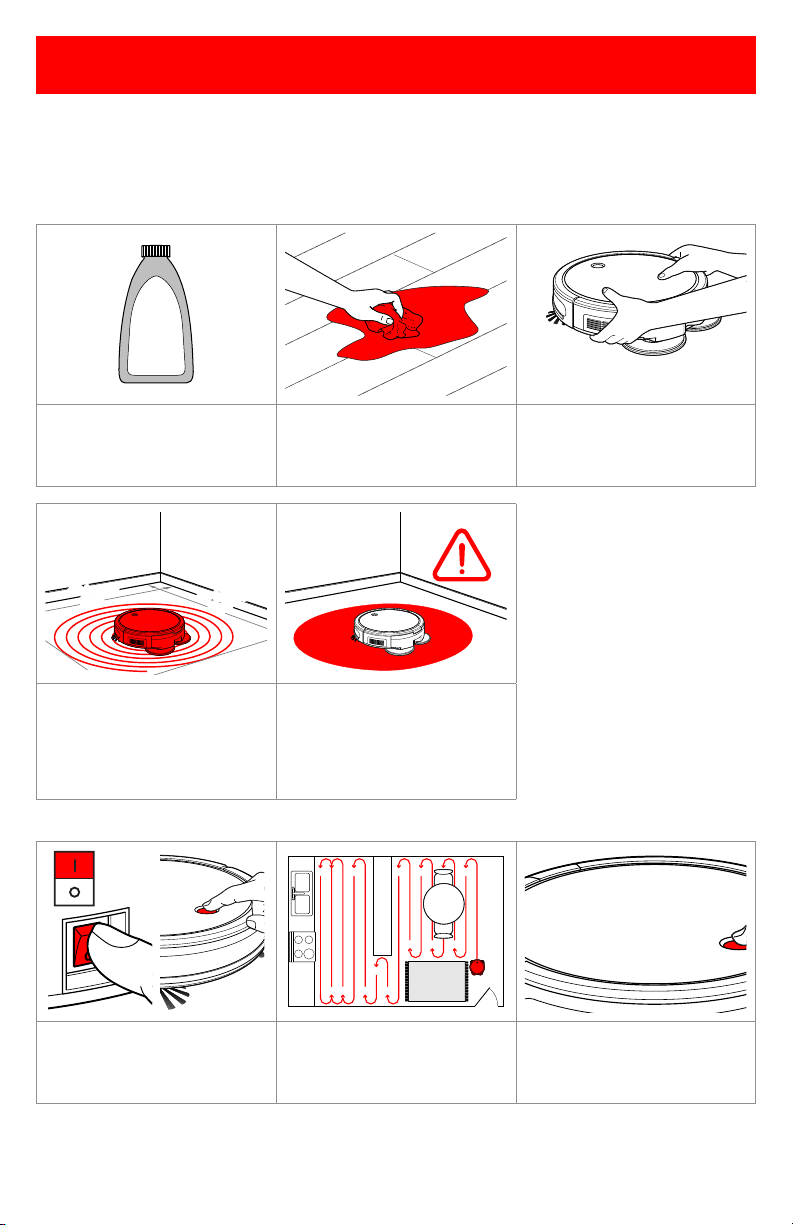
Sanitizing with Spot Mode
Spot mode can be used with BISSELL Hard Floor Sanitize Formula to sanitize floors after tough messes,
like a pet accident. Spot mode also works to give certain areas extra cleaning attention when used with
BISSELL Multi-Surface or Hard Floor Formulas. Access Spot mode in the BISSELL Connect App.
Note: You can sanitize 3 or 4 different areas around your home with a single tank.
HARD FLOOR
SANITIZE
Water
Formula
1. Add BISSELL Hard Floor
Sanitize formula following the
steps on page 5.
2. Wipe up the mess with
disposable towel.
3. Place the robot in the center
of the area you want to clean
and select “Spot” mode in the
BISSELL Connect App.
Water
Formula
40 inches
(1m)
40 inches
(1m) 40 inches
(1m)
40 inches
(1m)
Water
Formula
4. The robot will clean in a
spiral pattern, covering an area
approximately 40” x 40” or
1m x 1m for approximately 5
minutes. The robot will beep to
let you know it’s finished.
5. Use caution when removing
robot as the floor may be
slippery. Allow to remain wet
for 5 minutes.
Manual Cleaning
x2
1. Turn the robot ON. Press
the Start/Pause Button to start
cleaning.
2. The robot will clean hard
surfaces and avoid most soft
surfaces, such as area rugs and
carpet.
3. Return the robot to the dock.
Press the Start/Pause Button
twice. The light ring will flash
white as it finds its way back.
Note: The robot will stop if water is low. To resume cleaning, refill Mop Tank and push the
Start/Pause Button.
Mop Mode
(continued)

BISSELL.com 7
Maintaining the Mop Pads and Debris Trap
Formula
Water
1. Turn the Power Switch OFF.
Press the button on top of the
Mop Tank and pull to remove.
Place tank upside down on a
soft surface.
2. Firmly pull up on the Mop
Pads to remove from Mop Pad
Drivers. Replace Mop Pads if
damaged.
3. Machine wash separately
in warm water. Use only liquid
detergents. Do not use bleach
or fabric softener. Tumble dry
on low. Do not iron or dry clean.
4. To reattach, use the middle
hole on the pads to align with
the driver.
5. While in mopping mode,
your SpinWave® Robot can
sweep up a limited amount of
dry debris, so be sure to empty
the trap after each clean.
6. Pull down to open dry
debris trap door and empty
debris.
Mop Mode
(continued)
Dry Vacuum Mode
For more help, visit support.BISSELL.com.
Manual Cleaning
In Dry Vacuum Mode, your BISSELL SpinWave Robot will clean using a combination of dual edge
cleaning brushes, a rotating brush roll and powerful suction to clean multiple floor types in your home.
x2
1. Turn the robot ON. Press
the Start/Pause Button to start
cleaning.
2. When finished, press the
Start/Pause Button again to
stop the robot.
3. Return the robot to the dock.
Press the Start/Pause Button
twice. The light ring will flash
white as it finds its way back.

8 BISSELL.com
Maintaining the Dirt Bin
1. Turn the Power Switch OFF.
Press the button on top of the
Dirt Bin and pull to remove.
2. Open filter door by pulling
both sides apart. Empty the
debris from the Dirt Bin.
3. Remove the filter cover,
then the foam and pleated
filters.
4. Use the cleaning tool to
brush the filter cover and
filters. Do not wash the filters.
5. With filters removed, rinse
the Dirt Bin with tap water.
Ensure Dirt Bin is completely
dry before reinstalling. Do not
machine wash the Dirt Bin.
6. Once clean, reinstall the
filters and filter cover, close
and push back into the
machine.
1. Turn the Power Switch
OFF. Pinch the tabs on the
brush guard inward and pull
to remove. Lift to remove the
Brush Roll.
2. Clean the Brush Roll with
the cleaning tool.
3. Replace the Brush Roll and
brush guard. Note: The Brush
Roll has two different end
pieces. Ensure the square-
shaped end piece is inserted
into the square-shaped port.
Cleaning the Brush Roll
Check out the BISSELL Connect App for tips and videos on Brush Roll Maintenance.
WARNING To reduce the risk of electric shock, turn the Power Switch OFF before performing maintenance or
troubleshooting checks.
Dry Vacuum Mode
(continued)

BISSELL.com 9
1. Turn the Power Switch
OFF. Set your robot on a soft
surface and pull up firmly on
the caster wheel.
2. Clean out any visible hair
and debris with a dry cloth.
3. To reinstall the caster wheel,
push down firmly until you
hear a “click”.
Removing and Cleaning the Caster Wheel
For more help with maintaining your robot, open up the BISSELL Connect App.
Replacing the Edge Cleaning Brushes
Find replacement brushes on BISSELL.com.
WARNING To reduce the risk of electric shock, turn the Power Switch OFF before performing maintenance or
troubleshooting checks.
Occasionally, the Edge Cleaning Brushes need to be cleaned to work more effectively. Once removed,
they can be rinsed or soaked in water. Be sure they are completely dry before returning to the
machine.
1. Turn the Power Switch OFF.
Use a Phillips-head screwdriver
to remove the screw. Pull up
on the base of the brush.
2. Push the brush directly
onto the holder. Replace the
screws with a Phillips-head
screwdriver.
Storing Your Robot
Store your robotic vacuum cleaner safely indoors where it is unlikely to be damaged. Store with
clean, dry mop pads. Any solution remaining in the Mop Tank should be emptied prior to storage.
NOTICE To reduce the risk of a leaking condition, do not store machine where freezing may occur. Damage to internal
components may result.
10 BISSELL.com
Cleaning the Sensors
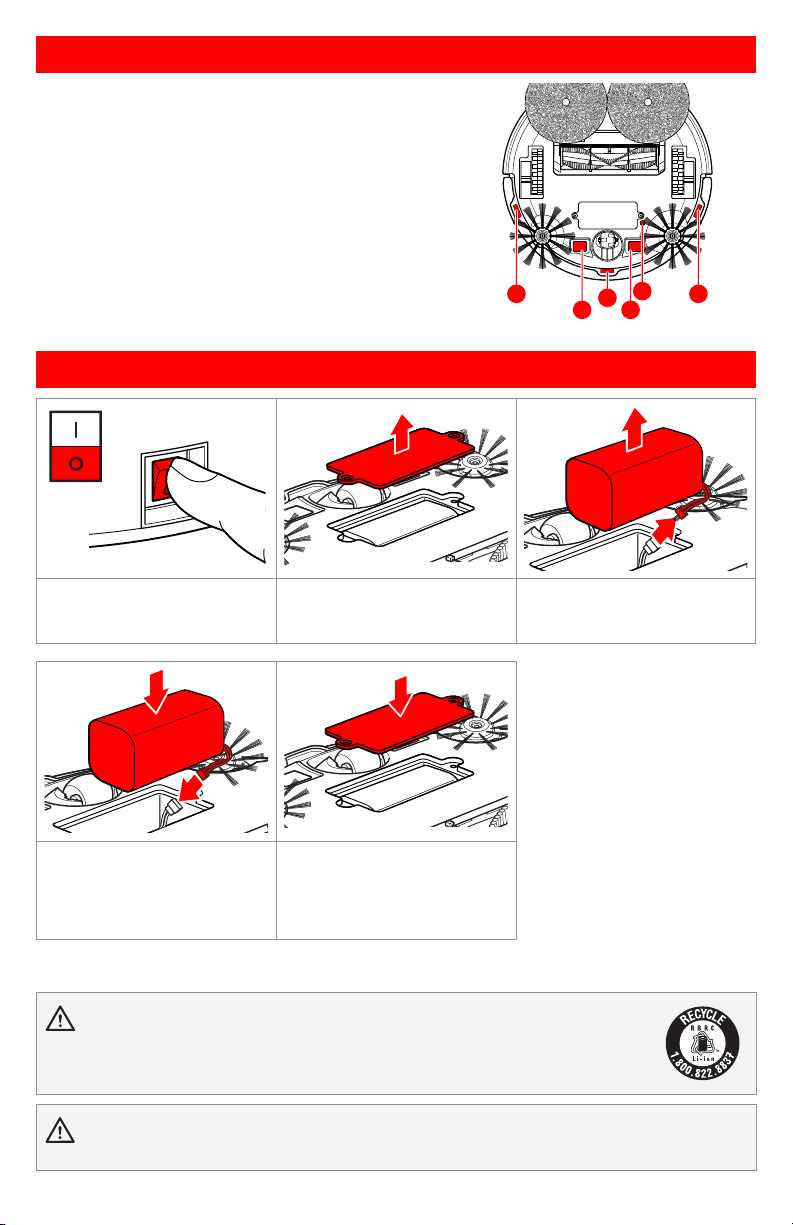
Replacing the Battery
WARNING To reduce the risk of electric shock, turn the Power Switch OFF before performing maintenance or
troubleshooting checks.
After repeated use, debris can accumulate on the sensors
of the robot and the robot’s performance could be affected.
To ensure the best efficiency, the sensors should be cleaned
off periodically by brushing any debris from them.
Turn the Power Switch OFF before cleaning the sensors.
WARNING This product contains Lithium-Ion rechargeable batteries. DO NOT mix Lithium-Ion
batteries with general household waste. According to Federal and State regulations, removal and proper disposal
of Lithium-Ion batteries is required. For specific battery disposal instructions please contact Call2Recycle at
877-723-1297 or visit www.call2recycle.org.
1. Turn the Power Switch OFF. 2. Use a Phillips-head
screwdriver to remove the two
screws and battery cover.
3. Remove the battery and
disconnect.
4. Connect the new battery
and install into battery
compartment. Do not remove
the plastic shrink sleeve from
the battery pack.
5. Use a Phillips-head
screwdriver to replace the
battery cover.
Note: Any other servicing should be performed by an authorized service representative.
Sensors and Contacts
1. Cliff Sensors
2. Charging Contact Points
3. Soft Surface Avoidance Sensor
13
2 2
11

BISSELL.com 11
Troubleshooting
For a comprehensive walkthrough of your product and support tips visit support.BISSELL.com.
This guide has everything you need to get ready for first use, including setting up, using and
maintaining your machine, but online you’ll find additional resources like tips and troubleshooting,
videos, product registration, parts, and more.
Error Notifications
Error Button Light State Sound Remedies
Robot is
Trapped, Lifted
or Cliff Sensors
are Dirty
Flashing Red 1 Beep Place robot on floor away from objects and
resume cleaning. If error persists, turn robot
OFF and use a dry cloth to clean the three
cliff sensors on the bottom of the robot.
Front Caster
Wheel Sensor
is Blocked
Flashing Red 3 Beep Turn robot OFF and remove front caster
wheel assembly. Clear debris from assembly
housing. Reinstall wheel.
Left or Right
Wheel is Stuck
Flashing Red >
Solid Red
1 Beep Turn robot OFF and remove hair and debris
from wheels.
Edge Cleaning
Brushes are
Stuck
Flashing Red >
Solid Red
2 Beeps Turn OFF the robot and remove hair and
debris from Edge Cleaning Brushes.
Brush Roll
is Stuck
Flashing Red >
Solid Red
3 Beeps Turn OFF the robot and remove hair and
debris from Brush Roll.
Bumper is
Stuck or Robot
is Trapped
Flashing White 2 Beeps Turn OFF the robot and tap the Bumper
serval times to release any debris that may
have accumulated.
Low Water Flashing Red and
White Alternately
3 Beeps Turn OFF the robot and remove the water
tank. Fill the water tank and resume cleaning.
Warranty
1-Year limited warranty, may vary by state. Visit support.BISSELL.com or call 1-844-383-2630
for complete warranty information.

But wait, there’s more!
Join us online for a complete guide to your new product, including
troubleshooting, product registration, parts, and more.
Go to support.BISSELL.com.
VIDEOSINFOREGISTER PARTS SUPPORT
We’re Waggin’ Our Tails!
BISSELL® proudly supports BISSELL Pet Foundation® and its mission to
help save homeless pets. When you buy a BISSELL product, you help
save pets, too. We’re proud to design products that help make pet
messes, odors and pet homelessness disappear.
Visit BISSELLsavespets.com to learn more.
©2020 BISSELL Inc. All rights reserved.
Part Number 1624086 07/20