Loading ...
Loading ...
Loading ...

10 11
FrançaisFrançaisEnglish
KRUPS shall not be obliged to repair or replace any product which is not accompanied by a valid
proof of purchase.
This guarantee will not cover any damage which could occur as a result of misuse, negligence,
failure to follow KRUPS instructions, use on current or voltage other than as stamped on the
product, or a modification or unauthorised repair of the product. It also does not cover normal
wear and tear, maintenance or replacement of consumable parts, or the following:
- -using the wrong type of water or consumable
-scaling (any de-scaling must be carried out according to the instructions for use);
-ingress of water, dust or insects into the product;
-mechanical damages, overloading
-damages or bad results due to wrong voltage or frequency
-accidents including fire, flood, thunderbolt etc
-professional or commercial use
-damage to any glass or porcelain ware in the product
-replacement of consumables
This guarantee does not apply to any product that has been tampered with, or to damages
incurred through improper use and care, faulty packaging by the owner or mishandling by any
carrier.
The international KRUPS guarantee applies only for products purchased in one of the countries
listed, and used for domestic purposes only in one of the countries listed on the Country List.
Where a product purchased in one listed country and then used in another listed country:
a) The international KRUPS guarantee does not apply in case of non conformity of
the purchased product with the local standards, such as voltage, frequency, power
plugs, or other local technical specifications
b) The repair process for products purchased outside the country of use may require
a longer time if the product is not locally sold by KRUPS
c) In cases where the product is not repairable in the new country, the international
KRUPS guarantee is limited to a replacement by a similar product or an alternative
product at similar cost, where possible.
Consumer Statutory Rights
This international KRUPS guarantee does not affect the statutory rights a consumer may have
or those rights that cannot be excluded or limited, nor rights against the retailer from which the
consumer purchased the product. This guarantee gives a consumer specific legal rights, and the
consumer may also have other legal rights which vary from State to State or Country to Country.
The consumer may assert any such rights at his sole discretion
Additional information
Accessories, Consumables and end-user replaceable parts can be purchased, if locally available,
as described on the KRUPS internet site.
Français
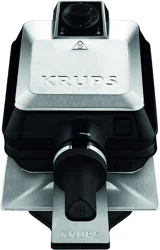
DESCRIPTION
a Voyant de mise sous tension (rouge)
b Voyant de fin de préchauffage (vert)
c Thermostat réglable
d Boutons d’éjection des plaques supérieure et
inférieure
e Poignée
f Plaques gaufres amovibles
g Ergots de fixation des plaques
h Plateau récupérateur de pâte aimantable
i Bouton de bloquage du produit en position
verticale pour rangement
j Cordon fixe
Les dessins explicatifs se trouvent en page 51
INSTALLATION
■ Ouvrir l’appareil.
■ Verser un peu d’huile sur les plaques avant la première utilisation. Essuyer avec un chiffon doux (Fig 1).
■ Placer le plateau récupérateur de pâte (h) sous l’appareil (Fig 2).
BRANCHEMENT ET PRÉCHAUFFAGE
■ Dérouler le cordon.
■ Fermer l’appareil.
■ Brancher le cordon sur le secteur. Le voyant rouge de mise sous tension (a) s’allume. Régler le
thermostat (c) sur la position de votre choix ou en fonction de la recette (Fig 3).
■ Laisser préchauffer l’appareil environ 7 minutes: le préchauffage est terminé lorsque le voyant vert (b)
s’allume (Fig 4). Le voyant vert s’éteindra et se rallumera régulièrement au cours de l’utilisation pour
indiquer que la température est maintenue.
CUISSON
■ Ouvrir l’appareil (Fig 5).
■ Ne pas toucher les surfaces chaudes de l’appareil : utiliser la poignée (e).
■ Verser la pâte à gaufre sur la plaque inférieure (f) de l’appareil à l’aide d’une louche (Fig 6).
■ Fermer l’appareil. Attendre 10 secondes (Fig 7). Retourner l’appareil en tournant la poignée (e) vers
la droite (Fig 8).
■ Laisser cuire selon le temps indiqué dans la recette (environ 3 minutes) (Fig 9).
■ En fin de cuisson, retourner à nouveau l’appareil en tournant la poignée (e) vers la gauche (Fig 10).
■ Ouvrir l’appareil (Fig 11) et retirer les gaufres (Fig 12).
APRÈS UTILISATION
■ Régler le thermostat sur la position mini (Fig 13).
■ Débrancher le cordon du secteur.
■ Laisser refroidir l’appareil en position ouverte (pendant deux heures environ - Fig 14).
Loading ...
Loading ...
Loading ...
