Loading ...
Loading ...
Loading ...
E-47
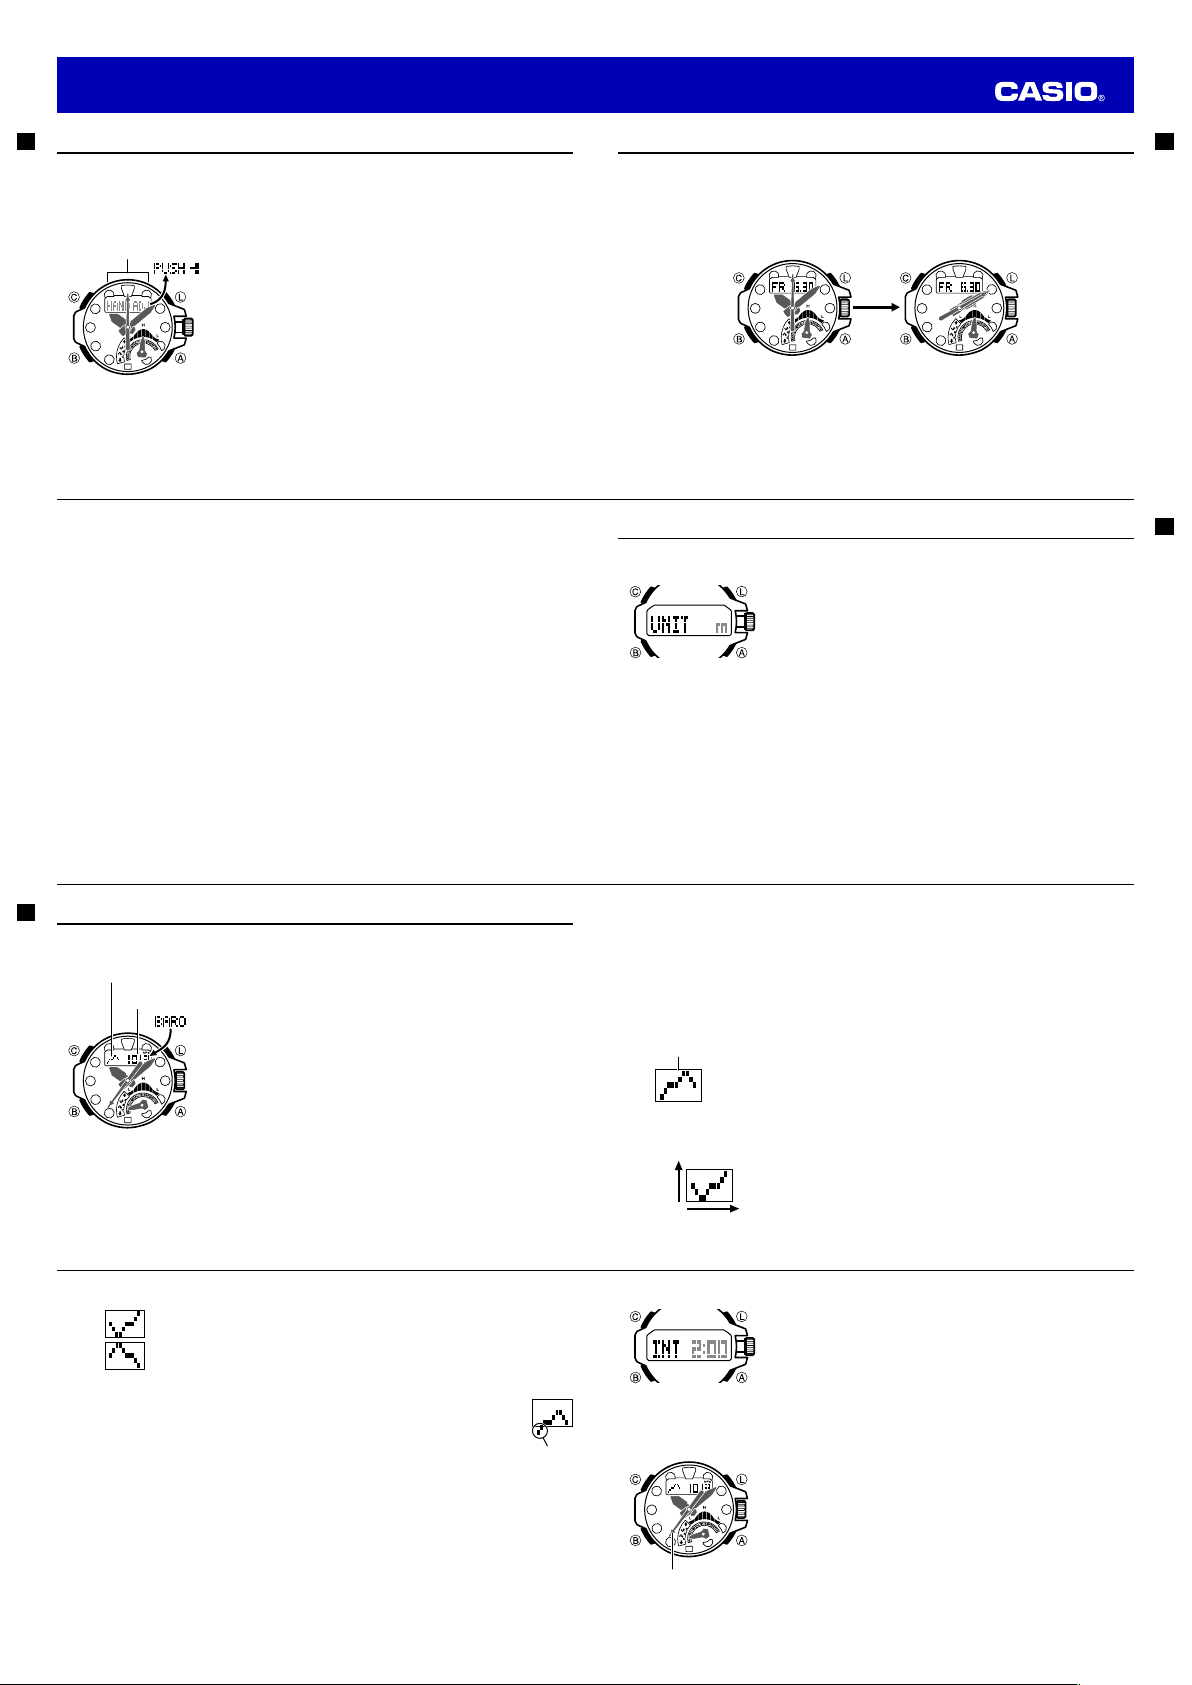
To specify the barometric pressure auto measurement interval
1. In the Barometer Mode, pull out the crown.
• This will cause the current barometric pressure reading value to
fl
ash on the display.
2. Press
B
.
• This causes INT (interval) to appear on the display, with the current
setting (0:30 or 2:00) fl ashing.
3. Rotate the crown to select either
0:30
or
2:00
.
4. Push the crown back in.
• This completes the setting procedure and exits the setting screen.
Barometric Pressure Differential Pointer
This pointer indicates the relative difference between the most recent
barometric pressure reading indicated on the Barometric Pressure Graph
(page E-45), and the current barometric pressure value displayed in the
Barometer Mode (page E-44).
To toggle barometric pressure differential indication on or off
1. Enter the Barometer Mode.
2. Press
C
.
• This causes the second hand to indicate the barometric pressure
differential.
l
l
l
l
l
l
l
l
l
l
l
l
l
l
l
l
l
l
l
l
l
l
l
l
l
l
l
l
Barometric pressure
differential pointer
E-46
How to interpret the data that appears on the Barometric Pressure Graph is shown below.
Rising barometric pressure indicates that upcoming weather will improve.
Falling barometric pressure indicates that upcoming weather will deteriorate.
Note
• If there are sudden changes in weather or temperature, the graph line of past
readings may run off the top or bottom of the display.
• The conditions below cause the barometric pressure reading to be skipped, with the
corresponding point on the Barometric Pressure Graph being left blank.
– Barometric reading that is out of range (260 hPa to 1,100 hPa or 7.65 inHg to 32.45
inHg)
– Sensor malfunction
• The Barometric Pressure Graph is not displayed while the barometric pressure change indicator is
displayed.
Specifying the Barometric Pressure Auto Measurement Interval
You can select either of two barometric pressure auto measurement interval times for drawing the
Barometric Pressure Graph.
0:30: 30-minute measurement interval
2:00: 2-hour measurement interval
Not visible on
the display.
E-45
Barometric Pressure
• Barometric pressure is displayed in units of 1 hPa (or 0.05 inHg).
• The displayed barometric pressure value changes to
- - -
if a measured barometric pressure falls
outside the range of 260 hPa to 1,100 hPa (7.65 inHg to 32.45 inHg). The barometric pressure value
will reappear as soon as the measured barometric pressure is within the allowable range.
Display Units
You can select either hectopascals (hPa) or inchesHg (inHg) as the display unit for the measured
barometric pressure. See “To specify altitude, depth, barometric pressure, and temperature units” (page E-43).
Barometric Pressure Graph
Barometric pressure indicates changes in the atmosphere. By monitoring
these changes you can predict the weather with reasonable accuracy.
Your watch can be confi gured to take barometric pressure readings
automatically every two hours or every 30 minutes. Readings are used to
produce Barometric Pressure Graph and to determine the barometric
pressure differential pointer position.
Reading the Barometric Pressure Graph
The Barometric Pressure Graph shows a chronological history of pressure readings.
• The horizontal axis of the graph represents time, with each dot
standing for either two hours or 30 minutes (depending on the watch
settings). The rightmost dot represents the most recent reading.
• The vertical axis of the graph represents barometric pressure, with
each dot standing for the relative difference between its value and that
of the dots next to it. Each dot represents 1 hPa.
Barometric Pressure Graph
Barometric
pressure
Time
E-44
Taking Barometric Pressure Readings
This watch uses a pressure sensor to measure air pressure (barometric pressure).
To take barometric pressure readings
While in the Timekeeping Mode or a sensor mode, use
A
to cycle
through the sensor modes until
BARO
appears on the display. See
“Selecting a Mode” (page E-30).
• This enters the Barometer Mode and displays a barometric pressure
reading after about one second.
• After a barometric pressure reading operation is started, the watch will
take readings every fi
ve seconds for the fi rst three minutes, and then
every two minutes after that.
• The watch will return to the Timekeeping Mode automatically if you do
not perform any operation for about one hour after entering the
Barometer Mode.
Barometric
Pressure Graph
Barometric
pressure
E-43
Specifying Altitude, Depth, Barometric Pressure, and Temperature Units
Use the procedure below to specify the units for altitude, depth, barometric pressure, and temperature
measurement.
Important!
• When
TYO
(Tokyo) is selected as the Home City, the following
measurement units are set automatically: Altitude and Depth: meters
(
m
), Barometric Pressure: hectopascals (
hPa
), Temperature: Celsius
(
°C
). These settings are fi
xed and cannot be changed.
To specify altitude, depth, barometric pressure, and temperature
units
1. In the Timekeeping Mode, pull out the crown.
2. Press
B
as many times as necessary until
UNIT
appears on the
digital display.
• Press
B
ni
ne times to display the UNIT screen for altitude and
depth units. Press
B
10 times to display the UNIT screen for
barometric pressure. For temperature, press
B
eleven times.
3. Rotate the crown to change the unit setting.
4. After the settings are the way you want, push the crown back in.
l
l
l
l
l
l
l
l
l
l
E-42
To return the hands to their normal positions
Press any one of the following buttons:
A
,
B
or
C
.
Note
• The hands will also return to their normal positions if you do not perform any operation for about 10
seconds.
• If the hands have moved to 2 o’clock because you pulled out the crown,* they will return to their normal
positions when you push the crown back in.
* Th
e hands will not move to 2 o’clock if you pull out the crown while confi guring the city code
setting (pages E-34, E-93) or the summer time setting (pages E-34, E-93), or while manually configuring time
(page E-36).
Auto Hand Shift
If the hour hand and/or minute hand is over the digital display when a barometric pressure, altitude,
temperature, or depth measurement is performed, the hand(s) will shift automatically (to 2 o’clock or 10
o’clock) and provide a better view of the displayed information. The hands will return to their normal
positions after about three seconds.
E-41
Moving the Hands for Easy Viewing of the Digital Display
You can use the procedure below to move the analog hands in order to better view a digital display.
Note
• The analog hands will not move while battery power is low.
To shift the hands and view digital info
While holding down
L
, press
B
.
• This will cause all hands to move to 2 o’clock.
E-40
Hand Home Position Adjustment
If the watch is exposed to strong magnetism or impact, its hands can go out of alignment with the time on
the digital display. This can result in incorrect time indication even though a time calibration signal is being
received. The watch periodically corrects hand positions automatically. You can also use the procedure
below to trigger hand position adjustment manually when required.
To trigger hand home position adjustment manually
1. In the Timekeeping Mode, pull out the crown.
2. Hold down
A
for at least fi ve seconds until
HAND SET
fl ashes and
then
HAND ADJ
appears on the digital display.
• This indicates the hand home position adjustment mode.
Important!
• Before performing step 3, below, make sure that all hands have
re
t
urned to the 12 o’clock position. Pushing the crown back in
while any hand is not at the 12 o’clock position will not trigger
home position adjustment.
3. Push the crown back in.
• This will cause all of the hands (hour, minute, second) to return to
their normal positions.
• The small hand will also return to tide level indication.
Note
After performing the above steps, enter the Timekeeping Mode and check to make sure that the analog
hands and the display indicate the same time. If they do not, trigger home position adjustment again.
l
l
l
l
l
l
l
l
l
l
l
l
l
l
l
l
Wait until all of the hands
move to 12 o’clock.
Operation Guide 5477
Loading ...
Loading ...
Loading ...