Loading ...
Loading ...
B.
Drill Pilot Holes and Fasten Bracket - Drill a 1/8" pilot
hole where screws are to be located. If bracket is to be
mounted to the wall, drill pilot hole at an approximate
20 ° downward angle. If bracket is to be mounted to
masonry or ceramic floors, drill a 5/32" pilot hole 1-3/
4" deep. The screws provided may be used in wood or
concrete material. Use a 5/16" nut-driver or flat head
screwdriver to secure the bracket in place.
FASTEN BRACKET (WALL OR FLOOR MOUNTING)
----_i 14--1=1/4" Max.
Leveling Leg -- b\
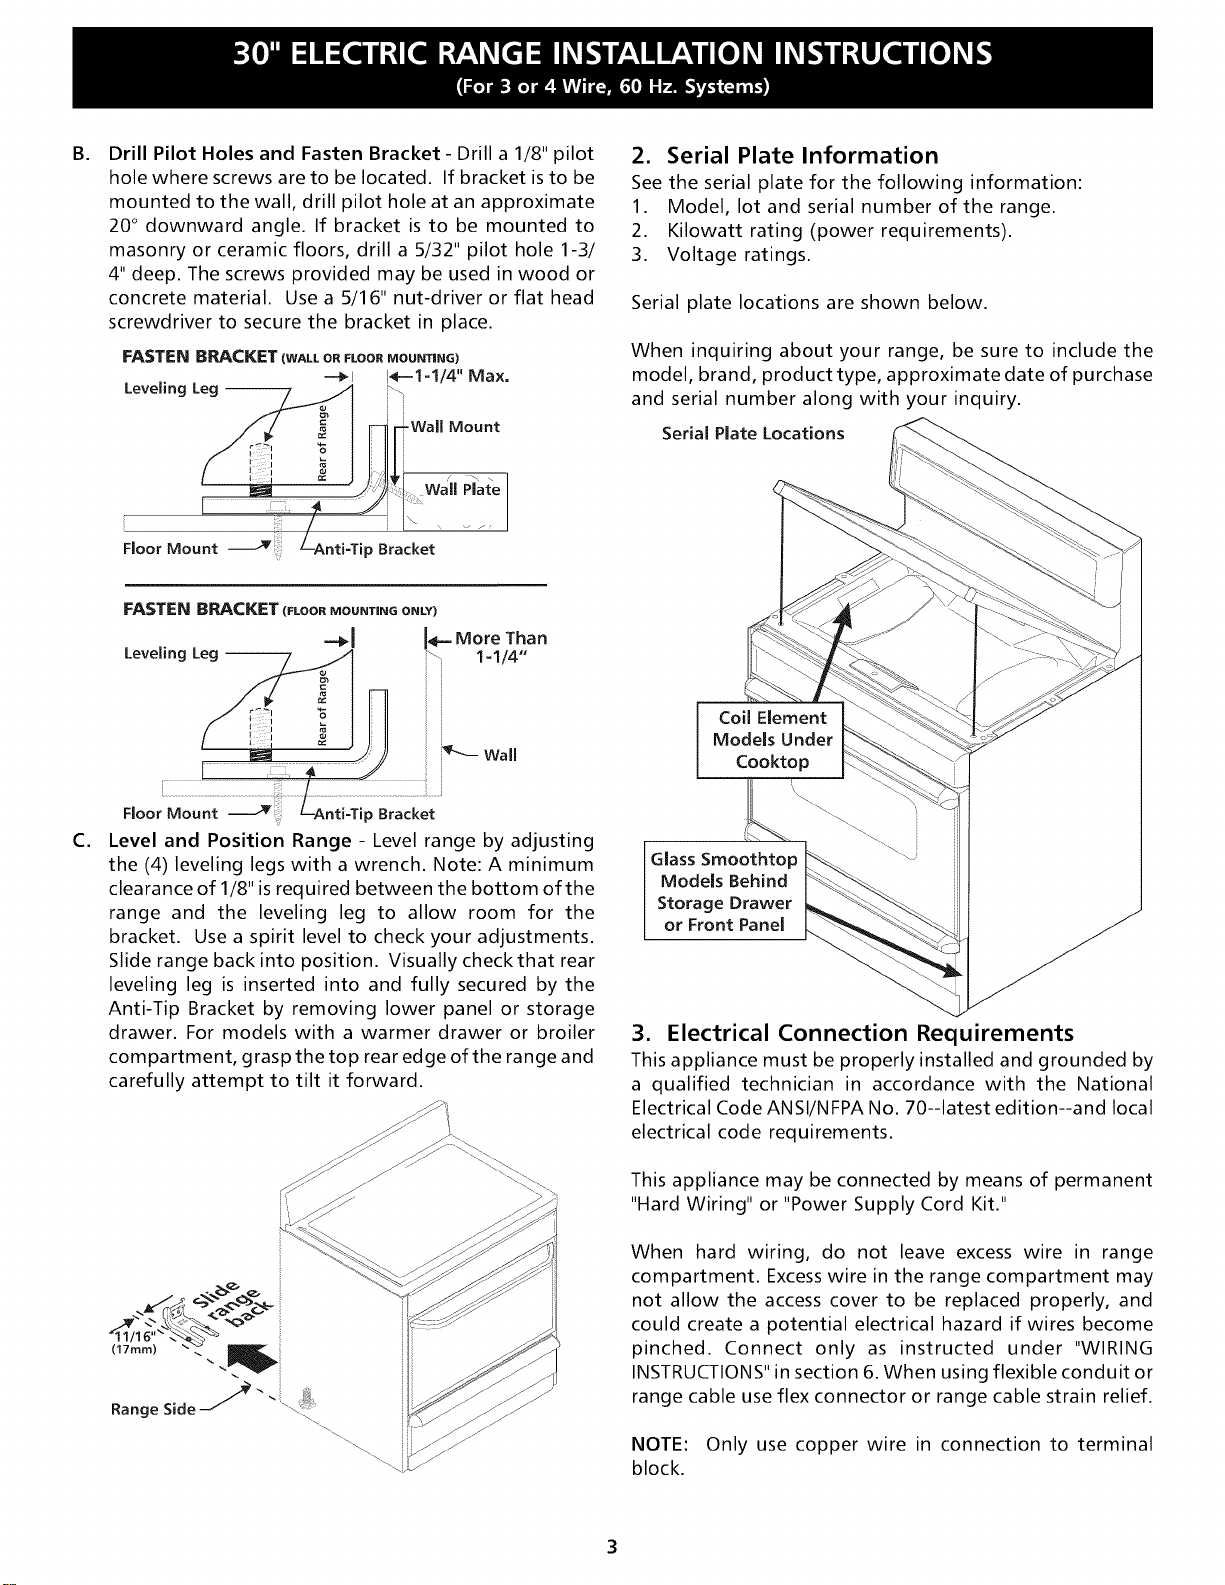
2. Serial Plate Information
See the serial plate for the following information:
1. Model, lot and serial number of the range.
2. Kilowatt rating (power requirements).
3. Voltage ratings.
Serial plate locations are shown below.
When inquiring about your range, be sure to include the
model, brand, product type, approximate date of purchase
and serial number along with your inquiry.
Serial Plate Locations
Floor Mount
C.
i iiii:i
Floor Mount
'ily
ip Bracket
Level and Position Range - Level range by adjusting
the (4) leveling legs with a wrench. Note: A minimum
clearance of 1/8" is required between the bottom of the
range and the leveling leg to allow room for the
bracket. Use a spirit level to check your adjustments.
Slide range back into position. Visually checkthat rear
leveling leg is inserted into and fully secured by the
Anti-Tip Bracket by removing lower panel or storage
drawer. For models with a warmer drawer or broiler
compartment, grasp the top rear edge of the range and
carefully attempt to tilt it forward.
Coil Element
Models Under
Cooktop
Glass Smoothtop _ "_
Models Behind
Storage Drawer __
or Front Panel
3. Electrical Connection Requirements
This appliance must be properly installed and grounded by
a qualified technician in accordance with the National
Electrical Code ANSI/NFPA No. 70--latest edition--and local
electrical code requirements.
This appliance may be connected by means of permanent
"Hard Wiring" or "Power Supply Cord Kit."
When hard wiring, do not leave excess wire in range
compartment. Excess wire in the range compartment may
not allow the access cover to be replaced properly, and
could create a potential electrical hazard if wires become
pinched. Connect only as instructed under "WIRING
INSTRUCTIONS" in section 6. When using flexible conduit or
range cable use flex connector or range cable strain relief.
NOTE: Only use copper wire in connection to terminal
block.
Loading ...
Loading ...
Loading ...