Loading ...
Loading ...
Loading ...
additional safety instructions for drill presses
WEAR YOUR
The operation of any power tool can result in foreign
objects being thrown into the _yes, which can result in
severe eye damage. Always wear safety goggles complying
with ANSI Z87,1 (shown on Package) before commencing
power tool operation. Safety Goggles are available at Sears
retail or catalog stores.
unpacking
checking
CONTENTS
Page
General Safety Instructions for Power Tools ..... 2
Additional Safety Instructions for Drill Presses .... 3
Unpacking and Checking Contents ............. 4
Table of Loose Parts ........................ 4
Motor Specifications and Electrical Requirements.. 5
Assembly ................................. 6
Installing the Chuck .................... 6
Installing and Tensioning Belt ............. 12
Getting to Know Your Drill Press .............. 13
Belt Tension Rod ...................... 13
Drilling Speed ......................... 13
Drilling to Depth ....................... 14
Removing the Chuck ................... 15
On-Off Switch ........................ 15
Basic Drill Press Operation .................... 16
Installing Drills ........................ 16
Positioning Table and Workpiece .......... 16
Feeding ............................. 17
Adjustments ............................. 17
Depth Scale .......................... 17
Quil Return Spring .................... 17
Table and Head Lock Handles ............ 17
Maintenance .............................. 18
Lubrication .............................. 18
Recommended Accessories ................... 18
Trouble Shooting .......................... 19
Repair Parts ............................... 20
UNPACKING AND CHECKING CONTENTS
Model No. 113.21371 is shipped complete in one carton
but does not include a motor.
Model No. 113-2137!0 is shipped complete in one carton
and includes a 1/2 HP 1725 RPM motor.
Separate all parts from packing materials and check each
one with the "Table of Loose Parts" to make certain all
items are accounted for, before discarding any packing
material.
If any parts are missing, do not attempt to assemble the
drill press, plug in the power cord or turn the switch on
until the missing parts are obtained and installed correctly.
Remove the protective oil that is applied to the table and
column. Use any ordinary household type grease and spo_
remover.
CAUTION: Never use gasoline, naptha or similar highly
volatile solvents.
Apply a coat of automobile wax to the table.
Wipe a!t parts thoroughly with a clean dry cloth.
4
contents
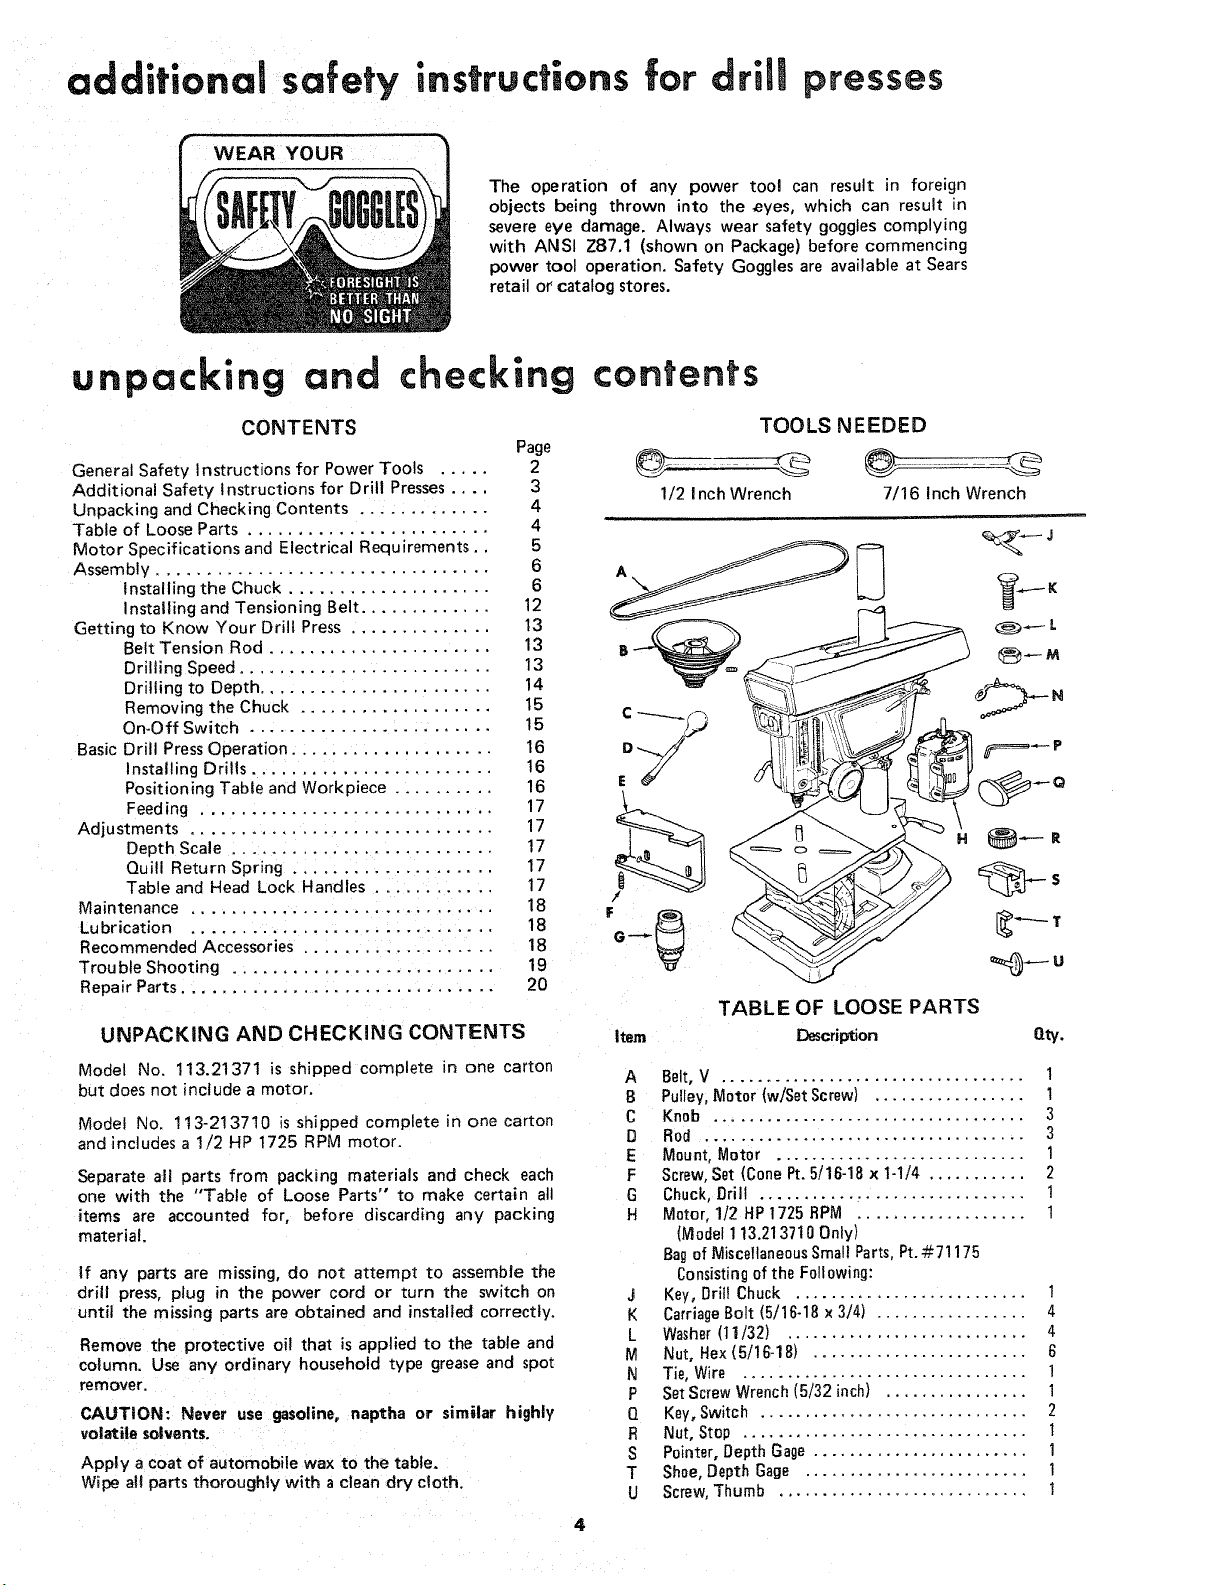
TOOLS NEEDED
1/2 Inch Wrench 7/16 Inch Wrench
TABLE OF LOOSE PARTS
Item ]Description Qty.
A Belt, V .................................. 1
B Pulley, Motor(wjSet Screw) ................. !
C Knob ................................... 3
D Rod .................................... 3
E Mount,Motor ............................ 1
F Screw,Set (ConePt.5/16-18 x 1-1]4 ........... 2
G Chuck, Drill .............................. 1
H Motor, 112 HP1725 BPM ................... t
(Model113.213710Only)
Bagof MiscellaneousSmall Parts,Pt.#71175
Consistingof the Following:
J Key, Drill Chuck .......................... 1
K CarriageBolt (5/16-18 x 3/4) ................. 4
L Washer(11/32) ........................... 4
M Nut, Hex(5/16-18) ........................ 6
N Tie, Wire ................................ !
P SetScrewWrench(5/32 inch) ................ 1
Q Key,Switch .............................. 2
R Nut, Stop ................................ 1
S Pointer, Depth Gage ........................ 1
T Shoe,DepthGage ......................... 1
U Screw,Thumb ............................ 1
Loading ...
Loading ...
Loading ...