Loading ...
Loading ...
Loading ...
En
22
4 Press the rotary selector.
This saves the parameters that have been set in this unit’s memory.
While the parameters are being saved, the eight buttons in the effect
section flash. Do not disconnect the USB cable from this unit during this
time.
5 Press the [BACK] button.
This unit switches from the utilities mode back to normal operation.
Changing the setting of the illumination
when tracks are loaded
The pattern with which the illumination lights when tracks are loaded
can be switched.
! By default, illumination type 1 is set.
1 Press the [BACK] button for over 1 second to switch
to the utilities mode.
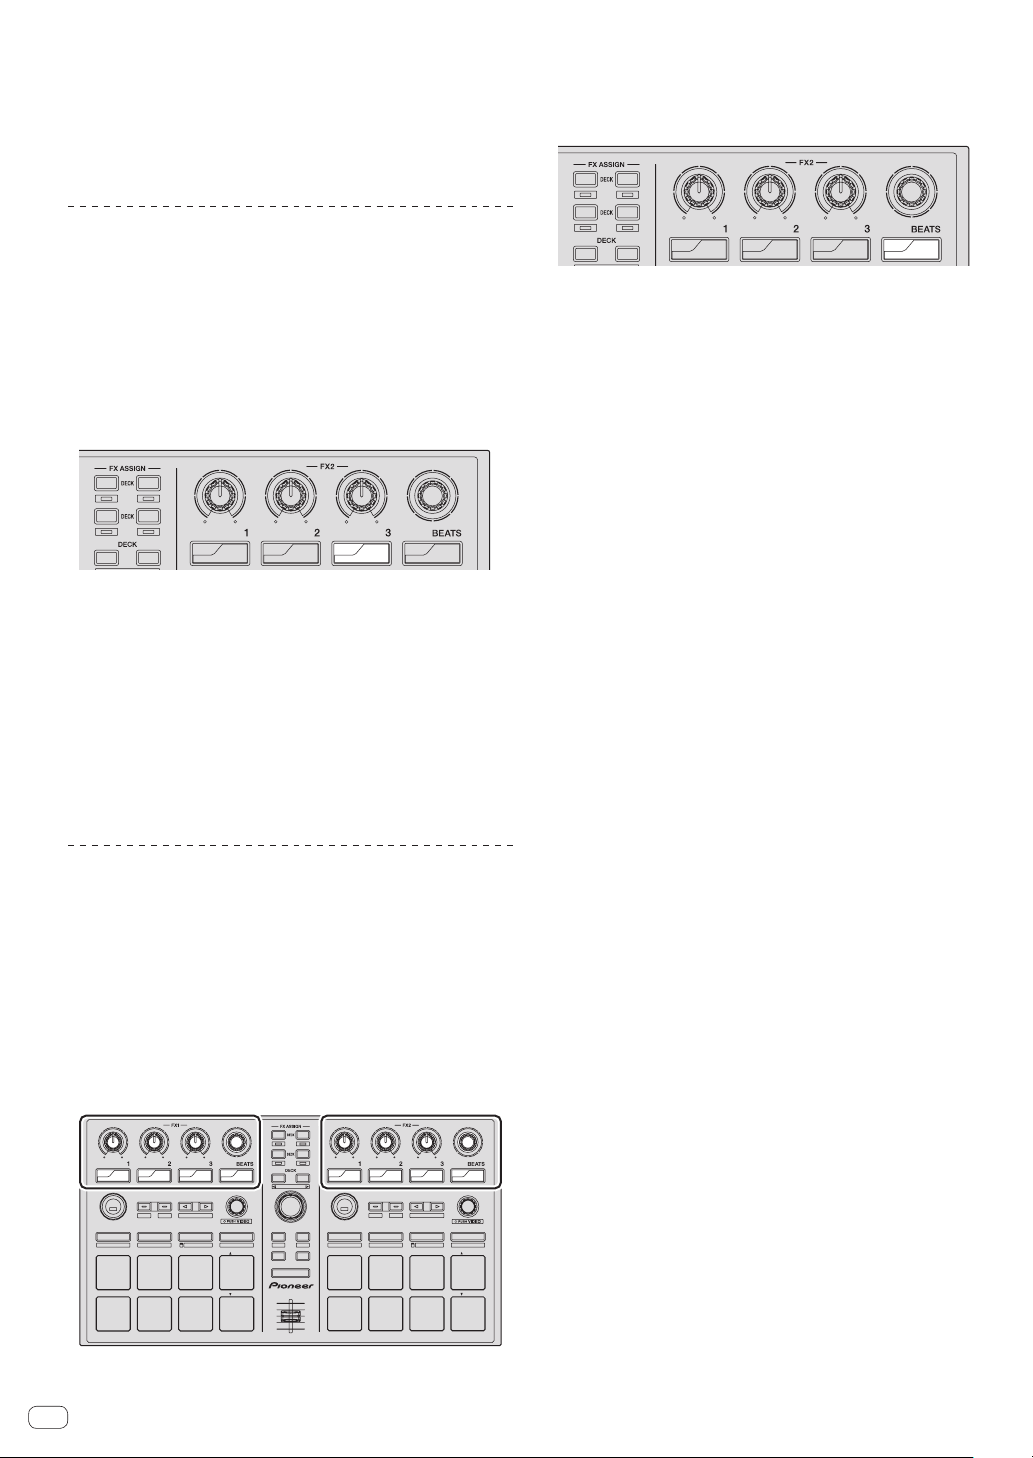
2 Turn the rotary selector so that the FX2 effect
parameter 3 button flashes.
1
3
4
2
34
2
1
ON
FX
SELECT
ON
FX
SELECT
ON
FX
SELECT
TAP
FX
MODE
3 Press pad 1 or pad 2 on the left performance pads.
The currently set value is indicated by which pads are flashing.
! Pad 1 flashing: Illumination type 1 selected
! Pad 2 flashing: Illumination type 2 selected
4 Press the rotary selector.
This saves the parameters that have been set in this unit’s memory.
While the parameters are being saved, the eight buttons in the effect
section flash. Do not disconnect the USB cable from this unit during this
time.
5 Press the [BACK] button.
This unit switches from the utilities mode back to normal operation.
Enabling the advanced MIDI setting
The advanced MIDI function will be used with future feature enhance-
ments to the Serato DJ software. When the advanced MIDI function
is enabled, the effect parameter controls, [FX BEATS] control, effect
parameter buttons and [TAP] button switch to special MIDI codes when
this unit’s [AUTO LOOP] control is pressed while pressing the [SHIFT]
button.
! By default, the advanced MIDI setting is disabled.
! To control Serato Video with this unit, disable the advanced MIDI
setting.
Buttons and controls to which advanced MIDI settings
are applied
1
3
4
2
34
2
1
PANEL SELECT
• BACK
—
UTILITY
LOAD
PREPARE
VIEW
LOAD LOAD
AREA
SHIFT
SAMPLER VOL
DJ CONTROLLER
DDJ-SP1
ON
FX
SELECT
ON
FX
SELECT
ON
FX
SELECT
TAP
FX
MODE
REL.
INT.
PARAM.2
SLIP
CENSOR
PARAM.1
AUTO LOOP
HOT CUE
HOT LOOP
ROLL
AUTO LOOP
SLICER
MANUAL LOOP
SAMPLER
VELOCITY
IN OUT
LOOPACTIVE
RELOOP
/
EXIT
SAVE
SLOT
SLOT
SYNC
OFF
REL.
INT.
PARAM.2
SLIP
CENSOR
PARAM.1
AUTO LOOP
HOT CUE
HOT LOOP
ROLL
AUTO LOOP
SLICER
MANUAL LOOP
SAMPLER
VELOCITY
IN OUT
LOOPACTIVE
RELOOP
/
EXIT
SAVE
SLOT
SLOT
SYNC
OFF
ON
FX
SELECT
ON
FX
SELECT
ON
FX
SELECT
TAP
FX
MODE
1 Press the [BACK] button for over 1 second to switch
to the utilities mode.
2 Turn the rotary selector so that the FX2 [TAP] button
flashes.
1
3
4
2
34
2
1
ON
FX
SELECT
ON
FX
SELECT
ON
FX
SELECT
TAP
FX
MODE
3 Press pad 1 or pad 2 on the left performance pads.
! Pad 1 flashing: Advanced MIDI settings disabled
! Pad 2 flashing: Advanced MIDI settings enabled
4 Press the rotary selector.
This saves the parameters that have been set in this unit’s memory.
While the parameters are being saved, the eight buttons in the effect
section flash. Do not disconnect the USB cable from this unit during this
time.
5 Press the [BACK] button.
This unit switches from the utilities mode back to normal operation.
Loading ...
Loading ...