

www.SereneLifeHome.com
2
IMPORTANT
After receiving the shipment, inspect the product thoroughly to ensure that
it has been shipped with care. Before assembly make sure that the packaging
contains all parts.
FEATURES:
•
Compact Design
•
Perfect for any Gameroom or Apartment
•
Space Saving
•
Stylish Design
•
Scratch Resistant and Durable Surface
•
Heavy Duty Plastic Corners
•
Digital LED Score Board
•
Safe and High-Quality Design
•
Sturdy Construction
•
Adjustable Foot Caps
•
Crossbar Leg Supports with Protective Corners
•
Built-in Score Tracker and Puck Dispenser
•
12V Fan Motor Pushes Air through the Surface for Smooth Gliding
•
Adjustable Levelers and Crossbar Leg Support for Stability
WHAT'S IN THE BOX:
•
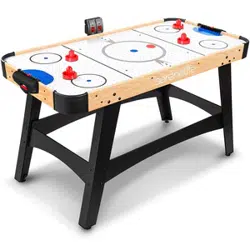
54'' Air Hockey Table
•
(4) Pusher
•
(2) Puck
TECHNICAL SPECS:
•
Construction Material: MDF with PVC and Graphic
•
Pusher: 3’’ -inches
•
Green Pad: 2.9’’ -inches
•
Puck: 2’’ inches
•
Hockey Table Thickness: 0.47’’ -inch MDF
•
Hockey Table Dimensions (L x W x H): 54'' x 27'' x 32'' -inches
www.SereneLifeHome.com
3
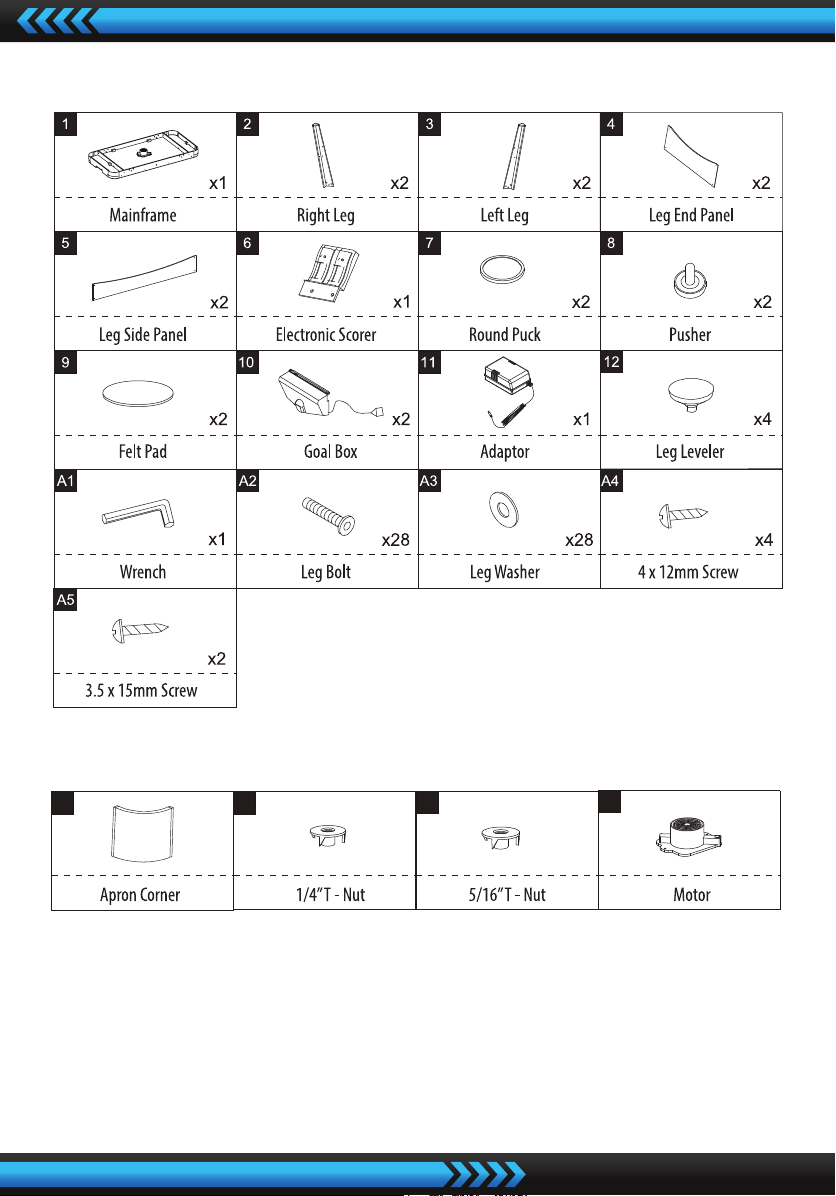
PARTS LIST
PRE-INSTALLED PARTS
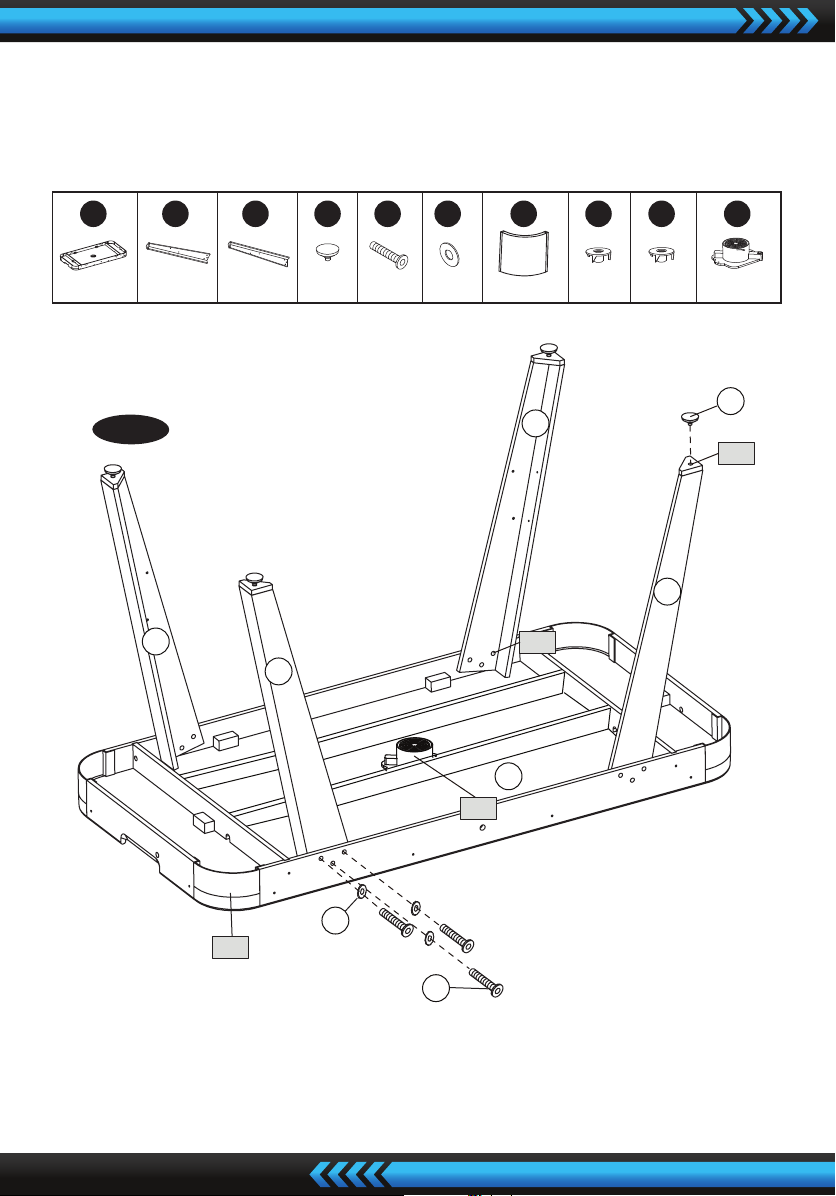
ASSEMBLY INSTRUCTIONS:
1. Find a clean, level place to begin the assembly of your Air Hockey Table.
The table must be assembled upside down and then turned over on its legs
once the assembly is completed.
This game table is heavy, and turning it over will require at least two strong
adults.
P1
x4
P2
x28
P3
x4
P4
x1
www.SereneLifeHome.com
4
2. Remove all parts from the box and verify that you have all the listed parts as
shown on the parts list page. Carefully cut or tear the four corners of the box
so that the bottom of the box can be used as your work surface.
FIG.1
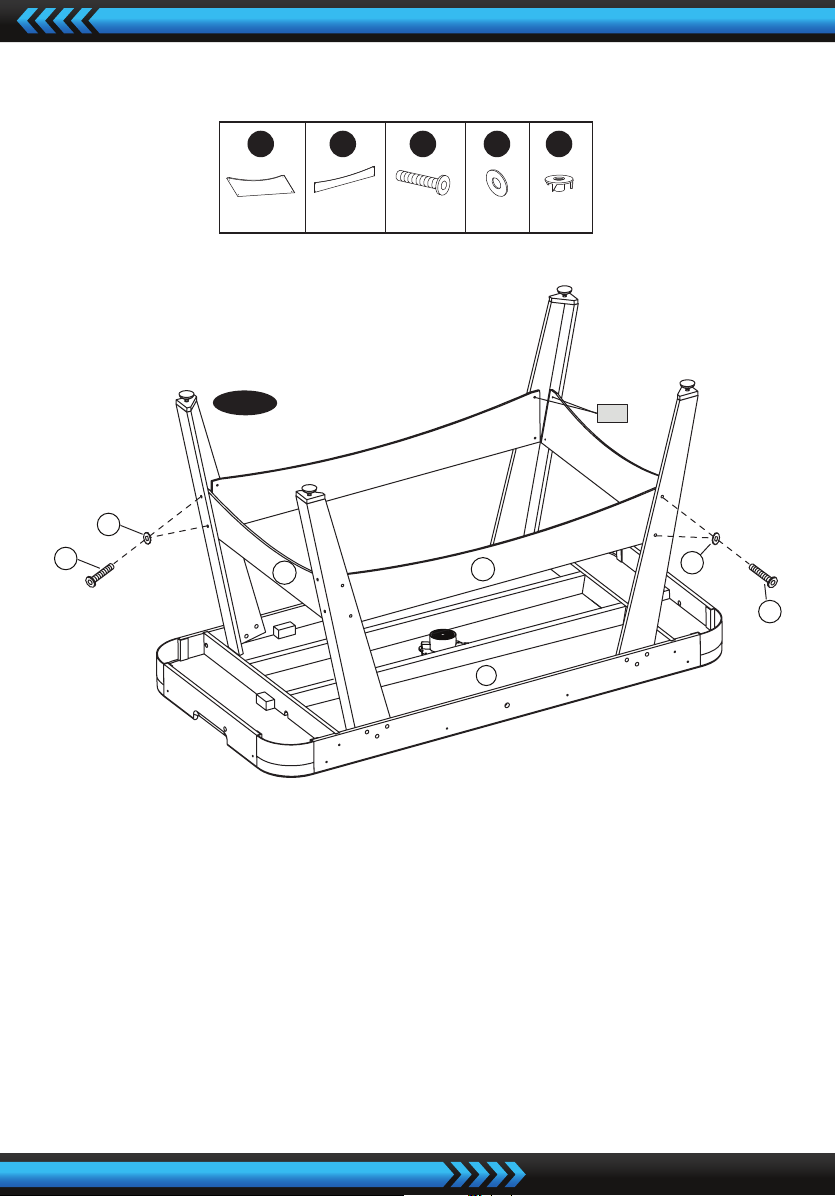
3. Place the Mainframe (#1) face down on a clean and at surface.
Attach the Right Leg (#2) and Left Leg (#3) to the Main Frame using three Leg
Bolts (#A2) , thee Leg Washers (#A3) per Leg. See FIG. 1.
FIG. 1
12
P1
2
2
3
3
P3
A2
A3
1
P4
P2
X 1 X 12 X 12 X 4 X 12 X 1
X 4
1
X2
2
X2
3
X 4
12 A2 A3 P1 P2 P3 P4
www.SereneLifeHome.com
5
4. Screw the Leg Levelers (#12) into the bottom of each leg.
FIG.2
5. Attach the Leg Side Panels (#5) to the Legs using four Leg Bolts (#A2),
four Leg Washers (#A3) per Leg Side Panel.
6. Attach the Leg End Panels (#4) to the Legs using four Leg Bolts (#A2),
four Leg Washers (#A3) per Leg End Panel.
7. Lift the table assembly from the oor with two adults, turn it over,
and set table on its leg in the location where you will play.
FIG. 2
1
4
5
A2
A3
A2
A3
P2
X2 X 16
4
X2
5
X 16
A2
X 16
A3 P2
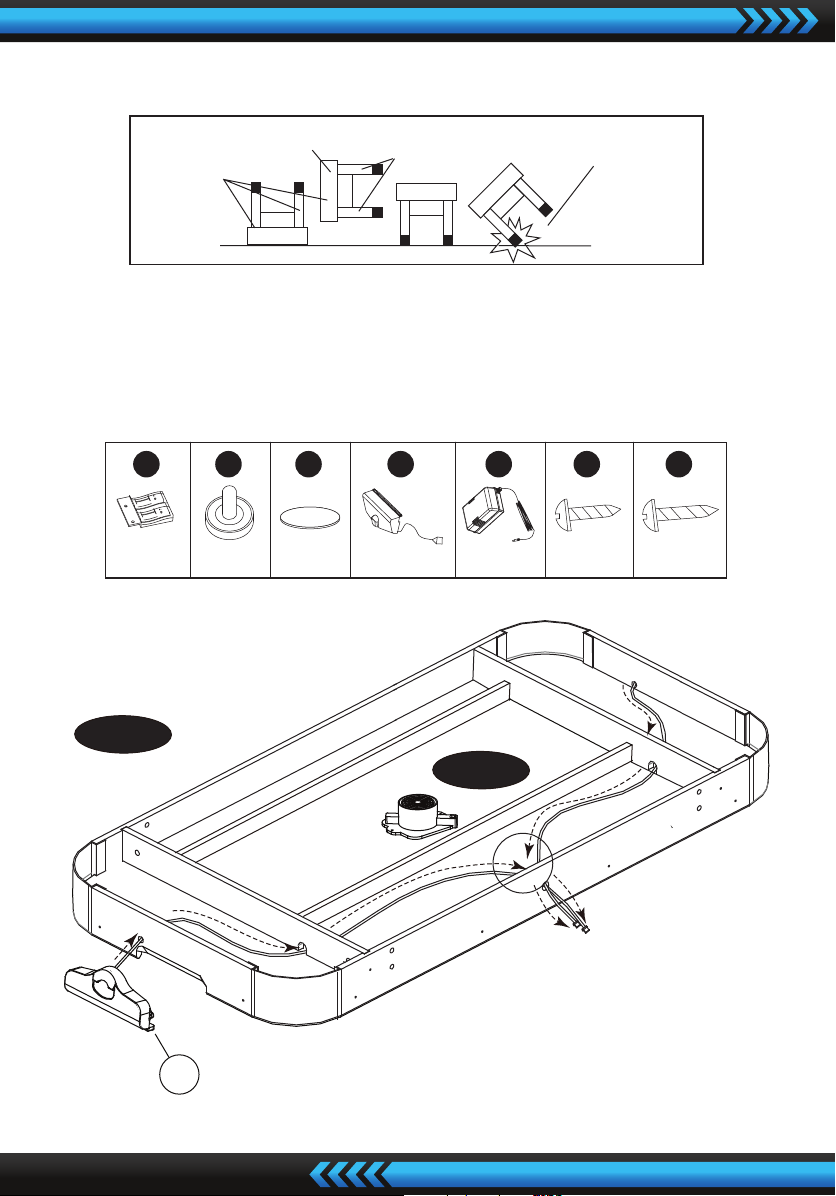
DO NOT LEAN THE
TABLE ON ITS LEGS
HOLD TABLE
CABINET
DO NOT HOLD THE LEGS
FIG. 3
10
underside of table
FIG. 3A
www.SereneLifeHome.com
6
Go back and make sure that all connections are tight.
CAUTION: Two strong adults are recommended to turn the table over as shown.
1. Lift the table o the ground.
2. Turn the table over.
3. Place it on all four feet at the same time on the ground.
X 1 X 1 X 4 X 2
6
X 2
8
X 2
9
X 2
10 11 A4 A5
6
A5
10
A4
FIG. 3B
www.SereneLifeHome.com
7
8
9
FIG. 3C
FIG. 3D
P4
11
www.SereneLifeHome.com
8
FIG.3
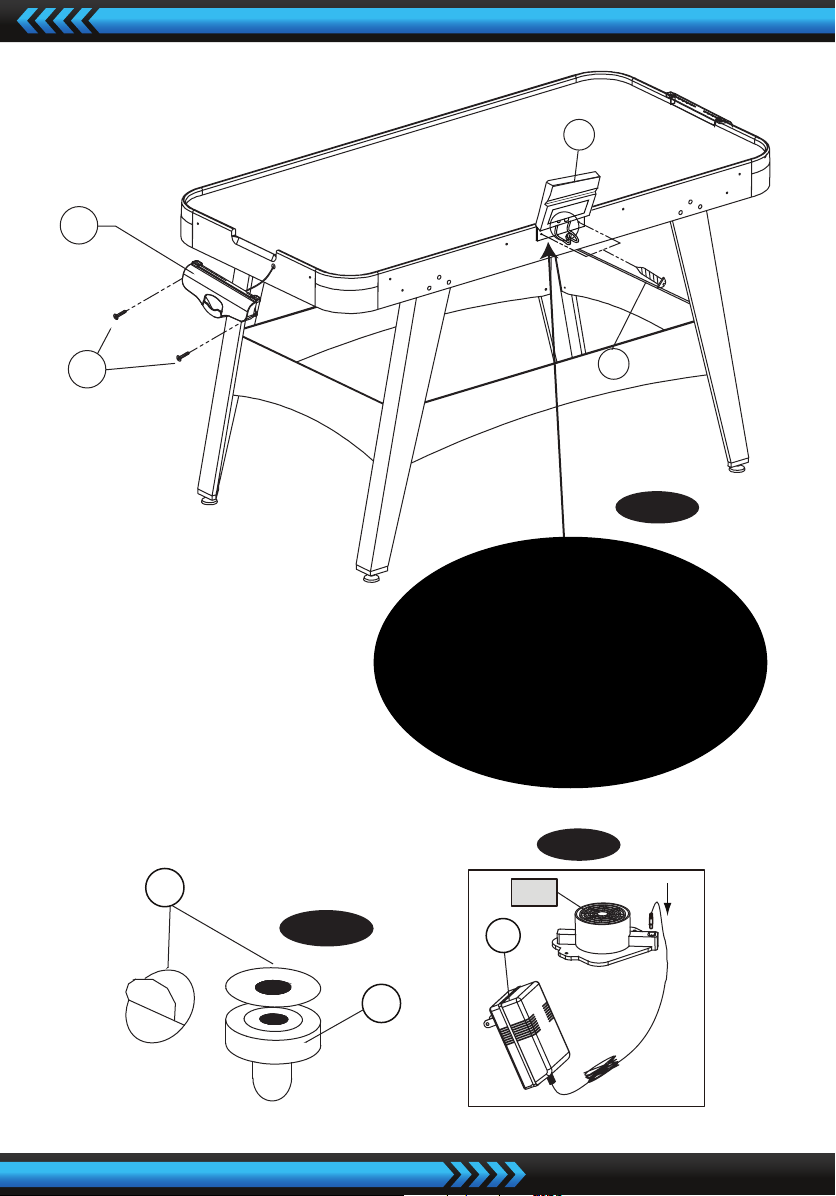
8. Thread the wire from Goal Box (#10) through the openings of the end aprons
and alongside the play-eld’s support beams to the opening of side apron
and use Velcro Straps to x Scorer Wire. See FIG. 3A
9. Attach the Goals Boxes (#10) to each End Apron using two Screws (#A4).
See FIG. 3.
10. Attach the Electronic Scorer (#6) to the side apron in the pre-drilled holes
using two Screws (#A5). Insert the Scorer Wire into the Electronic Scorer (#6).
See FIG. 3 & 3B.
11. Tear o the backside paper of the Felt Pad (#9) and stick them on the bottom
of the Pushers (#8). See FIG. 3C.
12. Insert the Adaptor (#11) into the DC Motor (#P4). See FIG. 3D.
WARNING:
1. Requires 2 “AAA” Batteries (Not included).
2. Do not mix old and new batteries.
3. Do not mix alkaline, standard (carbon zinc),
or rechargeable (nickel-cadmium) batteries.

www.SereneLifeHome.com
9
ELECTRONIC SCORER OPERATION
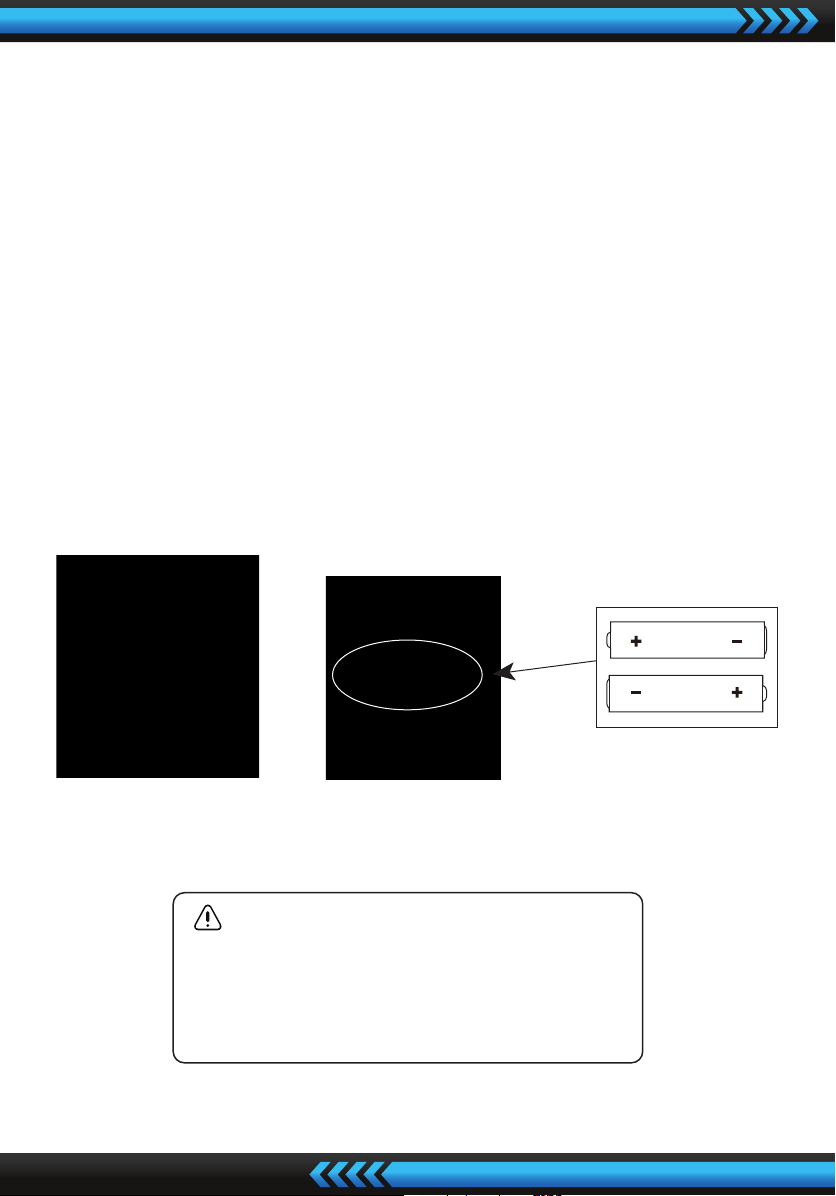
1. Install Batteries
Battery Box: Remove the battery cover and insert 2 “AAA” Batteries into the
battery box. ( 2 “AAA” Batteries not included.) When HOME/VISITOR indicates
“0”, the game can start.
2. Reminder:
a. Batteries must be installed according to the correct polarization (+ and -).
b. Please clean the battery contacts and also those of the device prior to
battery installation.
c. If the game will not be used for a long period of time, we recommend that
the batteries should be removed.
3. When the “HOME” player scores a point, the “HOME” indicator will show
1 point; when the “VISITOR” player scores a point, the “VISITOR” indicator will
show 1 point.
4. The rst player to reach 10 points wins the game, and the winner’s indicator
will stay at 9 points and ash for several seconds.
5. After the game, you can press the “RESET” button to start a new game and
the HOME/VISITOR will indicate “0”.
Note:
1. You can press the “RESET” button at any time, to set the scorer back to the
beginning status.
2. You can press “ON/OFF” at any time to turn o the scorer.
Press “ON/OFF” again to turn it back on.