
www.SereneLifeHome.com
2
IMPORTANT
After receiving the shipment, inspect the product thoroughly to ensure that it
has been shipped with care. Before assembly make sure that the packaging
contains all parts.
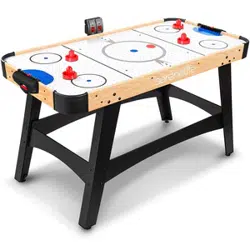
FEATURES:
•
Lightweight and Compact Design
•
Perfect for Any Game Room or Apartment
•
Space Saving
•
Stylish Design
•
Made of Durable 3mm MDF White High-Gloss Finish with PVC Printing Logo
•
Includes 2pcs 50mm Red Puck and 2pcs 65mm Green Felt Pusher
•
Scratch Resistant and Durable Surface
•
Heavy Duty Plastic Corners
•
Digital LED Scoreboard
•
Safe and High-Quality Design
•
Sturdy Construction
•
Adjustable Foot Caps
•
Crossbar Leg Supports with Protective Corners
•
L-Style Black Laminated Leg and 4pcs 5/16" Leg Levelers
•
Built-in Score Tracker and Puck Dispenser
•
Adjustable Levelers and Crossbar Leg Support for Stability
•
Comes with Hardware and Tools for Easy Assembly
•
110V Fan Motor Pushes Air through the Surface for Smooth Gliding
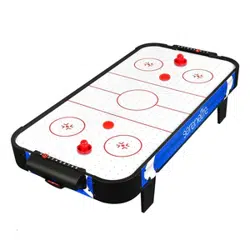
WHAT'S IN THE BOX:
•
48" Air Hockey Table
•
(2) Red Pusher with Green Pad
•
(2) Red Puck
TECHNICAL SPECS:
•
Construction Material: MDF with PVC and Graphic
•
Table Surface (L x W): 14.9" x 7.2" -inches
•
Panels: 3-3/4" x 12mm MDF with Color Label
•
Legs: (3" x 2-1/8") x 1/2" -inches
•
Scorer: 9" x 3-7/8" x 2" -inches
•
Pusher: 3’’ -inches
•
Green Pad: 2.9’’ -inches
•
Puck: 2-1/8’’ inches
•
Hockey Table Thickness: 1/2’’ MDF -inches
•
Hockey Table Dimensions (L x W x H): 48" x 24" x 31" -inches
www.SereneLifeHome.com
3
PLEASE READ THESE ASSEMBLY INSTRUCTIONS IN ENTIRETY
BEFORE ASSEMBLING YOUR PRODUCT.
ASSEMBLY TIPS
1. Find a clean, level surface to begin the assembly of your game table.
The table will be partially assembled upside down and then turned over onto its
legs. This is a heavy game and turning it over will require at least two strong adults.
2. Remove all of the contents from box and verify that you have all of the parts
shown on the Parts Identifier before you begin assembly.
Note: Some parts may be preinstalled or pre-assembled.
3. Some figures or drawings may not look exactly like your product.
Please read and understand the text before beginning each assembly step.
4. When installing parts that have more than one screw or bolt, hand tighten all
screws or bolts in place before finishing tightening with screwdriver or hex
wrench.
5. Electric screwdrivers may be helpful during assembly; however, please set a low
torque and use extreme caution because screws may be stripped or overtightened
if the electric screwdriver's torque is set too high.
WARNINGS!
READ AND FOLLOW ALL ASSEMBLY, OPERATION AND SAFETY INSTRUCTIONS
CAREFULLY.
CHOKE HAZARD - THIS TABLE CONTAINS SMALL BALLS AND PARTS -
NOT SUITABLE FOR CHILDREN UNDER 3 YEARS OF AGE.
PARTS LIST
Illustrations Not to Scale
www.SereneLifeHome.com
4
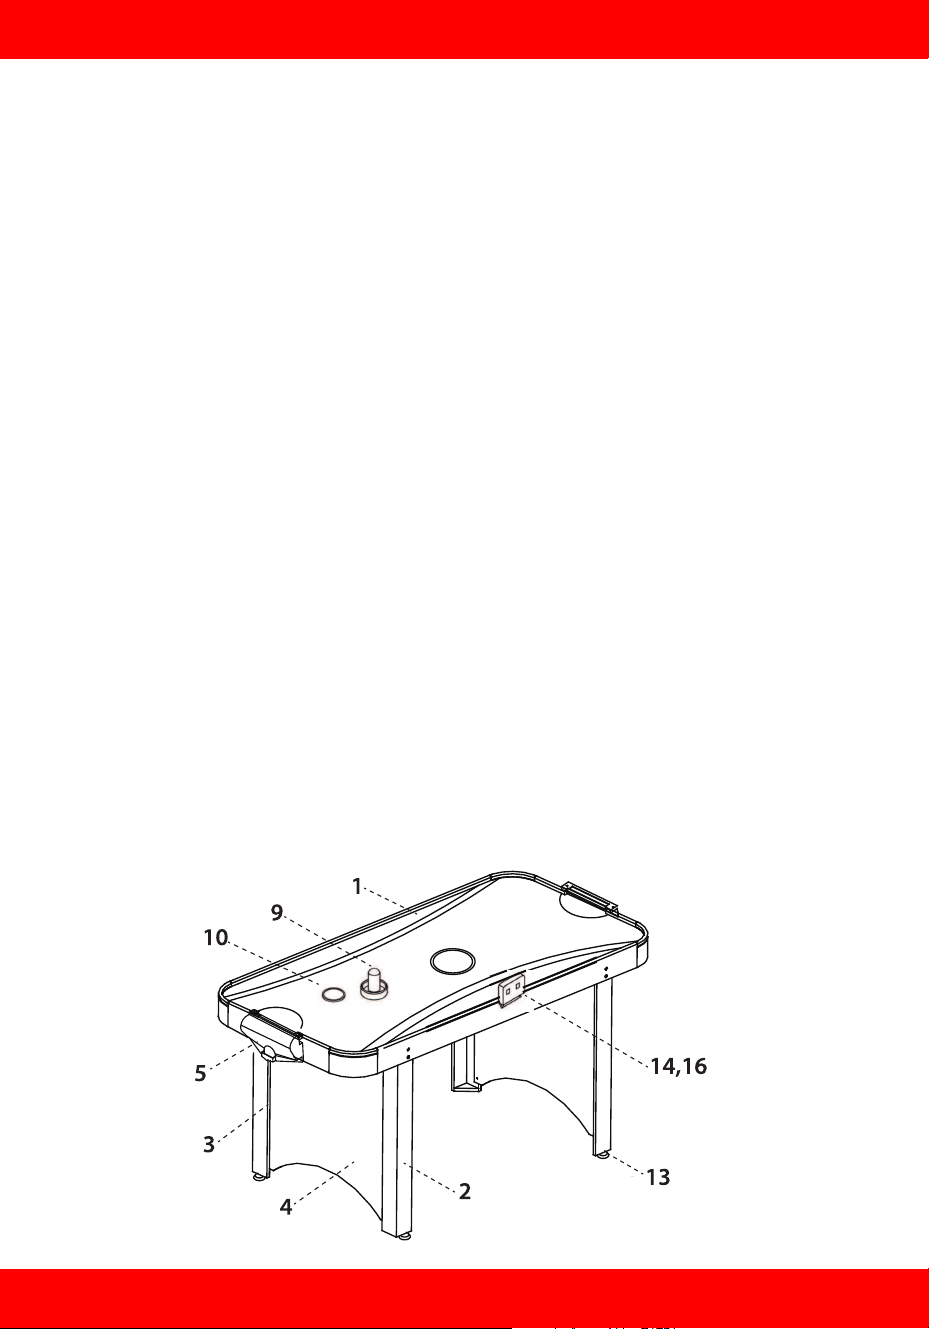
PARTS IDENTIFIER (NOT TO SCALE)
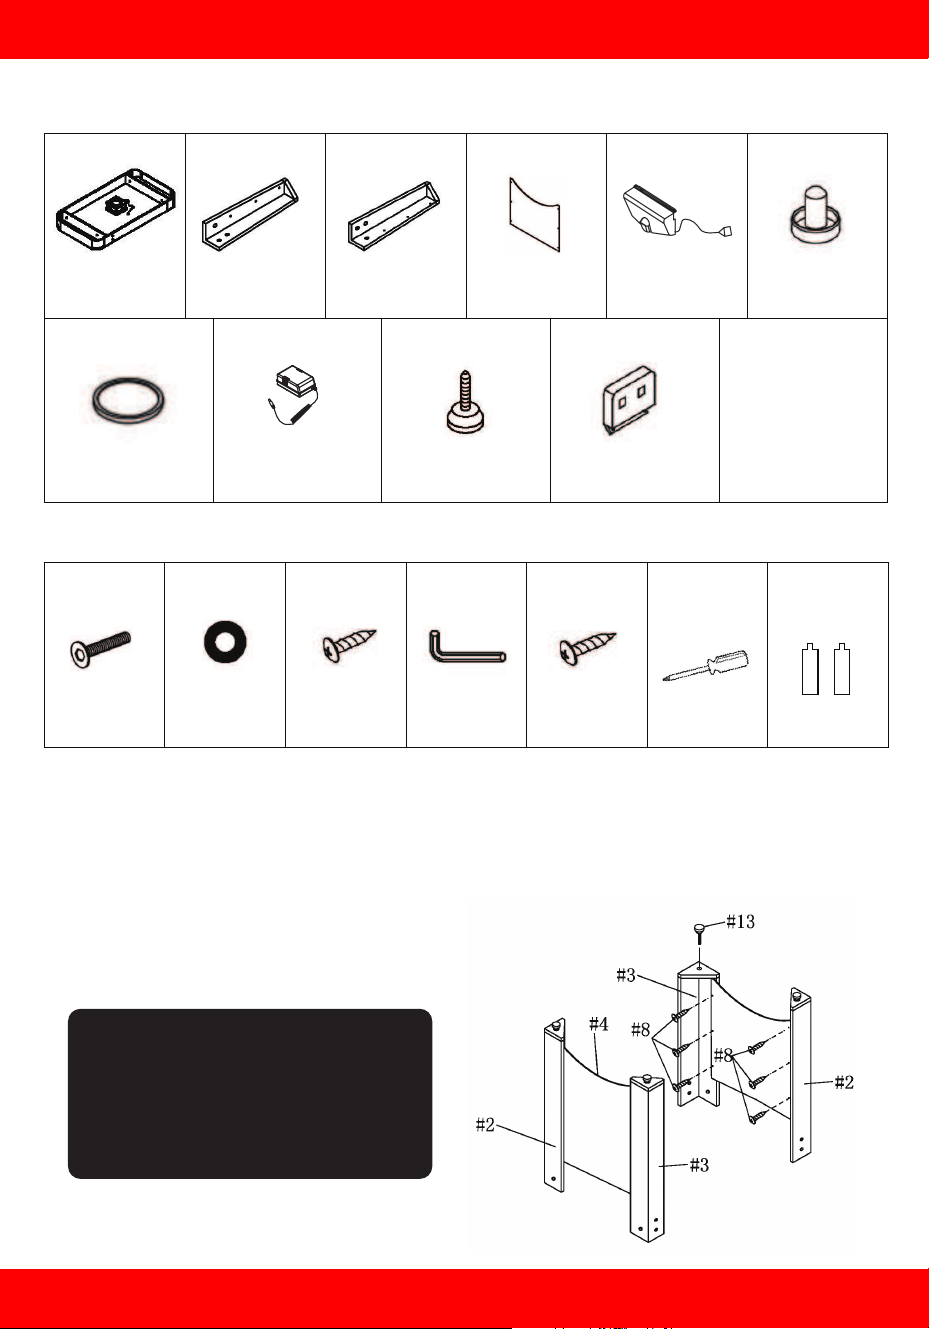
HARDWARE PACK
ASSEMBLY INSTRUCTIONS
1. Attach one LEG PANEL #4 to one RIGHT LEG #2 and one LEFT LEG #3 as shown
below with 1/2" SCREW #8. Repeat assembly with remaining LEG PANEL and LEGS.
Note: Leg panel graphic will face out and curved end down when table is upright.
2. Thread one LEG LEVELER #13 to each LEG.
#1 #2 #3#4 #5 #9
X1
TABLE BODY
X2
RIGHT LEG
X2
LEFT LEG
X2
LEG PANEL
X2
GOAL
X2
STRIKER
#10 #12 #13#16
X2
PUCK
X1
ADAPTOR
X4
LEG LEVELER
X1
ELECTRONIC SCORER
Part of Table Body
(A & B wires:
1 wire set per goal)
SCORER
SENSOR WIRE
#14
#6 #7 #8 #11 #15
X12
BOLT
X12
FLAT WASHER
X12
1/2 INCH SCREW
X1
HEX WRENCH
PHILLIPS HEAD
SCREWDRIVER
AAA BATTERY
ADDITIONAL
EQUIPMENT
REQUIRED:
X6
5/8 INCH SCREW
ADDITIONAL
EQUIPMENT
REQUIRED:
TIP: It may be easier to attach
legs to table body in Step 3 if
you leave #8 screws a little loose
until legs are attached and then
do the final tightening.
www.SereneLifeHome.com
5
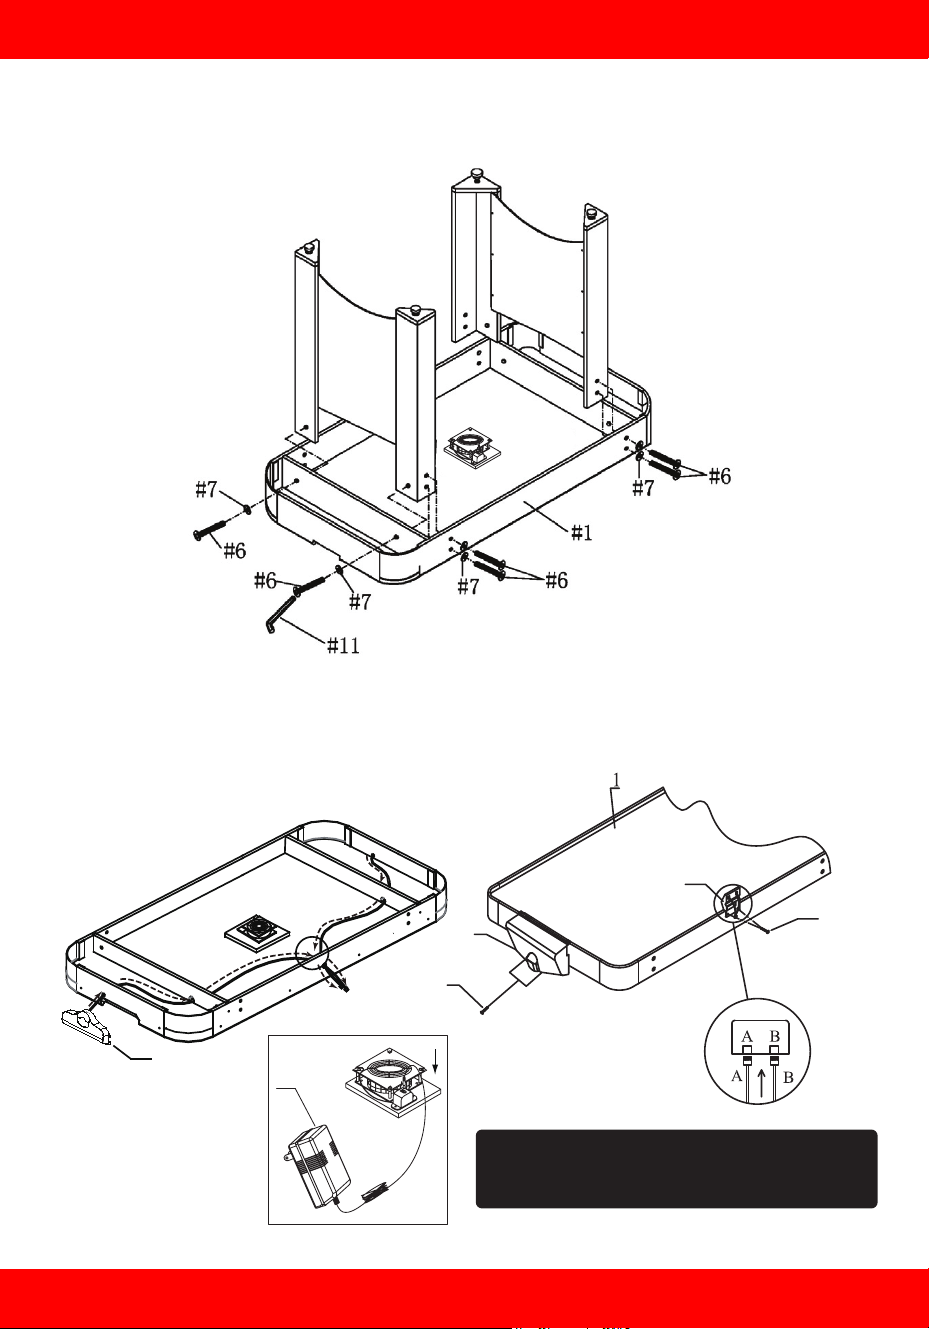
3. Attach assembled LEGS to TABLE BODY #1 with BOLT #6 and FLAT WASHER #7.
Note: The table is assembled upside down.
4. Carefully turn table over. Attach one GOAL #5 to each end of the table with 5/8"
SCREW #15. Attach Electronic Scorer #14 with 5/8” SCREW #15 and insert leads A
& B from Sensor Wires #16.
Insert the lead “A” into the “A” receptacle.
Insert the lead “B” into the “B” receptacle.
#12
Underside
the table
5
5
8
14
15