Loading ...
Loading ...
Loading ...
6 7
ninjakitchen.com
ninjakitchen.com
USING THE FOODI™
SMART THERMOMETER
Before First Use
Make sure the thermometer jack is free of any
residue and the cord is free of knots before
plugging it into the jack.
USING THE THERMOMETER
1 Pull the thermometer storage compartment on
the right side of the unit outward. Then unwind
the cord from the compartment to remove the
thermometer.
2 Plug the thermometer into the jack on the left
side of the unit. Push firmly on the plug until it
cannot go into the jack any further. Place the
storage compartment back onto the side of
the unit.
3 Once the thermometer is plugged into the jack,
it will illuminate the PRESET and MANUAL
thermometer button. Select the desired cook
function (e.g., Grill) and cook temperature.
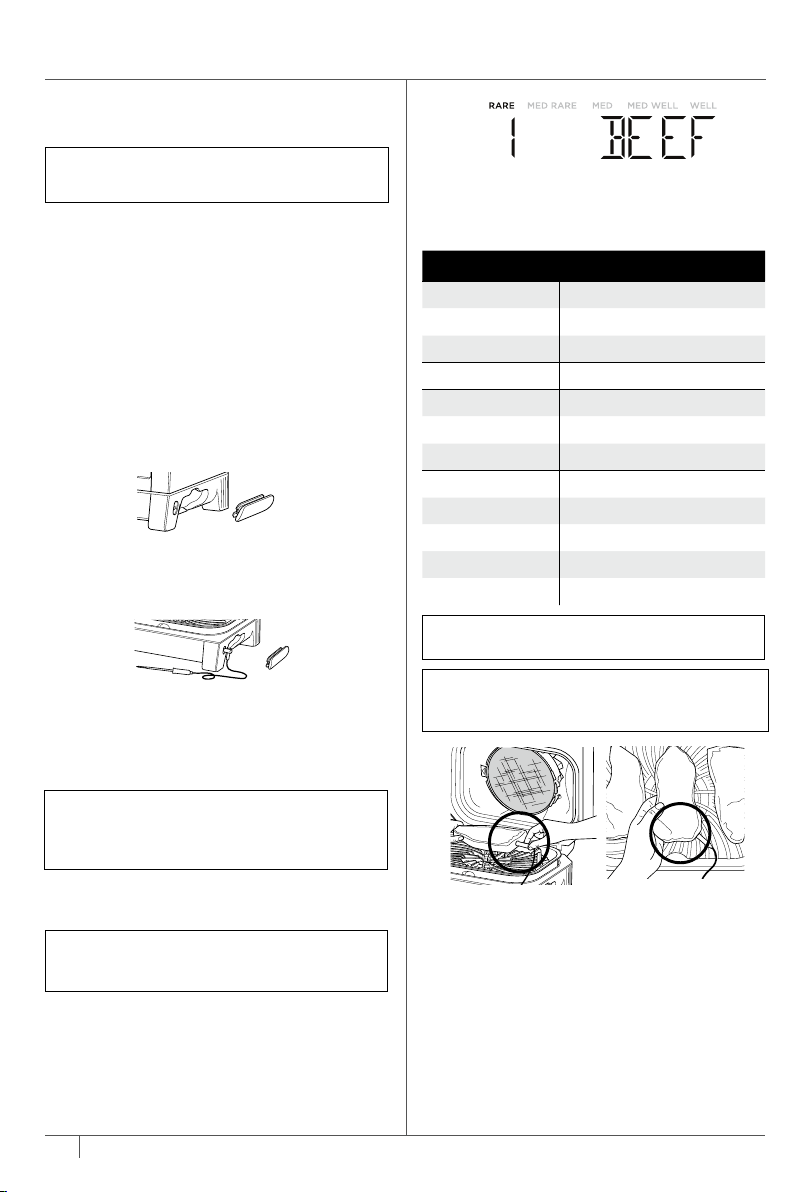
4 Press the Thermometer button to enable
PRESET thermometer settings. PRESET will
illuminate. Use the arrows to the right of the
display to select your desired food type and the
arrows to the left of the display to set the internal
doneness of your food (Rare through Well).
5 Place the accessory required for your selected
cook function in the unit and close the hood.
Press START/STOP to begin preheating.
NOTE: There is no need to set a cook time, as
the unit will automatically turn o the heating
element and alert you when your food has
finished cooking.
FOOD TYPE: SET DONENESS TO:
Fish Medium (130°F)
Medium Well (140°F)
Well Done (150°F)
Chicken/Turkey Well Done (165°F)
Pork Medium (130°F)
Medium Well (150°F)
Well Done (160°F)
Beef/Lamb Rare (115°F)
Medium Rare (125°F)
Medium (130°F)
Medium Well (145°F)
Well Done (150°F)
NOTE: Cooking dierent meats or the sames
ones to dierent doneness? Refer to the next
page for details on programming.
NOTE: Set doneness for BEEF/LAMB are
lower than normal recommendations as unit
will carry-over cook 10-15°F.
IMPORTANT: DO NOT place hands near Foodi
Smart Thermometer cord when in use to
prevent burning or scalding.
NOTE: Reference USDA guidelines for food-
safe temperature recommendations.
Correct thermometer placement.
Thermometer grip is fully inside unit.
COOKING FUNCTIONS – CONT.
6 While the unit is preheating, insert the
thermometer horizontally into the center of
the thickest part of the piece of protein. Refer
to the chart on the adjacent page on further
thermometer placement instructions.
7 When the unit has preheated and “ADD FOOD”
appears on the screen, open the hood, place
food with inserted thermometer in the unit, and
close the hood over the thermometer cord.
8 The progress bar at the top of the display will
track doneness. Flashing doneness indicates
progression to that doneness.
9 The unit will automatically stop when desired
doneness is almost reached, as it accounts for
carry-over cooking, and “GET FOOD” will display
on the screen.
10 Transfer the protein to a plate while “REST”
displays on the screen. Thermometer does
not need to still be inserted. The protein
will continue to carry-over cook to your set
doneness, which will take about 3–5 minutes.
This is an important step, as not resting could
lead to results looking “less” cooked. Carry-
over cook times can vary based on size of
protein, cut of protein, and type of protein.
To use MANUAL thermometer settings, press
Thermometer 1 twice until MANUAL is fully
illuminated and use the below recommended
internal cook temperatures.
Loading ...
Loading ...
Loading ...