Loading ...
Loading ...
Loading ...
12 INSTALLATION
2 Remove and save the foam block for future
use.
• If the pedestal washer must be moved in
the future, the foam block will help prevent
damage to the pedestal washer during
transportation.
• To prevent damage, do not remove the
foam block until the pedestal washer is at
the final location.
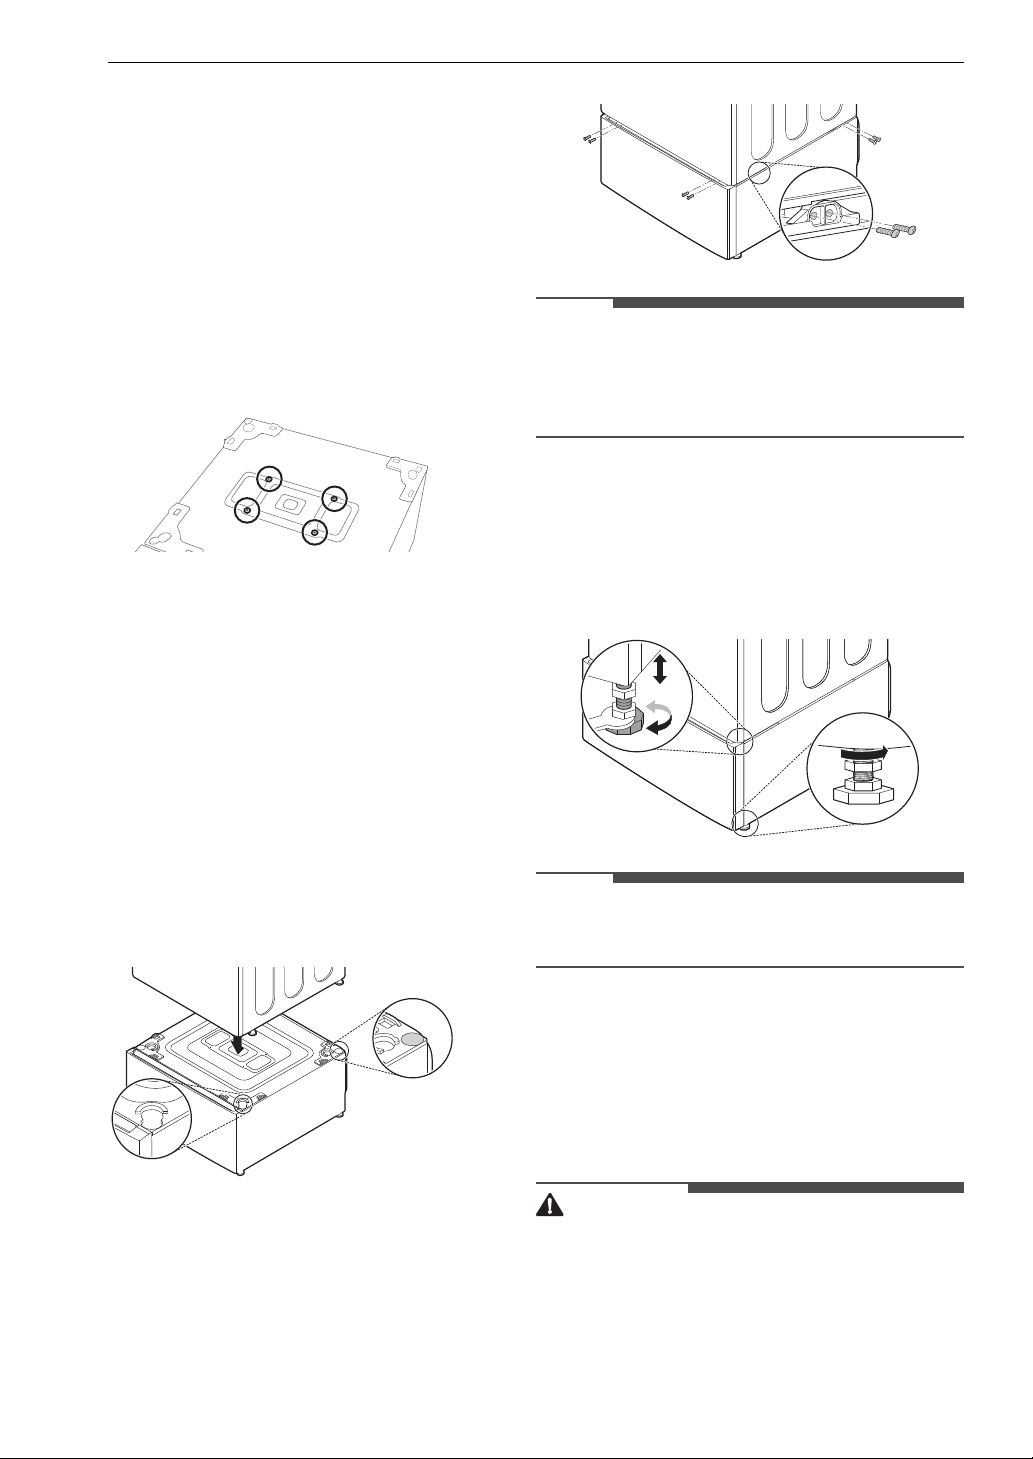
3 Turn the top cover about 180 degrees, cover
the opening in the top with the top cover and
install 4 short sheet metal screws.
Stacking the Front-Loading Washer
on the Pedestal Washer
1 Place the pedestal washer in the final location
and adjust the leveling legs on the pedestal
washer to level it. Fully retract the legs of the
front-loading washer.
2 Place the front-loading washer on top of the
pedestal washer.
• Place the leveling feet of the front-loading
washer inside the bracket openings on the
pedestal washer, and align the bracket
screw holes.
3 Securely attach the two washers at the
corners using screws.
• First, insert screws on each side. Then insert
screws on the front and back side.
NOTE
• For best results, level the pedestal washer
before stacking the front-loading washer on top
of it, and insert the screws in the recommended
order.
4 Extend the feet of the front-loading washer
slightly until the two washers are snug up
against each other. To extend the adjustable
feet, turn them clockwise for a half turn with a
wrench. Then tighten the four lock nuts. All
lock nuts must be tightened.
NOTE
• The pedestal washer will not work as a
standalone unit.
Connecting the Water Inlet
Hoses
To avoid the risk of costly water damage, purchase
and install new water inlet hoses when installing
the washer.
WARNING
• Do not overtighten the hoses or cross-thread the
hose fittings. Overtightening or cross-threading
can damage the valves or couplings, resulting in
leaking and property damage.
• Do not reuse old hoses. Use only new hoses
when installing the washer. Old hoses could leak
or burst causing flooding and property damage.
Loading ...
Loading ...
Loading ...