Loading ...
Loading ...
Loading ...
QUICK START GUIDE
4.
bottom hinge. Retain shoulder washers; they will be
reused.
5. Insert arrow clips into holes
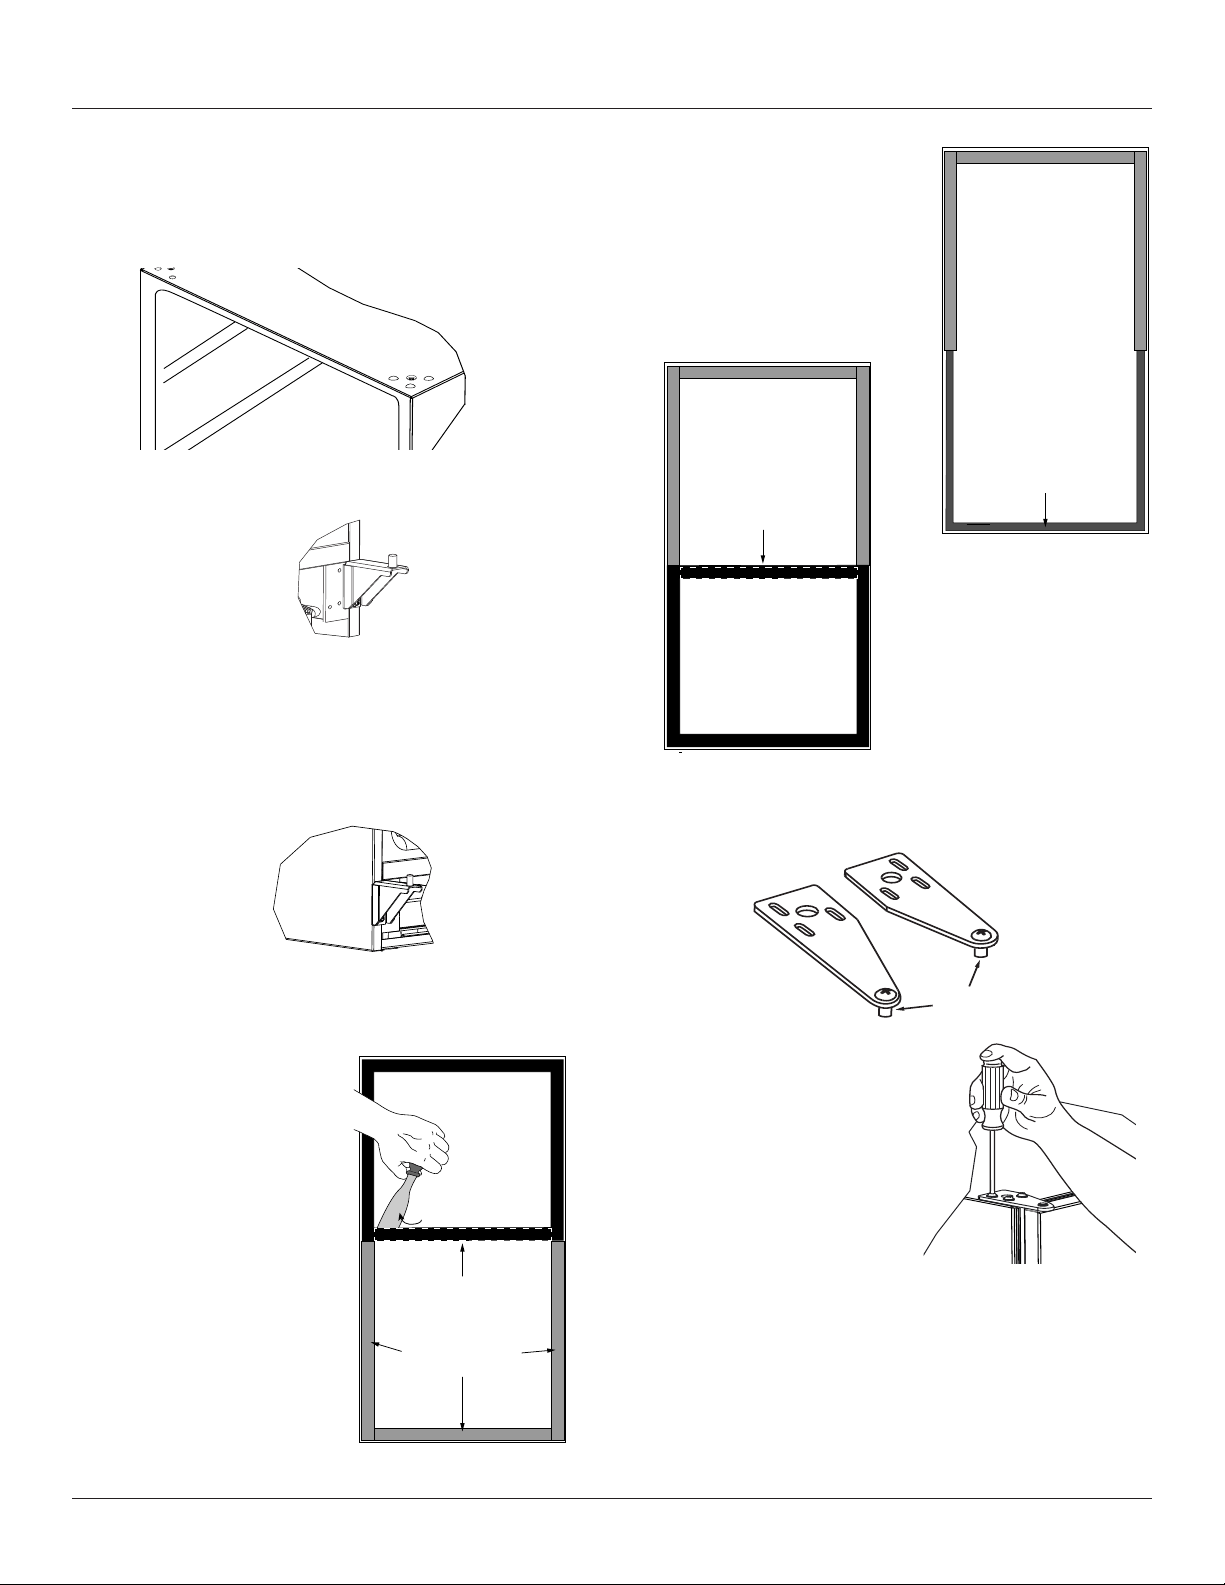
Remove bottom hinge:
1. Remove bottom hinge from cabinet using a 1/4”
socket.
2. Remove corresponding screws on opposite side of
cabinet. On some models there may be a nut behind
one or both screws on either side.
Install bottom hinge:
Install two or three screws, depending on model. Replace
nuts if used.
PREPARE DOOR FOR REINSTALLATION
Rotate gasket
1.
putty knife, gently pry up
beneath the gasket and
spacer until completely free
from the door surface.
2. Continue removing the
gasket by grabbing hold
and gently pulling outward,
exposing the gasket
channel.
3. Remove the 3 pieces of
gasket channel filler and
reinstall on the opposite end
of door.
4. Install gasket into channel,
beginning at one corner and
pressing in firmly.
5. Press down on middle
horizontal portion of gasket
until it adheres to the door
surface.
Install top hinge and door:
1. Remove pivot screw
over, and install the
pivot screw in the same
hole from the opposite
surface.
2. Lift the door onto the
bottom hinge.
3. Align edge of the hinge with the outer edge of the unit.
4. Tighten three screws and replace hinge cover.
5. Replace hinge cover.
Align and adjust the door:
Align and adjust the door (see DOOR ALIGNMENT AND
ADJUSTMENT)
Top Hinge
Right Side
Top Hinge
Left Side
Pivot
Screw
Gasket Channel
Filler
Gasket With Spacer
Beneath
Gasket Channel
Press down firmly
Note: It may be
necessary to apply
a strip of two-sided
tape for a firm
adhesion.
17
Loading ...
Loading ...
Loading ...