Loading ...
Loading ...
Loading ...
6
STEP 1:
PREPARING THE EXHAUST HOSE
ASSEMBLY
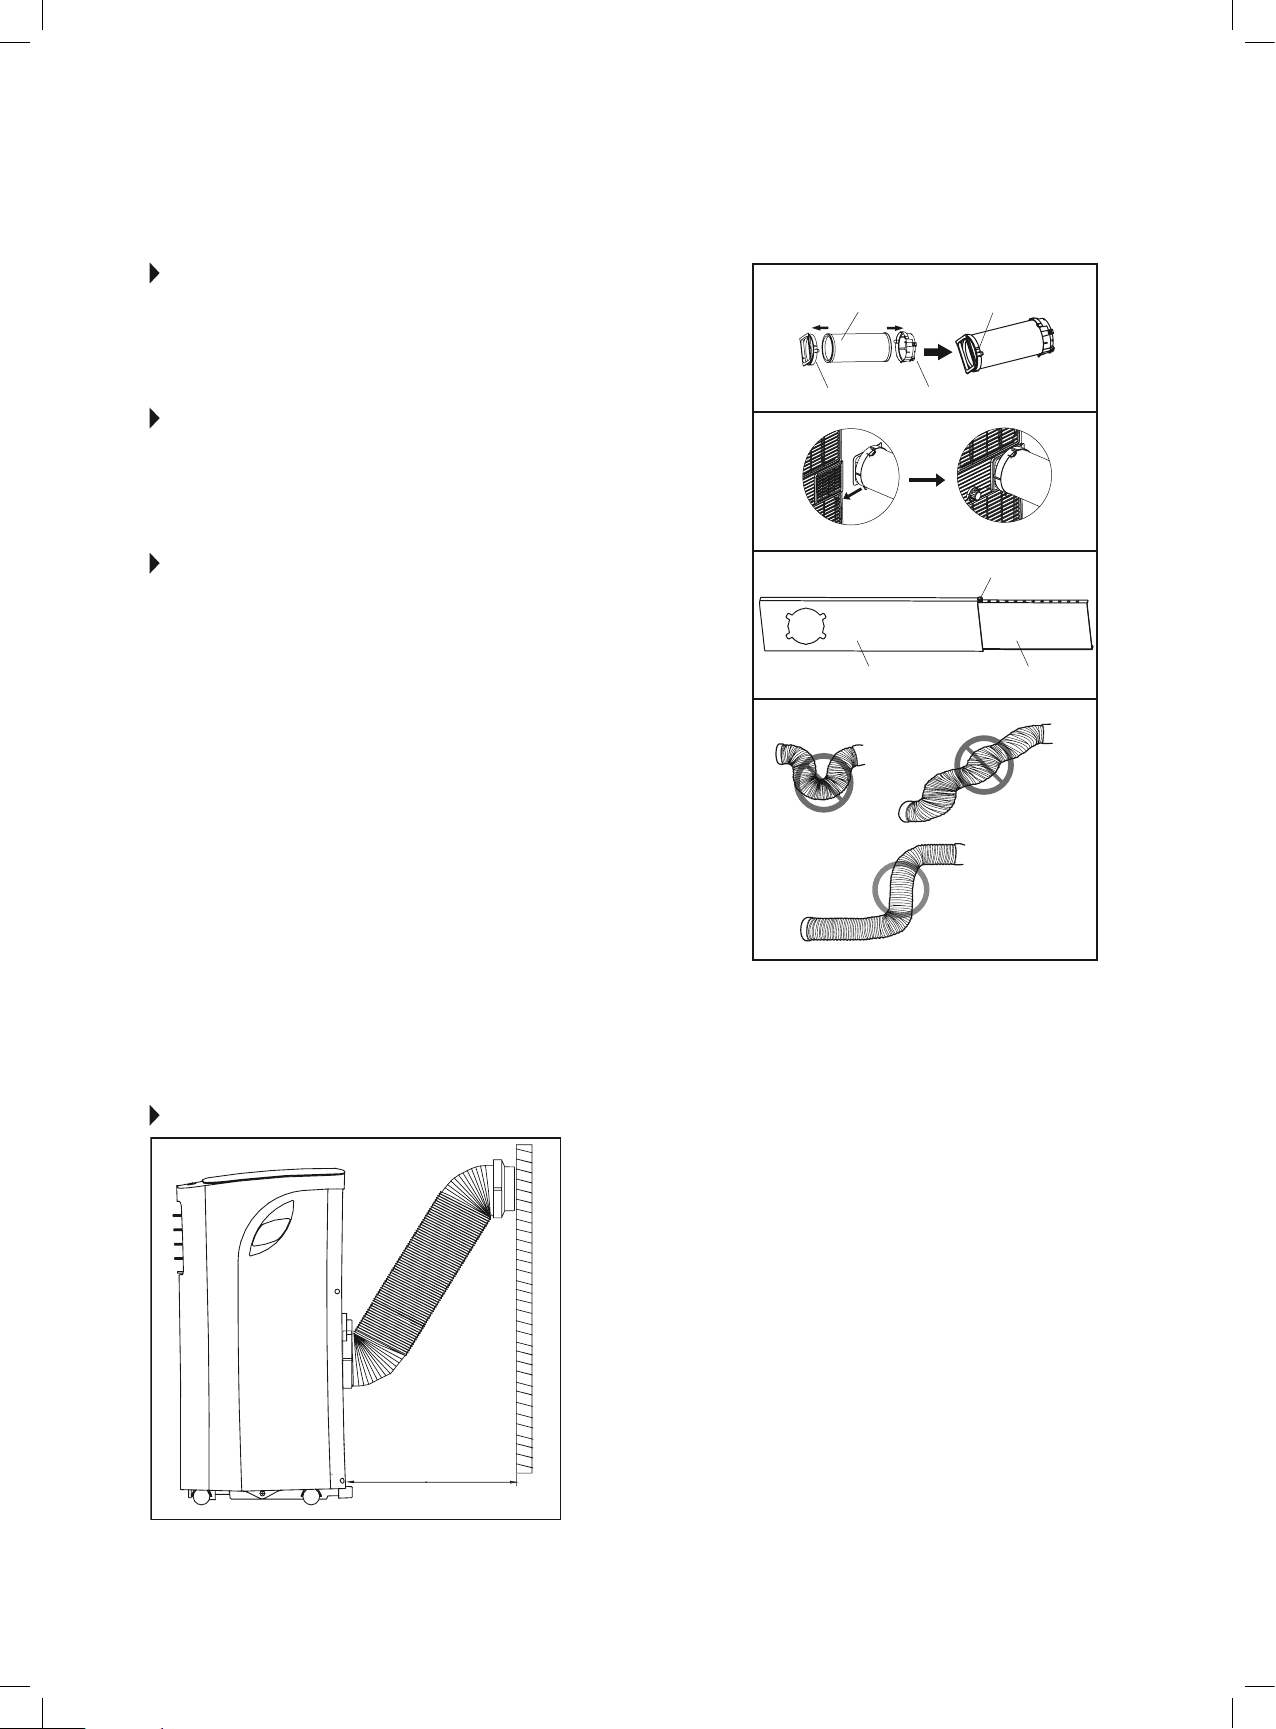
Fig. 8
Slide the exhaust hose into the window slider adapter and unit adapter; it
will snap automatically to the adapters.
STEP 2:
INSTALL THE EXHAUST HOSE ASSEMBLY
TO THE UNIT
Fig. 9
Slide the Exhaust hose assembly into the air outlet opening of the unit along
the arrow direction, from left to right.
STEP 3:
PREPARING THE ADJUSTABLE WINDOW
SLIDER
Fig. 10
a. Depending on the size of your window, choose the correct sliders and
adjustaccordingly.Sometimescuttingtheslidermaybenecessaryto
properly install. Please take extra care when cutting, and cut only when
absolutely necessary. Do not cut the hole in the window slider kit.
b. Ifthelengthofthewindowrequirestwowindowsliders,usethebolt
(included)tofastenthewindowslidersoncetheyareadjustedtothe
proper length.
NOTE: To ensure proper function, DO NOT overextend or bend the
hose. Make sure that there are no obstacles around the air outlet of the
exhausthose(20inchclearance)inordertoensuretheexhaustsystem
worksproperly.(Fig.11.)
Once the Exhaust Hose assembly is prepared, choose from one of the
following two installation methods:
• HungWindowInstallation(page7)
• SlidingWindowInstallation(page8)
Unit Adapter
Bolt (if needed)
Window Slider A Window Slider B
Window Slider Adapter
Exhaust Hose Exhaust Hose Assembly
FIG. 8
FIG. 9
FIG. 10
FIG. 11
RECOMMENDED INSTALLATION
19.7inches
50cm
NOTE: All the illustrations in this manual are for
explanation purposes only. Your unit may be slightly
different. The actual shape of the unit prevails.
The unit can be controlled by it’s control panel
or with the remote control. This manual does not
include remote control operations. See the Remote
Control User Manual included with the unit for
details.
Loading ...
Loading ...
Loading ...