Loading ...
Loading ...
Loading ...
5
INSTALLATION INSTRUCTIONS
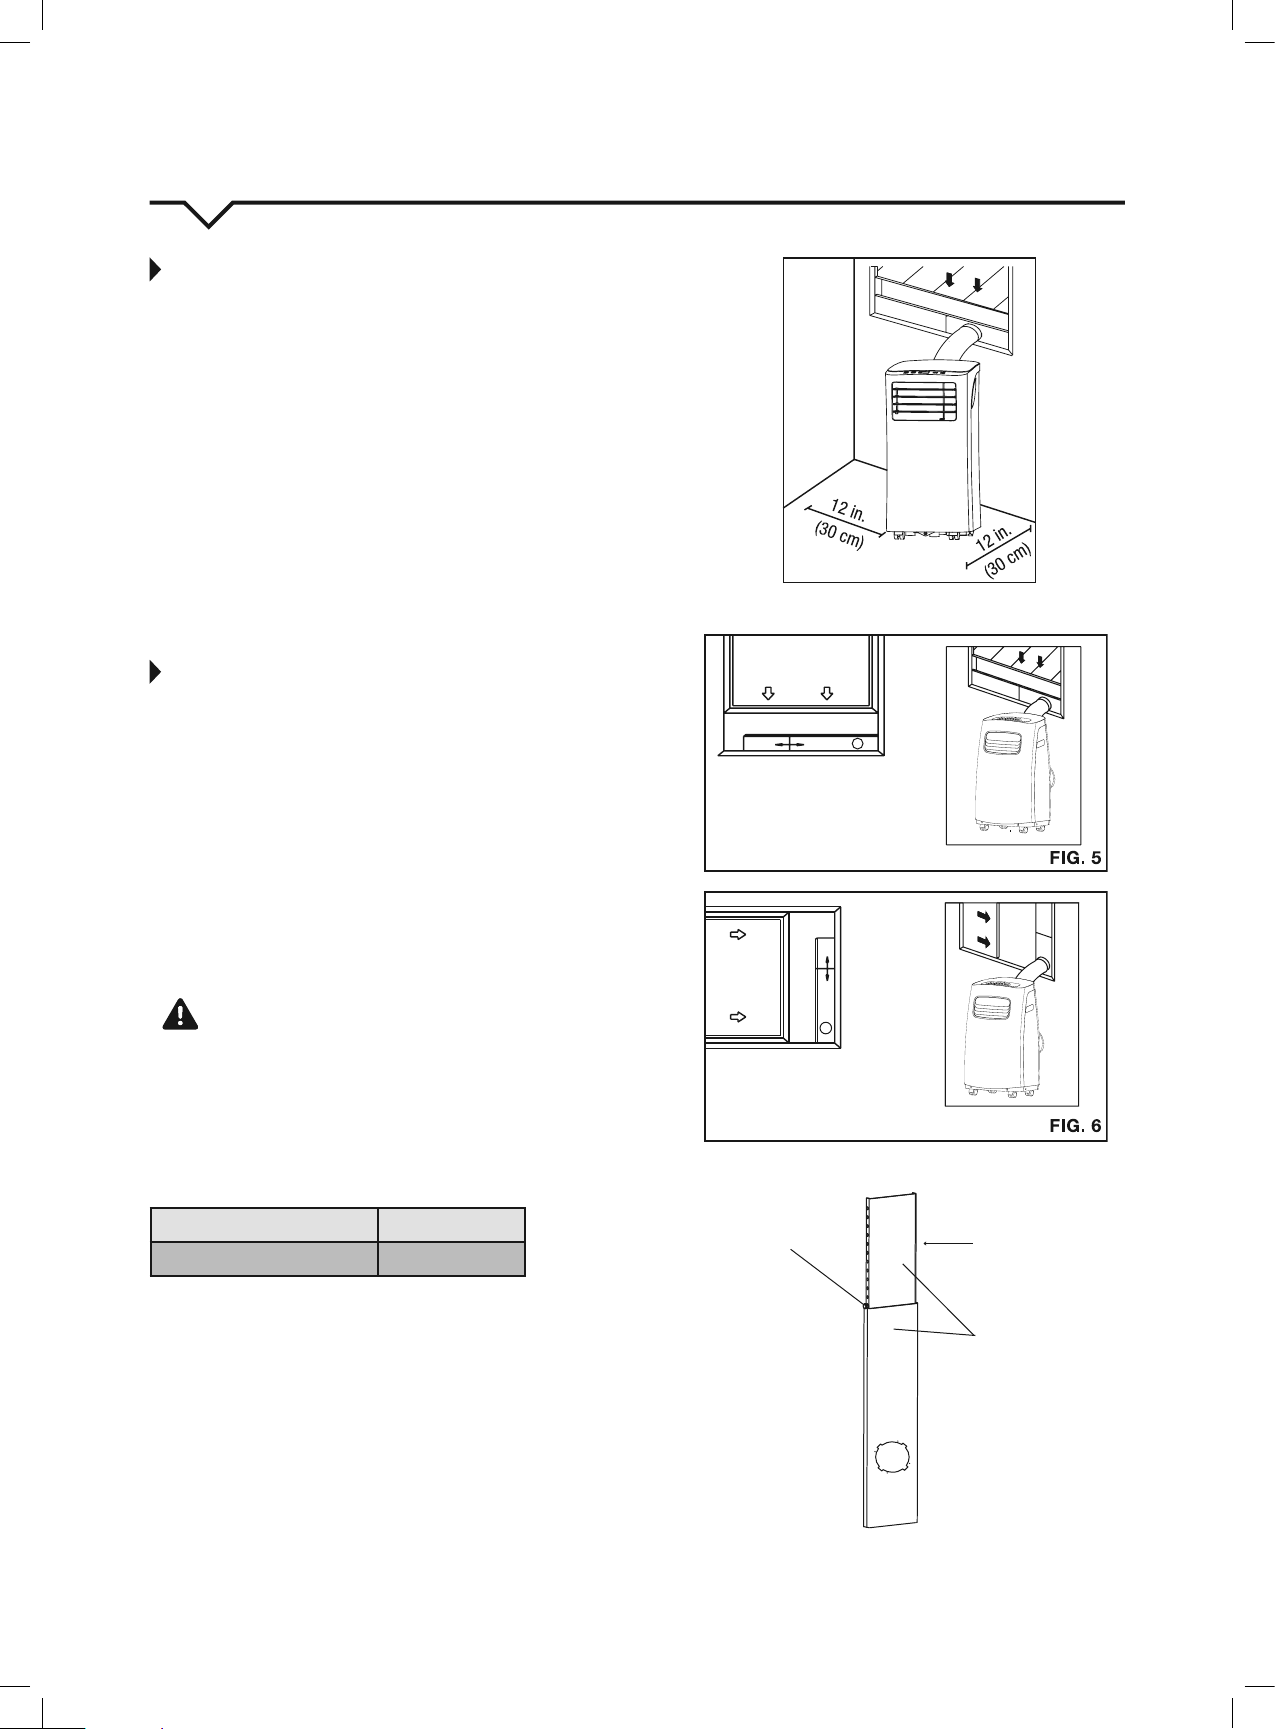
LOCATION
• The air conditioner should be placed on a firm surface
to minimize noise and vibration. For safe and secure
positioning, place the unit on a smooth, level floor strong
enough to support it.
• The unit has casters to aid placement; it should only be
rolled on smooth, flat surfaces. Use caution when rolling
on carpeted surfaces. Do not attempt to roll the unit over
objects.
• The unit must be installed near a grounded plug; the Collecti/
on Tray Drain (found on the back of the unit) must be
accessible.
• DO NOT cover the Intakes, Outlets or Remote Signal Receptor
of the unit, as this could prevent the unit from running
efficiently and can damage the unit.
• Allowatleast12inches(30cm)ofspacefromthewallfor
efficientair-conditioning.(SeeFig4.)
WINDOW SLIDER KIT INSTALLATION
Yourwindowsliderkithasbeendesignedtotmoststandard
“vertical” and “horizontal” window applications. However, it may
be necessary for you to improvise or modify some aspects of
the installation procedures for certain types of windows. Please
refertoFig.5andFig.6forminimumandmaximumwindow
openings.Windowsliderkitlengthcanbexedwithabolt.(See
Fig.7.)
NOTE:Ifthewindowopeningislessthan2ft.,cutthe
extensionpiece(SeeFig.7)shortersothekitproperlytsinthe
window opening. Only cut if absolutely necessary. Never cut the
hole in the window slider kit.
CAUTION
Make sure there are no obstacles around the air outlet of the
exhausthose(intherangeof20in./500mm)inorderforthe
exhaust system to
work properly.
The exhaust hose and adapter must be installed or removed in
accordance with the usage mode as indicated below:
COOL or AUTO mode Install Hose
FAN or DRY mode Remove Hose
FIG. 4
Vertical
Window
Horizontal
Window
Extension
Piece
Window Slider Kit
Bolt
Window Slider Kit
Minimum:2ft.(67cm)
Maximum:4ft.(123cm)
Window Slider Kit
Minimum:2ft.(67cm)
Maximum:4ft.(123cm)
Loading ...
Loading ...
Loading ...