Loading ...
Loading ...
Loading ...
ASSEMBLYSTEP
10o
86 71
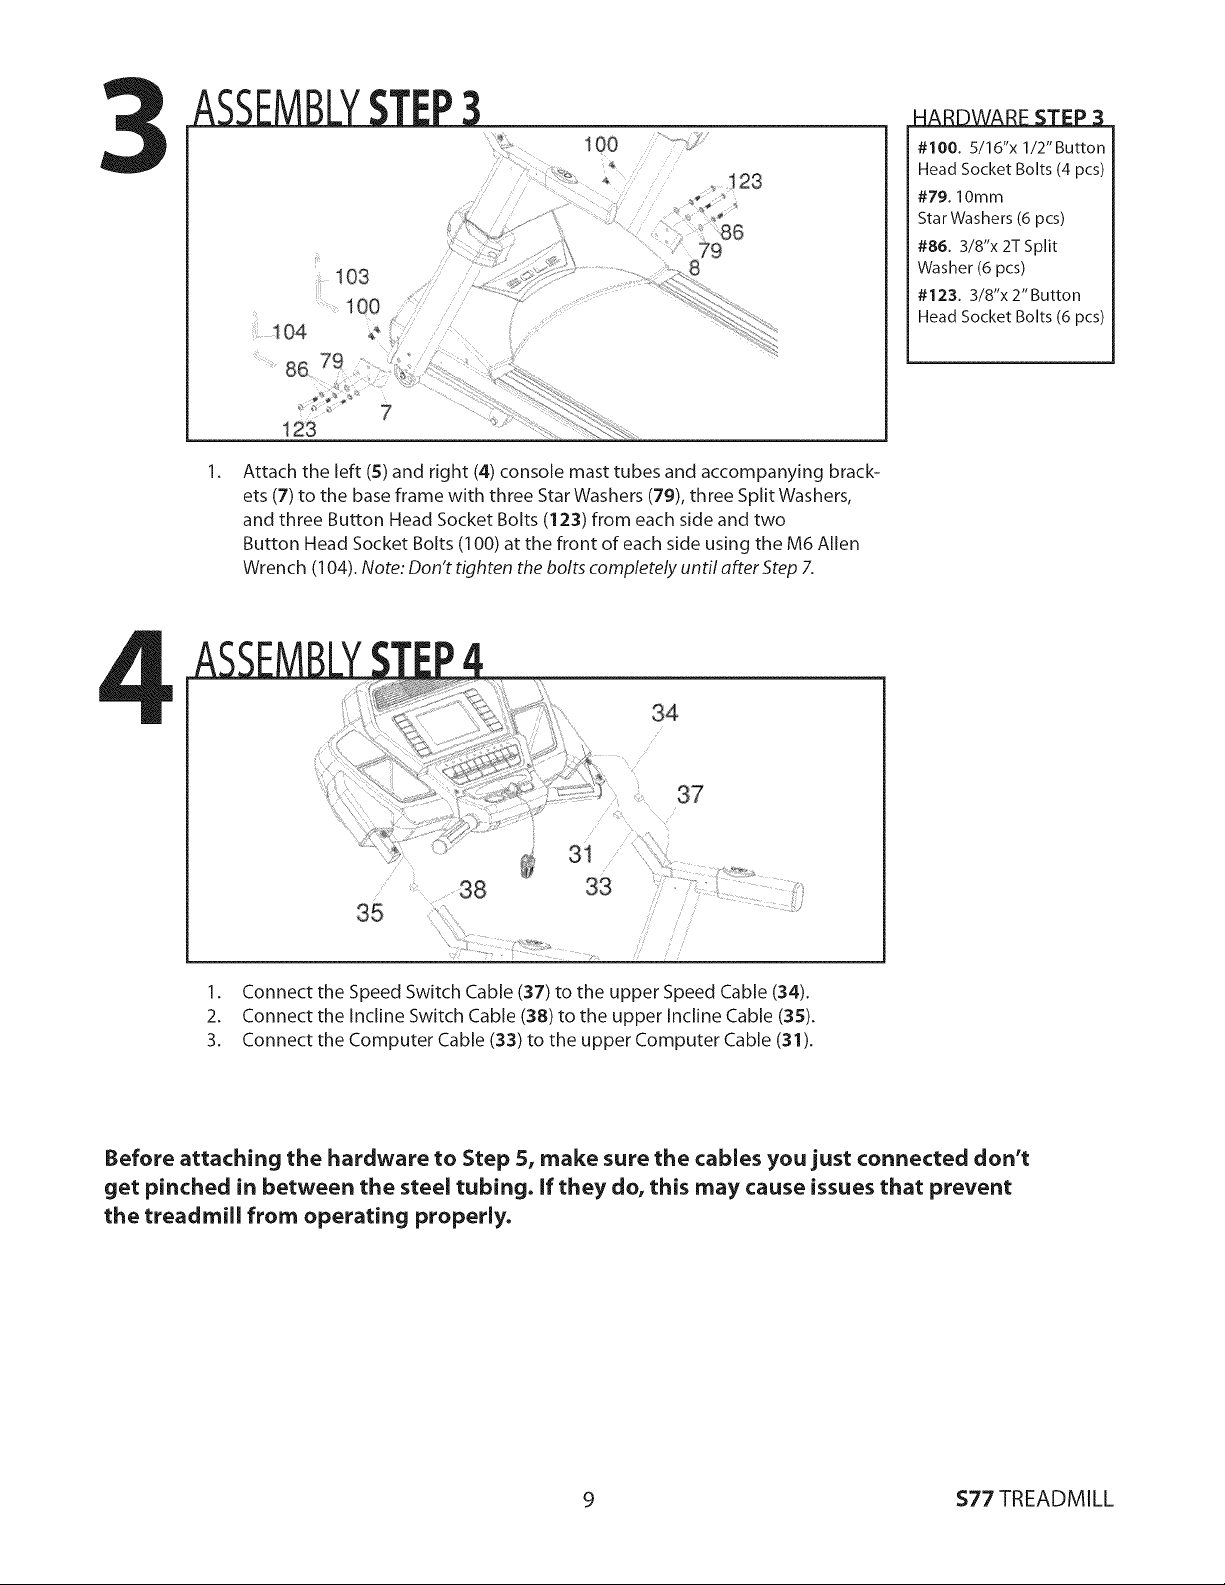
Attach the left (5) and right (4) console mast tubes and accompanying brack-
ets (7) to the base frame with three Star Washers (79), three Split Washers,
and three Button Head Socket Bolts (123) from each side and two
Button Head Socket Bolts (100) at the front of each side using the M6 Allen
Wrench (104). Note: Don't tighten the bolts completely until after Step 7.
# 100. 5/16"x 1/2" Button
Head Socket Bolts (4 pcs)
#79. lOmm
Star Washers (6 pcs)
#86. 3/8"x 2T Split
Washer (6 pcs)
#123. 3/8"x 2" Button
Head Socket Bolts (6 pcs)
34
37
35
31
38 33
1. Connect the Speed Switch Cable (37) to the upper Speed Cable (34).
2. Connect the Incline Switch Cable (38) to the upper Incline Cable (35).
3. Connect the Computer Cable (33) to the upper Computer Cable (31).
Before attaching the hardware to Step 5, make sure the cables you just connected don't
get pinched in between the steel tubing. If they do, this may cause issues that prevent
the treadmill from operating properly.
9 $77 TREADMILL
Loading ...
Loading ...
Loading ...