Loading ...
Loading ...
Loading ...
6
For Android™ and iPhone®
1. Press and hold the Power Button to turn on the printer. The Status LED Indicator Light will light up when fully
powered on.
2. Open the Sprocket app. Expand the Main menu and tap sprocket.
3. Tap Manage Printers. This opens a dropdown list of printers you have previously connected to. Select your
printer, or tap Add new printer.
4. If you are adding a new printer, select the printer you want to connect to from the list. Follow the on-screen
messages.
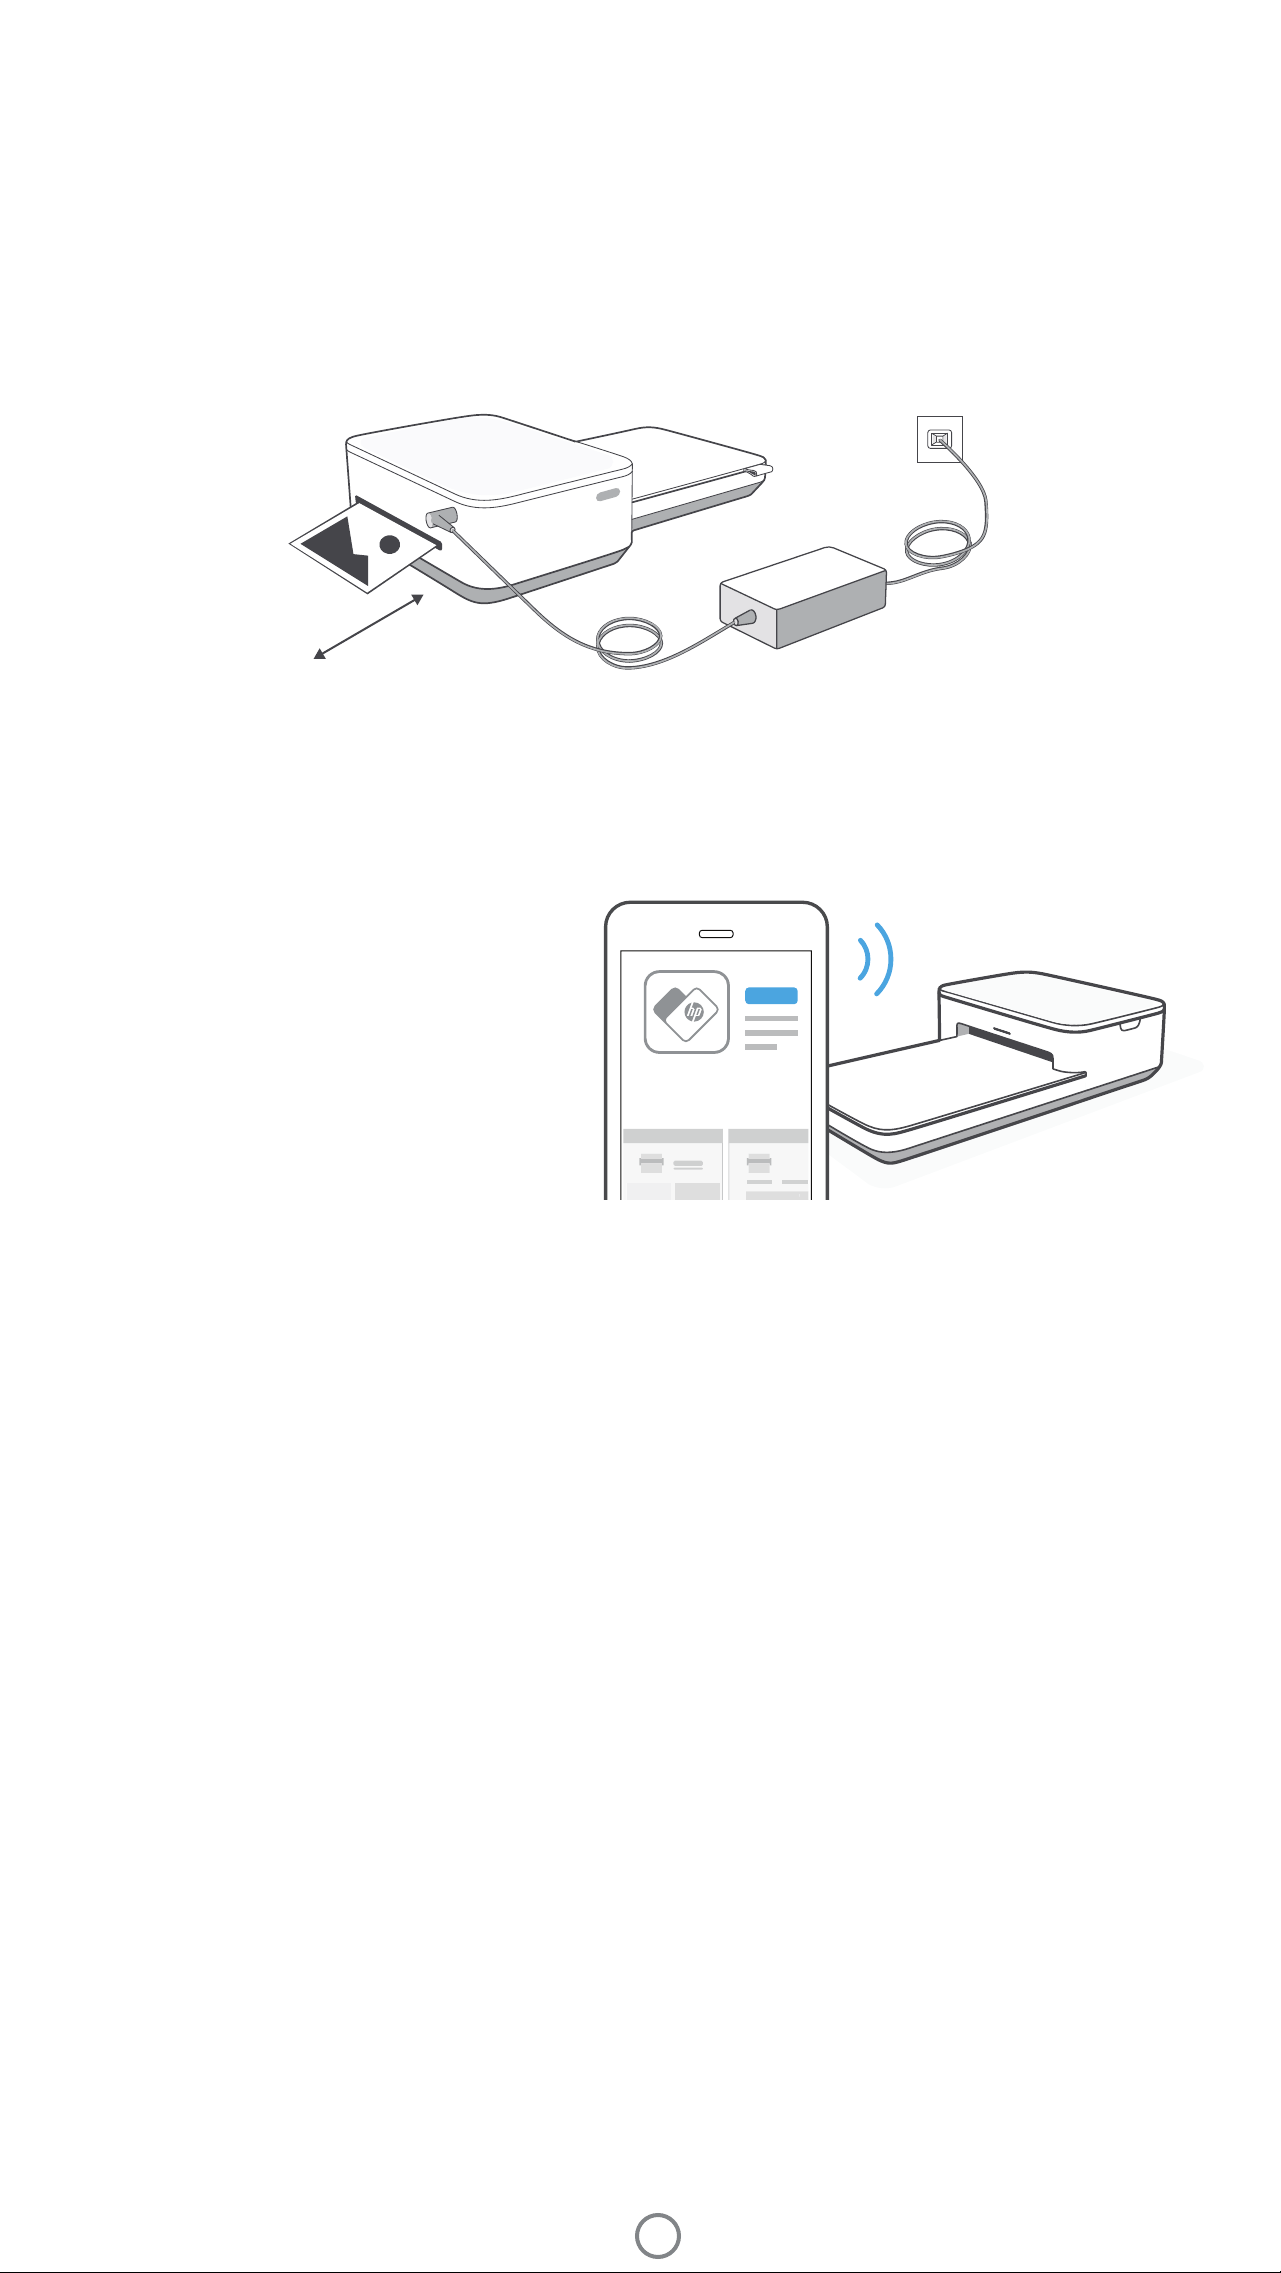
When the photo prints from the HP Sprocket printer, it passes through the printer and emerges multiple times. The
picture gets colors applied to the photo with each iteration. Do not touch or pull the photo until the print is nished and
lands on the top of the Paper Tray Cover.
Pairing a Mobile Device and the HP Sprocket Studio
Pair quickly and easily with your HP Sprocket Studio
using the in-app setup instructions. On rst launch
of the Sprocket app, select “my sprocket”. The in-
app instructions will help you easily pair with your
mobile device within the app. You can also access
the setup instructions anytime from the Help & How
To menu.
HP Sprocket
Printer Clearance
Check the rear of the printer for any obstructions. Make sure the power cord, power bank, or other items don’t block
the rear of the printer. Allow at least 5 inches (12.7 cm) of space while printing.
5 in / 12.7 cm
Note:
• Connect the AC Power Adapter and Power Cord to a power source capable of delivering 24 V DC/1.5 A.
• Only use the AC Power Adapter and Power Cord provided with your HP Sprocket Studio printer to power the printer itself and the optional power bank
accessory.
Check out the HP Sprocket app user guide to learn more about the Sprocket app and all
the fun features available for your printer!
Paper Tray Removal
You can remove the paper tray from the printer to transport it. To remove the tray:
1. Turn the printer upside-down.
2. Locate the latch on the underside of the printer. Slide and hold it to the left.
3. Hold the latch in the slid position and gently pull the paper tray away from the printer body. The two pieces will
disconnect.
4. To reconnect, line up the tray with the printer body and slide together. The tray will automatically lock when it
clicks into place.
Loading ...
Loading ...
Loading ...