Loading ...
Loading ...
Loading ...
5
Caution:
• Do not insert more than one pack of paper of HP Sprocket 3.9 x 5.8” (100 x 148 mm) Photo Paper into the
device at a time to avoid paper jams or print errors.
Only use HP Sprocket 3.9 x 5.8” (100 x 148 mm) Photo Paper with the device to avoid paper jams and
malfunctions. You can purchase additional paper and cartridges within the Sprocket app by tapping “Buy Paper”
in the Main Menu.
•
• In the case of a paper jam, do not pull on the paper. Instead, follow app instructions to automatically clear the
jam.
• Do not pull the paper out of the device during printing.
• If spills or moisture collect on a photo, wipe it away as soon as possible to prevent color damage.
• Keep photo paper clean and free of bends, dust, or damage for best print quality.
Remove perforated edges (2) on each photo by folding rst, then tearing slowly from one side.
Do not touch the glossy-side of the photo paper. Oils from your ngers will impact how the ink adheres to the
paper when printing.
•
•
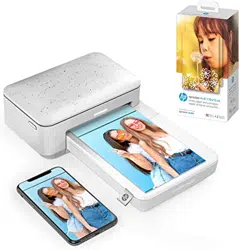
Install the Cartridge
1. Unwrap an HP Sprocket Studio cartridge. Make sure not to touch the
cartridge ribbon.
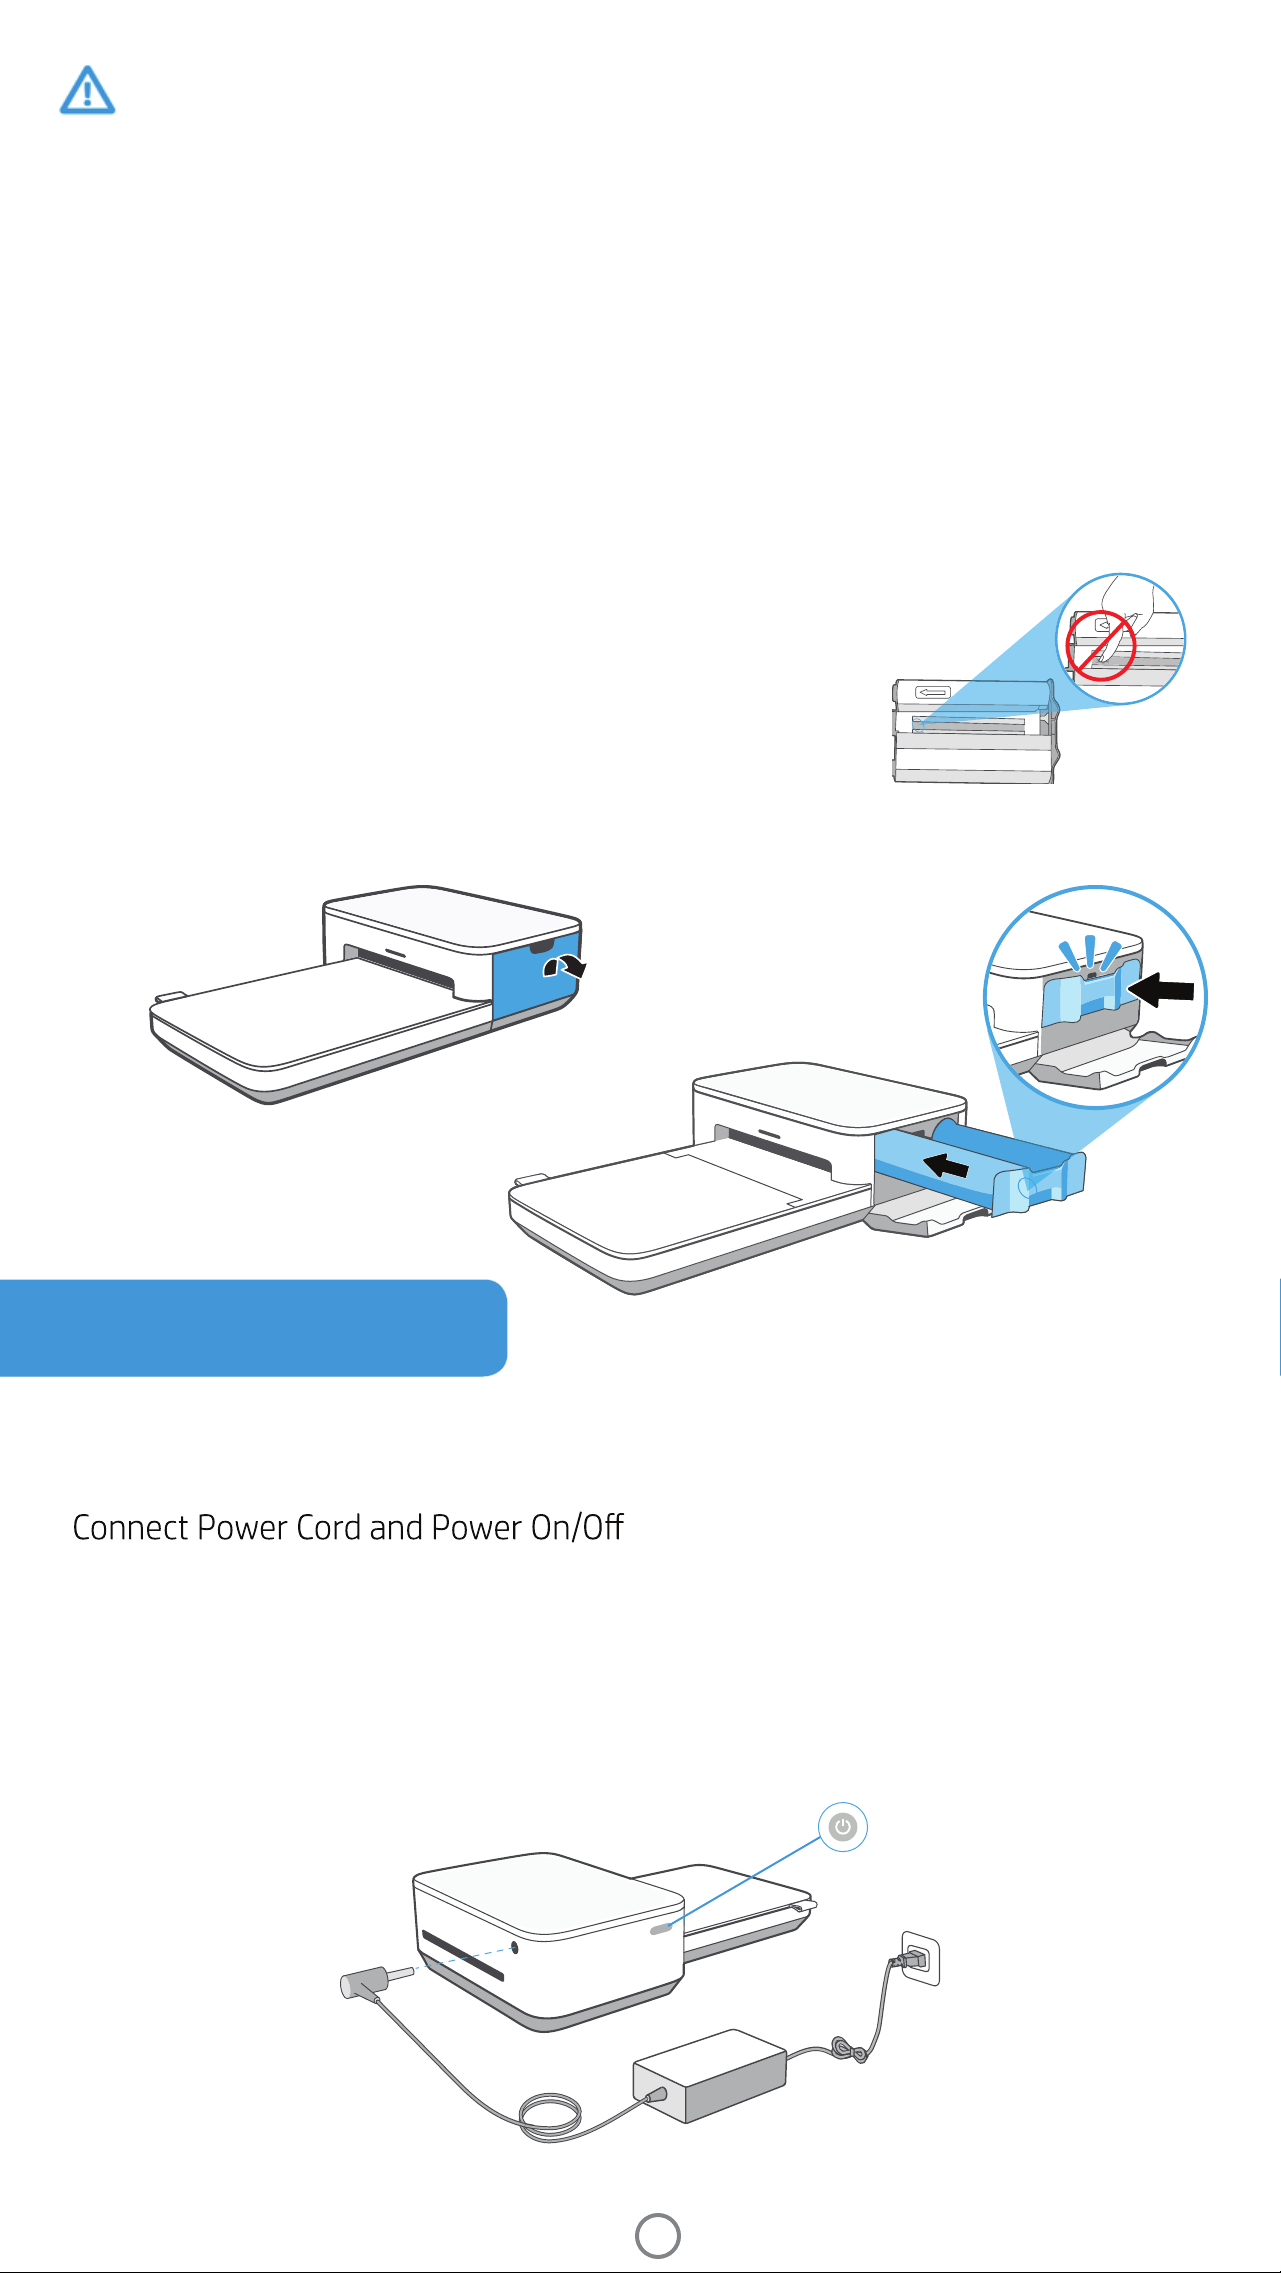
1. Connect included AC Power Adapter and included Power Cord together.
Turn off the device by pressing and holding the Power Button until the Status LED Indicator Light goes dark.
2. Insert the AC Power Adapter plug into your printer and connect the Power Cord plug to a wall outlet. Push the
power button until the Status LED Indicator Light illuminates and turns light blue (default) or a personalized
color.
3.
Note: To remove the cartridge, press down on the colored latch
underneath the slot to release the cartridge. When it releases,
remove the cartridge.
2. Open the printer side-door and insert the cartridge into the slot until it clicks. Close the door.
Loading ...
Loading ...
Loading ...