7322005 (Rev. A 5/28/10)
REPLACEMENT RO MEMBRANE CARTRIDGE
Part No. 7221217
end of cartridge
about 1-1/4” in from
end of housing when
fully seated
To replace the RO cartridge:
1. Turn off the water supply and close the stor-
age tank valve (if applicable), then open the
RO faucet to relieve pressure.
2. Press inward while turning the RO cap to the
left to remove from the bracket/membrane
housing.
3. Use a pliers, or heavy wire made into a
hook, to pull the RO cartridge from the hous-
ing.
4. Install the new RO cartridge, end with o-ring
seals inward. Work back and forth to get all
the way in (end of cartridge about 1-1/4” in
from end of housing).
5. Lubricate the RO cap o-ring seal with sili-
cone grease if dry. Replace the o-ring into
the cap. Press inward on the cap while turn-
ing to the right to lock. The cap will not go
on if the RO cartridge is not fully seated
inward.
6. Turn on the water supply to the RO.
7. Open the RO faucet to allow air to escape,
then close.
8. Important purging instructions: The RO
cartridge contains a food grade preservative
that you should clean from it before using
water from the system. The preservative will
give product water an unpleasant taste and
odor. Purge the membrane cartridge by
allowing the storage tank to fill with product
water (takes about 4 hours), then open the
faucet and drain. Repeat at least 4 times
(see your owner’s manual). Then the RO
system is ready to make product water for
use.
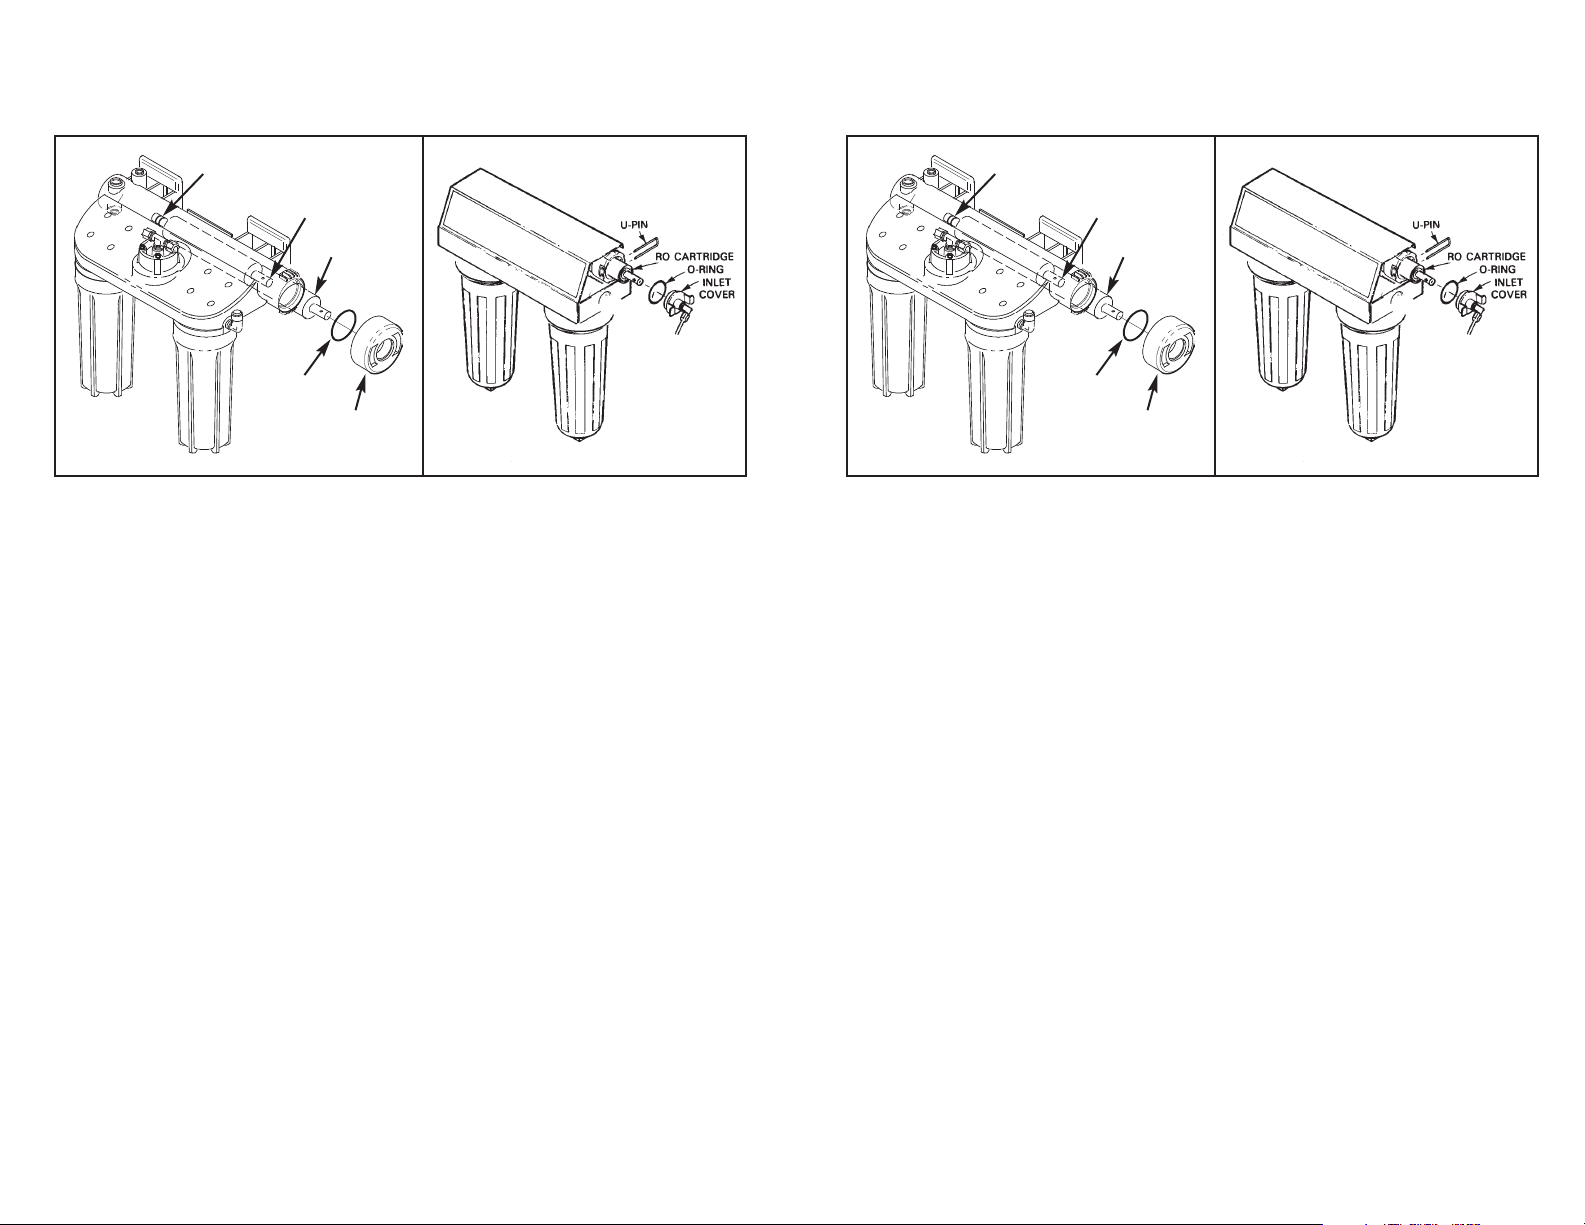
To replace the RO cartridge:
CAUTION: Before taking any parts off, close
the shutoff valve on the storage
tank and close (turn handle in) the
water supply shutoff valve. Open
the RO water faucet and wait 1
minute for pressure to drain from
the system.
1. Remove the u-pin from the RO housing.
2. Remove (pull outward) the inlet cover and o-
ring from the RO housing.
3. Pull the cartridge from the RO housing (use
pliers, if needed).
4. Insert new RO cartridge into the housing.
5. If needed, put a light coat of silicone grease
on the inlet cover o-ring. Then push the
cover into the housing and use the u-pin to
fasten in place.
6. Turn on the water supply to the RO.
7. Open the RO faucet to allow air to escape,
then close.
8. Important purging instructions: The RO
cartridge contains a food grade preservative
that you should clean from it before using
water from the system. The preservative will
give product water an unpleasant taste and
odor. Purge the membrane cartridge by
allowing the storage tank to fill with product
water (takes about 4 hours), then opening
the faucet and drain. Repeat at least 6 times
(see your owner’s manual). Then the RO
system is ready to make product water for
use.
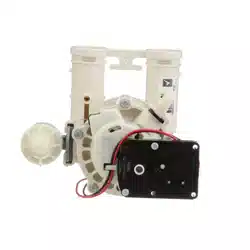
RO cartridge
RO cap
o-ring
seal
o-rings
7322005 (Rev. A 5/28/10)
REPLACEMENT RO MEMBRANE CARTRIDGE
Part No. 7221217
end of cartridge
about 1-1/4” in from
end of housing when
fully seated
To replace the RO cartridge:
1. Turn off the water supply and close the stor-
age tank valve (if applicable), then open the
RO faucet to relieve pressure.
2. Press inward while turning the RO cap to the
left to remove from the bracket/membrane
housing.
3. Use a pliers, or heavy wire made into a
hook, to pull the RO cartridge from the hous-
ing.
4. Install the new RO cartridge, end with o-ring
seals inward. Work back and forth to get all
the way in (end of cartridge about 1-1/4” in
from end of housing).
5. Lubricate the RO cap o-ring seal with sili-
cone grease if dry. Replace the o-ring into
the cap. Press inward on the cap while turn-
ing to the right to lock. The cap will not go
on if the RO cartridge is not fully seated
inward.
6. Turn on the water supply to the RO.
7. Open the RO faucet to allow air to escape,
then close.
8. Important purging instructions: The RO
cartridge contains a food grade preservative
that you should clean from it before using
water from the system. The preservative will
give product water an unpleasant taste and
odor. Purge the membrane cartridge by
allowing the storage tank to fill with product
water (takes about 4 hours), then open the
faucet and drain. Repeat at least 4 times
(see your owner’s manual). Then the RO
system is ready to make product water for
use.
To replace the RO cartridge:
CAUTION: Before taking any parts off, close
the shutoff valve on the storage
tank and close (turn handle in) the
water supply shutoff valve. Open
the RO water faucet and wait 1
minute for pressure to drain from
the system.
1. Remove the u-pin from the RO housing.
2. Remove (pull outward) the inlet cover and o-
ring from the RO housing.
3. Pull the cartridge from the RO housing (use
pliers, if needed).
4. Insert new RO cartridge into the housing.
5. If needed, put a light coat of silicone grease
on the inlet cover o-ring. Then push the
cover into the housing and use the u-pin to
fasten in place.
6. Turn on the water supply to the RO.
7. Open the RO faucet to allow air to escape,
then close.
8. Important purging instructions: The RO
cartridge contains a food grade preservative
that you should clean from it before using
water from the system. The preservative will
give product water an unpleasant taste and
odor. Purge the membrane cartridge by
allowing the storage tank to fill with product
water (takes about 4 hours), then opening
the faucet and drain. Repeat at least 6 times
(see your owner’s manual). Then the RO
system is ready to make product water for
use.
RO cartridge
RO cap
o-ring
seal
o-rings