Loading ...
Loading ...
Loading ...
Installation Section: Pages 12 - 27
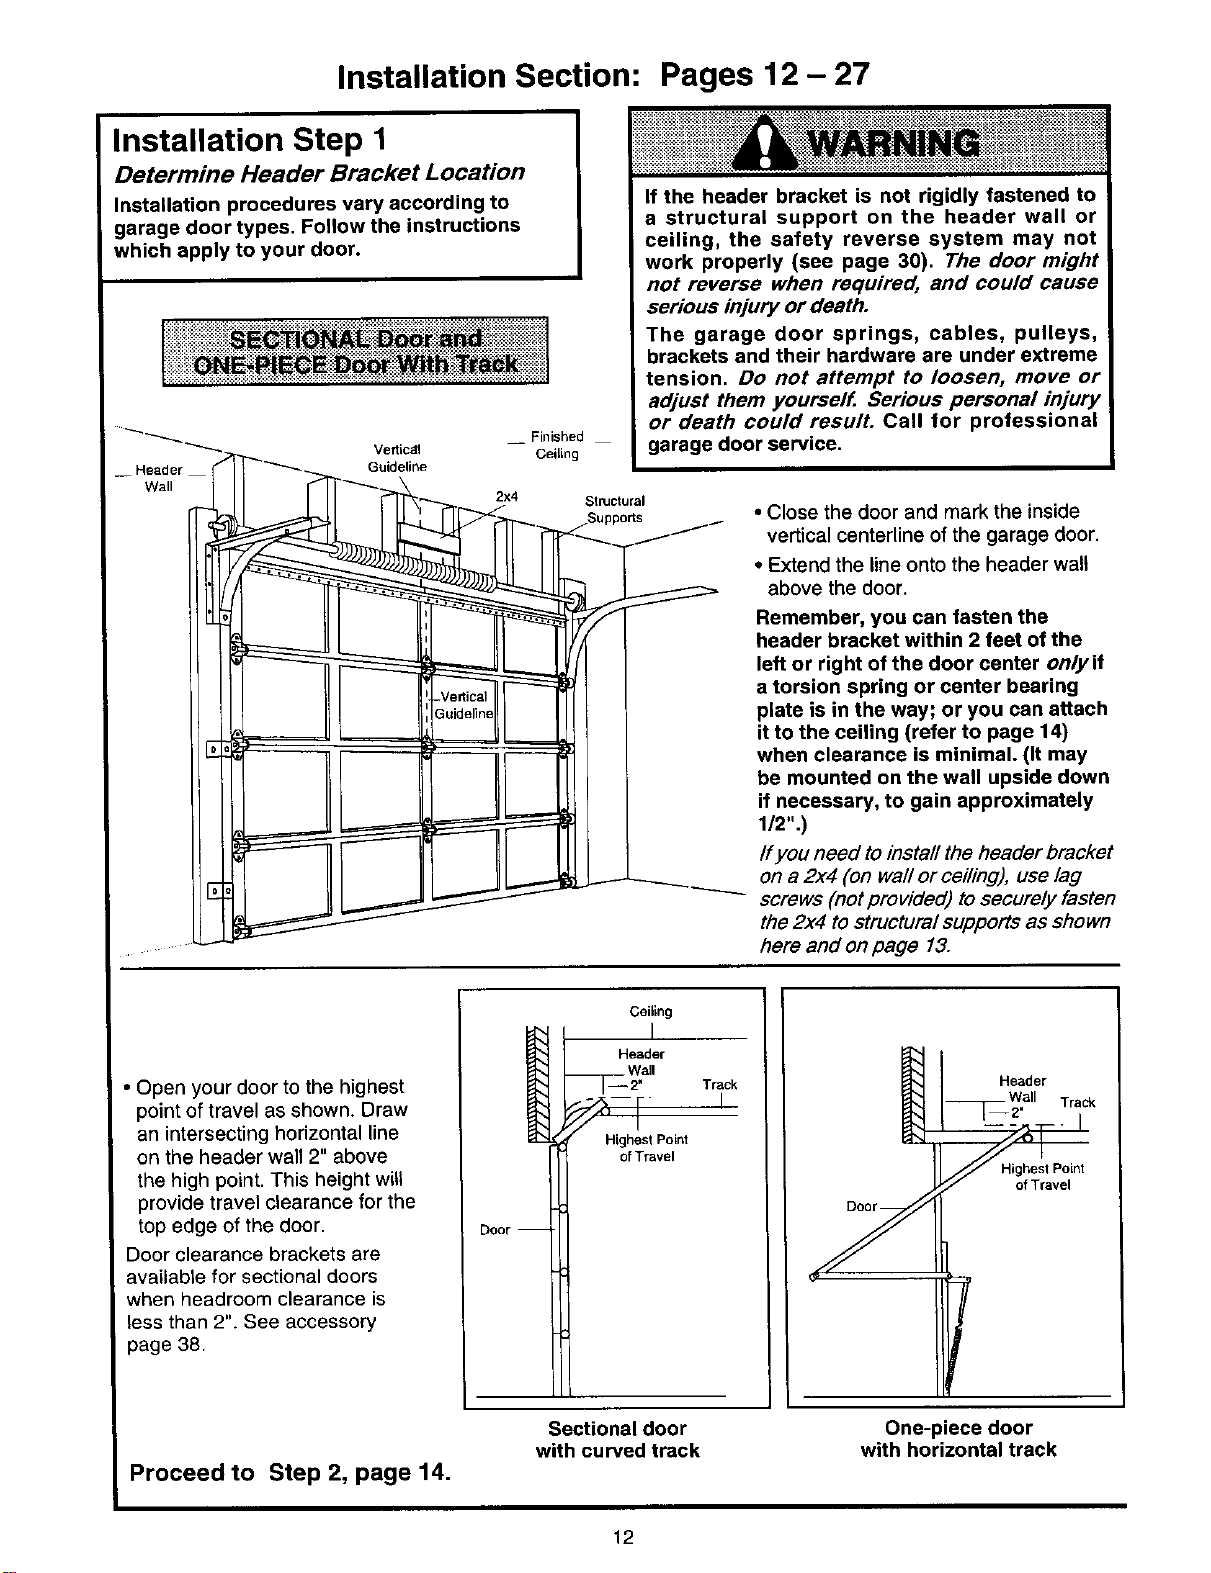
Installation Step 1
Determine Header Bracket Location
Installation procedures vary according to
garage door types. Follow the instructions
which apply to your door.
__ Header
Wall
__ Finished
vergc_{I Ceiling
Guideline
2x4
If the header bracket is not rigidly fastened to
a structural support on the header wall or
ceiling, the safety reverse system may not
work properly (see page 30), The door might
not reverse when required, and could cause
serious injury or death.
The garage door springs, cables, pulleys,
brackets and their hardware are under extreme
tension. Do not attempt to loosen, move or
adjust them yourself. Serious personal injury
or death could result. Call for professional
garage door service.
St_ctural
ods /
jJ
• Close the door and mark the inside
vertical centerline of the garage door.
• Extend the line onto the header wall
above the door.
Remember, you can fasten the
header bracket within 2 feet of the
left or right of the door center onlyif
a torsion spring or center bearing
plate is in the way; or you can attach
it to the ceiling (refer to page 14)
when clearance is minimal. (It may
be mounted on the wall upside down
if necessary, to gain approximately
1/2".)
If you need to install the header bracket
on a 2x4 (on wail or ceiling), use lag
screws (not provided) to securely fasten
the 2x4 to structural supports as shown
here and on page 13.
• Open your door to the highest
point of travel as shown. Draw
an intersecting horizontal line
on the header wall 2" above
the high point. This height will
provide travel clearance for the
top edge of the door.
Door clearance brackets are
available for sectional doors
when headroom clearance is
less than 2". See accessory
page 38.
Door
Ceiling
Header
- _ . Track
Highest Point
of Travel
Header
Track
Highest Point
of Travel
Proceed to Step 2, page 14.
Sectional door
with curved track
One-piece door
with horizontal track
12
Loading ...
Loading ...
Loading ...