Loading ...
Loading ...
Loading ...
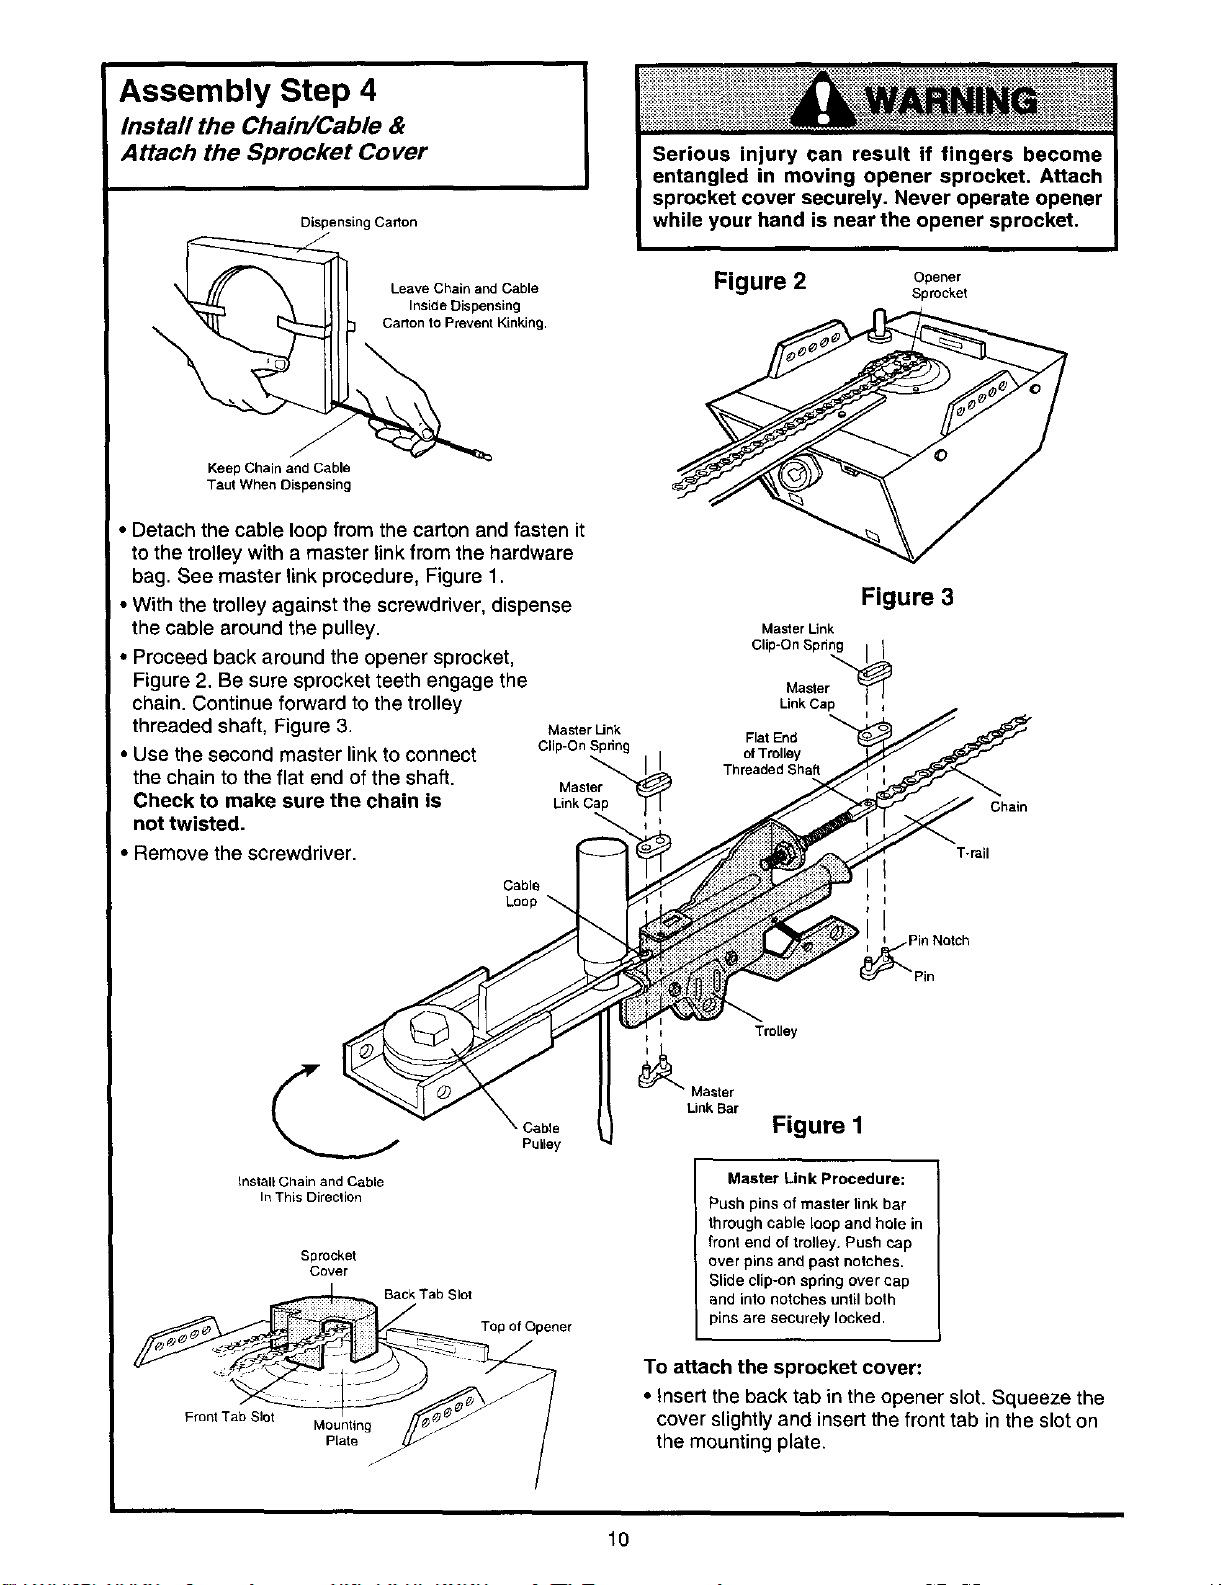
Assembly Step 4
Install the Chain/Cable &
Attach the Sprocket Cover
Dispensing Cadon
Leave Chain and Cable
Inside Dispensing
Carton to Prevent Kinking.
Keep Chain and Cable
Taut When DLspensing
• Detach the cable loop from the carton and fasten it
to the trolley with a master link from the hardware
bag. See master link procedure, Figure 1.
I • With the trolley against the screwdriver, dispense
the cable around the pulley.
Proceed back around the opener sprocket,
Figure 2. Be sure sprocket teeth engage the
chain. Continue forward to the trolley
threaded shaft, Figure 3.
Use the second master link to connect
the chain to the flat end of the shaft.
Cheek to make sure the chain is
not twisted.
Remove the screwdriver.
Figure 2 Opener
Sprocket
Figure 3
Master Link
Clip-On Spring
Master Link
Ma_er
Link Cap
Flat End
of Trol_y
ThreadedShaff
Chain
T-rail
t
•Pin Notch
'Pin
Install Chain and Cable
In This Direction
Sprocket
Cover
Back Tab Slot
Front Tab Slot
Mounting
Plate
_J
Cable
Pulley
Top of Opener
Trolley
_ Ma_ter
Link Bar
Figure 1
Master Link Procedure:
Push pins of master link bar
through cable loop and hole in
front end of trolley. Push cap
over pins and past notches.
Slide clip-on spdng over cap
and into notches until both
pins are securely locked.
To attach the sprocket cover:
• Insert the back tab in the opener slot. Squeeze the
cover slightly and insert the front tab in the slot on
the mounting plate.
10
Loading ...
Loading ...
Loading ...